
DIY: Installing USA Spec ACUxl 07 RDX (tech)
 10-04-2011, 05:35 PM
#1

DIY: Installing USA Spec ACUxl 07 RDX (tech)
Hey guys,
I installed myUSA Spec PA15-ACUxl not too long ago and took some pictures while doing it. So now that I have some time I'll post a DIY for it. It was pretty simple all together, and I have owned several PA15-HON2's in the past so I went with USA Spec again for the RDX (tech).
Purchasing: I got mine from a store called "Audio Connections" on Amazon for $132. Delivery was quick.
Install:The whole process took 20 minutes including taking pictures and such so it is pretty simple. However, if you are not comfortable doing something like this I recommend you take it to a professional to have it done, as this is a guide and I'm not responsible for you messing your car up doing it wrong. That said; first thing's first, read the included manual and make sure the DIP switches are set correctly for what you want. On the HON2 there were several options for how you could set them based on the way you wanted to use it, but on the ACUxl its just one way. I don't have a picture of the DIP switches, but it pretty simple, just follow the pictures in the documentation included with the unit.
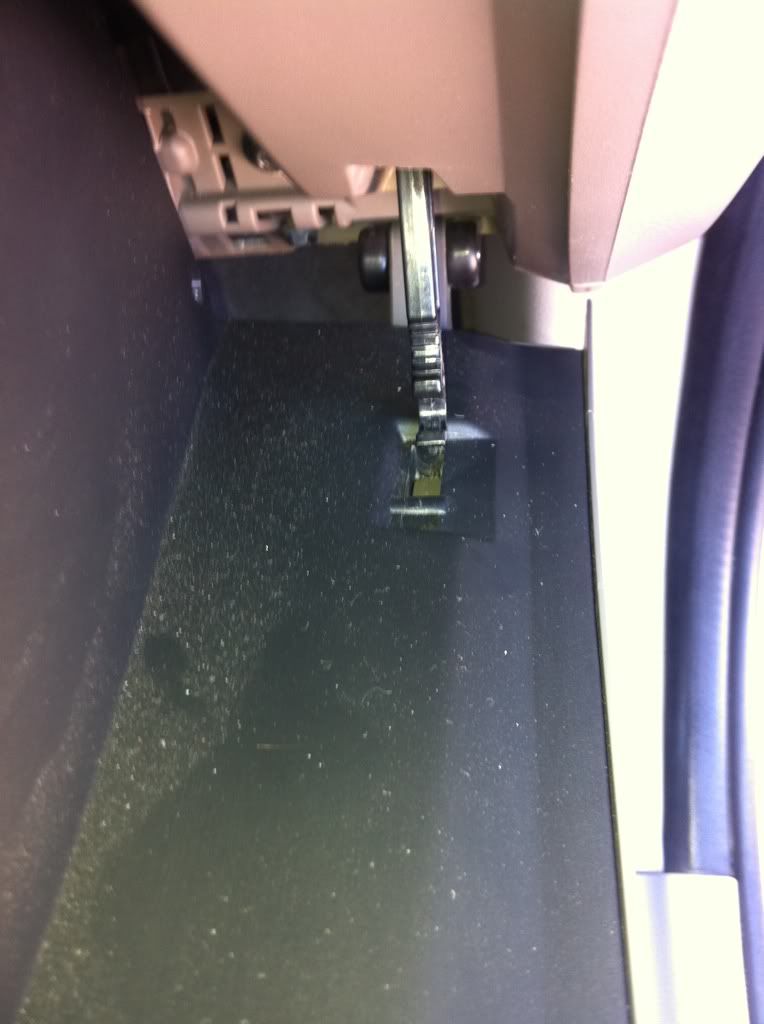
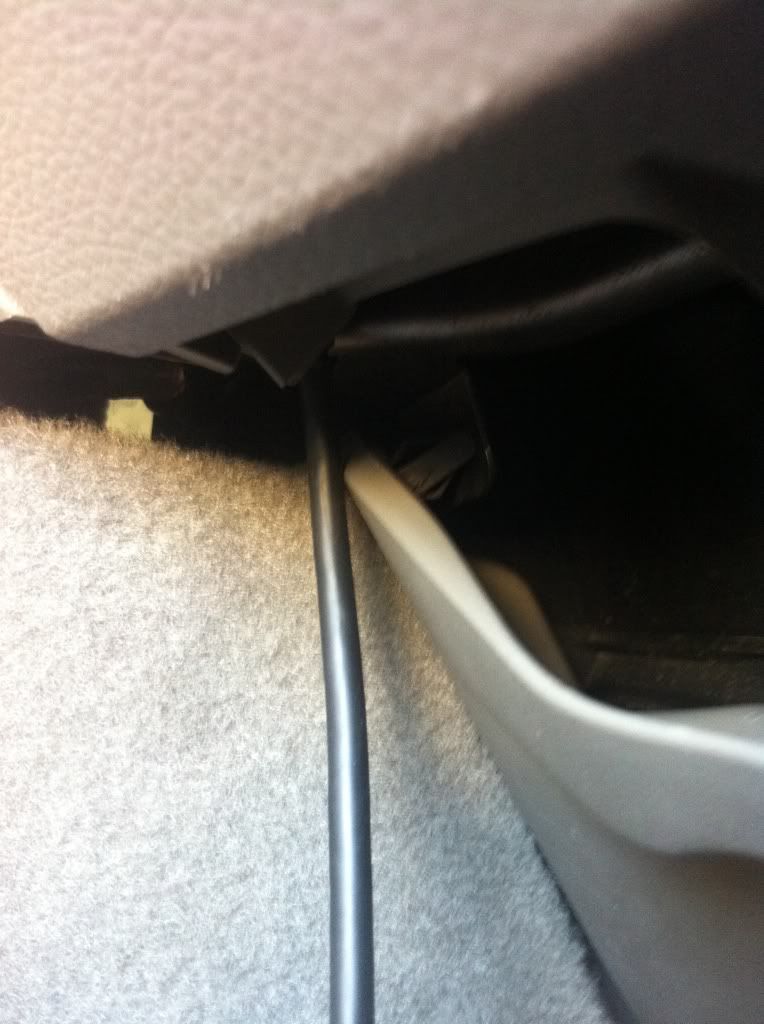
Next you need to unclip the panel under the glove box, to do that you need to reach in the left hand side of the footwell by the floor and pull the carpeted panel out (its the panel that the Navi Drive is behind, but the whole front of it not just the drive cover). Once you do that you can pop the two clips right under the glove box and pull it toward you to remove it (you need to pull the panel first because the plastic piece has a lip behind it).
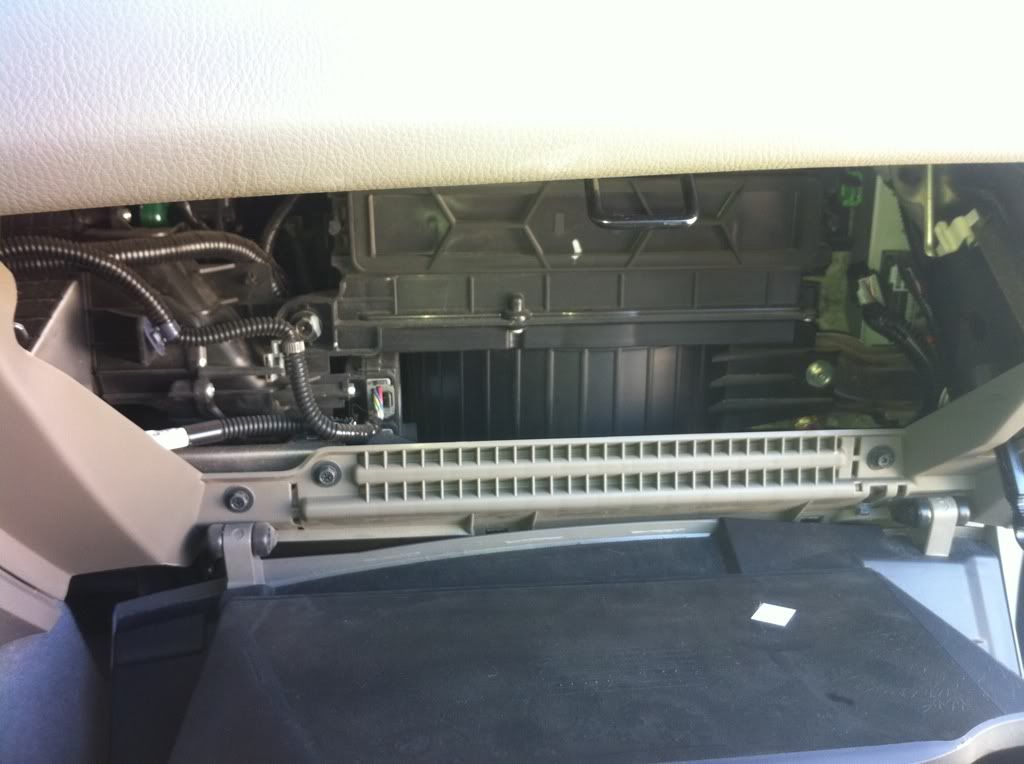
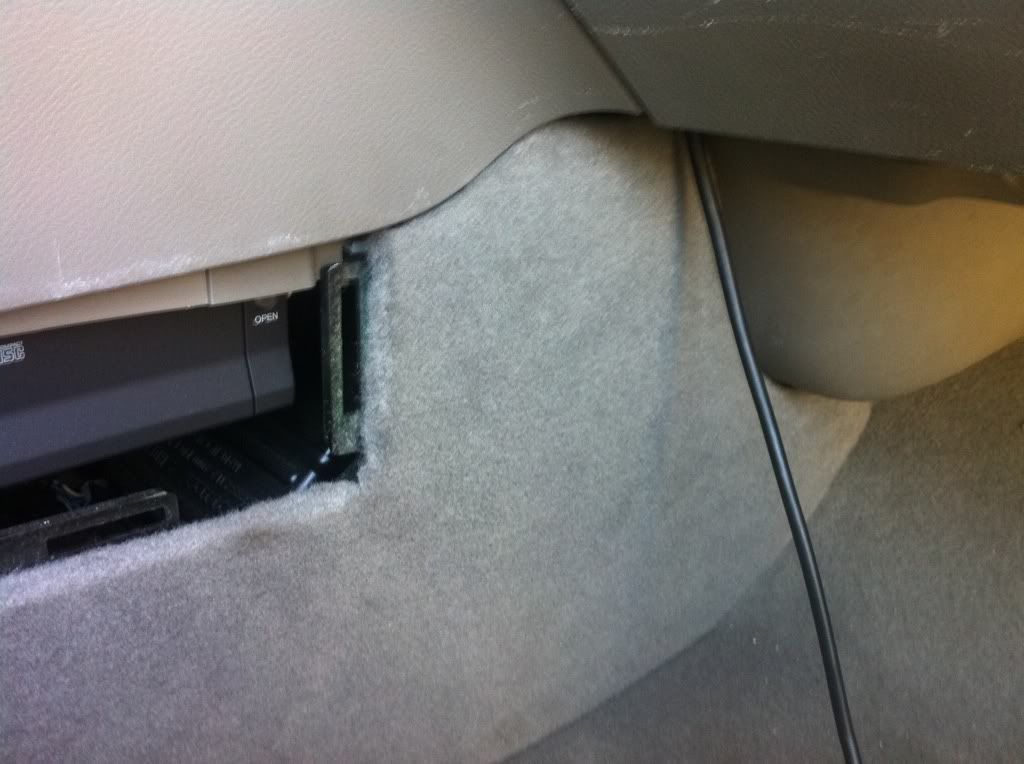
Then, open your glove box and empty its contents somewhere they wont get all over the place (or you could just let them dump all over the floor when you do the next step). The piece in the picture below is what makes it open slowly, lift the glove box just a little and push it toward the front of the car until it unclips. Then pinch the top (on both sides) of the glove box inward, this will let it fall completely down.
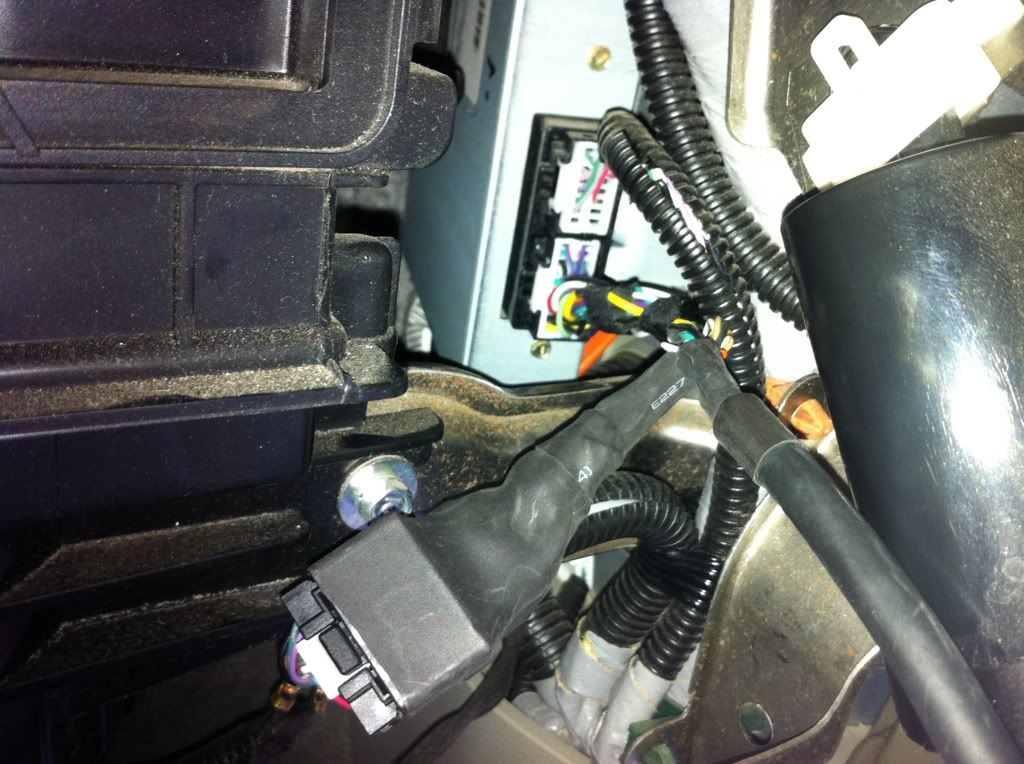
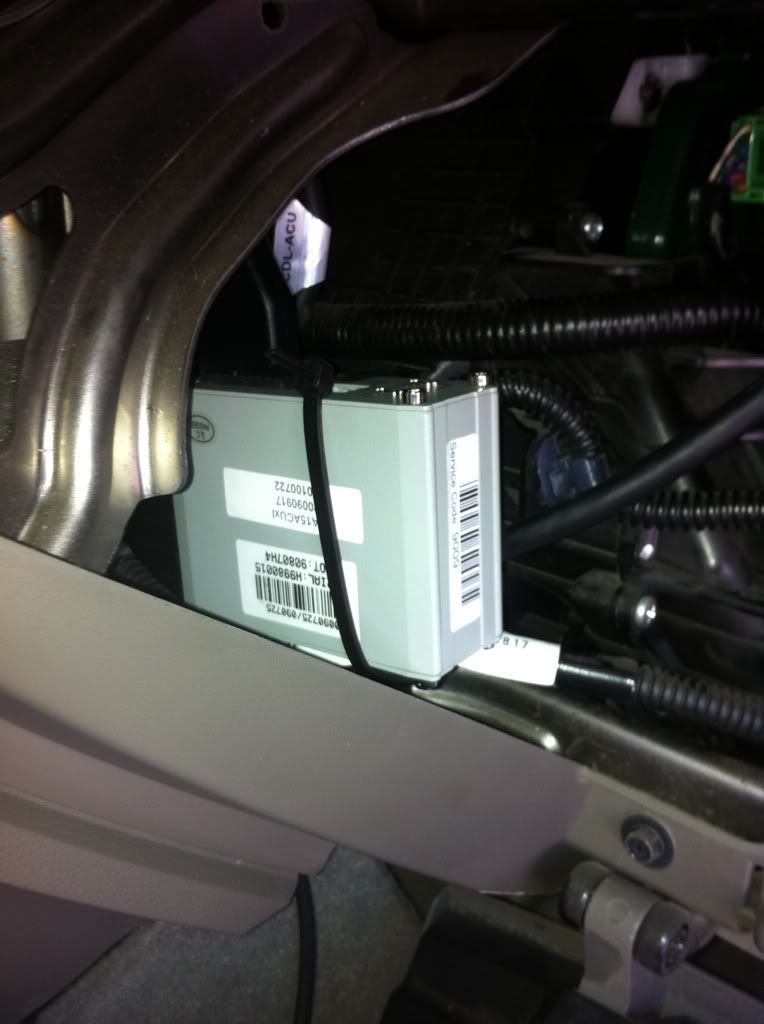
Now you will be looking at this; the XM module is on the right hand side of the picture
You can see the cable unplugged here.

The Cable included with the ACUxl has 3 connectors, one that obviously connects to the unit itself, a male connector, and a female connector. The male connector connects where you unplugged the connector from the XM module, and then you plug the factory connector (the one you unplugged from the XM module) into the female connector, like below.
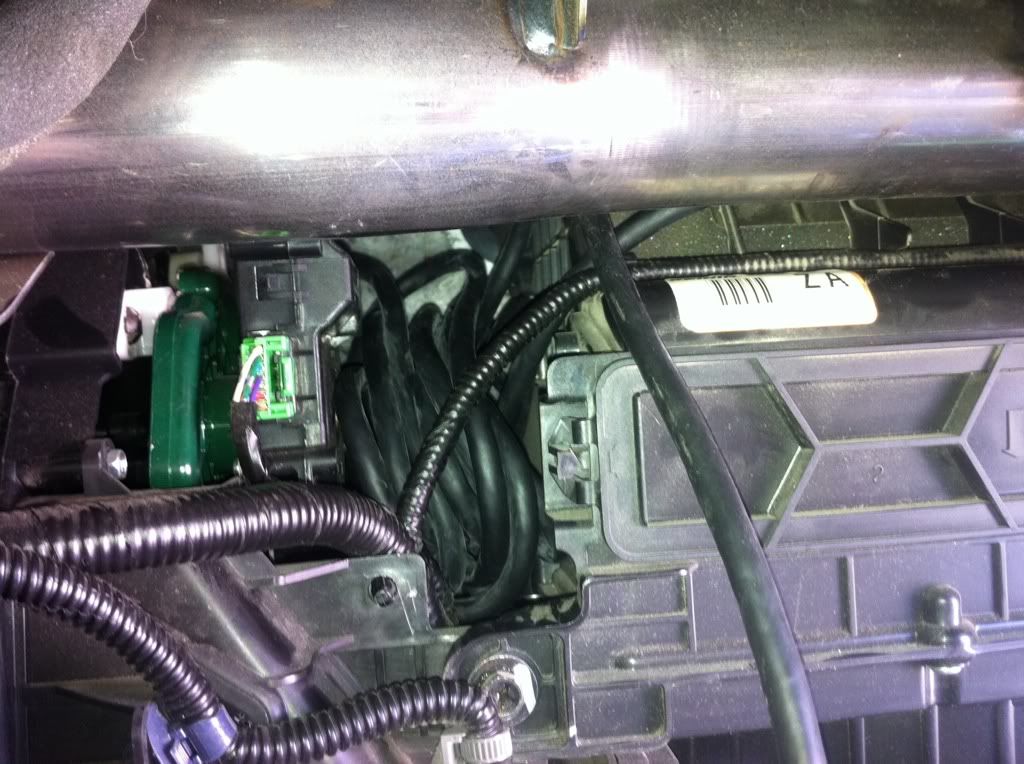
Back on the other side of the A/C box (blower/vent/box/thingy), there is a space where all the extra wire can be coiled and tucked away. (this is assuming you intend to place the ACUxl in the same location I have, behind the radio. You could at this point run the cable to another place in the car so you could make the ipod cable come up in another location; the center console for example. However, since I am using mine with an iPhone which I will need access to for various reasons, I am making the entire iPod cable accessible.) You will have to unclip the wires and move them out of the way to fit the coil, but it will fit in there nice and securely once you wiggle it in there.

Now, I placed the ACUxl unit behind the radio on the left hand side of the glove box area with the cables facing downward. This allows maximum usage of the iPod cable (reason discussed earlier). At this point you can see the iPod cable coming out the bottom of the plastic into the passenger footwell. This location provides enough cable to comfortably hold the phone up to your head and talk without issues. It also allows enough slack in the cable for someone sitting in the back seat to use the iPod/phone and rest it on the center console. I zip tied it securely to some wires in such a way it would not rub or rattle against anything.
Replace all panels/parts in reverse of removal, connect desired device, enjoy. (don't forget to reclip any wires you removed)
I installed myUSA Spec PA15-ACUxl not too long ago and took some pictures while doing it. So now that I have some time I'll post a DIY for it. It was pretty simple all together, and I have owned several PA15-HON2's in the past so I went with USA Spec again for the RDX (tech).
Purchasing: I got mine from a store called "Audio Connections" on Amazon for $132. Delivery was quick.
Install:The whole process took 20 minutes including taking pictures and such so it is pretty simple. However, if you are not comfortable doing something like this I recommend you take it to a professional to have it done, as this is a guide and I'm not responsible for you messing your car up doing it wrong. That said; first thing's first, read the included manual and make sure the DIP switches are set correctly for what you want. On the HON2 there were several options for how you could set them based on the way you wanted to use it, but on the ACUxl its just one way. I don't have a picture of the DIP switches, but it pretty simple, just follow the pictures in the documentation included with the unit.
Next you need to unclip the panel under the glove box, to do that you need to reach in the left hand side of the footwell by the floor and pull the carpeted panel out (its the panel that the Navi Drive is behind, but the whole front of it not just the drive cover). Once you do that you can pop the two clips right under the glove box and pull it toward you to remove it (you need to pull the panel first because the plastic piece has a lip behind it).
Then, open your glove box and empty its contents somewhere they wont get all over the place (or you could just let them dump all over the floor when you do the next step). The piece in the picture below is what makes it open slowly, lift the glove box just a little and push it toward the front of the car until it unclips. Then pinch the top (on both sides) of the glove box inward, this will let it fall completely down.
Now you will be looking at this; the XM module is on the right hand side of the picture
You can see the cable unplugged here.
The Cable included with the ACUxl has 3 connectors, one that obviously connects to the unit itself, a male connector, and a female connector. The male connector connects where you unplugged the connector from the XM module, and then you plug the factory connector (the one you unplugged from the XM module) into the female connector, like below.
Back on the other side of the A/C box (blower/vent/box/thingy), there is a space where all the extra wire can be coiled and tucked away. (this is assuming you intend to place the ACUxl in the same location I have, behind the radio. You could at this point run the cable to another place in the car so you could make the ipod cable come up in another location; the center console for example. However, since I am using mine with an iPhone which I will need access to for various reasons, I am making the entire iPod cable accessible.) You will have to unclip the wires and move them out of the way to fit the coil, but it will fit in there nice and securely once you wiggle it in there.
Now, I placed the ACUxl unit behind the radio on the left hand side of the glove box area with the cables facing downward. This allows maximum usage of the iPod cable (reason discussed earlier). At this point you can see the iPod cable coming out the bottom of the plastic into the passenger footwell. This location provides enough cable to comfortably hold the phone up to your head and talk without issues. It also allows enough slack in the cable for someone sitting in the back seat to use the iPod/phone and rest it on the center console. I zip tied it securely to some wires in such a way it would not rub or rattle against anything.
Replace all panels/parts in reverse of removal, connect desired device, enjoy. (don't forget to reclip any wires you removed)

 10-13-2011, 11:16 AM
#5
The intallations would be similar, but not the same. The non navigation equipped RDX uses a different module: PA15-HON3. This would either plug into the satellite radio box or if there isnt one, into the same plug on the back/bottom of the radio.
http://www.usaspec.com/product.php?ProductID=55
http://www.usaspec.com/product.php?ProductID=55
Last edited by H22A_CD5; 10-13-2011 at 11:21 AM.
10-13-2011, 06:01 PM
#6
10th Gear

Join Date: Aug 2011
Posts: 14
Likes: 0
Received 0 Likes
on
0 Posts
I'm well aware that it's a different unit. I was asking because I saw another tutorial for a different unit which showed that you have to remove the head unit and connect it to the back of it.
10-13-2011, 10:07 PM
#7
2nd Gear

Join Date: Aug 2007
Age: 40
Posts: 2
Likes: 0
Received 0 Likes
on
0 Posts
Looking to install my non navi usa spec, where did you see this tutorial acomp?
Trending Topics
10-17-2011, 08:27 PM
#9
10th Gear
Join Date: Aug 2011
Posts: 14
Likes: 0
Received 0 Likes
on
0 Posts
http://www.youtube.com/watch?v=Txm7cYSbB-s
Here it is. It's for the tech package RDX. The tutorial H22A posted is much more easier. I just wanna make sure it's the same for the non tech one. I don't want to rip apart my dash.
Here it is. It's for the tech package RDX. The tutorial H22A posted is much more easier. I just wanna make sure it's the same for the non tech one. I don't want to rip apart my dash.

Thread
Thread Starter
Forum
Replies
Last Post
nuldabz
3G TL Tires, Wheels & Suspension
3
09-03-2015 05:49 PM