
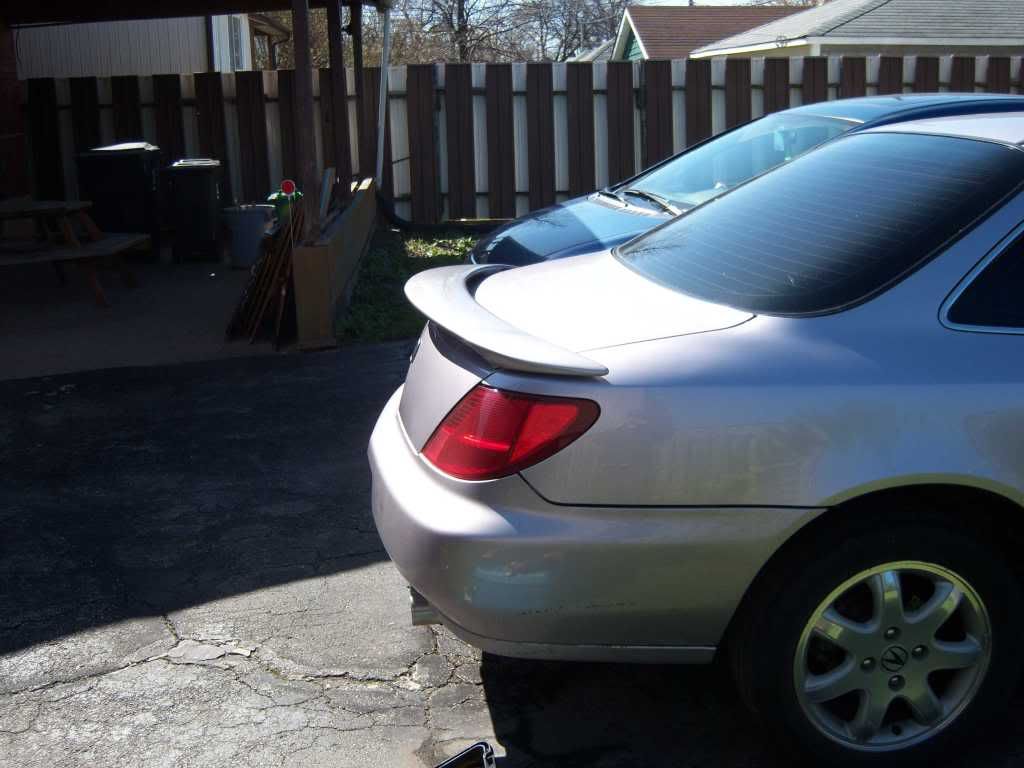
Stock Spoiler Install

Thread Starter
Instructor
Joined: Aug 2009
Posts: 117
Likes: 0
From: Toronto
Stock Spoiler Install
hey all
so i found a great deal on a spoiler( stock / painted) for my primrose 98. should be coming in this coming week. i will do a detailed DIY. job is simple enough but just to ease anyone with reservations, drilling into their trunks etc
pics soon
so i found a great deal on a spoiler( stock / painted) for my primrose 98. should be coming in this coming week. i will do a detailed DIY. job is simple enough but just to ease anyone with reservations, drilling into their trunks etc
pics soon

10th Gear
Joined: Jan 2010
Posts: 12
Likes: 0
From: Schenectady,NY
If you don't mind my asking, how much was it? I found a dealer in Florida that sells genuine Acura parts about 25% below retail, the spoiler and all pieces came to about $268 including the shipping! Ours is a primrose mist metalic also and have been thinking about putting one on. I'll be interested to see your posts on install!
Thread Starter
Instructor
Joined: Aug 2009
Posts: 117
Likes: 0
From: Toronto
If you don't mind my asking, how much was it? I found a dealer in Florida that sells genuine Acura parts about 25% below retail, the spoiler and all pieces came to about $268 including the shipping! Ours is a primrose mist metalic also and have been thinking about putting one on. I'll be interested to see your posts on install!
i told the guy i would share his info with Azine, price was unbeatable
http://stores.ebay.com/Mechanicsvill...__W0QQ_fsubZ12
get them while they last ( there were a few primrose left )
as for install .. this weekend ill have it up
Currently Post-Acura


Joined: Jan 2010
Posts: 998
Likes: 125
From: Bergen County, NJ
If you don't mind my asking, how much was it? I found a dealer in Florida that sells genuine Acura parts about 25% below retail, the spoiler and all pieces came to about $268 including the shipping! Ours is a primrose mist metalic also and have been thinking about putting one on. I'll be interested to see your posts on install!

Edit: not the same color, but..... http://cgi.ebay.com/ebaymotors/GENUI...#ht_3244wt_939
Last edited by MaxMike93; Apr 5, 2010 at 08:44 PM.
Thread Starter
Instructor
Joined: Aug 2009
Posts: 117
Likes: 0
From: Toronto
yea mine was also a honda in VA, same one most likely... some colours were cheaper 70$ + S/H
Thread Starter
Instructor
Joined: Aug 2009
Posts: 117
Likes: 0
From: Toronto
Look on eBay. I got a stock spoiler for my Iced Teal Pearl CL and its was $105 total. Is brand new, factory matched color from a Honda dealer in Virginia. Not sure if the seller had your color though. Just my
Edit: not the same color, but..... http://cgi.ebay.com/ebaymotors/GENUI...#ht_3244wt_939
Edit: not the same color, but..... http://cgi.ebay.com/ebaymotors/GENUI...#ht_3244wt_939

Trending Topics
Used that guy for my spoiler a few months ago 50$ for the Blue/Green one, havent sat down and painted it yet... its primed and waiting, can't wait for the DIY on drilling and placement ;D
Thread Starter
Instructor
Joined: Aug 2009
Posts: 117
Likes: 0
From: Toronto
Diy time
alright so here we go, just put it on. pretty simple job.
tools required

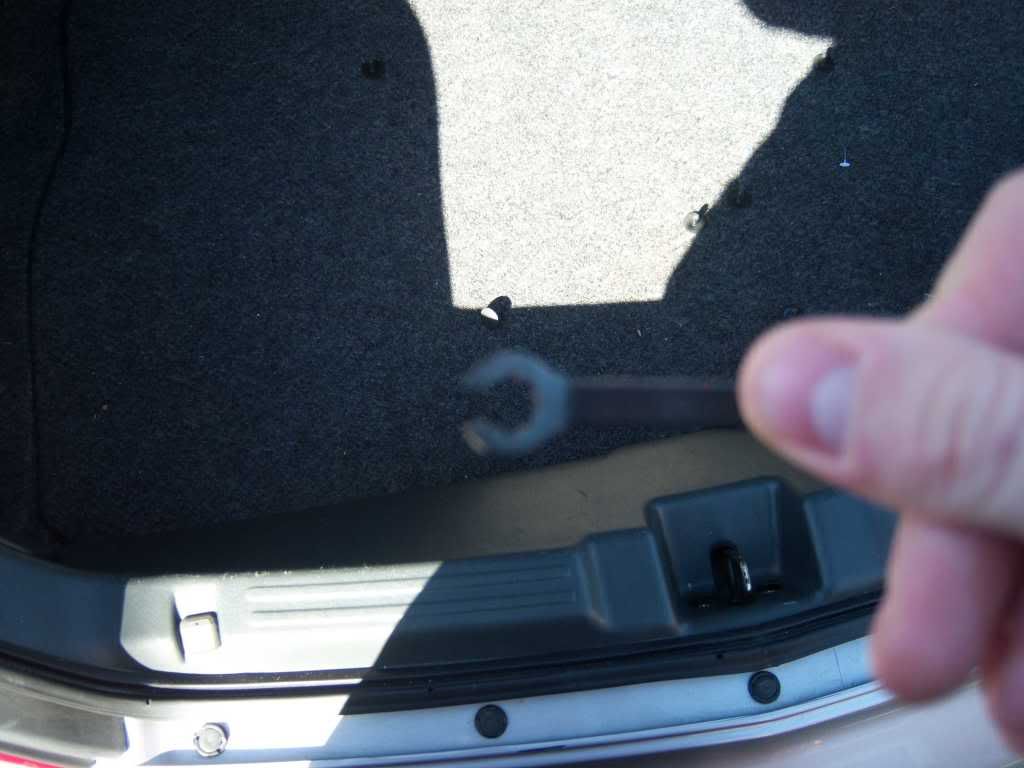
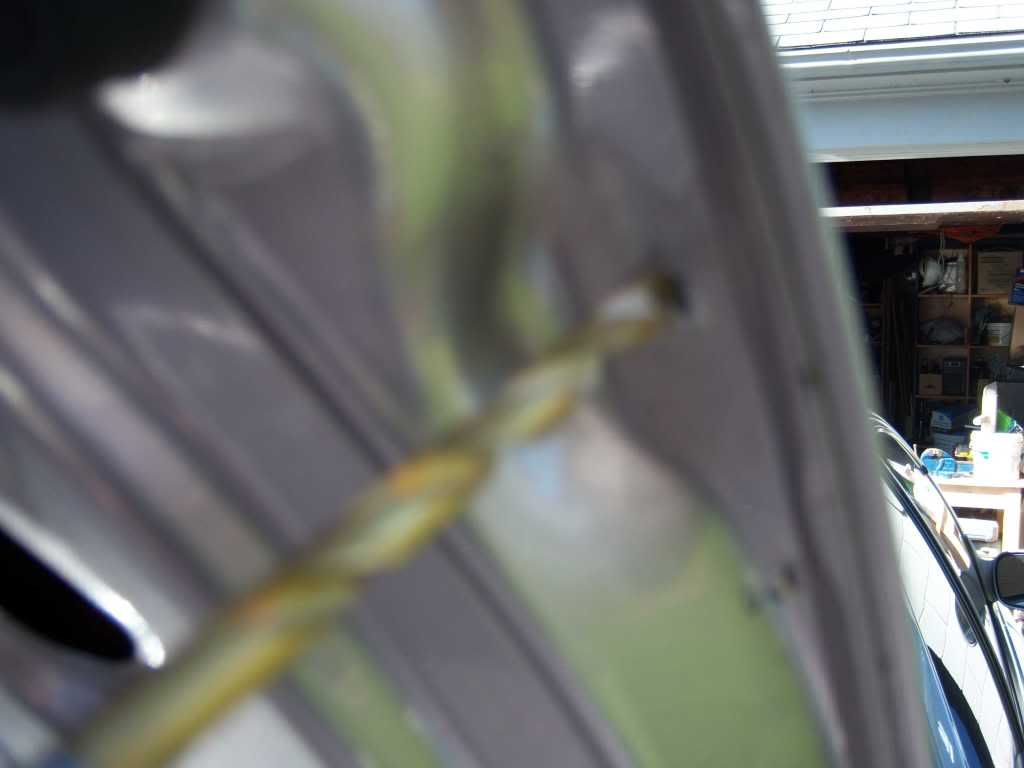
Remove all the tabs then the carpet using a tool like this, or similar, pliers help too. leave the latch on, its tight but u can fidget it out
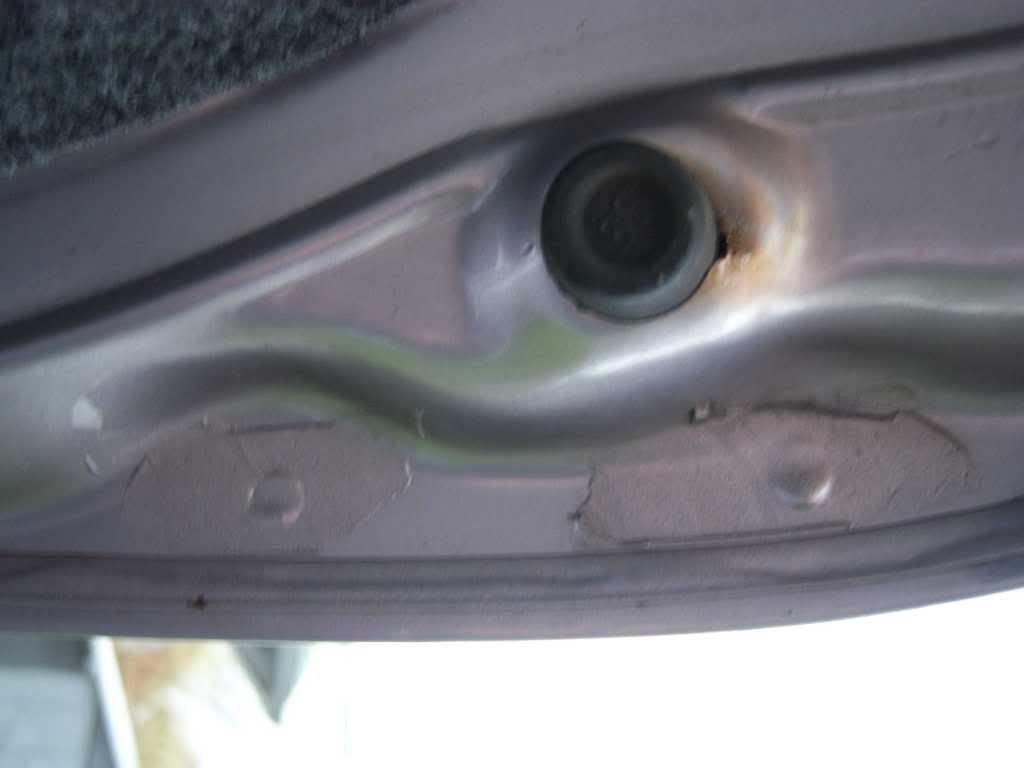
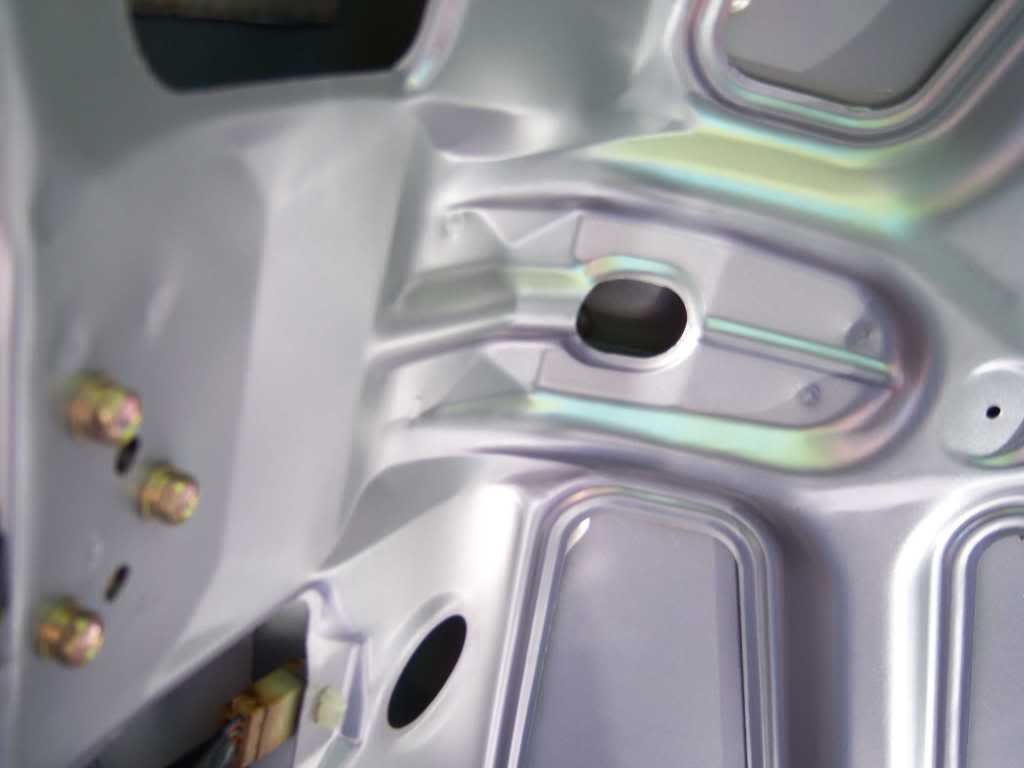
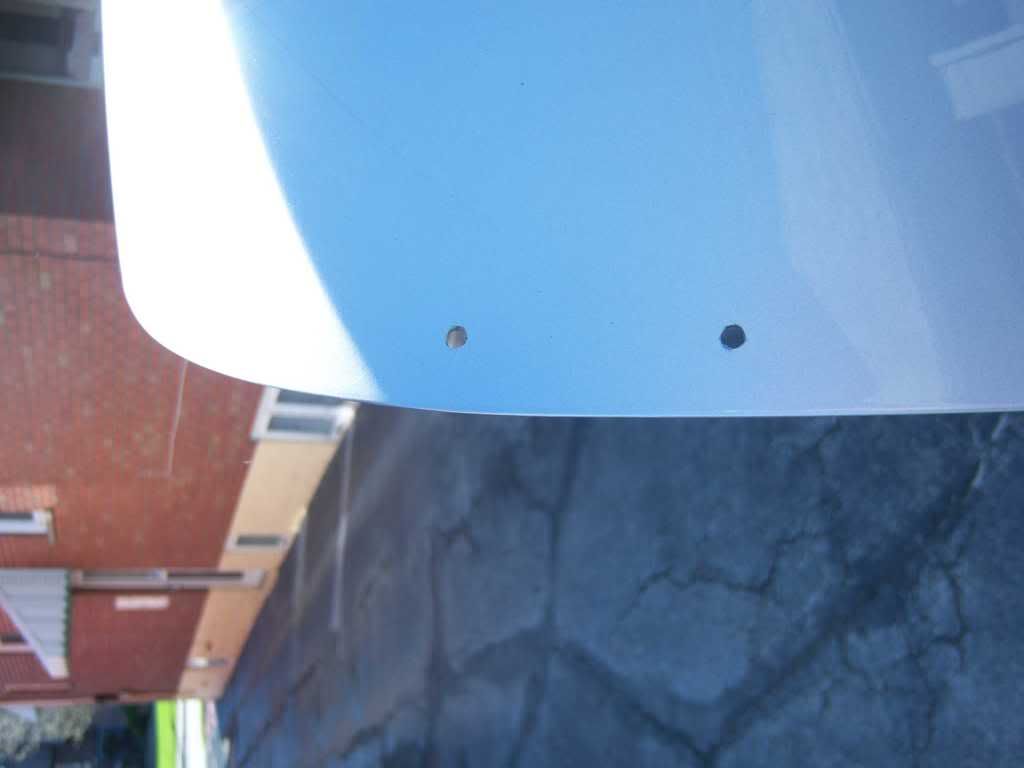
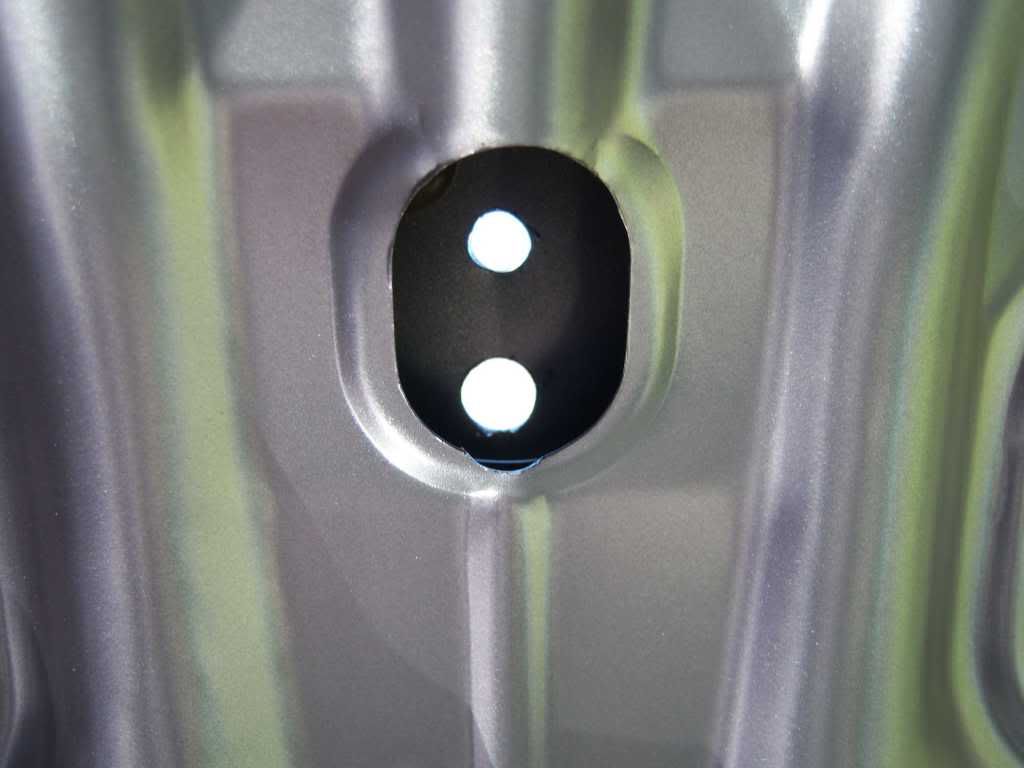
now look at your trunk open. do it in the day with lots of light. on the edges you will see what appear to be pre-drilled holes that were filled with putty and painted. in the centre you will see a oval openeing. this is where the centre mount will pop through. there is also an opening for the wiring
time to drill. make sure u have sharp/new bits ( titanium is best). we will drill out the sides first. use a 1/4" bit and drill out the holes from the inside. it will go easily
here we go. test fit as u go along. enlarge and file the holes as needed.
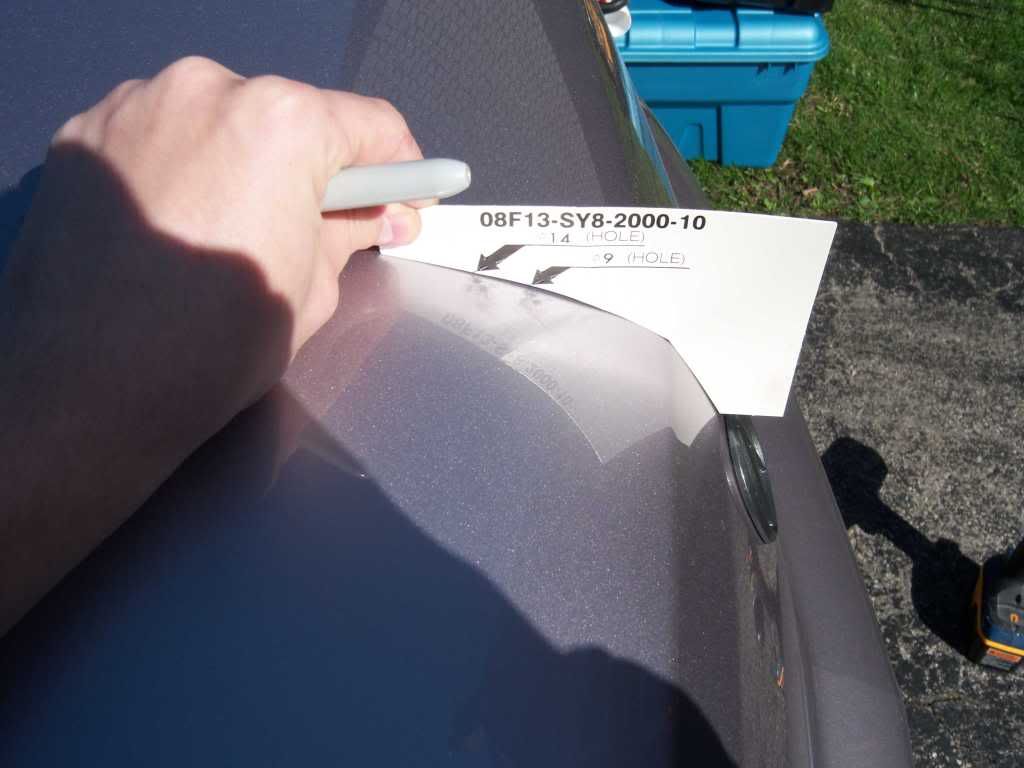
now for the centre support. this part is more involved. first use the template to mark the holes on the outside of the trunk. the template sits on the crease(centre) of our trunk.
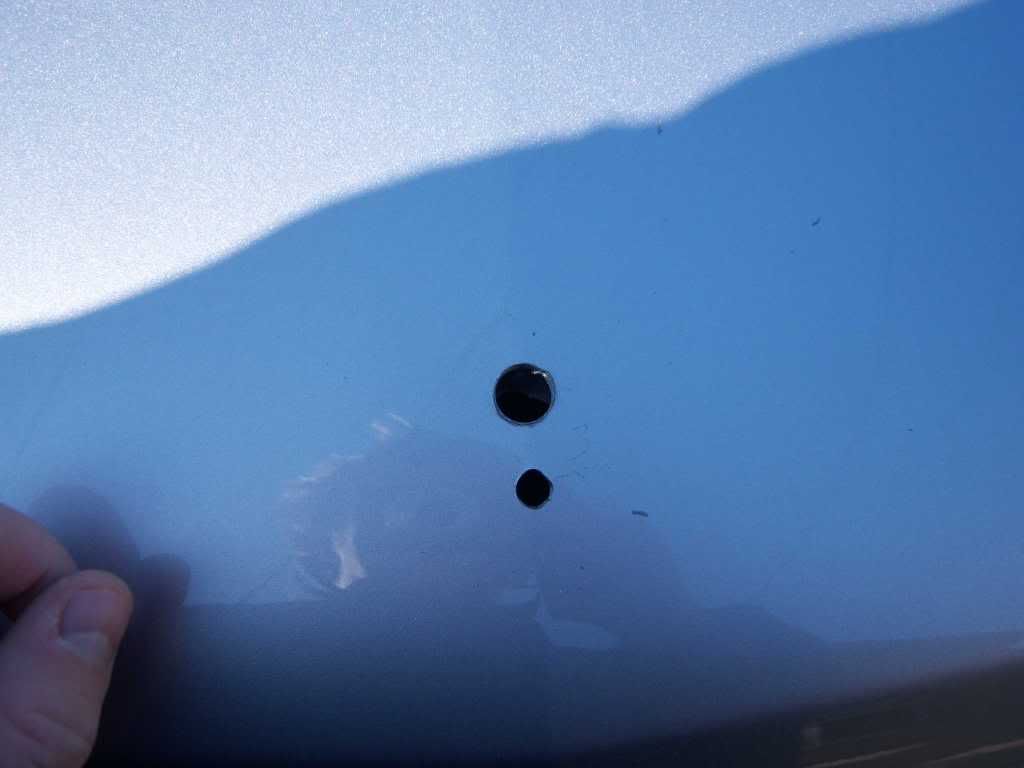
now to drill. use a 1/8" bit to dril the pilot holes. then a 1/4" to enlarge. the upper hole ( one toward rear window) needs to be bigger. step up to a 3/8" bit then a 1/2". when using the 1/2 be careful, use some lube to help cool the bit. and take breaks to allow the metal to cool. right when u break through the drill might bind and twist your wrist so be careful
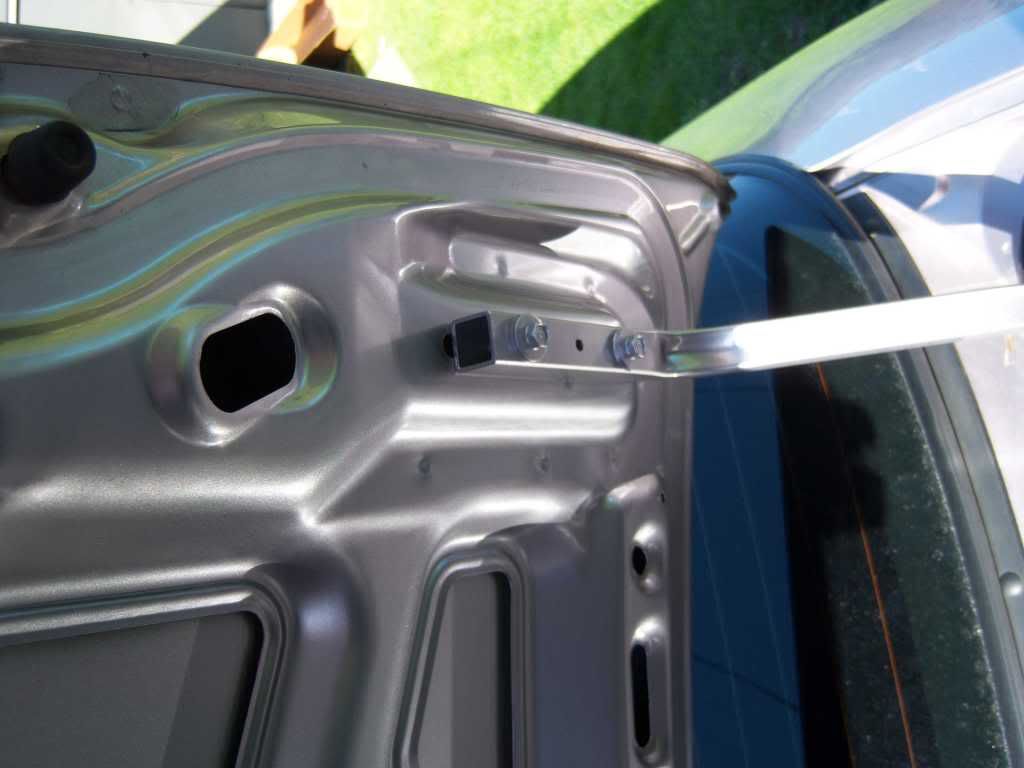
now put some clear silione around all the small holes. insert the rubber gromet into the big hole then silicone around it and wipe off excess. install the spoiler. make adjustments as needed. put little bit of silicone into the nuts and fasten the spoiler.
next the fun part. fish the wiring through the holes. its not hard just taks time. use tape and ties. and clip it into the 3rd taillight.
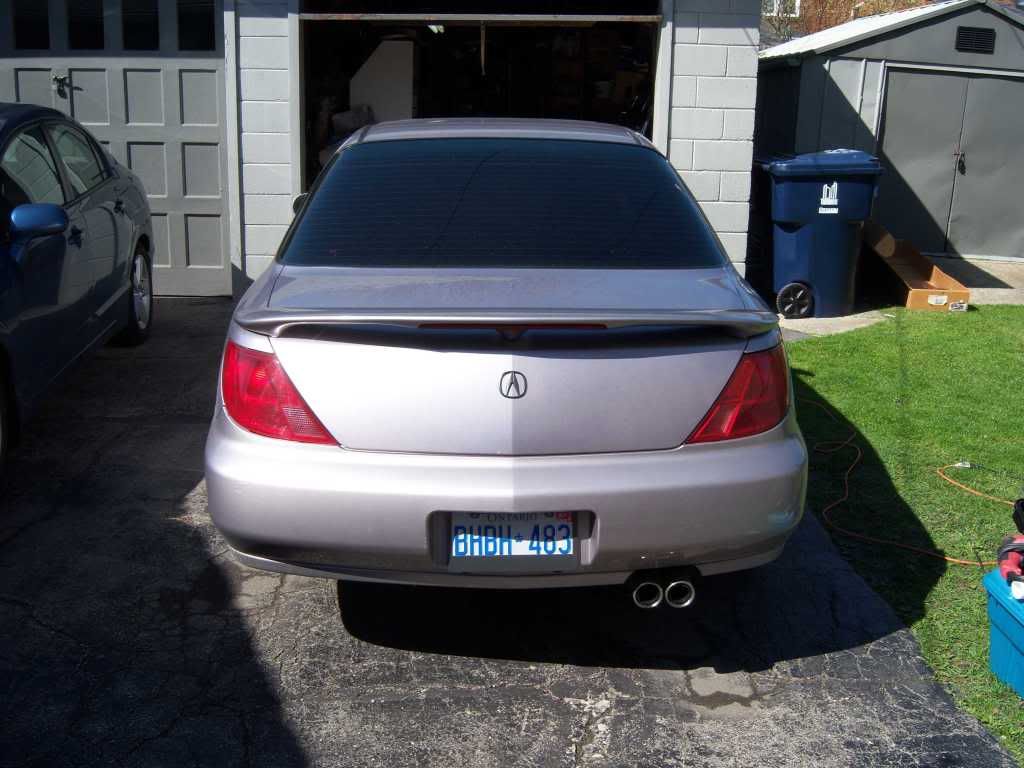
and you are done. reinstall the carpet and clips. trim if needed
note: my spoiler came with replacement rods for the trunk release. i did not install them. i had a hard time removing the old ones. i think u may have to remove everything as an assembly. but no worries the trunk still opens, just doesnt pop up like before.
hope this helps and good luck
tools required
- cordless drill ( fully charged) use higher speed setting
- box with all the goodies you ordered
- drill bits : 1/8 , 1/4 , 3/8 and 1/2 "
- socket driver / wrench ( 10 mm i think )
- tab removal tool ( for carpeting, i made my own )
- 100% silicone sealant ( clear)
- small file
- drill lube ( optional but recommended)
Remove all the tabs then the carpet using a tool like this, or similar, pliers help too. leave the latch on, its tight but u can fidget it out
now look at your trunk open. do it in the day with lots of light. on the edges you will see what appear to be pre-drilled holes that were filled with putty and painted. in the centre you will see a oval openeing. this is where the centre mount will pop through. there is also an opening for the wiring
time to drill. make sure u have sharp/new bits ( titanium is best). we will drill out the sides first. use a 1/4" bit and drill out the holes from the inside. it will go easily
here we go. test fit as u go along. enlarge and file the holes as needed.
now for the centre support. this part is more involved. first use the template to mark the holes on the outside of the trunk. the template sits on the crease(centre) of our trunk.
now to drill. use a 1/8" bit to dril the pilot holes. then a 1/4" to enlarge. the upper hole ( one toward rear window) needs to be bigger. step up to a 3/8" bit then a 1/2". when using the 1/2 be careful, use some lube to help cool the bit. and take breaks to allow the metal to cool. right when u break through the drill might bind and twist your wrist so be careful
now put some clear silione around all the small holes. insert the rubber gromet into the big hole then silicone around it and wipe off excess. install the spoiler. make adjustments as needed. put little bit of silicone into the nuts and fasten the spoiler.
next the fun part. fish the wiring through the holes. its not hard just taks time. use tape and ties. and clip it into the 3rd taillight.
and you are done. reinstall the carpet and clips. trim if needed
note: my spoiler came with replacement rods for the trunk release. i did not install them. i had a hard time removing the old ones. i think u may have to remove everything as an assembly. but no worries the trunk still opens, just doesnt pop up like before.
hope this helps and good luck


 Nice work
10th Gear
Joined: Jan 2010
Posts: 12
Likes: 0
From: Schenectady,NY
Looks fantastic! I saw the little filled in holes on the edges but had not removed the carpet lining yet. Doesn't look to be too hard to do, just be patient. Thanx for the DIY pictures, my turn to do an install!
Thread Starter
Instructor
Joined: Aug 2009
Posts: 117
Likes: 0
From: Toronto
yea goodluck. yea toughest part is those torsion rods. i dont see them coming out with removing everything. other than that piece of cake. PM me if u need any help
10th Gear
Joined: Jan 2010
Posts: 12
Likes: 0
From: Schenectady,NY
Just a little word of advice on installing the wire for the brake light. It is best to start at the back window light and feed it out to the trunk lid from there, the plug at the rear window is too large to fit trying to do it from the trunk side in. I did not change out the OE trunk springs, though I might at some point in the future. Will update if I do.
Thread Starter
Instructor
Joined: Aug 2009
Posts: 117
Likes: 0
From: Toronto
^ +1 agree with skatin, you can manage without that sequence but it will take you much longer, like me laying down inside my trunk , which surprisingly is pretty large fitting me in it lol ( 6'2" 195 lbs )


Thread
Thread Starter
Forum
Replies
Last Post
EE4Life
5G TLX (2015-2020)
3
Sep 11, 2015 10:13 PM