
DIY: Blackhousing Clear Corners
 10-20-2006 | 02:28 PM
#1
Thread Starter
Pro
Joined: Jul 2003
Posts: 732
Likes: 0
From: Shediac, N.B. Canada
DIY: Blackhousing Clear Corners
Disclaimer: by using these guides, you are removing me from any liability that is related to any injury that might occur. If you are unsure about your abilities for any of these projects, get a professional to do it.
Credit goes to me, acuratl_2nr (what_da_no@hotmail.com) for the original write up.
Estimated Time: 4 hours (not including drying time for paint and sealant)
-------------------------------------------------------------------------------------------------------
Tools needed:
Utility knife
Flat head screwdrivers
Heat gun OR Dremel rotary tool
Krylon Plastic Primer
Krylon Plastic Flat Black paint
Mono Clear Bathroom sealant (or another brand of sealant)
Caulking gun
Masking tape
Safety glasses
800 grit sandpaper (not shown in picture)

Instructions:
1. Remove your clear corners (http://www.acura-cl.com/forums/showthread.php?t=171869).
2. Find yourself a good working area where you don�t care to be messy.
3. To open up your clear corners, there are two methods.
a. Use a heat gun
b. Use a rotary tool with a cutting bit
METHOD A (takes a very long time� I would suggest method B)
1. Start heating up a small area where the lens and the housing meet up. Don�t stay in the same place for long because you will melt your housing.
2. When you�ve heated up a small section, use your utility knife to cut the hot plastic/sealant. Be sure to cut along the lens as straight as possible. It will help you later on if you do. TAKE YOUR TIME. If you rush into it you will either melt the housing or break the lens. Clear corners are made very cheaply so be careful with them.
3. Be careful when you reach the end with the plastic elbow. You don�t have lots of room to work but heat it up a little at a time and squeeze the knife in there. I started at the top and worked my way down a little at a time.
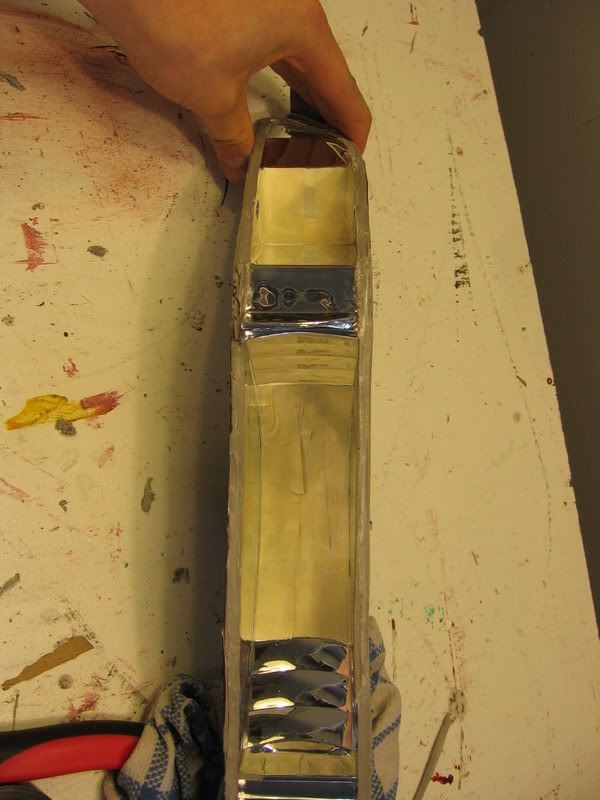
4. After you�ve went around the entire lens, it should come apart easily. If it doesn�t DO NOT pull on it, you will break the lens. Take your utility knife and cut in the opening, you might have missed a few spots.
SCROLL DOWN TO STEP 4
METHOD B (takes a lot less time but you can screw up very easily)
1. Put on eye protection. Bits and pieces of plastic will fly everywhere.
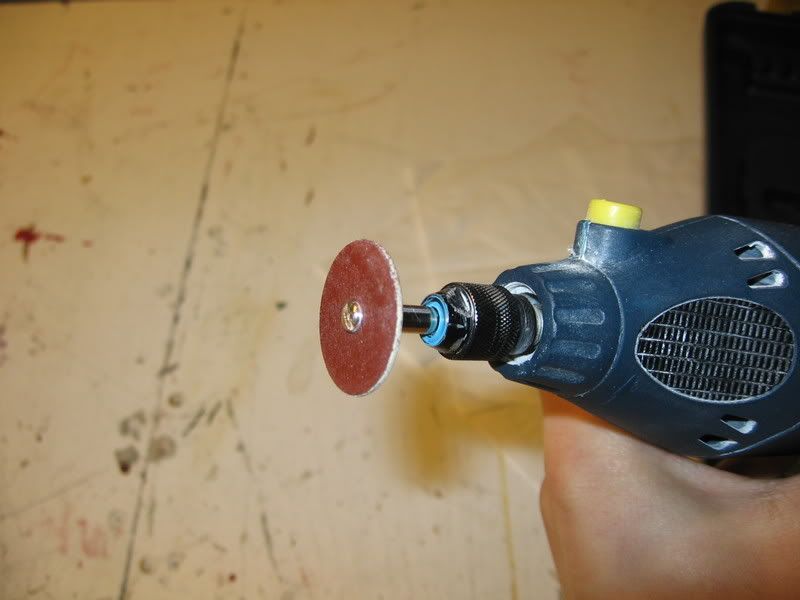
2. Use a cutting bit (looks like a small sanding disk) for your rotary tool. It should look like this:
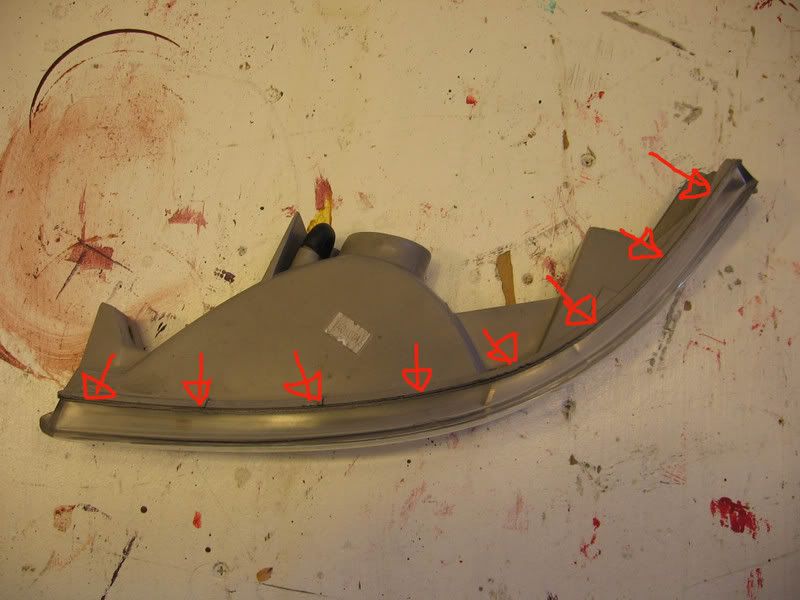
3. Cut along where the lens and housing meet. Take your time; if you try to do it fast you will melt everything. DO NOT cut too close to the lens because you will crack it.
4. Be careful when you get to the end with the little plastic elbow. Cut along the top first and work your way down. Be careful not to cut off the elbow.
5. After you�ve went around the entire lens, it should come apart easily. If it doesn�t DO NOT pull on it, you will break the lens. Take your utility knife and cut in the opening, you might have missed a few spots.
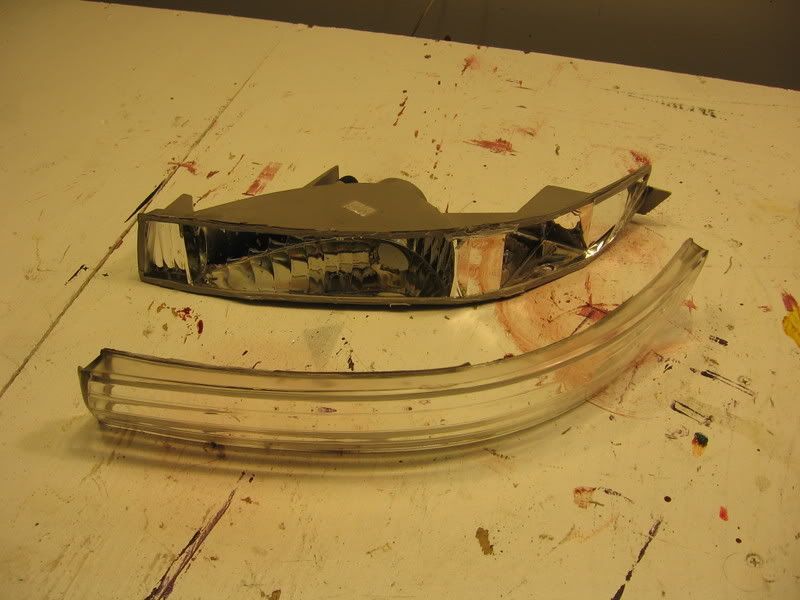
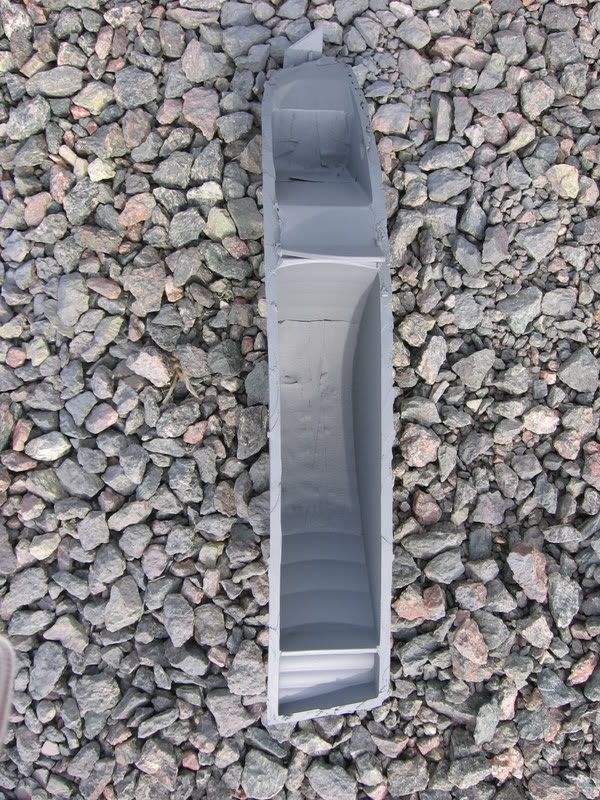
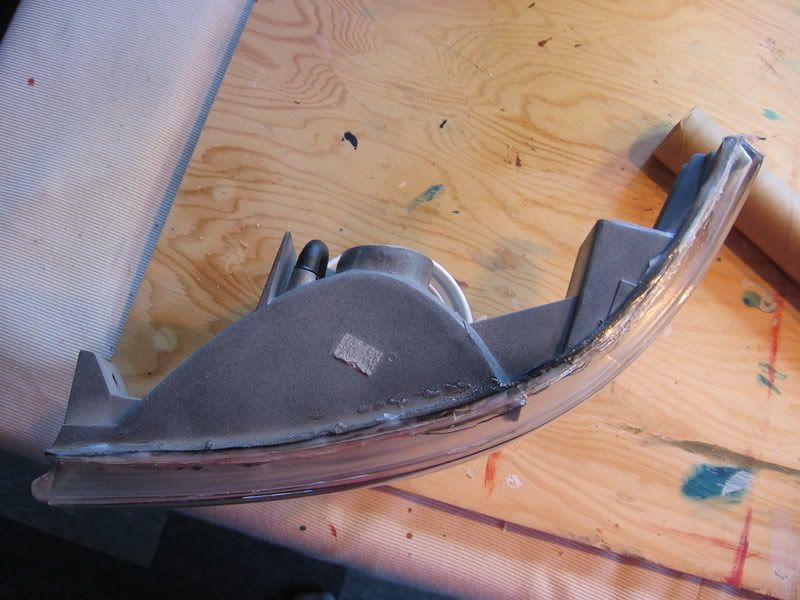
After you�ve opened up the lens, it should look like this.
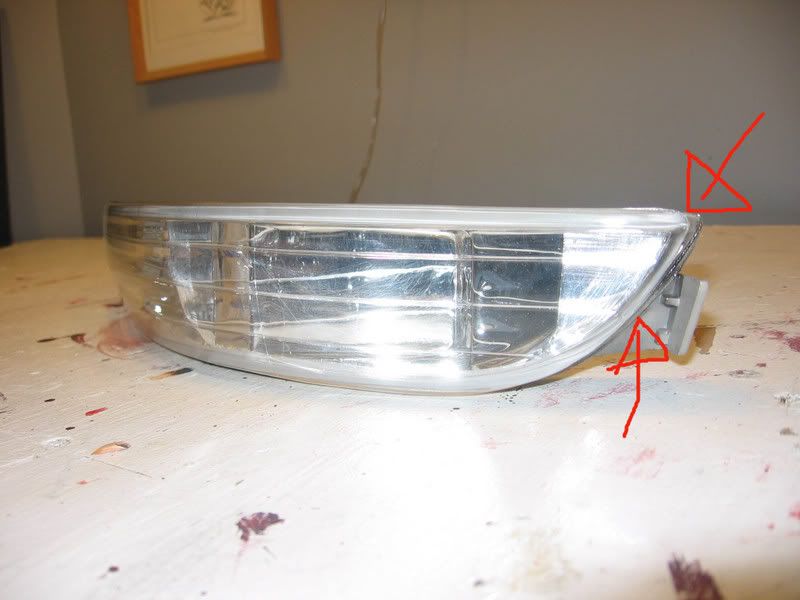
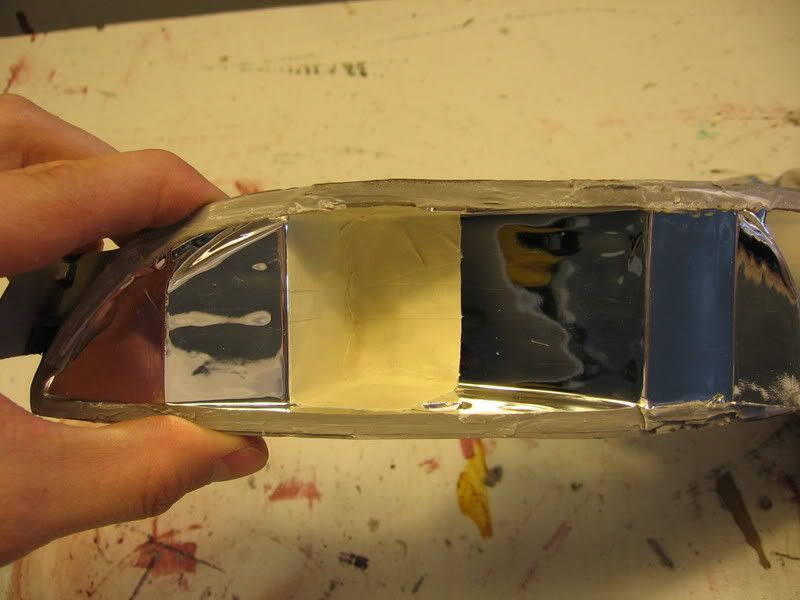
STEP 4. Take your utility knife and remove all of the uneven plastic bits that are on the edges of the lens and housing. Be careful not to cut either the lens or housing or to cut yourself
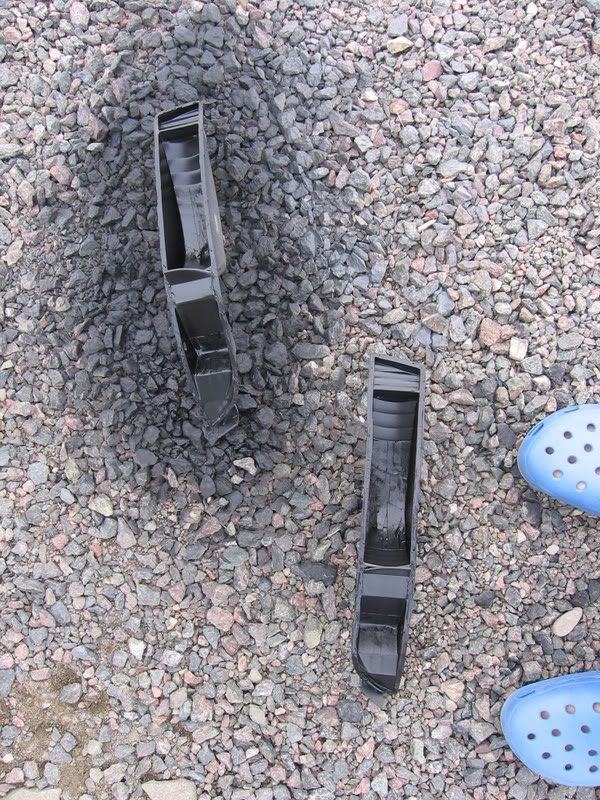
5. Remove pieces of plastic that went into housing.
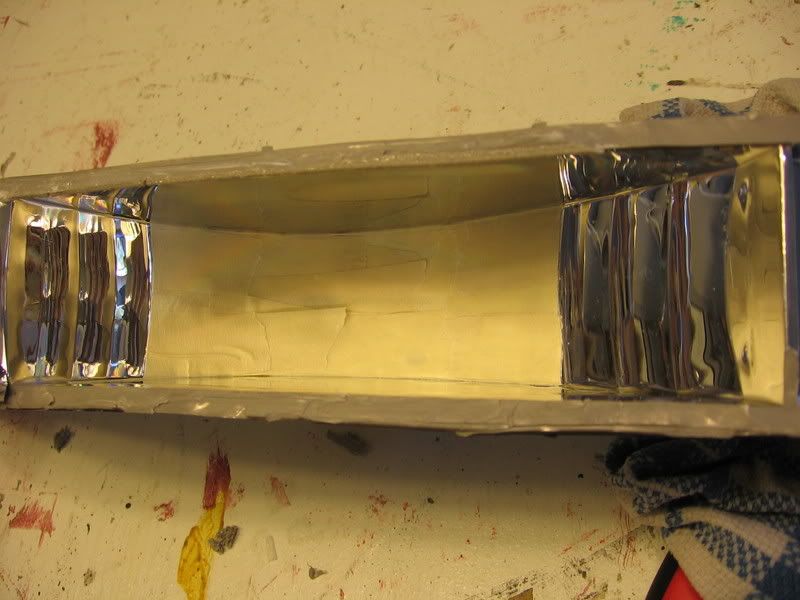
6. Using masking tape, mask what you don�t want to paint black. Here�s how I chose to mask it.
7. After masking everything, sand all the remaining chrome painted areas. You don�t need to all the paint off. Rough it up so the paint has something to adhere to.
8. Clean the housing of anything that the sanding might have left behind.
9. Outside or in a well ventilated area, prime your housings. Do not apply heavy coats or it will result in runs. I applied two coats of primer. Let it dry (time varies depending on type of primer you use).
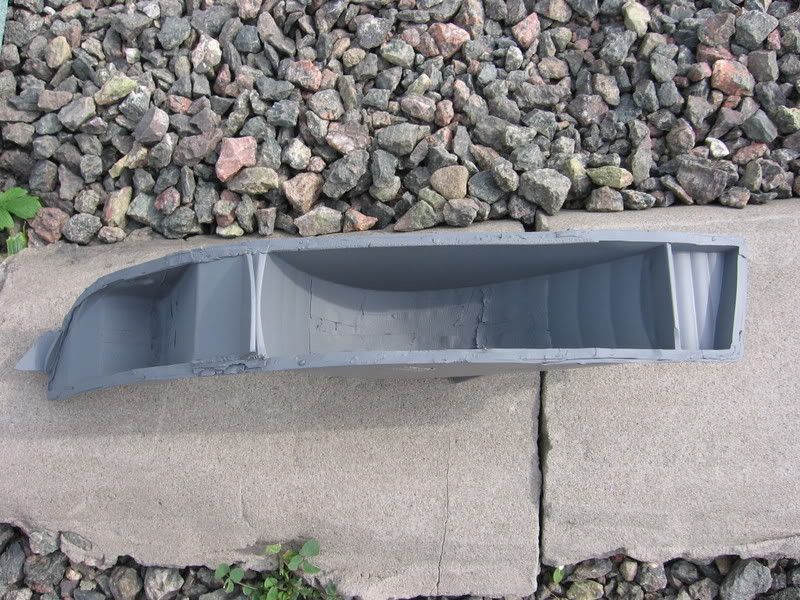
10. When your primer is dry, it�s time to paint. Do not apply heavy coats of paint or it will run due to the steep angles in the housing. I applied three thin coats of paint. Let it dry (time will vary depending on type of paint you use.) I usually let paint dry overnight.
11. After the paint is dry, remove the masking tape. Take your time or you will tear off the paint.
12. Be sure that the edges of the housing and lens are clean. It�s a good time to clean the inside of your lens now to remove any fingerprints or debris.
13. Line up the lens and the housing together. You will not be able to get them exactly right; their will be a gap between the housing and lens. When you�ve got them lined up, wrap them with masking tape to hold them together.
14. Take your caulking and fill the cracks. Do not use too much or it will run into the housing. Go around the masking tape. To even out the caulking, dip your finger in water, it will be easier to spread and the caulking won�t stick to your finger.
15. When it has dried (refer to caulking instructions for exact time), remove the masking tape holding the housing and lens together. At this time, you can fill in the holes left by the tape. Let it dry.
16. Be sure to double check that you haven�t missed any spots with the caulking or you will get owned by condensation, which is not a good thing.
17. To remove any caulking or glue on the lens, I used Meguiar�s PlastX plastic cleaner. Should be available at any auto parts stores.
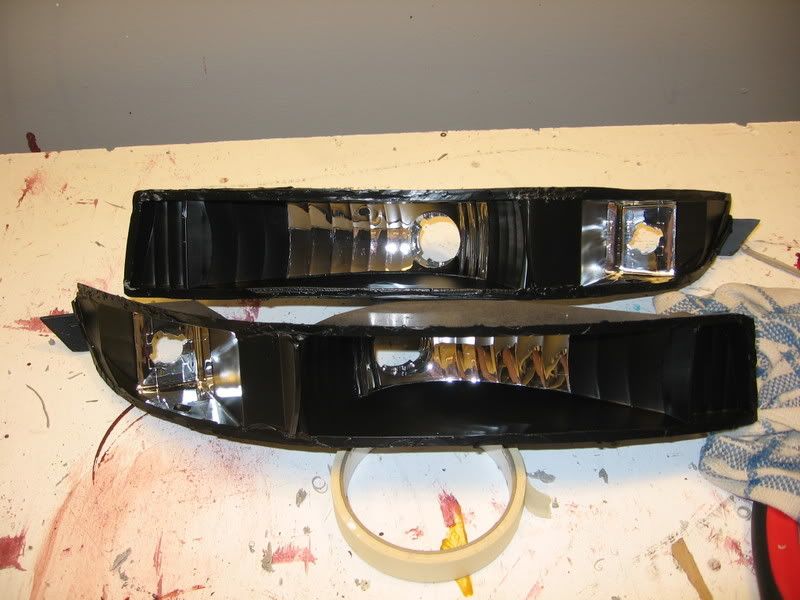
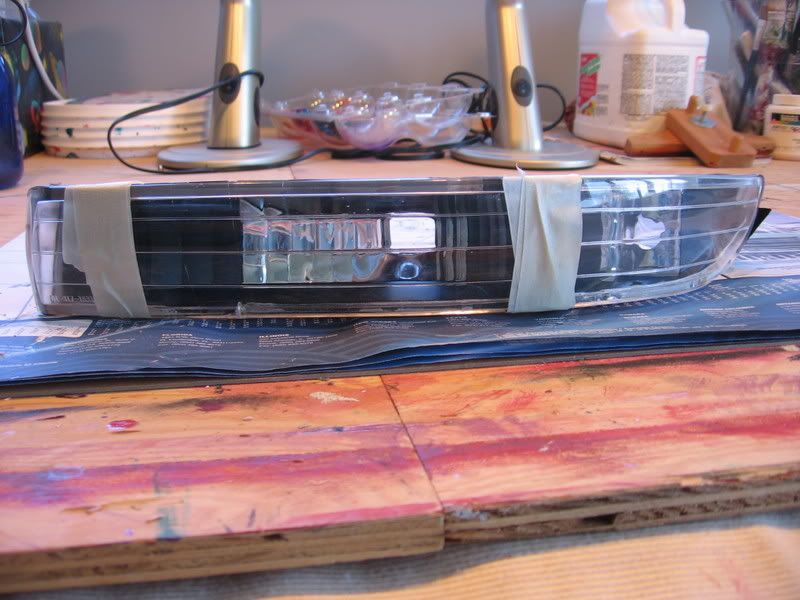
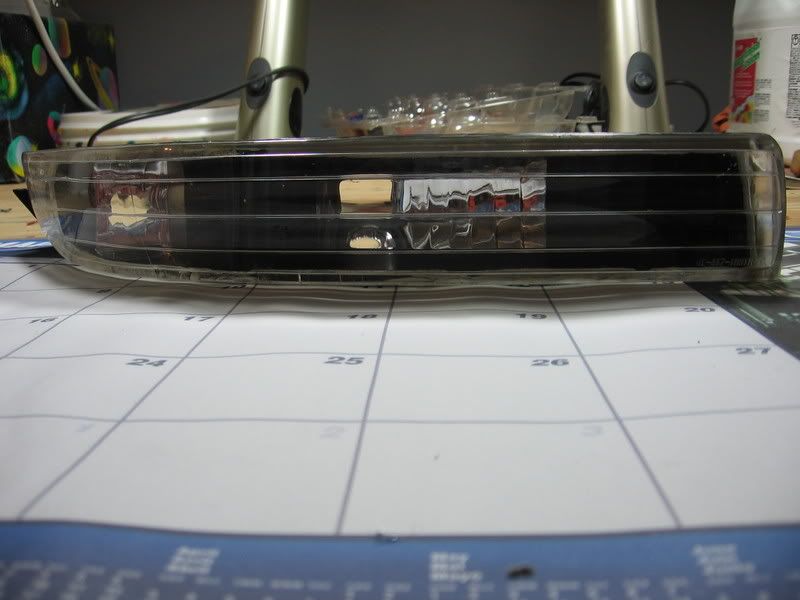
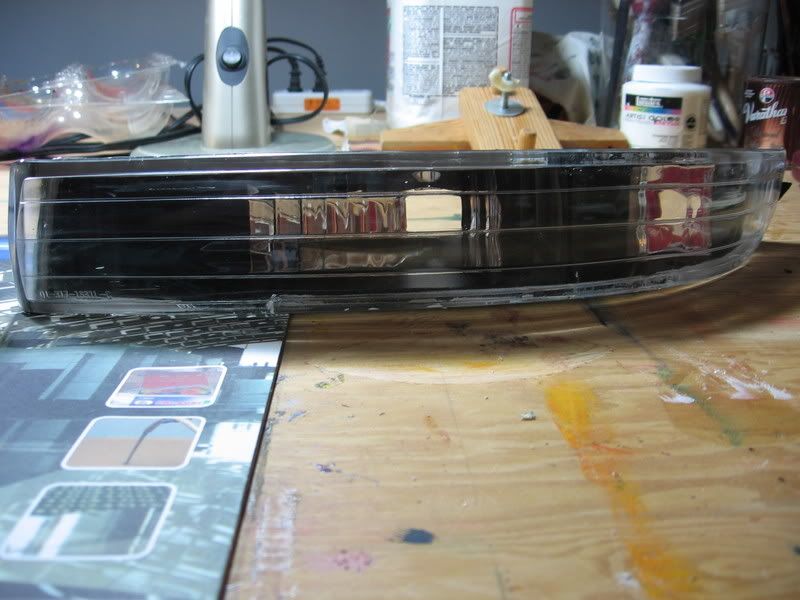
This is what the final product should look like:
On the car:
BEFORE
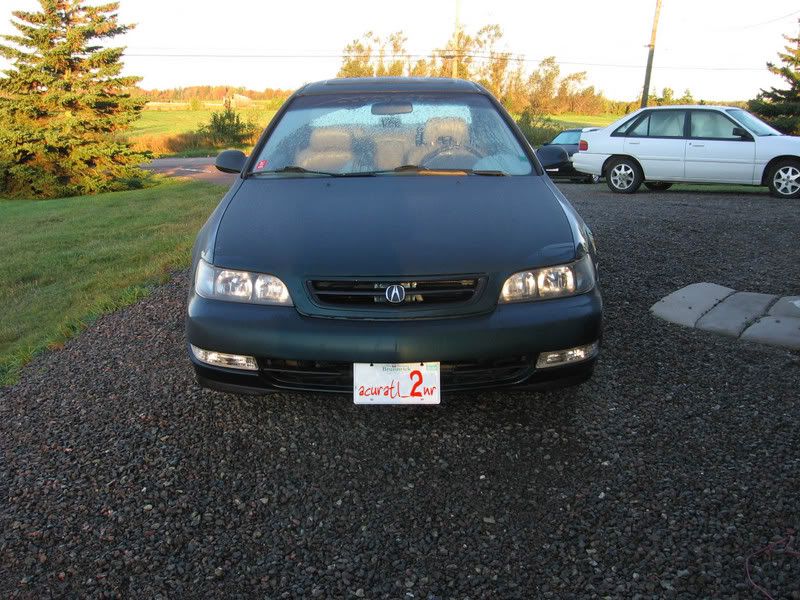
AFTER

Happy modding
Credit goes to me, acuratl_2nr (what_da_no@hotmail.com) for the original write up.
Estimated Time: 4 hours (not including drying time for paint and sealant)
-------------------------------------------------------------------------------------------------------
Tools needed:
Utility knife
Flat head screwdrivers
Heat gun OR Dremel rotary tool
Krylon Plastic Primer
Krylon Plastic Flat Black paint
Mono Clear Bathroom sealant (or another brand of sealant)
Caulking gun
Masking tape
Safety glasses
800 grit sandpaper (not shown in picture)
Instructions:
1. Remove your clear corners (http://www.acura-cl.com/forums/showthread.php?t=171869).
2. Find yourself a good working area where you don�t care to be messy.
3. To open up your clear corners, there are two methods.
a. Use a heat gun
b. Use a rotary tool with a cutting bit
METHOD A (takes a very long time� I would suggest method B)
1. Start heating up a small area where the lens and the housing meet up. Don�t stay in the same place for long because you will melt your housing.
2. When you�ve heated up a small section, use your utility knife to cut the hot plastic/sealant. Be sure to cut along the lens as straight as possible. It will help you later on if you do. TAKE YOUR TIME. If you rush into it you will either melt the housing or break the lens. Clear corners are made very cheaply so be careful with them.
3. Be careful when you reach the end with the plastic elbow. You don�t have lots of room to work but heat it up a little at a time and squeeze the knife in there. I started at the top and worked my way down a little at a time.
4. After you�ve went around the entire lens, it should come apart easily. If it doesn�t DO NOT pull on it, you will break the lens. Take your utility knife and cut in the opening, you might have missed a few spots.
SCROLL DOWN TO STEP 4
METHOD B (takes a lot less time but you can screw up very easily)
1. Put on eye protection. Bits and pieces of plastic will fly everywhere.
2. Use a cutting bit (looks like a small sanding disk) for your rotary tool. It should look like this:
3. Cut along where the lens and housing meet. Take your time; if you try to do it fast you will melt everything. DO NOT cut too close to the lens because you will crack it.
4. Be careful when you get to the end with the little plastic elbow. Cut along the top first and work your way down. Be careful not to cut off the elbow.
5. After you�ve went around the entire lens, it should come apart easily. If it doesn�t DO NOT pull on it, you will break the lens. Take your utility knife and cut in the opening, you might have missed a few spots.
After you�ve opened up the lens, it should look like this.
STEP 4. Take your utility knife and remove all of the uneven plastic bits that are on the edges of the lens and housing. Be careful not to cut either the lens or housing or to cut yourself
5. Remove pieces of plastic that went into housing.
6. Using masking tape, mask what you don�t want to paint black. Here�s how I chose to mask it.
7. After masking everything, sand all the remaining chrome painted areas. You don�t need to all the paint off. Rough it up so the paint has something to adhere to.
8. Clean the housing of anything that the sanding might have left behind.
9. Outside or in a well ventilated area, prime your housings. Do not apply heavy coats or it will result in runs. I applied two coats of primer. Let it dry (time varies depending on type of primer you use).
10. When your primer is dry, it�s time to paint. Do not apply heavy coats of paint or it will run due to the steep angles in the housing. I applied three thin coats of paint. Let it dry (time will vary depending on type of paint you use.) I usually let paint dry overnight.
11. After the paint is dry, remove the masking tape. Take your time or you will tear off the paint.
12. Be sure that the edges of the housing and lens are clean. It�s a good time to clean the inside of your lens now to remove any fingerprints or debris.
13. Line up the lens and the housing together. You will not be able to get them exactly right; their will be a gap between the housing and lens. When you�ve got them lined up, wrap them with masking tape to hold them together.
14. Take your caulking and fill the cracks. Do not use too much or it will run into the housing. Go around the masking tape. To even out the caulking, dip your finger in water, it will be easier to spread and the caulking won�t stick to your finger.
15. When it has dried (refer to caulking instructions for exact time), remove the masking tape holding the housing and lens together. At this time, you can fill in the holes left by the tape. Let it dry.
16. Be sure to double check that you haven�t missed any spots with the caulking or you will get owned by condensation, which is not a good thing.
17. To remove any caulking or glue on the lens, I used Meguiar�s PlastX plastic cleaner. Should be available at any auto parts stores.
This is what the final product should look like:
On the car:
BEFORE
AFTER
Happy modding
 01-30-2007 | 05:55 PM
#7
Thread Starter
Pro
Joined: Jul 2003
Posts: 732
Likes: 0
From: Shediac, N.B. Canada
nope,. they'll melt.. unlike the headlights that are sealed with a silicone type sealant. These are glued together. I suggest going at it with a dremel... if you have anymore questions, ask away! i've been waiting for someone to actually do it
Trending Topics
01-30-2007 | 08:18 PM
#9
Thread Starter
Pro
Joined: Jul 2003
Posts: 732
Likes: 0
From: Shediac, N.B. Canada
Originally Posted by 97BlackAckCL
Man, you're REALLY tempting me to do this
 01-30-2007 | 09:27 PM
#11
Senior Moderator
Regional Coordinator
(Mid-Atlantic)
Regional Coordinator
(Mid-Atlantic)
iTrader: (6)
Joined: Jan 2005
Posts: 92,261
Likes: 4,489
From: ShitsBurgh
No dremel OR heat gun!? what kinda diy car enthusiast are you?
2nr, I def think I'll do this, they're already off and just sitting around waiting for a new bumper
2nr, I def think I'll do this, they're already off and just sitting around waiting for a new bumper
01-30-2007 | 09:30 PM
#12
im 18 the only tools i have is a 236 piece craftsman tool set. and my dad doesnt let me use his tools cuz he says i break everything i touch.
which is true cuz i always used to break his shit i would borrow when i was buidling treehouses and paintball fields.
which is true cuz i always used to break his shit i would borrow when i was buidling treehouses and paintball fields.
01-31-2007 | 12:41 PM
#13
Thread Starter
Pro
Joined: Jul 2003
Posts: 732
Likes: 0
From: Shediac, N.B. Canada
ghost- the only other you might be able to open em up would be with a utility knife... maybe heat up the blade every now and then with a lighter or something,... you would probably end up breaking the lens because if you put too much pressure, they'll crack. Just go buy a dremel at walmart, do your lights and return that sucker
blackack - DO IT!!!
I could sell mine but I put so much work into them I wouldn't want to part with them,.. I almost lost a finger when I did them... I was scraping glue off with a utility knife and BAM the knife got me in the finger almost half way through... I have a scar because of theses lights
blackack - DO IT!!!
I could sell mine but I put so much work into them I wouldn't want to part with them,.. I almost lost a finger when I did them... I was scraping glue off with a utility knife and BAM the knife got me in the finger almost half way through... I have a scar because of theses lights
01-31-2007 | 02:51 PM
#15
Senior Moderator
Regional Coordinator
(Mid-Atlantic)
Regional Coordinator
(Mid-Atlantic)
iTrader: (6)
Joined: Jan 2005
Posts: 92,261
Likes: 4,489
From: ShitsBurgh
I've decided to do it to match my projectors which will have black trim around them(Like dragons), and my fogs 
I have all the tools and paint, just gotta open those bad boys up without breaking them
I have all the tools and paint, just gotta open those bad boys up without breaking them
01-31-2007 | 05:30 PM
#16
Thread Starter
Pro
Joined: Jul 2003
Posts: 732
Likes: 0
From: Shediac, N.B. Canada
Originally Posted by 972xghost
arite sounds good. i got the ambers back on anyways, so i got all the time in the world to do this. thanks tl2nr.
 01-31-2007 | 05:32 PM
#17
Thread Starter
Pro
Joined: Jul 2003
Posts: 732
Likes: 0
From: Shediac, N.B. Canada
Originally Posted by 97BlackAckCL
I've decided to do it to match my projectors which will have black trim around them(Like dragons), and my fogs
I have all the tools and paint, just gotta open those bad boys up without breaking them
I have all the tools and paint, just gotta open those bad boys up without breaking them

 I will def take my time, and post lots of pictures when I'm done
02-15-2007 | 11:59 AM
I will def take my time, and post lots of pictures when I'm done
02-15-2007 | 11:59 AM
#20
omg ive have been trying to take apart this directionals for weeks already. and its taking long not because i dont have the skill, its because im too cheap of a polock to buy tools for this  my utility knifes and etc are almost cashed.
my utility knifes and etc are almost cashed.
02-15-2007 | 06:03 PM
#23
Thread Starter
Pro
Joined: Jul 2003
Posts: 732
Likes: 0
From: Shediac, N.B. Canada
if you do it fast with dremel it would fuck everything up but if you take your time with the dremel it becomes an easy job as opposed to using a utility knife which I found to be a pain in the ass
11-17-2008 | 01:55 PM
#25

playin wit mah bawlz
Joined: Jul 2006
Posts: 36
Likes: 0
From: Chicago
Painting the interior reflectors looks nice. Aside from the fact that my light reflection will be much dimmer, I don't have the time to do this mod.
I was thinking about just throwing a light spritz of black spray paint on the outside of the lenses. Just enough to smoke, not turn black obviously.
Anyone tried this?
I was thinking about just throwing a light spritz of black spray paint on the outside of the lenses. Just enough to smoke, not turn black obviously.
Anyone tried this?
11-17-2008 | 02:20 PM
#26
Senior Moderator
Regional Coordinator
(Mid-Atlantic)
Regional Coordinator
(Mid-Atlantic)
iTrader: (6)
Joined: Jan 2005
Posts: 92,261
Likes: 4,489
From: ShitsBurgh
Painting the interior reflectors looks nice. Aside from the fact that my light reflection will be much dimmer, I don't have the time to do this mod.
I was thinking about just throwing a light spritz of black spray paint on the outside of the lenses. Just enough to smoke, not turn black obviously.
Anyone tried this?
I was thinking about just throwing a light spritz of black spray paint on the outside of the lenses. Just enough to smoke, not turn black obviously.
Anyone tried this?
 I was too lazy to do this mod, I sold my clear corners and bought the smoked ones, seeing these pics again, I wish I would have done the blackhousing ones
11-17-2008 | 02:47 PM
I was too lazy to do this mod, I sold my clear corners and bought the smoked ones, seeing these pics again, I wish I would have done the blackhousing ones
11-17-2008 | 02:47 PM
#27
Painting the interior reflectors looks nice. Aside from the fact that my light reflection will be much dimmer, I don't have the time to do this mod.
I was thinking about just throwing a light spritz of black spray paint on the outside of the lenses. Just enough to smoke, not turn black obviously.
Anyone tried this?
I was thinking about just throwing a light spritz of black spray paint on the outside of the lenses. Just enough to smoke, not turn black obviously.
Anyone tried this?
and call it a day.
 11-17-2008 | 03:26 PM
#29
Senior Moderator
Regional Coordinator
(Mid-Atlantic)
Regional Coordinator
(Mid-Atlantic)
iTrader: (6)
Joined: Jan 2005
Posts: 92,261
Likes: 4,489
From: ShitsBurgh
http://cgi.ebay.com/ebaymotors/_Car-...4506.m20.l1116
and call it a day.
and call it a day.
 screw that
 http://cgi.ebay.com/ebaymotors/_Car-...1%7C240%3A1318
and call it a day
11-18-2008 | 11:30 AM
#30
Exactly. 
Haha, I had no idea those were so cheap.

 11-20-2008 | 12:29 PM
#32
playin wit mah bawlz
Joined: Jul 2006
Posts: 36
Likes: 0
From: Chicago


Thread
Thread Starter
Forum
Replies
Last Post
rp_guy
Member Cars for Sale
9
07-16-2017 07:33 AM