


2010 Acura TL Factory Aero Kit


Thread Starter
Advanced
Joined: Jan 2011
Posts: 77
Likes: 0
From: California
2010 Acura TL Factory Aero Kit
I’m looking into getting the Factory Aero Kit (Front, Rear, and Side Underbody Spoiler) for my 2010 Acura TL Polished Metal Metallic. The lowest prices I found was on ebay total for $828.36. Does anybody know where I can get a lower price shipped and painted my color? Below is the link for the ebay quotes.
Front Underbody Spoiler $271.36
http://cgi.ebay.com/ebaymotors/2009-2010-Acura-TL-Frnt-Under-Body-Spoiler-Mayan-Bronze-_W0QQcmdZViewItemQQhashZitem334bd03cd6QQitemZ22031 5270358QQptZMotorsQ5fCarQ5fTruckQ5fPartsQ5fAccesso ries
Rear Underbody Spoiler $234.00 + $12.00 Shipping
http://cgi.ebay.com/ebaymotors/2009-10-Acura-TL-Rear-Under-Body-Spoiler-Palladium-OEM-_W0QQcmdZViewItemQQhashZitem4a9b77c475QQitemZ32043 5897461QQptZMotorsQ5fCarQ5fTruckQ5fPartsQ5fAccesso ries
Side Underbody Spoiler $299.00 + $12.00 Shipping
http://cgi.ebay.com/ebaymotors/2009-10-Acura-TL-Side-Body-Spoiler-Palladium-OEM-_W0QQcmdZViewItemQQhashZitem4a9b77c4d9QQitemZ32043 5897561QQptZMotorsQ5fCarQ5fTruckQ5fPartsQ5fAccesso ries
Front Underbody Spoiler $271.36
http://cgi.ebay.com/ebaymotors/2009-2010-Acura-TL-Frnt-Under-Body-Spoiler-Mayan-Bronze-_W0QQcmdZViewItemQQhashZitem334bd03cd6QQitemZ22031 5270358QQptZMotorsQ5fCarQ5fTruckQ5fPartsQ5fAccesso ries
Rear Underbody Spoiler $234.00 + $12.00 Shipping
http://cgi.ebay.com/ebaymotors/2009-10-Acura-TL-Rear-Under-Body-Spoiler-Palladium-OEM-_W0QQcmdZViewItemQQhashZitem4a9b77c475QQitemZ32043 5897461QQptZMotorsQ5fCarQ5fTruckQ5fPartsQ5fAccesso ries
Side Underbody Spoiler $299.00 + $12.00 Shipping
http://cgi.ebay.com/ebaymotors/2009-10-Acura-TL-Side-Body-Spoiler-Palladium-OEM-_W0QQcmdZViewItemQQhashZitem4a9b77c4d9QQitemZ32043 5897561QQptZMotorsQ5fCarQ5fTruckQ5fPartsQ5fAccesso ries
Thread Starter
Advanced
Joined: Jan 2011
Posts: 77
Likes: 0
From: California
Potmilkz: Somehow these eBay vendors keep changing their links. I already ordered the kit for $845 Total including shipping coming from New York to California and it should be here by next week Tuesday. Thanks for the response though.
My kit is on the way, but I heard several people on the forum had to drill the bumper
 . Can anyone tell me exactly where to drill, how big of a hole to drill, and if I need any extra installation material that I need to purchase? If there are any pictures available that would be great. Thanks a lot guys.
Last edited by Steven Bell; Jan 20, 2011 at 10:40 PM.
^ You do need to drill a few holes in the bumper (front & rear) to allow for the attachment clips to secure the spoilers. You really don't need any extra install materials, but I bought some 3M double sided adhesive tape to supplement the existing double-sided tape. I felt this would give me a bit more strength when mounting.
You should get the install instructions with the kit, but if not, you can download a copy from the Acura e-store accessible from the Acura website. They contain details on the location and size of the holes. I found it not too difficult to install, but having a friend can help when trying to remove and re-mount the rear bumper.
You should get the install instructions with the kit, but if not, you can download a copy from the Acura e-store accessible from the Acura website. They contain details on the location and size of the holes. I found it not too difficult to install, but having a friend can help when trying to remove and re-mount the rear bumper.
Last edited by StuartMMVITL; Jan 20, 2011 at 07:54 PM.

Thread Starter
Advanced
Joined: Jan 2011
Posts: 77
Likes: 0
From: California
^ You do need to drill a few holes in the bumper (front & rear) to allow for the attachment clips to secure the spoilers. You really don't need any extra install materials, but I bought some 3M double sided adhesive tape to supplement the existing double-sided tape. I felt this would give me a bit more strength when mounting.
You should get the install instructions with the kit, but if not, you can download a copy from the Acura e-store accessible from the Acura website. They contain details on the location and size of the holes. I found it not too difficult to install, but having a friend can help when trying to remove and re-mount the rear bumper.
You should get the install instructions with the kit, but if not, you can download a copy from the Acura e-store accessible from the Acura website. They contain details on the location and size of the holes. I found it not too difficult to install, but having a friend can help when trying to remove and re-mount the rear bumper.
Moderator
Joined: May 2010
Posts: 7,101
Likes: 1,022
From: Southern Cali 626 area
i will also be taking on this challenge, im waiting for tax returns so i can order my lip kit. take some pics of the process of install. any issues you run into, etc so we can all get a good idea on how the install process went.
Trending Topics



Thread Starter
Advanced
Joined: Jan 2011
Posts: 77
Likes: 0
From: California
Steven Bell: Yea the RonJon kit does look pretty good, but I lack patience. The kit should be here tomorrow and possibly on by this Sunday 
potmilkz: I will hook you up with some pictures. Hope I don’t get too excited that I forget the camera.
potmilkz: I will hook you up with some pictures. Hope I don’t get too excited that I forget the camera.
Thread Starter
Advanced
Joined: Jan 2011
Posts: 77
Likes: 0
From: California
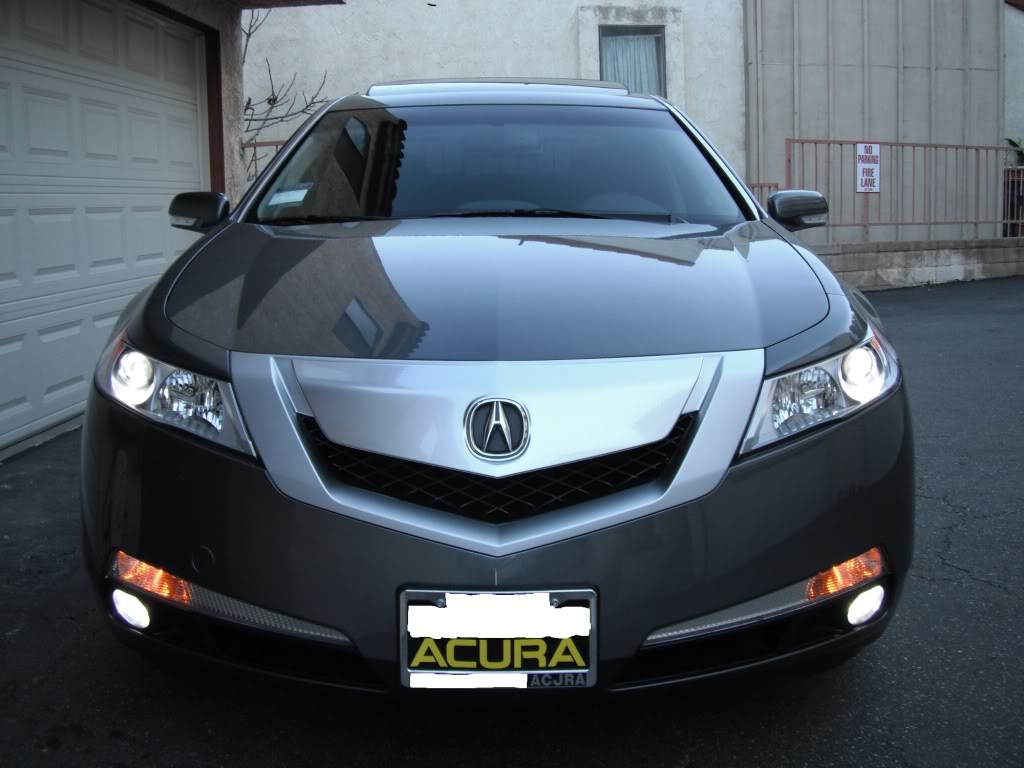
Got my kit installed partially on January 29, 2011 because it was getting dark. The only part left is the rear and that should be installed next week Sunday. Yes there are some cuttings that need to be done. The installation is pretty much self-explanatory. You can get the installation procedures here: http://estore.honda.com/accesssory-i...le-chooser.asp
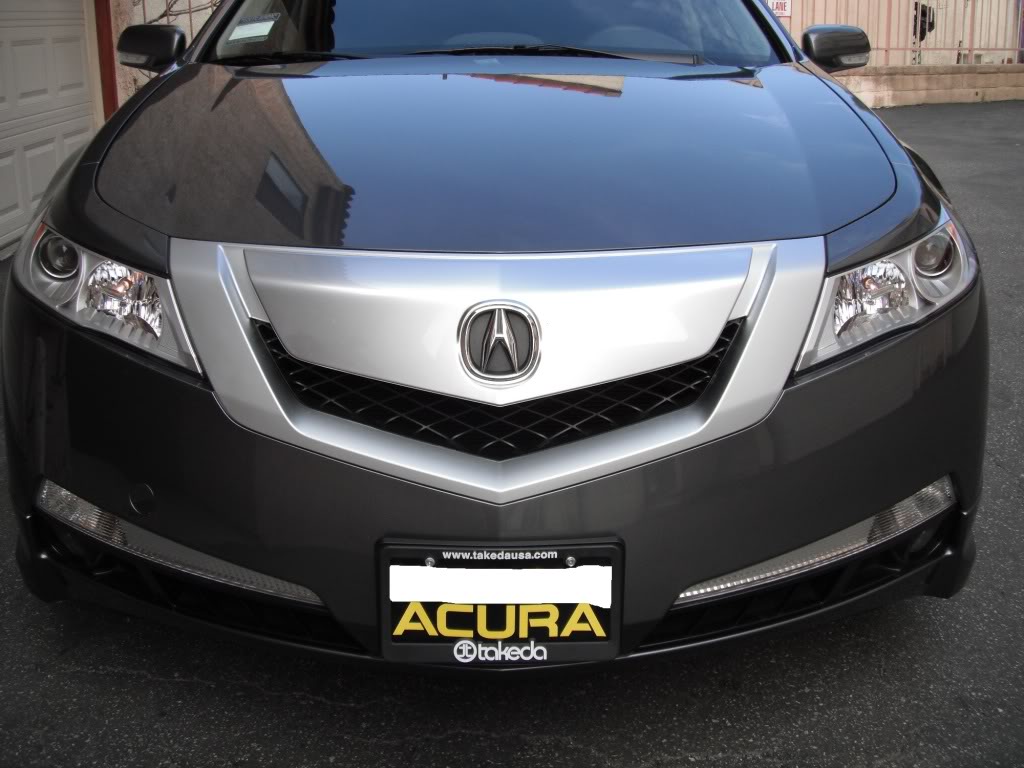
Before A-Spec Kit Front View

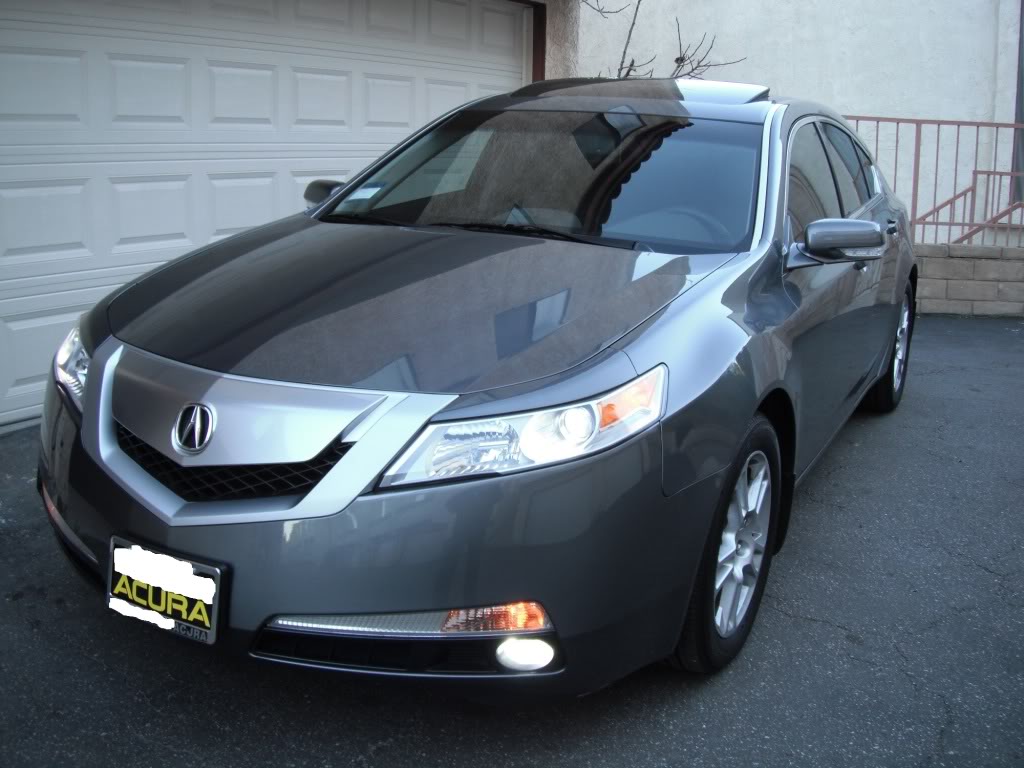
A-Spec Kit Front On

Before A-Spec Kit Side View

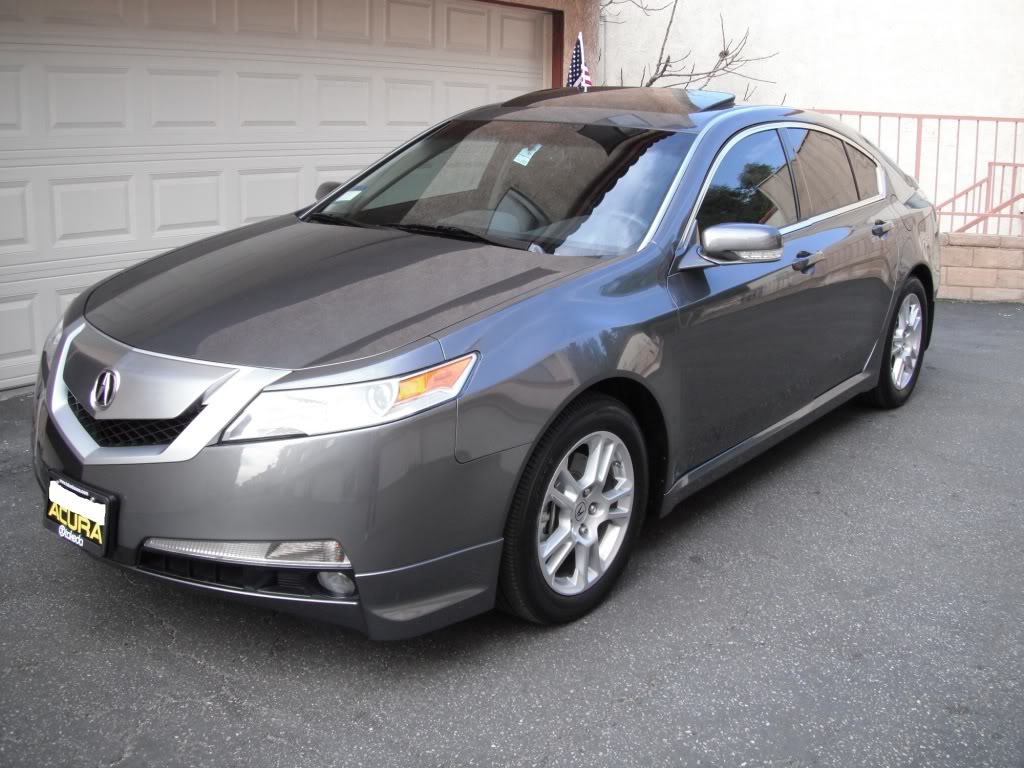
A-Spec Kit Side On

A-Spec Kit Tools

A-Spec Kit Front Right Inside View

A-Spec Kit Front Bumper (Stock) Underneath View

A-Spec Kit Left Bumper Installation

A-Spec Kit Front Center Close Up View

A-Spec Kit Front Left Close Up View

A-Spec Kit Front Right Close Up View

A-Spec Kit Front

A-Spec Kit Front Top View

A-Spec Kit Rear Right Top View

A-Spec Kit Rear Left Top View

A-Spec Kit Rear Left

A-Spec Kit Rear Right

Before A-Spec Kit Front View
A-Spec Kit Front On
Before A-Spec Kit Side View
A-Spec Kit Side On
A-Spec Kit Tools
A-Spec Kit Front Right Inside View
A-Spec Kit Front Bumper (Stock) Underneath View
A-Spec Kit Left Bumper Installation
A-Spec Kit Front Center Close Up View
A-Spec Kit Front Left Close Up View
A-Spec Kit Front Right Close Up View
A-Spec Kit Front
A-Spec Kit Front Top View
A-Spec Kit Rear Right Top View
A-Spec Kit Rear Left Top View
A-Spec Kit Rear Left
A-Spec Kit Rear Right

Suzuka Master
Joined: Apr 2009
Posts: 8,490
Likes: 609

Thread Starter
Advanced
Joined: Jan 2011
Posts: 77
Likes: 0
From: California
Before A-Spec Kit Front View
A-Spec Kit Front On
Before A-Spec Kit Side View
A-Spec Kit Side On
A-Spec Kit Tools
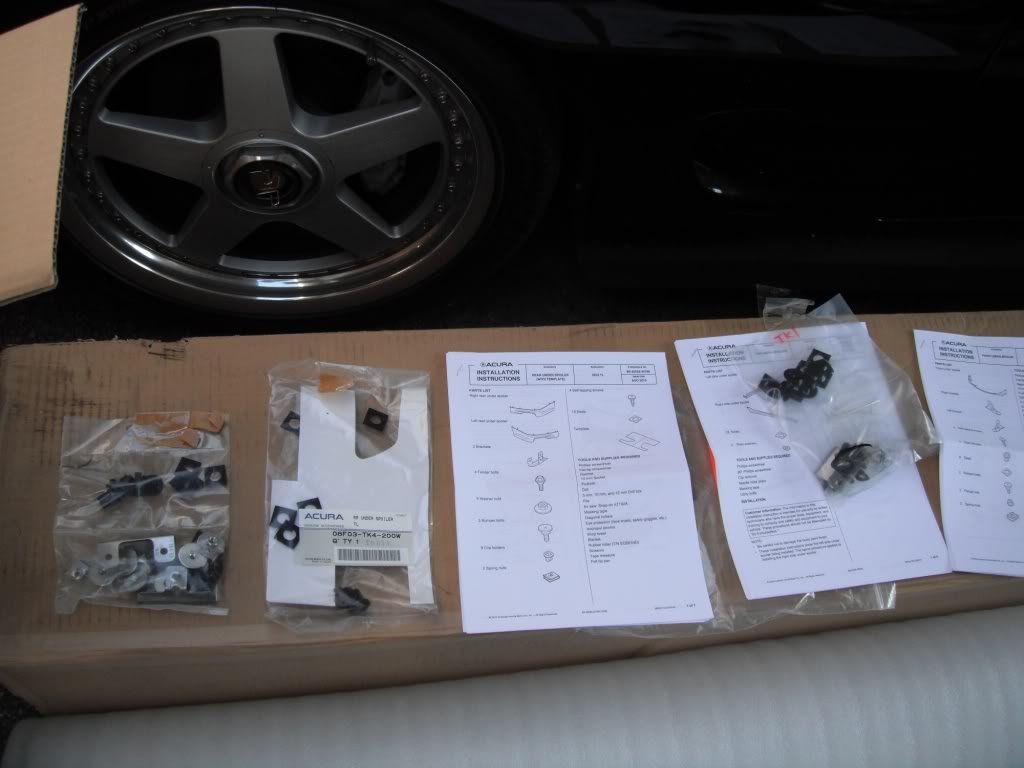
A-Spec Kit Front Right Inside View
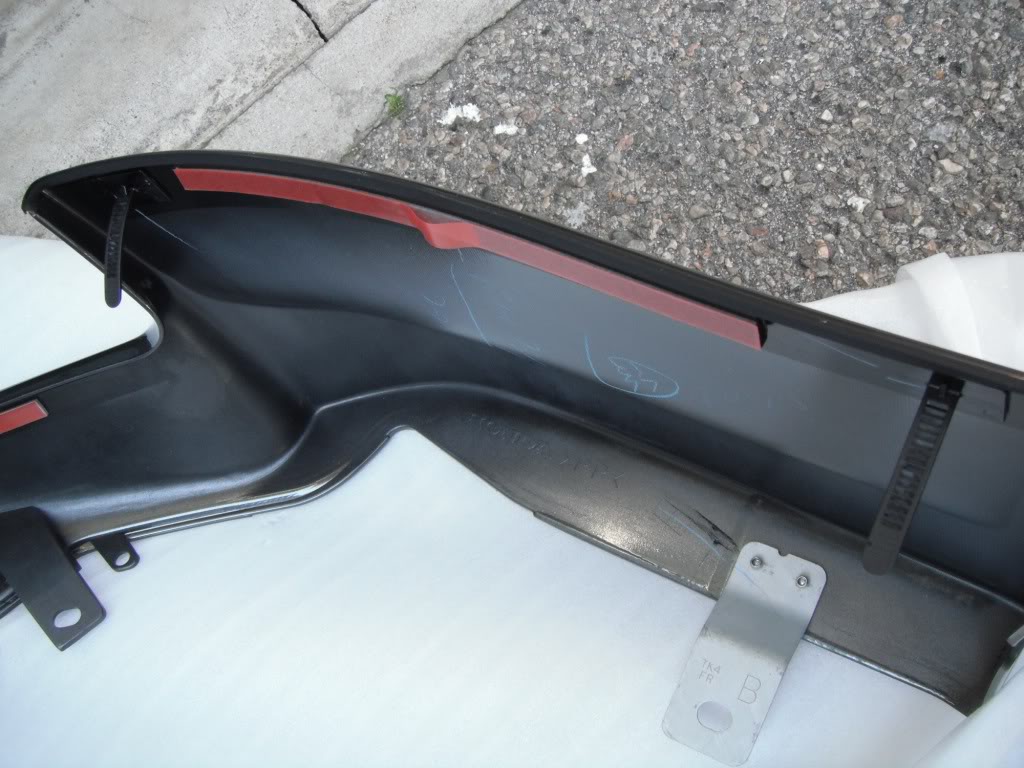
A-Spec Kit Front Bumper (Stock) Underneath View
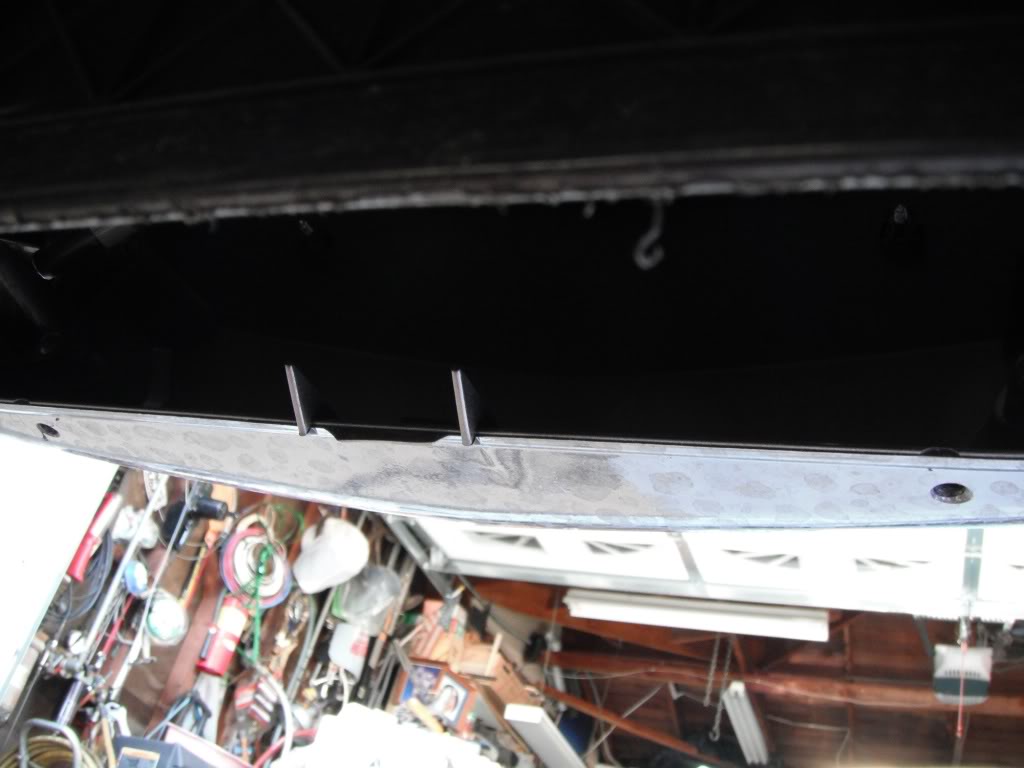
A-Spec Kit Left Bumper Installation
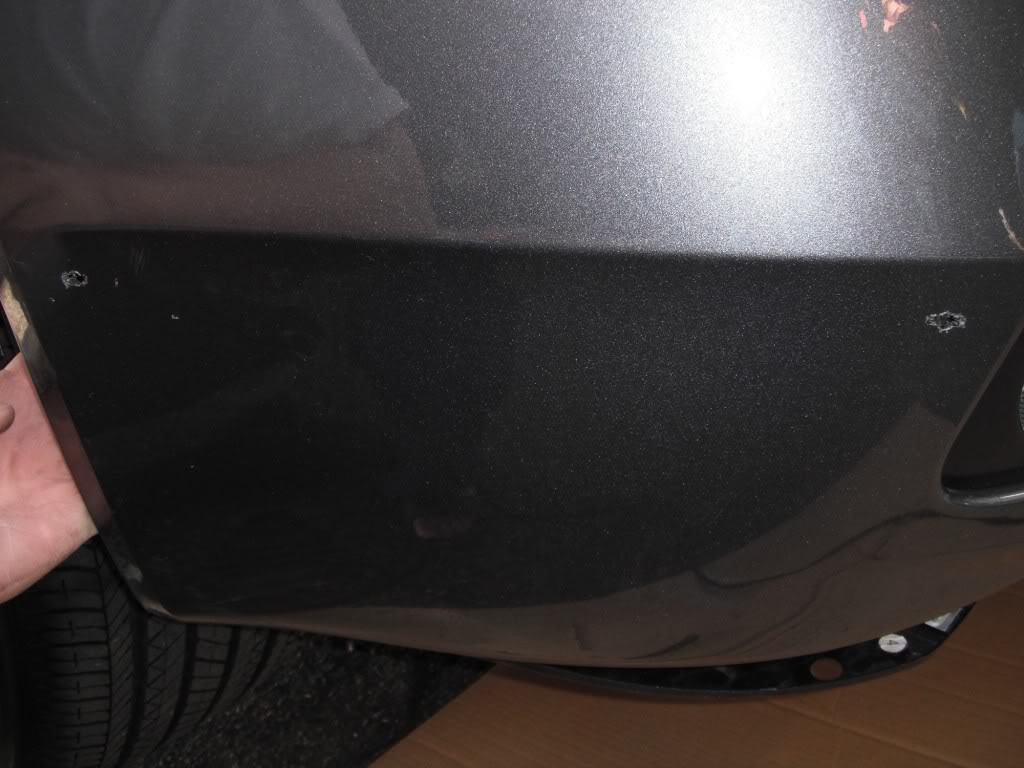
A-Spec Kit Front Center Close Up View
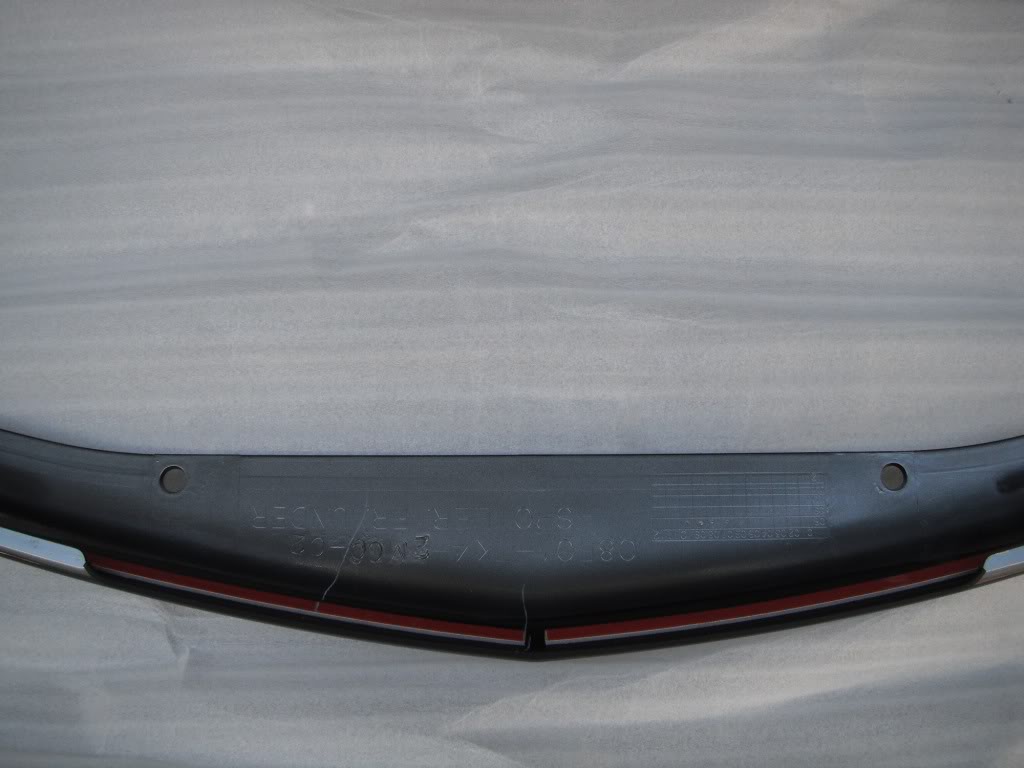
A-Spec Kit Front Left Close Up View
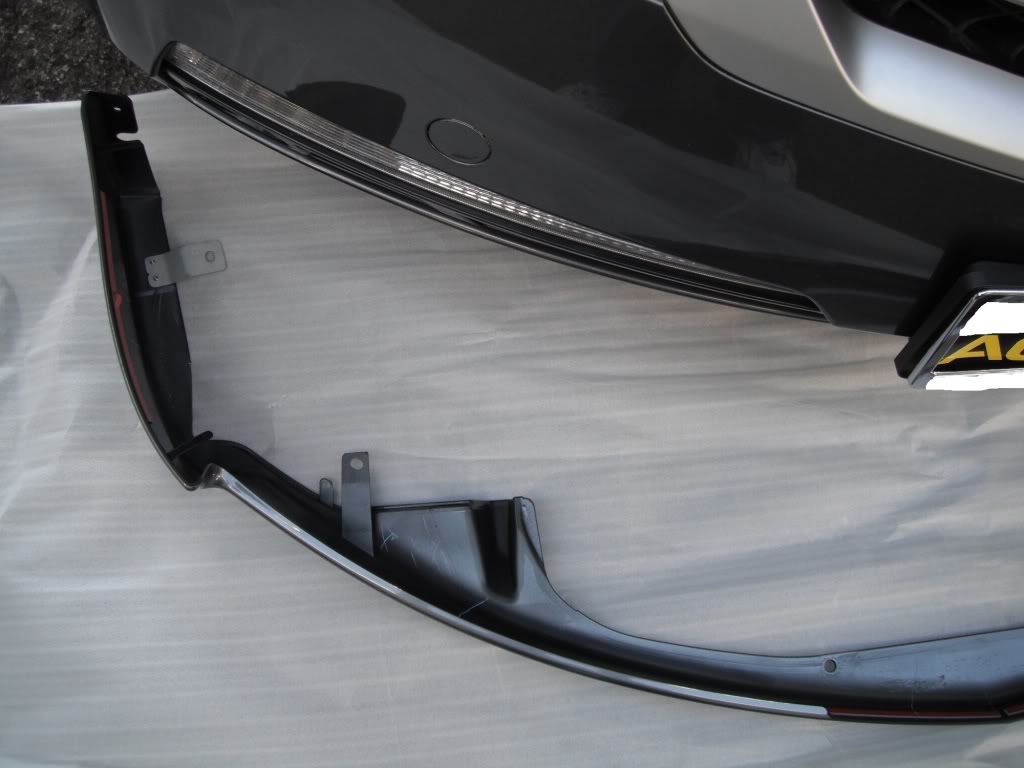
A-Spec Kit Front Right Close Up View
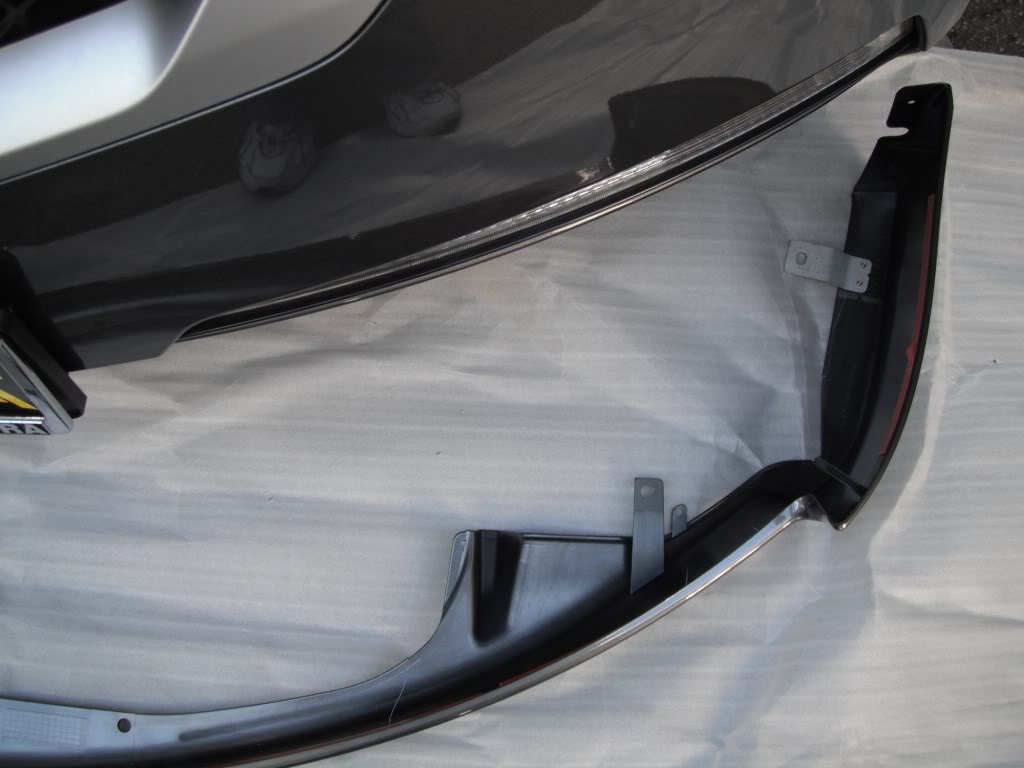
A-Spec Kit Front
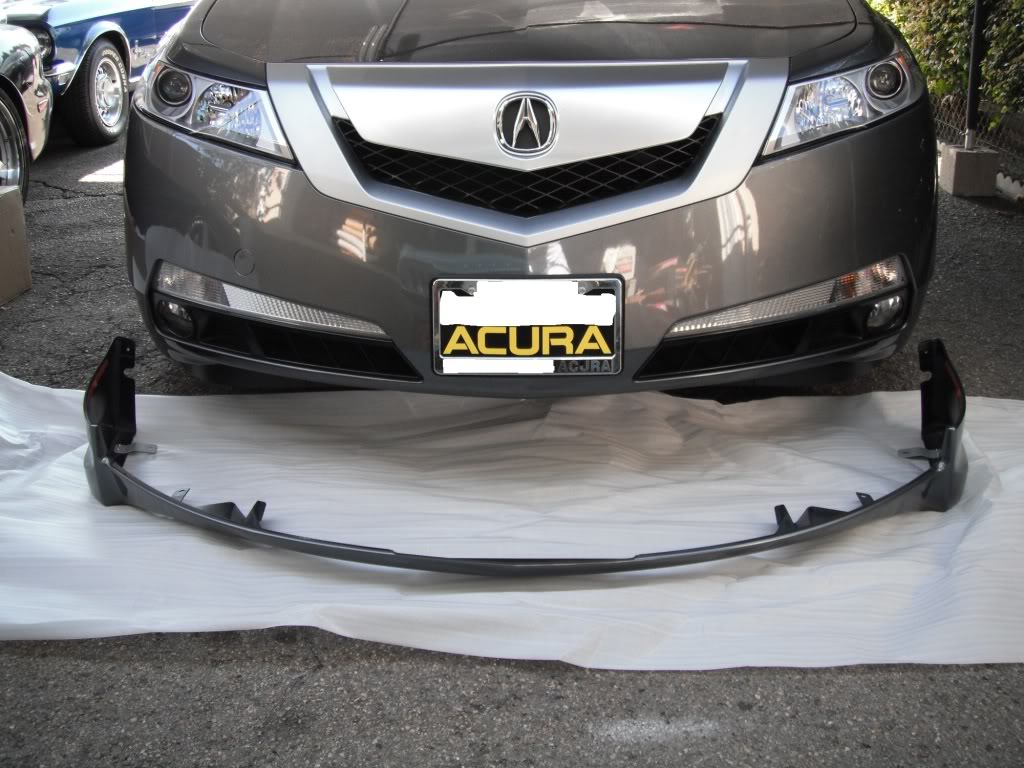
A-Spec Kit Front Top View
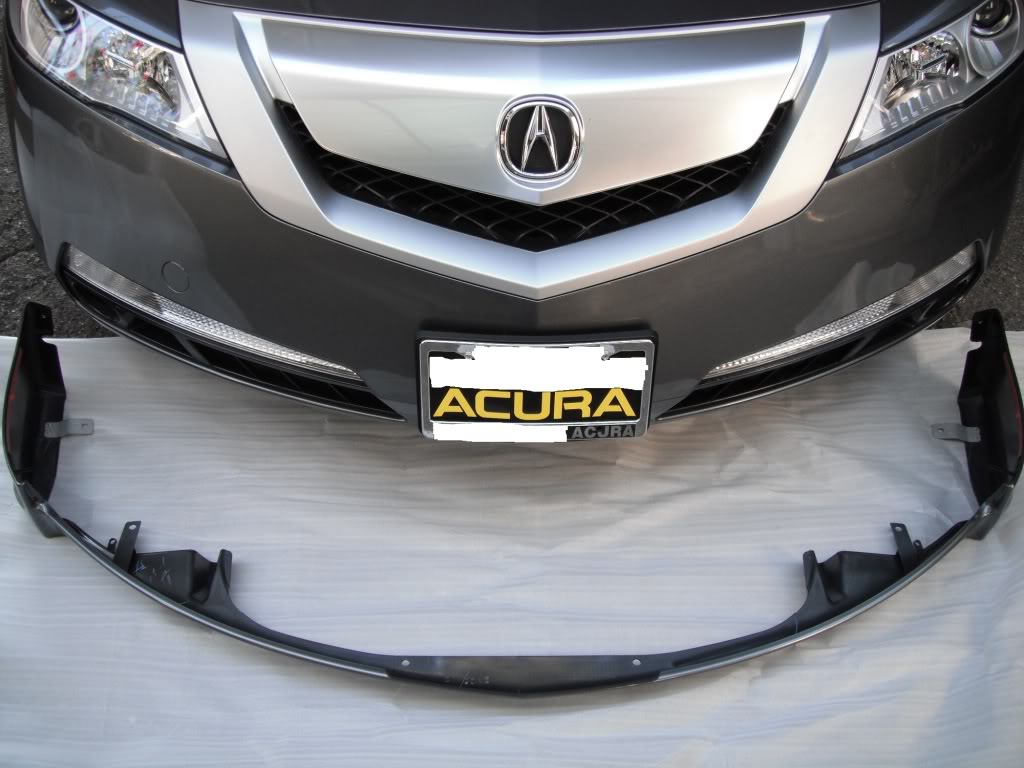
A-Spec Kit Rear Right Top View
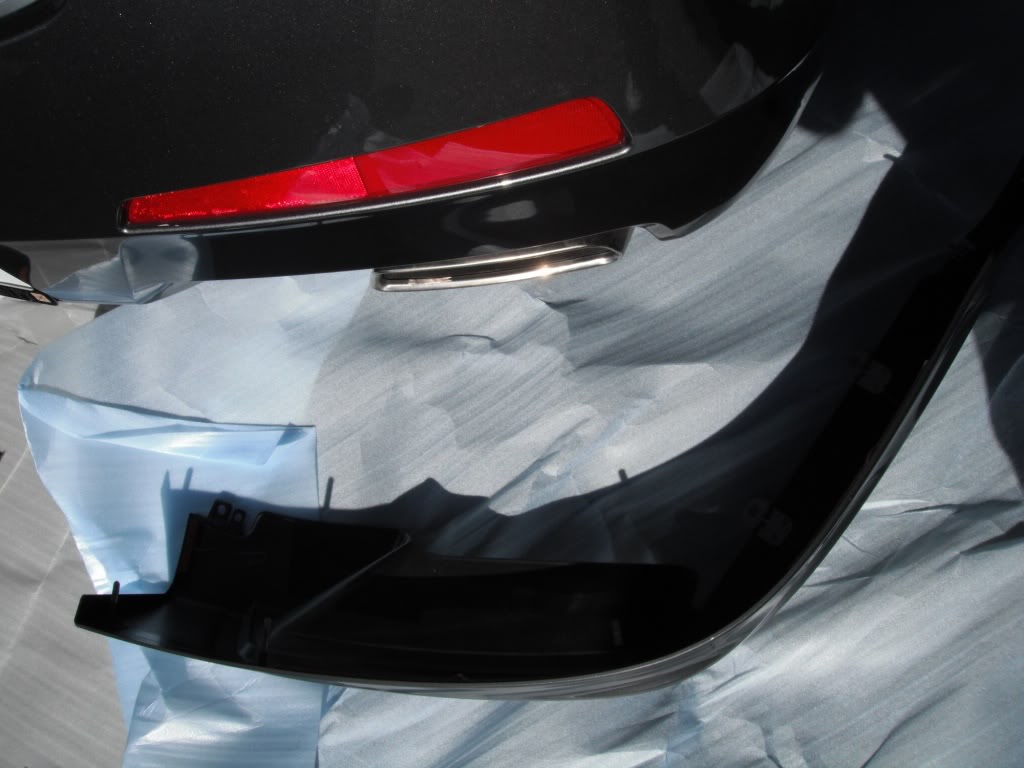
A-Spec Kit Rear Left Top View
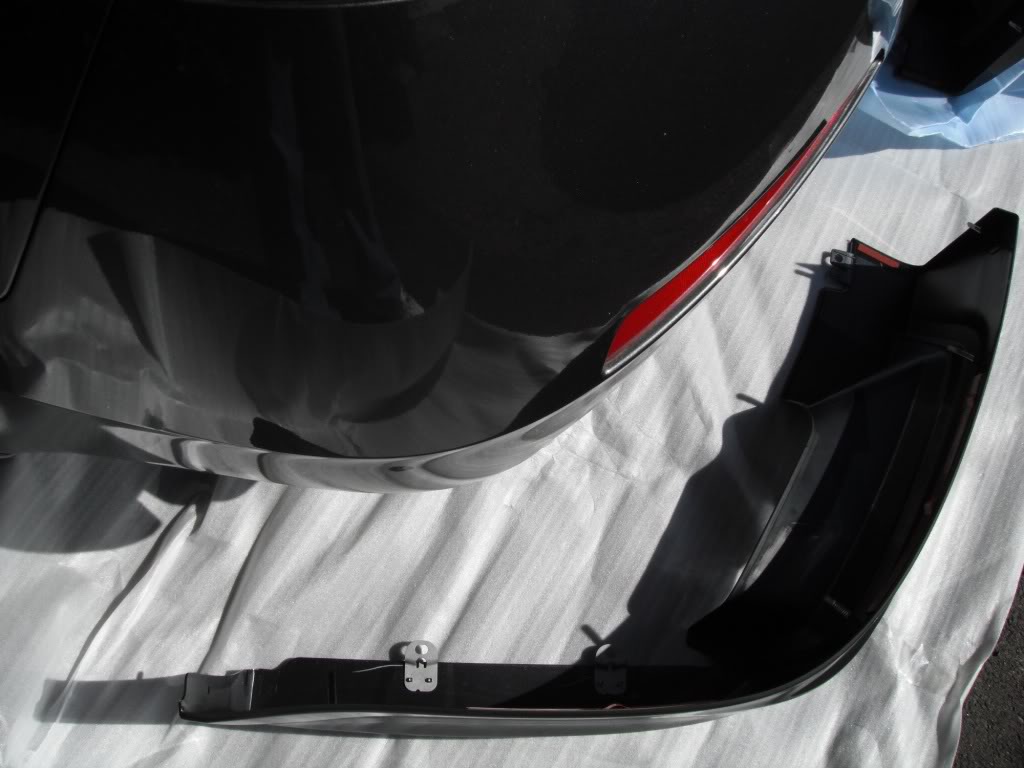
A-Spec Kit Rear Left
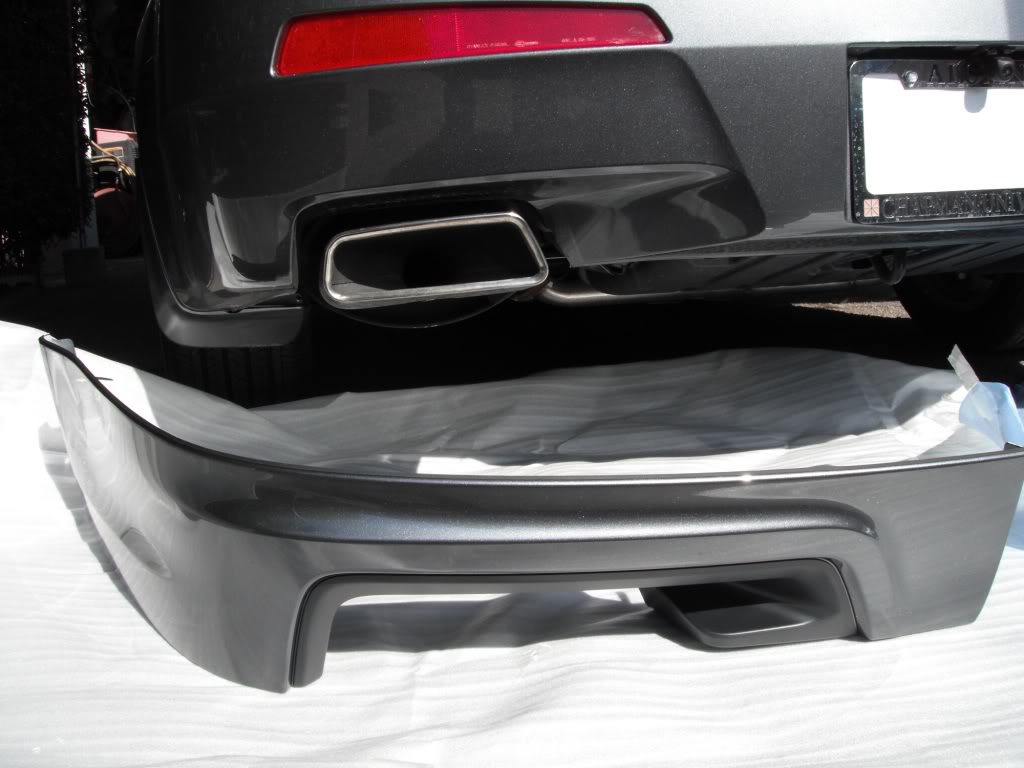
A-Spec Kit Rear Right
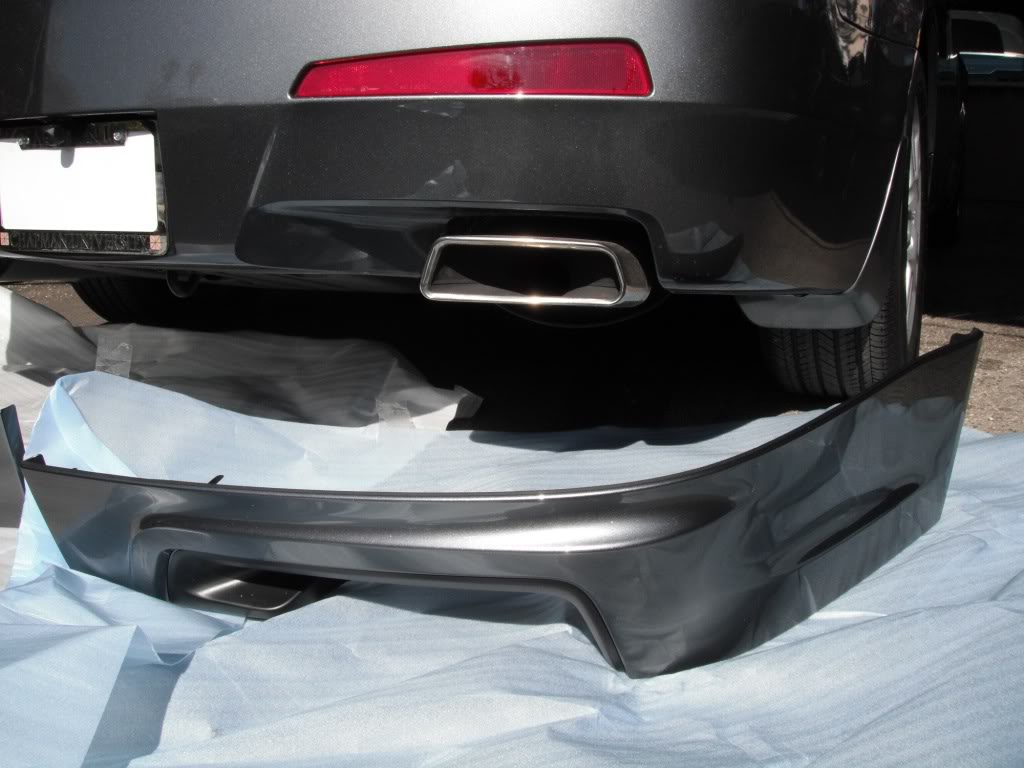
A-Spec Kit Front On
Before A-Spec Kit Side View
A-Spec Kit Side On
A-Spec Kit Tools
A-Spec Kit Front Right Inside View
A-Spec Kit Front Bumper (Stock) Underneath View
A-Spec Kit Left Bumper Installation
A-Spec Kit Front Center Close Up View
A-Spec Kit Front Left Close Up View
A-Spec Kit Front Right Close Up View
A-Spec Kit Front
A-Spec Kit Front Top View
A-Spec Kit Rear Right Top View
A-Spec Kit Rear Left Top View
A-Spec Kit Rear Left
A-Spec Kit Rear Right
Thread Starter
Advanced
Joined: Jan 2011
Posts: 77
Likes: 0
From: California
Moderator
Joined: May 2010
Posts: 7,101
Likes: 1,022
From: Southern Cali 626 area
lol can you show me what tool he used? a pic will be fine.
i also heard if you use painters tape and tape up the area your drilling, paint wont chip. thats just me tho. also if you drill from inside the bumper its fine.
im going to be taking off my bumper as i am putting on hids as well so yea
i also heard if you use painters tape and tape up the area your drilling, paint wont chip. thats just me tho. also if you drill from inside the bumper its fine.
im going to be taking off my bumper as i am putting on hids as well so yea
Thread Starter
Advanced
Joined: Jan 2011
Posts: 77
Likes: 0
From: California
lol can you show me what tool he used? a pic will be fine.
i also heard if you use painters tape and tape up the area your drilling, paint wont chip. thats just me tho. also if you drill from inside the bumper its fine.
im going to be taking off my bumper as i am putting on hids as well so yea
i also heard if you use painters tape and tape up the area your drilling, paint wont chip. thats just me tho. also if you drill from inside the bumper its fine.
im going to be taking off my bumper as i am putting on hids as well so yea
Thread Starter
Advanced
Joined: Jan 2011
Posts: 77
Likes: 0
From: California
http://techinfo.honda.com/rjanisis/pubs/AI/BII42538.pdf
2010 TL Rear Under Spoilers (Revised 08/25/2010)
http://techinfo.honda.com/rjanisis/pubs/AI/BII42533.pdf
2010 TL Front Under Spoiler
http://techinfo.honda.com/rjanisis/pubs/AI/BII42529.pdf
The installation is pretty much self-explanatory. I highly recommend having 2 people to do all the under spoiler installations, makes life a lot easier.

Drifting
Joined: Jul 2007
Posts: 2,112
Likes: 104
i think the new 2012 looks good, but the 09-11 look bad a$$ with that oem kit.... And oem fit is what you want with body kits. Aftermarket kits SUCK!! I learned the hard way on a prior car....they look great and fit poorly....
Oem will fit great... I want one of these TLs now!
Oem will fit great... I want one of these TLs now!
Thread Starter
Advanced
Joined: Jan 2011
Posts: 77
Likes: 0
From: California
Sorry guys, my friend did not have the time this Sunday to do the rear. Schedule for the rear to go up will be Sunday the 27th of this month. As of right now, I’m driving with the front, sides, and rear mud flap setup.
Thread Starter
Advanced
Joined: Jan 2011
Posts: 77
Likes: 0
From: California
Thread Starter
Advanced
Joined: Jan 2011
Posts: 77
Likes: 0
From: California
Enkei Racing RPF1
Finish: Black Painted
Offset: +40mm
Backspacing: 6.25"
Bolt Pattern: 5-120
Rec. Tire Size:245/45-18
Weight: 18.2lbs.
Set of 4: $1,196.00 + $51.91 Shipping at tirerack.com
http://www.tirerack.com/wheels/Wheel...All&sort=Brand
O.Z. Alleggerita HLT
Finish: Matte Graphite Silver
Offset: +40mm
Backspacing: 6.14"
Bolt Pattern: 5-120
Rec. Tire Size:245/45-18
Weight: 18.2lbs.
Set of 4: $1,540.00 + $51.61 Shipping at tirerack.com
http://www.tirerack.com/wheels/WheelCloseUpServlet?target=runWheelSearch&initialP artNumber=W0182420822MGS&wheelMake=O.Z.&wheelModel =Alleggerita+HLT&wheelFinish=Matte+Graphite+Silver &showRear=no&autoMake=Acura&autoModel=TL&autoYear= 2010&autoModClar=Base&filterFinish=All&filterSize= All&filterBrand=O.Z.&filterSpecial=false&filterNew =All&filterWeight=All&sort=Brand
Thread Starter
Advanced
Joined: Jan 2011
Posts: 77
Likes: 0
From: California
Moderator
Joined: May 2010
Posts: 7,101
Likes: 1,022
From: Southern Cali 626 area
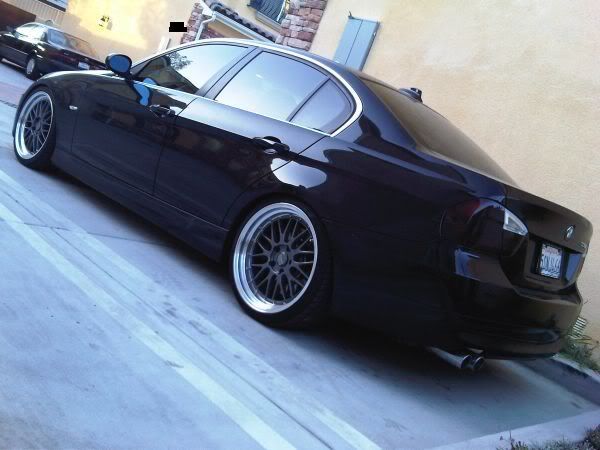
well if your more into form over function then go with staggered set wheels, but stick to the same size tire.
im running stock 18


But i plan to run some bbs LM's reps
VarrsToen | LM Style Mesh 19
hopefully if i roll my fenders im able to fit
19x8.5 +34
19x9.5 +33
im running stock 18
But i plan to run some bbs LM's reps
VarrsToen | LM Style Mesh 19
hopefully if i roll my fenders im able to fit
19x8.5 +34
19x9.5 +33
Thread Starter
Advanced
Joined: Jan 2011
Posts: 77
Likes: 0
From: California
Rear Underbody Spoiler Install
Here you go guys, the rear install. It took close to 4 hours for the installation (including 2 smoke breaks).
Marking with masking tape for fitting
[IMG]http://i1214.photobucket.com/albums/cc483/cybersonic_ca/A-Spec%20Kit/20110313_01.jpg[/IMG]
Starting point of bumper removal
[IMG]http://i1214.photobucket.com/albums/cc483/cybersonic_ca/A-Spec%20Kit/20110313_02.jpg[/IMG]
Rear Splash Guards Uninstalled
[IMG]http://i1214.photobucket.com/albums/cc483/cybersonic_ca/A-Spec%20Kit/20110313_03.jpg[/IMG]
Underneath of bumper
[IMG]http://i1214.photobucket.com/albums/cc483/cybersonic_ca/A-Spec%20Kit/20110313_04.jpg[/IMG]
Bumper removed
[IMG]http://i1214.photobucket.com/albums/cc483/cybersonic_ca/A-Spec%20Kit/20110313_05.jpg[/IMG]
Rear without bumper
[IMG]http://i1214.photobucket.com/albums/cc483/cybersonic_ca/A-Spec%20Kit/20110313_06.jpg[/IMG]
Template for marking
[IMG]http://i1214.photobucket.com/albums/cc483/cybersonic_ca/A-Spec%20Kit/20110313_07.jpg[/IMG]
Marking
[IMG]http://i1214.photobucket.com/albums/cc483/cybersonic_ca/A-Spec%20Kit/20110313_08.jpg[/IMG]
Tool for marking
[IMG]http://i1214.photobucket.com/albums/cc483/cybersonic_ca/A-Spec%20Kit/20110313_09.jpg[/IMG]
Marking
[IMG]http://i1214.photobucket.com/albums/cc483/cybersonic_ca/A-Spec%20Kit/20110313_10.jpg[/IMG]
Marking
[IMG]http://i1214.photobucket.com/albums/cc483/cybersonic_ca/A-Spec%20Kit/20110313_11.jpg[/IMG]
Marking
[IMG]http://i1214.photobucket.com/albums/cc483/cybersonic_ca/A-Spec%20Kit/20110313_12.jpg[/IMG]
Marking
[IMG]http://i1214.photobucket.com/albums/cc483/cybersonic_ca/A-Spec%20Kit/20110313_13.jpg[/IMG]
Tool to make marking bigger
[IMG]http://i1214.photobucket.com/albums/cc483/cybersonic_ca/A-Spec%20Kit/20110313_14.jpg[/IMG]
Drilled markings
[IMG]http://i1214.photobucket.com/albums/cc483/cybersonic_ca/A-Spec%20Kit/20110313_15.jpg[/IMG]
Drilled markings
[IMG]http://i1214.photobucket.com/albums/cc483/cybersonic_ca/A-Spec%20Kit/20110313_16.jpg[/IMG]
Tool for cutting
[IMG]http://i1214.photobucket.com/albums/cc483/cybersonic_ca/A-Spec%20Kit/20110313_17.jpg[/IMG]
Before cutting
[IMG]http://i1214.photobucket.com/albums/cc483/cybersonic_ca/A-Spec%20Kit/20110313_18.jpg[/IMG]
Marking with masking tape for cutting
[IMG]http://i1214.photobucket.com/albums/cc483/cybersonic_ca/A-Spec%20Kit/20110313_19.jpg[/IMG]
Marking for initial cutting
[IMG]http://i1214.photobucket.com/albums/cc483/cybersonic_ca/A-Spec%20Kit/20110313_20.jpg[/IMG]
Adding masking tape underneath cutting tool to prevent paint scratching
[IMG]http://i1214.photobucket.com/albums/cc483/cybersonic_ca/A-Spec%20Kit/20110313_21.jpg[/IMG]
Marking with marker on masking tape for cutting
[IMG]http://i1214.photobucket.com/albums/cc483/cybersonic_ca/A-Spec%20Kit/20110313_22.jpg[/IMG]
Marking with marker on masking tape for cutting
[IMG]http://i1214.photobucket.com/albums/cc483/cybersonic_ca/A-Spec%20Kit/20110313_23.jpg[/IMG]
Marking with marker on masking tape for cutting
[IMG]http://i1214.photobucket.com/albums/cc483/cybersonic_ca/A-Spec%20Kit/20110313_24.jpg[/IMG]
Rear Underbody Spoiler Cutting Video #1
http://www.youtube.com/watch?v=UW83EN3zno4
Rear Underbody Spoiler Cutting Video #2
http://www.youtube.com/watch?v=uX-uaoVhjC4
Cut pieces
[IMG]http://i1214.photobucket.com/albums/cc483/cybersonic_ca/A-Spec%20Kit/20110313_25.jpg[/IMG]
Aftermath from cutting
[IMG]http://i1214.photobucket.com/albums/cc483/cybersonic_ca/A-Spec%20Kit/20110313_26.jpg[/IMG]
Aftermath from cutting
[IMG]http://i1214.photobucket.com/albums/cc483/cybersonic_ca/A-Spec%20Kit/20110313_27.jpg[/IMG]
Hand drilling to smooth out drilled hole
[IMG]http://i1214.photobucket.com/albums/cc483/cybersonic_ca/A-Spec%20Kit/20110313_28.jpg[/IMG]
Hand drilling to smooth out drilled hole
[IMG]http://i1214.photobucket.com/albums/cc483/cybersonic_ca/A-Spec%20Kit/20110313_29.jpg[/IMG]
Adding Rear Underbody Spoiler
[IMG]http://i1214.photobucket.com/albums/cc483/cybersonic_ca/A-Spec%20Kit/20110313_30.jpg[/IMG]
Securing the Rear Underbody Spoiler
[IMG]http://i1214.photobucket.com/albums/cc483/cybersonic_ca/A-Spec%20Kit/20110313_31.jpg[/IMG]
Securing the Rear Underbody Spoiler
[IMG]http://i1214.photobucket.com/albums/cc483/cybersonic_ca/A-Spec%20Kit/20110313_32.jpg[/IMG]
Securing the Rear Underbody Spoiler
[IMG]http://i1214.photobucket.com/albums/cc483/cybersonic_ca/A-Spec%20Kit/20110313_33.jpg[/IMG]
Securing the Rear Underbody Spoiler
[IMG]http://i1214.photobucket.com/albums/cc483/cybersonic_ca/A-Spec%20Kit/20110313_34.jpg[/IMG]
Side mounting kit
[IMG]http://i1214.photobucket.com/albums/cc483/cybersonic_ca/A-Spec%20Kit/20110313_35.jpg[/IMG]
Side mounting kit installed
[IMG]http://i1214.photobucket.com/albums/cc483/cybersonic_ca/A-Spec%20Kit/20110313_36.jpg[/IMG]
Right Side Rear Underbody Spoiler Installed
[IMG]http://i1214.photobucket.com/albums/cc483/cybersonic_ca/A-Spec%20Kit/20110313_37.jpg[/IMG]
Rear Underbody Spoiler Installed
[IMG]http://i1214.photobucket.com/albums/cc483/cybersonic_ca/A-Spec%20Kit/20110313_38.jpg[/IMG]
Marking with masking tape for fitting
[IMG]http://i1214.photobucket.com/albums/cc483/cybersonic_ca/A-Spec%20Kit/20110313_01.jpg[/IMG]
Starting point of bumper removal
[IMG]http://i1214.photobucket.com/albums/cc483/cybersonic_ca/A-Spec%20Kit/20110313_02.jpg[/IMG]
Rear Splash Guards Uninstalled
[IMG]http://i1214.photobucket.com/albums/cc483/cybersonic_ca/A-Spec%20Kit/20110313_03.jpg[/IMG]
Underneath of bumper
[IMG]http://i1214.photobucket.com/albums/cc483/cybersonic_ca/A-Spec%20Kit/20110313_04.jpg[/IMG]
Bumper removed
[IMG]http://i1214.photobucket.com/albums/cc483/cybersonic_ca/A-Spec%20Kit/20110313_05.jpg[/IMG]
Rear without bumper
[IMG]http://i1214.photobucket.com/albums/cc483/cybersonic_ca/A-Spec%20Kit/20110313_06.jpg[/IMG]
Template for marking
[IMG]http://i1214.photobucket.com/albums/cc483/cybersonic_ca/A-Spec%20Kit/20110313_07.jpg[/IMG]
Marking
[IMG]http://i1214.photobucket.com/albums/cc483/cybersonic_ca/A-Spec%20Kit/20110313_08.jpg[/IMG]
Tool for marking
[IMG]http://i1214.photobucket.com/albums/cc483/cybersonic_ca/A-Spec%20Kit/20110313_09.jpg[/IMG]
Marking
[IMG]http://i1214.photobucket.com/albums/cc483/cybersonic_ca/A-Spec%20Kit/20110313_10.jpg[/IMG]
Marking
[IMG]http://i1214.photobucket.com/albums/cc483/cybersonic_ca/A-Spec%20Kit/20110313_11.jpg[/IMG]
Marking
[IMG]http://i1214.photobucket.com/albums/cc483/cybersonic_ca/A-Spec%20Kit/20110313_12.jpg[/IMG]
Marking
[IMG]http://i1214.photobucket.com/albums/cc483/cybersonic_ca/A-Spec%20Kit/20110313_13.jpg[/IMG]
Tool to make marking bigger
[IMG]http://i1214.photobucket.com/albums/cc483/cybersonic_ca/A-Spec%20Kit/20110313_14.jpg[/IMG]
Drilled markings
[IMG]http://i1214.photobucket.com/albums/cc483/cybersonic_ca/A-Spec%20Kit/20110313_15.jpg[/IMG]
Drilled markings
[IMG]http://i1214.photobucket.com/albums/cc483/cybersonic_ca/A-Spec%20Kit/20110313_16.jpg[/IMG]
Tool for cutting
[IMG]http://i1214.photobucket.com/albums/cc483/cybersonic_ca/A-Spec%20Kit/20110313_17.jpg[/IMG]
Before cutting
[IMG]http://i1214.photobucket.com/albums/cc483/cybersonic_ca/A-Spec%20Kit/20110313_18.jpg[/IMG]
Marking with masking tape for cutting
[IMG]http://i1214.photobucket.com/albums/cc483/cybersonic_ca/A-Spec%20Kit/20110313_19.jpg[/IMG]
Marking for initial cutting
[IMG]http://i1214.photobucket.com/albums/cc483/cybersonic_ca/A-Spec%20Kit/20110313_20.jpg[/IMG]
Adding masking tape underneath cutting tool to prevent paint scratching
[IMG]http://i1214.photobucket.com/albums/cc483/cybersonic_ca/A-Spec%20Kit/20110313_21.jpg[/IMG]
Marking with marker on masking tape for cutting
[IMG]http://i1214.photobucket.com/albums/cc483/cybersonic_ca/A-Spec%20Kit/20110313_22.jpg[/IMG]
Marking with marker on masking tape for cutting
[IMG]http://i1214.photobucket.com/albums/cc483/cybersonic_ca/A-Spec%20Kit/20110313_23.jpg[/IMG]
Marking with marker on masking tape for cutting
[IMG]http://i1214.photobucket.com/albums/cc483/cybersonic_ca/A-Spec%20Kit/20110313_24.jpg[/IMG]
Rear Underbody Spoiler Cutting Video #1
http://www.youtube.com/watch?v=UW83EN3zno4
Rear Underbody Spoiler Cutting Video #2
http://www.youtube.com/watch?v=uX-uaoVhjC4
Cut pieces
[IMG]http://i1214.photobucket.com/albums/cc483/cybersonic_ca/A-Spec%20Kit/20110313_25.jpg[/IMG]
Aftermath from cutting
[IMG]http://i1214.photobucket.com/albums/cc483/cybersonic_ca/A-Spec%20Kit/20110313_26.jpg[/IMG]
Aftermath from cutting
[IMG]http://i1214.photobucket.com/albums/cc483/cybersonic_ca/A-Spec%20Kit/20110313_27.jpg[/IMG]
Hand drilling to smooth out drilled hole
[IMG]http://i1214.photobucket.com/albums/cc483/cybersonic_ca/A-Spec%20Kit/20110313_28.jpg[/IMG]
Hand drilling to smooth out drilled hole
[IMG]http://i1214.photobucket.com/albums/cc483/cybersonic_ca/A-Spec%20Kit/20110313_29.jpg[/IMG]
Adding Rear Underbody Spoiler
[IMG]http://i1214.photobucket.com/albums/cc483/cybersonic_ca/A-Spec%20Kit/20110313_30.jpg[/IMG]
Securing the Rear Underbody Spoiler
[IMG]http://i1214.photobucket.com/albums/cc483/cybersonic_ca/A-Spec%20Kit/20110313_31.jpg[/IMG]
Securing the Rear Underbody Spoiler
[IMG]http://i1214.photobucket.com/albums/cc483/cybersonic_ca/A-Spec%20Kit/20110313_32.jpg[/IMG]
Securing the Rear Underbody Spoiler
[IMG]http://i1214.photobucket.com/albums/cc483/cybersonic_ca/A-Spec%20Kit/20110313_33.jpg[/IMG]
Securing the Rear Underbody Spoiler
[IMG]http://i1214.photobucket.com/albums/cc483/cybersonic_ca/A-Spec%20Kit/20110313_34.jpg[/IMG]
Side mounting kit
[IMG]http://i1214.photobucket.com/albums/cc483/cybersonic_ca/A-Spec%20Kit/20110313_35.jpg[/IMG]
Side mounting kit installed
[IMG]http://i1214.photobucket.com/albums/cc483/cybersonic_ca/A-Spec%20Kit/20110313_36.jpg[/IMG]
Right Side Rear Underbody Spoiler Installed
[IMG]http://i1214.photobucket.com/albums/cc483/cybersonic_ca/A-Spec%20Kit/20110313_37.jpg[/IMG]
Rear Underbody Spoiler Installed
[IMG]http://i1214.photobucket.com/albums/cc483/cybersonic_ca/A-Spec%20Kit/20110313_38.jpg[/IMG]
Instructor
Joined: Feb 2011
Posts: 146
Likes: 15
Thread Starter
Advanced
Joined: Jan 2011
Posts: 77
Likes: 0
From: California
Direct Image Links
Not sure why photobucket image code are not working but here are the direct image links.
Marking with masking tape for fitting
http://i1214.photobucket.com/albums/cc483/cybersonic_ca/A-Spec%20Kit/20110313_01.jpg
Starting point of bumper removal
http://i1214.photobucket.com/albums/cc483/cybersonic_ca/A-Spec%20Kit/20110313_02.jpg
Rear Splash Guards Uninstalled
http://i1214.photobucket.com/albums/cc483/cybersonic_ca/A-Spec%20Kit/20110313_03.jpg
Underneath of bumper
http://i1214.photobucket.com/albums/cc483/cybersonic_ca/A-Spec%20Kit/20110313_04.jpg
Bumper removed
http://i1214.photobucket.com/albums/cc483/cybersonic_ca/A-Spec%20Kit/20110313_05.jpg
Rear without bumper
http://i1214.photobucket.com/albums/cc483/cybersonic_ca/A-Spec%20Kit/20110313_06.jpg
Template for marking
http://i1214.photobucket.com/albums/cc483/cybersonic_ca/A-Spec%20Kit/20110313_07.jpg
Marking
http://i1214.photobucket.com/albums/cc483/cybersonic_ca/A-Spec%20Kit/20110313_08.jpg
Tool for marking
http://i1214.photobucket.com/albums/cc483/cybersonic_ca/A-Spec%20Kit/20110313_09.jpg
Marking
http://i1214.photobucket.com/albums/cc483/cybersonic_ca/A-Spec%20Kit/20110313_10.jpg
Marking
http://i1214.photobucket.com/albums/cc483/cybersonic_ca/A-Spec%20Kit/20110313_11.jpg
Marking
http://i1214.photobucket.com/albums/cc483/cybersonic_ca/A-Spec%20Kit/20110313_12.jpg
Marking
http://i1214.photobucket.com/albums/cc483/cybersonic_ca/A-Spec%20Kit/20110313_13.jpg
Tool to make marking bigger
http://i1214.photobucket.com/albums/cc483/cybersonic_ca/A-Spec%20Kit/20110313_14.jpg
Drilled markings
http://i1214.photobucket.com/albums/cc483/cybersonic_ca/A-Spec%20Kit/20110313_15.jpg
Drilled markings
http://i1214.photobucket.com/albums/cc483/cybersonic_ca/A-Spec%20Kit/20110313_16.jpg
Tool for cutting
http://i1214.photobucket.com/albums/cc483/cybersonic_ca/A-Spec%20Kit/20110313_17.jpg
Before cutting
http://i1214.photobucket.com/albums/cc483/cybersonic_ca/A-Spec%20Kit/20110313_18.jpg
Marking with masking tape for cutting
http://i1214.photobucket.com/albums/cc483/cybersonic_ca/A-Spec%20Kit/20110313_19.jpg
Marking for initial cutting
http://i1214.photobucket.com/albums/cc483/cybersonic_ca/A-Spec%20Kit/20110313_20.jpg
Adding masking tape underneath cutting tool to prevent paint scratching
http://i1214.photobucket.com/albums/cc483/cybersonic_ca/A-Spec%20Kit/20110313_21.jpg
Marking with marker on masking tape for cutting
http://i1214.photobucket.com/albums/cc483/cybersonic_ca/A-Spec%20Kit/20110313_22.jpg
Marking with marker on masking tape for cutting
http://i1214.photobucket.com/albums/cc483/cybersonic_ca/A-Spec%20Kit/20110313_23.jpg
Marking with marker on masking tape for cutting
http://i1214.photobucket.com/albums/cc483/cybersonic_ca/A-Spec%20Kit/20110313_24.jpg
Cut pieces
http://i1214.photobucket.com/albums/cc483/cybersonic_ca/A-Spec%20Kit/20110313_25.jpg
Aftermath from cutting
http://i1214.photobucket.com/albums/cc483/cybersonic_ca/A-Spec%20Kit/20110313_26.jpg
Aftermath from cutting
http://i1214.photobucket.com/albums/cc483/cybersonic_ca/A-Spec%20Kit/20110313_27.jpg
Hand drilling to smooth out drilled hole
http://i1214.photobucket.com/albums/cc483/cybersonic_ca/A-Spec%20Kit/20110313_28.jpg
Hand drilling to smooth out drilled hole
http://i1214.photobucket.com/albums/cc483/cybersonic_ca/A-Spec%20Kit/20110313_29.jpg
Adding Rear Underbody Spoiler
http://i1214.photobucket.com/albums/cc483/cybersonic_ca/A-Spec%20Kit/20110313_30.jpg
Securing the Rear Underbody Spoiler
http://i1214.photobucket.com/albums/cc483/cybersonic_ca/A-Spec%20Kit/20110313_31.jpg
Securing the Rear Underbody Spoiler
http://i1214.photobucket.com/albums/cc483/cybersonic_ca/A-Spec%20Kit/20110313_32.jpg
Securing the Rear Underbody Spoiler
http://i1214.photobucket.com/albums/cc483/cybersonic_ca/A-Spec%20Kit/20110313_33.jpg
Securing the Rear Underbody Spoiler
http://i1214.photobucket.com/albums/cc483/cybersonic_ca/A-Spec%20Kit/20110313_34.jpg
Side mounting kit
http://i1214.photobucket.com/albums/cc483/cybersonic_ca/A-Spec%20Kit/20110313_35.jpg
Side mounting kit installed
http://i1214.photobucket.com/albums/cc483/cybersonic_ca/A-Spec%20Kit/20110313_36.jpg
Right Side Rear Underbody Spoiler Installed
http://i1214.photobucket.com/albums/cc483/cybersonic_ca/A-Spec%20Kit/20110313_37.jpg
Rear Underbody Spoiler Installed
http://i1214.photobucket.com/albums/cc483/cybersonic_ca/A-Spec%20Kit/20110313_38.jpg
Marking with masking tape for fitting
http://i1214.photobucket.com/albums/cc483/cybersonic_ca/A-Spec%20Kit/20110313_01.jpg
Starting point of bumper removal
http://i1214.photobucket.com/albums/cc483/cybersonic_ca/A-Spec%20Kit/20110313_02.jpg
Rear Splash Guards Uninstalled
http://i1214.photobucket.com/albums/cc483/cybersonic_ca/A-Spec%20Kit/20110313_03.jpg
Underneath of bumper
http://i1214.photobucket.com/albums/cc483/cybersonic_ca/A-Spec%20Kit/20110313_04.jpg
Bumper removed
http://i1214.photobucket.com/albums/cc483/cybersonic_ca/A-Spec%20Kit/20110313_05.jpg
Rear without bumper
http://i1214.photobucket.com/albums/cc483/cybersonic_ca/A-Spec%20Kit/20110313_06.jpg
Template for marking
http://i1214.photobucket.com/albums/cc483/cybersonic_ca/A-Spec%20Kit/20110313_07.jpg
Marking
http://i1214.photobucket.com/albums/cc483/cybersonic_ca/A-Spec%20Kit/20110313_08.jpg
Tool for marking
http://i1214.photobucket.com/albums/cc483/cybersonic_ca/A-Spec%20Kit/20110313_09.jpg
Marking
http://i1214.photobucket.com/albums/cc483/cybersonic_ca/A-Spec%20Kit/20110313_10.jpg
Marking
http://i1214.photobucket.com/albums/cc483/cybersonic_ca/A-Spec%20Kit/20110313_11.jpg
Marking
http://i1214.photobucket.com/albums/cc483/cybersonic_ca/A-Spec%20Kit/20110313_12.jpg
Marking
http://i1214.photobucket.com/albums/cc483/cybersonic_ca/A-Spec%20Kit/20110313_13.jpg
Tool to make marking bigger
http://i1214.photobucket.com/albums/cc483/cybersonic_ca/A-Spec%20Kit/20110313_14.jpg
Drilled markings
http://i1214.photobucket.com/albums/cc483/cybersonic_ca/A-Spec%20Kit/20110313_15.jpg
Drilled markings
http://i1214.photobucket.com/albums/cc483/cybersonic_ca/A-Spec%20Kit/20110313_16.jpg
Tool for cutting
http://i1214.photobucket.com/albums/cc483/cybersonic_ca/A-Spec%20Kit/20110313_17.jpg
Before cutting
http://i1214.photobucket.com/albums/cc483/cybersonic_ca/A-Spec%20Kit/20110313_18.jpg
Marking with masking tape for cutting
http://i1214.photobucket.com/albums/cc483/cybersonic_ca/A-Spec%20Kit/20110313_19.jpg
Marking for initial cutting
http://i1214.photobucket.com/albums/cc483/cybersonic_ca/A-Spec%20Kit/20110313_20.jpg
Adding masking tape underneath cutting tool to prevent paint scratching
http://i1214.photobucket.com/albums/cc483/cybersonic_ca/A-Spec%20Kit/20110313_21.jpg
Marking with marker on masking tape for cutting
http://i1214.photobucket.com/albums/cc483/cybersonic_ca/A-Spec%20Kit/20110313_22.jpg
Marking with marker on masking tape for cutting
http://i1214.photobucket.com/albums/cc483/cybersonic_ca/A-Spec%20Kit/20110313_23.jpg
Marking with marker on masking tape for cutting
http://i1214.photobucket.com/albums/cc483/cybersonic_ca/A-Spec%20Kit/20110313_24.jpg
Cut pieces
http://i1214.photobucket.com/albums/cc483/cybersonic_ca/A-Spec%20Kit/20110313_25.jpg
Aftermath from cutting
http://i1214.photobucket.com/albums/cc483/cybersonic_ca/A-Spec%20Kit/20110313_26.jpg
Aftermath from cutting
http://i1214.photobucket.com/albums/cc483/cybersonic_ca/A-Spec%20Kit/20110313_27.jpg
Hand drilling to smooth out drilled hole
http://i1214.photobucket.com/albums/cc483/cybersonic_ca/A-Spec%20Kit/20110313_28.jpg
Hand drilling to smooth out drilled hole
http://i1214.photobucket.com/albums/cc483/cybersonic_ca/A-Spec%20Kit/20110313_29.jpg
Adding Rear Underbody Spoiler
http://i1214.photobucket.com/albums/cc483/cybersonic_ca/A-Spec%20Kit/20110313_30.jpg
Securing the Rear Underbody Spoiler
http://i1214.photobucket.com/albums/cc483/cybersonic_ca/A-Spec%20Kit/20110313_31.jpg
Securing the Rear Underbody Spoiler
http://i1214.photobucket.com/albums/cc483/cybersonic_ca/A-Spec%20Kit/20110313_32.jpg
Securing the Rear Underbody Spoiler
http://i1214.photobucket.com/albums/cc483/cybersonic_ca/A-Spec%20Kit/20110313_33.jpg
Securing the Rear Underbody Spoiler
http://i1214.photobucket.com/albums/cc483/cybersonic_ca/A-Spec%20Kit/20110313_34.jpg
Side mounting kit
http://i1214.photobucket.com/albums/cc483/cybersonic_ca/A-Spec%20Kit/20110313_35.jpg
Side mounting kit installed
http://i1214.photobucket.com/albums/cc483/cybersonic_ca/A-Spec%20Kit/20110313_36.jpg
Right Side Rear Underbody Spoiler Installed
http://i1214.photobucket.com/albums/cc483/cybersonic_ca/A-Spec%20Kit/20110313_37.jpg
Rear Underbody Spoiler Installed
http://i1214.photobucket.com/albums/cc483/cybersonic_ca/A-Spec%20Kit/20110313_38.jpg
Thread Starter
Advanced
Joined: Jan 2011
Posts: 77
Likes: 0
From: California
Photobucket is weird or maybe it’s the forum. Some of the links you’re able to click on and others you have to copy and paste on another web page. I used photobucket to post pictures before and it works but not sure what’s the problem now. I don’t know any other way to post them.
Thread Starter
Advanced
Joined: Jan 2011
Posts: 77
Likes: 0
From: California
Direct Image Links / 2nd attempt
Shout out to Potmilkz for introducing Imageshack.us. Thanks man.
Marking with masking tape for fitting

Starting point of bumper removal

Rear Splash Guards Uninstalled

Underneath of bumper

Bumper removed

Rear without bumper

Template for marking

Marking

Tool for marking

Marking

Marking

Marking

Marking

Tool to make marking bigger

Drilled markings

Drilled markings

Tool for cutting

Before cutting

Marking with masking tape for cutting

Marking for initial cutting

Adding masking tape underneath cutting tool to prevent paint scratching

Marking with marker on masking tape for cutting

Marking with marker on masking tape for cutting

Marking with marker on masking tape for cutting

Rear Underbody Spoiler Cutting Video #1
http://www.youtube.com/watch?v=UW83EN3zno4&feature=player_embedded
Rear Underbody Spoiler Cutting Video #2
http://www.youtube.com/watch?v=uX-uaoVhjC4&feature=player_embedded
Cut pieces

Aftermath from cutting

Aftermath from cutting

Hand drilling to smooth out drilled hole

Hand drilling to smooth out drilled hole

Adding Rear Underbody Spoiler

Securing the Rear Underbody Spoiler

Securing the Rear Underbody Spoiler

Securing the Rear Underbody Spoiler

Securing the Rear Underbody Spoiler

Side mounting kit

Side mounting kit installed

Right Side Rear Underbody Spoiler Installed

Rear Underbody Spoiler Installed

Marking with masking tape for fitting

Starting point of bumper removal

Rear Splash Guards Uninstalled

Underneath of bumper

Bumper removed

Rear without bumper

Template for marking

Marking

Tool for marking

Marking

Marking

Marking

Marking

Tool to make marking bigger

Drilled markings

Drilled markings

Tool for cutting

Before cutting

Marking with masking tape for cutting

Marking for initial cutting

Adding masking tape underneath cutting tool to prevent paint scratching

Marking with marker on masking tape for cutting

Marking with marker on masking tape for cutting

Marking with marker on masking tape for cutting

Rear Underbody Spoiler Cutting Video #1
http://www.youtube.com/watch?v=UW83EN3zno4&feature=player_embedded
Rear Underbody Spoiler Cutting Video #2
http://www.youtube.com/watch?v=uX-uaoVhjC4&feature=player_embedded
Cut pieces

Aftermath from cutting

Aftermath from cutting

Hand drilling to smooth out drilled hole

Hand drilling to smooth out drilled hole

Adding Rear Underbody Spoiler

Securing the Rear Underbody Spoiler

Securing the Rear Underbody Spoiler

Securing the Rear Underbody Spoiler

Securing the Rear Underbody Spoiler

Side mounting kit

Side mounting kit installed

Right Side Rear Underbody Spoiler Installed

Rear Underbody Spoiler Installed

Last edited by cybersonic; Mar 15, 2011 at 12:56 AM. Reason: broken image links
Thread Starter
Advanced
Joined: Jan 2011
Posts: 77
Likes: 0
From: California