Acura TSX: Suspension Diagnostic Guide
Some suspension problems present as odd tire wear patterns and some start off with weird noises, but all of them can be difficult to diagnose, since they happen under the car while it is moving. Read on and we'll detail some of the more common problems as solved by Acura forum members.
This article applies to the Acura TSX (2004-2014).
You notice an irritating noise coming from somewhere in your Acura TSX, maybe you can only hear it at slow speeds, maybe you only hear it over certain bumps, maybe only around left-hand corners. But you want the clicking or squeaking or thumping noise to be gone, and you deserve all the sporty handling you paid for. This article goes into the various types of suspension issues TSX owners have run across, and some ways to track them down as well as fix them.
Don't ignore suspension noises, even if they happen only very infrequently, because they are always a symptom of some other problem that will continue to get worse if you let it be. A clunk could be an indication of a bushing or ball joint going bad, and you don't want to let it get so bad that it affects the steering or causes a steering knuckle to come loose.

Materials Needed
- Floor jack
- Jack stands
- Lug wrench
- Socket set with extensions
- Torque wrench
- WD-40
- Thread lock
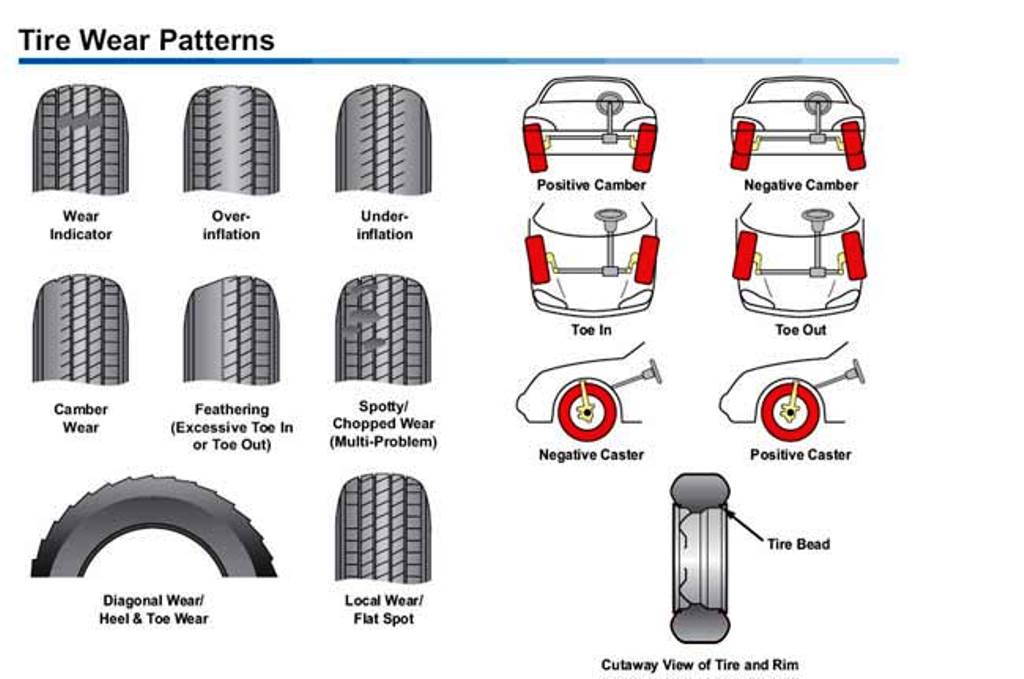
Step 1 – Tire wear problem indicators
The wear patterns on your tires are a great indication of what is going on with your suspension and front end alignment. Compare your tires to the chart below, and you may immediately have an answer to why your car pulls to one side, follows grooves in the highway, or darts from side to side with the slightest input. The only real solution in most case is to have your car professionally aligned back to factory specs. You can perform a front alignment yourself with some simple tools and measuring devices, but a pro job is always better and usually costs less than $100.
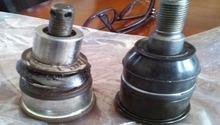
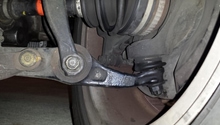
Step 2 – Check ball joints and tie rods
If your car is pulling to one side when you step on the brakes, or seems to have excessive play in the steering, you may have a bad ball joint or tie rod end. With the front of the car in the air, and the steering locked, grip the tire and try to pivot the wheel the way it would when steering. You should have barely any movement from side to side. Next, try to pivot it to the top or bottom, which would indicate a bad ball joint or possibly bushing. Repeat this test for the other side of the car as well.
The handling performance of the car is less likely to be affected by a bad bushing in the rear suspension, but it is possible. Since the TSX uses a multi-link, independent rear suspension, the wheels can behave just like the front and cause steering inputs you did not call for. You can easily check the back wheels the same way you did the fronts. For more on the rear suspension, skip on down to Step 4 below.
Step 3 – Front suspension noises
- Check your brakes: As the brakes wear, they will typically get to a point where the wear indicator makes a continuous squeak or squeal. Additionally, the pads can move back and forth causing noises, and the caliper itself can clunk if there is excessive wear. Jack up the car and remove the wheel so you can examine the calipers and pads, then test for play by hand.
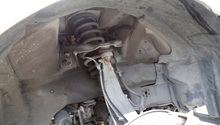
- Check your shocks: The front shocks should keep the nose of the car from diving too far when under braking. Check for leaking fluid on the body of the shock itself, under the spring. You can also test the damping by bouncing each corner of the car and seeing how long it takes to settle. Even after a severe compression it should only bounce back, not continue to move up and down like a boat on the ocean.
-
Check your front strut brace: The front strut bar strengthens the car by connecting the two shock towers just in front of the firewall/bulkhead. If it comes loose you will hear it rattling and banging against the hood as well as shock towers as you go through bumps or corners. Torque the nuts to 33 lb-ft (44 Nm) and use thread lock for extra security.
-
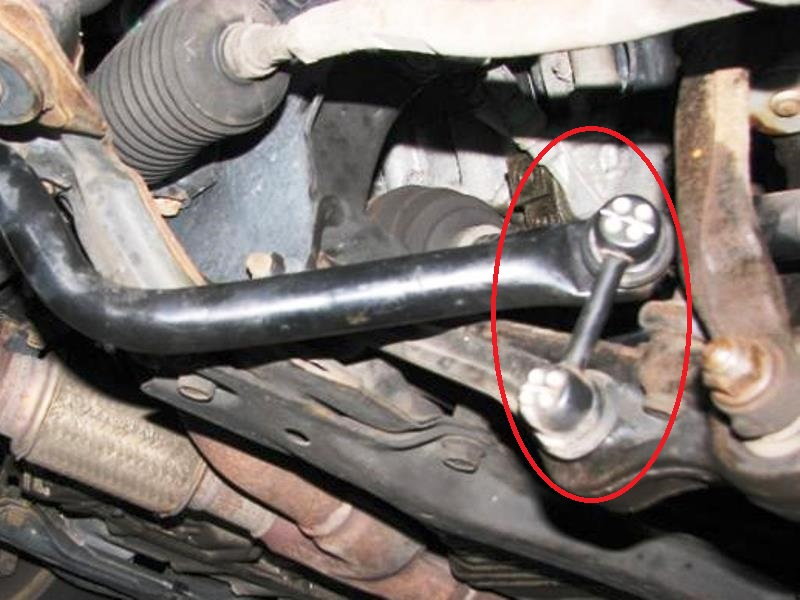
Check the front sway bar: Honda/Acura uses sway bar end links with special ends designed to break away under extreme conditions for safety reasons. If you have hit a curb or huge pothole at speed, you may have broken one of these and now have a sway bar that does nothing except clunk into other hard parts when you corner. Besides the noise, a bad sway bar end link usually causes the car to exhibit excessive body roll when cornering.
-
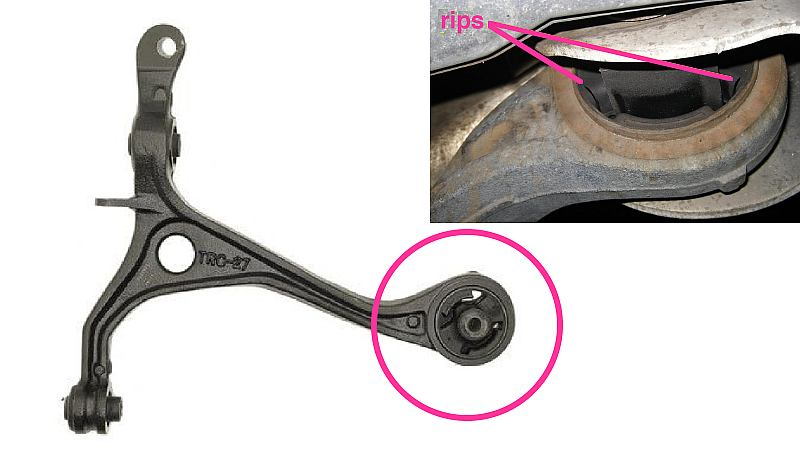
Check the compliance bushings: Another quirk of the typical Honda/Acura front suspension is the compliance bushing, which is oriented completely contrary to the why most manufacturers do things. A rip all the way through a compliance bushing can mean the front lower control arm is loose, causing a loud clunk in corners and bumps. While at it, also check the alignment of the compliance bushing for proper installation. There is a big dot on the control arm and a small one on the bushing that need to be lined up in order to allow the arm to pivot with little resistance, yet be held securely for proper handling.
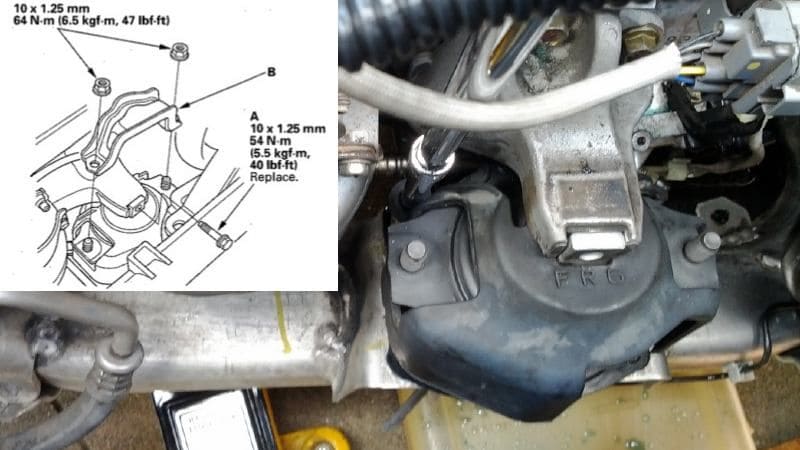
- Check the engine/transmission mounts: While not technically part of the suspension, the motor and transmission mounts can cause noises easily mistaken for a bad control arm bushing. Engine and/or transmission mount failure, in addition to creating front end noises when moving, can also cause cabin vibration at idle.

Pro Tip
DIY enthusiasts have come up with a simple procedure to test the status of motor mounts, but it requires an assistant:
- One person gets behind the wheel and the other stands by the car’s open hood to watch the engine, but not directly in front of the car for reasons that should soon become obvious.
- The driver starts the engine, holds the brake firmly with one foot, and puts the transmission in drive.
- Next, this time with the car in reverse, the driver repeats the procedure.
- Watch the engine for excessive movement as the torque of the motor tries to move the car—generally, over 1-inch (25mm) up, down, or twisting it too much indicates something is bad.
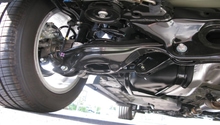
Step 4 – Rear suspension noises
Let’s now turn our attention to the the area behind the driver.
-
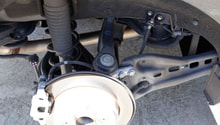
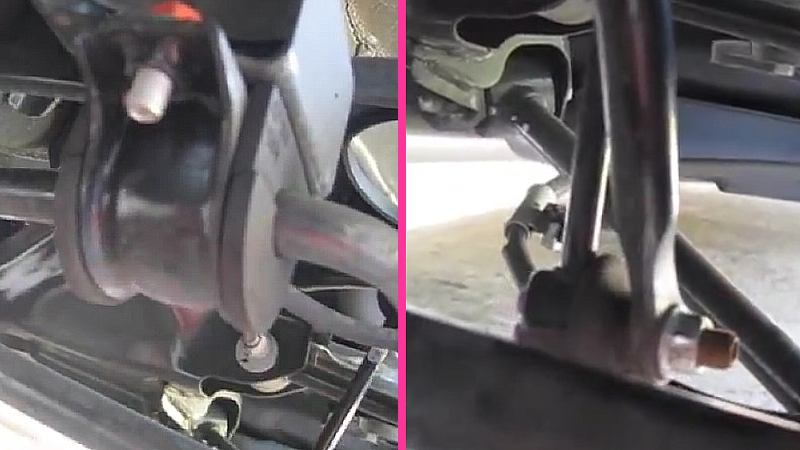
The rear suspension of the TSX is not that different than a typical front suspension, except it does not steer. There are multiple bushings that can go bad, causing slop and metal on metal clunks. One problem area is again the sway bar end links, just like up front. Check that one hasn't broken loose, or just developed excessive play. Inspect the end link ball joints to see if any of them are leaking grease. If so, replace the end links. If they’re not leaking, check for any noticeable play in the end link ball joints.
-
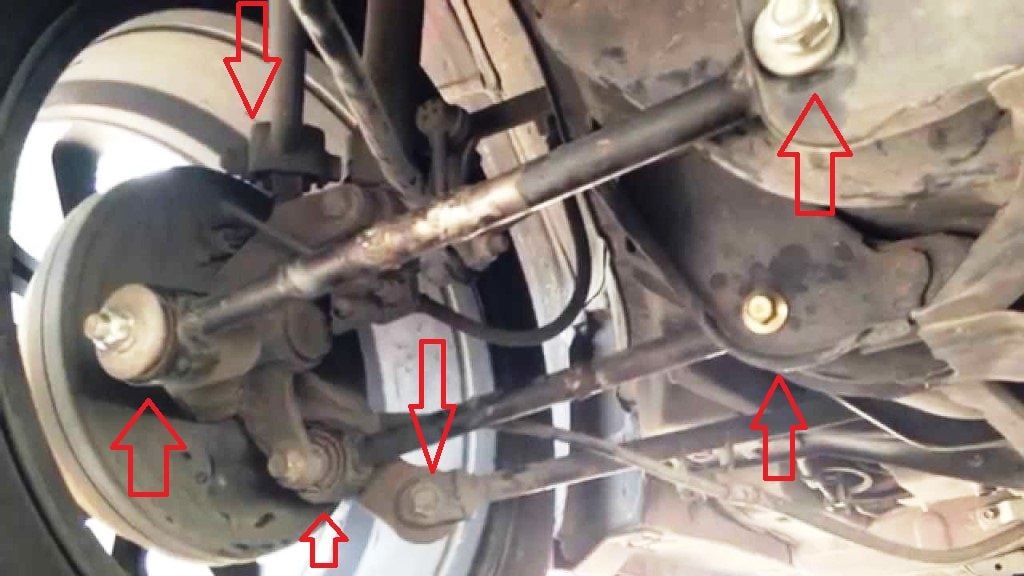
Check the bushings in the rear suspension for play, loose bolts, or worn rubber parts. There are four different control arms that connect the rear spindle/hub to the chassis, and any one of these can go bad, causing excessive motion and noise.
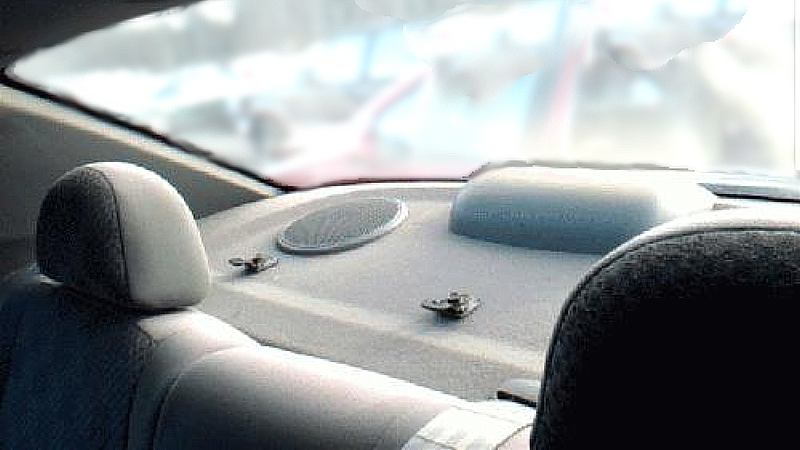
- Another, unusual, place for noises that can seem to be from the suspension is the rear parcel shelf. Located right above the rear shocks, between the rear seat and back window, it can be the cause of a vibration noise or squeak when it’s flexing. If putting something heavy on it stops the noise temporarily, you may be able to solve the problem for good with a dab of grease on the edge, or underneath, where the two parts are making contact.
Related Discussions and Sites
- Discussion of Possible Causes of a Rear Knocking Noise - AcuraZine.com
- Discussion of a Rear Clunking Noise and Possible Causes - AcuraZine.com
- Discussion of Possible Front Suspension Issues and Noises - AcuraZine.com
- Discussion of Noises Related to Cold Weather - TSXClub.com
- Discussion of Squeaking Coming from Rear Suspension Area - TSXClub.com