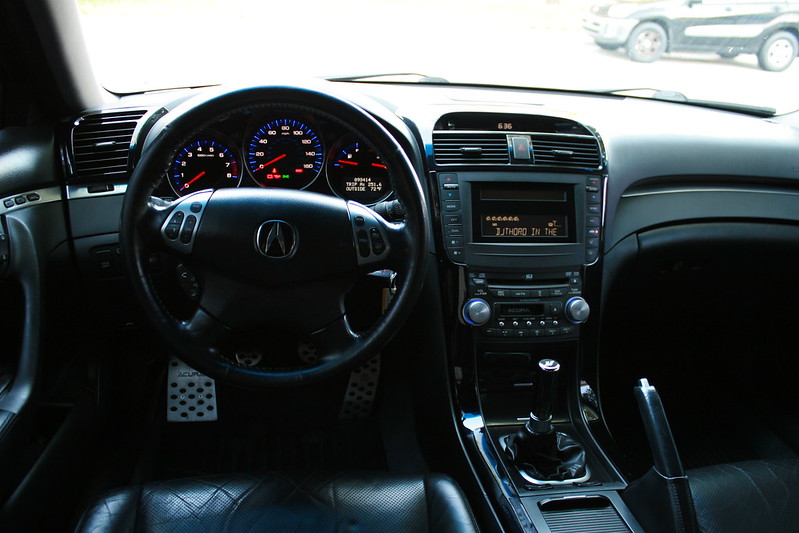
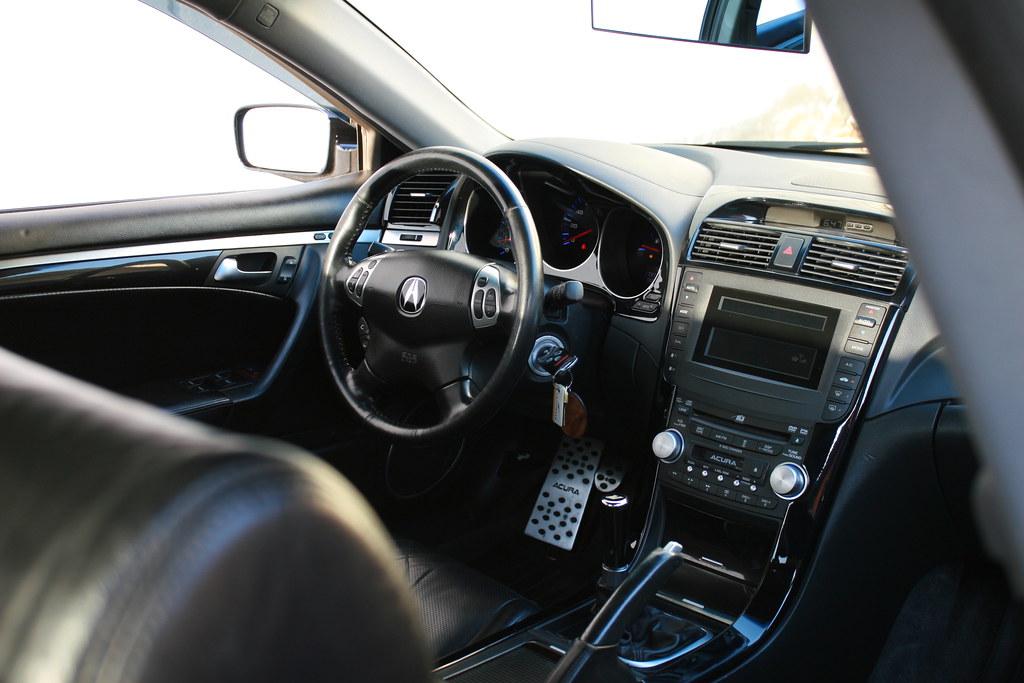
Center Console Side Garnishes are $350 to replace, I have your fix for free: inside

Thread Tools
 
Search this Thread
 
Old 02-09-2013, 02:40 PM
  #81  
TLicious Type S
 
dannyz's Avatar
 
Join Date: Jan 2013
Location: KC USA
Posts: 415
Received 119 Likes on 88 Posts
Nice fix, personally though, I'm saving up for the Acura part.
Old 02-09-2013, 06:55 PM
  #82  
Type Sour
iTrader: (2)
 
THEReeM718's Avatar
 
Join Date: Mar 2012
Location: NYC
Posts: 699
Received 72 Likes on 61 Posts
I have the same problem. Probably gonna end up using 3M di-noc vinyl.
Old 02-09-2013, 09:47 PM
  #83  
Moderator
Chapter Leader (South Florida Region)
Thread Starter
iTrader: (6)
 
rockstar143's Avatar
 
Join Date: Sep 2008
Posts: 77,904
Received 19,915 Likes on 14,457 Posts
Vinyl is how I fixed it now...the "Acura cost" to replace isn't an option for something I will definitely fuk up again.
Old 02-11-2013, 12:12 PM
  #84  
Advanced
 
jblessing's Avatar
 
Join Date: Jun 2006
Location: Denver
Posts: 80
Received 5 Likes on 5 Posts
Hey so for you guys that have sanded it, how much glare do you get off the raw metal? Is there something you can put on it so that you don't get blinded every time the sun hits it?
Old 02-11-2013, 12:58 PM
  #85  
Moderator
Chapter Leader (South Florida Region)
Thread Starter
iTrader: (6)
 
rockstar143's Avatar
 
Join Date: Sep 2008
Posts: 77,904
Received 19,915 Likes on 14,457 Posts
sun never really enters the car at enough of an angle to really hit you...I've never noticed it being an issue at least.
The following users liked this post:
jblessing (02-11-2013)
Old 05-03-2013, 05:31 PM
  #86  
Advanced
 
cougtype_s's Avatar
 
Join Date: Mar 2013
Location: Eastern WA
Posts: 64
Received 5 Likes on 4 Posts
Mine too were all scratched up... So I used 3M 1080 vinyl, resulting in...
Old 05-03-2013, 06:31 PM
  #87  
Three Wheelin'
 
BukvaMan's Avatar
 
Join Date: Aug 2004
Location: North Bergen, NJ
Age: 41
Posts: 1,670
Received 53 Likes on 36 Posts
^^^
I wonder how much it would cost to have something like that done. I love it !!
Old 05-03-2013, 08:13 PM
  #88  
Advanced
 
cougtype_s's Avatar
 
Join Date: Mar 2013
Location: Eastern WA
Posts: 64
Received 5 Likes on 4 Posts
Cost me about 22 dollars for 5 sq ft of vinyl and I did it myself with an exacto knife and heat gun. I have a lot of vinyl left over as well.
Old 05-03-2013, 09:42 PM
  #89  
Advanced
 
AZ4035's Avatar
 
Join Date: May 2013
Location: NYC
Posts: 98
Received 21 Likes on 15 Posts
Wow I was liking the brushed aluminum look! After you vinyled it, it sort of looked clean but "bleh". I'm eyeing some silver CF wrap right now but the one I see on Amazon is 24 x 48 inches for $15. It seems a bit more expensive than what cougtype_s bought his for -.-
Old 05-04-2013, 01:07 AM
  #90  
Advanced
 
cougtype_s's Avatar
 
Join Date: Mar 2013
Location: Eastern WA
Posts: 64
Received 5 Likes on 4 Posts
I went with metrorestyling.
Old 05-04-2013, 04:36 AM
  #91  
Make it so
 
DuoDSG's Avatar
 
Join Date: Oct 2009
Location: Austin, Texas
Posts: 482
Received 58 Likes on 46 Posts
Thumbs up

Honestly, that lighter-colored brushed aluminum look is STUNNING with a black interior like yours. The way it pops, it makes the interior look like something you'd see in a showroom for a '13 model car. That's saying something.

I *would* try it for myself, but the interior color for my 2004 NBP TL is the camel/tan color, and I'm worried it would look way too crazy with those colors to really look good.

This just validates my desire to buy a 2008 TL with a different interior color, even though everyone that rides in my TL loves the color combo and it's a rare combo for TL interiors anyway...

Decisions, decisions. Regardless, PROPS.
The following users liked this post:
cougtype_s (07-20-2013)
Old 05-04-2013, 06:21 AM
  #92  
Moderator
Chapter Leader (South Florida Region)
Thread Starter
iTrader: (6)
 
rockstar143's Avatar
 
Join Date: Sep 2008
Posts: 77,904
Received 19,915 Likes on 14,457 Posts
Why thank you. As usual, over time I get bored and ended up having a forum friend paint them nbp for me. That, the gauge bezel and all across vents.
Old 05-04-2013, 10:11 PM
  #93  
:what:
 
Wacker's Avatar
 
Join Date: May 2012
Location: Hernando, MS
Age: 45
Posts: 1,461
Received 348 Likes on 249 Posts
Originally Posted by rockstar143
Why thank you. As usual, over time I get bored and ended up having a forum friend paint them nbp for me. That, the gauge bezel and all across vents.
Wait wut? No pix?
Old 05-04-2013, 11:27 PM
  #94  
Moderator
Chapter Leader (South Florida Region)
Thread Starter
iTrader: (6)
 
rockstar143's Avatar
 
Join Date: Sep 2008
Posts: 77,904
Received 19,915 Likes on 14,457 Posts
That's my friend. Sorry Johnny...on kindle, it's tedious
Old 06-20-2013, 10:48 PM
  #95  
7th Gear
 
Homerduck's Avatar
 
Join Date: Jun 2013
Posts: 7
Received 1 Like on 1 Post
Hi. I'm new here. I have an 06 with the exact same problem. Never attempted anything like this. My question is how do I get the panels off? How are they mounted?
Old 06-21-2013, 08:06 AM
  #96  
Three Wheelin'
 
flyromeo3's Avatar
 
Join Date: May 2009
Location: PA/ NY/ FL
Posts: 1,773
Received 166 Likes on 140 Posts
You should of started to drink before donating the 25 bucks.
Good Job !

get a chrome shift nob too
Old 06-21-2013, 09:44 AM
  #97  
Moderator
Chapter Leader (South Florida Region)
Thread Starter
iTrader: (6)
 
rockstar143's Avatar
 
Join Date: Sep 2008
Posts: 77,904
Received 19,915 Likes on 14,457 Posts
Use a flathead with some painter's tape on it, start at back, pop upward, then toward you as you transition to the part of the bezel that goes up.

Forgot to revisit with Wacker's masterpiece!


The following 3 users liked this post by rockstar143:
AcuraVic (09-08-2014), Homerduck (06-25-2013), Wacker (06-25-2013)
Old 08-15-2014, 10:23 PM
  #98  
Intermediate
 
08NJCpe's Avatar
 
Join Date: Feb 2011
Location: Central NJ
Posts: 33
Likes: 0
Received 1 Like on 1 Post
Bringing this back. Anyone else do this lately? Pics?
Old 08-16-2014, 07:19 AM
  #99  
Moderator
Chapter Leader (South Florida Region)
Thread Starter
iTrader: (6)
 
rockstar143's Avatar
 
Join Date: Sep 2008
Posts: 77,904
Received 19,915 Likes on 14,457 Posts
I too wonder about the long term look of the exposed/sanded metal surface. It'd probably stay nice and fine with a coat of wax every once in a while...
Old 09-07-2014, 01:09 PM
  #100  
Intermediate
 
ddaviglus's Avatar
 
Join Date: Aug 2014
Posts: 28
Received 8 Likes on 5 Posts
Going to order some 3M 1080 this week. How many sq ft do you recommend to purchase for all the grey checkered interior trim pieces.


2006 Acura TL
Old 09-07-2014, 01:57 PM
  #101  
Moderator
Chapter Leader (South Florida Region)
Thread Starter
iTrader: (6)
 
rockstar143's Avatar
 
Join Date: Sep 2008
Posts: 77,904
Received 19,915 Likes on 14,457 Posts
Probably the 6' by 1 or 2 foot one...should be ample.
The following users liked this post:
ddaviglus (09-08-2014)
Old 09-09-2014, 05:50 PM
  #102  
10th Gear
 
datdrkidd92's Avatar
 
Join Date: Sep 2014
Posts: 12
Likes: 0
Received 1 Like on 1 Post
i did the same but after i finished i plasti dipped them black came out pretty nice
Old 09-09-2014, 06:12 PM
  #103  
Moderator
Chapter Leader (South Florida Region)
Thread Starter
iTrader: (6)
 
rockstar143's Avatar
 
Join Date: Sep 2008
Posts: 77,904
Received 19,915 Likes on 14,457 Posts

Nice, man...I ended up opting to have them painted NBP.
Old 12-07-2014, 09:55 PM
  #104  
5th Gear
 
kwoodsong's Avatar
 
Join Date: May 2014
Posts: 5
Likes: 0
Received 3 Likes on 2 Posts
Nice work Rockstar! I am going to try that with mine pretty soon. I will add a few coats of polyurethane for protection though. Then, if the surface gets a little dinged you are just sanding the poly coat, not the metal. The fine sand lines should be good for adhesion.
The following users liked this post:
rockstar143 (12-08-2014)
Old 12-08-2014, 08:01 AM
  #105  
Moderator
Chapter Leader (South Florida Region)
Thread Starter
iTrader: (6)
 
rockstar143's Avatar
 
Join Date: Sep 2008
Posts: 77,904
Received 19,915 Likes on 14,457 Posts

Thanks. Yeah, for sure...a little poly would adhere great to it...or even clear coat!
Old 12-08-2014, 09:12 AM
  #106  
Chapter Leader
(Northeast Florida)
iTrader: (1)
 
gatrhumpy's Avatar
 
Join Date: Jun 2004
Age: 44
Posts: 35,532
Received 1,651 Likes on 1,116 Posts
I would go with a clear coat. That would create a nice barrier between that and the metal.
Old 02-07-2015, 05:52 PM
  #107  
Drifting
 
Chad05TL's Avatar
 
Join Date: Jul 2008
Location: Dallas
Posts: 3,273
Received 166 Likes on 146 Posts
This Mothers Aluminum polish will take a smooth sanded aluminum all the way up to a high gloss , almost like chrome. But that gloss black looks good too, from a distance.
Robot Check Robot Check
Old 02-11-2015, 05:58 PM
  #108  
Moderator
Chapter Leader (South Florida Region)
Thread Starter
iTrader: (6)
 
rockstar143's Avatar
 
Join Date: Sep 2008
Posts: 77,904
Received 19,915 Likes on 14,457 Posts
Good shit, Chad...yeah, I'd give that a whirl if I were still bare metal!

The gloss black looks awesome up close even, it's actually NBP professionally painted by member :wacker: I've had 2 chips on the grill in the 3 years since he did that for me and NONE on the interior.
Old 02-12-2015, 09:34 PM
  #109  
Team Owner
iTrader: (2)
 
Steven Bell's Avatar
 
Join Date: Jan 2008
Location: Kansas City, MO (Overland Park, KS)
Posts: 36,545
Received 6,470 Likes on 5,162 Posts
I wish I only had 2 chips.....
Old 02-13-2015, 07:12 AM
  #110  
Moderator
Chapter Leader (South Florida Region)
Thread Starter
iTrader: (6)
 
rockstar143's Avatar
 
Join Date: Sep 2008
Posts: 77,904
Received 19,915 Likes on 14,457 Posts
I had a previous friend paint it that didn't even sand. I spent 10 minutes every Friday touching up the chips. It fkng SUCKED!
Old 02-15-2015, 10:52 AM
  #111  
Racer
 
EddieOnAZ's Avatar
 
Join Date: Sep 2014
Location: Montreal, Qc, Canada
Age: 31
Posts: 413
Received 62 Likes on 50 Posts
Wow I'm lucky this thread was revived. Those trim pieces have been bugging me for a while. I was thinking about wrapping them with brushed aluminum vinyl too. So what's everyone's opinion on this now? Simply sand them or paint them like Rockstar ended up doing?
The following users liked this post:
rockstar143 (12-01-2015)
Old 02-17-2015, 12:12 PM
  #112  
Chapter Leader
(Northeast Florida)
iTrader: (1)
 
gatrhumpy's Avatar
 
Join Date: Jun 2004
Age: 44
Posts: 35,532
Received 1,651 Likes on 1,116 Posts
Sand them for the weight savings. DUH!
Old 02-17-2015, 01:11 PM
  #113  
Moderator
Chapter Leader (South Florida Region)
Thread Starter
iTrader: (6)
 
rockstar143's Avatar
 
Join Date: Sep 2008
Posts: 77,904
Received 19,915 Likes on 14,457 Posts
Old 04-08-2015, 02:49 PM
  #114  
Racer
 
zexi's Avatar
 
Join Date: Sep 2003
Location: RHODE ISLAND
Age: 58
Posts: 322
Received 4 Likes on 3 Posts
Did anyone try the kits from exotic wood-trim?
http://www.ebay.com/itm/161095523827?_trksid=p2060353.m1438.l2648&ssPageName=STRK%3AMEBIDX%3AIT&autorefresh=true
Old 04-08-2015, 07:16 PM
  #115  
Moderator
Chapter Leader (South Florida Region)
Thread Starter
iTrader: (6)
 
rockstar143's Avatar
 
Join Date: Sep 2008
Posts: 77,904
Received 19,915 Likes on 14,457 Posts
I haven't...do it and post up!
Nice find
Old 07-27-2015, 04:21 PM
  #116  
Instructor
 
mc_holla's Avatar
 
Join Date: Jun 2008
Location: Providence,RI
Age: 40
Posts: 180
Received 0 Likes on 0 Posts
This issue is next up on the list for me. Was thinking of scraping off the rest of the original thin coating and then either repainting them or wrapping them with sort of a thin transparent (but tinted) vinyl. Goal is to restore the original color without covering the original texture/pattern (07 Type-S) seen on the metal.

Has anyone tried anything like this? Want to avoid creating a mismatch that requires me to have to re-do all of the trim pieces.
Old 08-25-2015, 10:43 AM
  #117  
Advanced
 
LogicWavelength's Avatar
 
Join Date: Feb 2012
Age: 40
Posts: 75
Received 8 Likes on 8 Posts
I want to do all of the metal trim at the same time - not just the two center console pieces. Above, rockstar143 says how to remove the console trim, and I know the door cards have to come off for the door pieces...

...but how do you get off the two bits on the main dashboard? The little on on the drivers side and the big one crossing in from of the passenger?
Old 09-01-2015, 05:18 PM
  #118  
5th Gear
 
ProjectTL-S's Avatar
 
Join Date: Aug 2015
Location: Los Angeles California
Age: 36
Posts: 5
Likes: 0
Received 0 Likes on 0 Posts
Good idea! Maybe using really fine sandpaper so the lines wont be too deep.
Old 09-02-2015, 08:48 AM
  #119  
Instructor
 
mc_holla's Avatar
 
Join Date: Jun 2008
Location: Providence,RI
Age: 40
Posts: 180
Received 0 Likes on 0 Posts
Originally Posted by ProjectTL-S
Good idea! Maybe using really fine sandpaper so the lines wont be too deep.
Thanks. I'm going to attempt this soon (using very fine sand paper). If that fails, then I plan on using some carbon fiber vinyl (3M) to cover them up. Such a eye sore.
Old 09-02-2015, 12:56 PM
  #120  
Moderator
Chapter Leader (South Florida Region)
Thread Starter
iTrader: (6)
 
rockstar143's Avatar
 
Join Date: Sep 2008
Posts: 77,904
Received 19,915 Likes on 14,457 Posts
the design is very thin...do not sand it if you plan to keep it...
I wonder if just clearing over the top will disappear the discoloration.

The dash portions pop off with plastic retaining clips IIRC.


Quick Reply: Center Console Side Garnishes are $350 to replace, I have your fix for free: inside


All times are GMT -5. The time now is 09:17 PM.