Center Console Side Garnishes are $350 to replace, I have your fix for free: inside
 10-30-2011, 06:23 PM
#1
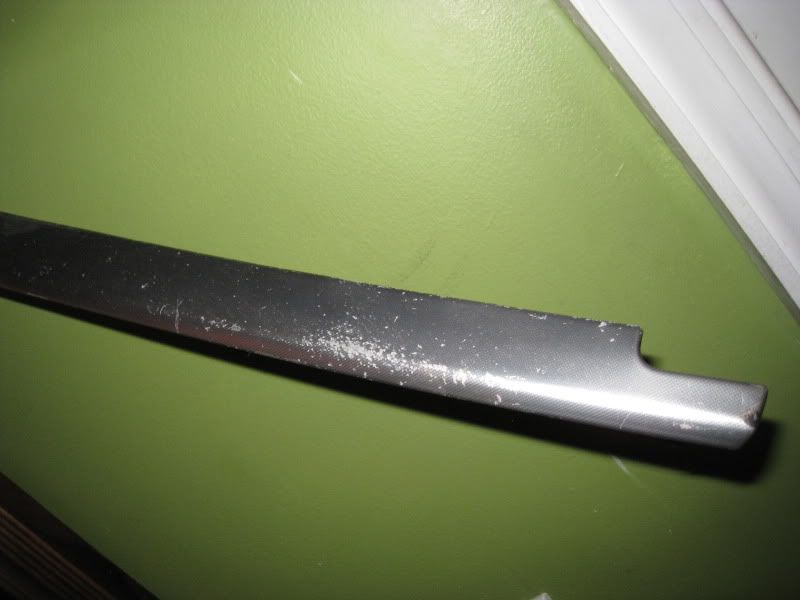
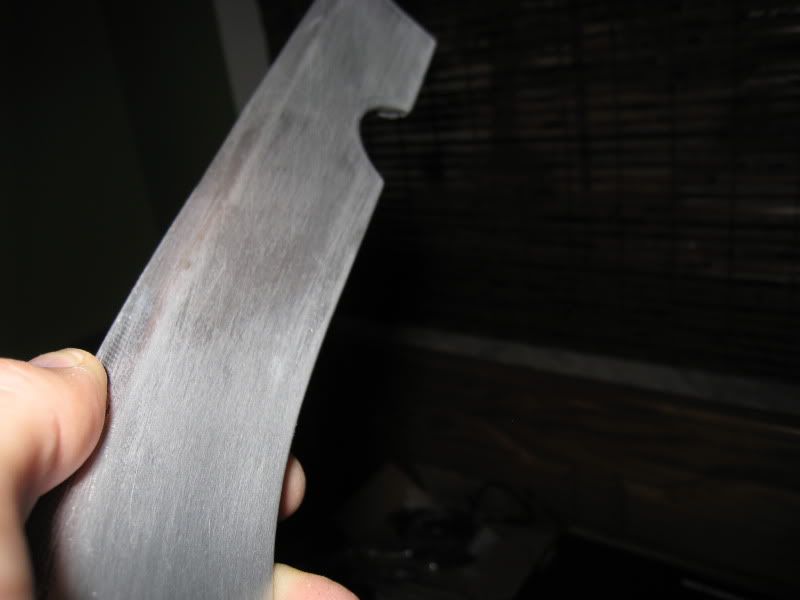
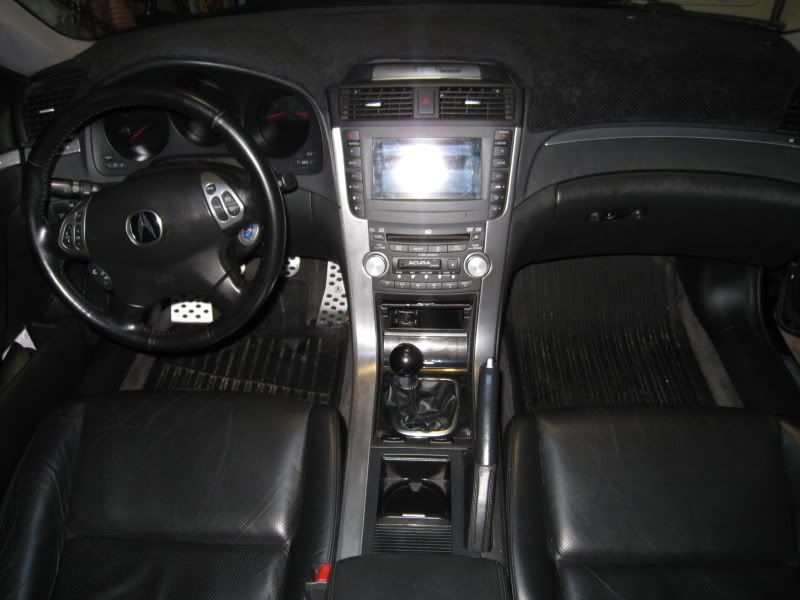
So, I have an '04 and among other things that have begun to look crumby, I noticed that my side sill garnishes were starting to look beat up! It looks like I dice tomatos on it or have a small army of tap dancing mice that live in my car at night. I don't get it because my keys are not in my pocket and my phone can't hit it, but it looks like shit.
So, my options:
1) buy new ones that will look like this again to the tune of a kidney transplant. Even on oemacuraparts.com, they are $176 each plus shipping. Sorry, I know it's cool metal wrapped plastic but even if it was Kimmy K's ass skin mounted on plutonium from the last space shuttle launch, I ain't paying that much money for something that doesn't keep my car from driving me from A to B.
2) wrap with material or suede, could have been cool...but it ain't the 70's....I'm not that good at wrapping, and I'm afraid I'd end up with serious wear marks on them again.
3) spray with plastidip. in theory, sounds good, and I've seen pics and it looks good. 2 problems i have with it are that it looks like I just spray painted my interior, which I don't like and since the parts are silver to begin with, I don't like the idea of losing the contrast of the silver.
4) wrap with dinoc or some other vinyl. thought about black CF, but since I don't have any of it on anything but my type S diffusers, so I'd have to do it to other surfaces to make it blend and I truly don't love the look THAT much. Real carbon fiber, sure...but being able to see a sticker that looks like it, not as much. No offense to all the veteran vinyl dudes...what YOU'VE done looks great because you have a theme going.
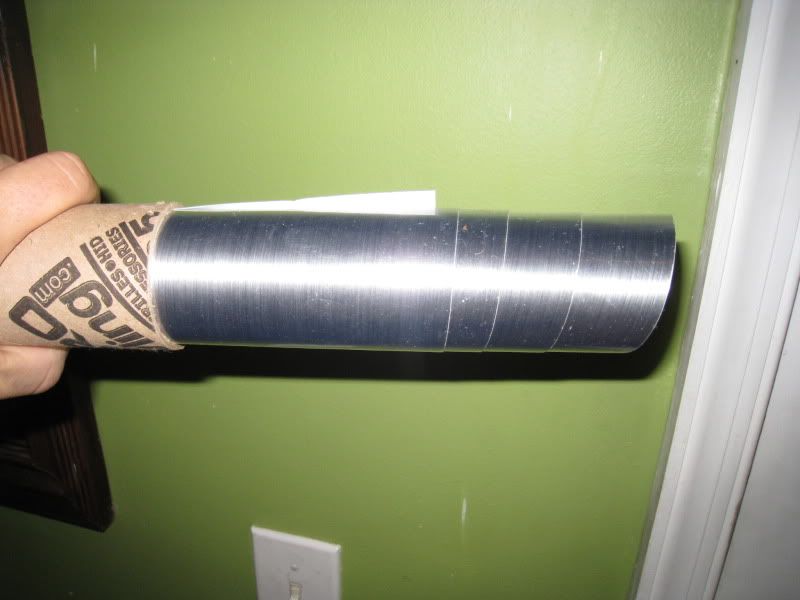
5) So I opted for a vinyl that looks like brushed aluminum. Figured that'd go closely enough to the rest of the silver trim that wraps the interior. So I ordered from Ebay...$25 shipped for 6 feet by 4 feet of it. ( I know I said FREE...so read on, the plot thickens). So, I'm a total virgin with vinyl, I understand the concept but when wrapping a concave piece of plastic, holy fk...it sucks. It's VERY hard to get it to curve and pull to the right or left to make it in one shot. I finally did get it...but it looks a lot more like scratched chrome than brushed aluminum. So, after an hour and half and my 6th attempt, I finally cut a strip long enough to cover the piece in one shot. Got it done and thought it looked decent...then put it in the car to see the comparison...wow, looked like a stripper at a retirement home dinner. It was SUPER chrome looking in comparison to the rest of the interior. So I scrapped it.
Now, here's where the brainstorming (and drinking) begin. I was so annoyed. The only thing worse than a mod gone wrong is a mod gone wrong and money wasted. So I started playing battlefield III to get some of my frustration out. Had 2 vodka crystal lights (calorie counting?!?, YEP) and it came to me....this is a metal piece...what would happen if I...
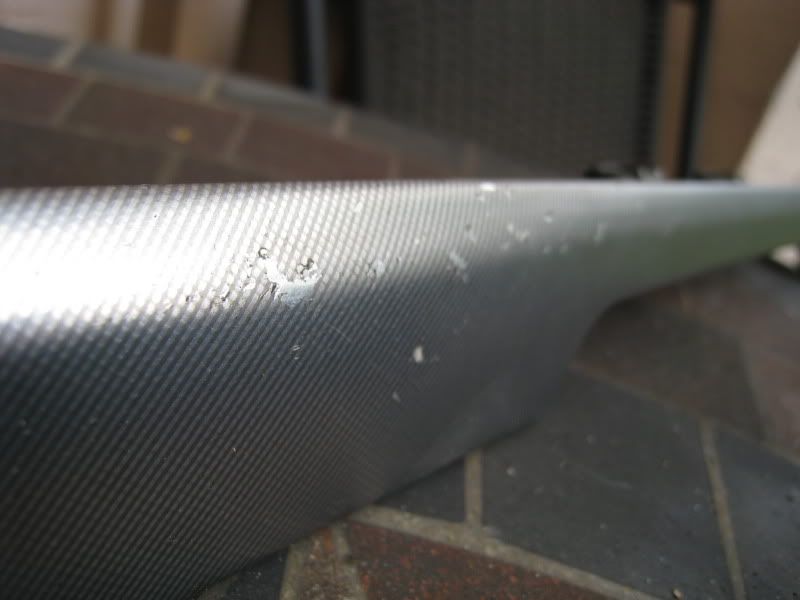
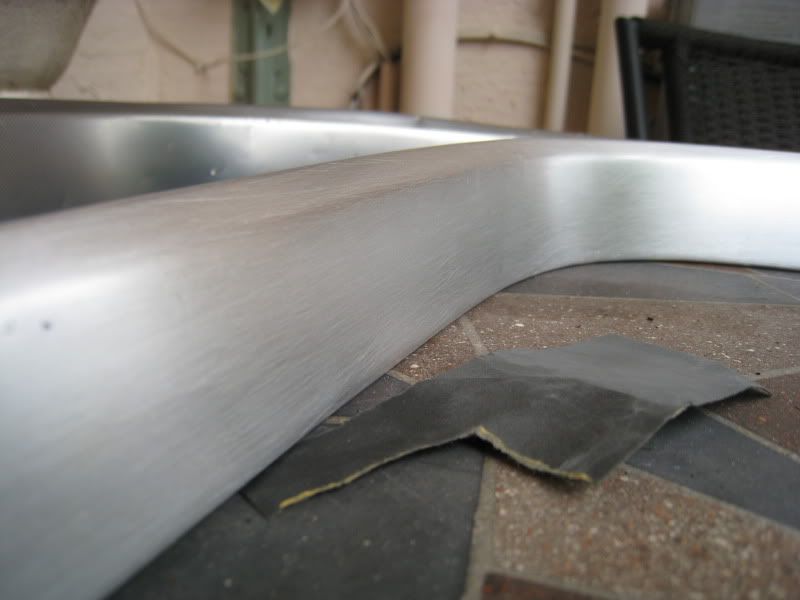
You guessed it...started sanding that motherfcker...so I did...did it quickly at first just to see what it would do. Sure enough, 50 grit got the crappy design that was peeling off OFF permanently and exposed the metal beneath...then a shot of 150...finished with a scotch pad and voila...not brushed aluminum vinyl....REAL BRUSHED ALUMINUM!
Wow...for free...and looks great...one of my better moments. Hope you all enjoy, figured I'd put the option out there.
-rockstar
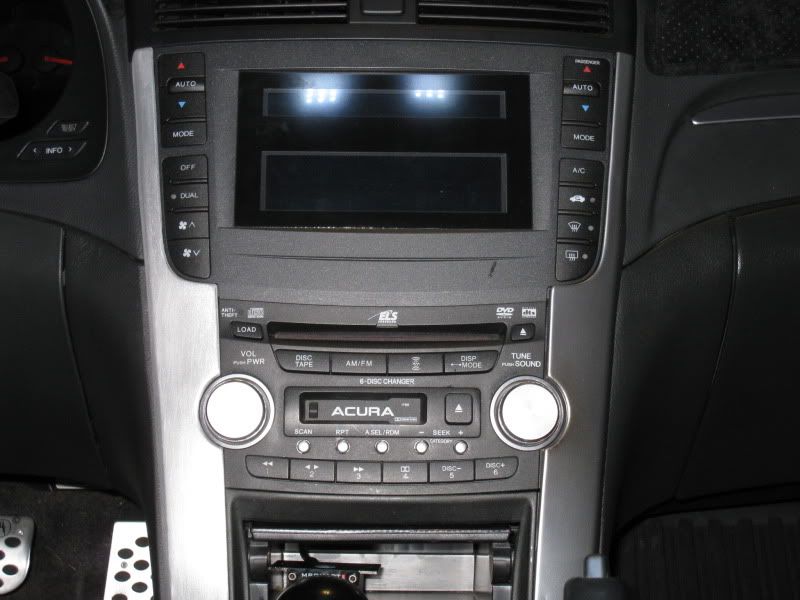
So here is what it looked like...yuck.
and here is the vinyl wrap I originally got, but decided not to use. No pics of the one time I got it install because I hated it.
Quick attempt to sand last night in a bout of buzz and desperation
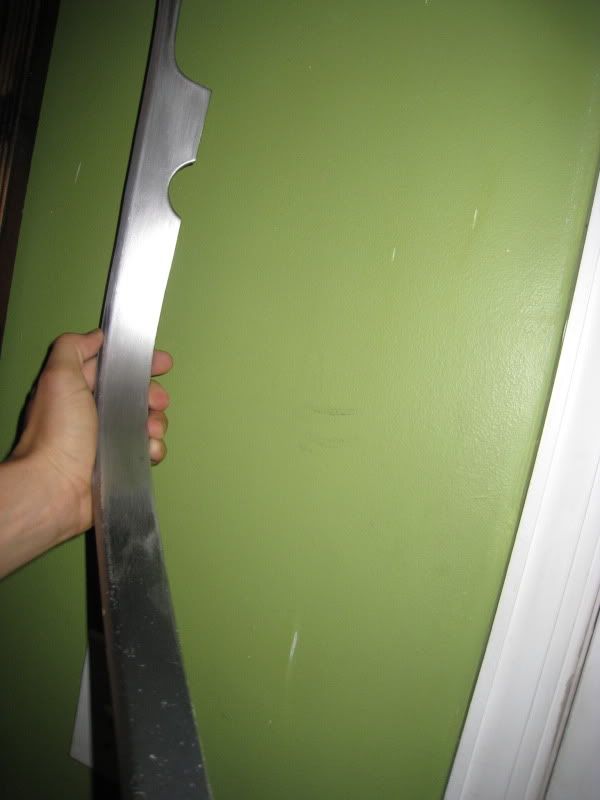
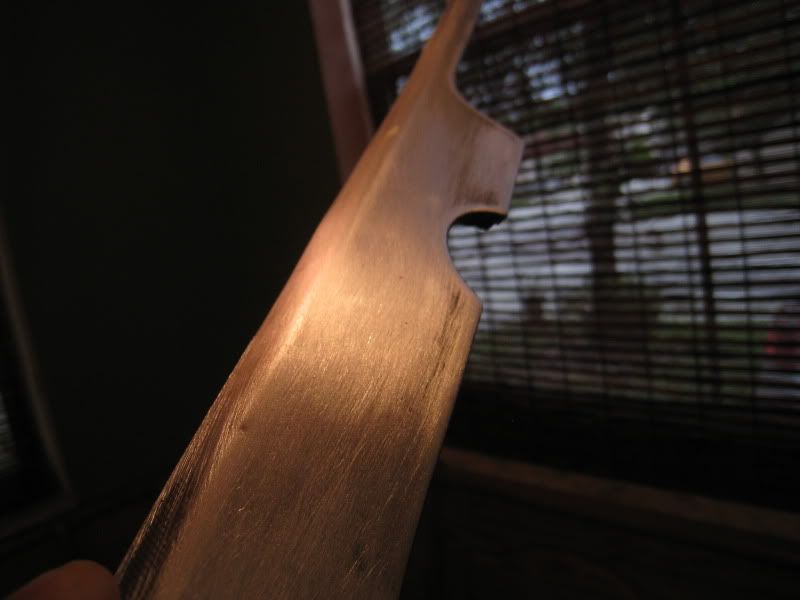
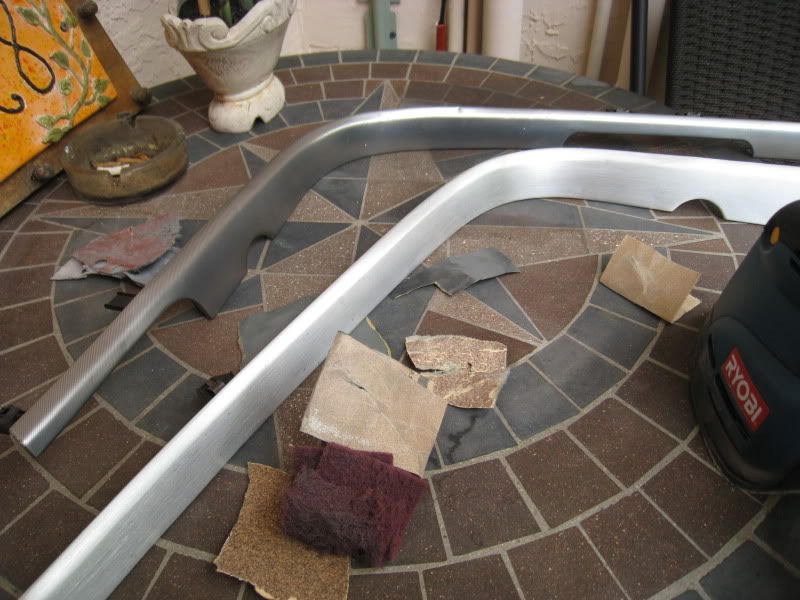
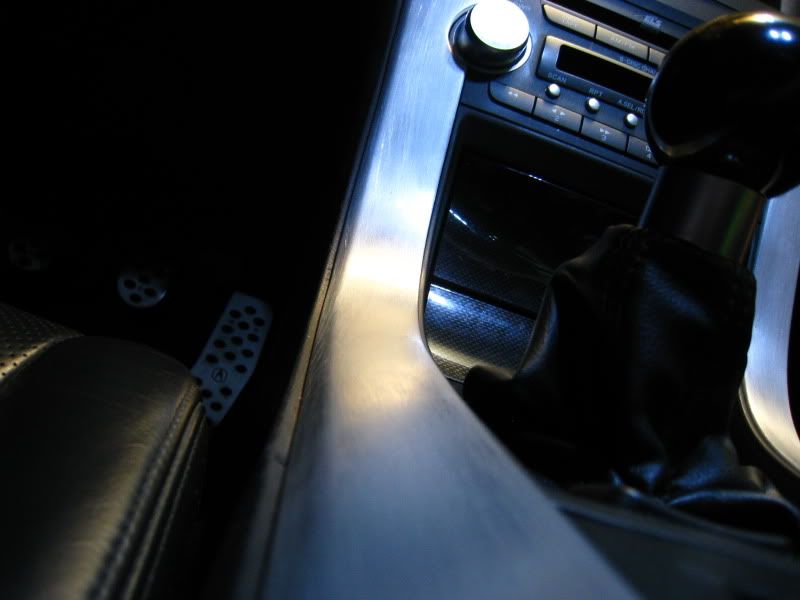
Today, got out my Ryobi Corner cat with a 150 grit and took off the majority of the dark pattern...then finished with the 50 grit, then 150 by hand, scotchpad, then 1000 wet/dry and 2000 we dry. Washed it all down and put some meg wax on it, just to give it a little gloss/protection.
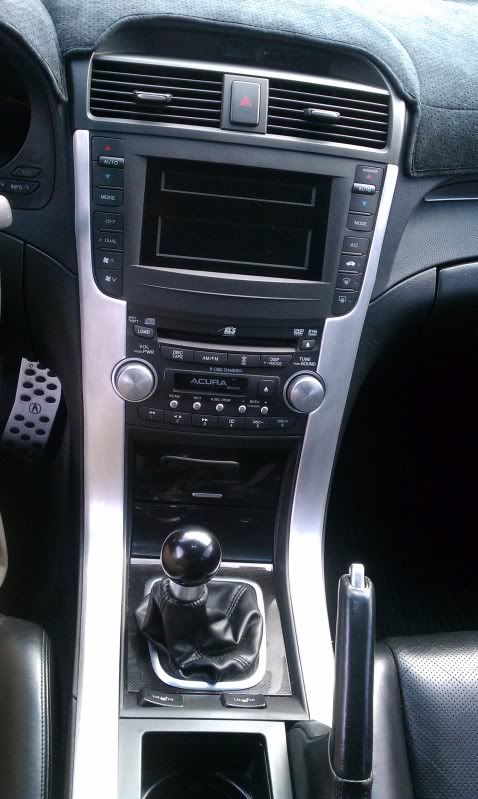
Here's a side by side with the old one
Threw em in the car to see the difference
This evening I finished up...my plan is to wait and see if it holds up, and if it does, I'll do the rest of the silver strips around the dash and door panels. I'd rather wait and see though before I go sanding down all the ones that still look ok.

Hope this helps someone out!
-J
So, my options:
1) buy new ones that will look like this again to the tune of a kidney transplant. Even on oemacuraparts.com, they are $176 each plus shipping. Sorry, I know it's cool metal wrapped plastic but even if it was Kimmy K's ass skin mounted on plutonium from the last space shuttle launch, I ain't paying that much money for something that doesn't keep my car from driving me from A to B.
2) wrap with material or suede, could have been cool...but it ain't the 70's....I'm not that good at wrapping, and I'm afraid I'd end up with serious wear marks on them again.
3) spray with plastidip. in theory, sounds good, and I've seen pics and it looks good. 2 problems i have with it are that it looks like I just spray painted my interior, which I don't like and since the parts are silver to begin with, I don't like the idea of losing the contrast of the silver.
4) wrap with dinoc or some other vinyl. thought about black CF, but since I don't have any of it on anything but my type S diffusers, so I'd have to do it to other surfaces to make it blend and I truly don't love the look THAT much. Real carbon fiber, sure...but being able to see a sticker that looks like it, not as much. No offense to all the veteran vinyl dudes...what YOU'VE done looks great because you have a theme going.
5) So I opted for a vinyl that looks like brushed aluminum. Figured that'd go closely enough to the rest of the silver trim that wraps the interior. So I ordered from Ebay...$25 shipped for 6 feet by 4 feet of it. ( I know I said FREE...so read on, the plot thickens). So, I'm a total virgin with vinyl, I understand the concept but when wrapping a concave piece of plastic, holy fk...it sucks. It's VERY hard to get it to curve and pull to the right or left to make it in one shot. I finally did get it...but it looks a lot more like scratched chrome than brushed aluminum. So, after an hour and half and my 6th attempt, I finally cut a strip long enough to cover the piece in one shot. Got it done and thought it looked decent...then put it in the car to see the comparison...wow, looked like a stripper at a retirement home dinner. It was SUPER chrome looking in comparison to the rest of the interior. So I scrapped it.
Now, here's where the brainstorming (and drinking) begin. I was so annoyed. The only thing worse than a mod gone wrong is a mod gone wrong and money wasted. So I started playing battlefield III to get some of my frustration out. Had 2 vodka crystal lights (calorie counting?!?, YEP) and it came to me....this is a metal piece...what would happen if I...
You guessed it...started sanding that motherfcker...so I did...did it quickly at first just to see what it would do. Sure enough, 50 grit got the crappy design that was peeling off OFF permanently and exposed the metal beneath...then a shot of 150...finished with a scotch pad and voila...not brushed aluminum vinyl....REAL BRUSHED ALUMINUM!
Wow...for free...and looks great...one of my better moments. Hope you all enjoy, figured I'd put the option out there.
-rockstar
So here is what it looked like...yuck.
and here is the vinyl wrap I originally got, but decided not to use. No pics of the one time I got it install because I hated it.
Quick attempt to sand last night in a bout of buzz and desperation
Today, got out my Ryobi Corner cat with a 150 grit and took off the majority of the dark pattern...then finished with the 50 grit, then 150 by hand, scotchpad, then 1000 wet/dry and 2000 we dry. Washed it all down and put some meg wax on it, just to give it a little gloss/protection.
Here's a side by side with the old one
Threw em in the car to see the difference
This evening I finished up...my plan is to wait and see if it holds up, and if it does, I'll do the rest of the silver strips around the dash and door panels. I'd rather wait and see though before I go sanding down all the ones that still look ok.
Hope this helps someone out!
-J
Last edited by rockstar143; 10-30-2011 at 06:26 PM.

The following 6 users liked this post by rockstar143:
Bearcat94 (10-30-2011),
DMZ (12-11-2014),
gatrhumpy (08-18-2014),
gogators22 (10-30-2011),
perilousp (02-06-2013),
and 1 others liked this post.
The following users liked this post:
nate_0022 (02-06-2013)
10-30-2011, 06:34 PM
#3
something tells me my post had too many words for you and you skipped to the bottom... 
cliffs notes:
side sills looked like crap
had a failed attempt to vinyl it
sanded it down to make it look like brushed metal.
done.
cliffs notes:
side sills looked like crap
had a failed attempt to vinyl it
sanded it down to make it look like brushed metal.
done.
Last edited by Steven Bell; 11-01-2011 at 09:53 PM. Reason: Merged Posts.
The following 3 users liked this post by rockstar143:
10-30-2011, 08:03 PM
#4
AZ Community Team

Join Date: May 2007
Location: N35�03'16.75", W 080�51'0.9"
Posts: 32,488
Received 7,770 Likes
on
4,341 Posts
Good idea. Thanks for sharing.
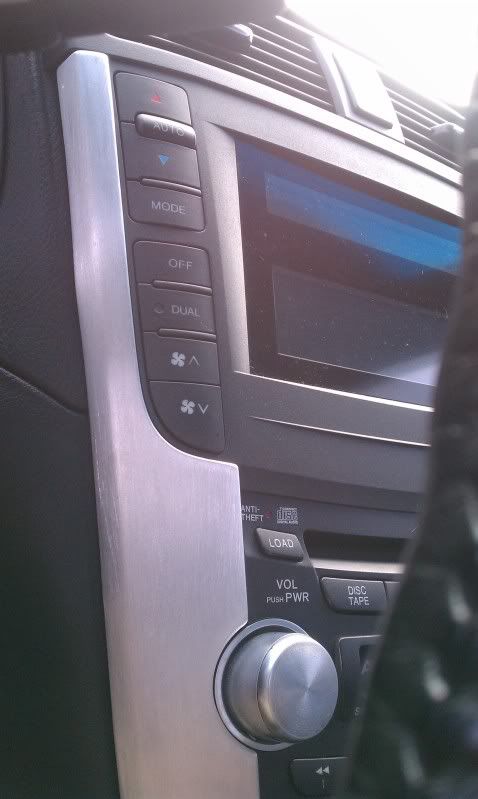
Some of the "brushing" looks a little deep in the pics - more like scratches. How's it look in person? What do you think about using finer grits earlier on?
Some of the "brushing" looks a little deep in the pics - more like scratches. How's it look in person? What do you think about using finer grits earlier on?
The following users liked this post:
rockstar143 (10-30-2011)
10-30-2011, 08:09 PM
#5
Well, to be honest, when you look at it as a whole with the dash, or from a distance (not the macro camera angle). You really can't see....
What I DID try and remove totally was the little squiggly lines the corner cat left...I did this by running the 50 grit to create the long deep lines.
I can always pull it off and redo it...I'll take some pics tomorrow in normal daylight the way you normally would see it.
What I DID try and remove totally was the little squiggly lines the corner cat left...I did this by running the 50 grit to create the long deep lines.
I can always pull it off and redo it...I'll take some pics tomorrow in normal daylight the way you normally would see it.
The following users liked this post:
GKinColo08TL (01-13-2012)
Trending Topics
10-31-2011, 10:02 AM
#8
US Navy Seabees
good job!
10-31-2011, 10:09 AM
#9
Thank you very much! I'm very happy with it. Had I thought of this earlier...I probably would have done this a long time before. Once I thoguht of doing this, I thought...wow, why didn't this dawn on me before.
10-31-2011, 01:21 PM
#10
Chapter Leader (Southern Region)
looks like crap. 

I bought a couple pair from Carrielynn a couple years ago (fucking expensive to ship). I sanded them.. was considering doing vinyl but decided to paint them high gloss. Came out really nice. The part that really bothers me is it doesn't look right unless all the trim pieces are the same.. too lazy to pull them off.
I bought a couple pair from Carrielynn a couple years ago (fucking expensive to ship). I sanded them.. was considering doing vinyl but decided to paint them high gloss. Came out really nice. The part that really bothers me is it doesn't look right unless all the trim pieces are the same.. too lazy to pull them off.
10-31-2011, 02:12 PM
#11
Thanks Maj...
Yeah, honestly...it just hit me to give it a shot and I DO love it. I will probably sand down a little more with the 150 to get rid of the deep gouges, as suggested.
The front 2 silver trims on the dash come off REALLY easily. Get a flathead...start on left of the passenger one...pry from bottom and you'll see the white clip...then insert the flathead and it'll pop off...work your way right. The last one is vertical rather than horizontal.
I'm guessing the left ac vent will be the same.
The doors i think are riveted from the back, I can check, if not, I will end up just putting painters tape so I dont' sand the pleather and sand it carefullly on the door.
10-31-2011, 03:17 PM
#12
Chapter Leader (Southern Region)
I think they are all easily removable.. I'm just lazy. So much required work needs to be done that the aesthetics will have to wait.
Keep us updated!! Also.. if you want to do something really cool. Dremel a design through the trim. Mold acrylic in the space and do LED's underneath.

Keep us updated!! Also.. if you want to do something really cool. Dremel a design through the trim. Mold acrylic in the space and do LED's underneath.
 10-31-2011, 08:35 PM
#15
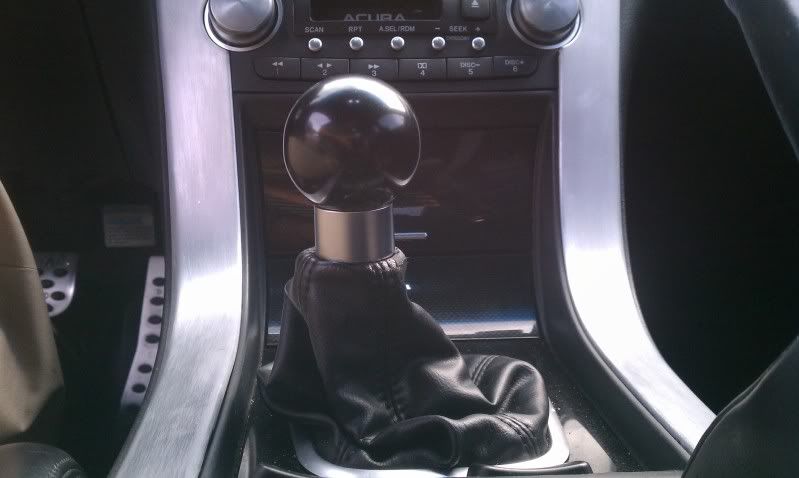
Thanks man...monsterknobs dot com ...it doesn't get hot or cold and is somewhat countersunk. I think I paid $40 shipped for it.
Yeah, update this thread if/when you decide to sand it down. You WON'T regret it!
Yeah, update this thread if/when you decide to sand it down. You WON'T regret it!
10-31-2011, 09:05 PM
#16
I always love your fixes Jeremy... always crafty, clever and money conscious to get the best value out of a fix properly. Good work man ... from the fixing of the cracked dash to the black chroming of the emblems and now to the restoration of these trims... keep it up. 
The following users liked this post:
rockstar143 (10-31-2011)
10-31-2011, 09:47 PM
#17
Well, thank you VERY much for that. That's quite a compliment, especially from you!
And not to let you down, but my cracked dash fix failed me...it would expand and contract with heat. I ended up doing a dash cover instead. Came out looking pretty nicely though.
And not to let you down, but my cracked dash fix failed me...it would expand and contract with heat. I ended up doing a dash cover instead. Came out looking pretty nicely though.
 11-01-2011, 11:14 AM
#20
Full of water...
Nice work!
A hot/cold knob sucks, but an aluminum one would probably look nice now.
The following users liked this post:
rockstar143 (12-01-2015)
11-01-2011, 02:07 PM
#23
thanks jstn...appreciate it. I need to tweak it a bit, but it was so simple to fix such an expensive piece to replace.
Deathmetal suggested matte clearing it...I may still do that. Was afraid of chipping it though...
if it holds up well I'll end up going for ALL the silver trim and make it brushed aluminum.
Deathmetal suggested matte clearing it...I may still do that. Was afraid of chipping it though...
if it holds up well I'll end up going for ALL the silver trim and make it brushed aluminum.
11-01-2011, 02:32 PM
#24
You can simulate real brused aluminuim out of those parts. Prep and prime, then silver bascoat, then a uniform pass of a scotch brite pad puts the brushed part in, then clear coat them.
11-01-2011, 02:45 PM
#25
Well, if you're an artiste like YOU you can! Doens't hurt to have a little portable booth in your garage too and access to a gun.
Actually, just saw the "inside west coast customs" on this one...the jeep they made for zippo. Looked great!
Actually, just saw the "inside west coast customs" on this one...the jeep they made for zippo. Looked great!
 11-01-2011, 07:59 PM
#29
Matt, next meet, man...you can check it out.
Brian is a perfectionist and knows what he's talking about. I do need to matte clear it and brush it out more uniformily
Honestly...if I were to go nuts and paint it, I'd probably paint it NBP.
Then again, painted, especially dark, that thing would show scratches like crazy.
Brian is a perfectionist and knows what he's talking about. I do need to matte clear it and brush it out more uniformily
Honestly...if I were to go nuts and paint it, I'd probably paint it NBP.
Then again, painted, especially dark, that thing would show scratches like crazy.
11-01-2011, 09:14 PM
#30
Matt, next meet, man...you can check it out.
Brian is a perfectionist and knows what he's talking about. I do need to matte clear it and brush it out more uniformily
Honestly...if I were to go nuts and paint it, I'd probably paint it NBP.
Then again, painted, especially dark, that thing would show scratches like crazy.
Brian is a perfectionist and knows what he's talking about. I do need to matte clear it and brush it out more uniformily
Honestly...if I were to go nuts and paint it, I'd probably paint it NBP.
Then again, painted, especially dark, that thing would show scratches like crazy.
 11-01-2011, 09:52 PM
#31
Team Owner
iTrader: (2)
Join Date: Jan 2008
Location: Kansas City, MO (Overland Park, KS)
Posts: 36,545
Received 6,470 Likes
on
5,162 Posts
Dude, very well done. That's a mod you can be very proud of.
The following users liked this post:
rockstar143 (11-02-2011)
11-02-2011, 06:08 PM
#34
Well, I put some wax on it after, but not really "sealed" it. That's why I wanted to see how it'll hold up with nothing. I will end up sealing it with matte clear.
Then I'll do all the other ones that are silver to match.
Thanks man...glad you found it useful.
Then I'll do all the other ones that are silver to match.
Thanks man...glad you found it useful.
11-02-2011, 09:04 PM
#35
Three Wheelin'
iLike!
A lot of euro car makers use brushed aluminum trim for their interiors, looks way better than that printed crap Acura uses..
I actually had a similar fix for my center trim as well in the last year, using a pearl effects clearcoat. I love how subtle it looks until the sunlight hits it, I'll post a pic when i can.
Last edited by HQTL6SPD; 11-02-2011 at 09:11 PM.
The following users liked this post:
rockstar143 (11-02-2011)
 11-05-2011, 05:55 AM
#39
Three Wheelin'
That would look pretty awesome, brushed al in the shade and pearl effx in the sun. Only thing is, I'm wondering if the clearcoat will fill in the scratches undoing the brushed effect...


I tried getting a zoomed out shot, but that wouldn't capture the effect (my camera sucks)


I tried getting a zoomed out shot, but that wouldn't capture the effect (my camera sucks)
Last edited by HQTL6SPD; 11-05-2011 at 05:58 AM.
The following users liked this post:
rockstar143 (11-05-2011)
11-05-2011, 06:57 AM
#40
2004 SSM TL

Great Jove rockstar... Pretty awesome for free.
But you lost me with this:
[quote]
Today, got out my Ryobi Corner cat with a 150 grit and took off the majority of the dark pattern...then finished with the 50 grit, then 150 by hand, scotchpad, then 1000 wet/dry and 2000 we dry. Washed it all down and put some meg wax on it, just to give it a little gloss/protection. [\quote]
Please explain to a future DIY'er and to a fellow south Florida TL owner who's new to the board
The following users liked this post:
rockstar143 (11-05-2011)