Acura TSX: How to Install Lowering Springs
Want to improve your TSX's handling and looks? This DIY guide will show you how to accomplish both with a set of lowering springs.
This article applies to the Acura TSX (2004-2014).
Lowering your TSX is good for both handling and looks. It lowers your car's center of gravity, which improves cornering performance, and it eliminates that ugly gap between your tires and fender wells. The easiest and most effective way to accomplish a lower stance is with a set of lowering springs. Plus, it's a job you can easily accomplish at home in a weekend with just some elbow grease. Keep reading and we'll walk you through the process.

Materials Needed
- Socket and ratchet set
- Lug wrench
- Spring compressor
- Jack and jack stands
Of course, if you are going to be working on the suspension of the car, you need to get it off the ground and remove the wheels. Loosen the lug nuts on all four wheels with the car on the ground to make your life easier. Jack up the front and put it on jack stands, then jack up the back. If all you have is a pair of jack stands, you can do one end at a time.
Step 1 – Replace front springs
The TSX uses a double wishbone suspension, with a non adjustable coil over front shock, much like a lot of Acura and Honda models. This means you don't have to worry about messing up the alignment when changing out the front shocks, which many people erroneously call struts.
- Remove the pinch bolt from the fork at the bottom of each shock.
- Step down on the brake rotor and the shock should separate from the metal fork.
- Use the floor jack to lift the steering knuckle and increase the clearance between the top A-arm and shock.
- Remove the five bolts under the hood from the top of the shock tower.
- As you lower the shock, tilt the lower part toward the front of the car and move down until the spring clears the upper arm.
- Remove, spring side first, tilting toward the rear of the car.
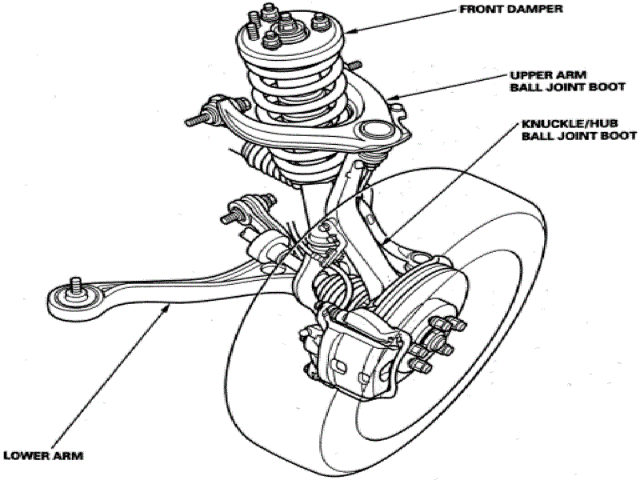
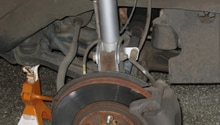
Figure 1. Front suspension of the TSX. 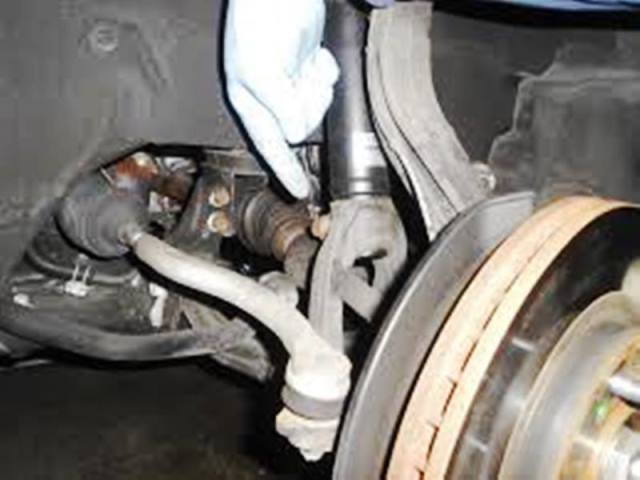
Figure 2. Lower shock pinch bolt. 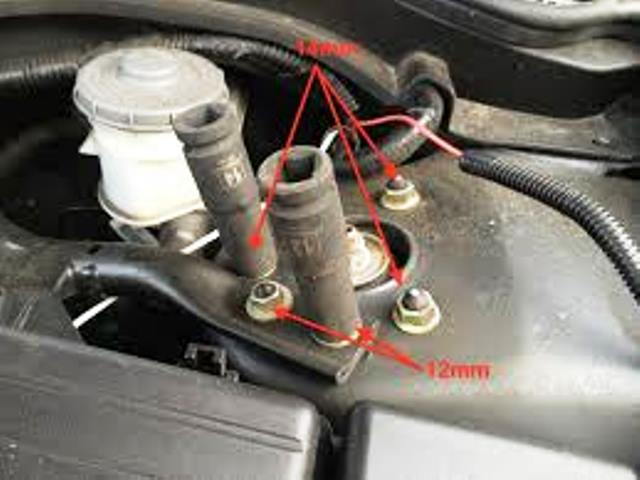
Figure 3. Five upper shock mount bolts.
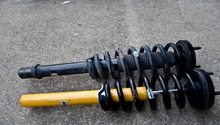
Step 2 – Change over springs
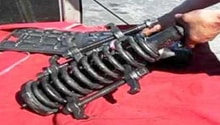
This next part is the hardest part of the job. Luckily, you can borrow or rent a good quality spring compressor from most large chain auto parts stores. Or, for a nominal fee, most shops will swap over the springs for you once you have the shocks off of the car.
- Carefully break loose the big nut on top of the shock holding the spring hat on, but don't remove it.
- If you have trouble getting it loose, you can use a hex key and wrench to help break it free.
- Compress the springs with a spring compressor until the there is no force against the hat on top.
- Loosen and remove the top nut on the shock.
- Remove the ring under the nut and pull off the top hat.
- Remove the old spring from the shock and decompress it by loosening the spring compressor.
- Compress the new lowering spring and install it on the strut, then replace the top hat and nut.
- Lowering springs tend to be shorter, so installing is easier than removal.
- Decompress the spring.

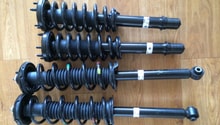
Step 3 – Reinstall front shocks
Putting everything back in is even easier than taking it out. Maneuver the shock back into place, bottom first, then slide the top back into the shock tower. Use a few of the upper nuts, loosely installed, to hold it in place. You can use your floor jack to help get the fork back in place around the bottom of the shock, then tighten the pinch bolt to 32 ft-lbs. Now you can tighten the five nuts on top of the strut tower: the larger ones to 37 ft-lbs, and the smaller ones until they are snug (16 ft-lbs).
Step 4 – Remove rear shocks
The rear shocks are a little easier to change; though, you do have to get at the upper mounting nuts, which are hidden behind the rear.
- Pry forward the rear seat bolster and remove the 10mm bolt, then carefully slid off the plastic hooks holding it in place.
- Loosen the two nuts holding the top of the strut.
- Remove the upper rear trailing arm, which is secured by a 17mm bolt.
- Remove the upper end of the rear sway bar end link.
- Now wiggle the shock, and you should be able to drop it down and out of the car.
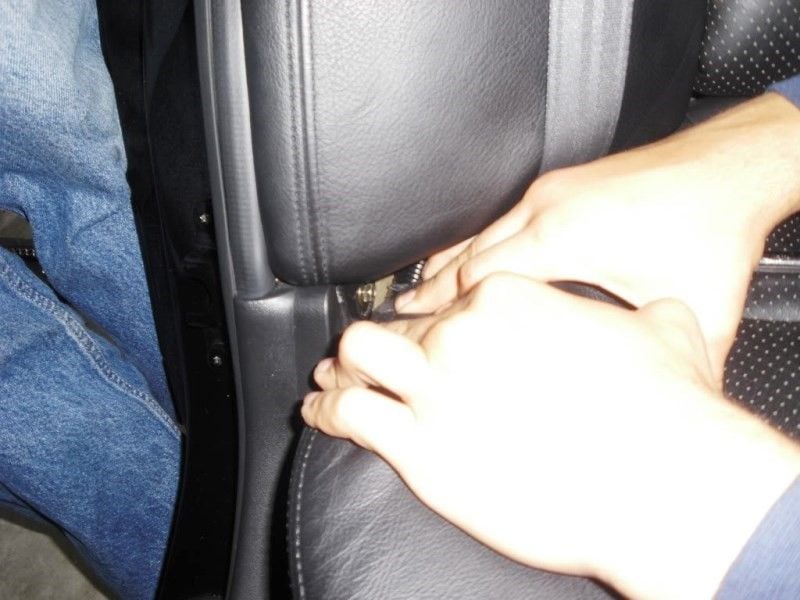
Figure 5. Carefully pry forward so you can reach the mounting bolt. 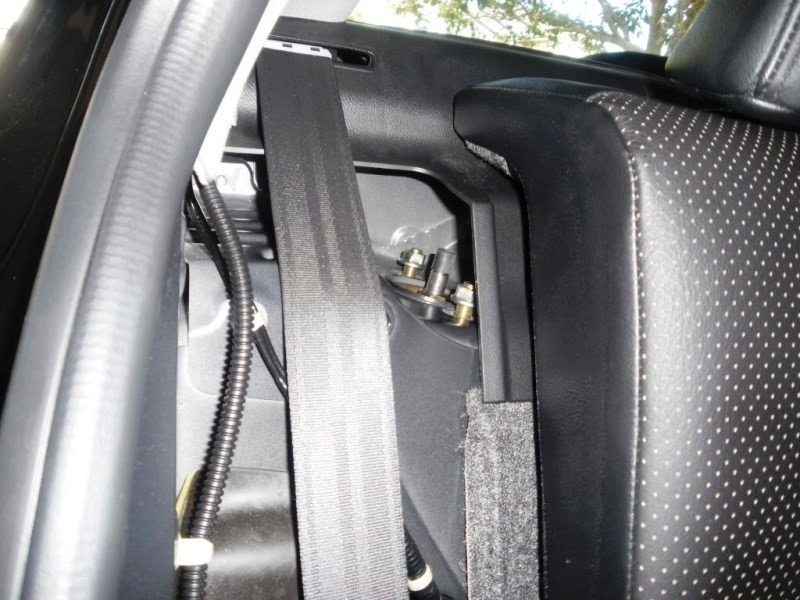
Figure 6. Now you can reach the upper shock mounting bolts. 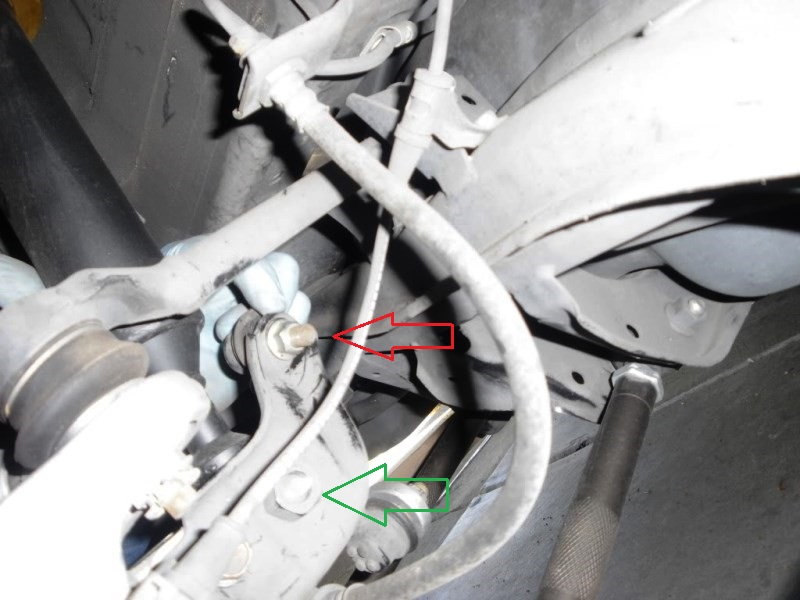
Figure 7. The sway bar end link (red arrow) and lower shock mount bolts (green arrow).
Step 5 – Install rear shocks
Of course, now you have to swap the new springs onto the shocks, which is done the same way you did the front. Compress the rear springs and remove the top bolt and mount, then slide off the dust boot (modify if instructed by new spring manufacturer). Reinstall the dust boot and compress the lowering springs and slide them on. Reinstall the top cap and nut, then decompress the springs. Install the new coil over assembly into the car, then replace the bottom bolt and top nuts. Put the upper control arm and sway bar end link back in place. Reinstall the rear seat back, and you are done.

Featured Video: Acura TSX Front Shock Removal Tips
Related Discussions and Site
- DIY Suspension Install - TSXClub.com
- My Koni Shocks Spring Install - AcuraZine.com
- Best Lowering Kit for My TSX - AcuraZine.com
- How Should I Lower My Car? - AcuraZine.com