Acura TSX 2004-2008: How to Replace Power Steering Rack
The steering and brakes are the most important safety features of your car. If things don't feel right behind the wheel, you may need a new steering rack.
This article applies to the Acura TSX (2004-2008).
The Acura TSX is a sporty, fun to drive sedan known for its precise steering and great feel from behind the wheel. If things in the steering rack get worn, or the seals go, it can begin to feel like you are trying to steer an old truck with play in the steering and no power assist. The steering rack isn't cheap, but if you do the labor yourself, you can cut the price of replacing it in half. Follow along and we'll show you all the steps involved in changing it out.

Materials Needed
- Jack and jack stands
- Ratchet and extension
- Assorted common socket sizes
- Drain pan
- Ball joint separator (for tie rods)
- Torque wrench
As with most work on your car, you start this job by jacking up the front of the car, placing it on jack stands, and removing the front wheels.
Step 1 – Disconnect steering column
Of course, in order to remove the steering rack, you first have to disconnect it from the steering wheel from inside the passenger compartment. In order to access the connection, first remove the plastic dash panel underneath the steering wheel that covers the steering u-joint. Remove the two 10mm bolts in the knuckle and slide the half off the splined shaft. You may have to improvise some sort of holder to pull back and hold the steering shaft. A wire coat hanger can work nicely to keep it up out of the way.
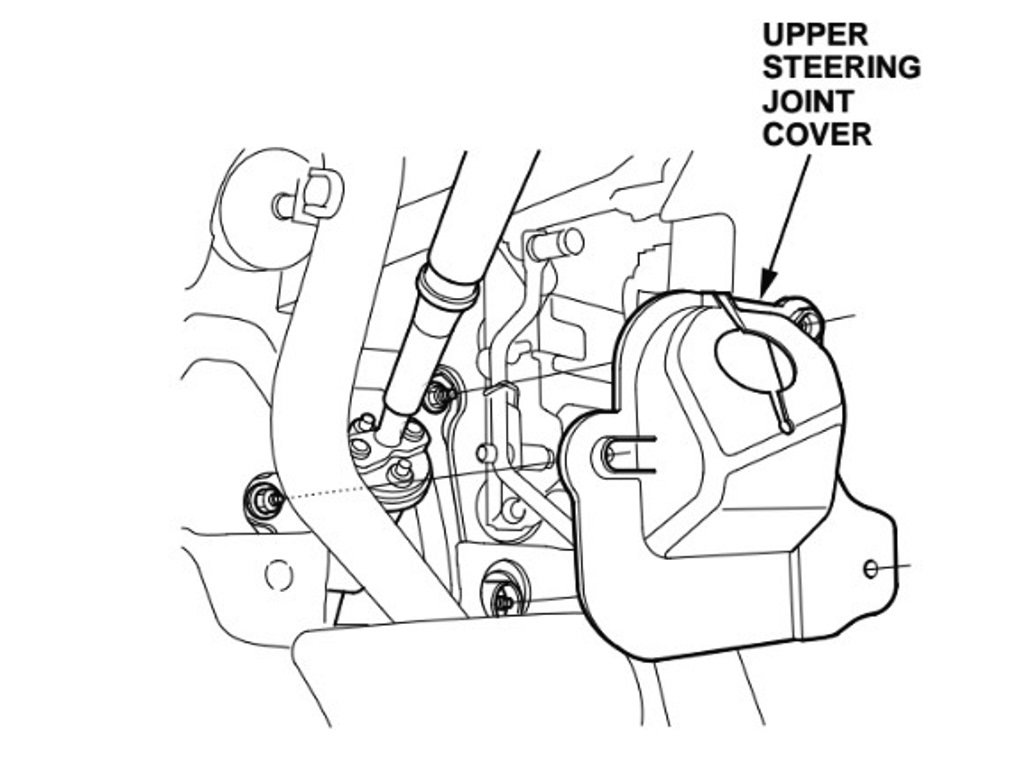
Figure 1. Remove the lower steering joint cover. 
Figure 2. Loosen these 10mm pinch bolts and the u-joint should slide.
Step 2 – Disconnect the power steering fluid lines
Remove the splash shield from the underside of the car for better access to everything. Place a drain pan underneath the power steering lines and pop the hood. Remove the two lines (14mm).
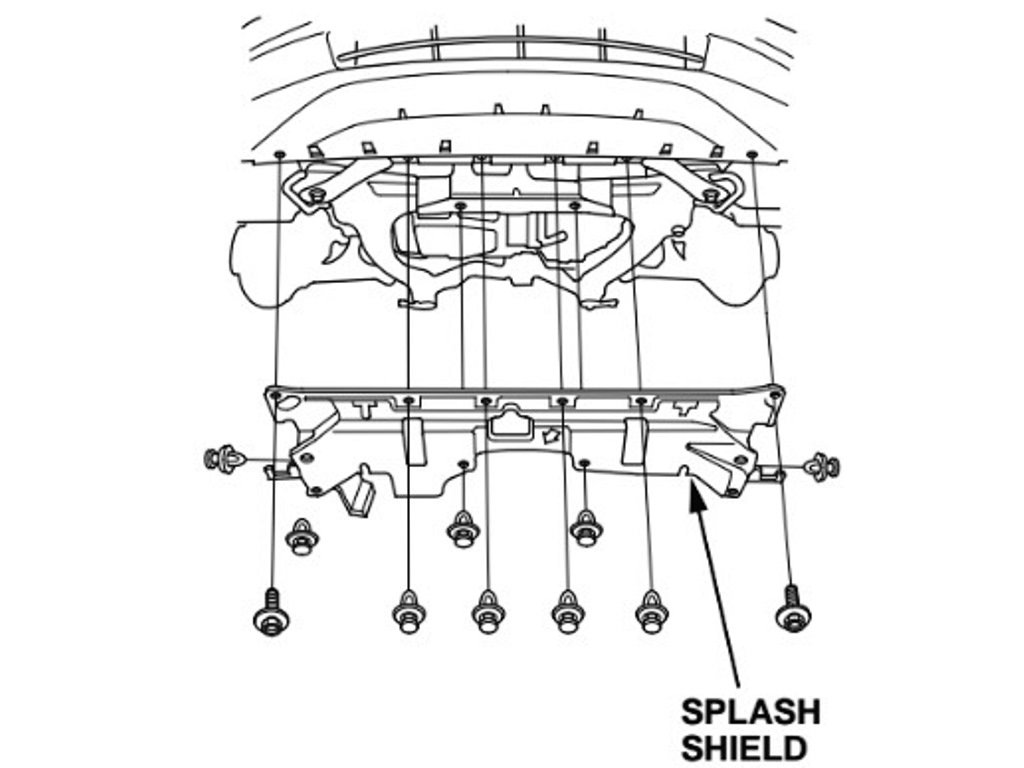
Figure 3. Remove the aerodynamic splash shield. 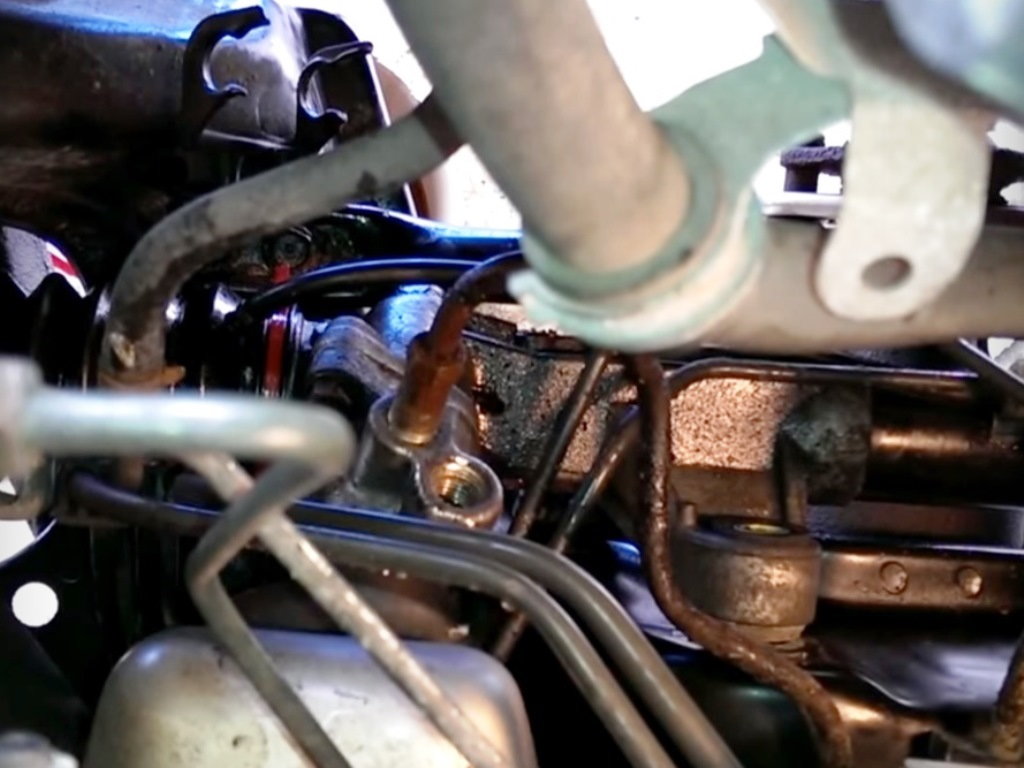
Figure 4. Remove the power steering lines and let drain.
Step 3 – Loosen the subframe
In order to have enough room to get the rack out, you will have to remove a bunch of braces and loosen up the subframe mount bolts. You do not have to take the entire subframe off of the car. The official manual has you remove the strut tower brace and support the engine from above with a cross bar and fixture, but you can accomplish the same with a jack under the car and a piece of wood to avoid damaging anything. Remove the left and right suspension mid mounts, and the front bracket holding the subframe to the body. Then carefully loosen the rear subframe bolts until you have at least an inch sticking out. Lower the jack supporting the subframe to achieve the needed clearance for the rack to be removed.
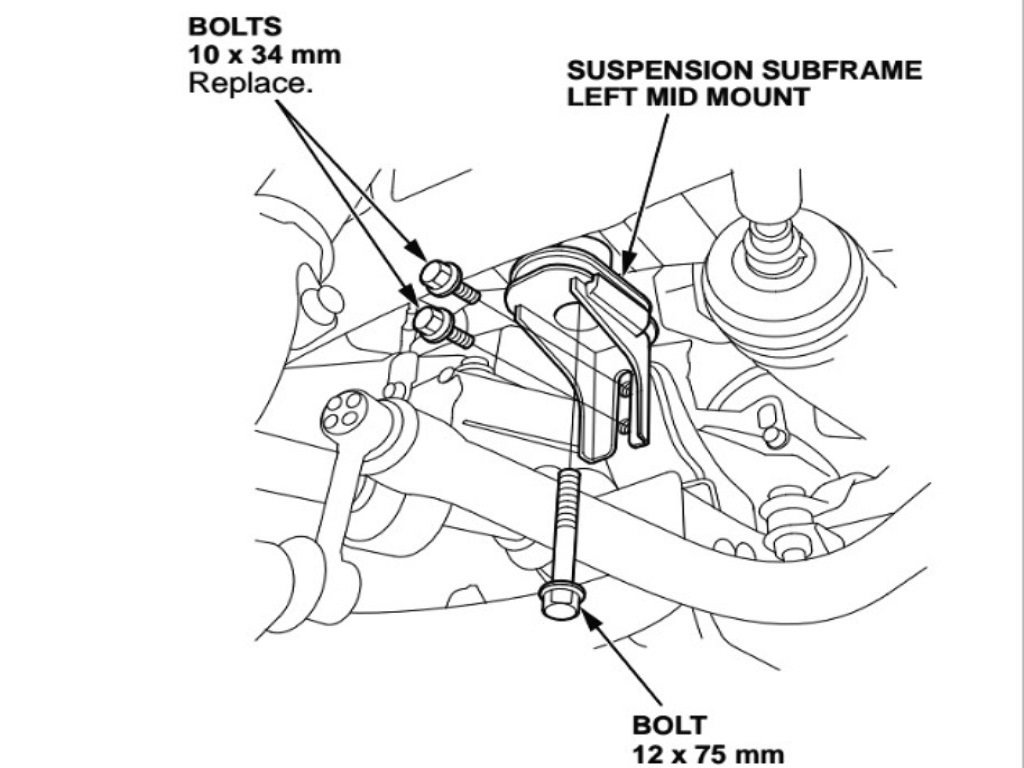
Figure 5. Remove the mid mount on both the left and right sides. 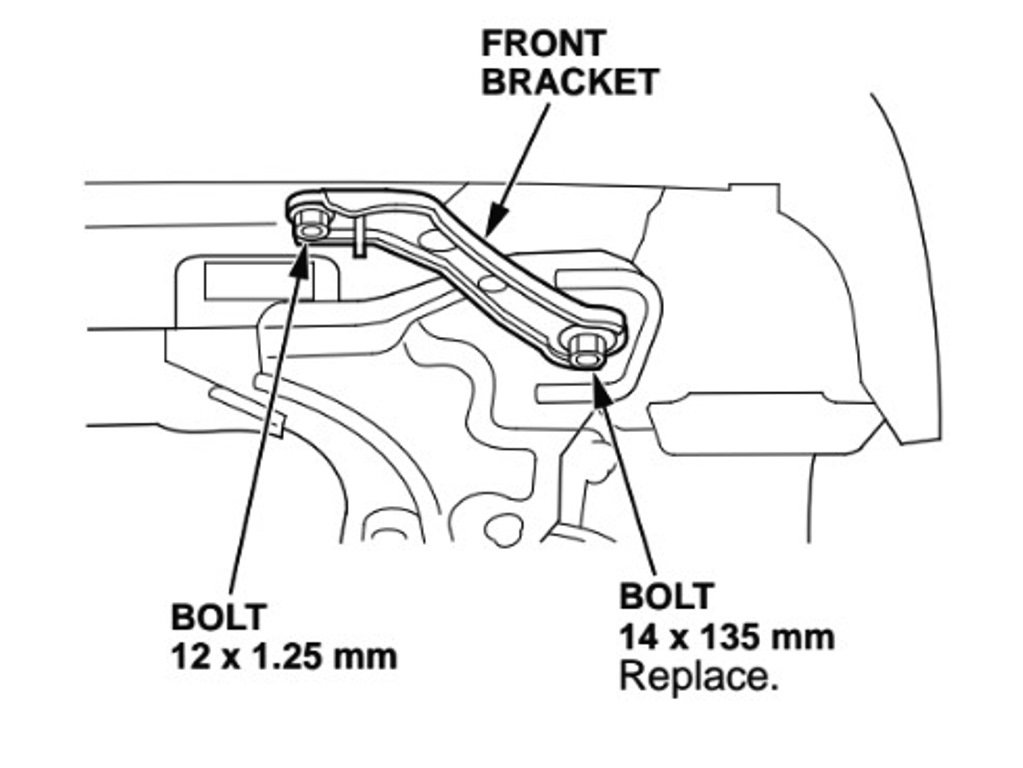
Figure 6. Remove the front subframe bracket. 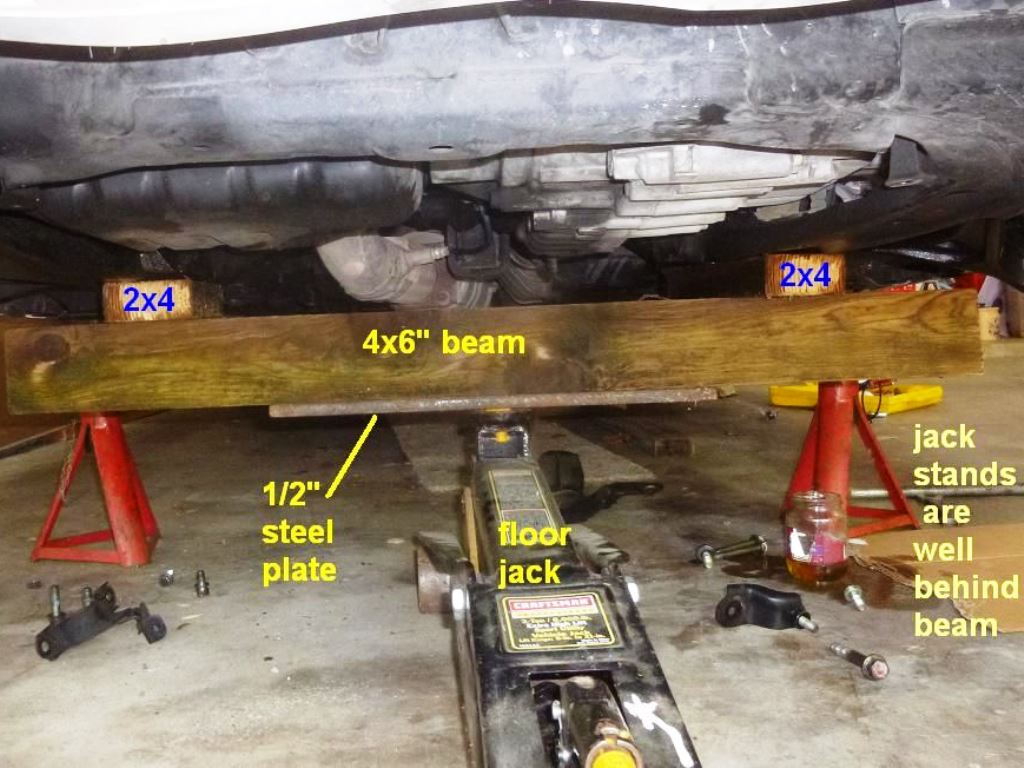
Figure 7. Simple improvised subframe support. 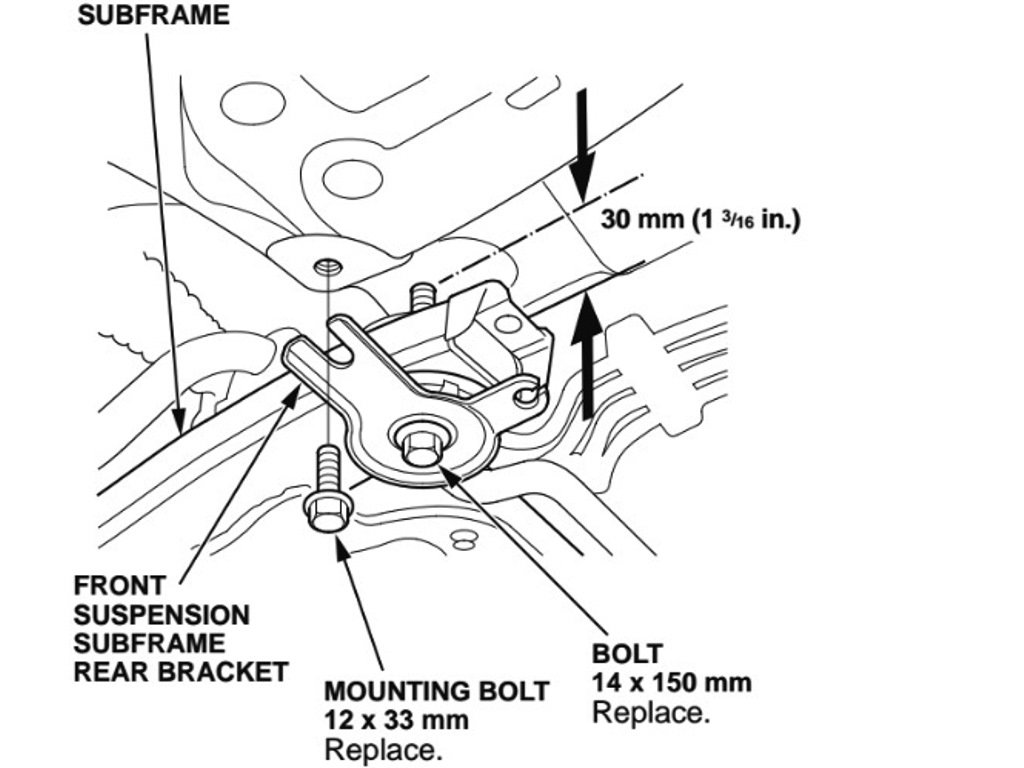
Figure 8. Loosen the rear subframe bolts to allow about 1 1/4" clearance.
Step 4 – Unbolt the rack and remove
Now all that is left is to disconnect the rack from the wheels and the chassis to slide it out. First, remove the outer tie rods from the steering knuckle by pulling the cotter pin, undoing the castle nut, and using a ball joint separator. Remove the heat shield, which is between the rack and the exhaust downpipe by the firewall, by removing the two obvious 10mm bolts holding it in place.
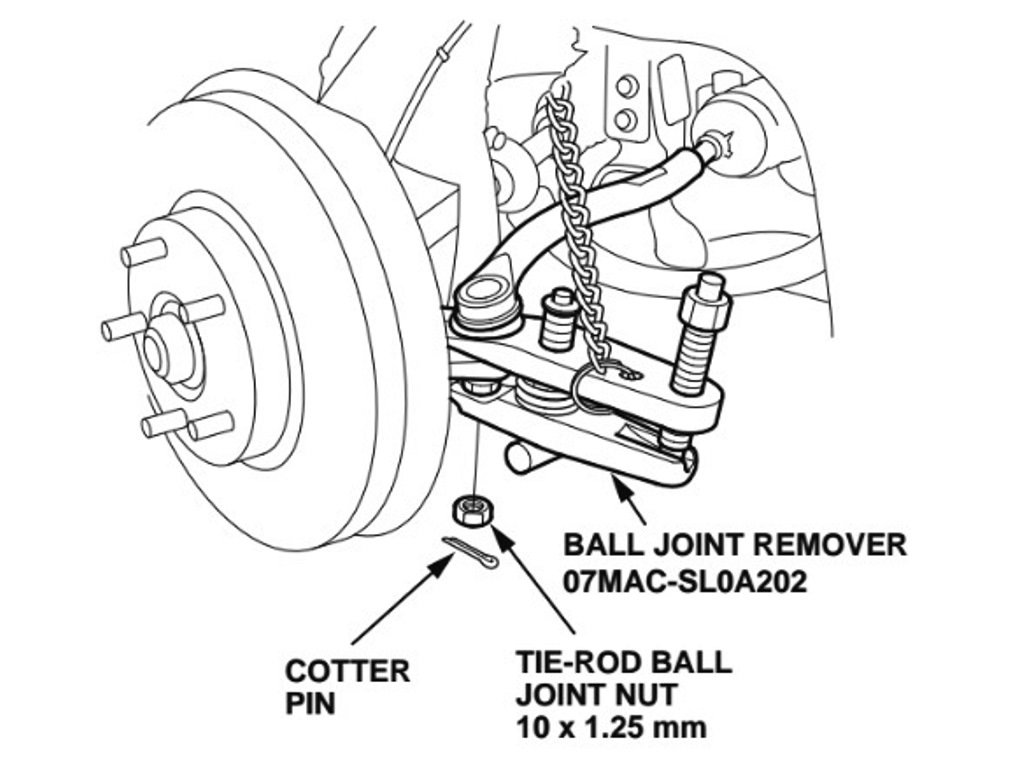
Figure 9. Undo the castle nut and press out the tie rod end from the steering knuckle. 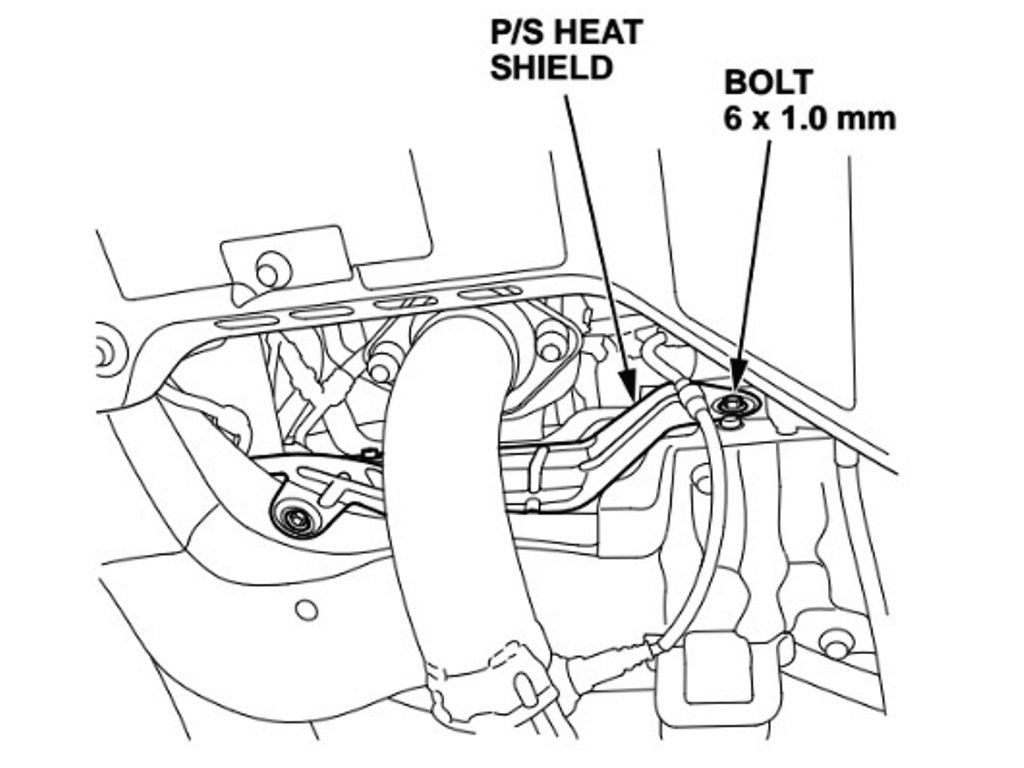
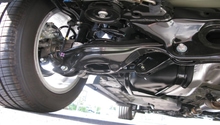
Figure 10. The heat shield is in the way of rotating the rack to remove.
Next, unbolt the rack from the chassis. There are two bolts on the driver's side that bolt directly through the mounting holes in the rack, plus a third bolted through a small stiffening bracket. On the passenger side there are two smaller bolts and a strap the wraps around the rack.
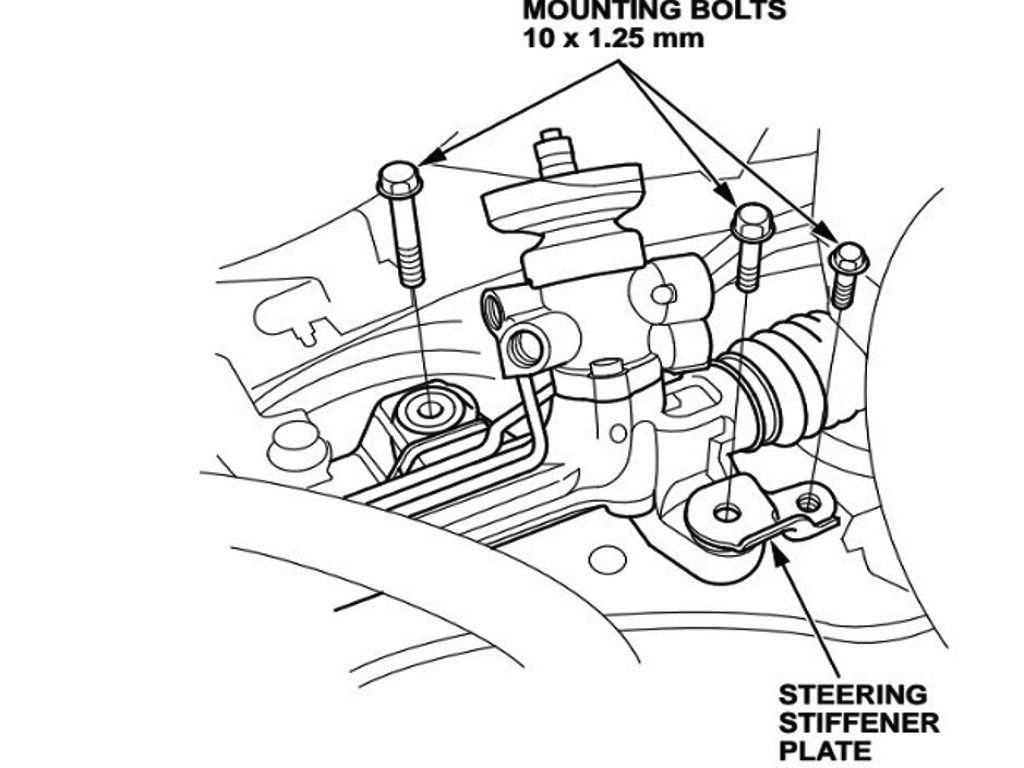
Figure 11. Driver side rack mounting bolts. 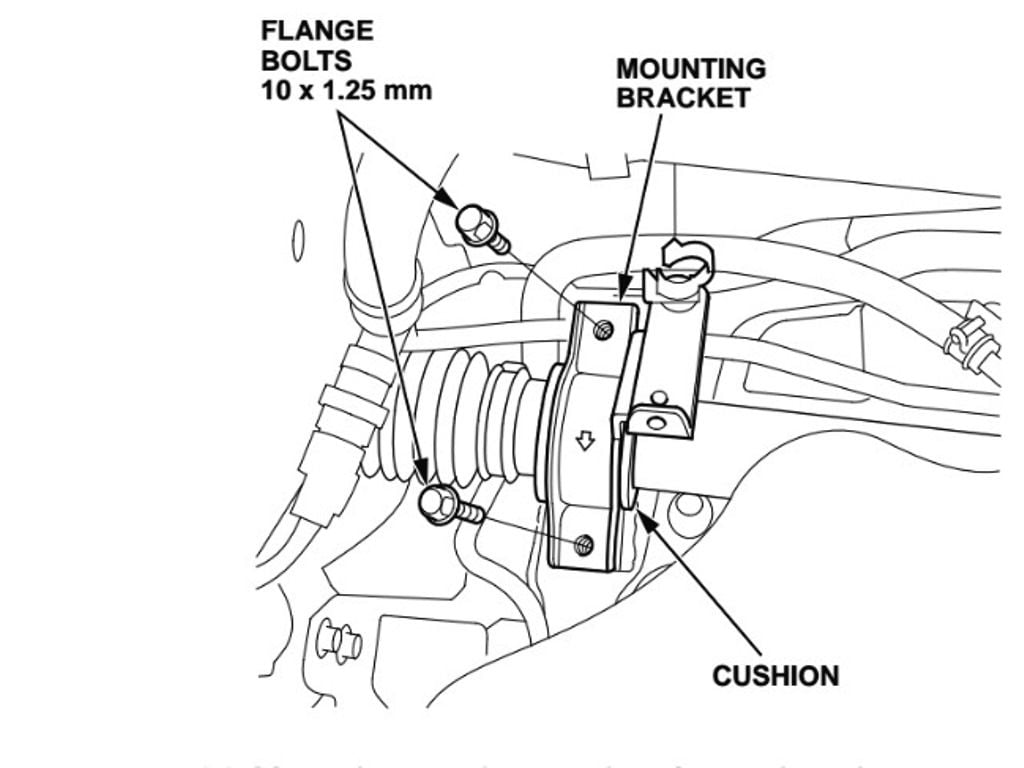
Figure 12. Passenger side rack mount.
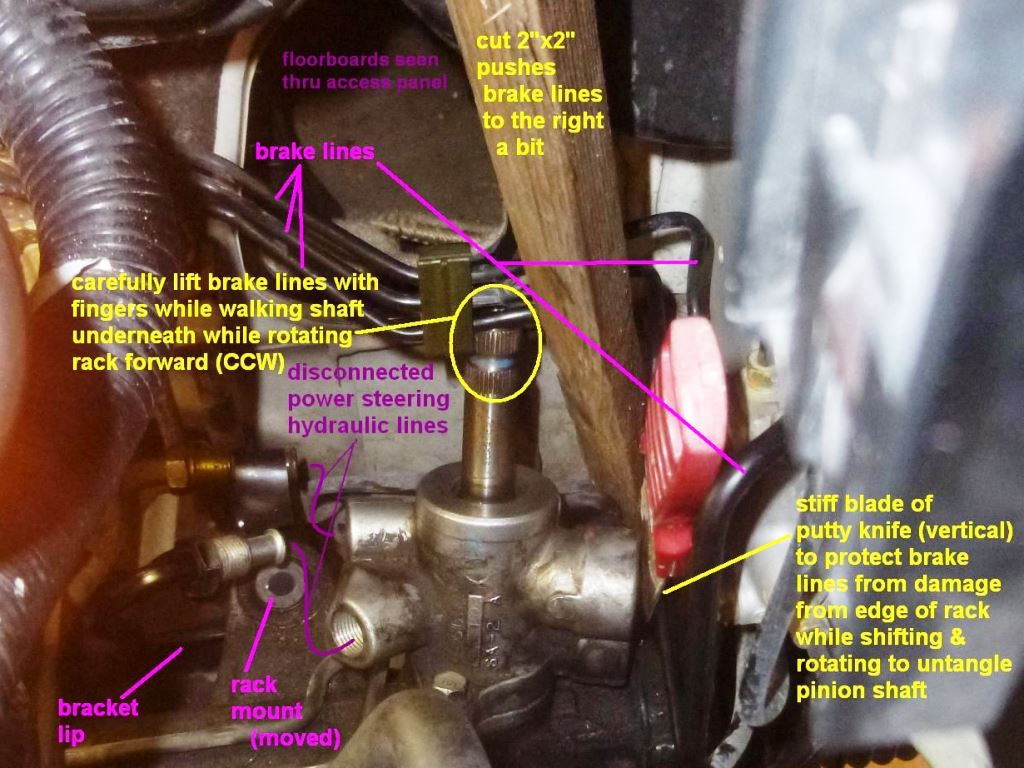
Pull the splined shaft from its hole in the firewall. Now, carefully pry the brakes lines up, and rotate the entire rack counter clockwise to get the steering shaft free of the lines, so you can then slide the rack out through the driver's side wheel well.
Step 5 – Install new steering rack
Installing the new rack is basically the above steps performed in reverse. First, you will most likely have to remove the tie rod ends from the old rack and put them on the new rack. Take the old rack and measure how far the tie rod ends are screwed in by counting how many rotations it takes to remove them. It may also be helpful to use a tape measure to get a rough idea of how long they are, as a backup. Typically you don't have to reuse the inner tie rod ends, but if you do, push back the boots and take them off as well. You may also have to swap over the hard lines, and some other parts, depending on how complete the rack you got it.
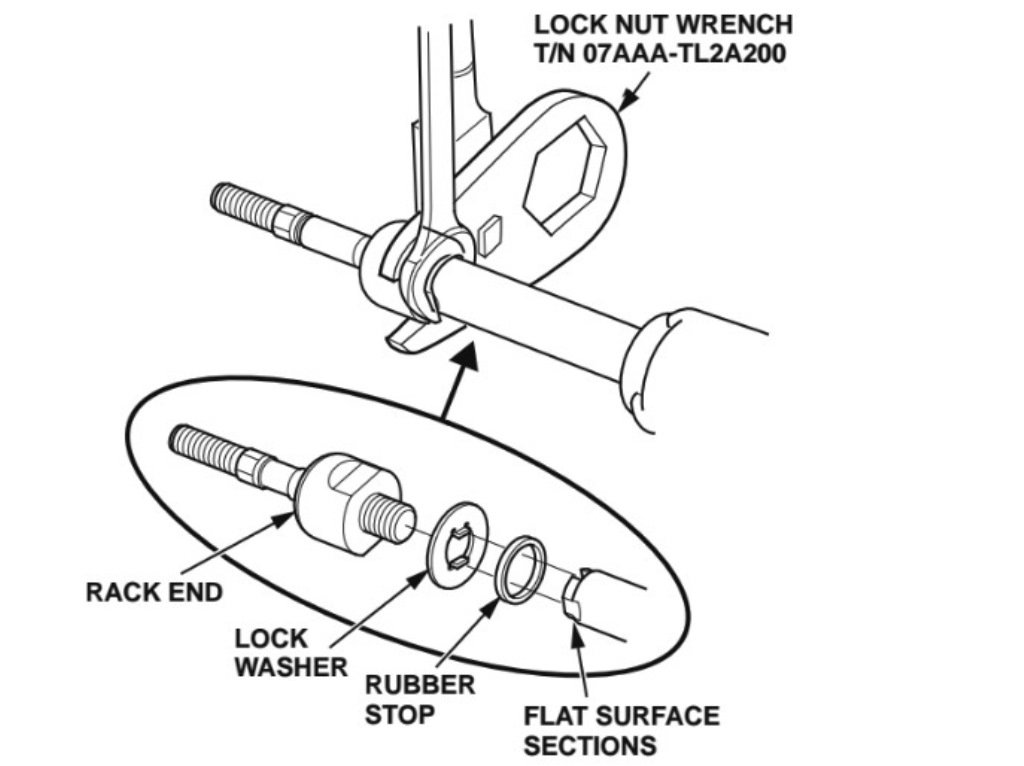
Figure 14. Inner tie rod end removal. 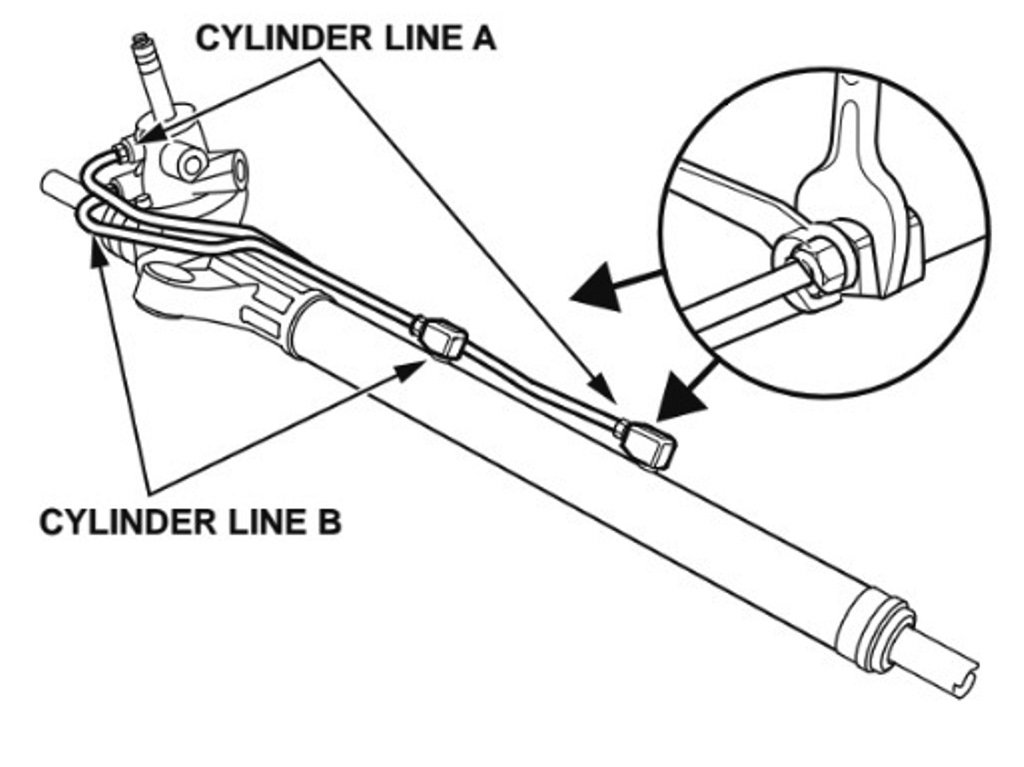
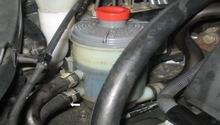
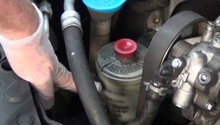
Figure 15. Power steering rack lines.
Slide the new rack in place and torque the bolts to 28 ft-lbs on the driver's side and 43 ft-lbs on the passenger side. Reinstall the tie rod ends (torque to 29-35 ft-lbs) and reconnect them to the steering knuckle. Reinstall the heat shield and reconnect the power steering lines. Replace all the subframe brackets and bolts, and tighten them down as well. Reconnect the steering shaft inside the car and replace the plastic cover. Top off the power steering fluid (or you can flush the system if your fluid needs replacing). Even if you were very good about the tie rods, chances are you need a professional alignment before extensive driving, otherwise you may wear your tires out very quickly with excessive toe.
Related Discussions and Site
- TSX Rack Replacement TSB - GoogleDrive
- Power Steering Rack Replacement - AcuraZine.com
- DIY How to Replace Steering Rack - AcuraZine.com