Acura TL 2009-2014: How to Replace Wheel Hub and Bearings
Are the bearings in your Acura TL making funny noises or negatively impacting your ride quality and performance? Here's how to replace them yourself, at home, and save some money over taking it to a professional.
This article applies to the Acura TL (2009-2014).
Wheel bearings are exactly what they sound like: they allow the hub, which the wheel is mounted on, to spin freely. As the bearing ages, friction increases until the bearing begins making an awful grinding or howling sound, which can be heard when cruising with the windows down. Not only is it annoying to listen to, it's also very dangerous. If the hub fails, it results in a serious wheel wobble, and could end up with the car losing a wheel as you drive, which is bad. While replacing the bearing by itself is possible for most cars, many people will recommend replacing the whole hub and bearing assembly since you're already "in there" when doing the work. So let's get it done and replace that hub as well as bearing.

Materials Needed
- Ratchet
- 10, 12, 14, 17, 24, 32, and 36mm (axle nut) sockets
- 17mm wrench
- Impact gun
- Impact screwdriver
- Needle nose pliers
- Tie rod end puller
- 12 ton or higher hydraulic press (optional)
- Dremel tool with cutting wheel
- Floor jack and jack stands
- Hammer
- Chisel
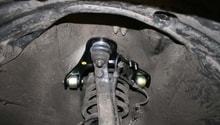
Step 1 – Remove the front hubs/bearings
- Jack up the front of the car, place it on jack stands, and remove the front wheels.
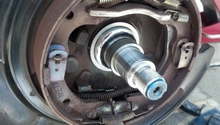
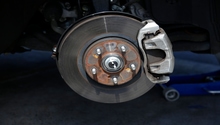
- Remove the caliper from the knuckle by removing the bolts (#17 in Figure 2).
- Remove the rotor from the knuckle by removing the screw (#20 in Figure 2). If it is stubborn to remove, give it a few good whacks with a hammer on the back side.
- Remove the axle nut (#21 in Figure 2) with an impact gun.
- Remove the cotter pin from the upper control arm (#17, Figure 1) with needle nose pliers, then the lower control arm cotter pin (#18, Figure 1), then the cotter pin from the tie rod end.
- Remove the nuts where the cotter pins were located (17mm).
- Disconnect the ABS sensor (#9, Figure 1) by removing the 10mm bolts (#15 and #19, Figure 1).
- Use the tie rod end puller to remove the upper and lower control arm, as well as the tie rod end.
- Lift the ball joint out of the lower control arm and toward you to remove it from the axle, and remove the knuckle.
(Related Article: How to Replace Ball Joints - AcuraZine.com)
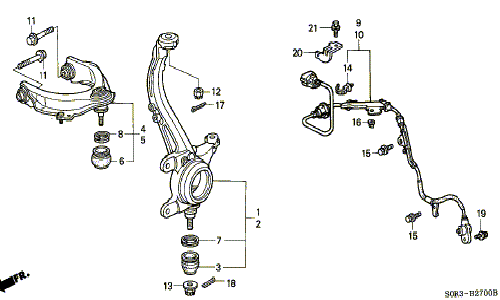
Figure 1. Control arm diagram. 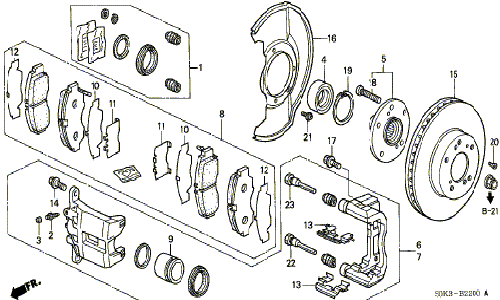
Figure 2. Front brake diagram.
Step 2 – Replace front hub/bearing
To press the new bearings on the new hubs, it's much easier to take them to a machine shop and let them do it, especially if you don't have at least a 12 ton press. This is fairly cheap and will save you a big headache as well as a big bill from purchasing expensive equipment. Regardless, if you have a press and want to do this yourself, press the hub off the knuckle first. If replacing the bearings only and if the inner race of the bearing is stuck on the hub, use a Dremel with a cutting wheel to make a couple of cuts (without cutting the hub), then whack them with a chisel and hammer to remove it. Once the race is off, press the bearings off the hubs and press the new bearings on the new hubs, then press the hub/bearing assembly back on the knuckle.
Reverse the steps in Step 1 to reinstall the knuckles, control arms, tie rod end, brakes and wheels, then lower the car off the jack stands and move on to the rear.
Related Video: Overview on Replacing Front Wheel Bearing on TL
Step 3 – Remove and replace rear hubs/bearings
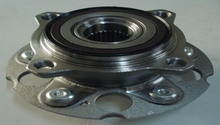
Fortunately for us, the rear hub and bearing is a piece of cake on these cars. Buy the hub and bearing as one pre-assembled unit and you can have this done in 20 minutes.
Jack up the rear of the car and place it on jack stands, then remove the rear wheels (19mm). Remove the rear caliper (12mm) and caliper bracket (14mm), rotor set screw and rotor (impact screwdriver), dust cover (hammer and chisel), and 32mm bearing nut (impact gun). At this point you will be able to simply slide the rear hubs off and replace it with a new one.
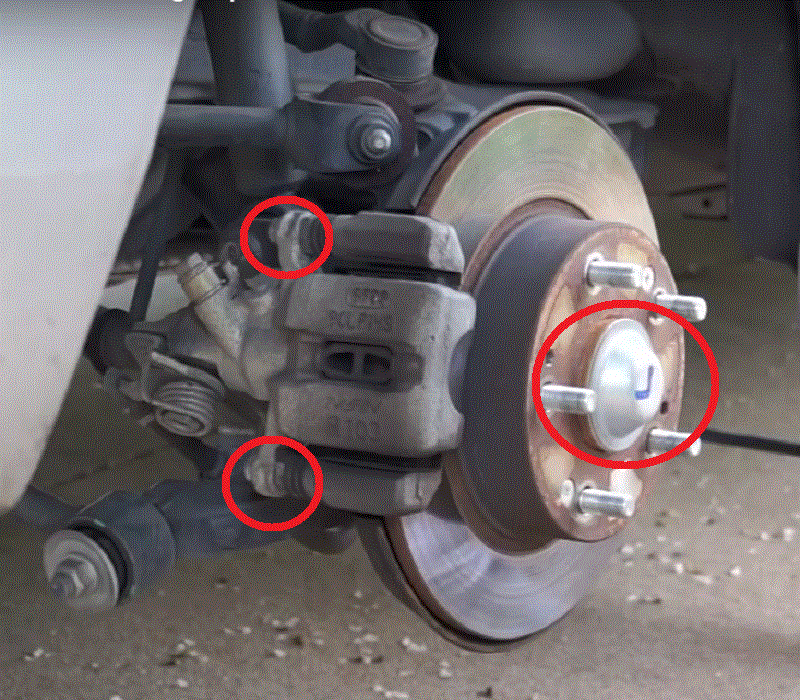
Figure 3. Remove caliper and dust cover. 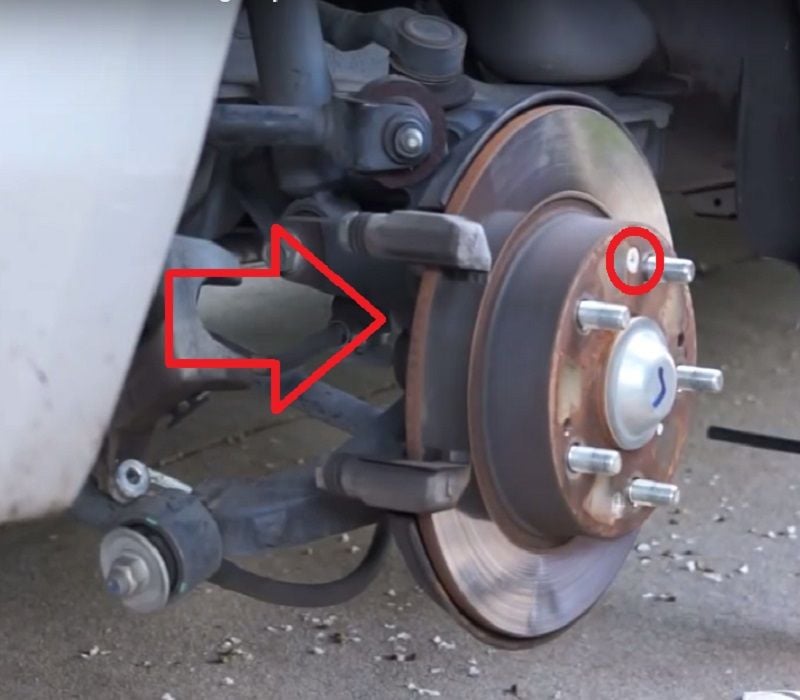
Figure 4. Remove caliper bracket and rotor. 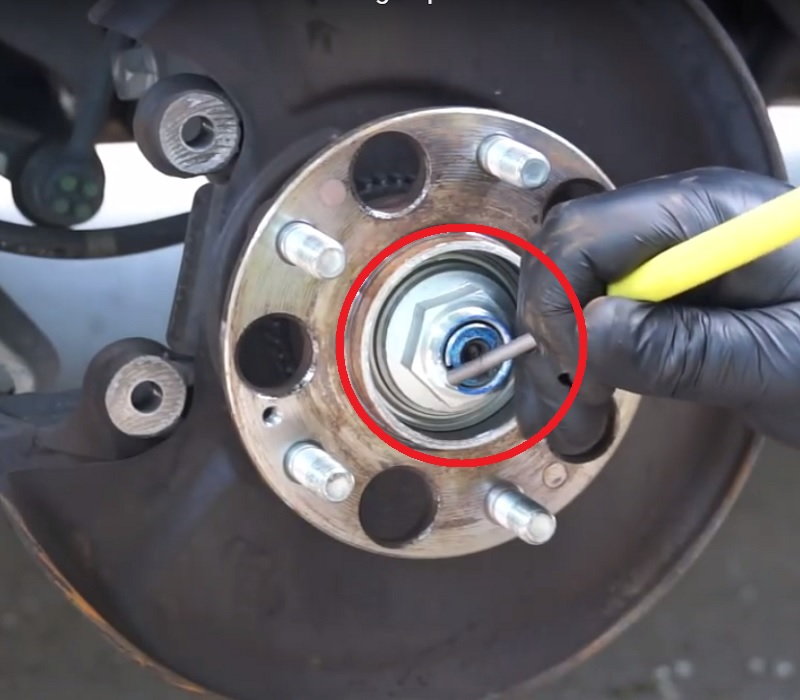
Figure 5. Remove 36mm hub nut. 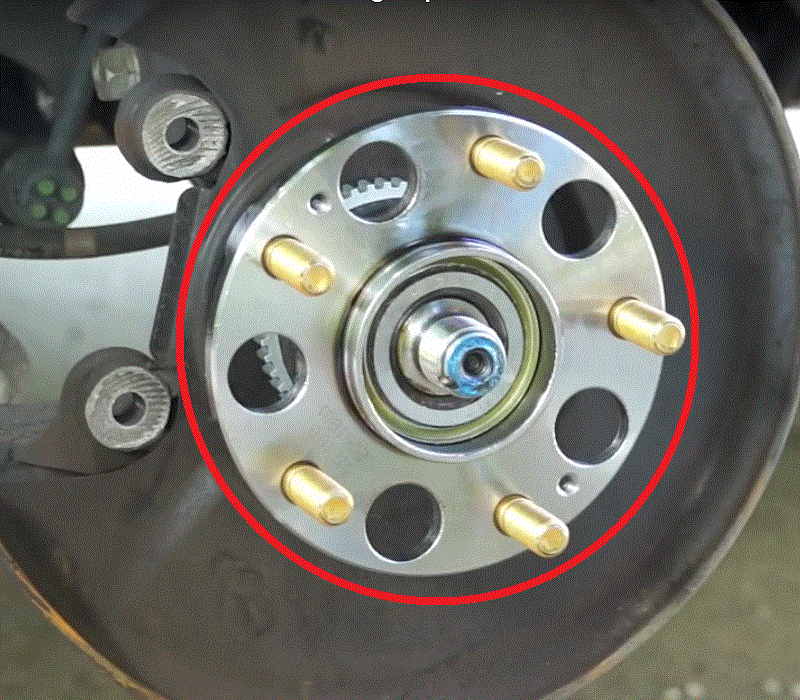
Figure 6. Fit the new hub and reassemble.
With the new hub and bearing fitted, fasten it down with the main bearing nut and refit the dust cover. From there, it's just a matter of reinstalling the rotor and brake caliper, then bolting the wheel back on. Easy.
Featured Video: How to Replace Rear Hub and Bearing Accord/TL
Related Discussions
- Wheel Bearing DIY - AcuraZine.com
- Rear Wheel Bearing Replacement - AcuraZine.com
- Front Wheel Bearing Replacement - AcuraZine.com