Acura TL 2009-2014: How to Replace/Install HID Headlight Bulbs
HID bulbs degrade with time, and even if you have plenty of light, some people prefer a bluer or whiter than stock color output. Read on and we'll shine some light on the subject of replacing them.
This article applies to the 4th Gen Acura TL (2009-2014).
HID lighting presents a pretty massive upgrade over old, halogen style bulbs. HID lights are considerably brighter and have a much longer lifespan than regular incandescent bulbs, but long before they blow, they do lose light output. Even if your TL's HID headlights are still plenty bright, you might want to switch from 4300k to 6000k bulbs, or some other color. Regardless of what your end goal is, installation/replacement is a pretty straightforward job that most anyone can do in a reasonable amount of time. If you have small hands, you might be able to get to them without removing the inner fenders, but there is very little room to work. Read on and we'll detail the easier, though more involved method of doing it.

Materials Needed
- Small flat head screwdriver
- Drop light
- Floor jack and jack stands
- HID bulbs
- Rubber gloves
Step 1 – Remove front wheels and fender liners
Jack up the front of the car and place it on jack stands. In each fender liner you will find three snap-in connectors that hold the liners in place. Two of them have small slots in the them, while the other does not. Use a small flat head screwdriver to remove the connectors by sticking it in between the inner and outer plastic, then twisting it to pull out, but not remove, the center portion. Pull down on the fender liners to remove them.
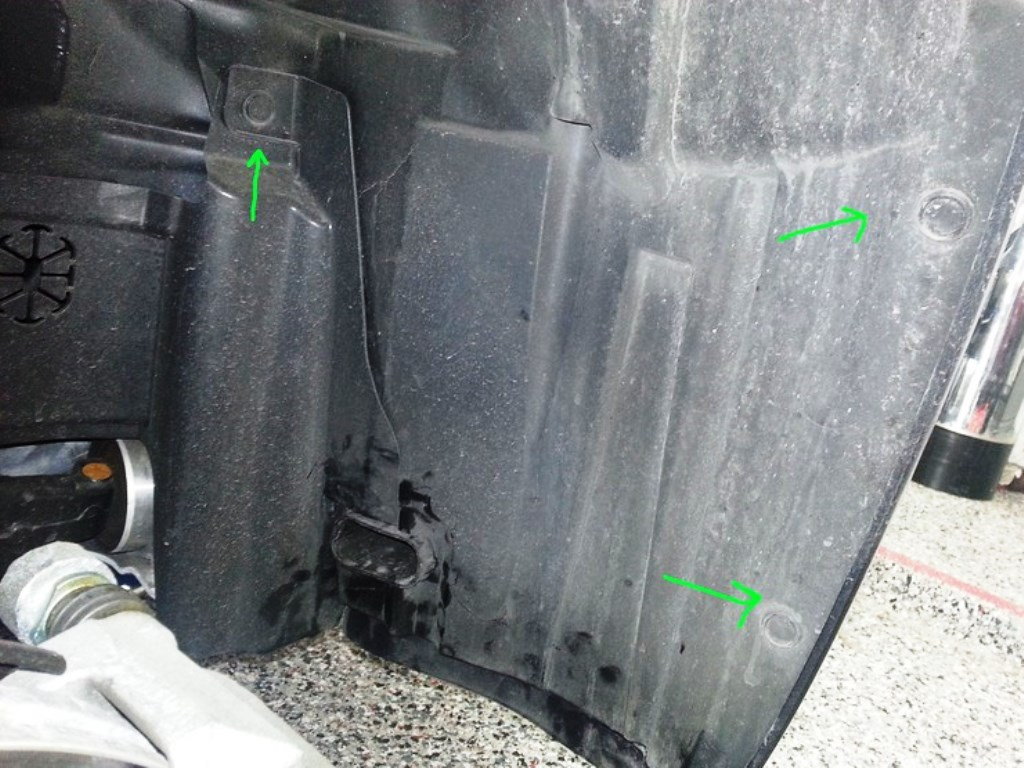
Figure 1. Snap connectors in the driver's side fender liner. 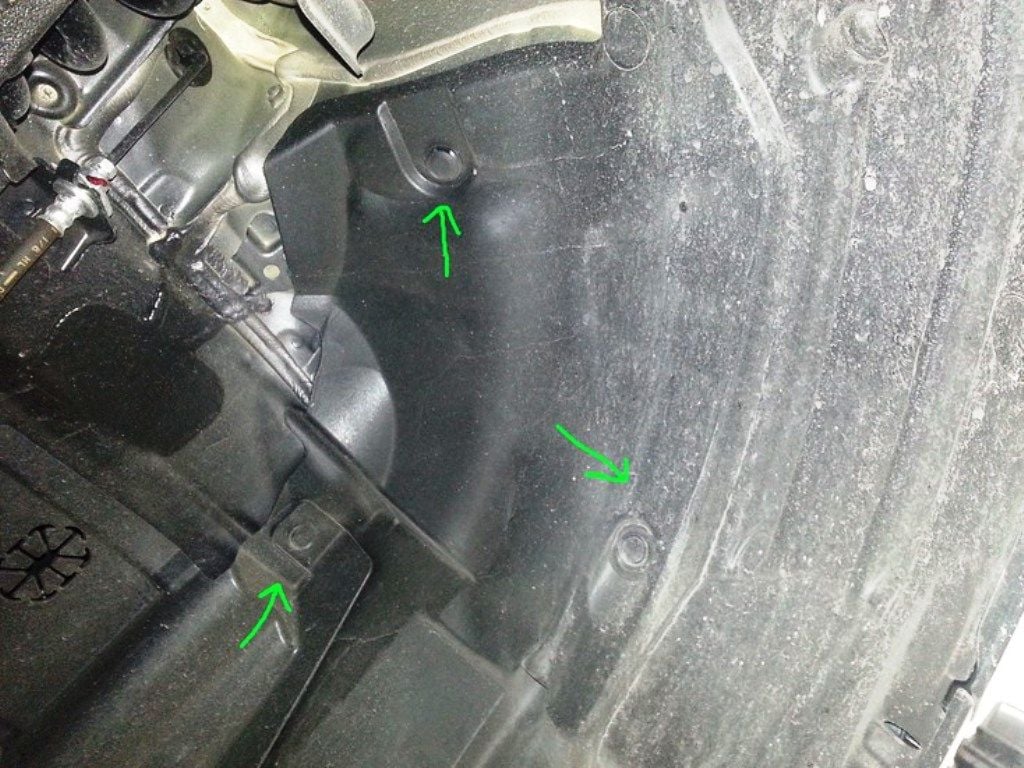
Figure 2. Snap connectors in the passenger side fender liner. 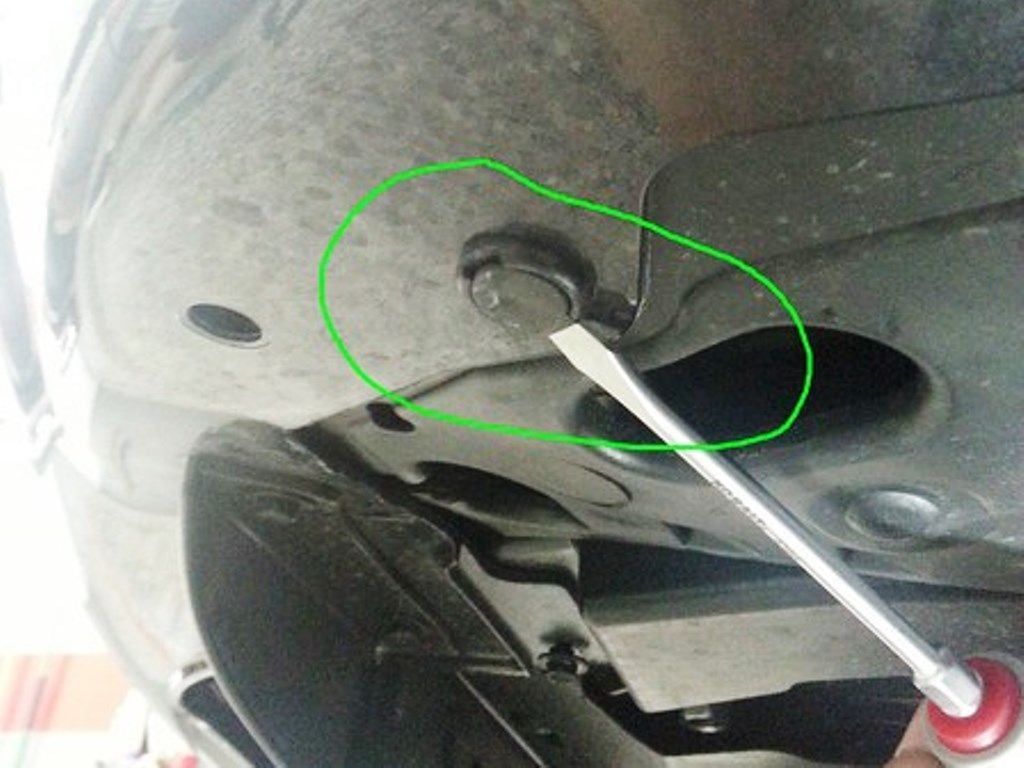
Figure 3. Pry out the center section of the snap connectors with a small flat head screwdriver to release them.
Step 2 – Replace HID bulbs
Remove the black cover over the headlight bulbs (the one with a warning sticker on it) by twisting it to unlock then pulling. Turn the silver connector (shown in Figure 4) clockwise until it stops, then pull it off. Place it out of the way near the bottom of the headlight housing. Unsnap the metal clip from the bulb (circled in green in Figure 7) and slide the circular ends of the clip toward each other. Pull down and move the clip out of the way. Pull the bulb base straight out. Remove the old bulb and install the new bulb with the slot on top, being careful not to touch the bulb with your fingers. Reinstall the clips, silver connector, and black cover. Reinstall the fender liners and push the center portion of the snap connectors back in place, then reinstall the wheels and lower the car from the jack stands.
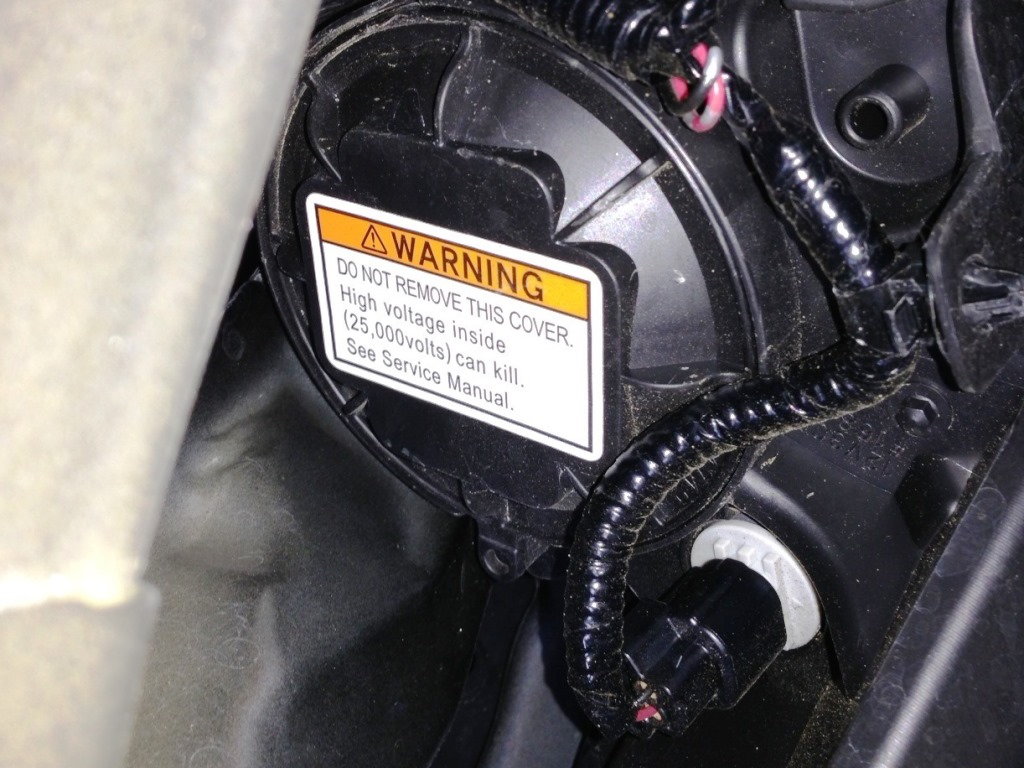
Figure 4. Turn black cover counterclockwise to unlock and remove. 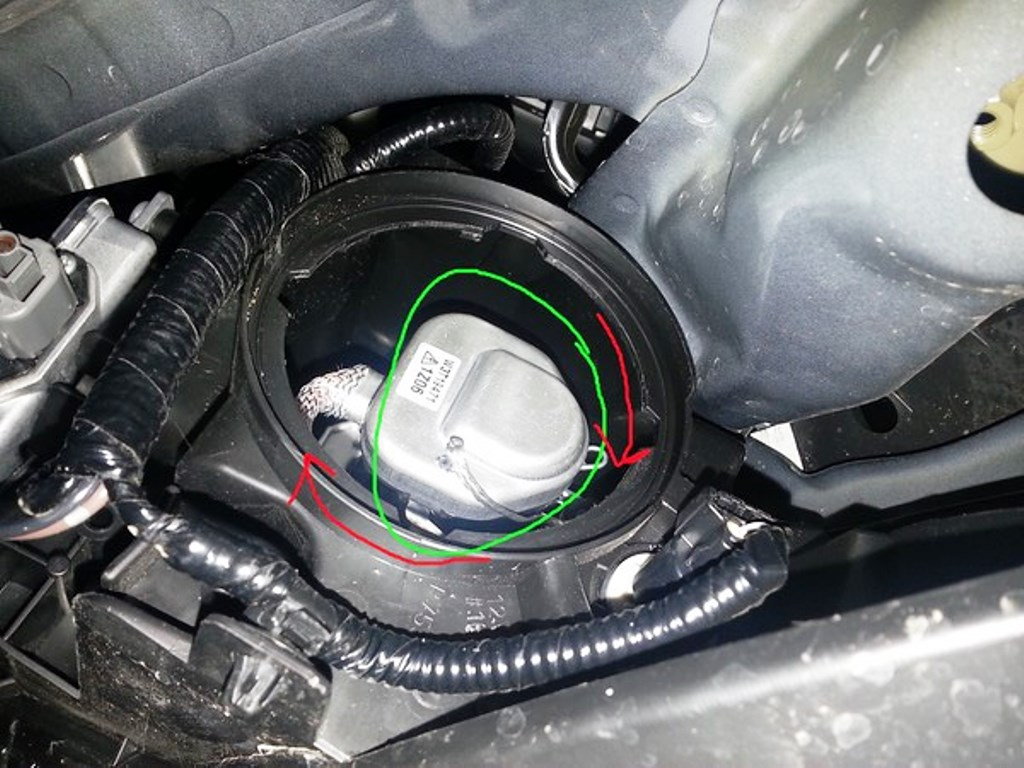
Figure 5. Remove the silver connector. 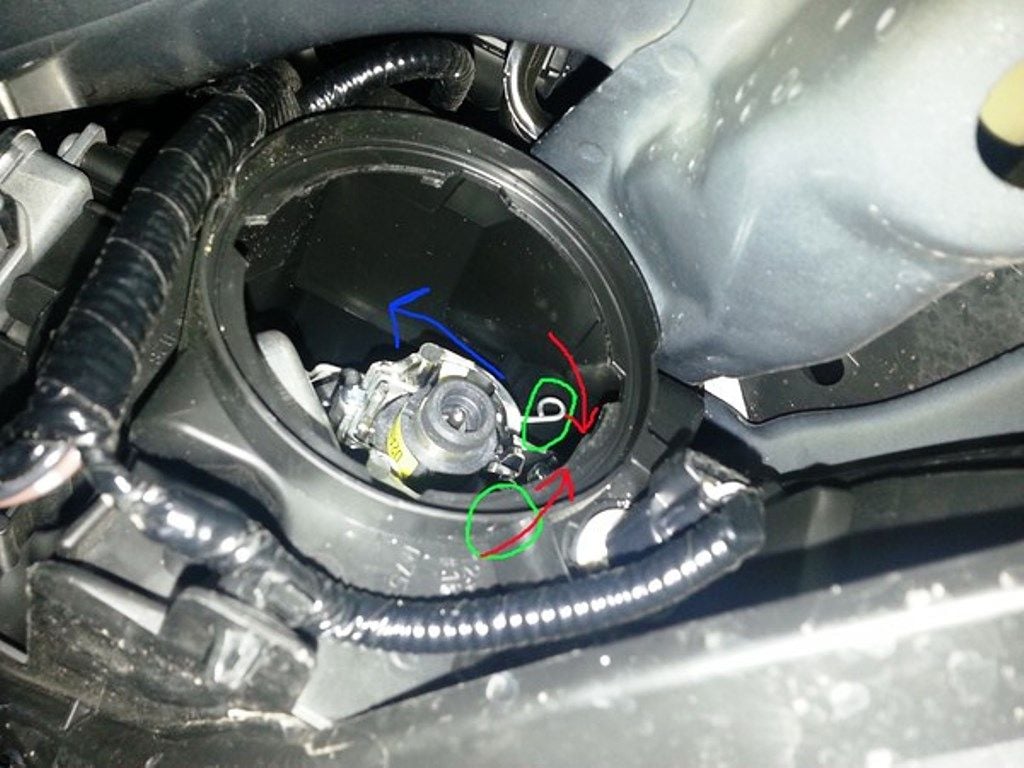
Figure 6. Remove the clips to access the bulb connector.
Pro Tip
Wear gloves to prevent oil from your fingers getting on the bulb and making it blow immediately. You can clean the bulb with rubbing alcohol if you do touch it accidentally.
Related Discussions
- How to Replace HID Bulbs in Headlights on 4th Gen TL - AcuraZine.com