Acura TL 2009-2014: How to Change the Oil
Changing the oil yourself is not a large task. You just need to know where everything is located and what to do with it. In the time it takes you to get down to the "Jiffy" joint, get the oil changed, and get home, you'd be done already!
This article applies to the Acura TL/MDX 3.5 (2009-2014).
Changing the oil is one of the rudimentary types of maintenance: you need to do it or the vehicle will suffer. The oil does so much work for the engine, including lubricating, cooling, cleaning, reducing friction, and much more. Letting the oil languish and get older will only cause engine damage. Purchasing a TL isn't exactly cheap, so keeping up with maintenance is a must if you want it to last as it should.
While getting the engine oil changed at a quicky joint isn't overly expensive, getting bombarded with a host of other maintenance suggestions will happen as well. Changing it at home is an easy option, seeing as how it can be done on your schedule and at your pace. No need to listen to the "jiffy" guy try to sell you a new serpentine belt which they replaced the last time you were in there. While this job isn't difficult by any stretch, you may not want to do it if you know there'll be an issue disposing of the oil correctly.

Materials Needed
- Jack, jack stands, and wheel chocks
- 17mm socket/ratchet
- Torque wrench
- Oil filter wrench
- Drain pan
- Funnel
- Nitrile gloves
- Shop rags
- 5W-20 oil
Factory recommendations for oil is to use 5W-20 in your Acura's engine. Using synthetic isn't required, but will usually prolong the life of your engine. Replacing the washer on the drain plug every time you change the oil is not only recommended, it really is a good idea to ensure no leaks occur.
Step 1 – Jack up and support the vehicle
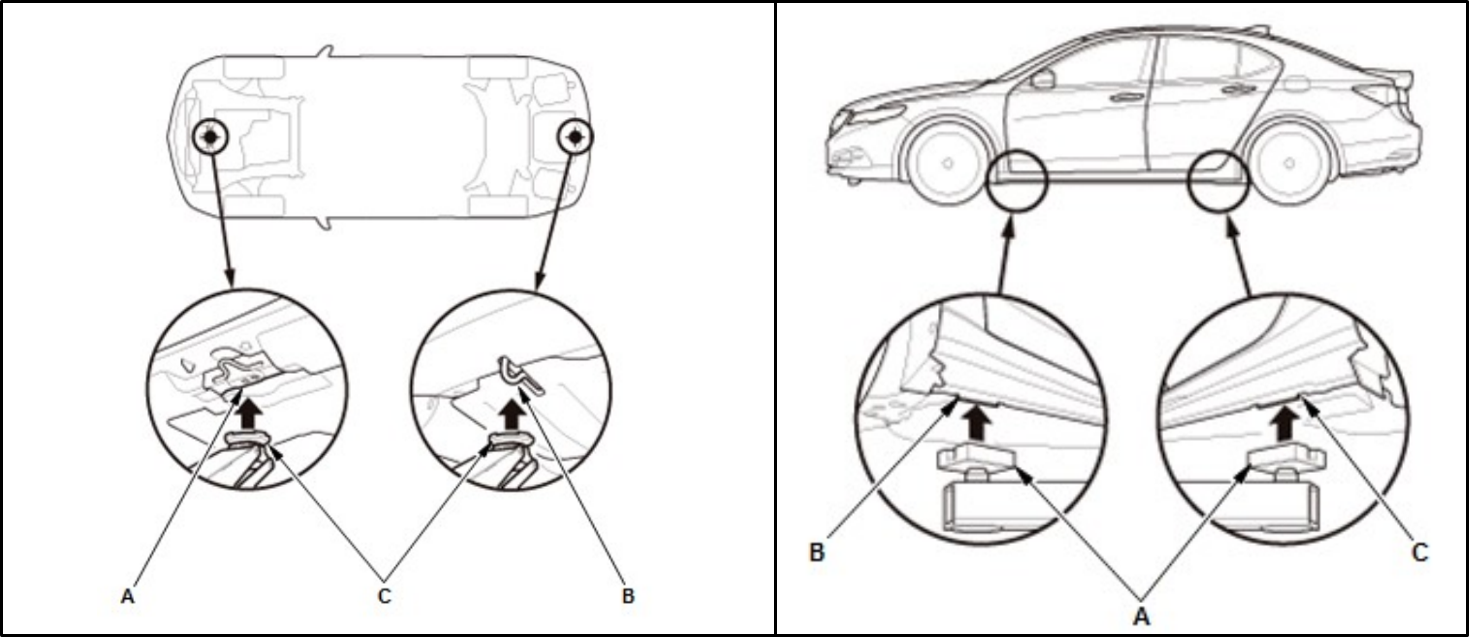
Place the wheel chocks before and after a single tire on the rear of the vehicle. Apply the parking brake. Using the jack, lift the front of the vehicle using the prescribed jacking points (left side, Figure 1), and place the jack stands (right side, Figure 1).
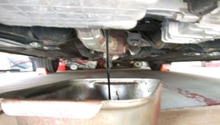
Step 2 – Drain the oil
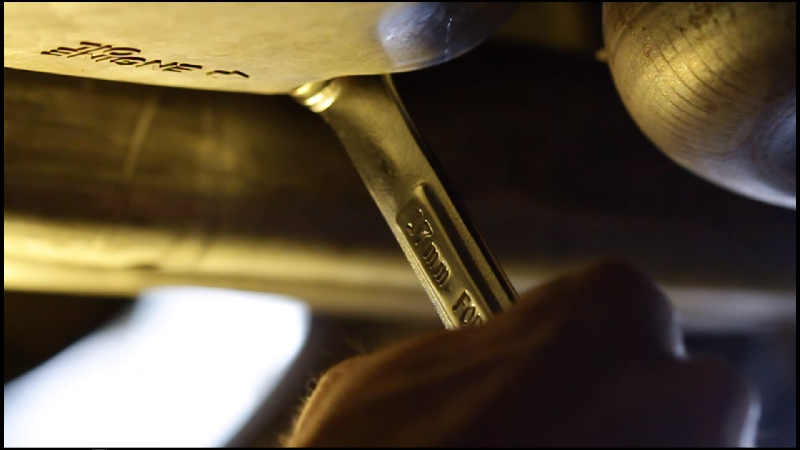
Pop the hood and raise it up. Place the drain pan under the vehicle near the center of the engine. Crawl under the vehicle with the 17mm socket and loosen the drain plug. Before pulling the plug all the way out, arrange the drain pan to ensure it will catch the oil. Remove the drain plug and allow the oil to drain. After the oil slows down to a drip, replace the drain plug (with the new metal washer if so desired). Tighten the plug to 29 lb-ft.
Pro Tip
Using a torque wrench to tighten the drain plug will not only get it properly tightened, it will ensure you do not strongarm it to the point of stripping the threads in the oil pan.
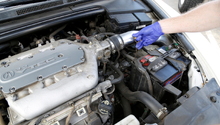
Step 3 – Remove and replace the oil filter
Turning the front wheels all the way to the right will allow the oil filter to be seen on the driver's side of the vehicle (Figure 3).
Place the oil drain pan directly under the filter. Loosen the oil filter using the filter wrench. As oil starts to flow, allow it to drain off the filter somewhat before unscrewing it completely. Once oil runoff has slowed down some, remove the filter by unscrewing it, placing it upside down in the drain pan. Ensure the old oil filter gasket has been removed with the filter. Clean around the filter boss location with a shop rag. Locate the new filter. Using new oil, fill the filter approximately 2/3 full. Dip a finger into the clean oil and swipe it around the new filter's gasket, ensure complete coverage. Screw the filter onto the filter boss, tightening it usually as tight as you can get it by hand (not with the filter wrench) or about 1/2 a turn after the filter gasket makes contact with the filter boss.

Pro Tip
You can utilize the filter for the S2000, which is a larger filter than what standardly comes on the TL. This will provide more filtering element and will provide better overall oil flow performance. A typical oil filter from a S2000 might be the Mobil M1-104.
Step 4 – Refill the oil
Back up top, remove the oil filter and place the funnel in the hole. Fill the oil, just shy of an entire five quart bottle, as the TL uses 4.5 quarts total. Remove the oil drain pan from under the vehicle if not done so already. Take the vehicle down off the jack stands. Start the vehicle and let it run for several minutes. While the vehicle is running, check the oil filter and oil drain plug for leaks. Stop the engine to allow the oil to drain back to the pan. Pull the dipstick and check the oil to ensure proper level. Add oil as needed if low.
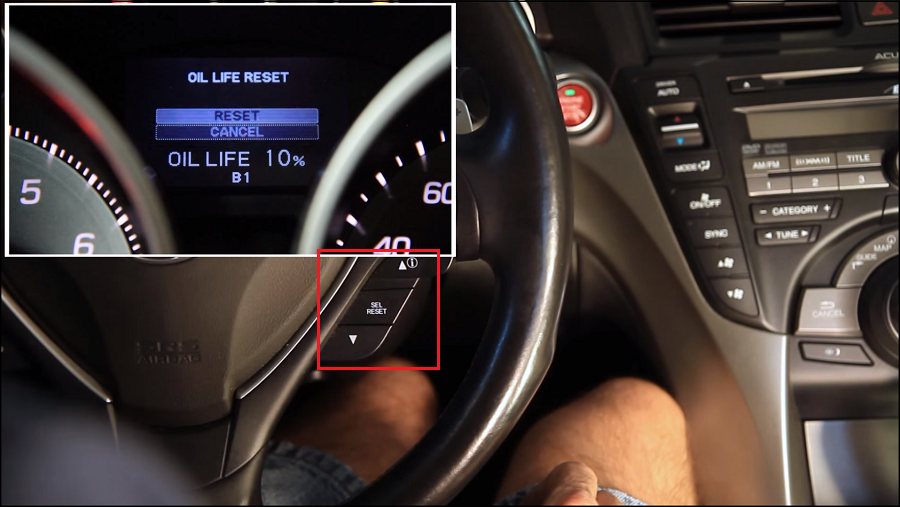
Step 5 – Reset the maintenance light
In the driver's seat, with your foot off the brake, press the engine start button once (or turn the key to position 1), then press the button one more time to get the display to come on. Do not step on the brake pedal as this will allow the car to start. Sitting for just a second will allow the Maintenance Minder to appear. Press the Select/Reset button until you get to the oil life selection. Then press and hold the Select/Reset button for 10 seconds until the Oil Life Reset menu appears (Figure 4). Use the arrow selector buttons to highlight RESET, then press the Select/Reset button to reset the Oil Life meter.
Featured Video: Acura TL Oil Change
Related Discussions
- Oil Filter - Acurazine.com
- Low oil warning - Acurazine.com
- Getting 8k miles about mid before 0% oil life - Acurazine.com
- How often do you guys check your oil? - Acurazine.com
- Fumoto oil valve review thoughts - Acurazine.com