Acura TL 2004-2008: How to Replace Oxygen (O2) Sensor
While not a fun job, replacing the O2 sensors on your TL will give your ride better mileage and manners. Replacing them when needed will quickly save the driver enough in fuel to overcome the replacement cost. Read on to get the low down on replacement.
This article applies to the Acura TL (2004-2008).
The O2 sensors give the computer indication of how much oxygen is in the exhaust stream, and therefore allow it to make decisions on how much fuel to put into the system to get the air/fuel mixture as close to stock as possible. While the O2 sensors don't need to be changed very often, usually every 100k miles, they do grow lazy over time. When this happens, fuel mileage suffers. Usually the fuel mileage goes down over an extended period of time, so slowly that most vehicle owners don't realize it has happened. Once replaced and the computer is reset, fuel mileage will go up, sometimes dramatically. This job is usually a little harder than most for one reason: after 100,000 miles in the very hot exhaust system, the O2's will be nearly welded into place.

Materials Needed
- Ratchet and/or breaker bar
- O2 sensor socket
- Extensions as needed
- Anti-seize compound
Selecting the right O2 sensor to replace can be difficult to figure out for the uninitiated. For the TL, there are four different O2 sensors: two located before the cats (upstream) and two after (downstream). Specifically, the one to the rear of the engine and before the cat is considered bank 1, sensor 1 or B1S1. The sensor after the cat on the same side is considered bank 1, sensor 2, or B1S2. The sensors at the front of the engine are considered B2S1 and B2S2, respectively.
It is stated on the forums to stay away from the Bosch generic sensors, as these don't work well with the engine management on the TL. There are several brands which can be chosen, but Honda/Acura OEM sensors are preferred. You can never go wrong with OEM anything. It is also highly recommended to change out the O2 sensors in pairs. If you have a code for one sensor being bad (upstream), replace both. The downstream sensors are not nearly as important to replace in pairs as their only job is to ensure the proper function of the cat and do not affect how the engine itself runs.
Step 1 – Remove engine covers and retrieve radio code
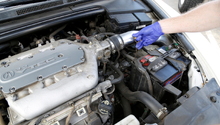
Raise the hood. If present, remove all of the engine covers, because they will be in the way.
If you don't already have them, retrieve the five digit radio code. There are three basic places where the code might be. First, look in the owner's manual. Originally there was a card which came from the factory with the code on it along with the serial number. Second, it may have been written in the maintenance manual by the technician who first worked on the car when it was received by the dealership. Third, the code may be on a nondescript white sticker, which would have been placed either in the glove box or in the trunk, again, by the first technician.
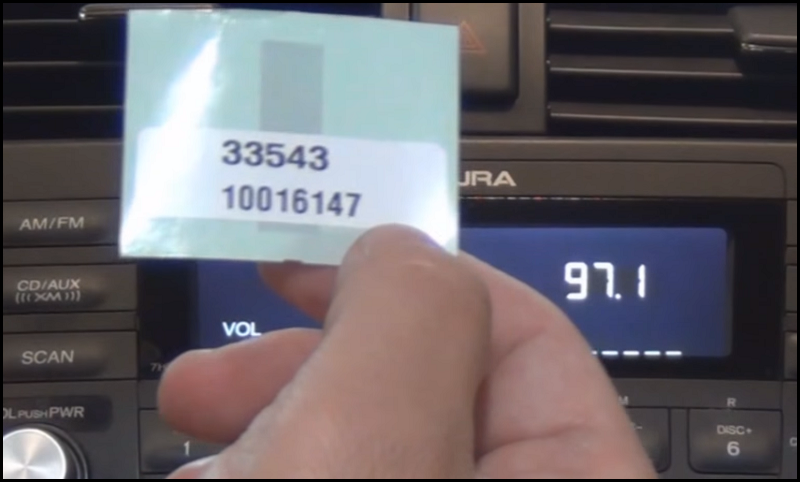
If the code cannot be found in any of these places, all is not lost. Retrieve the serial number of the radio from the radio itself by pressing the 1 and 6 buttons at the same time, then pressing the on button. The eight digit number will appear in the display in two segments. Call Acura Client Services at 1-800-382-2238 with your VIN as well as the serial number and they can give you the code. After you are sure you have the radio code, disconnect the battery so the computer will reset fuel tables back to factory.
Step 2 – Remove strut tower brace
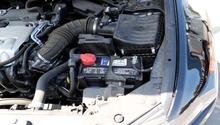
Remove the strut tower brace by removing the three 12mm nuts and single 10mm bolt from the passenger side (left side Figure 2), then remove the three 12mm nuts and two 10mm bolts from the driver side (right side Figure 2). To make removal of the bolt on the passenger side easier, disconnect the attached part of the wiring harness (red arrow, left side Figure 2).

Step 3 – Remove O2 sensor
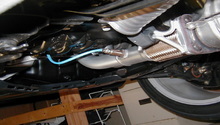
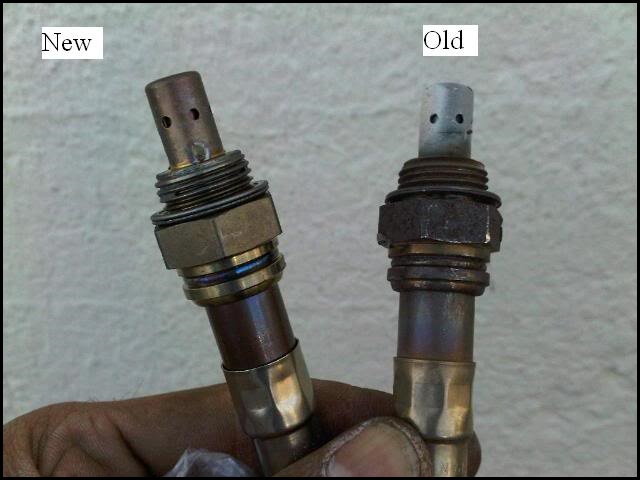
Locate which O2 sensor from Figure 3 will be removed first. In the image, the sensors are numbered 9, 10, 11, and 12. Use the O2 sensor socket to break the sensor free. Disconnect O2 connector from wiring harness. Use the socket, if necessary, to finish unscrewing the sensor and remove from vehicle. A 7/8" combination wrench can sometimes be of use here to help removal. Check the old sensor against the new sensor to ensure the wiring plugs are the same configuration before proceeding. Depending on which brand is purchased, the sensor end may be different.

Pro Tip
During removal, if you check the pigtail of the old sensor against the new sensor and ensure you have the correct sensor, cut off the pigtail of the old sensor. This makes it much easier to pull the O2 sensor rather than fumbling with it as the sensor turns around and around.
Step 4 – Install new sensor
Note
Don't touch the business end of the O2 sensor, as this can damage or destroy it before it's ever installed.
Place a small amount of anti-seize compound on the threads of the sensor. Screw the sensor into the sensor bung and hand-tighten. Finish tightening by using the socket. Ensure the crush washer is in full contact with the bung to prevent leaks into the exhaust system, which could interfere with proper O2 function.
Step 5 – Re-code the radio
After replacing affected sensors, replace the strut tower brace. If the procedure has taken more than 30 minutes, connect the battery. Using the code obtained in Step 1, turn on the vehicle to see "code" in the display. Input the five digit code and the radio should become live again.
Note
If navigation is installed in your TL, it will require a four digit code. If the sticker for the radio was placed, the Navi code should be close by.
Related Discussions
- DIY Oxygen O2 Sensor Installation - AcuraZine.com
- Oxygen Sensor Location - AcuraZine.com
- Check Engine Light P2243 P0134 Oxygen Sensor - AcuraZine.com
- P0161 O2 Sensor Heater Circuit Malfunction B2S2 - AcuraZine.com
- How Do I Replace Front Oxygen Sensors - AcuraZine.com