
Mini Review: Meguiar's PlastX
 02-27-2011, 05:21 PM
#1
Racer
Thread Starter
Mini Review: Meguiar's PlastX
Ive had a bottle of this stuff just laying around my house waiting for me to use. I had some extra time today after cleaning my car, and I decided to give it a go.
Before I begin, I must say that at first I was very skeptical. I was actually planning on using a more heavy duty kit such as 3M's headlight restoration kit.
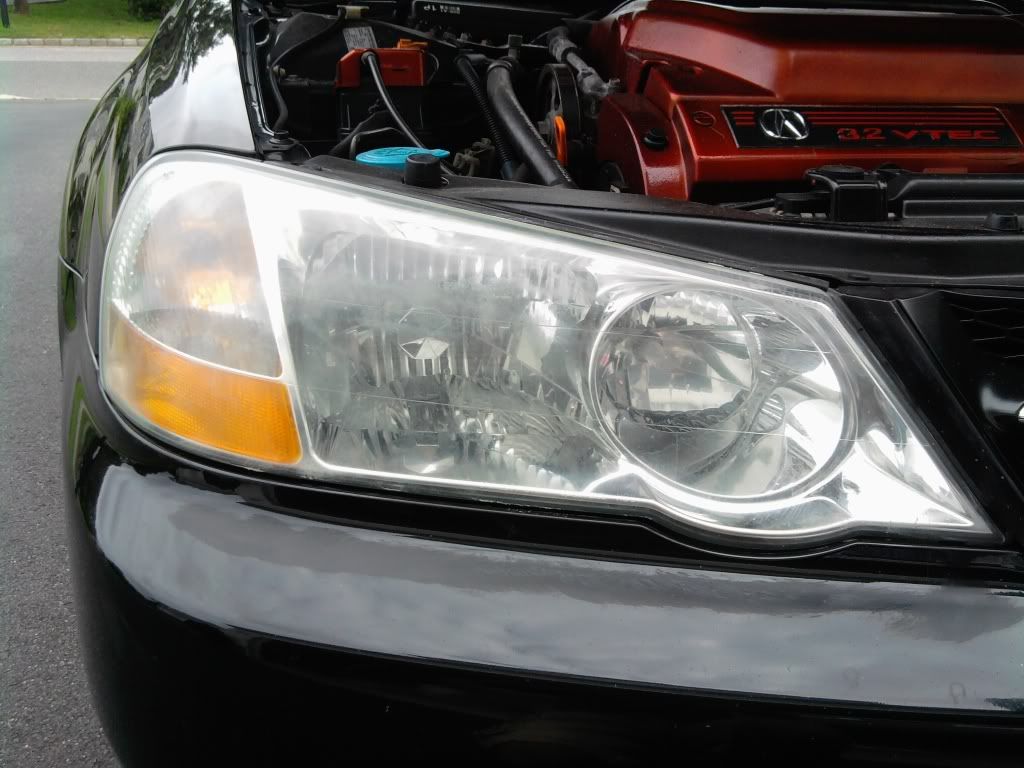
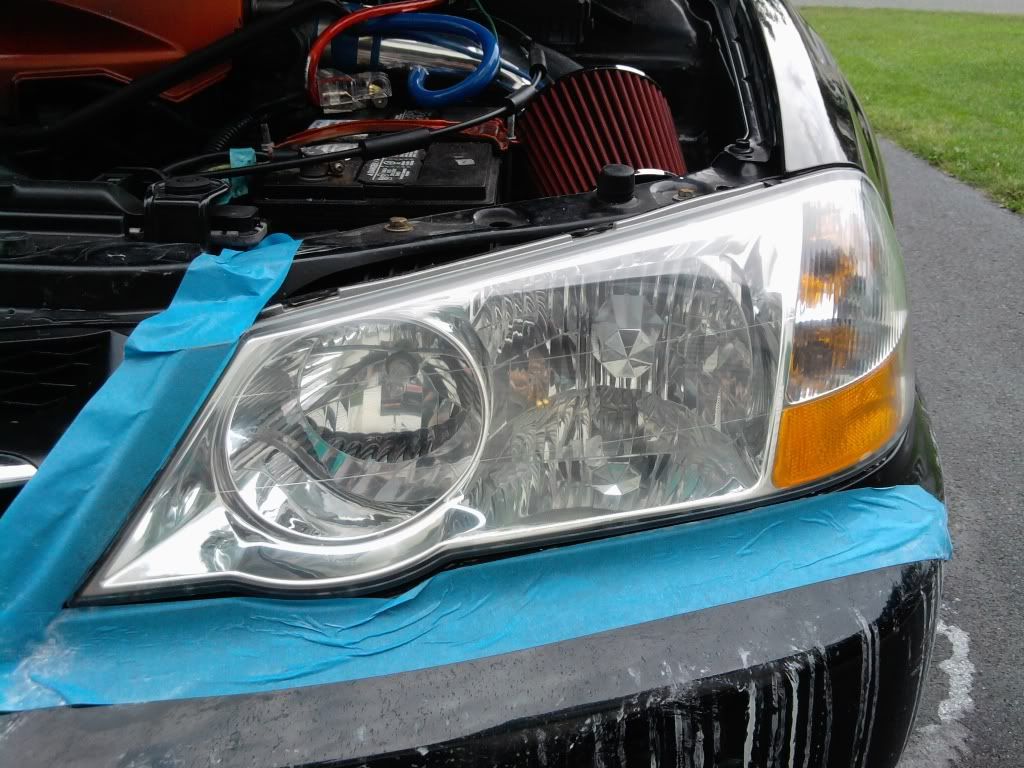
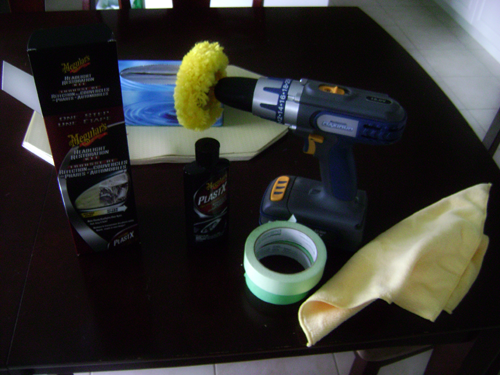
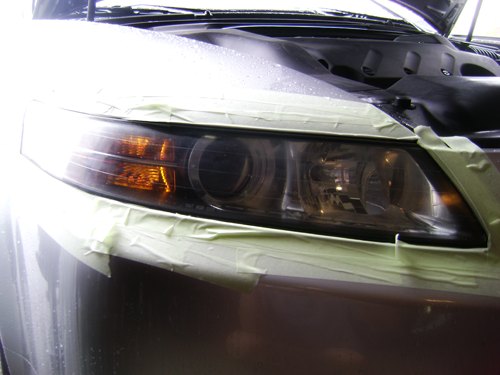
Instructions are simple, apply a bit to an applicator pad then rub it in. I kept adding more plastx when it was difficult to continue rubbing. After your done, you simply clean off the residue with a terry cloth. I did this twice per headlight. It was obvious that I was working since during my first pass over the headlights, the applicator pad had a dirty orange color on the parts i was rubbing with. On the 2nd pass, I used a different section of the applicator pad. There was alot less of that orangy residue.
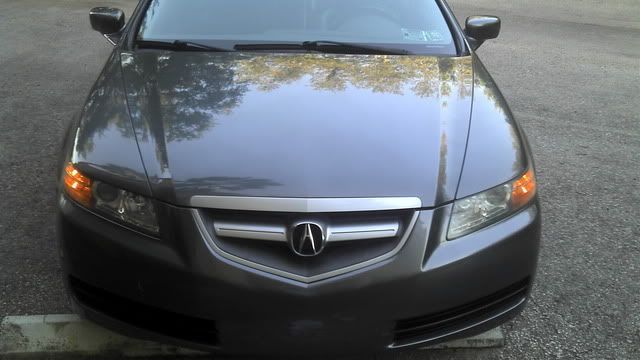
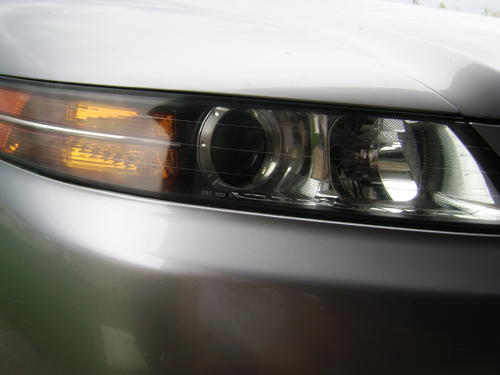
In the end, I was extremely impressed. my TL's headlights have been neglected for a little over 7 years now (had my TL for seven years and one week now ). Although this didnt bring them back to a factory clearness, its certainly not embarrassing anymore. The haze was terrible, so bad that it was difficult to see the projectors. PlastX vastly improved the look, and it only took about 30-45min overall. I probably will still end up getting the 3M kit at a later day, but PlastX definitely makes me feel better about my car in its current state. Here are some poor pictures of the results. I dont feel that the pictures do a good job of representing what an improvement was made, but this thread would be worthless without them
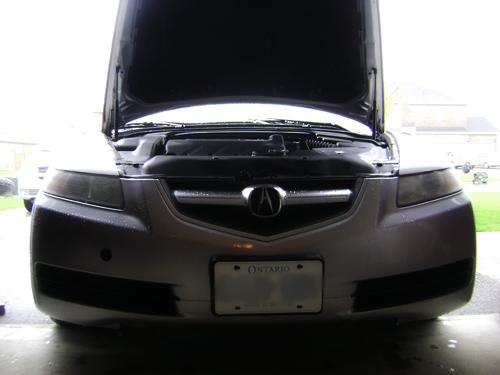
Before passenger side headlight
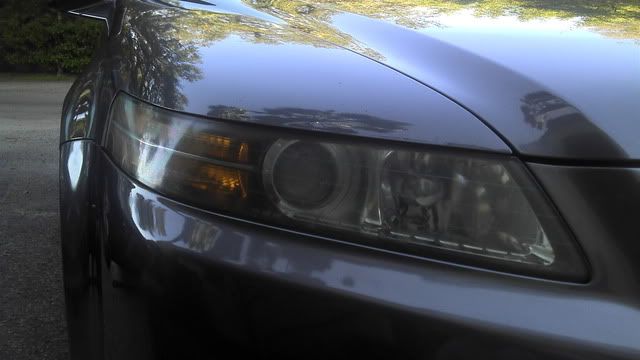
After passenger side headlight
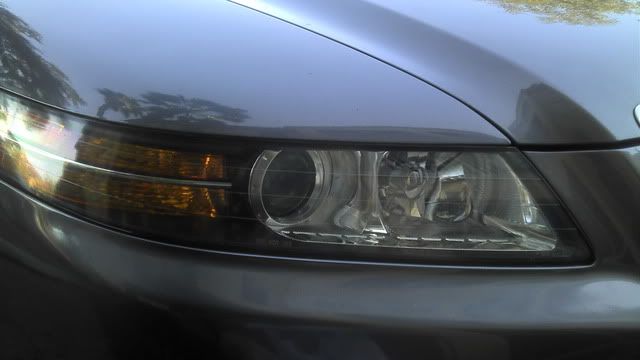
Before driver side headlight
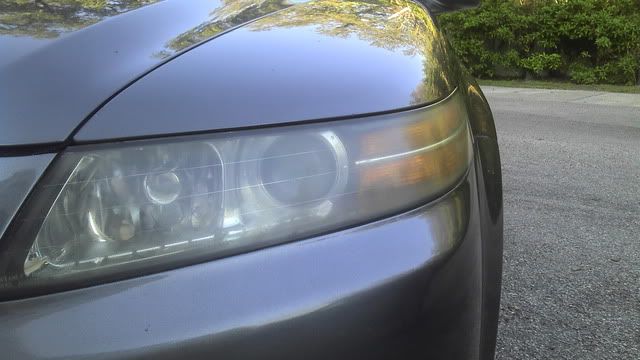
After driver side headlight
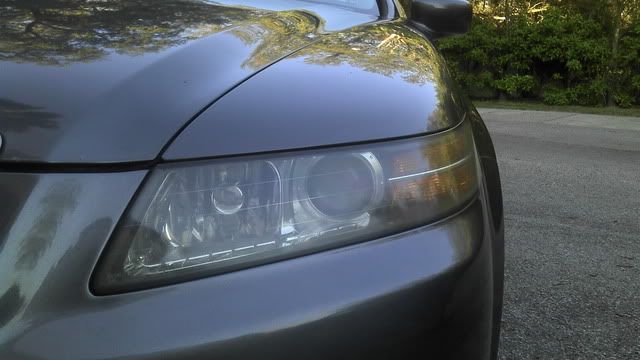
Finished!
Before I begin, I must say that at first I was very skeptical. I was actually planning on using a more heavy duty kit such as 3M's headlight restoration kit.
Instructions are simple, apply a bit to an applicator pad then rub it in. I kept adding more plastx when it was difficult to continue rubbing. After your done, you simply clean off the residue with a terry cloth. I did this twice per headlight. It was obvious that I was working since during my first pass over the headlights, the applicator pad had a dirty orange color on the parts i was rubbing with. On the 2nd pass, I used a different section of the applicator pad. There was alot less of that orangy residue.
In the end, I was extremely impressed. my TL's headlights have been neglected for a little over 7 years now (had my TL for seven years and one week now
). Although this didnt bring them back to a factory clearness, its certainly not embarrassing anymore. The haze was terrible, so bad that it was difficult to see the projectors. PlastX vastly improved the look, and it only took about 30-45min overall. I probably will still end up getting the 3M kit at a later day, but PlastX definitely makes me feel better about my car in its current state. Here are some poor pictures of the results. I dont feel that the pictures do a good job of representing what an improvement was made, but this thread would be worthless without themBefore passenger side headlight
After passenger side headlight
Before driver side headlight
After driver side headlight
Finished!
 02-27-2011, 05:32 PM
#2
Race Director
iTrader: (8)
Nice job!
I used the headlight restoration kit (which includes PlastX) when I bought my car with hazy headlights, and they work wonders.
I wetsanded my headlights first, then applied PlastX =)
I used the headlight restoration kit (which includes PlastX) when I bought my car with hazy headlights, and they work wonders.
I wetsanded my headlights first, then applied PlastX =)
02-27-2011, 06:17 PM
#3
Racer
Thread Starter
I just went out and looked at them again. They honestly look so much better then these pictures show. I love the result.
What did you grit did you wet sand with?
What did you grit did you wet sand with?
02-27-2011, 06:25 PM
#4
Suzuka Master
you can start out with ah heavy grit then work up but your better off to be patient and use 2500 wet.
Look in the detail forum this has been covered a few times.
Look in the detail forum this has been covered a few times.
 02-27-2011, 08:57 PM
#7
Racer
I used PlastX on my pressure gauge for my 20gal air compressor. It went from barely being able to read the readout to 98% clear, except for the burn spots from welding.
Trending Topics
 02-28-2011, 08:19 PM
#9
Race Director
iTrader: (8)
I believe I went 1500 grit first, then 2500 grit - can't remember too well haha
Getting ready:
Before: (It was kinda raining, too)
During:
After:
The next week after, I wasn't too happy with my job so I just used PlastX and rubbed it in haha.
Almost good as new =)

Getting ready:
Before: (It was kinda raining, too)
During:
After:
The next week after, I wasn't too happy with my job so I just used PlastX and rubbed it in haha.
Almost good as new =)


Thread
Thread Starter
Forum
Replies
Last Post
rockyboy
2G RDX (2013-2018)
171
08-04-2024 10:35 AM
detailersdomain
Wash & Wax
3
10-09-2015 10:13 PM
detailersdomain
Wash & Wax
0
09-03-2015 10:56 PM