When you click on links to various merchants on this site and make a purchase, this can result in this site earning a commission. Affiliate programs and affiliations include, but are not limited to, the eBay Partner Network.
G-100: DIY LED Interior Part III: Steering Wheel LEDs (Audio and Cruise Modules)
Well...this was a long time coming, a long time in the making, but lo and behold, we're finally here. This will be MY version of the steering wheel LED install, sans hotspots and featuring some serious illumination. I'll make something abundantly clear before we begin - this is NOT an easy LED retrofit, and I do NOT recommend doing this unless you have some serious balls, moderate soldering/LED experience, the patience of a monk, or an overwhelming desire to drive yourself crazy. I don't paint it in this context for purposes to extol what has been done here, but as a warning that while I would absolutely consider the other DIYs completley do-able to a novice, this one is by far the most challenging of the set. If you have any question, PLEASE ASK. I'm here to help everyone a best I can.
First let me say a big thanks to dwb993 for his help in answering my endless PMs and maddssick for his guidance in getting everything done. Without the help of my fellow AZiner's, this would have taken A LOT longer. THAT'S community.
LET'S GO! TOOLS NEEDED
#2 Phillips Head Driver
T30 Torx Socket
Ratchet
+6" Ratchet Extension
Soldering Iron
MATERIALS
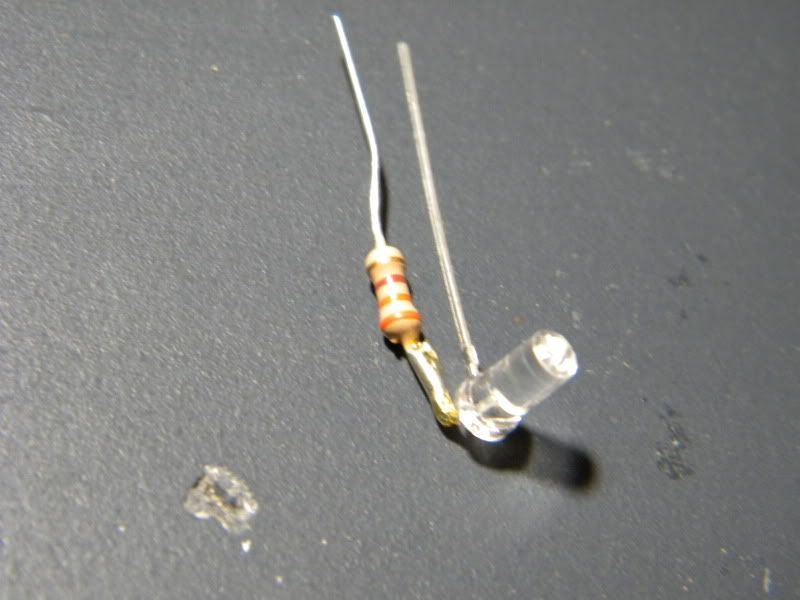
8 x 3mm bulb to your liking...I am used wide-angle flat headed 3mm bulbs
Solder
FLUX, I CANNOT STRESS THIS ENOUGH
8 x 1k-ohm resistors if you like it bright (4 x thin-film, 4 x carbon composite)
8 x 3.3k-ohm resistors if you want it closer to stock
4 x 242mm zip ties
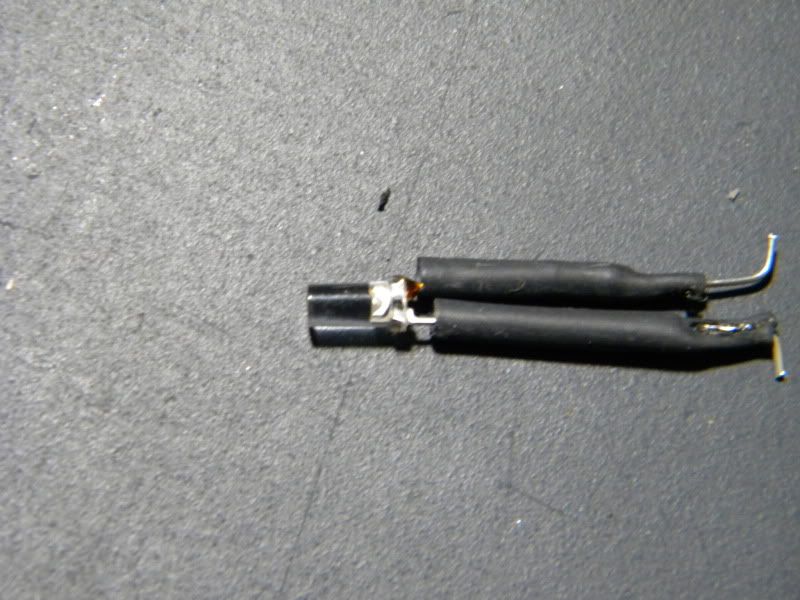
Small shrink tube NOTE: If you plan on using white...DON'T. There is an issue with white LEDs that is literally blowing my mind and I am attempting to resolve.
TIME
Holy shit, I don't know...took me well over 10 hours, maybe close to 15, but bear in mind I was trying all sorts of crazy shit.
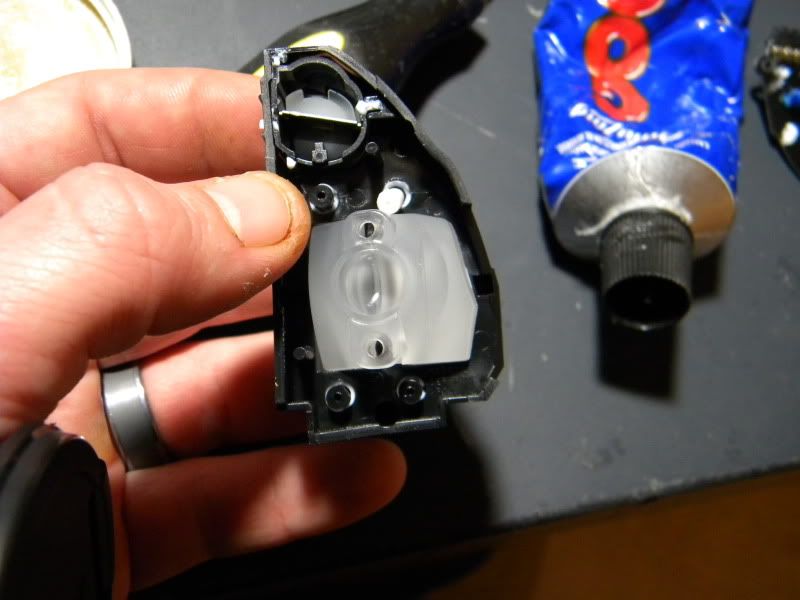
STEP I - BOMB TECH, 101
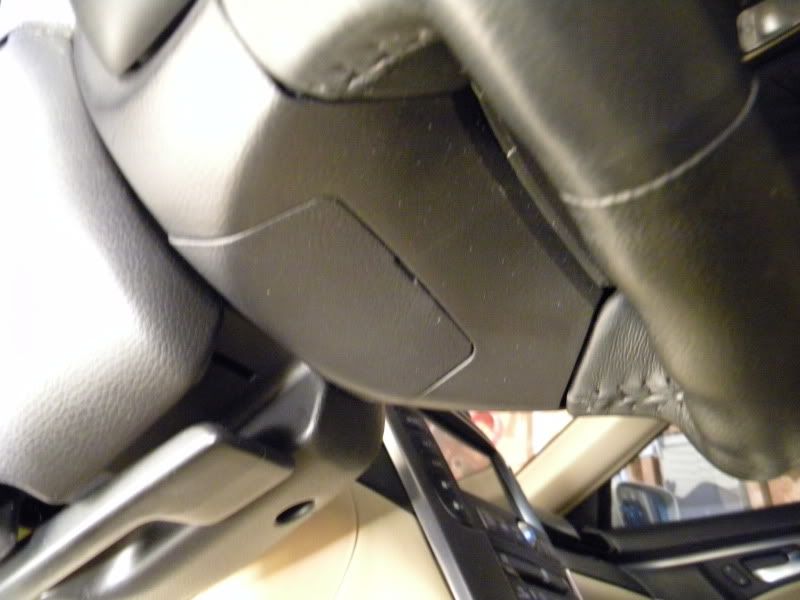
Yeah, so, I don't normally post how to remove panels, but for this one I will. Your first job will be to remove the airbag, which sounds intimidating, but in all honesty, it's quite easy.
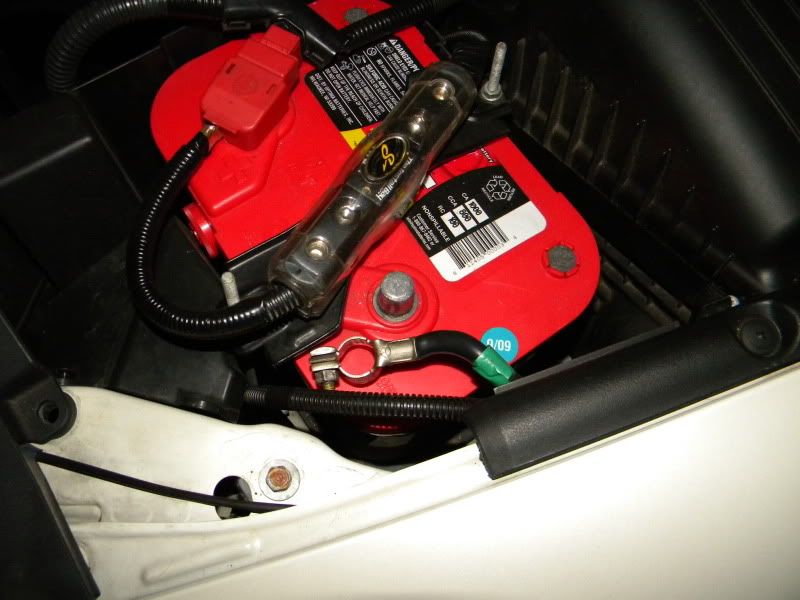
First, unplug the battery and allow the system to discharge (heh-heh...I said discharge)
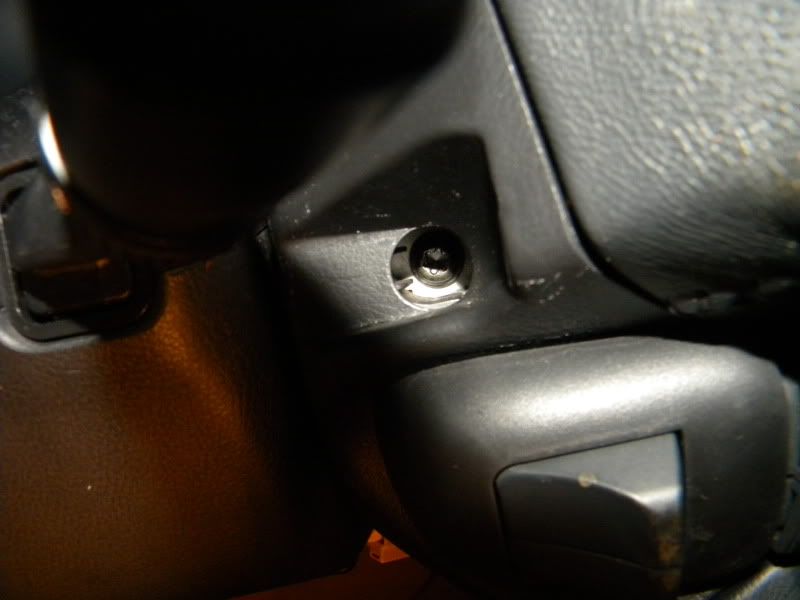
Ok, now, you're going to need to unplug the airbag. Remove the cover beneath the wheel and then pull the spring retainer back to get the whole thing going. Smart thinking, obviously this person did not design the lighting array...you'll know what I mean shortly.
Sweet, easy enough, right? Ok, now use the torx bit to drive the two bolts out...there's an opening on the left and the right. Don't position yourself in front of the airbag unless you've got a hidden desire to act as one of those vaudville carnies whom took cannoballs to the gut for a nickel...only you won't get a nickel, you'll probably get a trip to the ER, months of rehab, and a $xxx bill to replace the bag if something goes awry.
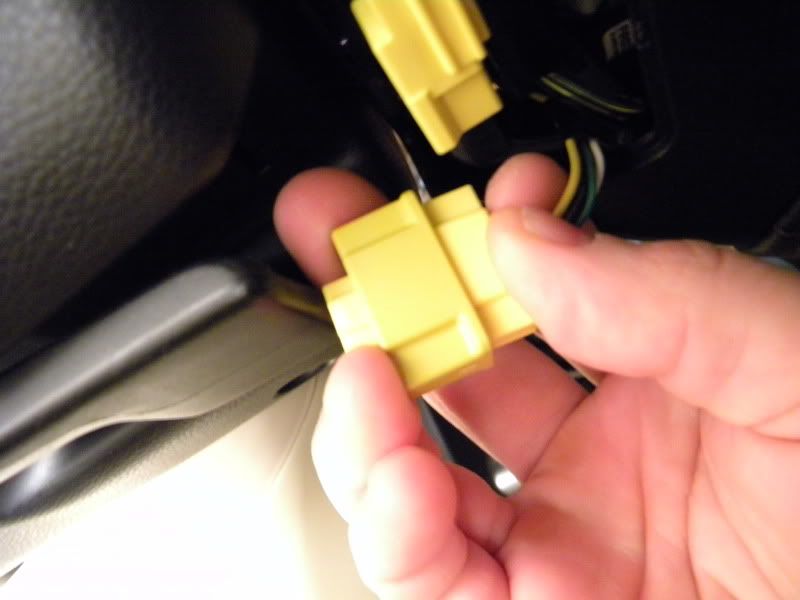
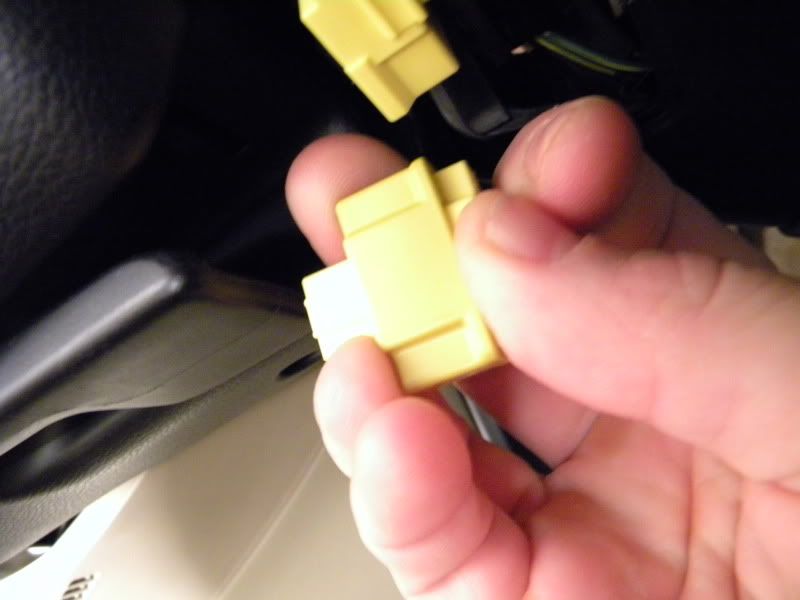
It should pull right out, now. Finally, remove the horn contact.
Place the bag aside in a SAFE location and resist the urge to tempt the fates and wonder what it takes to blow one of these suckers.
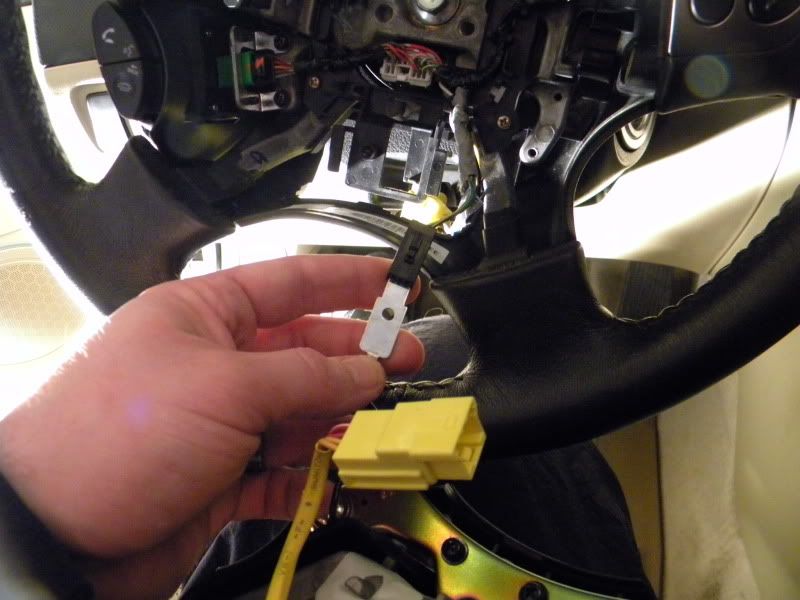
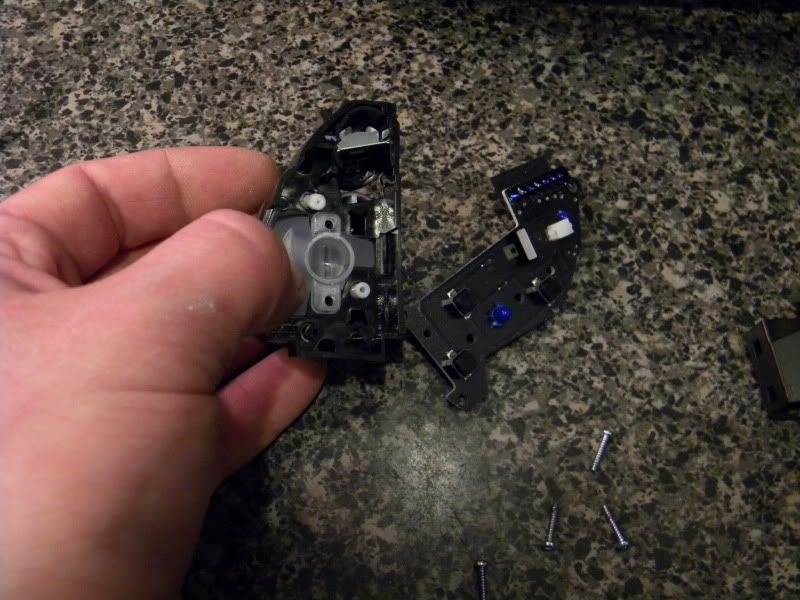
STEP II - THOSE @#$%ING SWITCHES
I don't know about you guys, but this part was an effing nightmare for me. First, start by positing your wheel in an INTELLIGENT location, i.e.perpendicular to the dash. In order to do this, you'll need to reconnect the battery and give her powah...which is not a problem, now. There are two incredibly difficult to remove screws in the back of the audio and cruise panels, which should be a straight shot were it not for the flexible plastic that leads you to believe you're turning the screw when you're really just dulling the tip of said driver against the fastener. Anyway, back them out, and pop off.
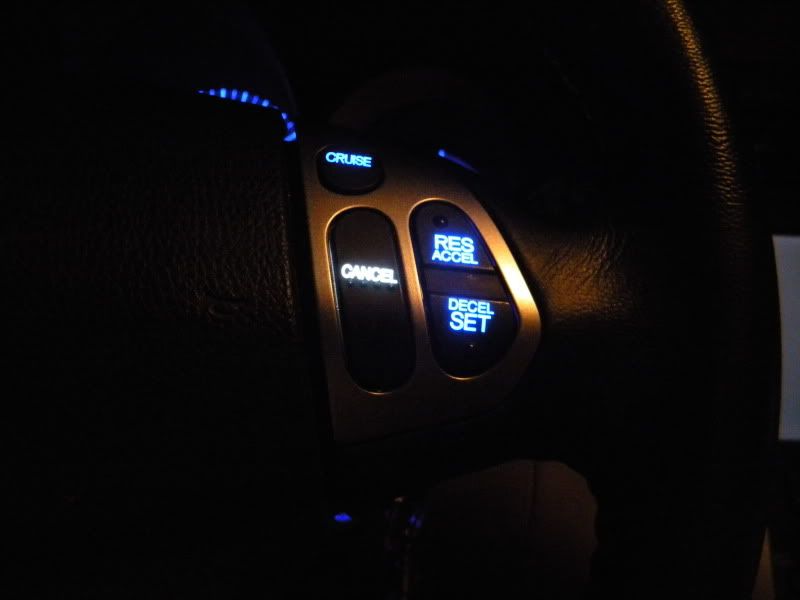
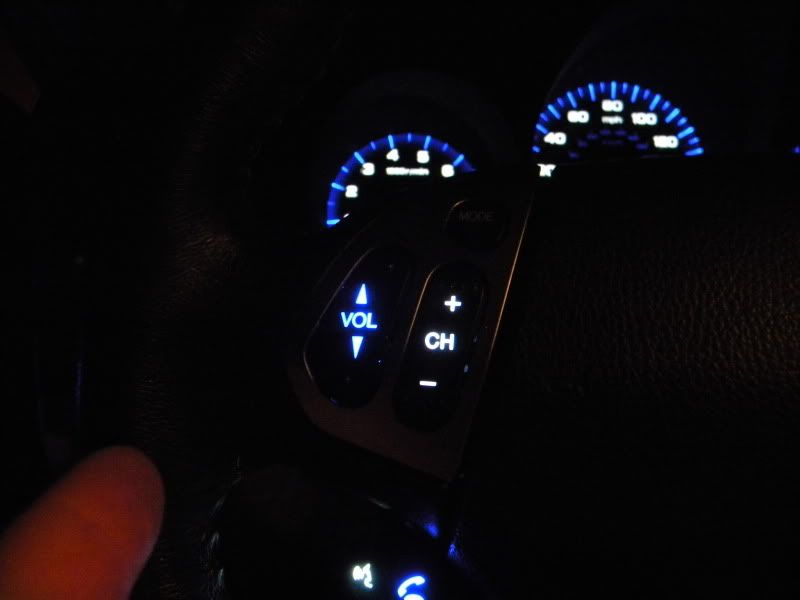
STEP II - CRUISE/AUDIO
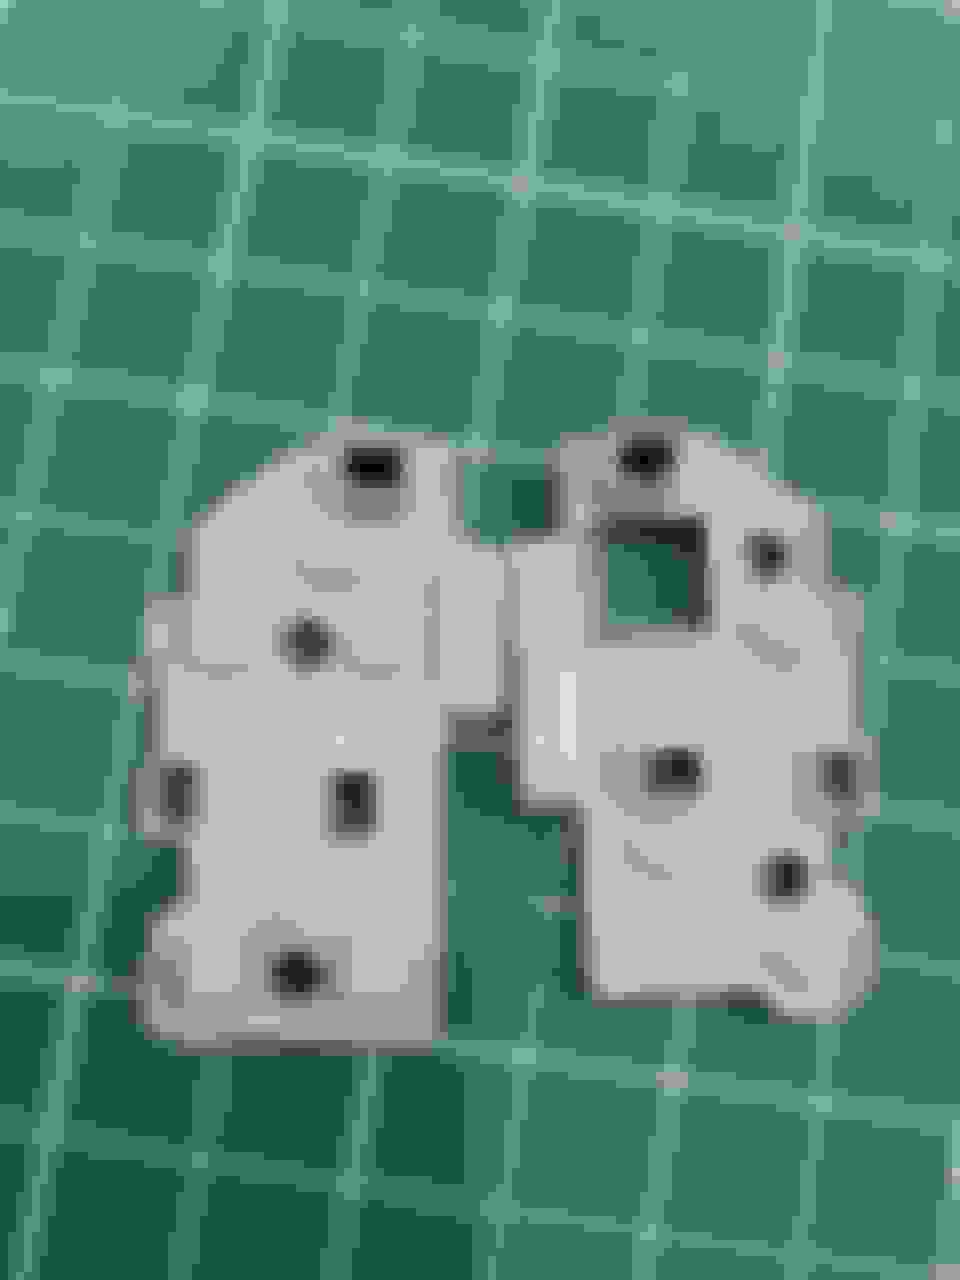
I was going to start with the HFLs, but that was a small battle. Instead, let's start here. While I tried MANY different ways to do this, this was the one I like best. Wanna hear something funny? The grease acts as a sound dampener, who'd a thunk?
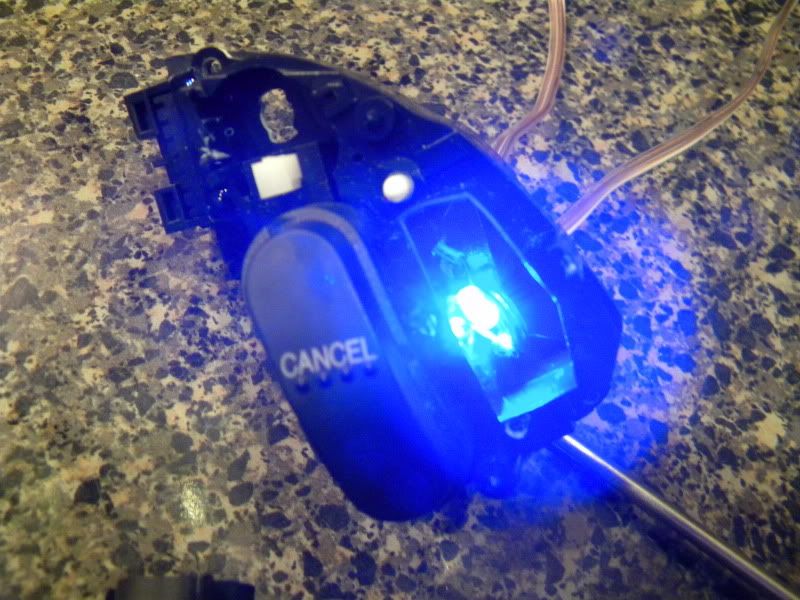
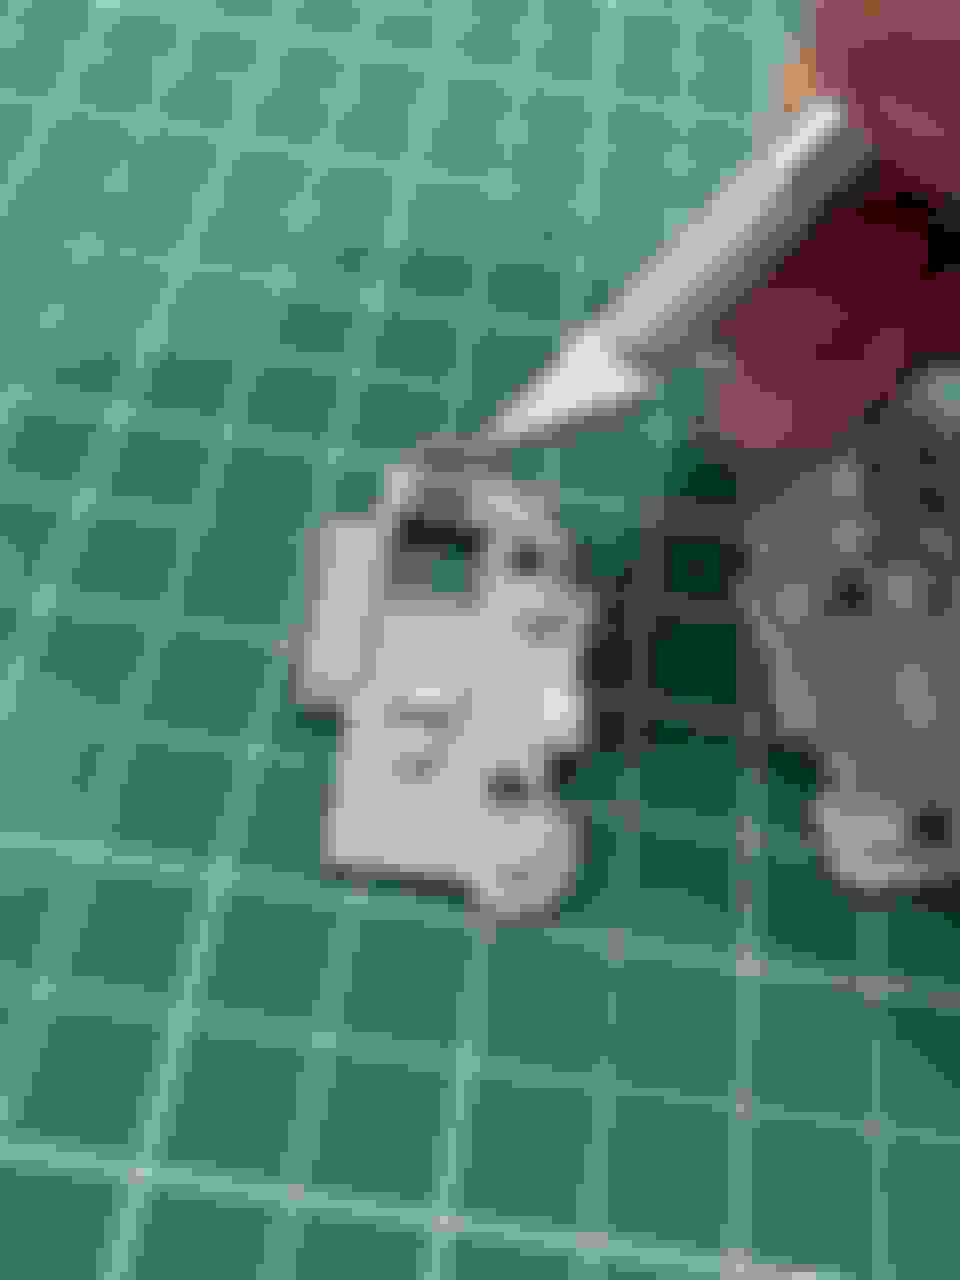
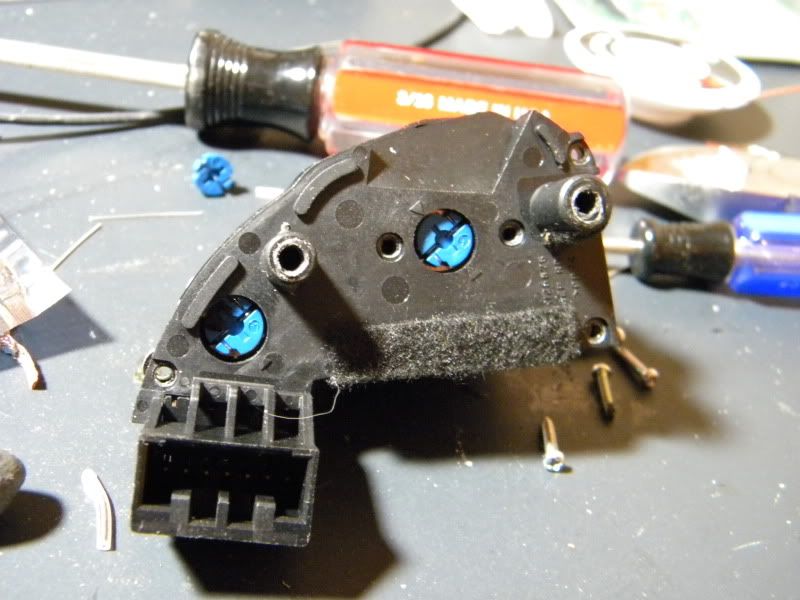
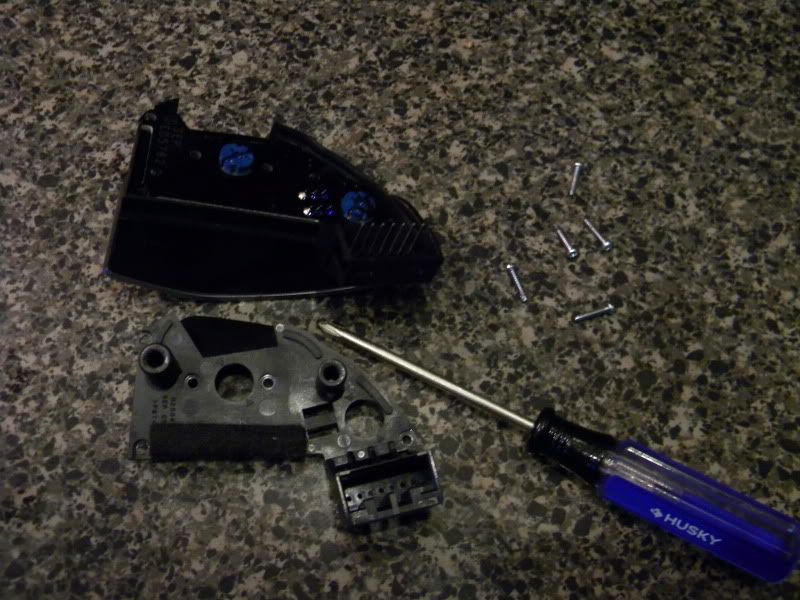
Start by removing the 5 small Phillips screws of the switch.
Take the cover off, and pitch the crap diffusers. DO NOT LET THE MODE BUTTON HIT THE FLOOR!!! Seriously. There's some crazy tolerance crap going on there and it took me about an hour with a box of q-tips, lithium grease spray, and mineral spirits to get this thing actuating again in a proper fashion.
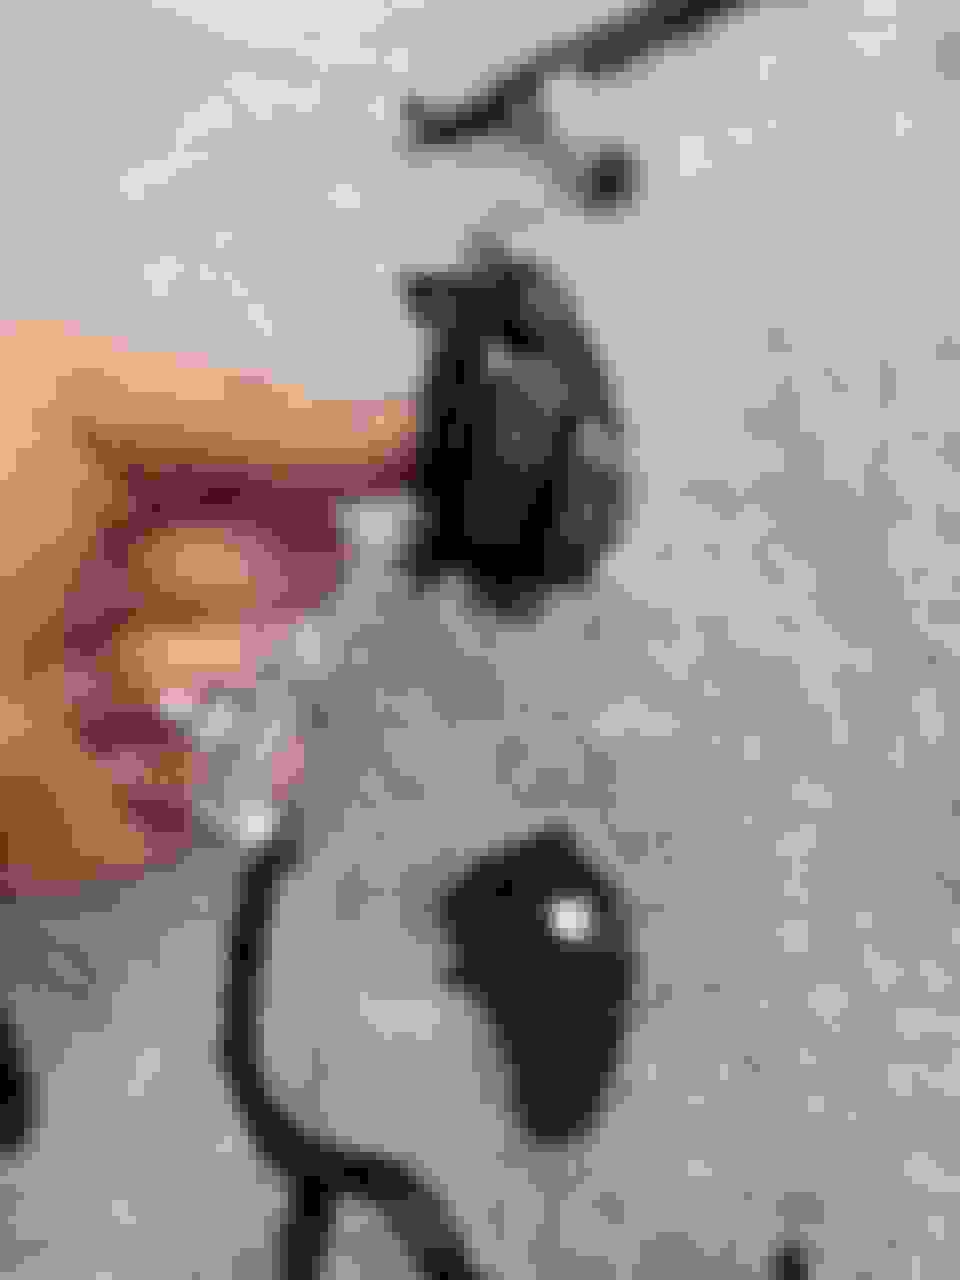
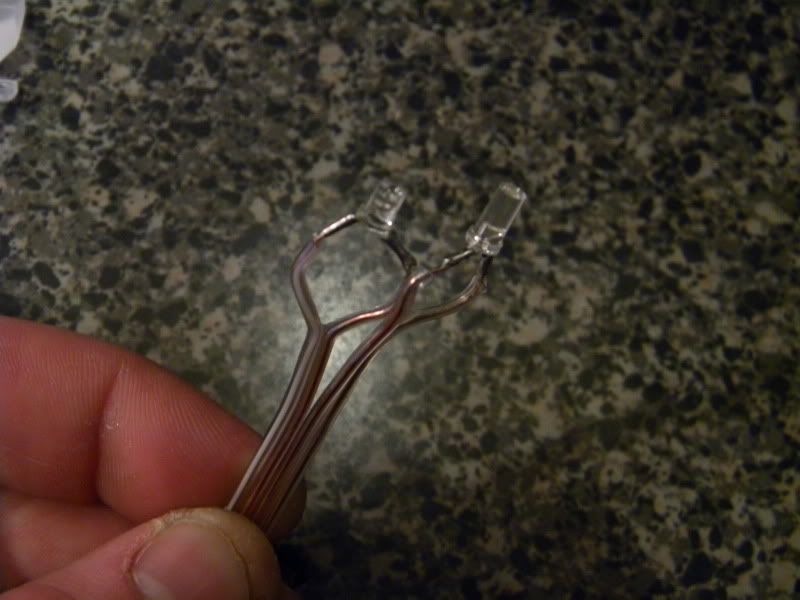
Wire an LED...NO RESISTOR...with some thin-gauge wire. I thought I had a pic of this, but lo, I don't know where it is.
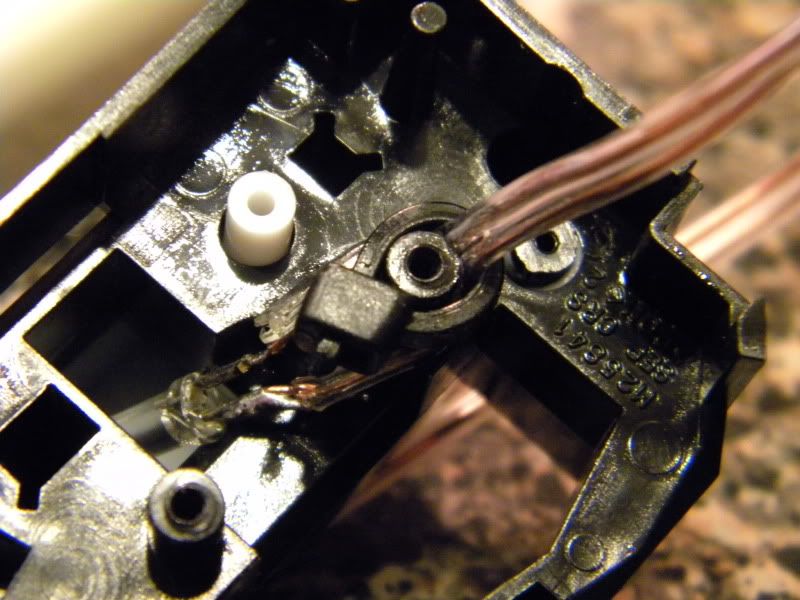
Ok, let me walk you through this...you're going to separate a SMALL portion of the wire and straddle the mounting beam for the PCB board...then secure with a small zip tie. The mechanical compression of the board and the zip tie are more then sufficient to ensure this remains in place. Point the fastener end of the zip tie towards the middle, then mirror on the opposite end.
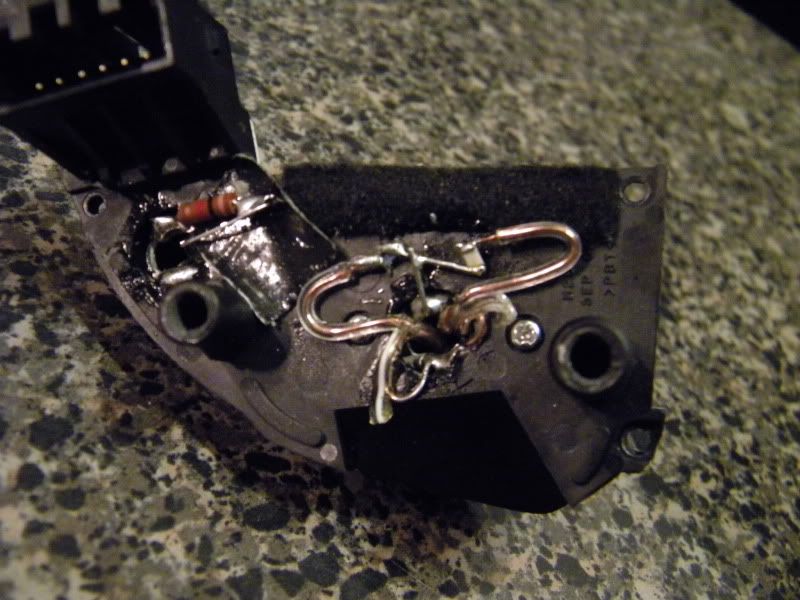
Ok, now aim the sucker. With the LED exposed, attach a resistor, and fire up using a 9V, an aim using a toothpick (ADVANCED, huh? )
Now, you're going to attach a resistor to each negative end and solder to the OE lead...yes, I could have done this in series, but with differing Vf values, I was not about to experiment considering the time I'd already put in.
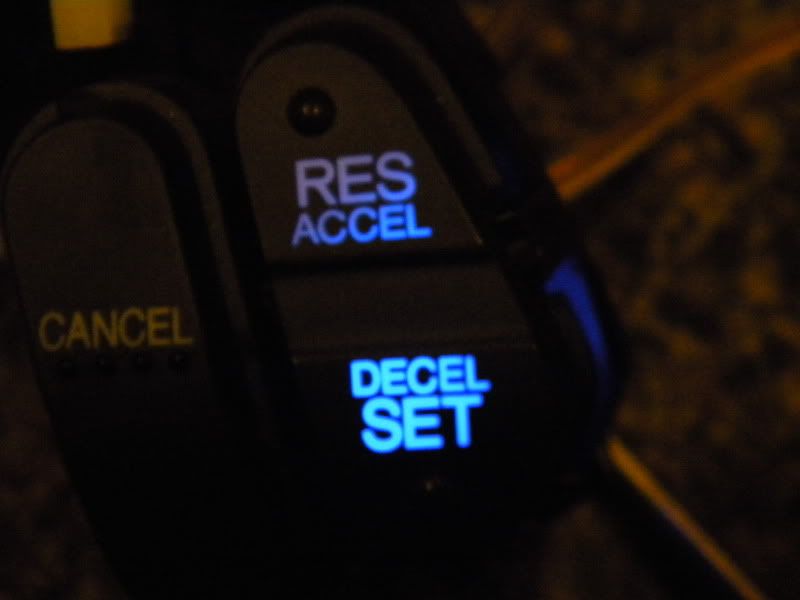
POLARITY GUIDE:
AUDIO - Positive is facing the airbag, negative facing the steering wheel
CRUISE - Positive is facing the steering wheel, negative facing the airbag
Now, for the MODE and CRUISE buttons, simply drop an LED in there, with resistor, and solder.
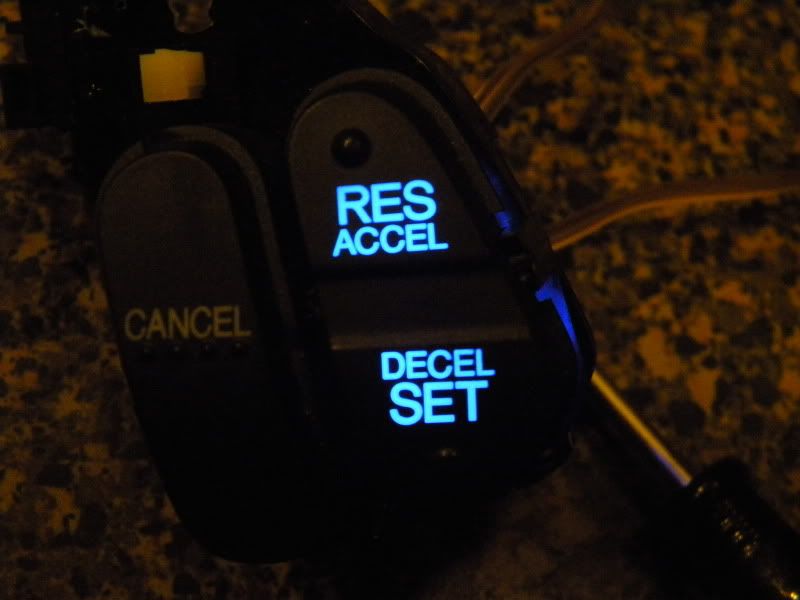
Plug in and test.
Dammit, MODE is out. Why? The tolerance between the steering wheel and panel is VERY SMALL, so we need to be quite precise. This went out AFTER I tightened it.
Ok, that's it for now. Kinda like unexpected parents get caught up in the moment and 'forget things', I got caught up in the moment for the HFL LEDs...but don't worry, that'll be up in about 2 weeks. I am having my steering wheel custom wrapped and will be fixing the MODE button, so I can snap some pics of the HFL and post that up as well.
That is sweet!! i want to send you all my steering wheel and dash buttons around gauges as well as, vsa, mirror, fogs, trunk. Hell maybe window and seat heater buttons!
That is sweet!! i want to send you all my steering wheel and dash buttons around gauges as well as, vsa, mirror, fogs, trunk. Hell maybe window and seat heater buttons!
how much to do for me?
Shoot me a PM if you are sincerely interested in having this done. Bear in mind, I can only do this in BLUE as the circuit integrity is proven for this color.
This has been the most problematic part of my conversion. I couldn't get the locktight bolts to budge so I took the car to a few places and finally found someone to "loosen" them for me. Well, he didn't loosen them enough or the locktight goo re-locked the bolts cuz I still couldn't get them to budge.
Now that I'm back in my city I've had the airbag scheduled for removal at my dealership on Tuesday.
I'm excited to have the TL back to 100% in the lights category.
this looks really good.removing an airbag im no so confident about.for the radio and screen in the middle it looks like you replaced those with leds as well.did those require soldering too?(i burn myself a lot when soldering so i try to avoid that to) or was it a matter over replacing the bulbs with aftermarket ones.if so id love to see a step by step( or picture by picture) tutorial on how you did it just like the way you did for the steering wheel bulb replacement
this looks really good.removing an airbag im no so confident about.for the radio and screen in the middle it looks like you replaced those with leds as well.did those require soldering too?(i burn myself a lot when soldering so i try to avoid that to) or was it a matter over replacing the bulbs with aftermarket ones.if so id love to see a step by step( or picture by picture) tutorial on how you did it just like the way you did for the steering wheel bulb replacement
The HVAC controls in the center console are an easy replacement. The radio is a different beast. There is thread by madsiick detailing how he did his, or you can PM DeathMetal for a custom LED board.
^yes. Base models get a blue "condom" over the bulbs to make them glow greenish. Type-S have red condoms. The buttons themselves are the same with no (or very little) tinting.
I just finished changing the LEDs on my radio board (gosh that was a beast) and I"m trying to keep my momentum going! I bookmarked this a while ago and figured I would tackle this one next. I just realized that Photobucket ruined this thread too. Ugh lol
If you do white LEDs, use resistors. I found that LEDs in the steering wheel were pretty obnoxious at night. Anything you can do to tone them down will help.
Good info to know... I always thought my climate controls LEDs were a bit bright and now with all of the radio buttons replaced, my console is extremely bright.
We'll see if I actually do this though. Not having pictures really sucks. If I do complete this modification, I'll be sure to post tons of pictures
I purchased my TL in 2015 and just realized this thread is12 years old now! Regardless, I still want to share my experiences with everyone. I recently completed a Type-S steering wheel (with paddle shifters) conversion on my base model and swapped out the LEDs to finish MY LAST INTERIOR LED CONVERSION!
I also found that the lights were not shining nearly as bright as my other LEDs. I believe Acura used stronger resistors within the steering wheel to help eliminate bright lights shining directly into the driver's face. However, they were still a bit too dull for my liking, so I used an X-Acto knife and cut out the thin rubber film covering the holes for where the LEDs shine through.
Here are a few additional pictures, which demonstrate how to expose the LED boards. The 2007-08 steering wheel buttons are obviously different, so there are some varying steps. Below is a picture of a 2007-08 Type-S steering wheel wiring harness.
To expose the Cruise Control LED board, I had to remove three screws and various clips on the side of the button housing, which can carefully be removed with a flathead screwdriver.
***The same steps apply to the Audio LED board***
To expose the Phone LED board, I had to remove three screws from behind the LED board. There is no backing plate on this housing.
***The same steps apply to the Audio LED board***
However, the LED board did not budget. That's when I noticed that the LED board was also being held in place by two clips, which keep the board attached to the housing (I do not have a picture of this step). After unclipping those two clips, the LED board started to lift, but was still getting stuck behind the two button caps. I found there is no way to remove the LED board without first removing the button caps. As such, they also had to be removed.
To remove each button cap, I had to remove each one side at a time. Each side of the button cap is held in place with a hole/peg combination as well as an additional clip (2 hole/pegs and 2 clips for each button).
Once the button caps were removed, I made sure to re-install the springs that help make the buttons function properly so I did not lose them.

 02-13-2010, 12:18 AM


 )
)