
G-100: DIY LED Interior Conversion Part 0: Retrofit OEM Bayonet Housings with an LED
 10-11-2009, 05:01 PM
#1
Fearless DIY Guy
Thread Starter
iTrader: (2)
G-100: DIY LED Interior Conversion Part 0: Retrofit OEM Bayonet Housings with an LED
You know, it occurred to me I never really did detail how to retrofit the bulb, so let's leave that open ended nuisance with a red CLOSED stamp, shall we? Ok, it's quite simple, really. This is a basic skill you will need before starting any of the LED conversions, so get wet and sandy, soldier.
I am making this a stand-alone thread because it will be heavily referenced in threads to come.
LET'S GO!
TOOLS NEEDED
Soldering Iron
Angle cutters
Flat head screwdriver
MATERIALS
3mm bulbs to your liking...I am used wide-angle flat headed 3mm bulbs
Solder
FLUX, I CANNOT STRESS THIS ENOUGH
560-ohm resistors
TIME
About 5 minutes
STEP I - HOW MANY AZINERS DOES IT TAKE TO REPLACE A LIGHTBULB?
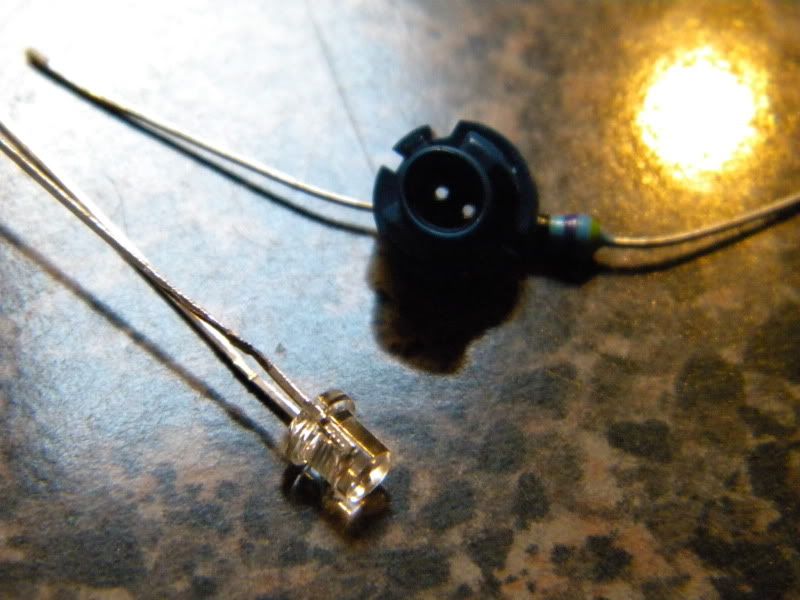
First, pop the bulb out by inserting your standard head driver and turning counterclockwise, then pop the bayonet-base out. If you need to see how this is done, seriously, stop now.
STEP II - IF AT FIRST YOU DON'T SUCCEED, PRY, PRY AGAIN...
Ok, pry the little metal leads you see at the base off and pull the bulb out. You will then see two little openings...
STEP III -WE'RE JAMMIN'...
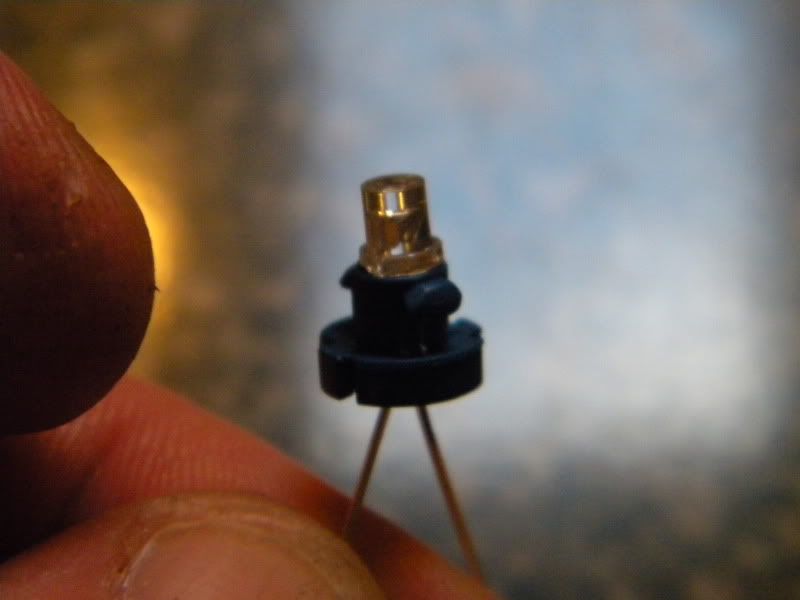
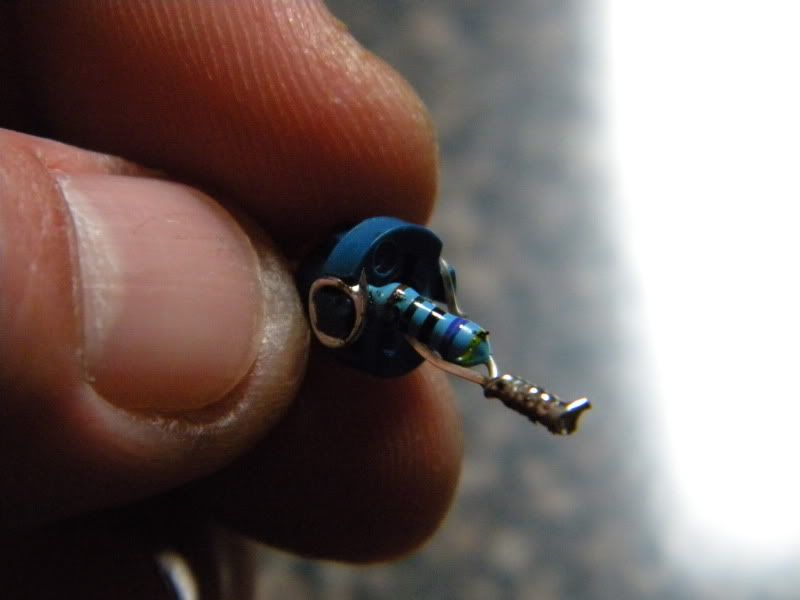
...and I hope you like jammin' too...(sorry, couldn't resist). Jam the bulb in the base. You can pull through, which is tough, or press the base against the bulb on a hard surface.
STEP IV - POSITIVE VIBES
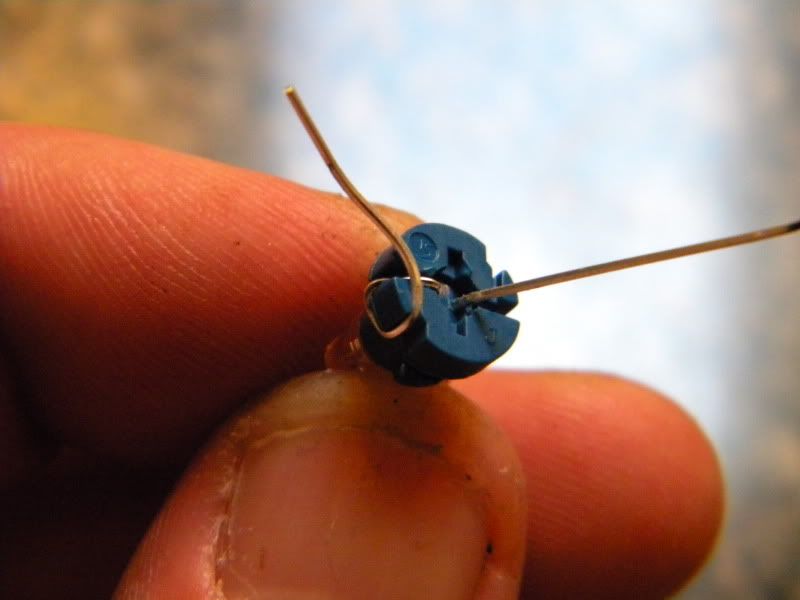
You should have a long and a short end on your LEDs...the longer side, which should be connected to the tiny part of the LED, is the anode, or POSITIVE side. Bend this to the left in to the tiny little channel and wrap around the side post.
STEP IV - NEGATIVITY CAN BE A GOOD THING
You should have a long and a short end on your LEDs...the shorter side, which should be connected to the large part of the LED, is the cathode, or NEGATIVE side. [/ctrl C + ctrl V]
Aight, a little different, eh? First, wrap one end of the resistor around the post...TWICE. Why? Well, there's a thickness difference between a single band of the resistor lead and the positive lead, so the double-wrap will make up for that.
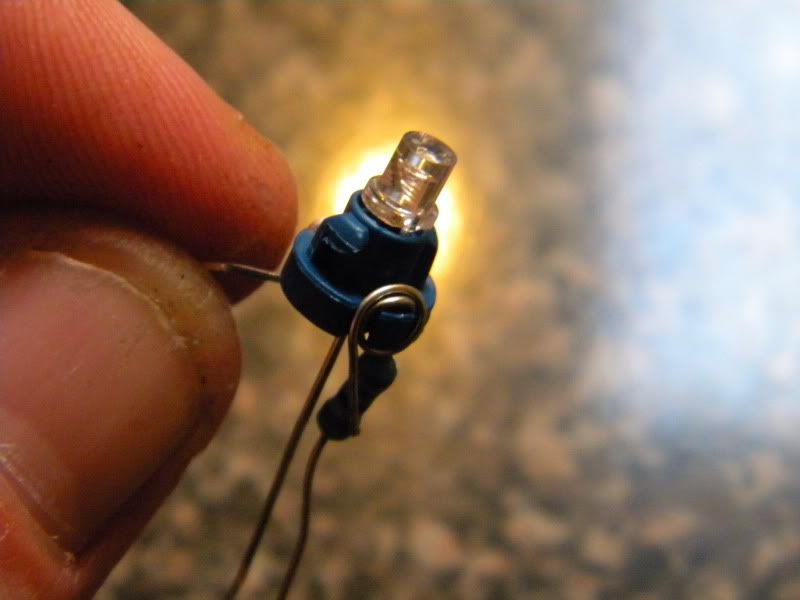
Ok, THEN you're going to want to attach the other end to the cathode of the resistor. This was a pretty sloppy job, so I went back and re-did it before soldering.
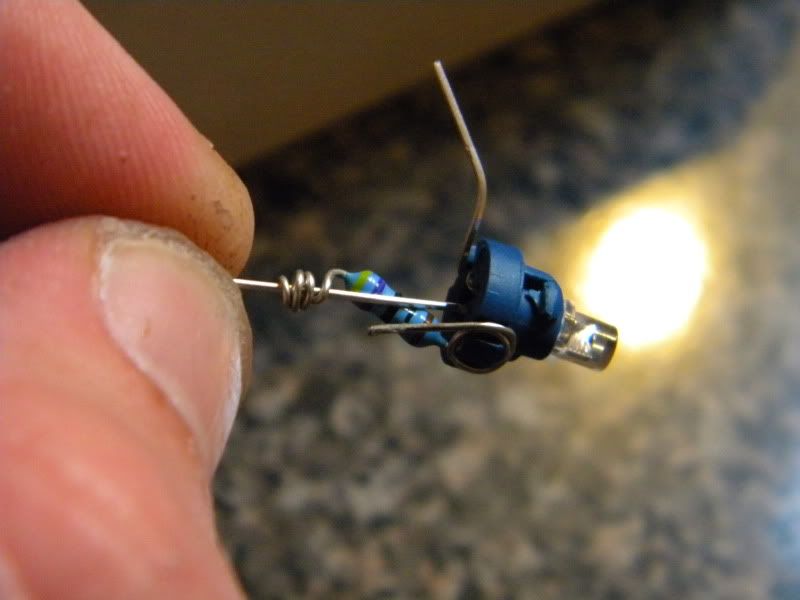
Finally, apply a small amount of solder to the two wrapped ends to ensure a firm contact.
That's it and that's all. Two more DIY conversions coming tonight, folks...stay tuned!
I am making this a stand-alone thread because it will be heavily referenced in threads to come.
LET'S GO!
TOOLS NEEDED
Soldering Iron
Angle cutters
Flat head screwdriver
MATERIALS
3mm bulbs to your liking...I am used wide-angle flat headed 3mm bulbs
Solder
FLUX, I CANNOT STRESS THIS ENOUGH
560-ohm resistors
TIME
About 5 minutes
STEP I - HOW MANY AZINERS DOES IT TAKE TO REPLACE A LIGHTBULB?
First, pop the bulb out by inserting your standard head driver and turning counterclockwise, then pop the bayonet-base out. If you need to see how this is done, seriously, stop now.
STEP II - IF AT FIRST YOU DON'T SUCCEED, PRY, PRY AGAIN...
Ok, pry the little metal leads you see at the base off and pull the bulb out. You will then see two little openings...
STEP III -WE'RE JAMMIN'...
...and I hope you like jammin' too...(sorry, couldn't resist). Jam the bulb in the base. You can pull through, which is tough, or press the base against the bulb on a hard surface.
STEP IV - POSITIVE VIBES
You should have a long and a short end on your LEDs...the longer side, which should be connected to the tiny part of the LED, is the anode, or POSITIVE side. Bend this to the left in to the tiny little channel and wrap around the side post.
STEP IV - NEGATIVITY CAN BE A GOOD THING
You should have a long and a short end on your LEDs...the shorter side, which should be connected to the large part of the LED, is the cathode, or NEGATIVE side. [/ctrl C + ctrl V]
Aight, a little different, eh? First, wrap one end of the resistor around the post...TWICE. Why? Well, there's a thickness difference between a single band of the resistor lead and the positive lead, so the double-wrap will make up for that.
Ok, THEN you're going to want to attach the other end to the cathode of the resistor. This was a pretty sloppy job, so I went back and re-did it before soldering.
Finally, apply a small amount of solder to the two wrapped ends to ensure a firm contact.
That's it and that's all. Two more DIY conversions coming tonight, folks...stay tuned!
 01-23-2010, 11:39 PM
#4
Fearless DIY Guy
Thread Starter
iTrader: (2)
UPDATE: NOTE FOR THOSE USING WHITE LEDS
I hate to bump all of the threads, but there is an important item that needs to be noted; some of the white LEDs have been burning out, which can be attributed to one thing and one thing only: thermal overload. Therefore,
IT IS HIGHLY RECOMMENDED THAT A 1K-OHM RESISTOR BE USED FOR ALL WHITE LEDS.
I have begun the process of replacing LEDs/resistors for the dearly-departed and can state that the new resistors seem to do the trick.
12-29-2011, 11:19 AM
#5
Jokerman
FYI for anyone wanting to da these mods the website www.Niktronixonline.com has great prices and everything i have needed for this mod. Plus the website has instructions on how to do lighting mods for your Wii and Xbox.


Thread
Thread Starter
Forum
Replies
Last Post
TLDude876
Car Talk
134
12-28-2016 03:18 PM
handsom-hustla
Car Parts for Sale
70
11-13-2015 05:04 PM