
G-031: DIY Accord foglight mod without removing A-Spec and bumper
 03-24-2009, 09:47 PM
#1
Drifting
Thread Starter
G-031: DIY Accord foglight mod without removing A-Spec and bumper
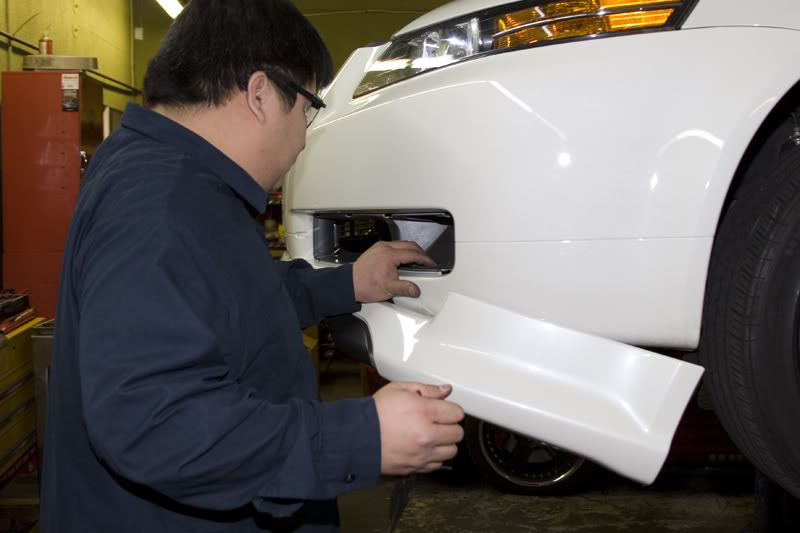
I cant say its a full DIY as some here because I couldnt remember the exact details. Plus a friend of mine did the majority of the install. But I thought Id share the process as I am sure there are some that would rather keep the bumper and lip on the car.
Items used during the install:
-2004-2005 OEM Honda Accord foglight kit (wires and all)
-inline fuse holder
-20 amp fuse
-about 5 feet of wire
-metal coat hanger (more on this in a bit)
-dremel
-air saw
-marker
-lift
-6000K H11 HID kit
-3M electrical tape
-3M double stick tape
-wire loom cover (used the ones from the Accord kit)
note:
-the bumper and A-Spec lip were not removed from the car. the A-Spec was just moved out of the way for the sides, but otherwise remained on the car.
-this setup allows the accord fogs to come on only when the parklights are engaged. they stay lit even when you engage high beams. they also go off (even if the switch is on) when all the lights are on the OFF position. they also function like the OEM fogs, where if you leave them on but shut the door, they go out.
on to the pics:
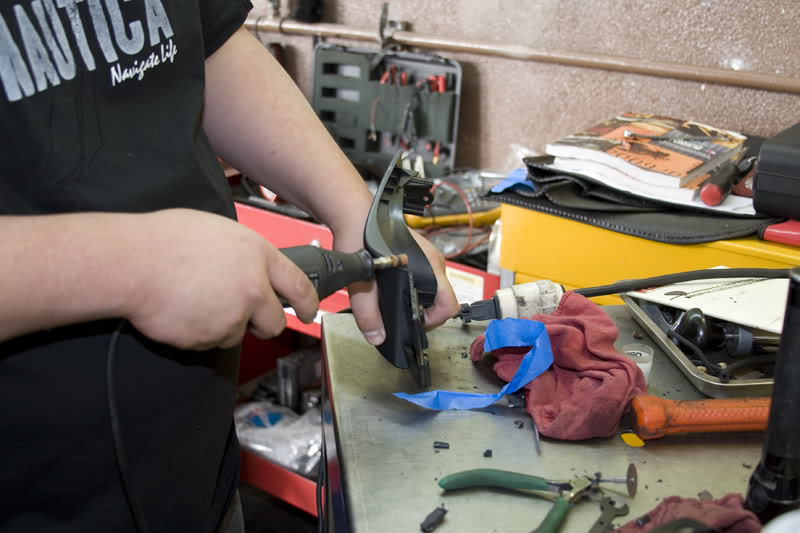
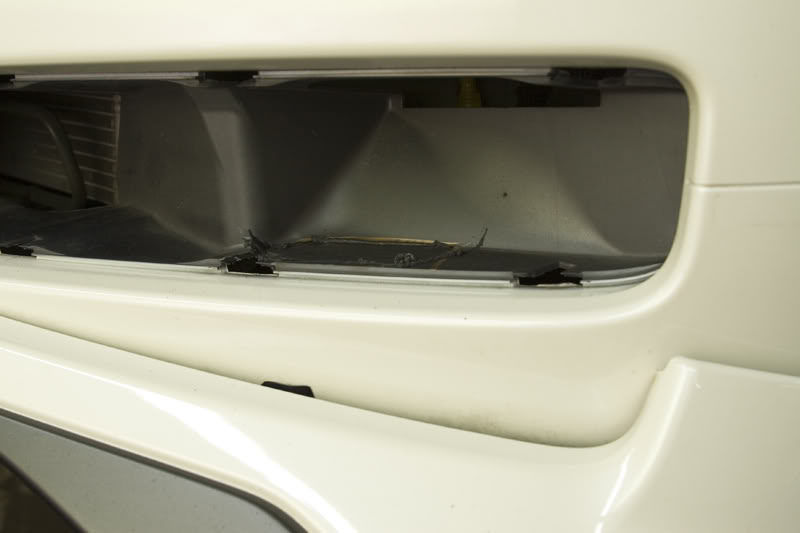
grinding down the right foglight bezel to fit the rightmost corner of the bumper
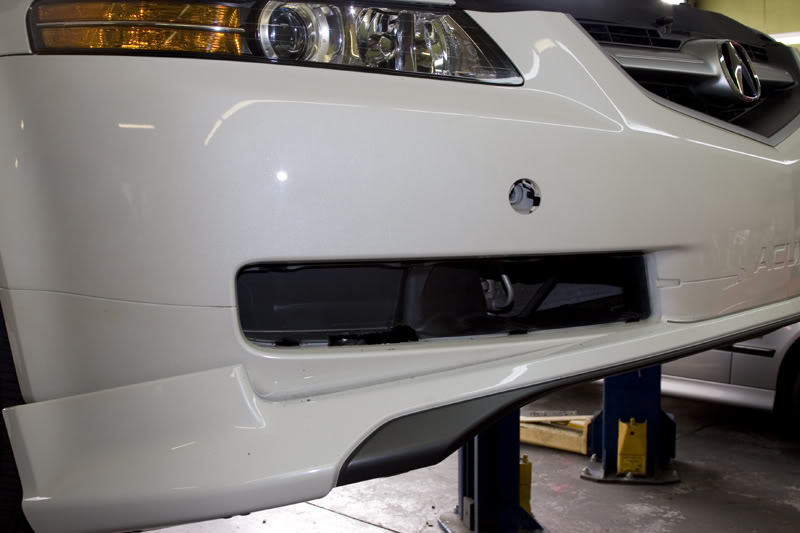
the lip semi-off the bumper
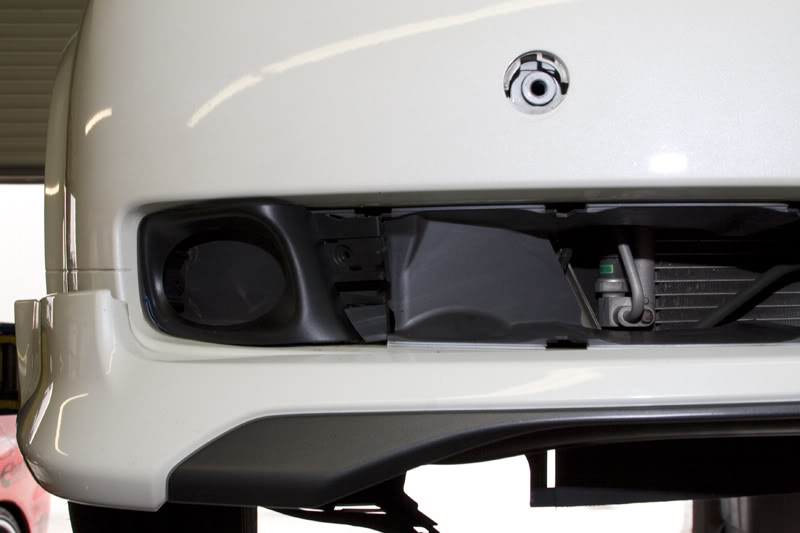
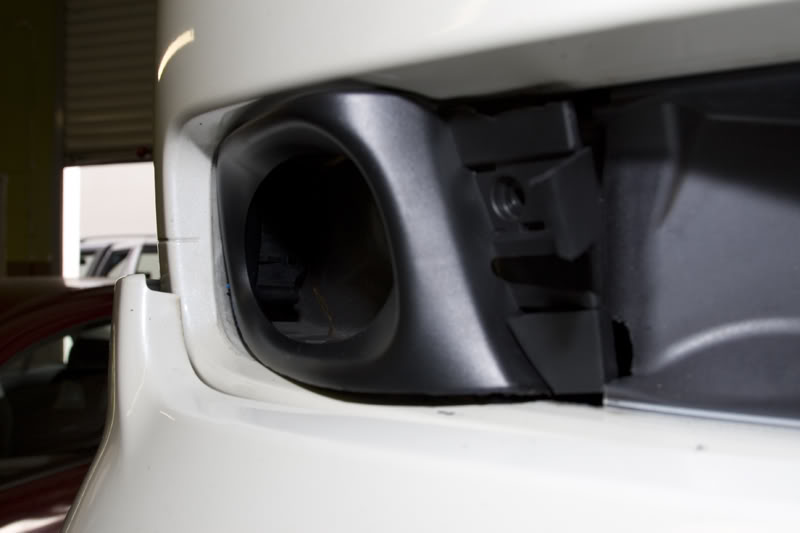
test-fitting the bezel
with the foglight housing and halogen bulb (with kit) pre-fitted
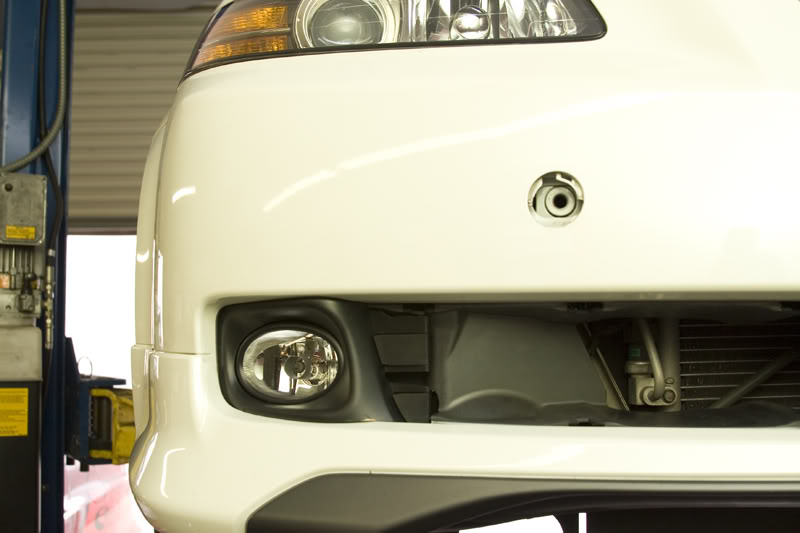
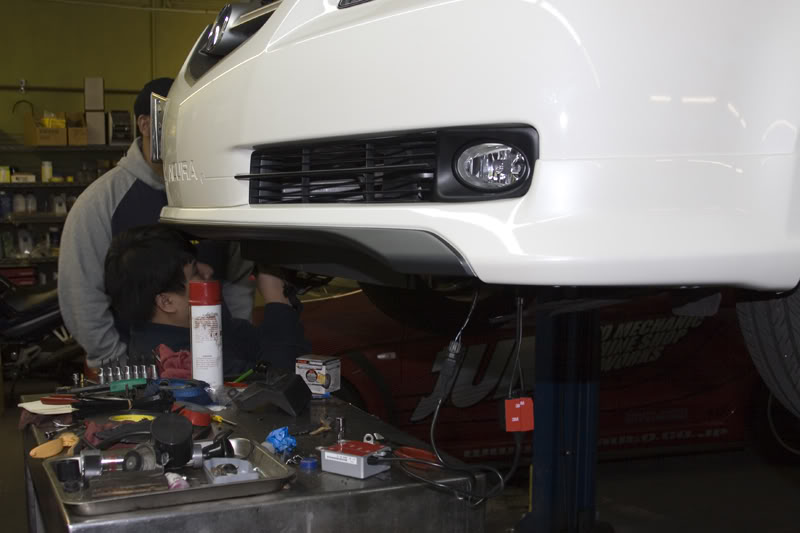
with the grille finish
testing the fog
doing the driver side:
fitting the driver side foglight bezel
wiring layout:


final layout before putting the cover
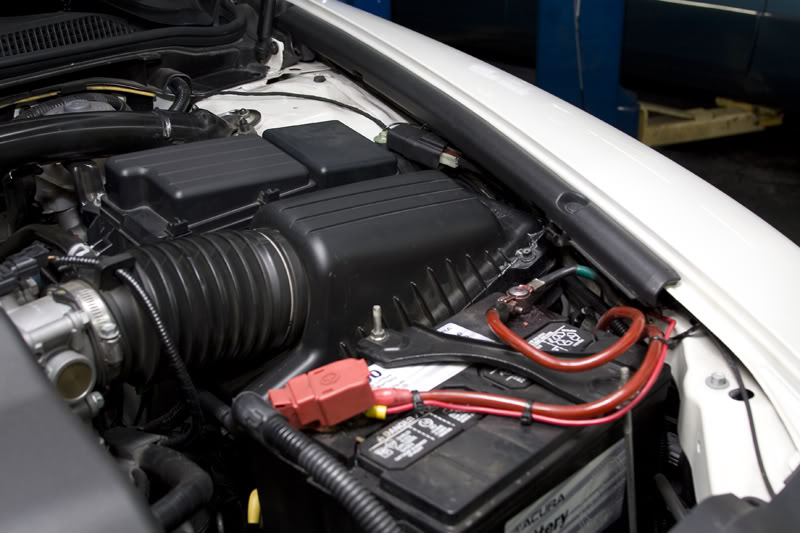
installing the HIDs
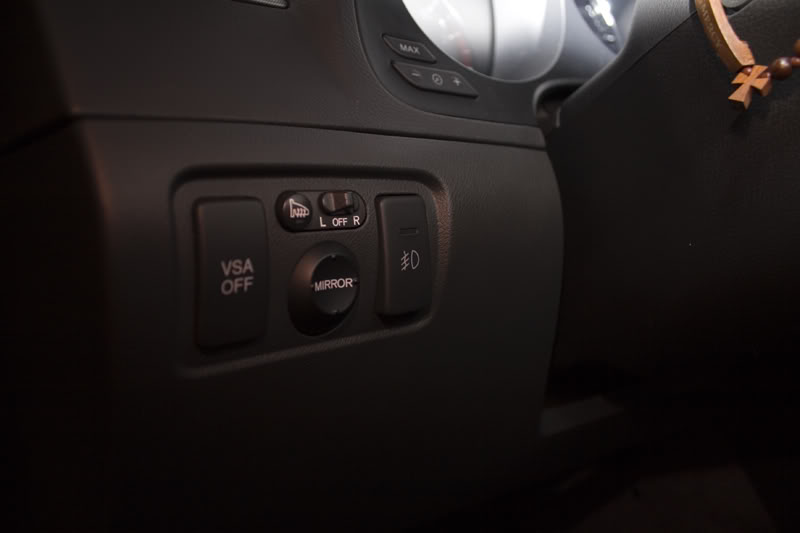
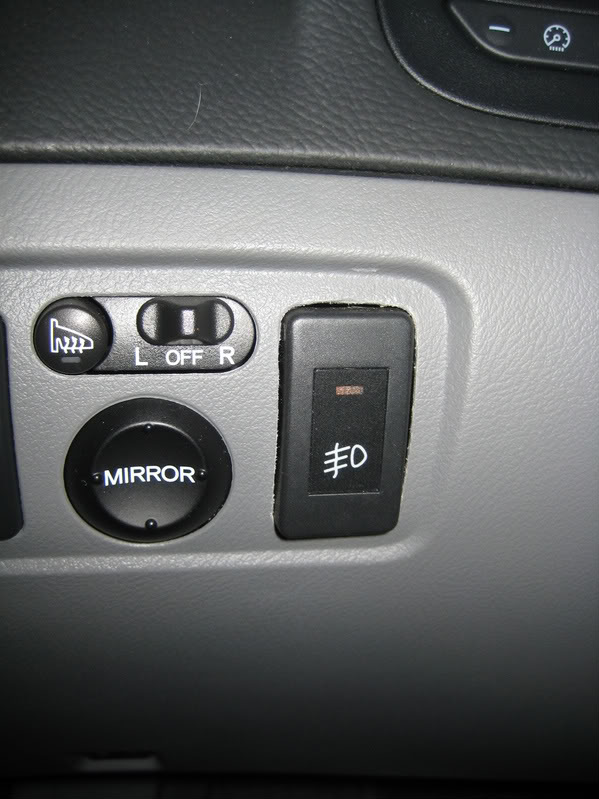
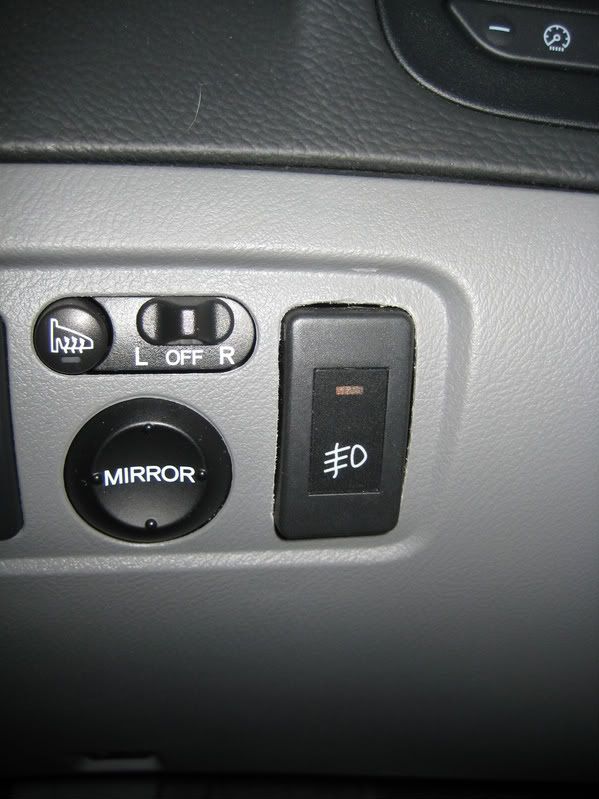
inside switch (off)
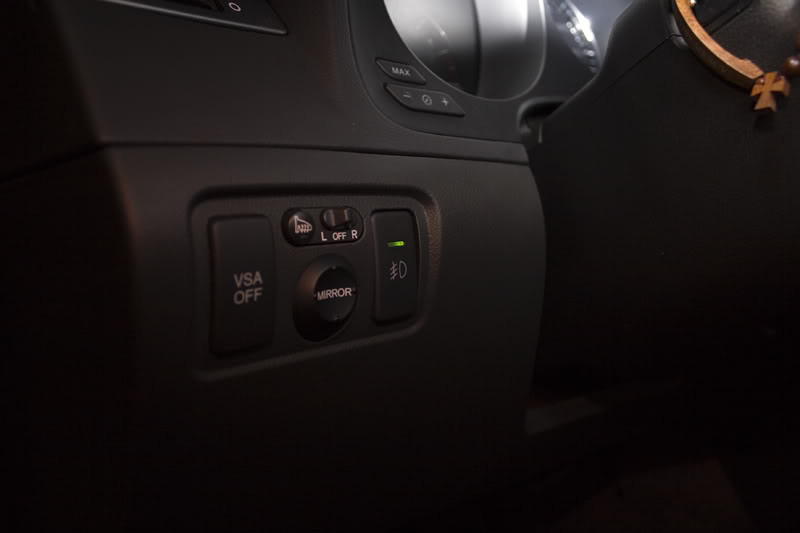
inside switch (on)
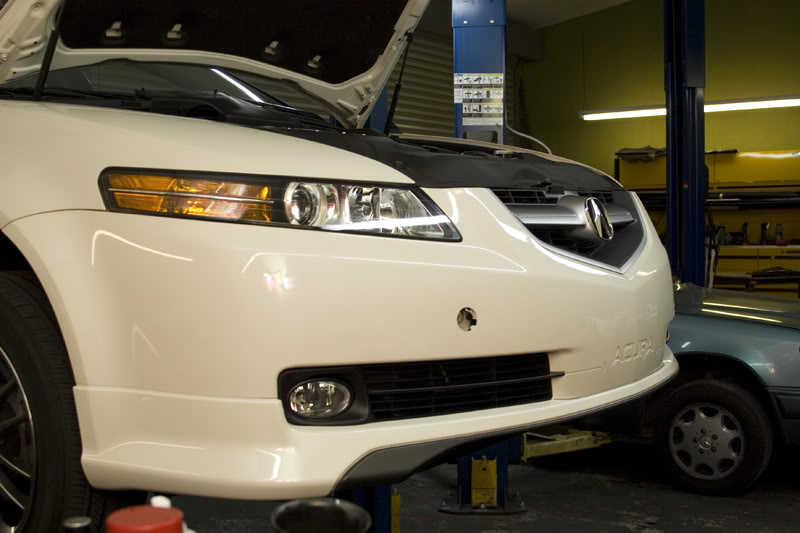
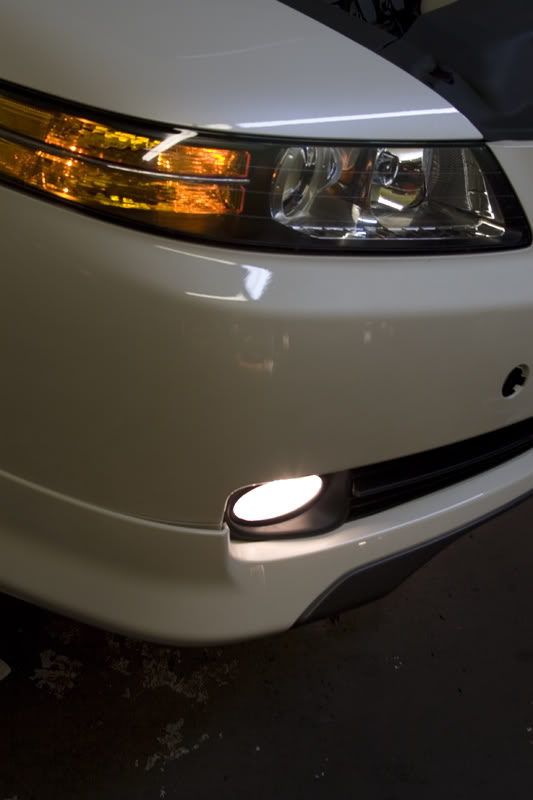
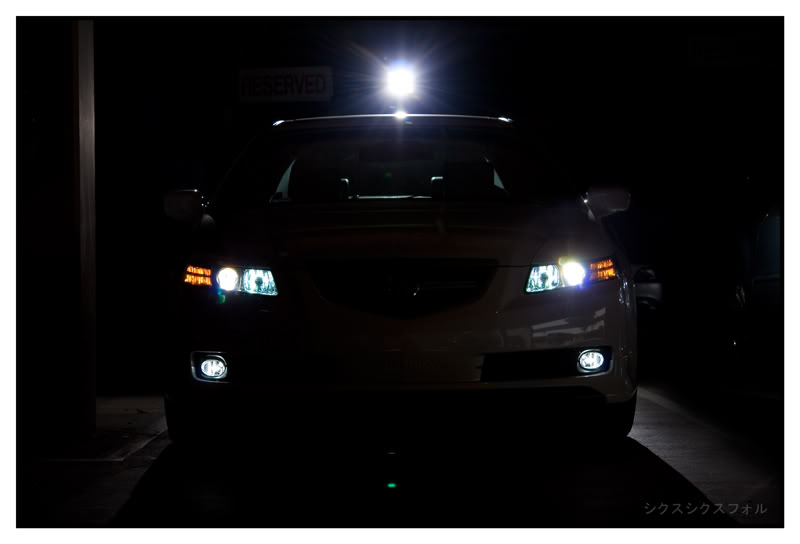
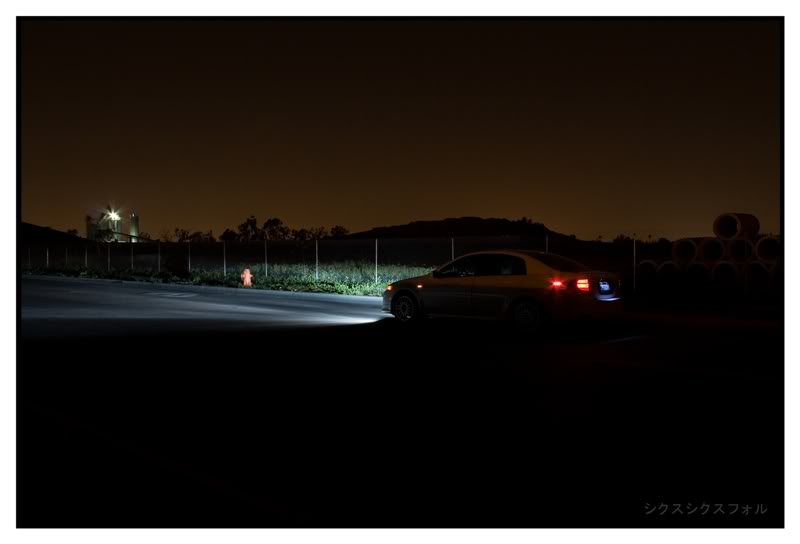
and the actual pics:
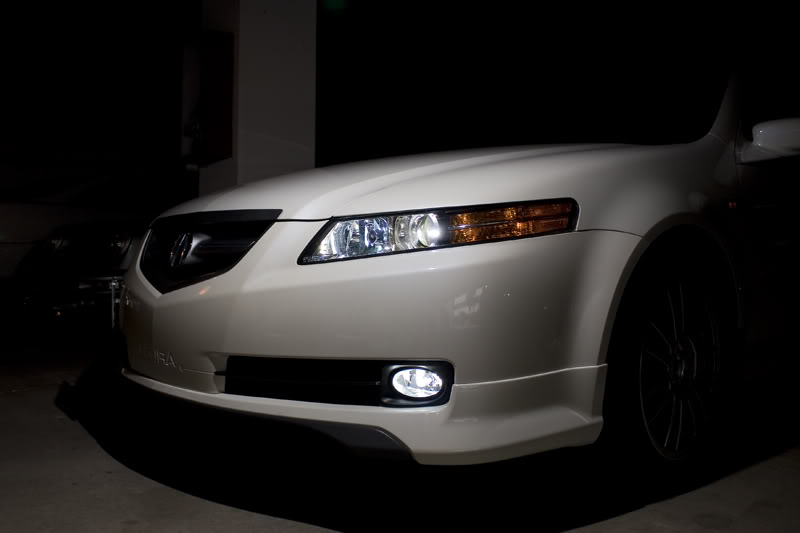
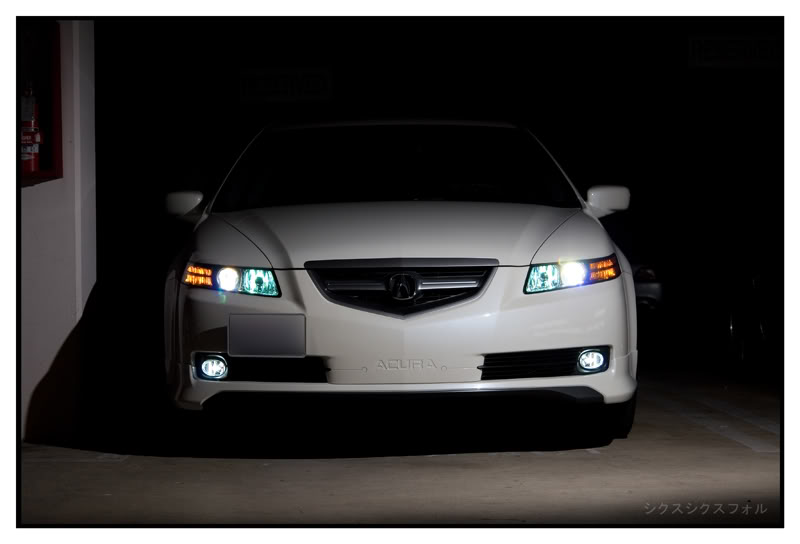
fogs and parklight
fogs and lows
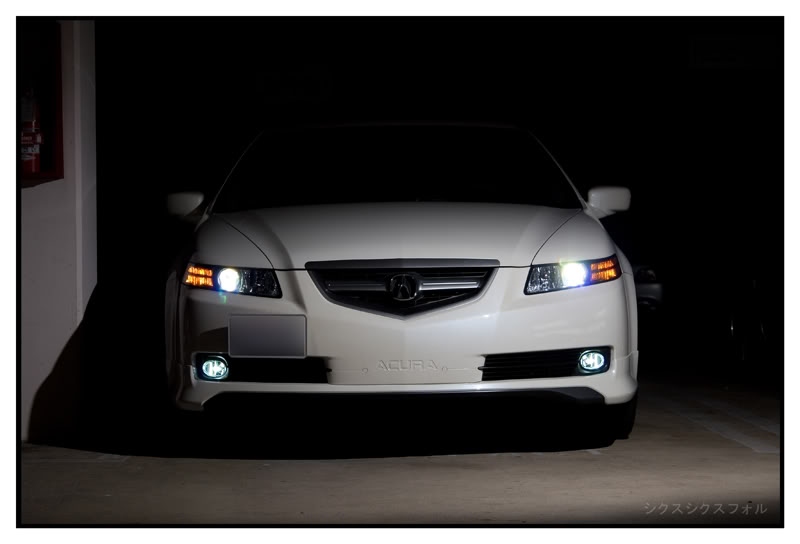
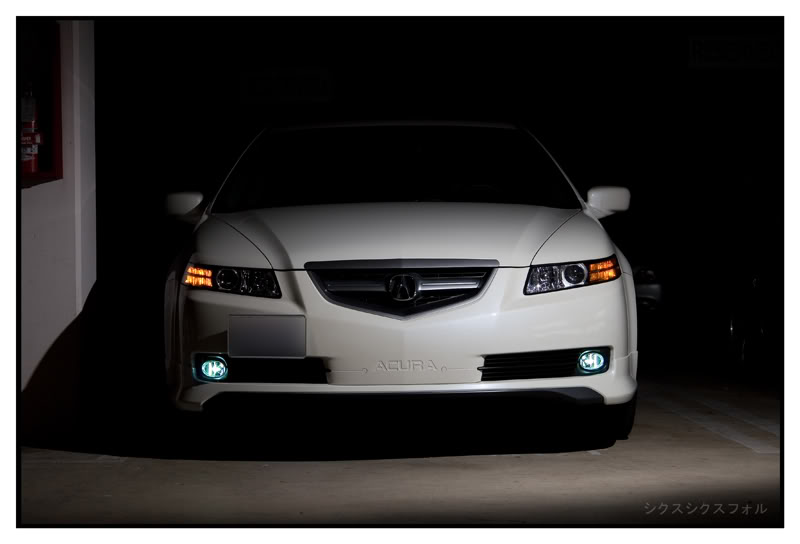
fogs, lows and OEM fogs (with 6000K HIDs as well)
thanks for looking
Items used during the install:
-2004-2005 OEM Honda Accord foglight kit (wires and all)
-inline fuse holder
-20 amp fuse
-about 5 feet of wire
-metal coat hanger (more on this in a bit)
-dremel
-air saw
-marker
-lift
-6000K H11 HID kit
-3M electrical tape
-3M double stick tape
-wire loom cover (used the ones from the Accord kit)
note:
-the bumper and A-Spec lip were not removed from the car. the A-Spec was just moved out of the way for the sides, but otherwise remained on the car.
-this setup allows the accord fogs to come on only when the parklights are engaged. they stay lit even when you engage high beams. they also go off (even if the switch is on) when all the lights are on the OFF position. they also function like the OEM fogs, where if you leave them on but shut the door, they go out.
on to the pics:
grinding down the right foglight bezel to fit the rightmost corner of the bumper
the lip semi-off the bumper
test-fitting the bezel
with the foglight housing and halogen bulb (with kit) pre-fitted
with the grille finish
testing the fog
doing the driver side:
fitting the driver side foglight bezel
wiring layout:
final layout before putting the cover
installing the HIDs
inside switch (off)
inside switch (on)
and the actual pics:
fogs and parklight
fogs and lows
fogs, lows and OEM fogs (with 6000K HIDs as well)
thanks for looking
 03-24-2009, 09:55 PM
#3
Drifting
Thread Starter
i forgot to mention - the metal coat hanger was used to feed the control wire through the firewall. i cut the hanger and sharpened one end. i then taped the wire and coiled it around the hanger and poked it through the rubber boot that goes through the firewall. this rubber boot has a wire loom poking out from it. its below the brake fluid reservoir.
03-24-2009, 09:57 PM
#4
Drifting
Thread Starter

the kit is very nice. we used one of the relays, the wire loom cover, and much of the positive and negative wires. the only things i bought were the 20A fuse, the fuse holder and the HID kit. my friend took care of pretty much everything.
Trending Topics
03-24-2009, 10:49 PM
#8
Drifting
Thread Starter
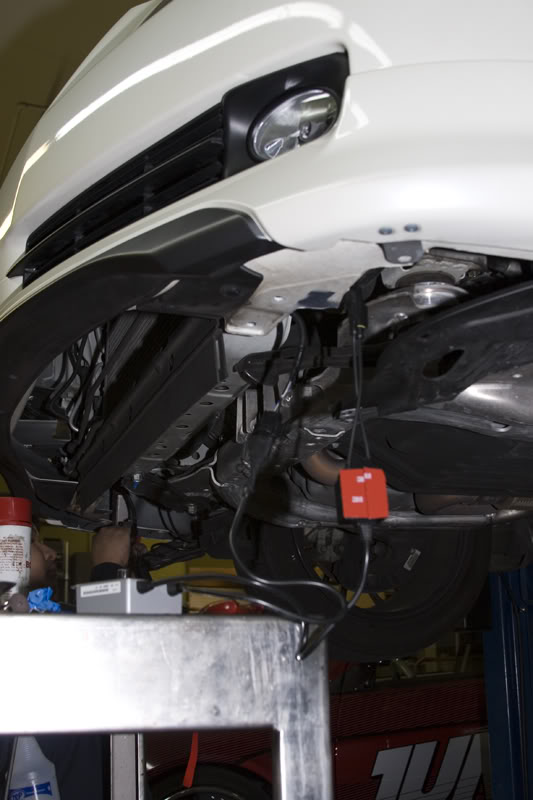
it is held by three bolts that were not part of the kit. only small parts of the inside of the bumper were trimmed (to allow access of the fog light housing), so the majority of the plastic structure were still intact.
the bezel was bolted onto the plastic structures, then the fogs were mounted afterwards.
the bezel was bolted onto the plastic structures, then the fogs were mounted afterwards.
03-24-2009, 10:50 PM
#9
Drifting
Thread Starter
03-25-2009, 08:56 AM
#16
Drifting
Thread Starter
pretty much, thicker bolts with nuts were put behind the bezel.
03-25-2009, 09:56 AM
#18
Drifting
Thread Starter
03-25-2009, 10:18 AM
#20
Drifting
Thread Starter


 03-25-2009, 11:32 AM
#23
Three Wheelin'
iTrader: (3)
Very clean looking install and nice cuts. I'm not sure about only using double sided tap though as far as long term secureness of the fog lights in the bumper. And I say this in the most polite way possible, but IMO in order to do this install right and make sure that all wiring is routed and secured properly (not dangling or free to move around while driving) then removing the bumper is necessary. This is especially true for those planning to do HID's because there is nowhere to cleanly mount the ballasts in the engine bay. Very clean car tho man!!!
03-25-2009, 12:29 PM
#24
Drifting
Thread Starter
Very clean looking install and nice cuts. I'm not sure about only using double sided tap though as far as long term secureness of the fog lights in the bumper. And I say this in the most polite way possible, but IMO in order to do this install right and make sure that all wiring is routed and secured properly (not dangling or free to move around while driving) then removing the bumper is necessary. This is especially true for those planning to do HID's because there is nowhere to cleanly mount the ballasts in the engine bay. Very clean car tho man!!!
the fogs are secured by 3 bigger bolts that we bored through the plastic shroud in the bumper.
we used the double stick tapes for the A-Spec kit as we had to remove the existing one that was installed by the dealer

all the wiring is secured behind the bumper along the front cross beam. the wires that come from the passenger side fog are covered inside the wire loom that was with the OEM Accord kit. so it is adequately protected. the wiring from the driver side all the way up short of the battery are also shrouded and zip tied as well. nothing is dangling nor moving around
the ballasts of the HID kit are stuck with double stick tape and also zip tied - the driver side has them on the lower intake resonator and the passenger side (iirc) is mounted on the lower frame support, i dont remember for sure. i appreciate the concern though
 ill try to take pics of the wiring when i get a chance. we did remove pretty much everything under the bumper when we did this and didnt cut any corners. the whole install took all weekend, as my friend did it carefully and thoroughly
03-25-2009, 12:31 PM
ill try to take pics of the wiring when i get a chance. we did remove pretty much everything under the bumper when we did this and didnt cut any corners. the whole install took all weekend, as my friend did it carefully and thoroughly
03-25-2009, 12:31 PM
#25
Drifting
Thread Starter
03-25-2009, 12:35 PM
#26
Three Wheelin'
iTrader: (3)
You learn something new everyday!!!! thx
03-25-2009, 12:56 PM
#27
Drifting
Thread Starter
So having used the DEPO kit myself and not the OEM kit as the OP has, I can affirmatively state that the OEM switch needs no modification to fit the opening, while the DEPO brand switch needs slight sanding around the "square" corners of the switch's fascia. eBay's are still unknown though...
You learn something new everyday!!!! thx
You learn something new everyday!!!! thx
and yes i can affirm that the OEM fog switch latches without modifications on the existing blank next to the mirror controls.


 03-30-2009, 03:38 PM
#38
Rev High; Drive Happy
iTrader: (2)
Join Date: Feb 2008
Location: Scarborough, Ontario
Age: 34
Posts: 4,074
Received 398 Likes
on
332 Posts
I have the OEM switch, switch-wiring-harness and fog-light-wiring-harness. I'm playing around with them at the moment..... My two brown connectors and one dark blue connector are filled with some sort of paste-looking-substance.
What exactly do these 3 connectors plug into?
I'm also a little oblivious as to what the two light blue and two grey connectors on the switch-wiring-harness connect to as well. I thought these wires would connect to each other.. but I guess not.
Reason I ask is because I'm trying to run the accord switch with custom fogs. So I ended up getting the OEM switch+OEM wiring harness+switch-harness.
 04-03-2009, 12:09 PM
#40
Drifting
Thread Starter
Hey, would you care to tell me what is in the bag on the far right?
I have the OEM switch, switch-wiring-harness and fog-light-wiring-harness. I'm playing around with them at the moment..... My two brown connectors and one dark blue connector are filled with some sort of paste-looking-substance.
What exactly do these 3 connectors plug into?
I'm also a little oblivious as to what the two light blue and two grey connectors on the switch-wiring-harness connect to as well. I thought these wires would connect to each other.. but I guess not.
Reason I ask is because I'm trying to run the accord switch with custom fogs. So I ended up getting the OEM switch+OEM wiring harness+switch-harness.
the one in the bag is one of the relays. im not sure how exactly my friend did it, but he did stip out most of the wiring and customized the install.