
E-035: DIY How To Remove Trunk Liner (WITH PICS)
 02-13-2010, 03:57 PM
#1
Burning Brakes
Thread Starter
E-035: DIY How To Remove Trunk Liner (WITH PICS)
So when I was looking for how to remove my trunk liner to remove the big A emblem I had a hard time finding directions, let alone pics. So I figured I would try and make my first how to. Let me know if this is any good.
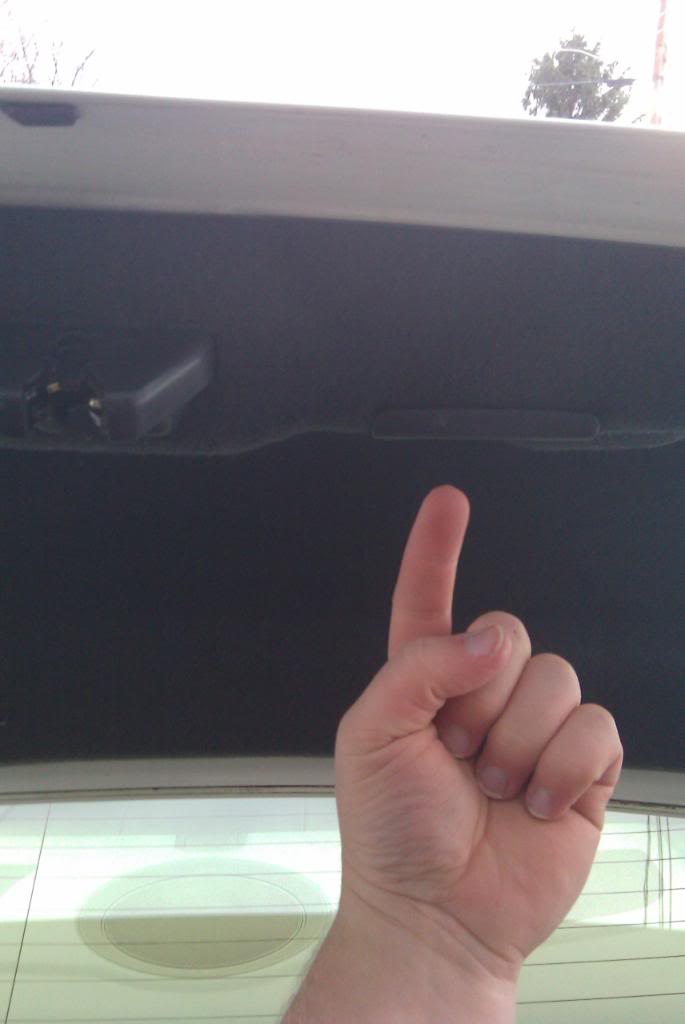
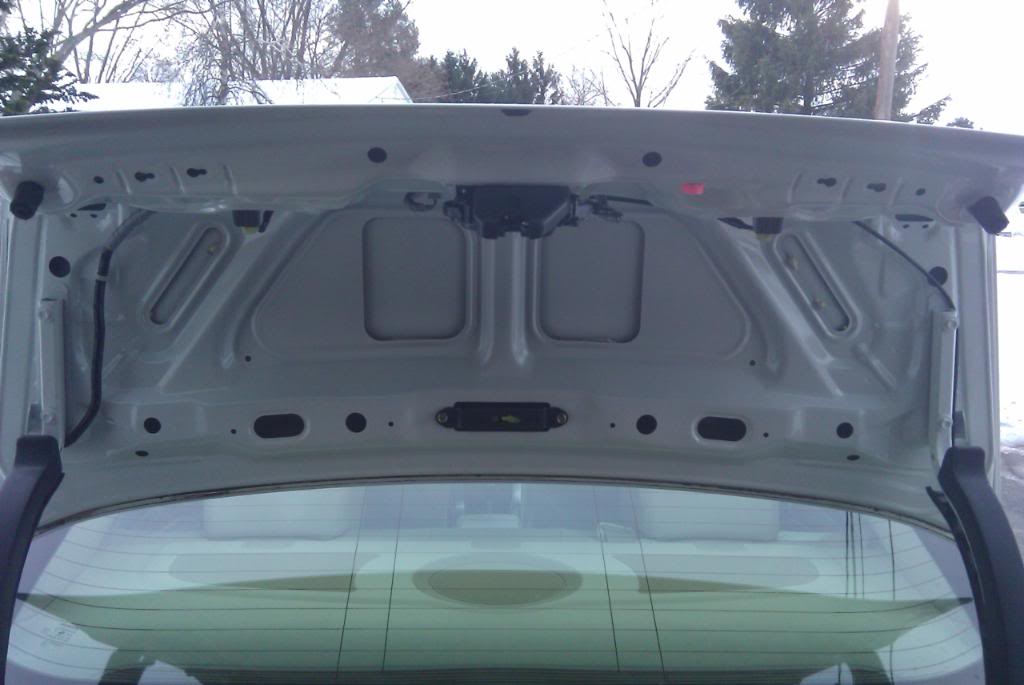
First things first, you need to pop the trunk and find 11 little circular clips.
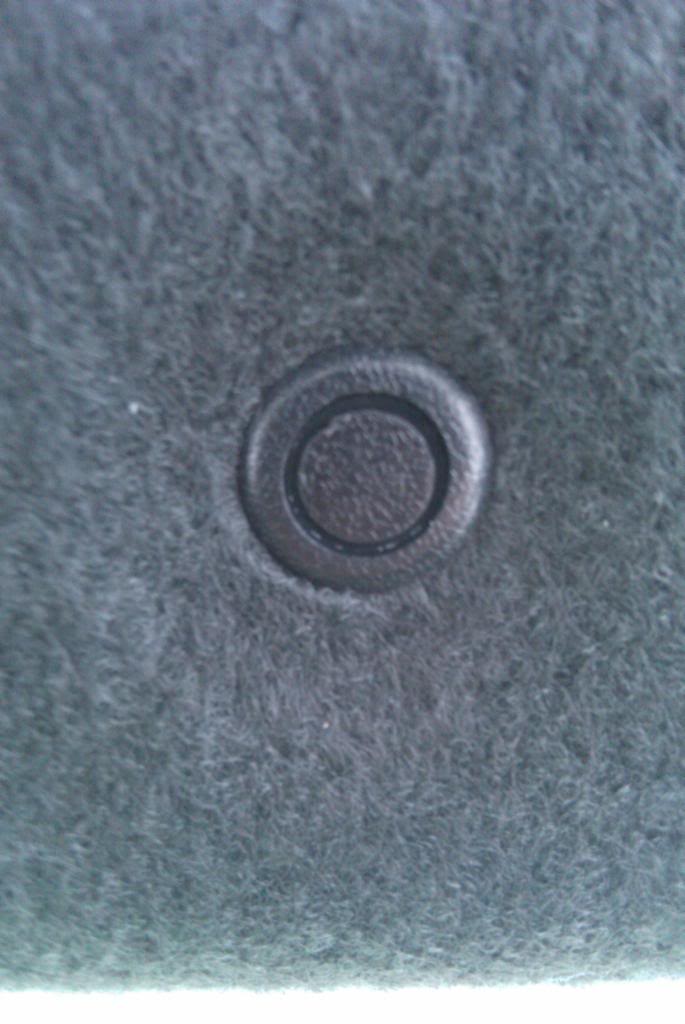
Once you find the clips you will need a very pointy narrow tipped flathead screw driver so you can pop out the middle of the clip. Then you pop out the rest of the clip. (This is in my 2006 TL im not sure if the steps are the same in other years, cant imagine they are that much different in the 3rd gen. cars.)
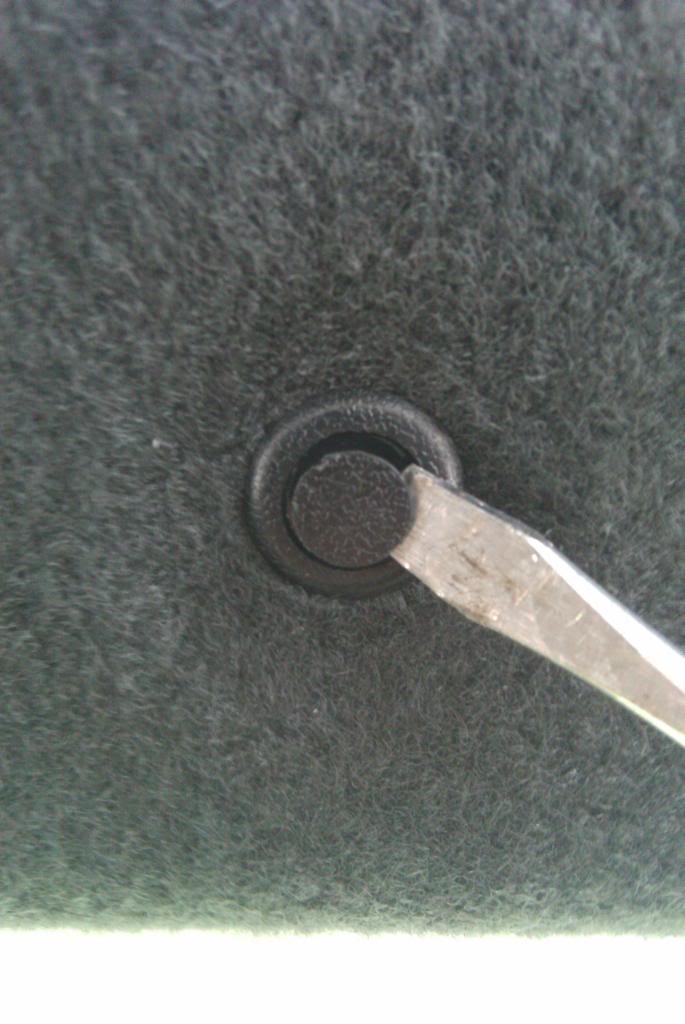
Pop the middle and remove....
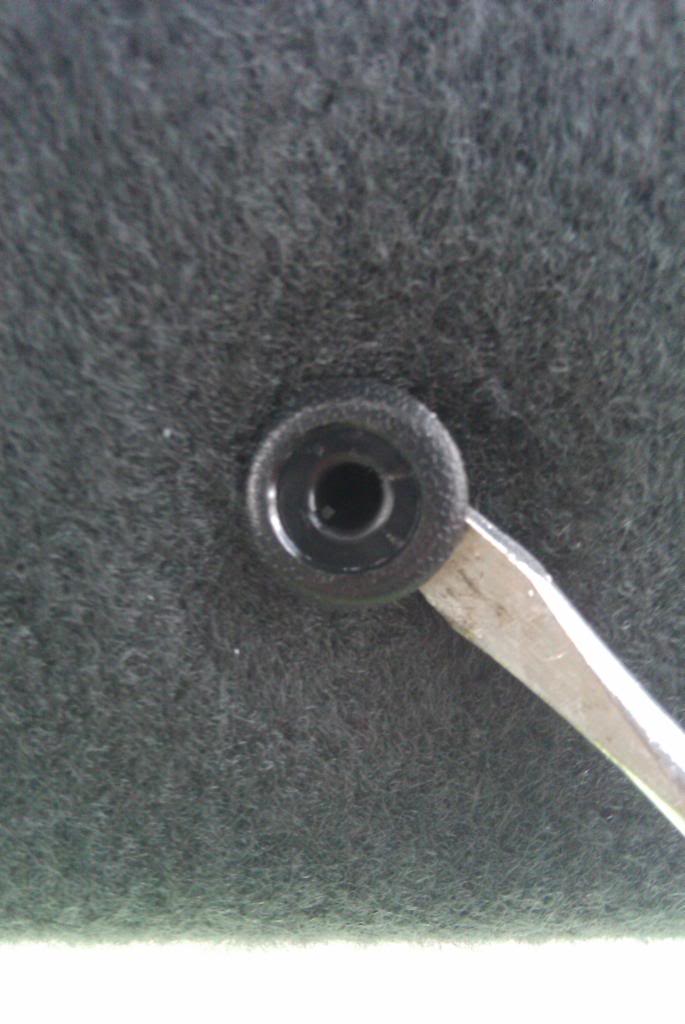
Then remove the rest of it and repeat, be careful not to break them.
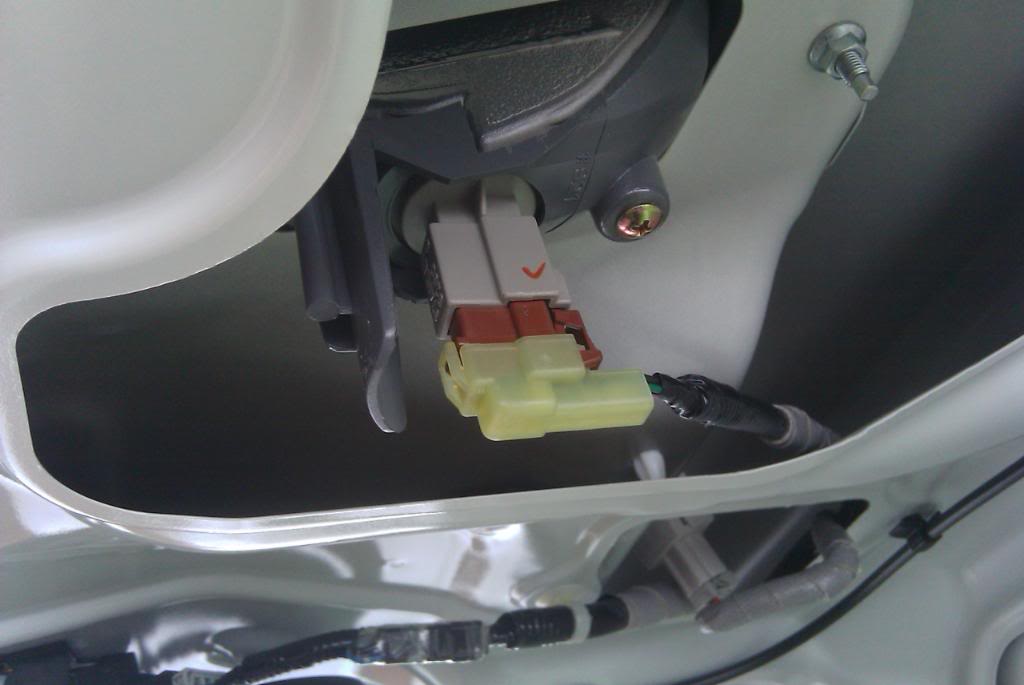
Next is the only part that I found hard, the hinges that the trunk opens on are covered by black plastic and you have to pry the 2 halfs apart so you can pull the liner away, the best way to do this is use a broad tipped flathead and just be careful.
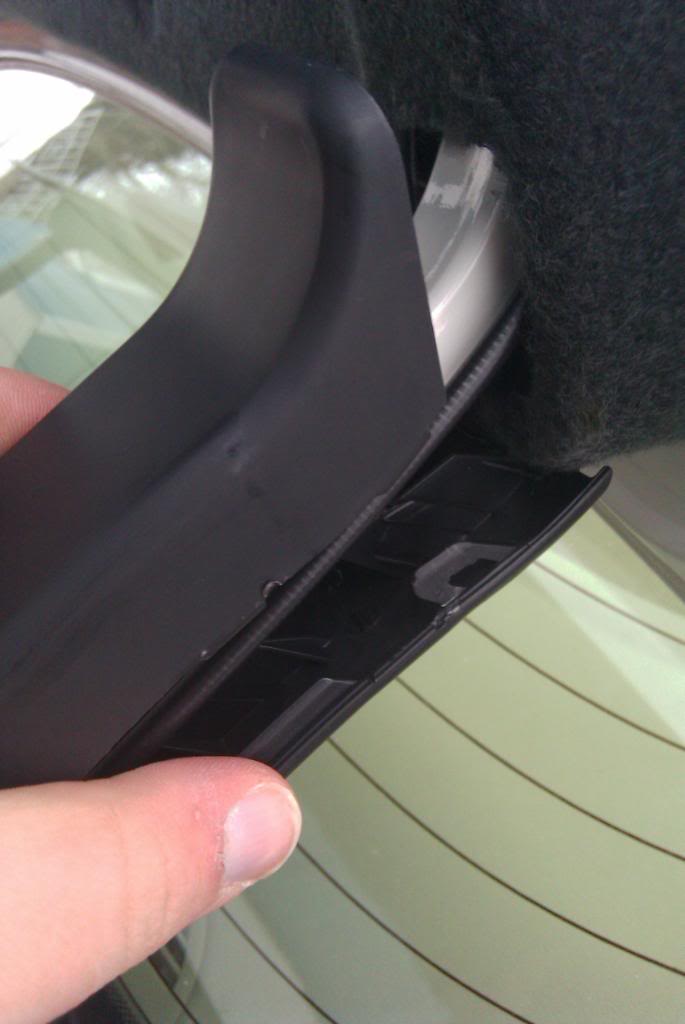
Thats what it should look like if you did it right.
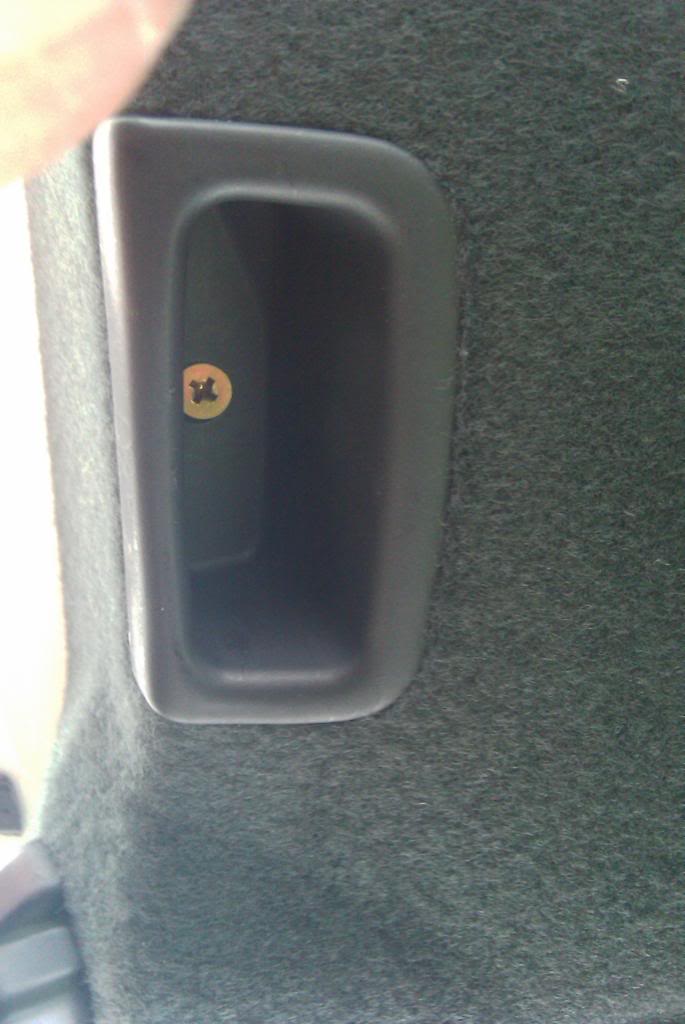
Next is a single phillips head screw thats tucked up in a little handle on the inside lip of the trunk.
And the finnal part are the two black plastic bars that cousin the trunk when it closes. They are kind of tricky, you have to pry out the end farthers to the outside of the car (the one on the right u pull the right side, left one u pull the left side) and then slide it towards the outside of the car and the last to just pull right out. Remember DO NOT pry the last to out, just the first one.
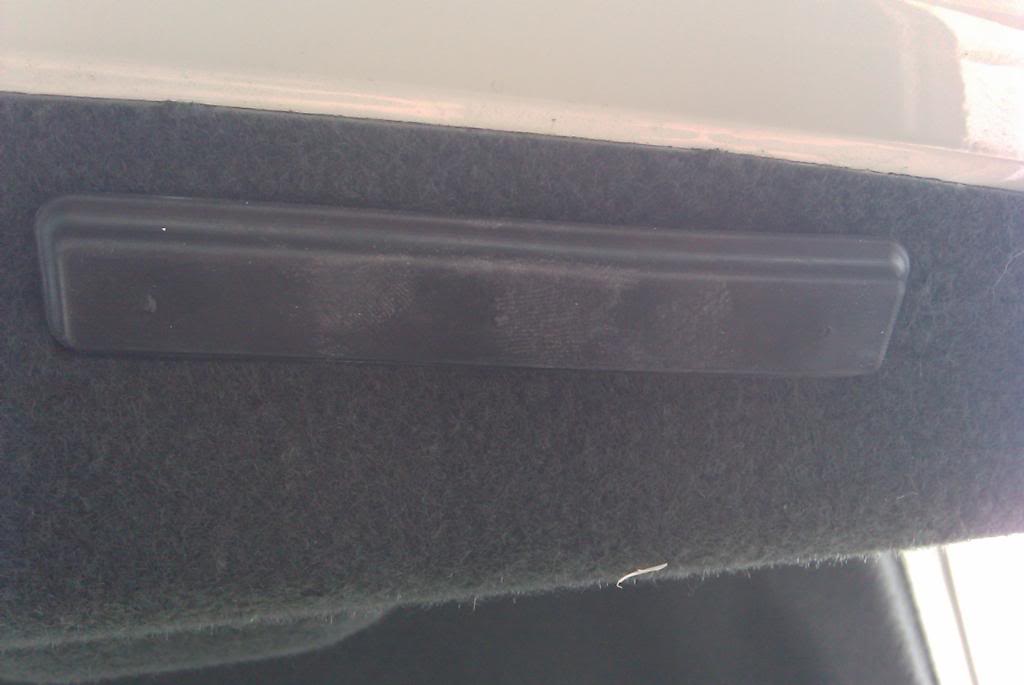
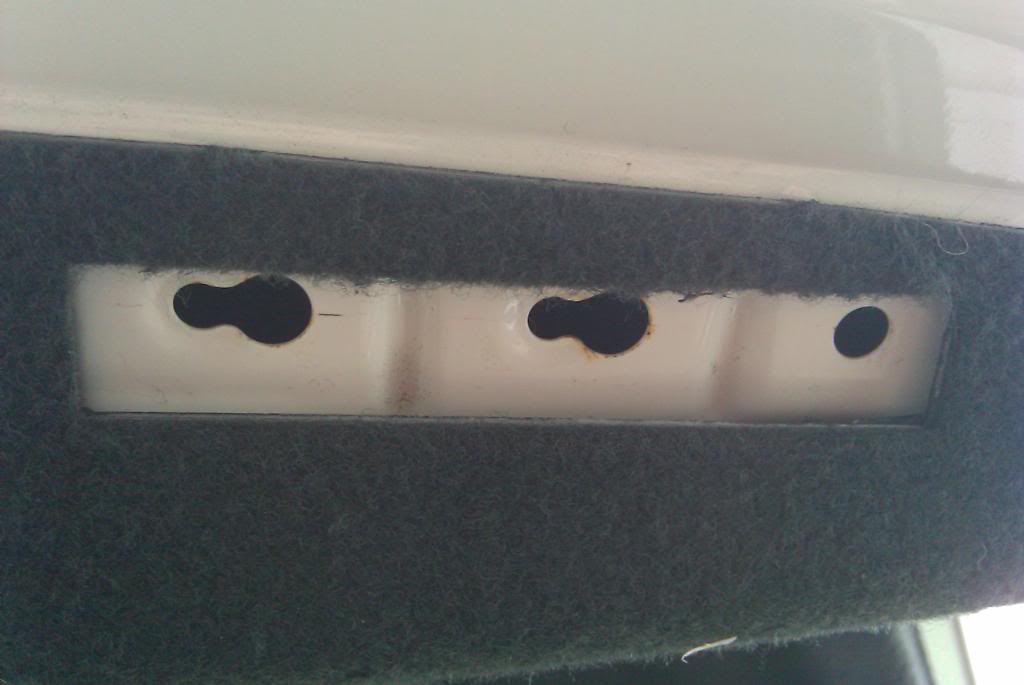
As you can see in the pic you slide the inside to pegs out and they just pull out.
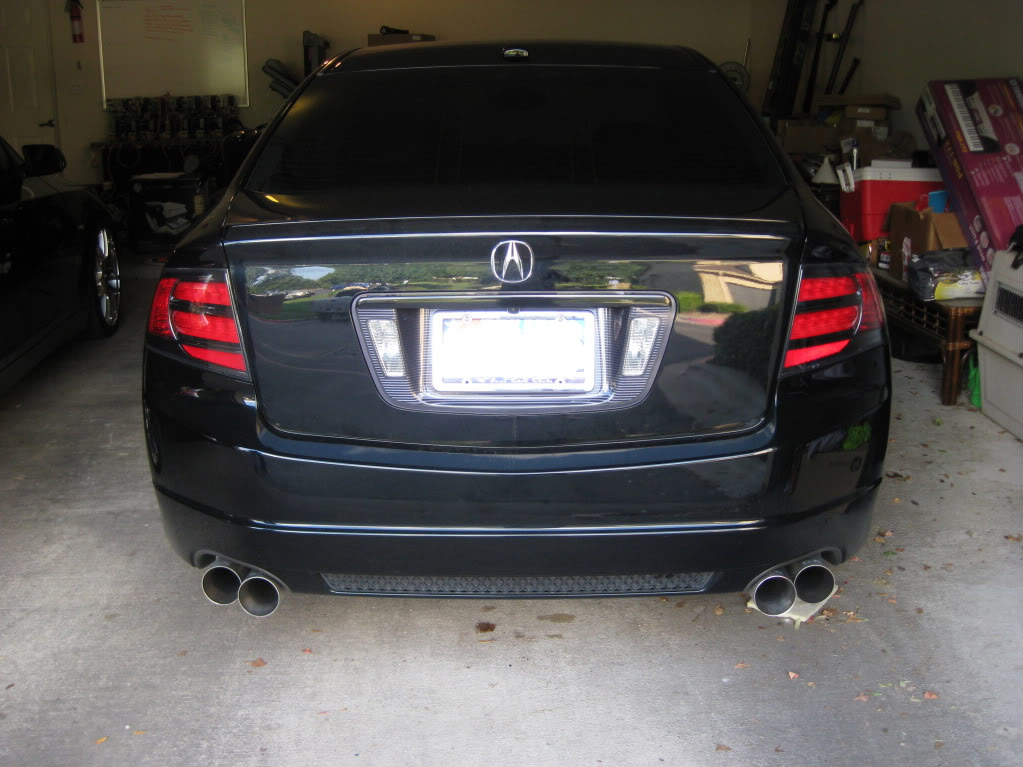
Now you just work the liner out, it might be a little hard at first but just work with it and you can get it. Putting it back in is just as easy.
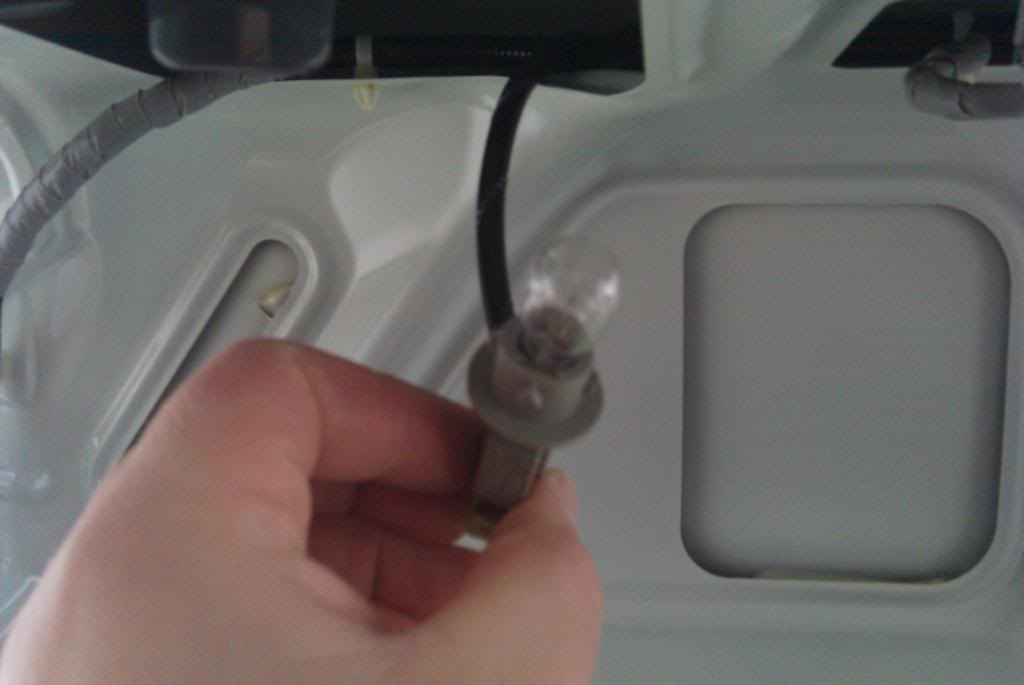
Thats the socket for the reverse lights which I will be replacing for brighter ones.
Well there ya go guys, I hope that helps someone, I know it woulda helped me lol.
First things first, you need to pop the trunk and find 11 little circular clips.
Once you find the clips you will need a very pointy narrow tipped flathead screw driver so you can pop out the middle of the clip. Then you pop out the rest of the clip. (This is in my 2006 TL im not sure if the steps are the same in other years, cant imagine they are that much different in the 3rd gen. cars.)
Pop the middle and remove....
Then remove the rest of it and repeat, be careful not to break them.
Next is the only part that I found hard, the hinges that the trunk opens on are covered by black plastic and you have to pry the 2 halfs apart so you can pull the liner away, the best way to do this is use a broad tipped flathead and just be careful.
Thats what it should look like if you did it right.
Next is a single phillips head screw thats tucked up in a little handle on the inside lip of the trunk.
And the finnal part are the two black plastic bars that cousin the trunk when it closes. They are kind of tricky, you have to pry out the end farthers to the outside of the car (the one on the right u pull the right side, left one u pull the left side) and then slide it towards the outside of the car and the last to just pull right out. Remember DO NOT pry the last to out, just the first one.
As you can see in the pic you slide the inside to pegs out and they just pull out.
Now you just work the liner out, it might be a little hard at first but just work with it and you can get it. Putting it back in is just as easy.
Thats the socket for the reverse lights which I will be replacing for brighter ones.
Well there ya go guys, I hope that helps someone, I know it woulda helped me lol.

The following users liked this post:
: Gabriel : (04-08-2020)
02-13-2010, 04:06 PM
#2
Senior Moderator
Thank you for the DIY, it's been added into the 3G garage! 

The following users liked this post:
: Gabriel : (04-08-2020)
The following users liked this post:
: Gabriel : (04-08-2020)
The following users liked this post:
: Gabriel : (04-08-2020)
02-13-2010, 10:33 PM
#5
Moderator
iTrader: (3)
I see you figured it out! Nice job
The following users liked this post:
: Gabriel : (04-08-2020)
The following users liked this post:
: Gabriel : (04-08-2020)
02-14-2010, 03:56 AM
#8
The following users liked this post:
: Gabriel : (04-08-2020)
The following users liked this post:
: Gabriel : (04-08-2020)
02-14-2010, 12:18 PM
#10
Burning Brakes
Thread Starter
I still have to order new lights, not sure what im going with yet, maybe PIAA lights. Id love to do HID but thats prob not happening anytime soon. Any ideas for another DIY?
The following users liked this post:
: Gabriel : (04-08-2020)
02-19-2010, 05:23 PM
#11
Burning Brakes
Thread Starter
Hey guys, made another DIY today! Check it out... https://acurazine.com/forums/showthr...7#post11758257
The following users liked this post:
: Gabriel : (04-08-2020)
02-20-2010, 10:26 AM
#12
Advanced
The following users liked this post:
: Gabriel : (04-08-2020)
The following users liked this post:
: Gabriel : (04-08-2020)
02-26-2010, 06:02 PM
#15
I bought a "tack puller" from home depot, makes pulling clips out even easier
http://www.homedepot.com/Tools-Hardw...atalogId=10053
http://www.homedepot.com/Tools-Hardw...atalogId=10053
Last edited by ZhenyaF; 02-26-2010 at 06:04 PM.
02-26-2010, 06:11 PM
#16
My Garage not
iTrader: (2)
Join Date: Jun 2006
Location: Westsiiiiiiiiiiiiiiiiiiiiiiiiiiiiiiiiiiide
Posts: 2,121
Likes: 0
Received 4 Likes
on
1 Post
this is true. don't remove the plastic hinge covers. the felt cover for the trunk is pre-cut around the covers (take a look at them) so u can just leave the plastic on and slide the trunk liner around it to take it off.
02-26-2010, 06:19 PM
#17
Burning Brakes
Thread Starter
Your not taking into consideration how your gonna get them back on
09-12-2010, 11:50 AM
#18
Advanced
Join Date: Jun 2010
Age: 37
Posts: 69
Likes: 0
Received 0 Likes
on
0 Posts
I used this DIY for my 08 and it was great, I pulled out all the clips like suggested and had no problems putting it back together. Thanks Crestwood. I did this so I could vinyl the chrome part above my license plate, you have to pop out that entire fixture in order to get that one part out. If anyone is interested in pics for that process let me know, just a few sneaky plastic clips. Thanks again Crest, good write up
09-12-2010, 12:03 PM
#19
Burning Brakes
Thread Starter
I used this DIY for my 08 and it was great, I pulled out all the clips like suggested and had no problems putting it back together. Thanks Crestwood. I did this so I could vinyl the chrome part above my license plate, you have to pop out that entire fixture in order to get that one part out. If anyone is interested in pics for that process let me know, just a few sneaky plastic clips. Thanks again Crest, good write up

 09-13-2010, 10:39 PM
#24
09-14-2010, 12:49 PM
#25
Burning Brakes
Thread Starter
You dont just "go" hid, you have to do quite a bit of wiring for that, you cant just tap into the power in the trunk you gotta get power from the battery. And if you wanna do it right and have an auto tranny you need to install a timer inline because when you pass R to go to D the reverse lights flash on and off for a split second. Thats very bad for the HID bulbs.
04-01-2011, 10:24 PM
#27
Cruisin'
Join Date: Dec 2010
Posts: 24
Likes: 0
Received 0 Likes
on
0 Posts
you have to take off the trunk lining to change your license plate lights?! please someone tell me this is not true, as I am looking to attempt this install tomorrow. Please anyone know of any DIY's on here for license plate light removal or can anyone explain the best way to do so thanks!
04-02-2011, 07:36 PM
#28
Cruisin'
Join Date: Dec 2010
Posts: 24
Likes: 0
Received 0 Likes
on
0 Posts
scratch that last thread. actually installed my led's in the license plate lights today. i just popped em out thru the outside, not doing the whole taking out of the trunk liner. a lot easier. 
04-02-2011, 10:40 PM
#30
baller on a budget, b!tch
If you plan on doing led reverse lights, you have to remove the trunk liner. Really a no brainer, just try to be dainty with those friggin plastic pins! Oh and while you have it off? Might as well throw in sone LP LeDs!!
04-04-2011, 07:15 PM
#31
Cruisin'
Join Date: Dec 2010
Posts: 24
Likes: 0
Received 0 Likes
on
0 Posts
i just opened up my trunk and took a look at the two bays which were holding the 2 lights in for the license plate lights. you can see on the plastic pieces ( 2 different ones) that if you slide it to the right it tightens the clips and makes it able to pop out. Once they pop out u just have to finagle it to come out. Change the lights, then pop back in.
NOTE: Getting them to go back in is a lot harder than coming out. It takes a lot of maneuvering back and forth and lot of patience, but trust me they do go in. after getting the 1st one back in the 2nd one was cake. probably took me no longer than 15 minutes to complete this task. good luck to all who attempt. let me know if you have anymore questions.
NOTE: Getting them to go back in is a lot harder than coming out. It takes a lot of maneuvering back and forth and lot of patience, but trust me they do go in. after getting the 1st one back in the 2nd one was cake.
probably took me no longer than 15 minutes to complete this task. good luck to all who attempt. let me know if you have anymore questions.
12-13-2011, 11:03 AM
#33
Instructor
Bumping this to try to get an answer... What are the part numbers for the small plastic fasteners / clips (from the first picture) and the rectangular rubber cushions? I was not dainty and broke several of everything while swapping out LEDs. 
12-13-2011, 02:35 PM
#34
Drifting
iTrader: (13)
The fasteners (also lovingly called "Bitch Clips"---you now know why) can be had here:
http://www.clipsandfasteners.com/Hon...eners_s/65.htm
Or on ebay.
The rubber grommets are #25 in this diagram (I believe):
http://www.acurapartswarehouse.com/P...gPicture=False
http://www.clipsandfasteners.com/Hon...eners_s/65.htm
Or on ebay.
The rubber grommets are #25 in this diagram (I believe):
http://www.acurapartswarehouse.com/P...gPicture=False
The following 3 users liked this post by dwb993:
12-14-2011, 12:18 AM
#35
Instructor
The fasteners (also lovingly called "Bitch Clips"---you now know why) can be had here:
http://www.clipsandfasteners.com/Hon...eners_s/65.htm
Or on ebay.
The rubber grommets are #25 in this diagram (I believe):
http://www.acurapartswarehouse.com/P...gPicture=False
http://www.clipsandfasteners.com/Hon...eners_s/65.htm
Or on ebay.
The rubber grommets are #25 in this diagram (I believe):
http://www.acurapartswarehouse.com/P...gPicture=False
12-14-2011, 08:36 AM
#36
Drifting
iTrader: (13)
No---those are for the bumper. Its kind of tough to figure out the right one---make sure you measure.
I also found this diagram, where I believe it is #21:
http://www.acurapartswarehouse.com/P...igPicture=True
I also found this diagram, where I believe it is #21:
http://www.acurapartswarehouse.com/P...igPicture=True


The following users liked this post:
Mrtastygoody (04-29-2013)
06-04-2013, 01:15 PM
#39
Drifting
good thing I found this thread Im wanting to vinyl wrap the trim piece above license plate gloss black soon
