DIY: Rewrapping that faded bottom window trim
#41
Acura Member
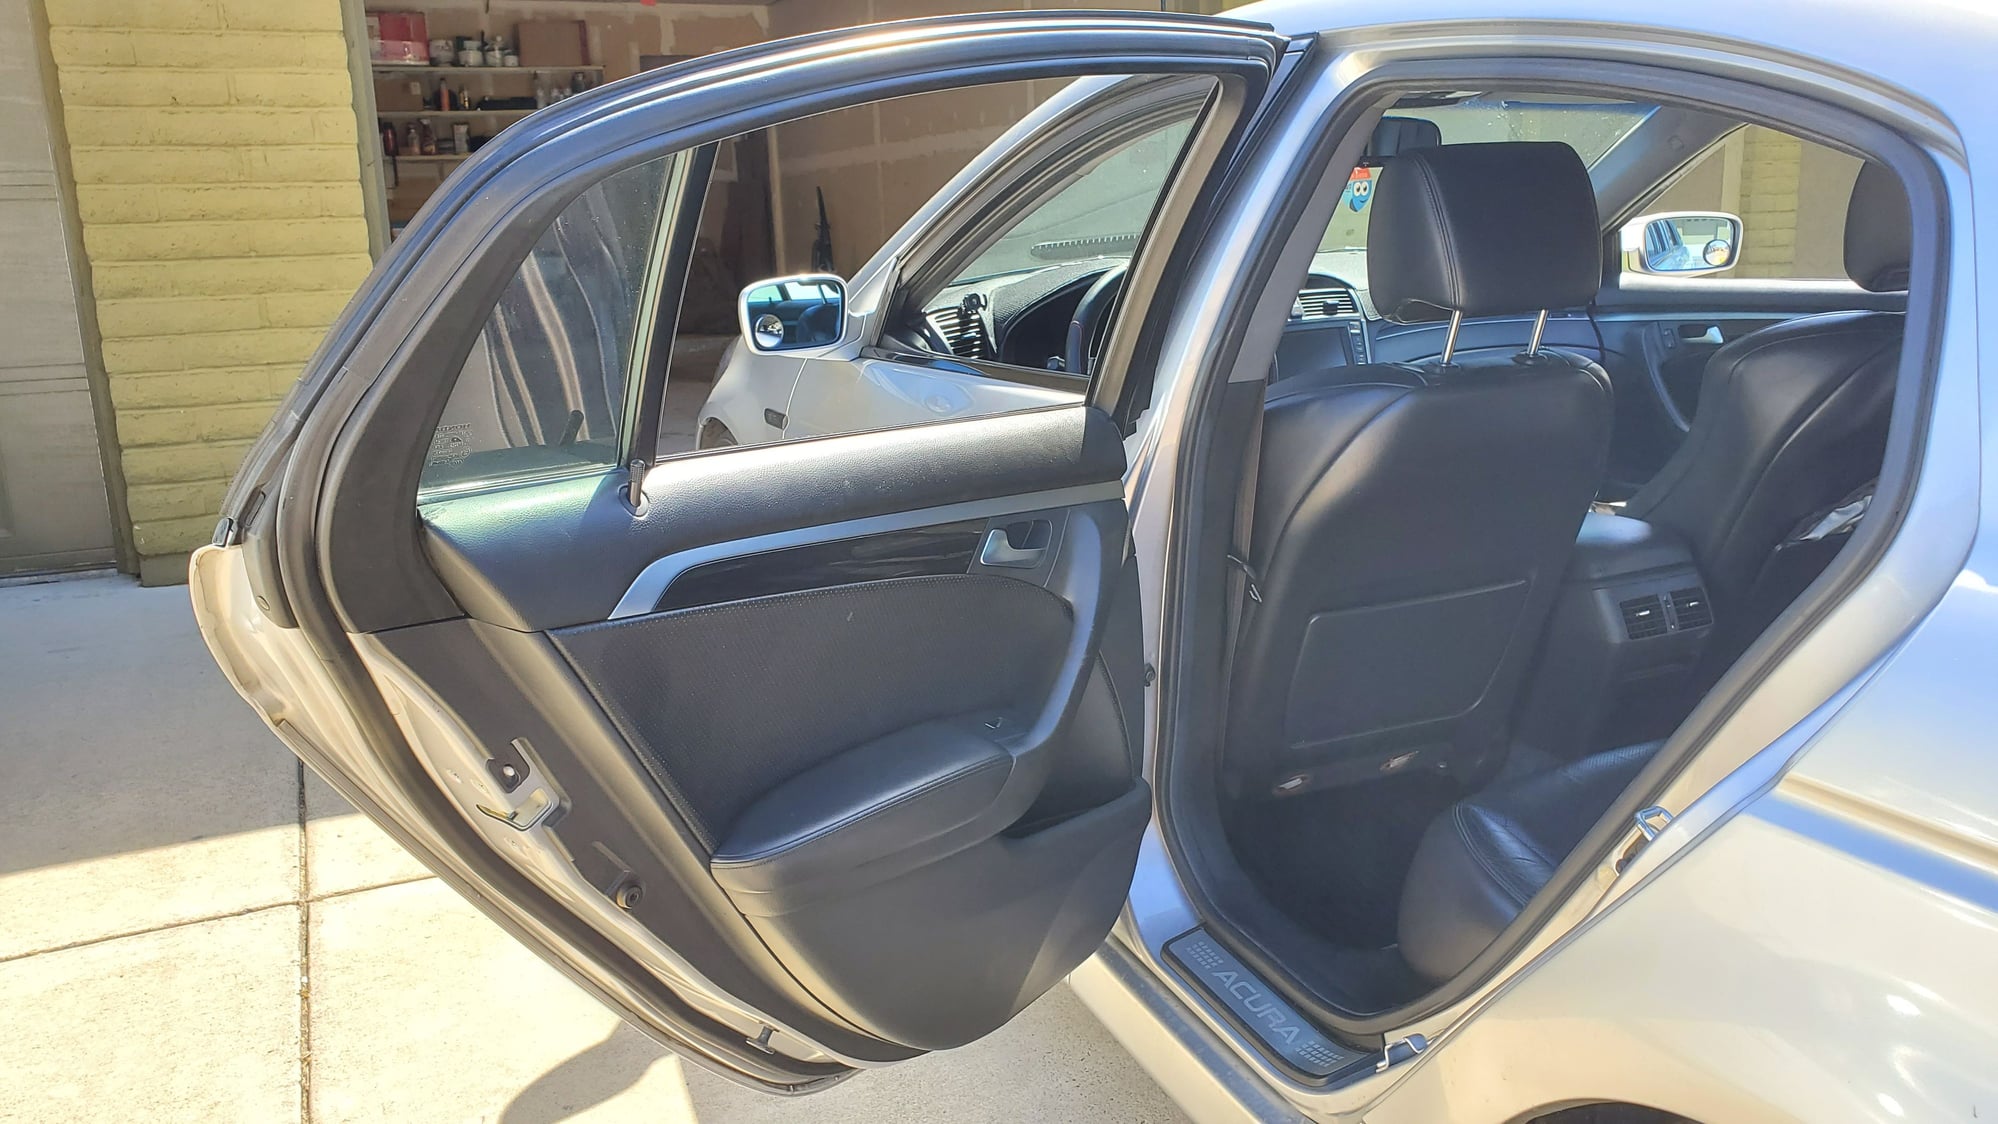
I started with the window down... I do not see how it would be necessary since the door panel does not have to come off but I think having the window down definitely helps.
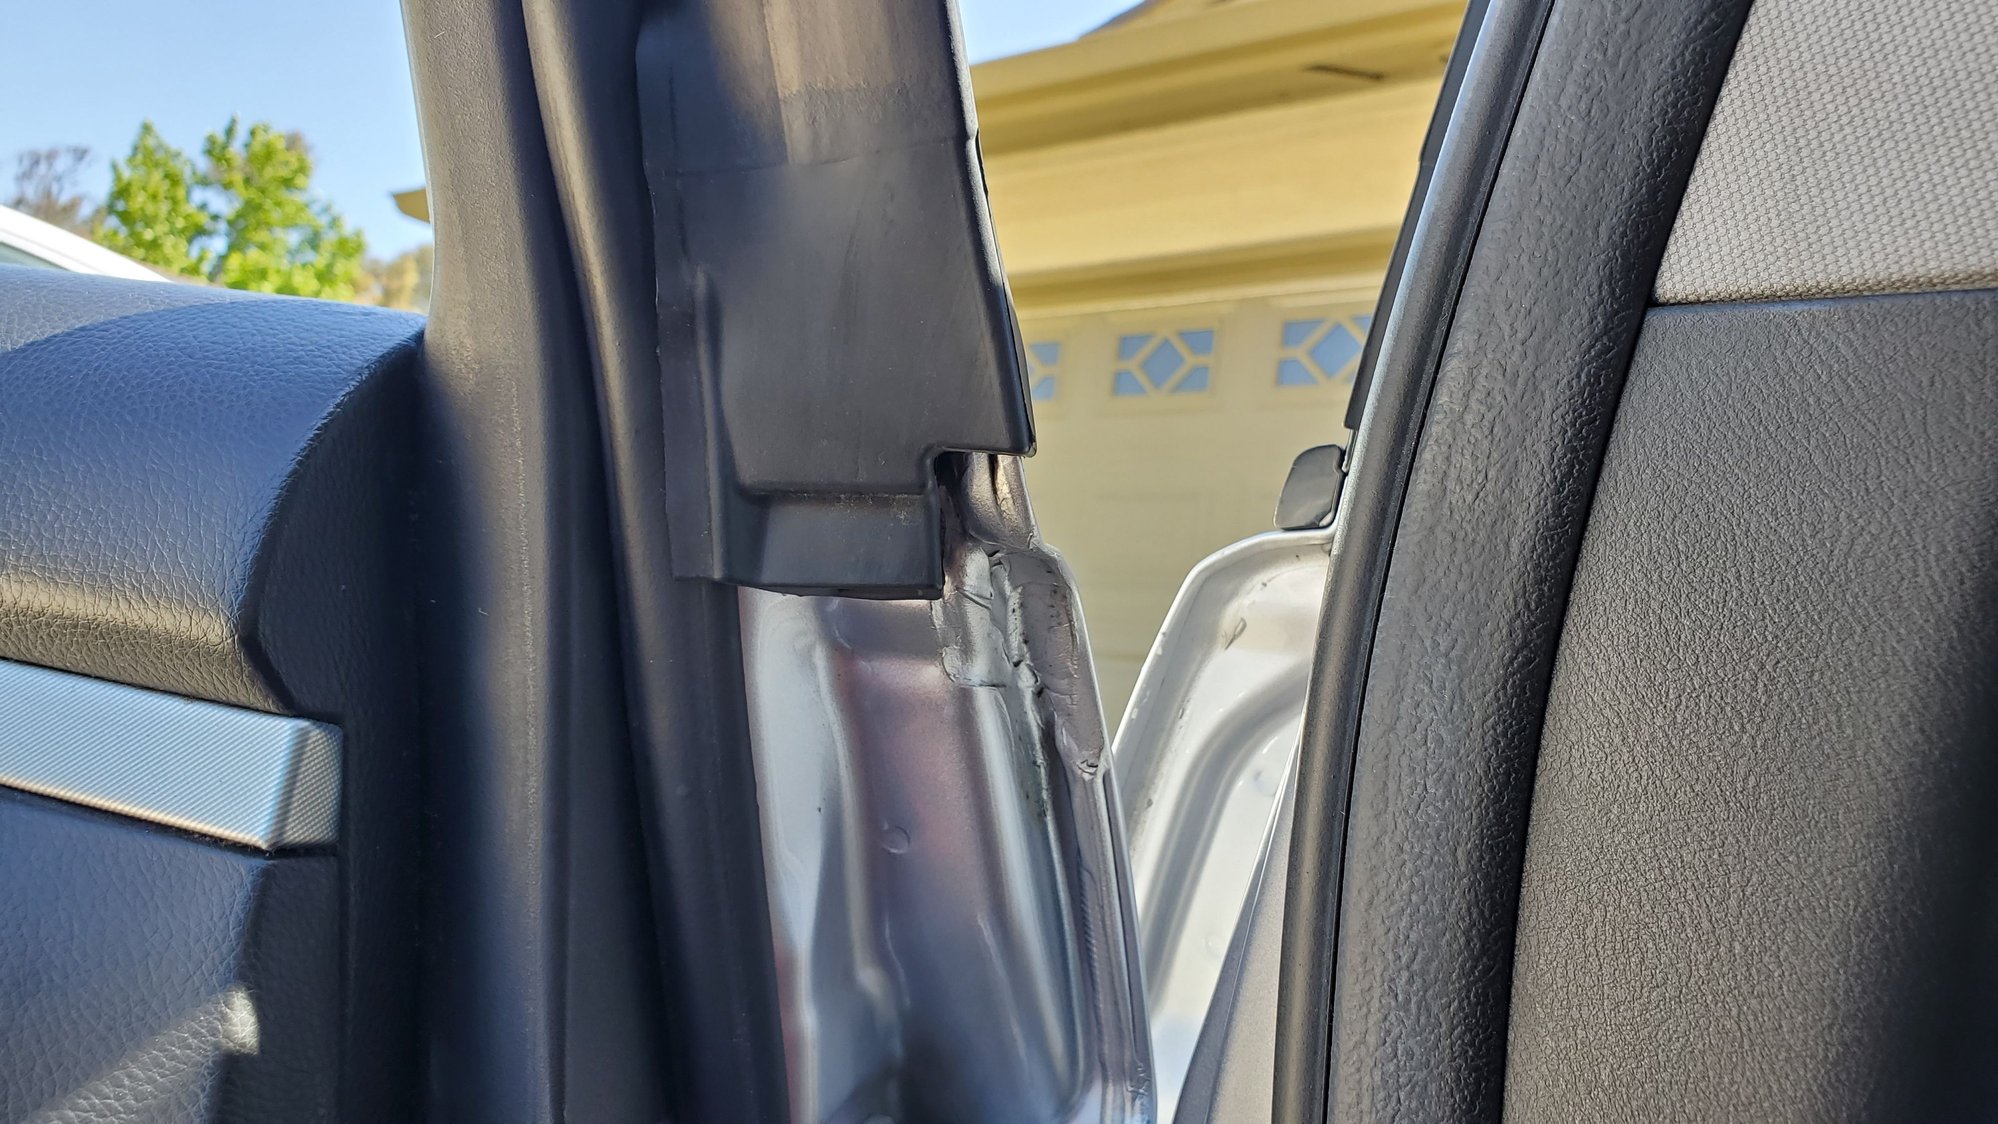
Next, you're going to have feel for the clip in screw on the bottom of the rubber weather strip

As you can see, there's a squarish opening and that is where you can slide a flat tip screwdriver in to pop the clip out. You can also use pliers too.
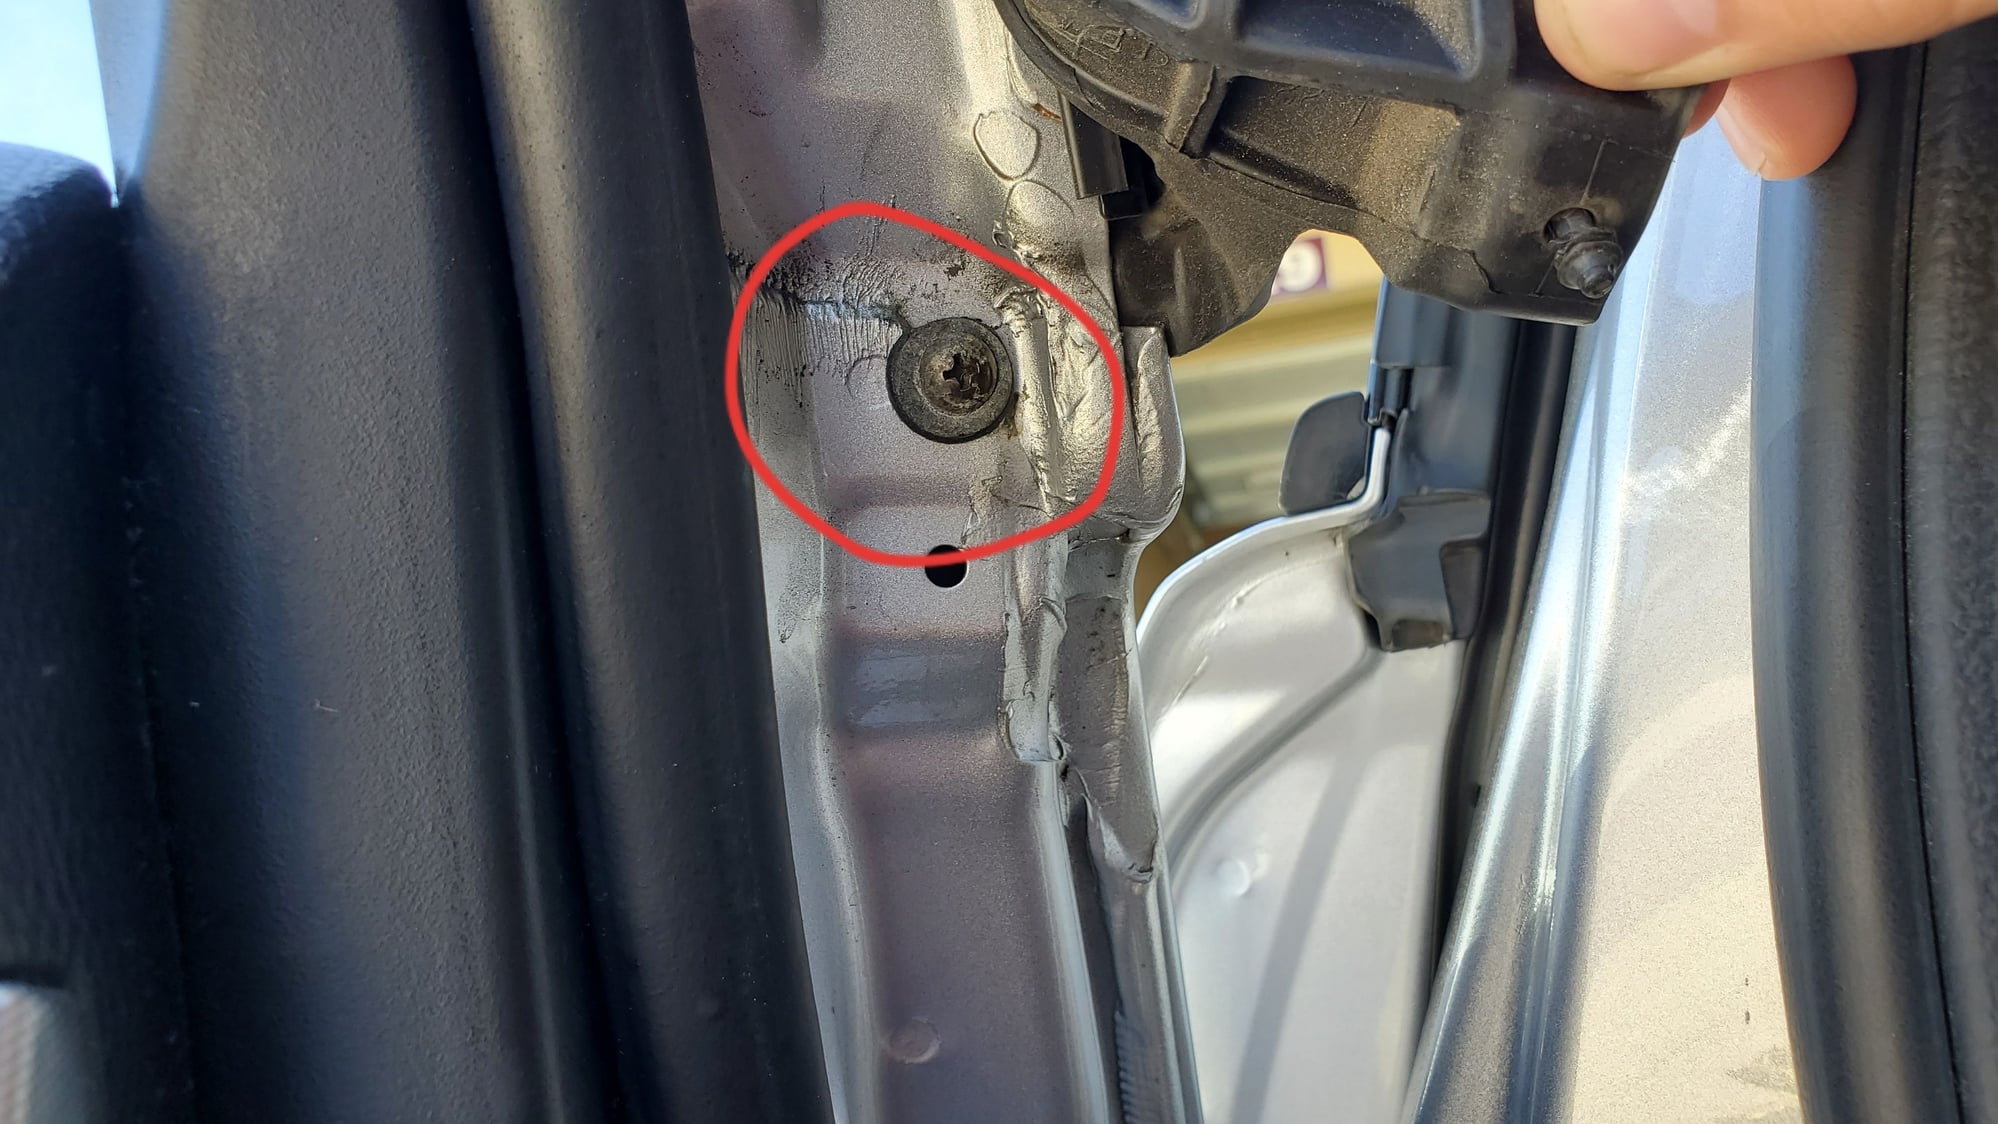
You can now peel the weather strip up to reveal the lone screw holding/securing the outer window trim piece in.
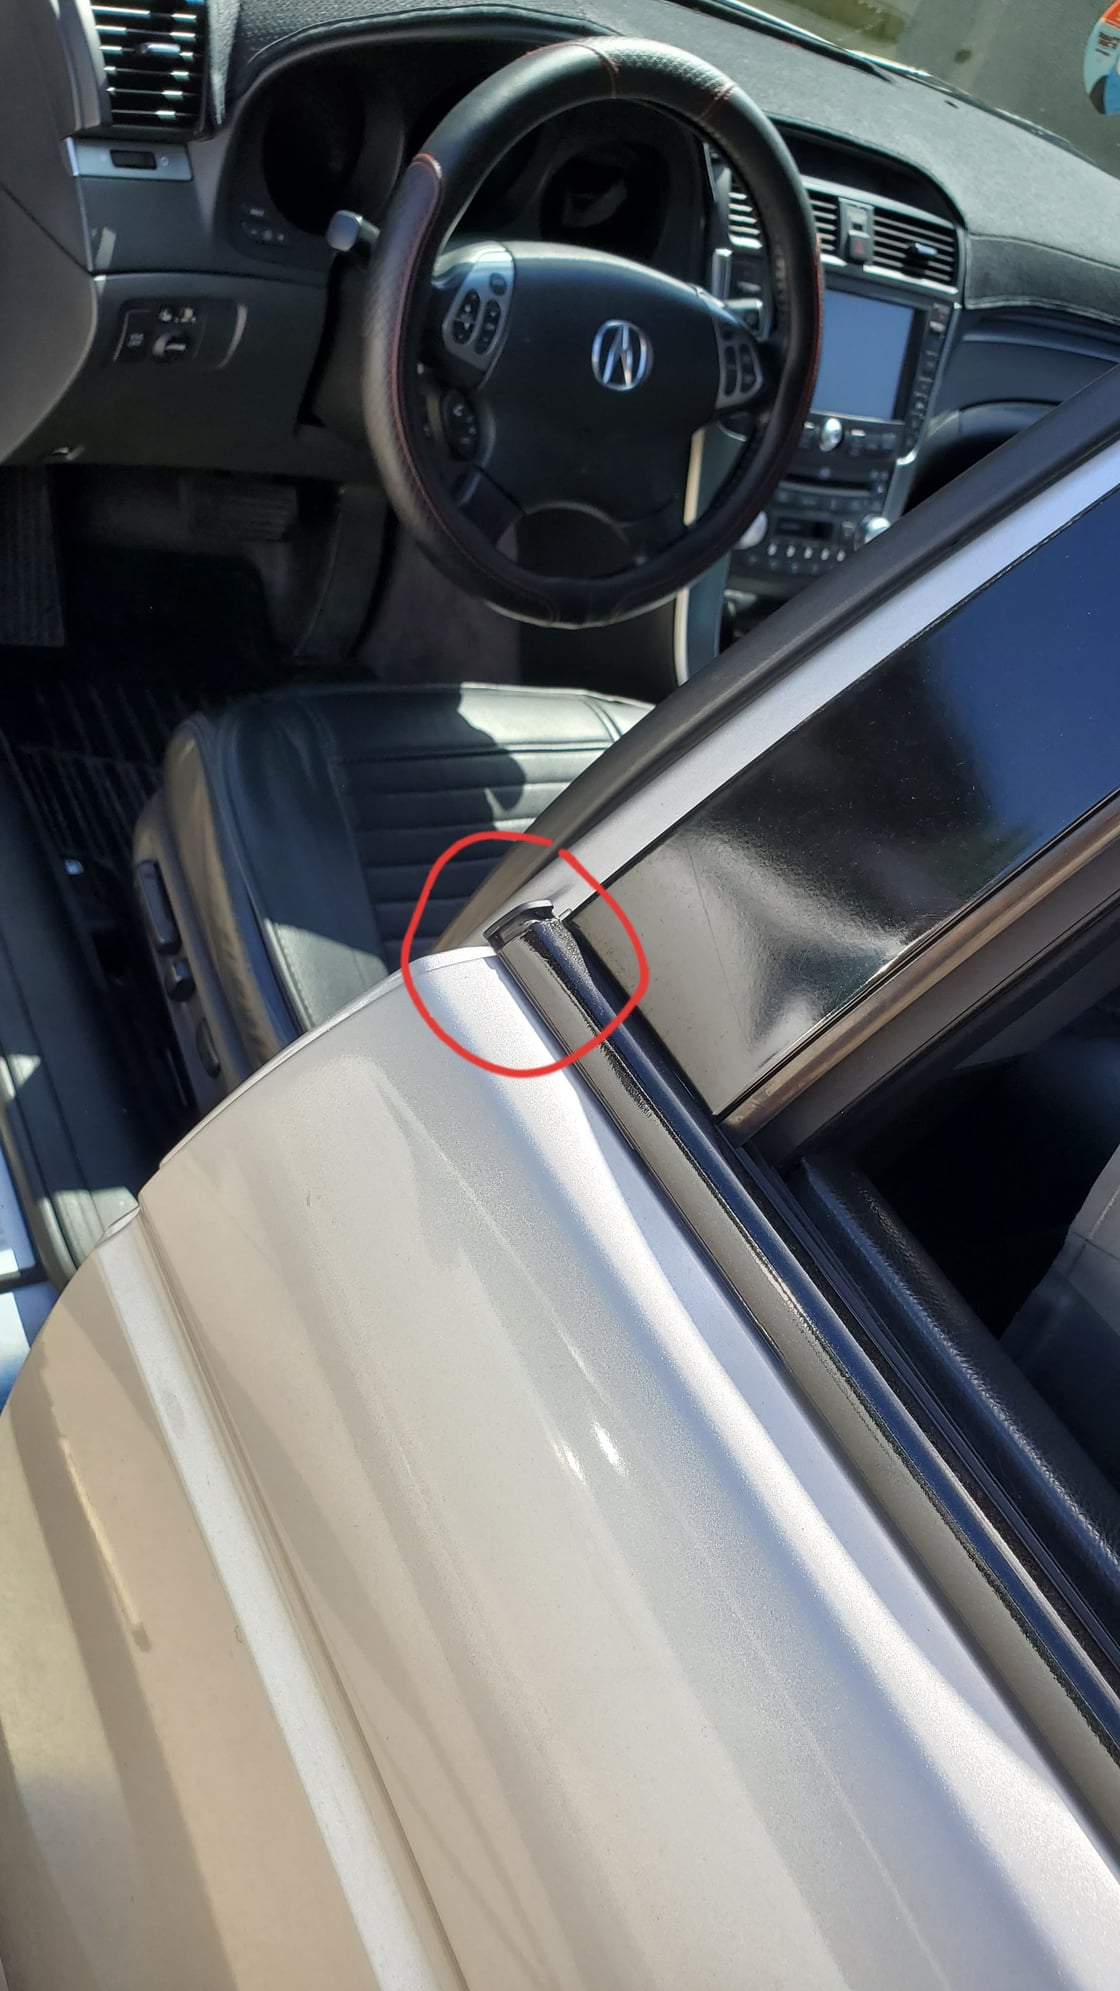
With the screw removed, you'll need to pop the end front end piece out. In order to do this you need to open the front door. Then you can use a small flat tip screwdriver and a hammer/mallet to pop the piece out. BE CAREFUL! This piece can be bent and ruined easily. Once you have it out enough to be gripped by your fingers I would recommend using your fingers to pull it the rest of the way out.
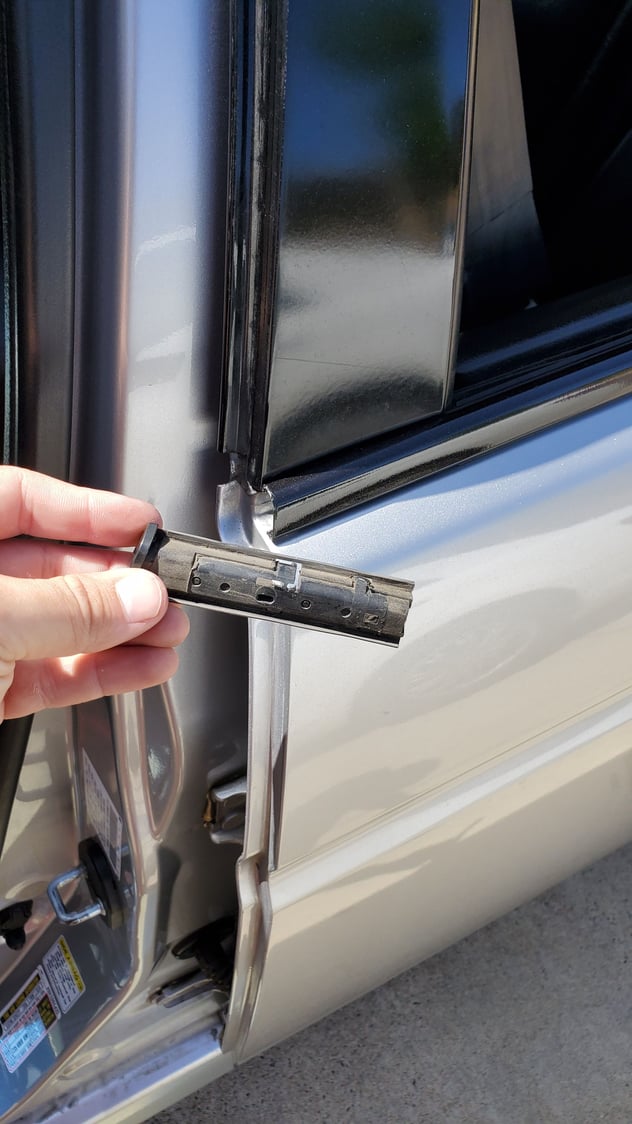
Once removed it will look like this. This piece should easily slide back in place during reinstallation.
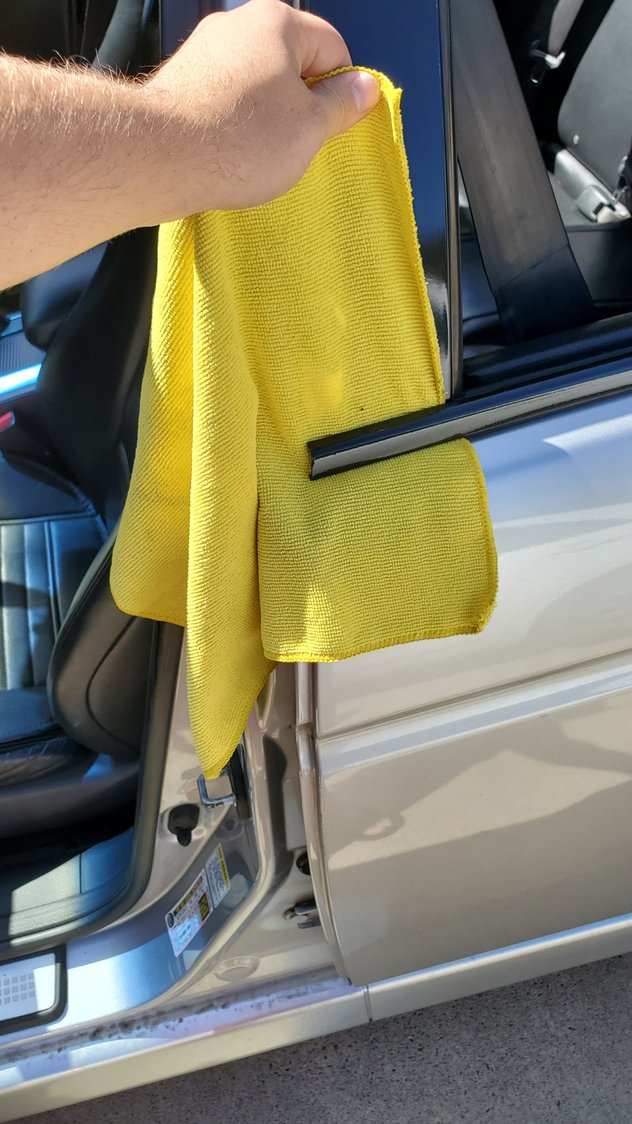
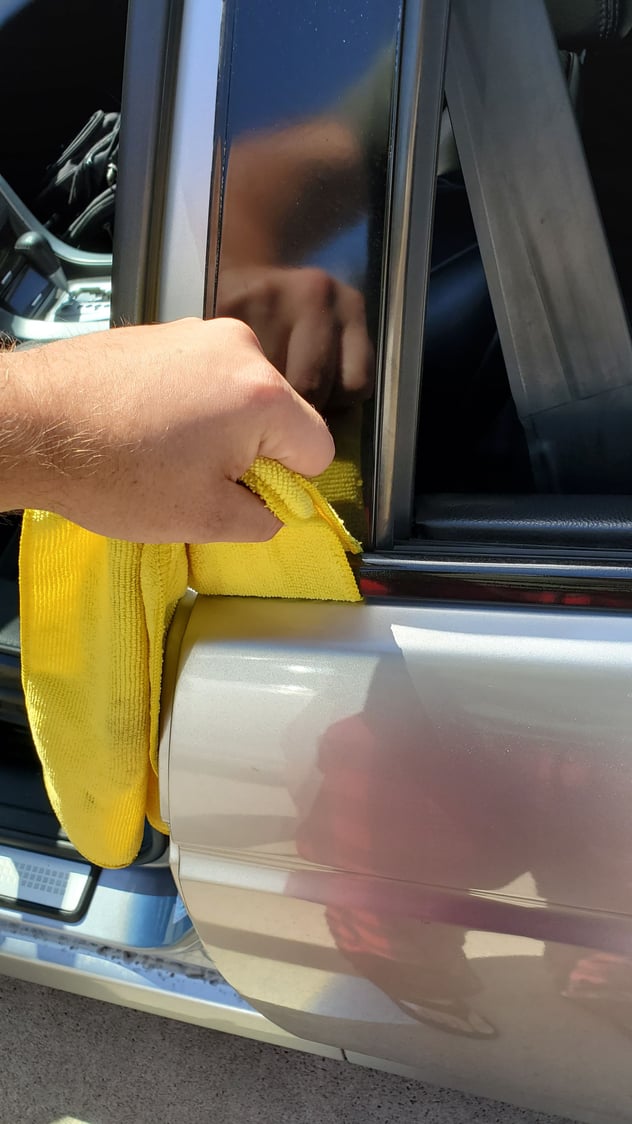
Next, you can either grip the end with your hand and pry upward or you can use a towel to slide between the trump piece and car to get better leverage. The towel is not necessary for the back window trims but I'd highly recommend using this approach for the 2 front trim pieces.
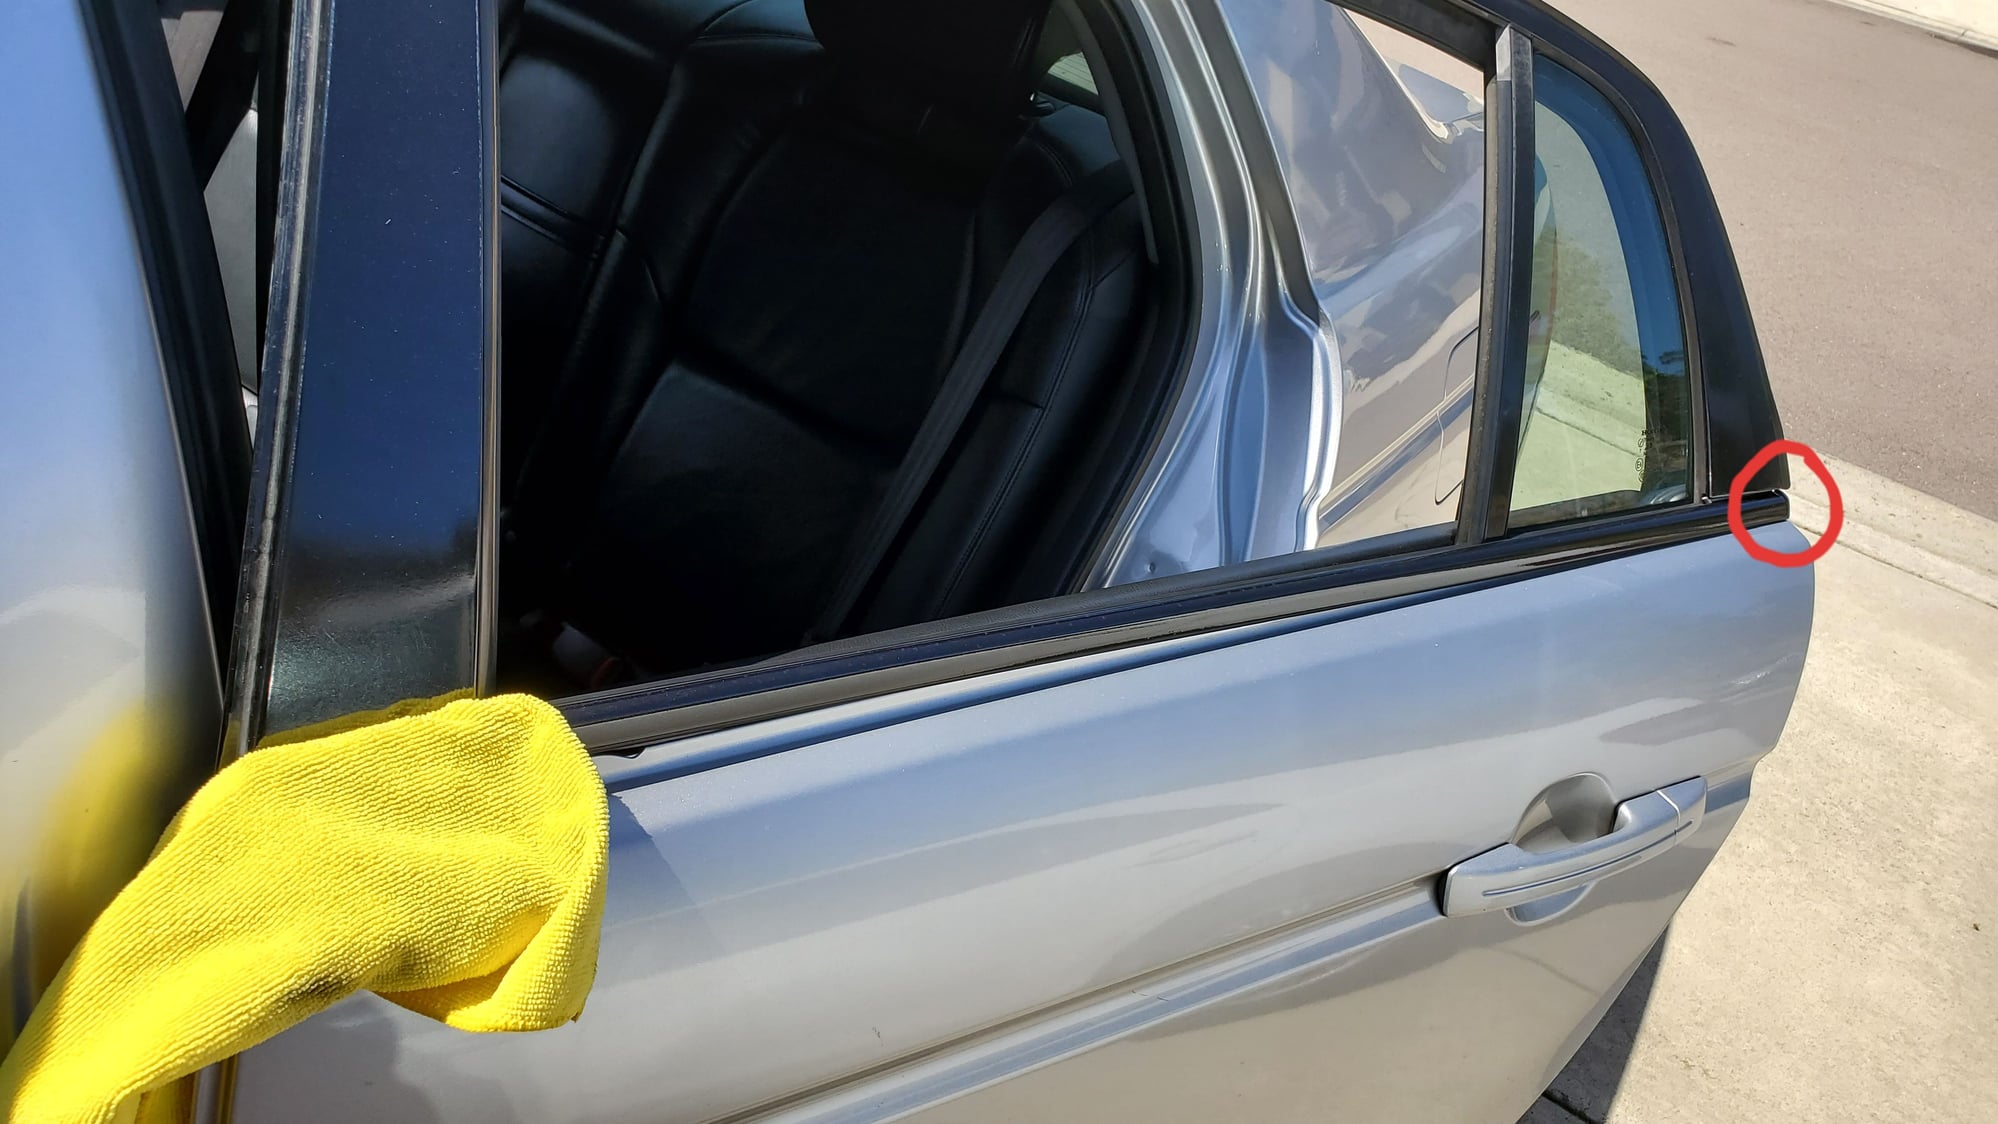
As you pry up be careful because if you pull too far up you can bend the back trim pieces. Once you have it this far, try sliding the trim off (toward the front of the car). Once the trim piece is slid far enough out you will see the trim slides all the way off of the back end piece. At this point you should be able to pry the entire piece up and off the car if you haven't already gotten that far.
Now all you need to do is slide the long plastic piece out of the trim and you'll have full access to the trim piece for removing the old vinyl and applying new vinyl.
Reinstallation will be the same process but in reverse.
Last edited by mayjarjar; 05-24-2019 at 01:09 PM.
The following 6 users liked this post by mayjarjar:
Chad05TL (03-21-2021),
Legend2TL (10-25-2020),
PaulM9999 (05-22-2020),
ProfessorFunk (01-09-2021),
Shawn Challu (07-20-2020),
and 1 others liked this post.
#42
AZ Community Team
Great thread, thanks for all the posters who put up pics.
Gonna do this In November
Gonna do this In November
#44
chillin in the desert
window sill wrap
so far I have completed the rear window sills. I wrapped them in vivid carbon fiber wrap. I will wrap the other ones in a few days when I feel like taking off door panels.
- Wash hands well after removing pieces, your hands will be dirty.
- Clean the surface to be wrapped with alcohol so there is no residual chemicals that might stop your wrap from adhering.
- Cut 2 inch strips about a half inch longer than the metal sill piece you are wrapping.
- Peel the backing off of the wrap and lay it on a countertop.
- Lay the metal piece you are wrapping in the center of the strip and start to hand wrap the metal piece.
- Using your fingers and a heat gun to help shape the wrap, work from one end to the other carefully wrapping all exposed pieces of the metal.
- Once you have worked out any air bubbles and completely wrapped the section you are working on trim the edge with a razor knife so that there isn't any wrap inside the channel where the rubber seal is going to go back into.
- Once all the edges are trimmed and the wrap is completely stuck to the metal reinstall


Last edited by full_stealth; 01-08-2021 at 06:15 PM.
#45
front kinda sucks, i basically just slide the entire metal part off the rubber while it was on the door. I tried on two different TLs at the junkyard to lift the trim on inner edge and pull but it wouldnt budge.
just remove the screw and slide it off straight. just give it a strong tug and it'll start to come off. I didnt even need to remove the mirror on install.
just remove the screw and slide it off straight. just give it a strong tug and it'll start to come off. I didnt even need to remove the mirror on install.
#46
AZ Community Team
I did the left rear this past Sunday, I would recommend putting some masking tape on the plastic vertical panels above the trim at the far left and far right.
I accidently scratched both of them slightly when lifting the trim off the door. I'll post some pics later.
Not entirely happy with the quality of the job I did, there are a couple spots that have slightly raised due to some small air bubbles.
This is the vinyl I'm using from Amazon.
I accidently scratched both of them slightly when lifting the trim off the door. I'll post some pics later.
Not entirely happy with the quality of the job I did, there are a couple spots that have slightly raised due to some small air bubbles.
This is the vinyl I'm using from Amazon.
The following users liked this post:
Slpr04UA6 (01-13-2021)
#47
I did the left rear this past Sunday, I would recommend putting some masking tape on the plastic vertical panels above the trim at the far left and far right.
I accidently scratched both of them slightly when lifting the trim off the door. I'll post some pics later.
Not entirely happy with the quality of the job I did, there are a couple spots that have slightly raised due to some small air bubbles.
This is the vinyl I'm using from Amazon.
https://www.amazon.com/VViViD-Gloss-...0460049&sr=8-1
#48
Head a da Family
Join Date: Jul 2003
Location: New Friggin Jerzy
Age: 69
Posts: 5,505
Received 561 Likes
on
393 Posts
Use a heat gun to remove then use Black Flex Tape! One $12 roll was enough for the 2 doors that were peeling. No removing screws, no expensive replacement material.
Worked for me! Looks great!
.
.
Worked for me! Looks great!
.
.
#50
AZ Community Team
I finished the remaining three door/window yesterday (was on holiday for MLK day)
I'll post pics later as I need to wash the car and has lots of fingerprints and smudges from removing and installing the trim.
FWIW some tips below.
1) to easily remove the old black vinyl wrap, heat the trim (once it is separated from the plastic core) from the back inner side (not the outer side which has the wrap). This made it far easier as the tape came off in one piece on one of the pieces I removed and two pieces on the other two. The first time I did this I had the heat gun fixed on a work surface blowing hot air on the tape side and it kept breaking apart, making it a chore to get off. I tried the back side and it made a HUGE difference.
2) As noted the rear trim is far easier than the front to get off, I did those first. It's pretty well documented above. My only addition is to put some masking tape on the upright plastic trim pieces at the front and back of the window frame. I accidently scratched the first one I did, small scratches that are very hard to see but I know they're there kind of scratches.
3) I did not remove either mirror for the front trim. I was able to get the whole trim assembly off the left door with only removing the plastic end cap retaining screw. Then carefully lifted the rear section and pulled rearward the whole trim, took less than a minute. The right door was a different story, after removing the screw I could not lift the trim assembly from the door. I used the cloth wrap technique that was shown above, still couldn't get it loose. I finally just pulled the metal trim from the plastic core assembly once i removed the plastic end cap. It was easy to reinstall both left and right. I used water to lubricate the plastic for the right side to help the trim slide into the plastic core.
4) When applying the new wrap I used a cotton sock over my hand to help smooth out any bubbles or creases. I learned to be patient for using the heat, I had a HF heatgun and used high setting to remove the old wrap but low for putting on the new wrap. For the new wrap I strongly suggest trying a test piece first and expect to take a couple tries. Use distance from the heat gun and movement of the trim to not overheat the wrap.
5) I will never have a job at a wrap shop, I give my overall effort a 7/10 for appearance. If I did it again I could probably get it up to a 9 if I was more patient.
Good luck, looks alot better despite a few flaws in the new wrap.
From 6' away looks great, from 6" I can see a few flaws.
The following users liked this post:
Slpr04UA6 (01-19-2021)
#51
I finished the remaining three door/window yesterday (was on holiday for MLK day)
I'll post pics later as I need to wash the car and has lots of fingerprints and smudges from removing and installing the trim.
FWIW some tips below.
1) to easily remove the old black vinyl wrap, heat the trim (once it is separated from the plastic core) from the back inner side (not the outer side which has the wrap). This made it far easier as the tape came off in one piece on one of the pieces I removed and two pieces on the other two. The first time I did this I had the heat gun fixed on a work surface blowing hot air on the tape side and it kept breaking apart, making it a chore to get off. I tried the back side and it made a HUGE difference.
2) As noted the rear trim is far easier than the front to get off, I did those first. It's pretty well documented above. My only addition is to put some masking tape on the upright plastic trim pieces at the front and back of the window frame. I accidently scratched the first one I did, small scratches that are very hard to see but I know they're there kind of scratches.
3) I did not remove either mirror for the front trim. I was able to get the whole trim assembly off the left door with only removing the plastic end cap retaining screw. Then carefully lifted the rear section and pulled rearward the whole trim, took less than a minute. The right door was a different story, after removing the screw I could not lift the trim assembly from the door. I used the cloth wrap technique that was shown above, still couldn't get it loose. I finally just pulled the metal trim from the plastic core assembly once i removed the plastic end cap. It was easy to reinstall both left and right. I used water to lubricate the plastic for the right side to help the trim slide into the plastic core.
4) When applying the new wrap I used a cotton sock over my hand to help smooth out any bubbles or creases. I learned to be patient for using the heat, I had a HF heatgun and used high setting to remove the old wrap but low for putting on the new wrap. For the new wrap I strongly suggest trying a test piece first and expect to take a couple tries. Use distance from the heat gun and movement of the trim to not overheat the wrap.
5) I will never have a job at a wrap shop, I give my overall effort a 7/10 for appearance. If I did it again I could probably get it up to a 9 if I was more patient.
Good luck, looks alot better despite a few flaws in the new wrap.
From 6' away looks great, from 6" I can see a few flaws.
I'll post pics later as I need to wash the car and has lots of fingerprints and smudges from removing and installing the trim.
FWIW some tips below.
1) to easily remove the old black vinyl wrap, heat the trim (once it is separated from the plastic core) from the back inner side (not the outer side which has the wrap). This made it far easier as the tape came off in one piece on one of the pieces I removed and two pieces on the other two. The first time I did this I had the heat gun fixed on a work surface blowing hot air on the tape side and it kept breaking apart, making it a chore to get off. I tried the back side and it made a HUGE difference.
2) As noted the rear trim is far easier than the front to get off, I did those first. It's pretty well documented above. My only addition is to put some masking tape on the upright plastic trim pieces at the front and back of the window frame. I accidently scratched the first one I did, small scratches that are very hard to see but I know they're there kind of scratches.
3) I did not remove either mirror for the front trim. I was able to get the whole trim assembly off the left door with only removing the plastic end cap retaining screw. Then carefully lifted the rear section and pulled rearward the whole trim, took less than a minute. The right door was a different story, after removing the screw I could not lift the trim assembly from the door. I used the cloth wrap technique that was shown above, still couldn't get it loose. I finally just pulled the metal trim from the plastic core assembly once i removed the plastic end cap. It was easy to reinstall both left and right. I used water to lubricate the plastic for the right side to help the trim slide into the plastic core.
4) When applying the new wrap I used a cotton sock over my hand to help smooth out any bubbles or creases. I learned to be patient for using the heat, I had a HF heatgun and used high setting to remove the old wrap but low for putting on the new wrap. For the new wrap I strongly suggest trying a test piece first and expect to take a couple tries. Use distance from the heat gun and movement of the trim to not overheat the wrap.
5) I will never have a job at a wrap shop, I give my overall effort a 7/10 for appearance. If I did it again I could probably get it up to a 9 if I was more patient.
Good luck, looks alot better despite a few flaws in the new wrap.
From 6' away looks great, from 6" I can see a few flaws.
The following users liked this post:
Slpr04UA6 (01-19-2021)
Thread
Thread Starter
Forum
Replies
Last Post
troper24996
2G TL Problems & Fixes
7
03-12-2013 04:59 PM


