
DIY: Rear sunshade
 11-12-2012, 05:25 PM
#1
Instructor
Thread Starter
DIY: Rear sunshade
With my son still rear facing I would always hear him cry whenever the sun hits his eyes so I had to think of a way to install a rear sunshade even though I have tints already. So I saw a diy using a manual sunshade for a 2006 VW Passat. Looks oem and screw holes will not be visible (just my opinion) when removed, as the screws are thin.
Special thanks to Inaccurate for taking the time taking pictures of his roof for me although I ended up a different route (I didnt have the balls to drill a hole on the roof and use bmw hooks).
This diy will not be for everyone as with any modifications and I will not be responsible for any installation errors.
Parts:
2006 VW Passat part # 3C0 064 360 (price range from $9-15.00 online and dealer)
1x1 zip tie mounting base (found at home depot)
super glue
knife
8 pcs 1 x 1/4 x 1/16 Neodymium magnet (bought from ebay member zigmag416)
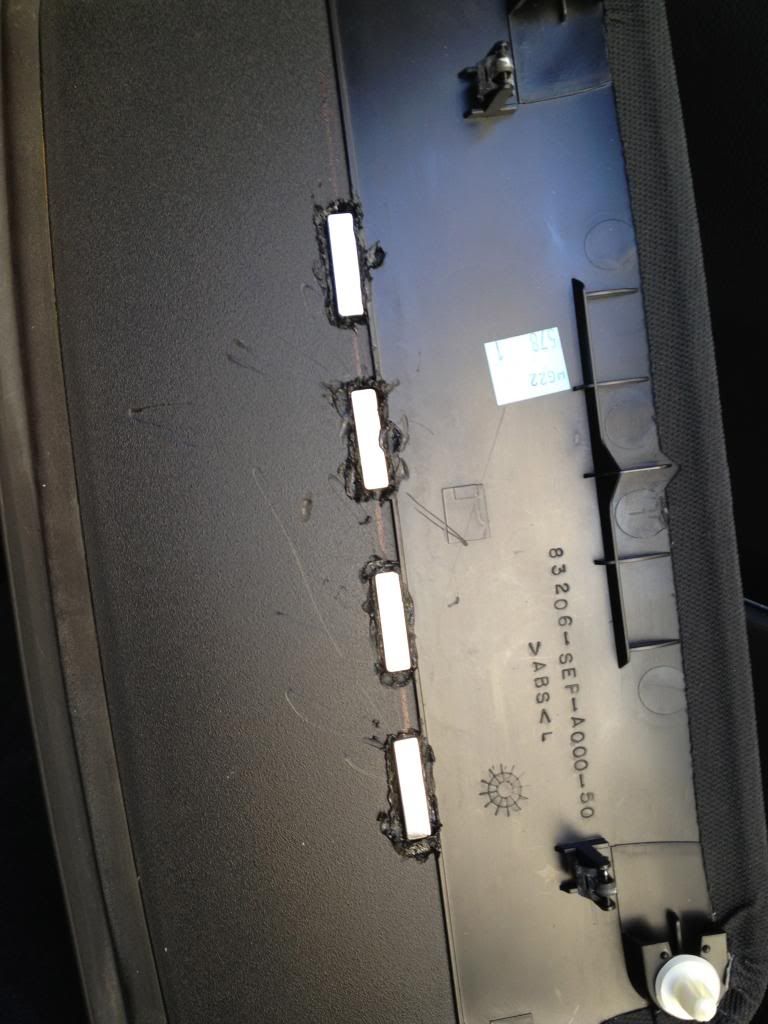
1. Theres two options of mounting the sunshade to the speaker deck.
a. The easy way is by using the supplied plastic screw and screw it in and you're done.
b. The hard way is to remove the speaker deck then install the shade. Instructions on deck removal can be seen in the garage and look for rear shock diy upgrade. Remove the seat to gain access to the deck and remove it. Install the shade with 6-32 machine screws with two 6-32 nuts in between the shade and another two nuts to hold everything down. The downside of this is harder to take off when you want to remove it. But the pro is no chance of it getting pulled off in the long run especially with the rattling from the rear shock.
c. Make sure the shade is centered and pre drill the hole for the 6-32 screw.
The shade comes with foam, the foam has to be cut to the contour of the
deck so there will be no gap between the shade and speaker deck. Lay down the shade and on both end there will be a slope. measure about 1/4 inch then taper up to about 1/8 all the way down to the other end and slope down 1/4 inch. Use a very sharp box cutter or knife. Even if the cut is rough it will still compress when installed. The trick is not to make the center to thick as it will make the center bulge out.
d. Position the shade in between the speaker and car seat harness mount.
The harness mount should still be operational when the shade is installed.
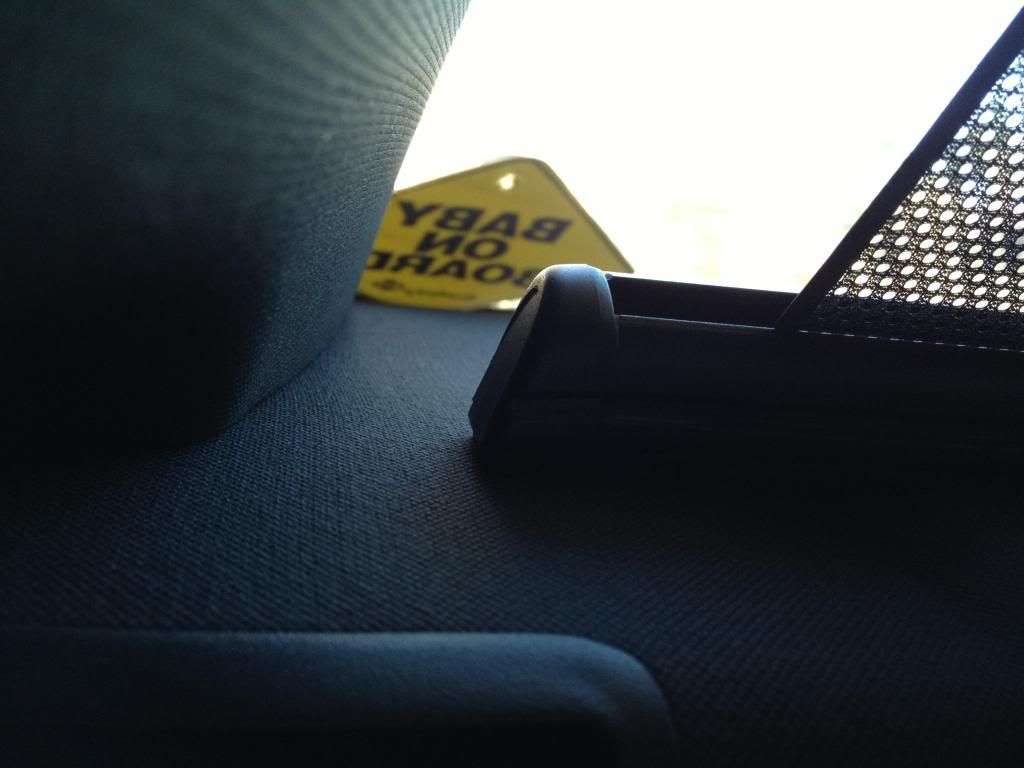
screw location behind the end cap
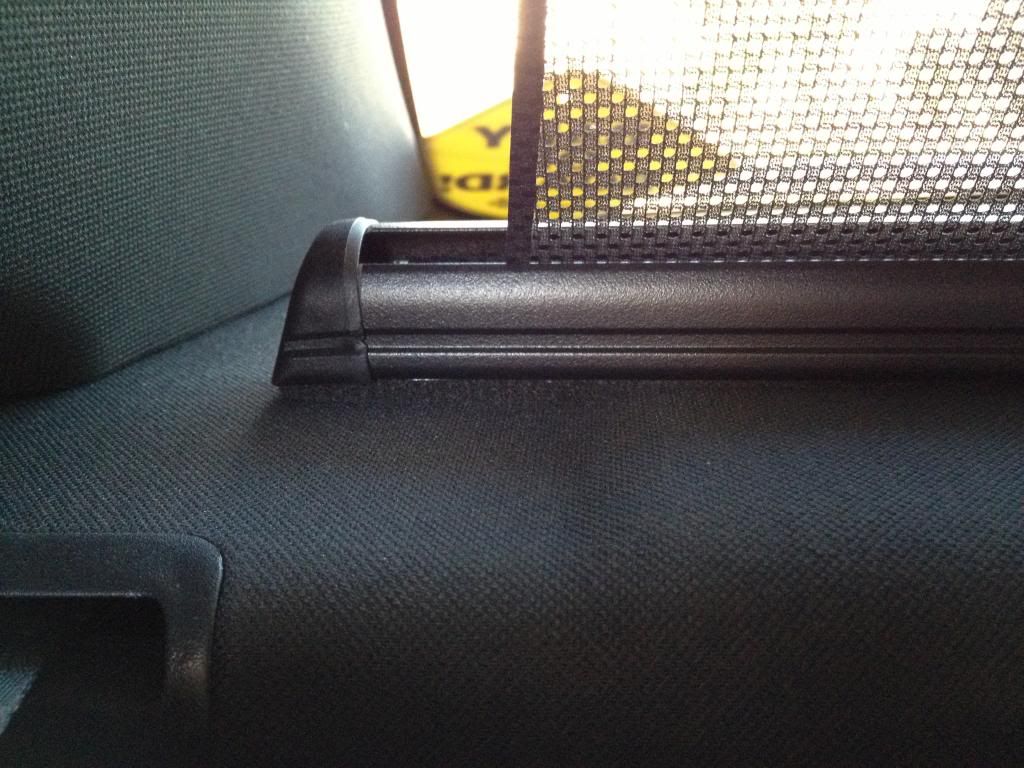
slope on the deck. cut the foam around the screw to allow the nut to screw in without pinching the foam.
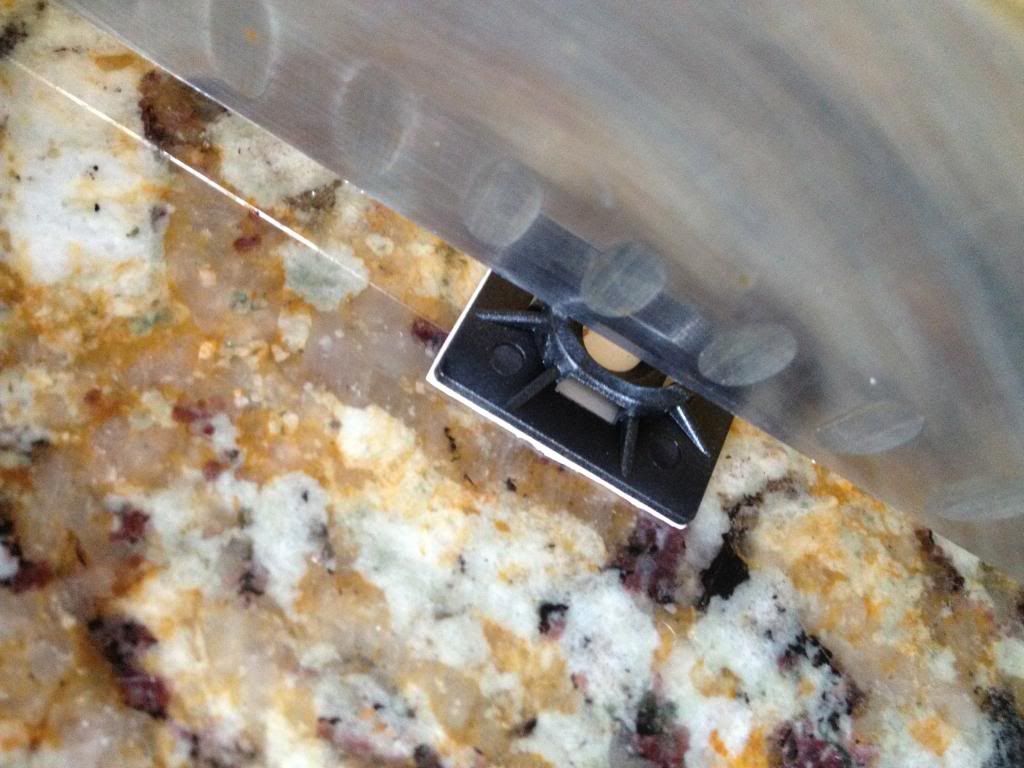
2. Cut the zip tie base as shown and you should be able to get two pieces out of it. Remove the double sided tape and rough up the underside to prep it for the super glue (I just rubbed it back and forth on the concrete, and cleaned it with alcohol).
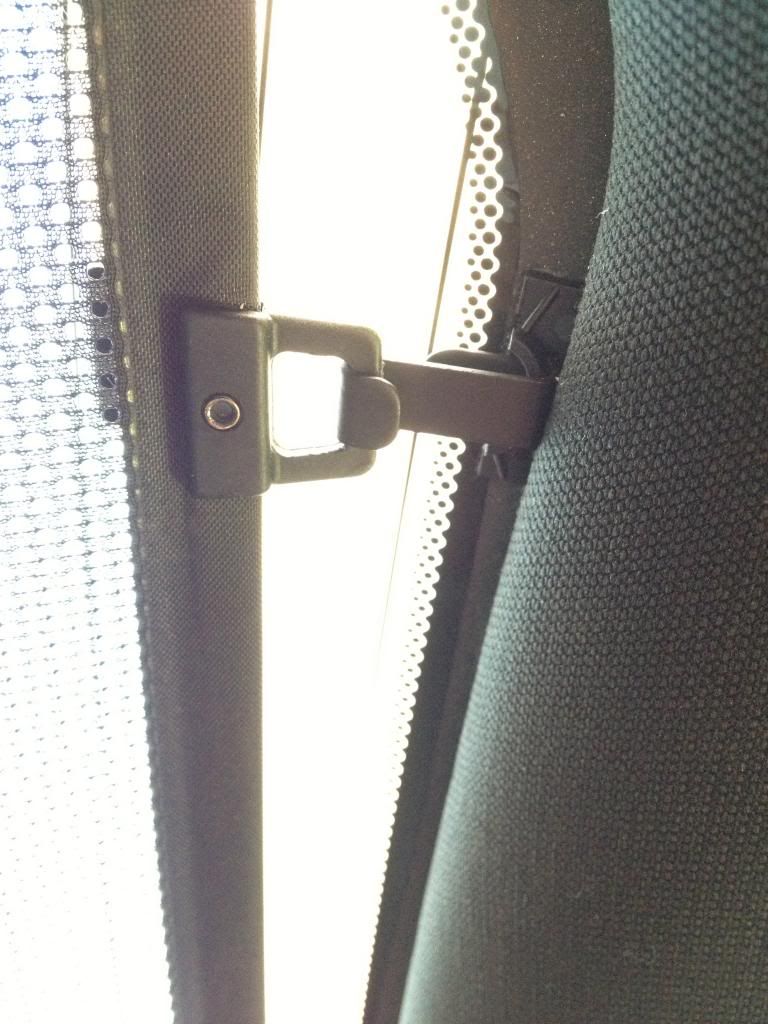
3. With the s type flat hook included with the sunshield test fit it with the zip tie base and just remove enough material for the hook to slide in. I used a hot knife to melt the slot a bit. Make sure to remove only whats needed to retain rigidity.
4. This step is better to have two people. pull shade up from the center and roughly estimate where to glue the zip tie base with the s hook. The hook set up shouldn't be glued to the tint if you have one. I had to trim the tint just a hair. It should be avoided to hold the edge of the shade and always pull it on the center by grabbing the metal rod in the shade. I did this myself and accidentally grabbed one edge to prevent the shade from rolling back in so one side has a wavy look to it but not that noticeable.
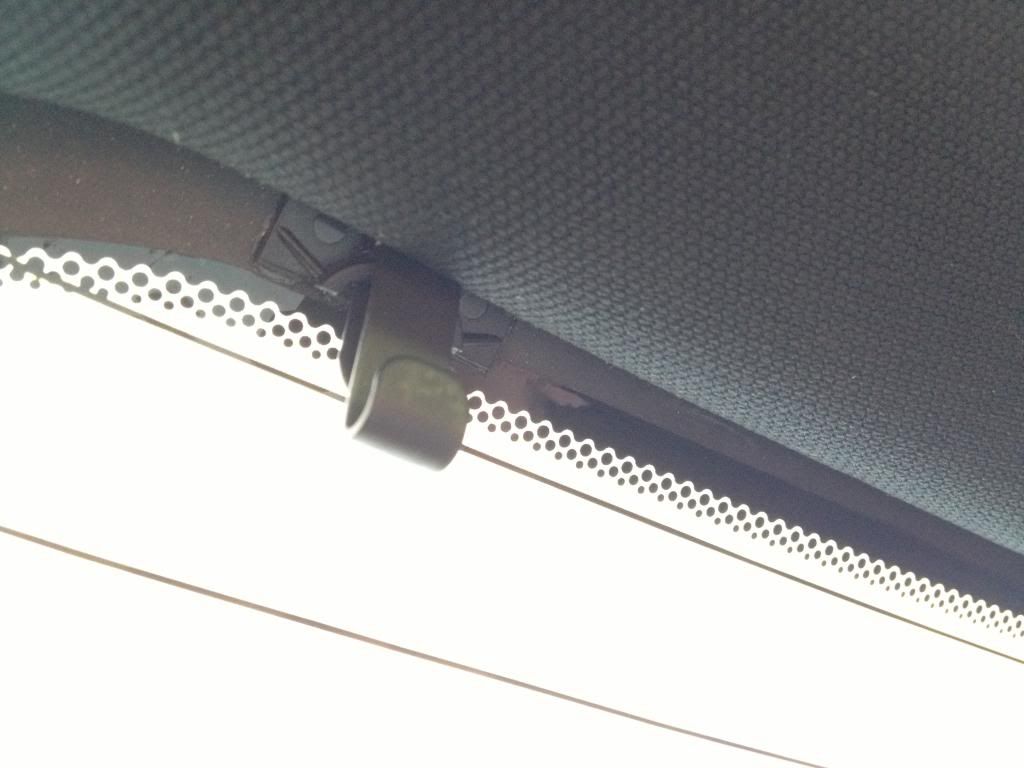
super glue it as close to the headliner as possible to so that the hook is less visible and make sure they're both level. I used the antenna as my guide.
follow the super glue drying time before attaching the shade.
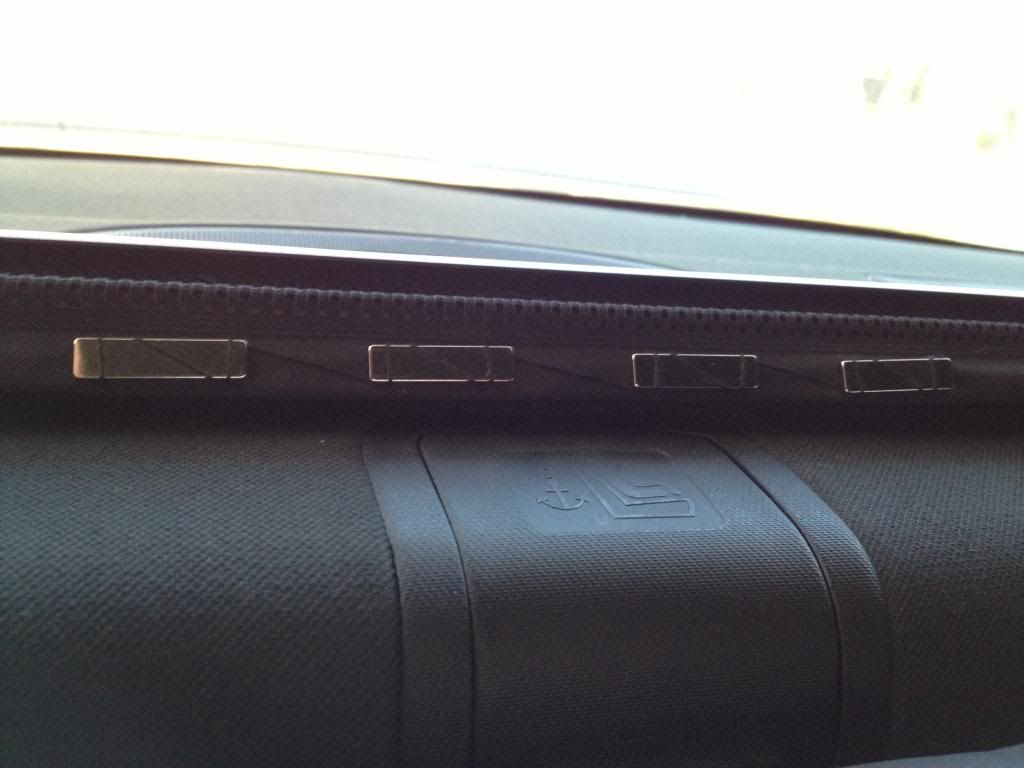
5. The upside of having the hooks close to the edge is a nice stretched shade on the sides without waviness but the center will sag. Thats where the magnets come in. Put painters tape where the shade meets the rear brake cover and draw a line with a pencil. below that line is where the magnets will go.Remove the rear brake cover by gently pulling on one side close to the headliner. Coincidentally theres already a line built in on the other side of the cover. I had to melt the cover just a bit so the magnet is flush because the first set of magnet I got was weak (melting might not be needed, put the magnet first and put another one on the other side. If the pull is strong then dont melt the plastic). The magnets from zigmag416 is so strong it can actually hold the shade without the hooks but for aethetics reason the hooks are needed. glue the magnets with a little bit of super glue and space them evenly. put electrical tape or spray with black paint.
this magnets are just 1/16" thin but so strong!

with electrical tape
6. Replace the modded rear brake cover and put the remaining four magnets on the underside of the cover. The magnets will line itself straight.
7. After the glue has fully cured on the hooks pull the shade up and attach on the hooks. The shade has a metal rod and just push it to the line of magnets. The magnet will go in the shade if rolled down and will not interfere when fully rolled in. I originally sewed the magnets on the shade but ended up removing the stitches.
take note the position of shade with regards to the car seat latch.
Now the finished product:
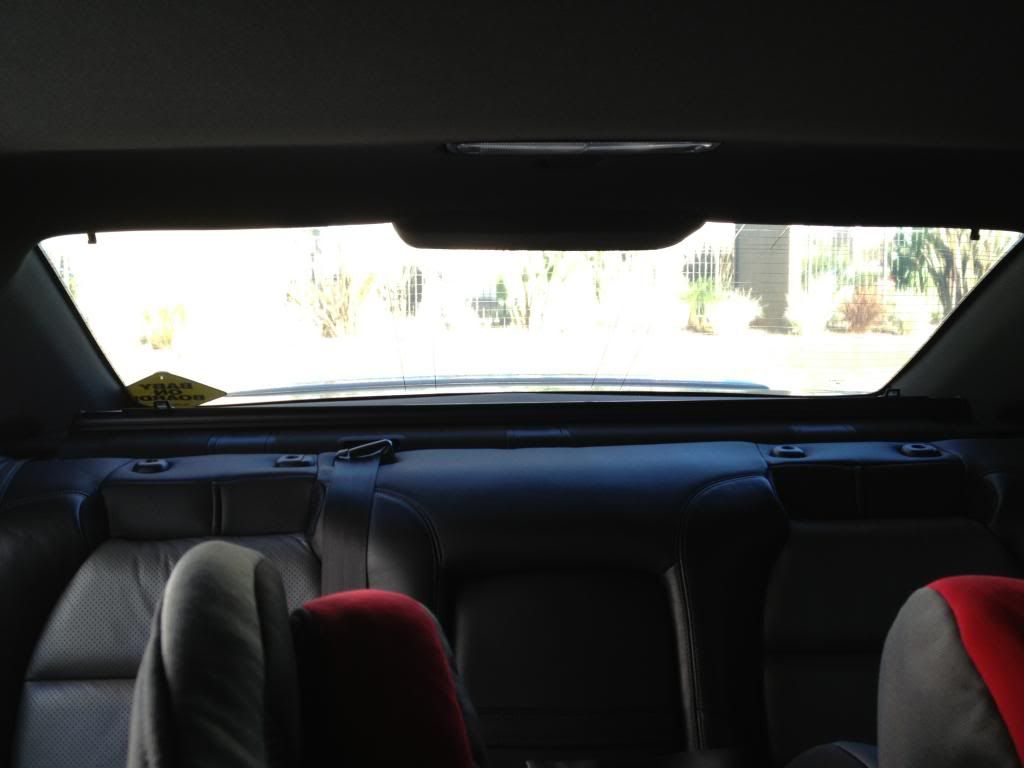
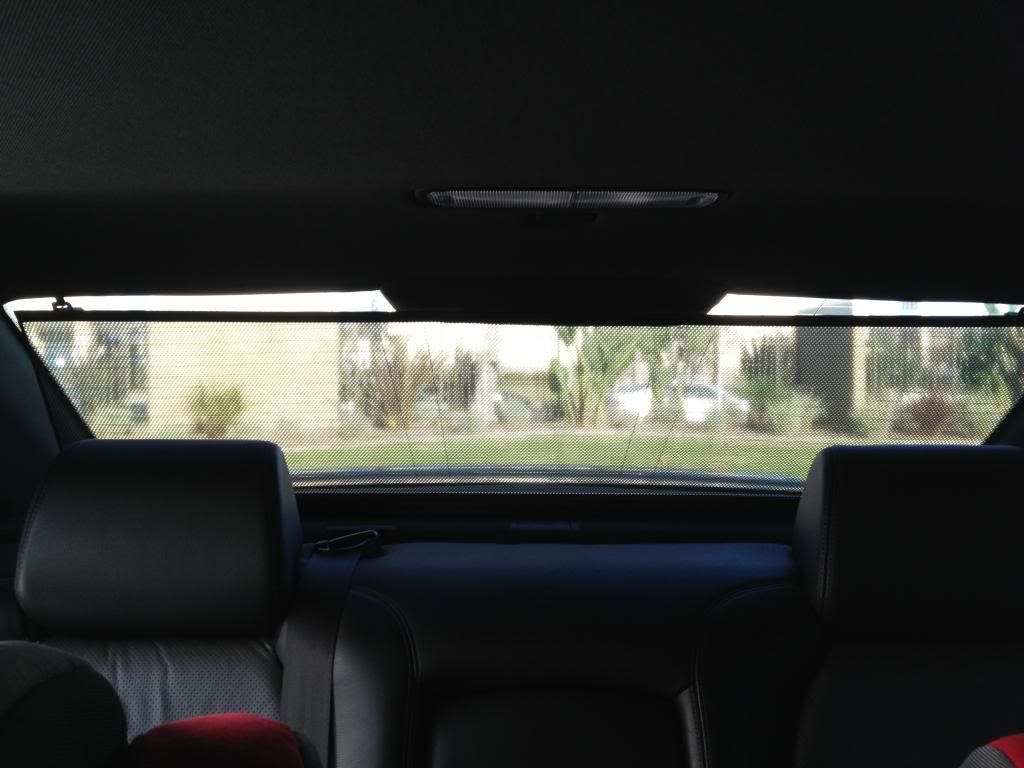
sunshade retracted without the headrest. you can see the hook on both ends

sunshade up without headrest
with headrest
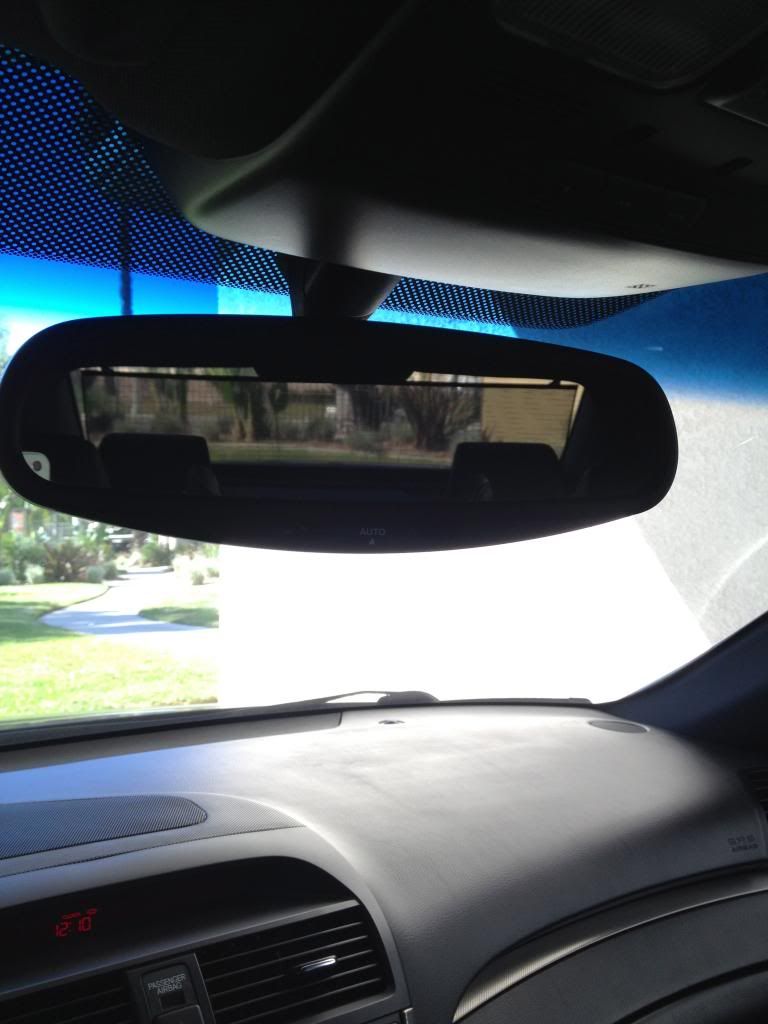
rearview mirror
I've been using it for 3 weeks now and its hard to tell how long super glue will last with the heat and cold here in socal. So use a glue that you think is appropriate to your weather condition.
With that said backing up might be harder without a backup camera so keep that in mind especially if you have tint already. Driving at night still remains the same to me. In my opinion it looks a lot better than the motorized shade coz you dont see two bars at the rear window.
Special thanks to Inaccurate for taking the time taking pictures of his roof for me although I ended up a different route (I didnt have the balls to drill a hole on the roof and use bmw hooks).
This diy will not be for everyone as with any modifications and I will not be responsible for any installation errors.
Parts:
2006 VW Passat part # 3C0 064 360 (price range from $9-15.00 online and dealer)
1x1 zip tie mounting base (found at home depot)
super glue
knife
8 pcs 1 x 1/4 x 1/16 Neodymium magnet (bought from ebay member zigmag416)
1. Theres two options of mounting the sunshade to the speaker deck.
a. The easy way is by using the supplied plastic screw and screw it in and you're done.
b. The hard way is to remove the speaker deck then install the shade. Instructions on deck removal can be seen in the garage and look for rear shock diy upgrade. Remove the seat to gain access to the deck and remove it. Install the shade with 6-32 machine screws with two 6-32 nuts in between the shade and another two nuts to hold everything down. The downside of this is harder to take off when you want to remove it. But the pro is no chance of it getting pulled off in the long run especially with the rattling from the rear shock.
c. Make sure the shade is centered and pre drill the hole for the 6-32 screw.
The shade comes with foam, the foam has to be cut to the contour of the
deck so there will be no gap between the shade and speaker deck. Lay down the shade and on both end there will be a slope. measure about 1/4 inch then taper up to about 1/8 all the way down to the other end and slope down 1/4 inch. Use a very sharp box cutter or knife. Even if the cut is rough it will still compress when installed. The trick is not to make the center to thick as it will make the center bulge out.
d. Position the shade in between the speaker and car seat harness mount.
The harness mount should still be operational when the shade is installed.
screw location behind the end cap
slope on the deck. cut the foam around the screw to allow the nut to screw in without pinching the foam.
2. Cut the zip tie base as shown and you should be able to get two pieces out of it. Remove the double sided tape and rough up the underside to prep it for the super glue (I just rubbed it back and forth on the concrete, and cleaned it with alcohol).
3. With the s type flat hook included with the sunshield test fit it with the zip tie base and just remove enough material for the hook to slide in. I used a hot knife to melt the slot a bit. Make sure to remove only whats needed to retain rigidity.
4. This step is better to have two people. pull shade up from the center and roughly estimate where to glue the zip tie base with the s hook. The hook set up shouldn't be glued to the tint if you have one. I had to trim the tint just a hair. It should be avoided to hold the edge of the shade and always pull it on the center by grabbing the metal rod in the shade. I did this myself and accidentally grabbed one edge to prevent the shade from rolling back in so one side has a wavy look to it but not that noticeable.
super glue it as close to the headliner as possible to so that the hook is less visible and make sure they're both level. I used the antenna as my guide.
follow the super glue drying time before attaching the shade.
5. The upside of having the hooks close to the edge is a nice stretched shade on the sides without waviness but the center will sag. Thats where the magnets come in. Put painters tape where the shade meets the rear brake cover and draw a line with a pencil. below that line is where the magnets will go.Remove the rear brake cover by gently pulling on one side close to the headliner. Coincidentally theres already a line built in on the other side of the cover. I had to melt the cover just a bit so the magnet is flush because the first set of magnet I got was weak (melting might not be needed, put the magnet first and put another one on the other side. If the pull is strong then dont melt the plastic). The magnets from zigmag416 is so strong it can actually hold the shade without the hooks but for aethetics reason the hooks are needed. glue the magnets with a little bit of super glue and space them evenly. put electrical tape or spray with black paint.
this magnets are just 1/16" thin but so strong!
with electrical tape
6. Replace the modded rear brake cover and put the remaining four magnets on the underside of the cover. The magnets will line itself straight.
7. After the glue has fully cured on the hooks pull the shade up and attach on the hooks. The shade has a metal rod and just push it to the line of magnets. The magnet will go in the shade if rolled down and will not interfere when fully rolled in. I originally sewed the magnets on the shade but ended up removing the stitches.
take note the position of shade with regards to the car seat latch.
Now the finished product:
sunshade retracted without the headrest. you can see the hook on both ends
sunshade up without headrest
with headrest
rearview mirror
I've been using it for 3 weeks now and its hard to tell how long super glue will last with the heat and cold here in socal. So use a glue that you think is appropriate to your weather condition.
With that said backing up might be harder without a backup camera so keep that in mind especially if you have tint already. Driving at night still remains the same to me. In my opinion it looks a lot better than the motorized shade coz you dont see two bars at the rear window.

The following 6 users liked this post by abracing:
08WDPTL (11-13-2012),
csmeance (05-24-2015),
rockyfeller (08-22-2014),
thoiboi (08-24-2014),
Toddy (11-13-2012),
and 1 others liked this post.
11-12-2012, 05:26 PM
#2
Race Director
iTrader: (3)
Join Date: Feb 2012
Location: South Florida
Age: 30
Posts: 18,278
Received 3,824 Likes
on
2,847 Posts
Great job man! 
I'm sure your boy with thank you very much for that.
I'm sure your boy with thank you very much for that.
11-12-2012, 07:54 PM
#6
Suzuka Master
see if you got a RL then problem fixed.
Trending Topics
11-12-2012, 08:10 PM
#8

Nice job OP. Do you know if there are other color options for the shade trim?
I may be interested in going this, but I'm wondering if there's an option that would blend better with a parchment interior.
I may be interested in going this, but I'm wondering if there's an option that would blend better with a parchment interior.
11-12-2012, 11:01 PM
#9
Instructor
Thread Starter
11-12-2012, 11:05 PM
#10
Instructor
Thread Starter
This is kinda a cross between both worlds. Sporty with tls and luxury with RL
just black afaik.
11-13-2012, 12:08 AM
#11
2014 Jeep SRT
Awesome mod!

 11-13-2012, 09:46 AM
#16
Moderator
iTrader: (3)
Whoa, I want this!
11-14-2012, 01:39 PM
#19
Instructor
Thread Starter
The following users liked this post:
Shoot2Thrill (06-11-2013)
 08-22-2014, 03:53 AM
#21
Instructor
Thread Starter
To this day Im still using it although not as much because my son is front facing now and Im currently working the night shift.
08-22-2014, 02:14 PM
#22
Yes, it seems like the price has come up. From the time of writing I was told by the VW dealership that the corporate is just trying to sell remaining stock so they have a promo going on. They where actually out of stock and had to get it at canada.
To this day Im still using it although not as much because my son is front facing now and Im currently working the night shift.
To this day Im still using it although not as much because my son is front facing now and Im currently working the night shift.
08-22-2014, 05:22 PM
#24

Now how can I do this with curtains...

Thread
Thread Starter
Forum
Replies
Last Post
BoricuaTL
Car Parts for Sale
138
04-08-2016 01:08 PM
ExcelerateRep
Sponsored Sales & Group Buys
0
09-22-2015 10:39 AM
Yumcha
Automotive News
1
09-17-2015 09:01 PM