

DIY- '07 TL A-spec Front Lip Install 3G Garage #E-002
 08-19-2007, 03:28 PM
#1
DIY- '07 TL A-spec Front Lip Install 3G Garage #E-002
I have a pdf of the actual instructions from Stephen Bradburn of John Eagle Acura. I don't know exactly how to post that. I can email it if anyone is interested.
Ok, you start by removing the front bumper https://acurazine.com/forums/showthr...t=front+bumper It's the same for an 07 except you have to unplug the fog lights and remove a clip holding the fog light wire.
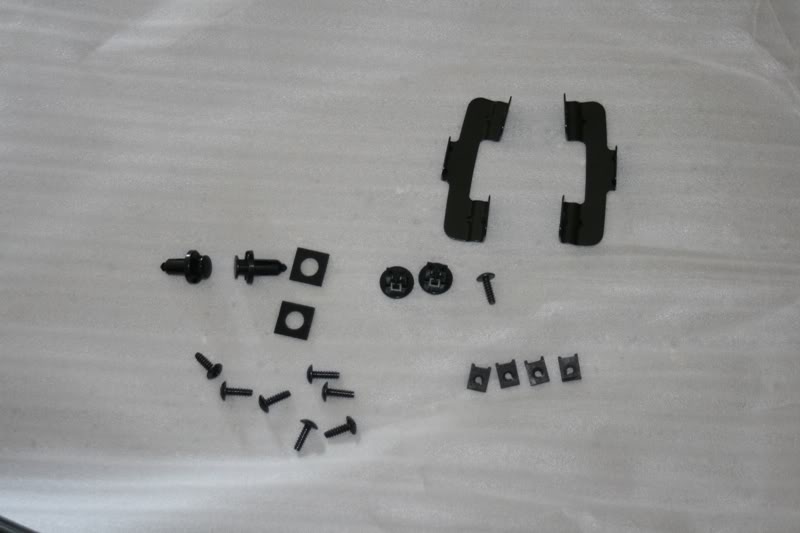
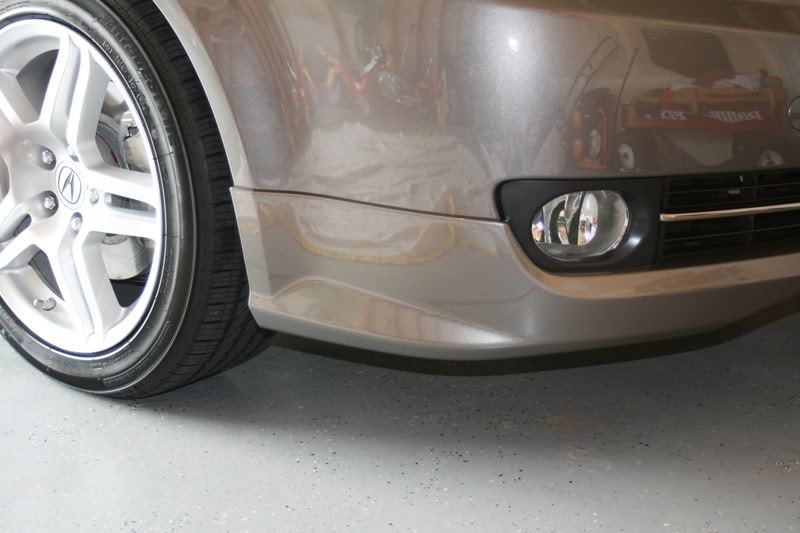
Here are the parts that come with the lip. 2 Brackets, 8 self tapping screws, 2 female clips, 2 seals, 4 spring nuts, 2 long clips, and the lip.
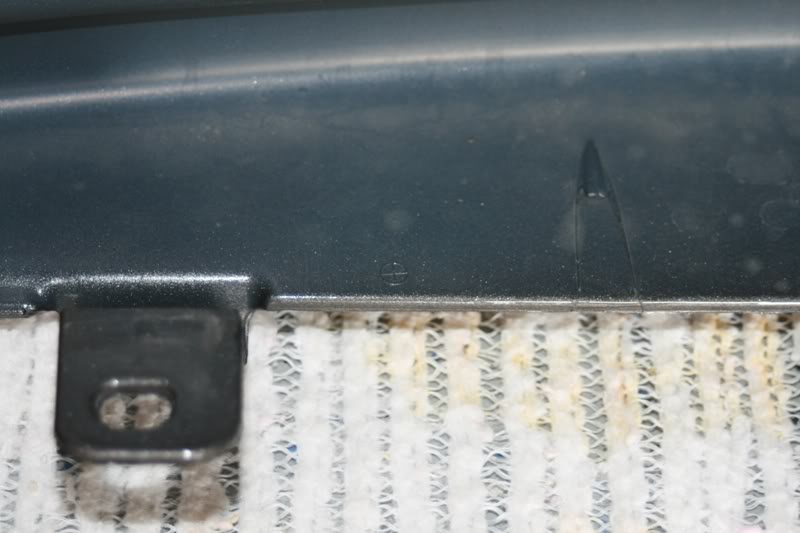
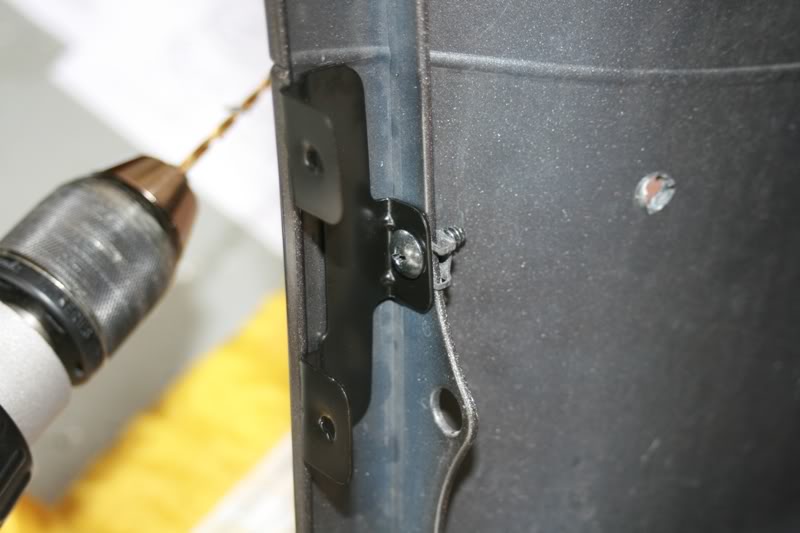
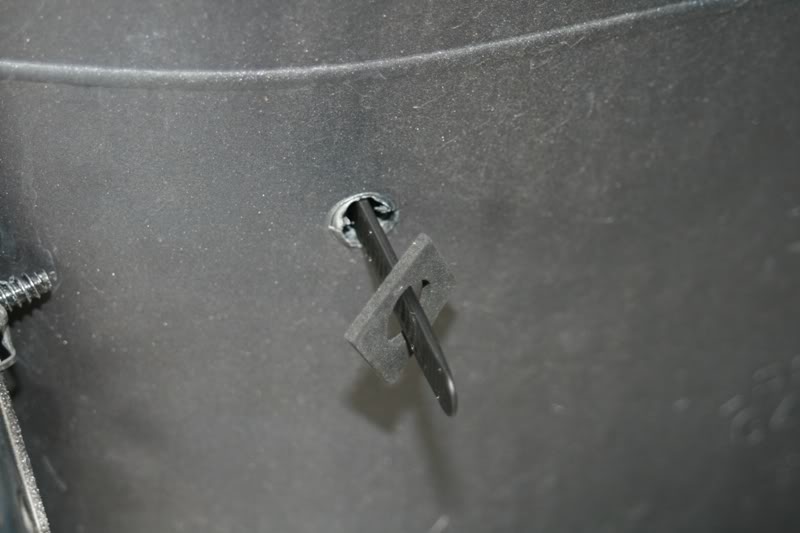
Step 1: Drill a hole in the sides of the bumper were it's already marked with a circle with a + in the middle of it. The instructions say use a 4mm bit to go from the inside out and a 12mm bit to drill from the outside of the bumper in. I used a 5/32" bit first, then I used a 3/8" bit second and it worked fine. This hole is for the black zip tie looking clips that are attached to the lip. Drill both sides.
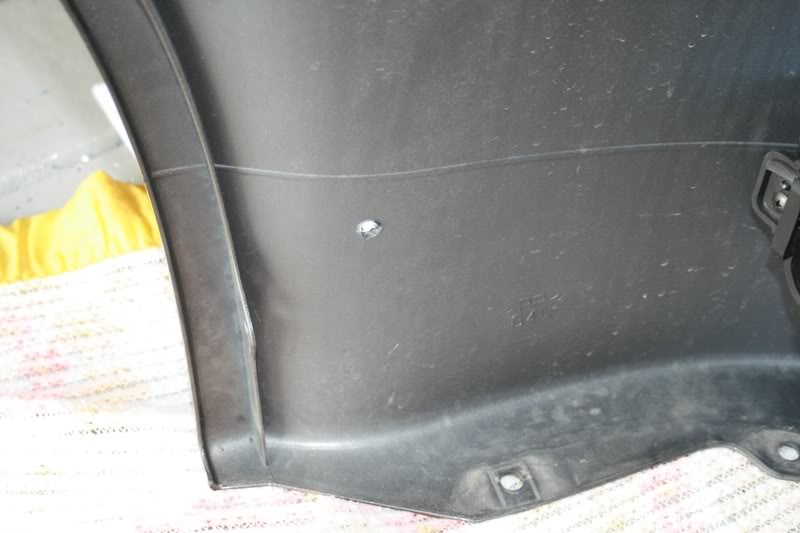
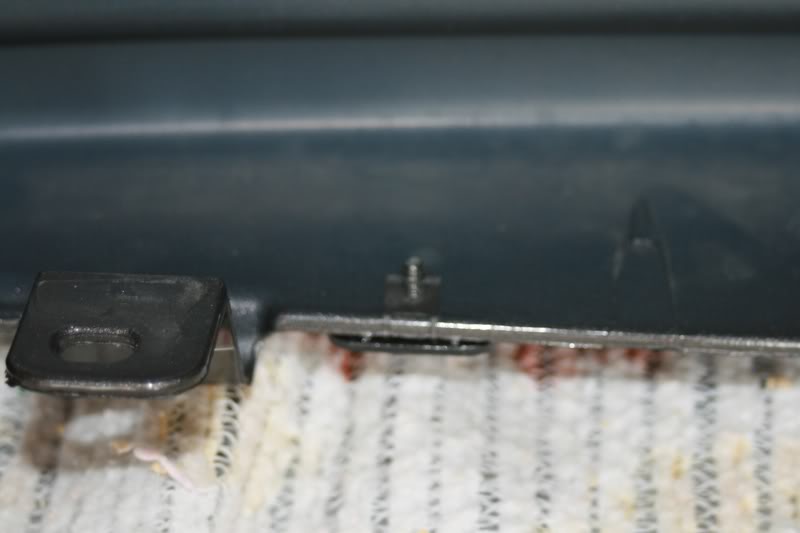
Step 2: In the lower middle of the bumper are two more plus circles. Use a 4mm or 5/32" bit to drill two holes.
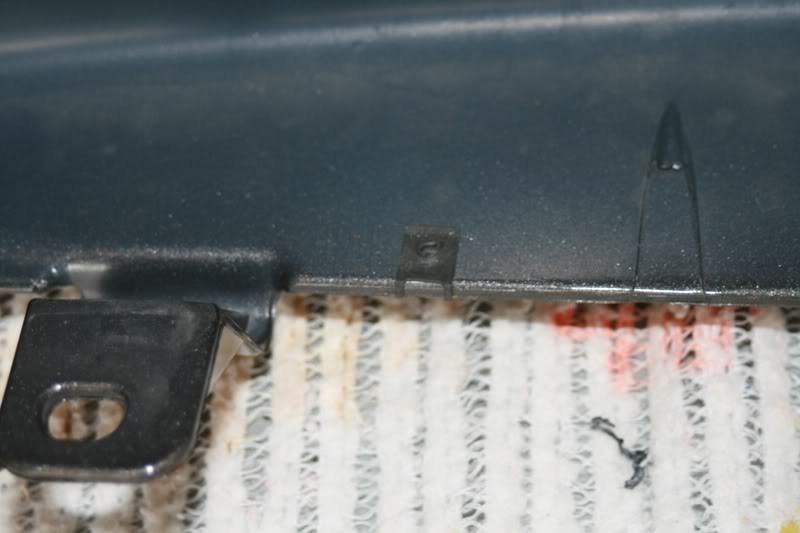
Step 3: Place a spring nut over each of the holes with the curved part of the nut facing up.
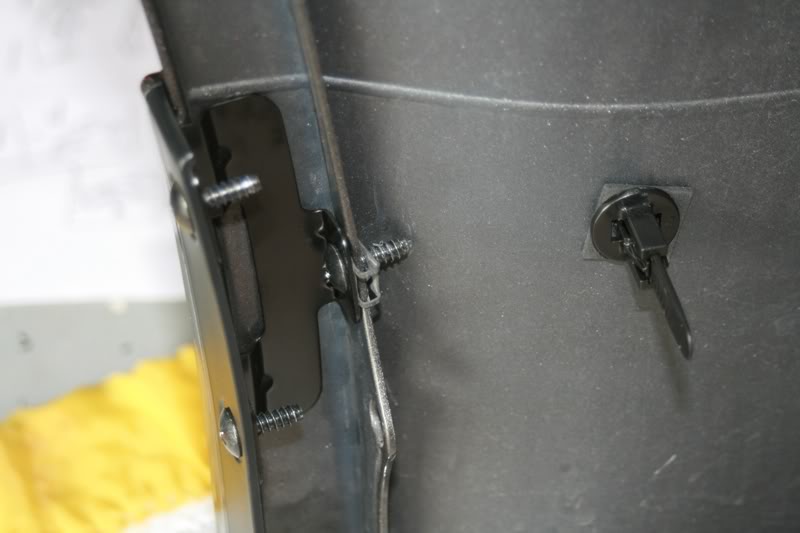
Step 4: On the edge of the bumper that faces the front tires you will see another plus circle. You will use a 4mm or 5/32" bit to drill a hole. Be careful when drillig this hole! If you push too hard or drill too deep you will drill through the bumper. Repeat for the other side.
The directions say to hold the bracket up and mark the hole, but it worked out fine to just drill where the plus circle was.
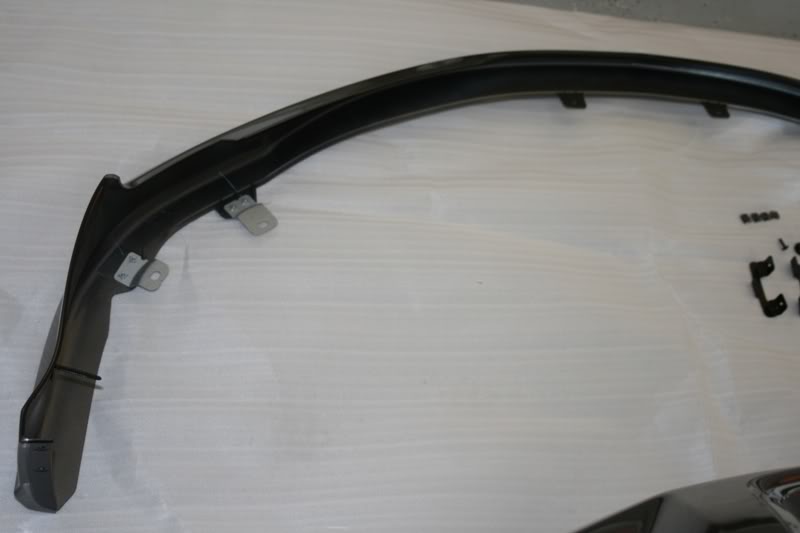
Step 5: Place a spring nut over the holes and mount the bracket with a self-tapping screw.
Step 6: There are 4 pieces of double sided tape on the lip. You need to peel a little piece of the backing up and use masking tape to stick it to the outside of the lip. On the sides, peel from the back or the part closest to the tire and on the front peel from the outside towards the middle. For now just peel a small piece, enough to get a hold of after you mount the lip.
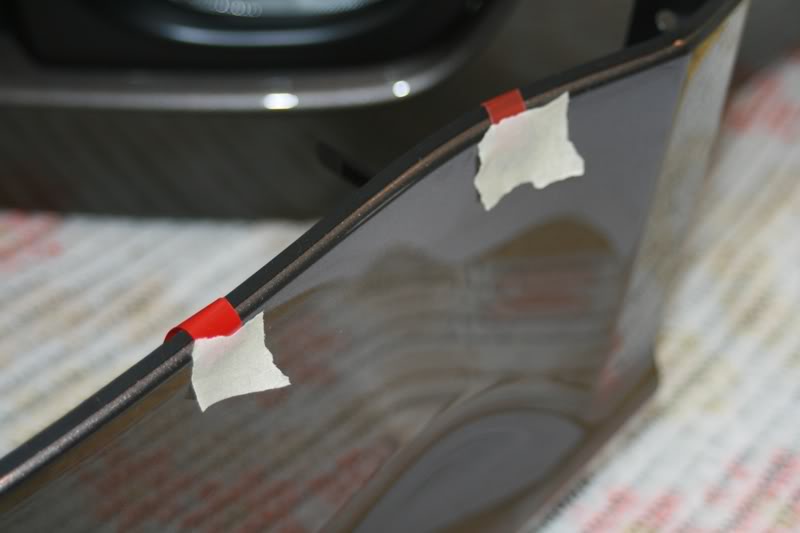
I added some more tape under what was already there, just for piece of mind.
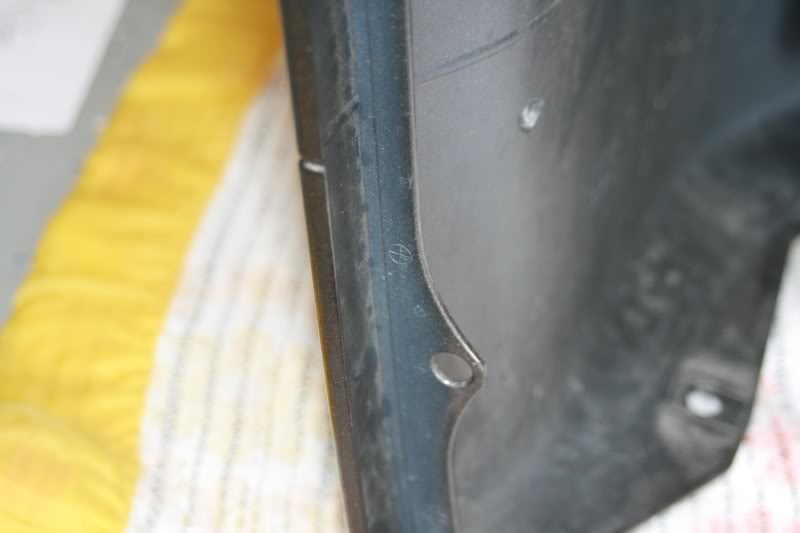
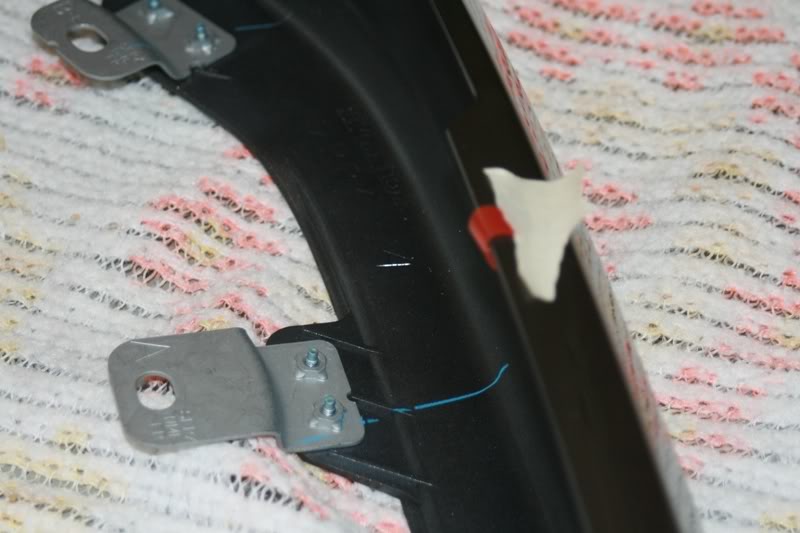
Step 7: Now you can put the lip onto the bumper, making sure that the black zip tie looking clip goes into the 3/8" holes that you drilled. You will have to apply some pressure to get the ends of the lip around the ends of the bumper.
Step 8: Use two of the self tapping screws to secure the middle of the lip to the middle of the bumper.
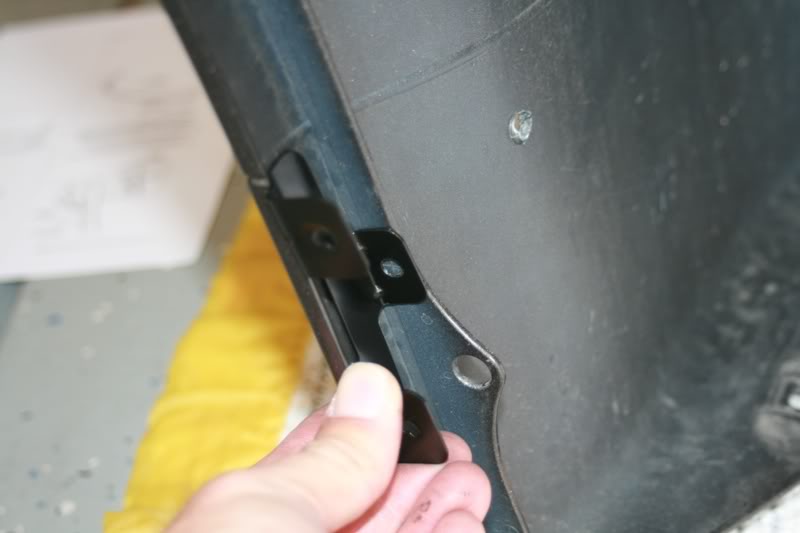
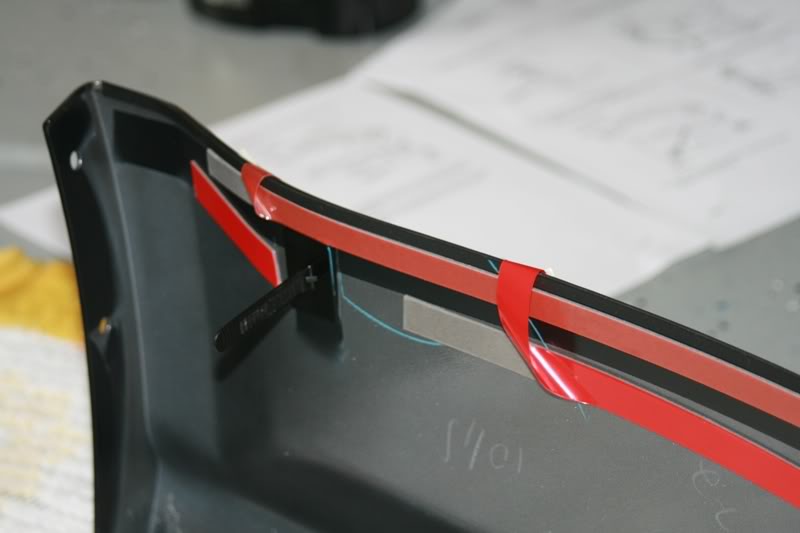
Step 9: Attached the seal and then the female clip onto the zip tie looking clip
Step 10: Using the self tapping screws attached the lip to the bracket.

Step 11: Now re-install the front bumper. You will use all the same screws and clips that you removed except for on the two outside metal brackets of the lip. You will use the supplied long clips.
Step 12: Pull the backing out from the double sided tape, being careful not to cut or rip it on the lip. It will stretch, but I didn't have a problem with it ripping.
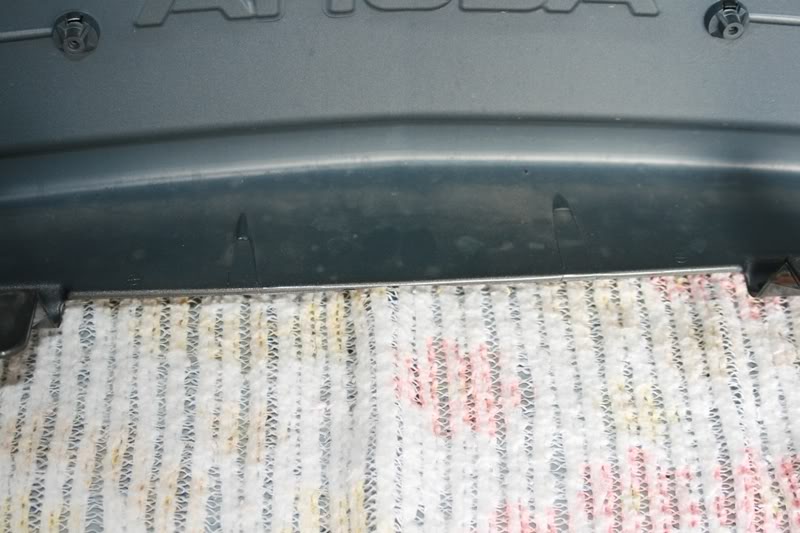
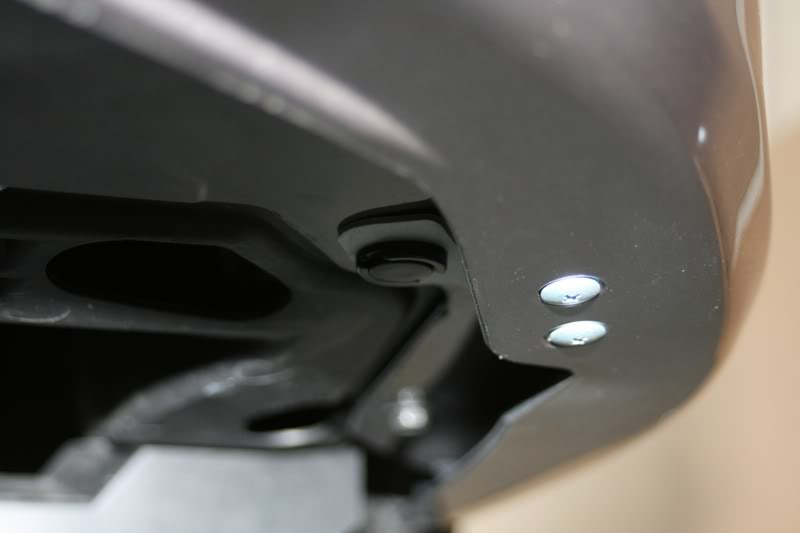
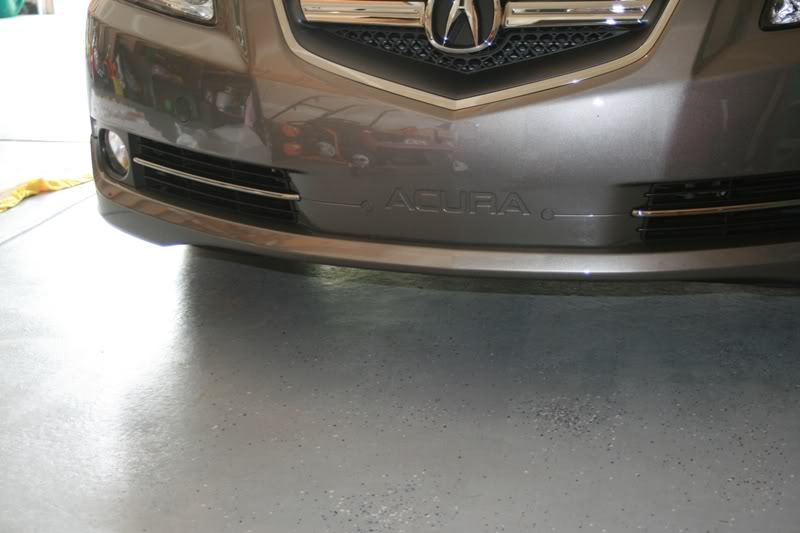
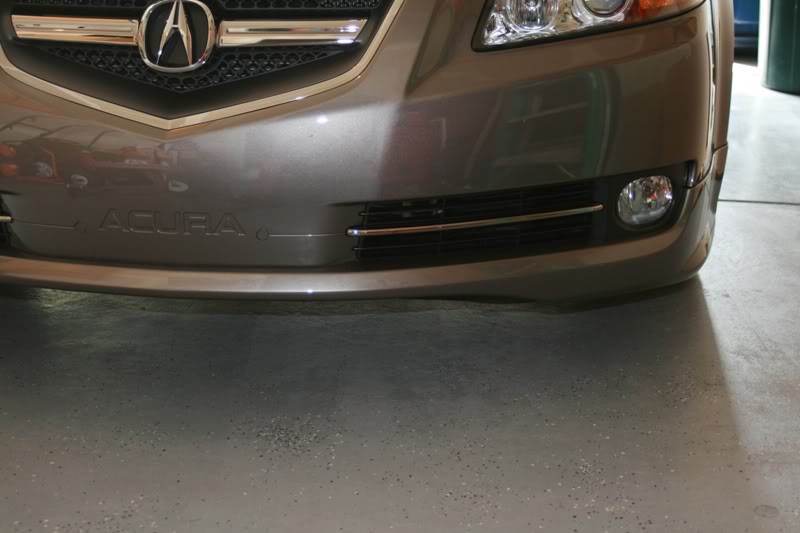
And here's the finished product. The 07 lip doesn't have any plastic showing, it's all painted as you can see.
If anyone has any questions, just let me know.
Ok, you start by removing the front bumper https://acurazine.com/forums/showthr...t=front+bumper It's the same for an 07 except you have to unplug the fog lights and remove a clip holding the fog light wire.
Here are the parts that come with the lip. 2 Brackets, 8 self tapping screws, 2 female clips, 2 seals, 4 spring nuts, 2 long clips, and the lip.
Step 1: Drill a hole in the sides of the bumper were it's already marked with a circle with a + in the middle of it. The instructions say use a 4mm bit to go from the inside out and a 12mm bit to drill from the outside of the bumper in. I used a 5/32" bit first, then I used a 3/8" bit second and it worked fine. This hole is for the black zip tie looking clips that are attached to the lip. Drill both sides.
Step 2: In the lower middle of the bumper are two more plus circles. Use a 4mm or 5/32" bit to drill two holes.
Step 3: Place a spring nut over each of the holes with the curved part of the nut facing up.
Step 4: On the edge of the bumper that faces the front tires you will see another plus circle. You will use a 4mm or 5/32" bit to drill a hole. Be careful when drillig this hole! If you push too hard or drill too deep you will drill through the bumper. Repeat for the other side.
The directions say to hold the bracket up and mark the hole, but it worked out fine to just drill where the plus circle was.
Step 5: Place a spring nut over the holes and mount the bracket with a self-tapping screw.
Step 6: There are 4 pieces of double sided tape on the lip. You need to peel a little piece of the backing up and use masking tape to stick it to the outside of the lip. On the sides, peel from the back or the part closest to the tire and on the front peel from the outside towards the middle. For now just peel a small piece, enough to get a hold of after you mount the lip.
I added some more tape under what was already there, just for piece of mind.
Step 7: Now you can put the lip onto the bumper, making sure that the black zip tie looking clip goes into the 3/8" holes that you drilled. You will have to apply some pressure to get the ends of the lip around the ends of the bumper.
Step 8: Use two of the self tapping screws to secure the middle of the lip to the middle of the bumper.
Step 9: Attached the seal and then the female clip onto the zip tie looking clip
Step 10: Using the self tapping screws attached the lip to the bracket.
Step 11: Now re-install the front bumper. You will use all the same screws and clips that you removed except for on the two outside metal brackets of the lip. You will use the supplied long clips.
Step 12: Pull the backing out from the double sided tape, being careful not to cut or rip it on the lip. It will stretch, but I didn't have a problem with it ripping.
And here's the finished product. The 07 lip doesn't have any plastic showing, it's all painted as you can see.
If anyone has any questions, just let me know.

The following 5 users liked this post by 1meand:
JD TL-S (06-01-2012),
Midnight Mystery (02-11-2022),
robocam (08-25-2015),
rockstar143 (02-28-2016),
Teo_cleanNlean (12-28-2014)
 08-19-2007, 05:02 PM
#6
08-19-2007, 06:00 PM
#7
I sent you a PM with my email address so you can send me the PDF.
Trending Topics
08-19-2007, 11:27 PM
#8
Originally Posted by Ron A
I sent you a PM with my email address so you can send me the PDF.
Ron A ..........PM me. I got the PDFs for the front lip, side skirts, and rear under spoiler.
Complements of : Stephen Bradburn
John Eagle Acura Parts
281-589-0326
800-441-6878
08-20-2007, 06:51 AM
#11
Originally Posted by Tonywp75
Ron A ..........PM me. I got the PDFs for the front lip, side skirts, and rear under spoiler.
Complements of : Stephen Bradburn
John Eagle Acura Parts
281-589-0326
800-441-6878
Complements of : Stephen Bradburn
John Eagle Acura Parts
281-589-0326
800-441-6878
 08-21-2007, 04:44 AM
#15
Originally Posted by blacktls07
Noob question, but would a non Type-S lip fit on a Type-S?

and it angles down around the fog lights on a TL-S. There are some great pics in this post https://acurazine.com/forums/ramblings-12/magic-must-see-164666/ complete with the A-Spec kit.
08-26-2007, 10:45 PM
#17
He ordered it from :
Stephen Bradburn
John Eagle Acura Parts
281-589-0326
800-441-6878
Just make sure to mention......Tony from AcuraZine sent you. So he will know where you are coming from.
Stephen Bradburn
John Eagle Acura Parts
281-589-0326
800-441-6878
Just make sure to mention......Tony from AcuraZine sent you. So he will know where you are coming from.
 08-02-2008, 12:43 PM
#23
Suzuka Master
This DIY is the best! My kit came with no instructions, so reading through this one, seeing the marks the factory left for the kit.. easy!!
THANK YOU! I now have an '08 with the Aspec body kit installed! Pics to come.
THANK YOU! I now have an '08 with the Aspec body kit installed! Pics to come.
 09-25-2008, 07:52 PM
#27
Racer
02-21-2009, 12:37 AM
#29
 02-21-2009, 06:35 AM
#30
Road Racer / Solo Addict
Thank you so much for taking your time to make this write up.
stillhere153 and others had been helping me sort out the lip I was going to buy and once I get it I know your write up will help me out a lot..
So I appreciate you taking your time to document this for us..
stillhere153 and others had been helping me sort out the lip I was going to buy and once I get it I know your write up will help me out a lot..
So I appreciate you taking your time to document this for us..
 11-17-2009, 08:31 AM
#33
Drifting
iTrader: (13)
 04-19-2011, 03:38 PM
#35
Advanced
05-11-2011, 11:57 AM
#37
Instructor
thanks for the info. i'be been trying to figure out which lip i want to get too. so the lower grill area makes the difference. i have a base 06, does it matter which year of the aspec lip you get if its base and not type s?
