
CV axle install question
 08-28-2009, 10:02 AM
#1
Nismo TL yo!
Thread Starter
iTrader: (1)
Join Date: Mar 2008
Posts: 1,803
Likes: 0
Received 0 Likes
on
0 Posts
CV axle install question
Has anyone done this themselves? did you need the ball joint extractor tool from honda to do it or could you use a generic one?
If you had the work done, how much was it just for the labor? I got a quote of 3 hours from acura, which is over 300 bucks.
If you had the work done, how much was it just for the labor? I got a quote of 3 hours from acura, which is over 300 bucks.
 08-28-2009, 01:31 PM
#2
Chapter Leader (Southern Region)
I had my trans guy do it for me.. I think he quoted me $130 but I gave him an extra $50. I know the driver's side will probably be a PITA to remove. A generic ball joint extractor will work. Make sure you buy the replacement hardware and new spindle nuts if it didn't come with your new shafts.
08-28-2009, 01:47 PM
#3
Nismo TL yo!
Thread Starter
iTrader: (1)
Join Date: Mar 2008
Posts: 1,803
Likes: 0
Received 0 Likes
on
0 Posts
I had the spindle nut off when I attempted to do it without an extractor. Just tried to pry the ball joint out with a quick stomp on a pry bar while standing on the hub. no dice. this has worked on older hondas I've worked on in the past but not this time. I put the original spindle nut back on no problem.
08-28-2009, 01:51 PM
#4
Chapter Leader (Southern Region)
I had the spindle nut off when I attempted to do it without an extractor. Just tried to pry the ball joint out with a quick stomp on a pry bar while standing on the hub. no dice. this has worked on older hondas I've worked on in the past but not this time. I put the original spindle nut back on no problem.
Trending Topics
08-28-2009, 02:30 PM
#8
Chapter Leader (Southern Region)
New 12mm castle nut & cotter pin (#14 & 20)

New 12mm Self-Locking Nut (#25)
New 10mm Flange Nut (#15)

New 12mm Self-Locking Nut (#25)
New 10mm Flange Nut (#15)
08-28-2009, 02:51 PM
#10
Burning Brakes

Join Date: Sep 2008
Location: elkins park, pa
Age: 34
Posts: 1,015
Likes: 0
Received 0 Likes
on
0 Posts
^ its not a hard job, DIY all the way. once you use the ball joint tool, if it still it tough you can put a jack under that little metal tab and jack it up, that will pop them out.
08-28-2009, 03:08 PM
#12
Senior Moderator
You shouldnt need to replace those nuts. They will be fine to reuse. If you use one of the separator forks to separate the ball joint pick up a new ball joint boot from the dealer just incase you tear the boot. You can get them for like 2 bucks from them.
08-28-2009, 04:45 PM
#14

Got to be careful with separating that ball joint, don't want to destroy it.
A question for the guys that have done the job:
Without separating the ball joint, can you undo the stabilizer link and damper fork, then remove the lower control arm from the frame, then be able to pull the spindle/control arm out far enough so that the axle will be able to be removed from the spindle? I've done others this way as there is no need to separate the ball joint and also no need for an alignment afterwards, at least on the cars that have adjustable camber. Just curious.
08-28-2009, 05:49 PM
#15
The tool you need is called a Tie Rod Lifter. Beats the pants off pickle forks and shouldn't damage your balljoint boots. You can rent one for free as part of the 5-piece front end set (various tools) at Checker Autoparts or buy one for $20 off of eBay...
http://shop.ebay.com/i.html?_nkw=tie...sacat=0&_rdc=1

http://shop.ebay.com/i.html?_nkw=tie...sacat=0&_rdc=1
08-28-2009, 06:19 PM
#16
Chapter Leader (Southern Region)
 08-28-2009, 06:25 PM
#17
The tool you need is called a Tie Rod Lifter. Beats the pants off pickle forks and shouldn't damage your balljoint boots. You can rent one for free as part of the 5-piece front end set (various tools) at Checker Autoparts or buy one for $20 off of eBay...
http://shop.ebay.com/i.html?_nkw=tie...sacat=0&_rdc=1
http://shop.ebay.com/i.html?_nkw=tie...sacat=0&_rdc=1
Also that fork can damage more than just the boot, it can damage the joint itself.
08-28-2009, 08:28 PM
#18
6speed Anthracite
I just replaced both of my CV shafts last week and all I did was:
Remove #13 and pop that out
#16 and #21 here and take out #12/13 and the big nut on the end of the shaft
Also the break line has to be losend so you can push everything down
[/QUOTE]
And thats it... it comes right out. Not easy but it comes out.
Each side toke me 25 min (out and in)
Remove #13 and pop that out
#16 and #21 here and take out #12/13 and the big nut on the end of the shaft
Also the break line has to be losend so you can push everything down
[/QUOTE]And thats it... it comes right out. Not easy but it comes out.
Each side toke me 25 min (out and in)
08-30-2009, 11:03 AM
#19
Here's the process:
- Remove wheel
- Pop off center cap
- Install wheel & put car on ground
- Remove hub nut w/ giant socket and large breaker bar (with pipe handle extension)
- Remove wheel
- Separate lower ball joint from lower control arm (tie-rod lifter/pickle fork/etc)
- Remove damper Fork (part 12/13 above)
- Use large flat blade screw driver to pop Driveshaft out of transmission
- Install is reverse of removal
BTW: I don't know how easy it is on this car, but on the older Civics/Integras, you can pop the lower ball joint like this:
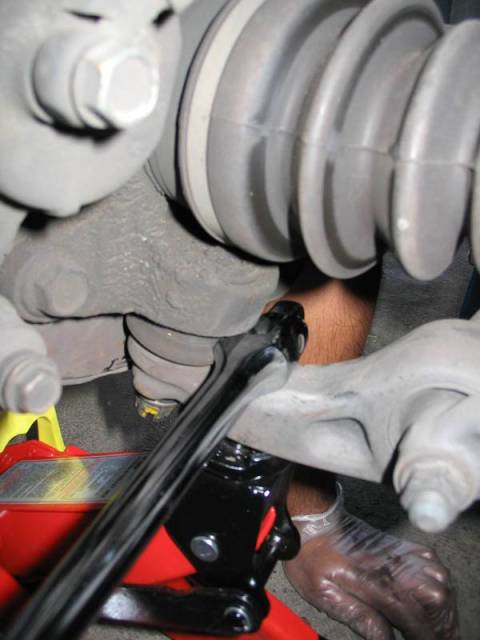
- Jack up under suspension until you can fit your 3/8" ratchet handle (or breaker bar) between the knuckle and the LCA on it's taller edge as shown bellow.
- Then let down the jack until the ratchet binds up.
- Now remove the jack and push down on the suspension.
- The binding will pop the ball joint easily nearly every time. This works great and does absolutely NO damage to the boot. I've been doing this for years on my Civics, so I know it works...
- Remove wheel
- Pop off center cap
- Install wheel & put car on ground
- Remove hub nut w/ giant socket and large breaker bar (with pipe handle extension)
- Remove wheel
- Separate lower ball joint from lower control arm (tie-rod lifter/pickle fork/etc)
- Remove damper Fork (part 12/13 above)
- Use large flat blade screw driver to pop Driveshaft out of transmission
- Install is reverse of removal
BTW: I don't know how easy it is on this car, but on the older Civics/Integras, you can pop the lower ball joint like this:
- Jack up under suspension until you can fit your 3/8" ratchet handle (or breaker bar) between the knuckle and the LCA on it's taller edge as shown bellow.
- Then let down the jack until the ratchet binds up.
- Now remove the jack and push down on the suspension.
- The binding will pop the ball joint easily nearly every time. This works great and does absolutely NO damage to the boot. I've been doing this for years on my Civics, so I know it works...
08-31-2009, 10:50 AM
#20
Nismo TL yo!
Thread Starter
iTrader: (1)
Join Date: Mar 2008
Posts: 1,803
Likes: 0
Received 0 Likes
on
0 Posts
Here's the process:
- Remove wheel
- Pop off center cap
- Install wheel & put car on ground
- Remove hub nut w/ giant socket and large breaker bar (with pipe handle extension)
- Remove wheel
- Separate lower ball joint from lower control arm (tie-rod lifter/pickle fork/etc)
- Remove damper Fork (part 12/13 above)
- Use large flat blade screw driver to pop Driveshaft out of transmission
- Install is reverse of removal
BTW: I don't know how easy it is on this car, but on the older Civics/Integras, you can pop the lower ball joint like this:
- Jack up under suspension until you can fit your 3/8" ratchet handle (or breaker bar) between the knuckle and the LCA on it's taller edge as shown bellow.
- Then let down the jack until the ratchet binds up.
- Now remove the jack and push down on the suspension.
- The binding will pop the ball joint easily nearly every time. This works great and does absolutely NO damage to the boot. I've been doing this for years on my Civics, so I know it works...
- Remove wheel
- Pop off center cap
- Install wheel & put car on ground
- Remove hub nut w/ giant socket and large breaker bar (with pipe handle extension)
- Remove wheel
- Separate lower ball joint from lower control arm (tie-rod lifter/pickle fork/etc)
- Remove damper Fork (part 12/13 above)
- Use large flat blade screw driver to pop Driveshaft out of transmission
- Install is reverse of removal
BTW: I don't know how easy it is on this car, but on the older Civics/Integras, you can pop the lower ball joint like this:
- Jack up under suspension until you can fit your 3/8" ratchet handle (or breaker bar) between the knuckle and the LCA on it's taller edge as shown bellow.
- Then let down the jack until the ratchet binds up.
- Now remove the jack and push down on the suspension.
- The binding will pop the ball joint easily nearly every time. This works great and does absolutely NO damage to the boot. I've been doing this for years on my Civics, so I know it works...
thanks for all the responses
08-31-2009, 12:55 PM
#24
BTW: This is very important!!!!
When you reinstall the #12/13 damper fork, it is EXTREMELY imporant not to tighten & torque the #25 nut until AFTER the everything is finished and the car is back on the ground. If you don't tighten this nut at "ride-height", you will be TWISTING the bushing way out of spec and will lead to premature failure.
All suspension bolts that go through the center of a rubber bushing must be tightened and torqued at ride height. This is how the car is assembled from factory and must be done every time the suspension is worked on.
Reassembly instructions:
- Install axle into gearbox making sure it's fully seated
- Slip axle into hub and thread on axle nut
- Install castle nut on lower ball joint & tighten & torque to spec (may require you to jack up the LCA to put pressure on balljoint & keep it from spining)
- Install new cotter pin in castle nut
- Install the damper fork on the damper so it's fully seated
- Install the #16 pinch bolt, tighten & torque
- Install the #21 thru bolt
- thread on the #25 nut by hand
- Install wheel and tighten lug nuts
- Lower car till wheels touch the ground and torque your lug nuts
- Let car down completely
- Tighten and torque #25 nut to spec
- Tighten and torque axle nut to spec
- Reinstall center cap
03-05-2010, 03:54 PM
#25
6th Gear

Join Date: Apr 2005
Age: 52
Posts: 6
Likes: 0
Received 0 Likes
on
0 Posts
I'm going to change my right side halfshaft tomorrow due to the great info you guys have put on here. In the post above it says to torque to spec, but doesn't list the spec. Does anyone have the torque specs for this job?
 03-07-2010, 12:00 PM
#27
6th Gear
Join Date: Apr 2005
Age: 52
Posts: 6
Likes: 0
Received 0 Likes
on
0 Posts
Done! Thanks for the great info. Wasn't exactly a piece of cake, but not too hard. I used the ratchet handle method of separating the lower ball joint. Worked like a charm. Getting the inner cv out was probably the hardest part. I ended up using a large screwdriver not to pry, but I fished it through the exhaust so that it made contact with the inner cv and tapped it with a hammer. Getting the lower ball joint back in was a bit of a chore. I was able to get it in enough so I could put the nut on upside down and grab a few threads and gently pry the ball joint down more. Then I was able to turn the nut over and draw it home. The old outer cv joint was pretty stiff, but no tears in the boot. I changed it because it was clicking during cold temps when turning left with power. Glad I got it changed so cheap and relatively easy.
The dealer wanted $500 to change the half shaft. The halfshaft from the dealer was $300. I paid $80 (after the core return) for a remanufactured Cardone with a lifetime warranty.
The dealer wanted $500 to change the half shaft. The halfshaft from the dealer was $300. I paid $80 (after the core return) for a remanufactured Cardone with a lifetime warranty.
05-18-2010, 05:40 PM
#29
1st Gear

Join Date: May 2010
Posts: 1
Likes: 0
Received 0 Likes
on
0 Posts
Hi Kelleher,
I like to ask you a question. I am trying to replace the right driveshft assembly on my 08 TL, but I am having a hell of a time removing it from the intermidiate shaft. How much pressure do you need to apply? thank you for you help in advance. I don't want to apply too much pressure ass I am worried that I can bust something else!
I like to ask you a question. I am trying to replace the right driveshft assembly on my 08 TL, but I am having a hell of a time removing it from the intermidiate shaft. How much pressure do you need to apply? thank you for you help in advance. I don't want to apply too much pressure ass I am worried that I can bust something else!
05-25-2010, 07:28 PM
#30
2nd Gear

Join Date: Nov 2006
Location: Indianapolis, IN
Age: 52
Posts: 2
Likes: 0
Received 0 Likes
on
0 Posts
I fished a large and long screwdriver up through the exhaust onto the inner side of the inner cv joint. I then just tapped the screwdriver, fairly lightly, with a hammer and the inner cv popped right out of the transmission. It took me a few minutes to find the best path for the screwdriver but it was pretty easy once I found it.
Getting the new inner cv into the transmission was harder. I pinched the snap ring down a bit to help out.
I got a reman halfshaft from Autozone for $80 after the core return. After the install I had a bad vibe while accellerating. Turns out the halfshaft was out of balance. Autozone gave me a new one under warranty. No more vibe.
09-08-2010, 10:15 PM
#32
1st Gear

Join Date: Oct 2004
Location: Minneapolis, MN
Age: 53
Posts: 1
Likes: 0
Received 0 Likes
on
0 Posts
This thread has been a big help so far, but I have a few questions:
I'm replacing both CV axles, but I too am having trouble separating the right axle from the intermediate shaft. Anyone have any advice? flyfishtrip, can you describe in a little more detail where you inserted the screwdriver? I tried getting in behind the intermediate bearing seal, but I didn't want to risk damaging it.
Also, I managed to rip both lower ball joint boots when I separated them. I assume they're fairly easy to replace, any done it?
09-08-2010, 11:33 PM
#33
Replacing the ball joint boot should be super simple. Simply pull the old one off with it's wire ring. Then re-grease the joint, put a little grease inside the new boot and slip it on. Then work the wire ring around the new boot until it snaps down in it's groove. That should be all there is too it.
As for popping the CV's out of the intermediate shaft, that is a PITA! I've never done it on my TL, but they are a bitch on the Integra motors I've worked on. Wish I could help you...
As for popping the CV's out of the intermediate shaft, that is a PITA! I've never done it on my TL, but they are a bitch on the Integra motors I've worked on. Wish I could help you...
09-09-2010, 07:03 AM
#34
2nd Gear
Join Date: Nov 2006
Location: Indianapolis, IN
Age: 52
Posts: 2
Likes: 0
Received 0 Likes
on
0 Posts
Spaceman, there was a little space just inside of the boot where I could get the screwdriver tip onto solid metal. The shank of the screwdriver was against the transmission housing. It wasn't the best angle, but a light tap with a hammer and I was home free. I'd take a picture for you, but just got rid of the car. I'm now surfing the bimmer forums for advice. Best of luck. You'll get it off. Don't give up.
09-23-2010, 11:25 AM
#35
Instructor
 02-20-2012, 09:24 PM
#36
Cruisin'

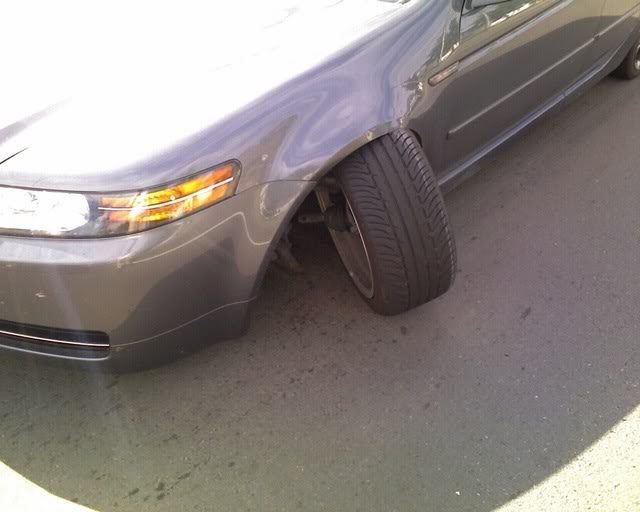
First I will have to say that this thread has been very very helpful....I have one question, are the passenger and driver side axles the same or different? I ordered a set of axles and I went to change out my passenger side today, as soon as I pulled into my driveway my passenger side axle broke, completely separated... I put it into the air, got it out only to discover that the axles i was sent that said they were for a 2006 Acura TL (guaranteed fit) weren't for my car at all...lol wrong end for the tranny smh
02-21-2012, 01:51 PM
#38
Either you got two axles for the same side of the car or you ordered some shitty ones (like Cardones). I recently replaced mine (2 weeks ago) and after reading up on the available choices, I would not put on anything besides OEM or as I did in my case...Raxles....you can easily tell the difference between the shitty ones made in Asia they sell at Autozone and Advance Auto vs. Raxles....
On a side note Raxles use synthetic grease for the joints and dont regrind old CV axles and resell them....
On a side note Raxles use synthetic grease for the joints and dont regrind old CV axles and resell them....
