
Anyone paint their engine cover??


 08-29-2012, 09:49 AM
#82
Team Owner
iTrader: (2)
Join Date: Jan 2008
Location: Kansas City, MO (Overland Park, KS)
Posts: 36,545
Received 6,470 Likes
on
5,162 Posts

Jeremy, there have also been a couple of other guys that have said the same thing.....sorry about that, buddy.
I had the same thing happen with my Carbon Fiber domed ACURA logo on the front of my Type S. Thank goodness for Domed Decals!
 08-29-2012, 10:44 AM
#84
Well, in one way, I'm happy to have the air coming in from the cooler bumper area. But in another way, after driving through a big puddle on Monday, I'd like to have the filter in the engine bay. I'm sure it's fine.
Sell me yours, Steven!
Sell me yours, Steven!

The following users liked this post:
Undying Dreams (08-29-2012)
08-29-2012, 01:33 PM
#88
Chapter Leader (Midwest Region)
Glad I could help. I'm gonna get that setup and use the whole thing and get a new filter. I don't have to worry about rain, since I don't drive the TL when it rains.
08-29-2012, 04:34 PM
#89
OT: has anyone really ever had problems or water locked their motor over some rain? I can see a "POSSIBILITY" of some damage happening if driven in depths of water 6,8 or 12in of water...But daily "RAIN" puddles?
Or are you just not justifying speding the $$$ for a CAI Jer?
The wife is telling me go all the way with the TEAL on all the engine panel/covers...I still don't know about that. I am leaning toward Metallic Charcoal Grey, bringing the wheel color into the engine bay or a re-new plastic flat black finish
Last edited by Steven Bell; 08-29-2012 at 06:47 PM. Reason: Merged Posts.
08-29-2012, 06:48 PM
#90
Team Owner
iTrader: (2)
Join Date: Jan 2008
Location: Kansas City, MO (Overland Park, KS)
Posts: 36,545
Received 6,470 Likes
on
5,162 Posts
Jeremy, Matt has a great link there for you! And it's cheaper than mine anyway-plus, it's got all the pieces too.


 08-30-2012, 08:32 PM
#93
Team Owner
iTrader: (2)
Join Date: Jan 2008
Location: Kansas City, MO (Overland Park, KS)
Posts: 36,545
Received 6,470 Likes
on
5,162 Posts
Did you decide not to go with teal for all the outside pieces?
The following users liked this post:
JayVee (08-31-2012)
08-31-2012, 12:36 AM
#96
Safety Car
iTrader: (5)
here's what i did to mine a while back...everything sanded, primed, and painted black with a clear coat (not the greatest picture)...and painted in the grey area on the main engine cover
08-31-2012, 03:31 AM
#97
I decided against all TEAL. Sorry, I just felt at the end of the day it was too much. In short, the negative thought or image I was having with so much TEAL was "Cotton Candy". And the thought of Cotton Candy related to my whip was enough for me keep it simple and keep it clean, allowing the TEAL to do what it's suppose to do...POP with a accent color contrasting to my continuous BLACK & Charcoal Grey (Carbon Fiber) theme. I am positive the finished product will not disappoint.  As I pic it in my head complete, its going to look amazing Steve!
Very clean OEM look. Nice job!
As I pic it in my head complete, its going to look amazing Steve! 
Last edited by Steven Bell; 08-31-2012 at 08:42 AM. Reason: Merged Posts
08-31-2012, 08:43 AM
#98
Team Owner
iTrader: (2)
Join Date: Jan 2008
Location: Kansas City, MO (Overland Park, KS)
Posts: 36,545
Received 6,470 Likes
on
5,162 Posts
You might be right, buddy. Still the engine cover done in Teal will look great!
09-01-2012, 03:02 PM
#100
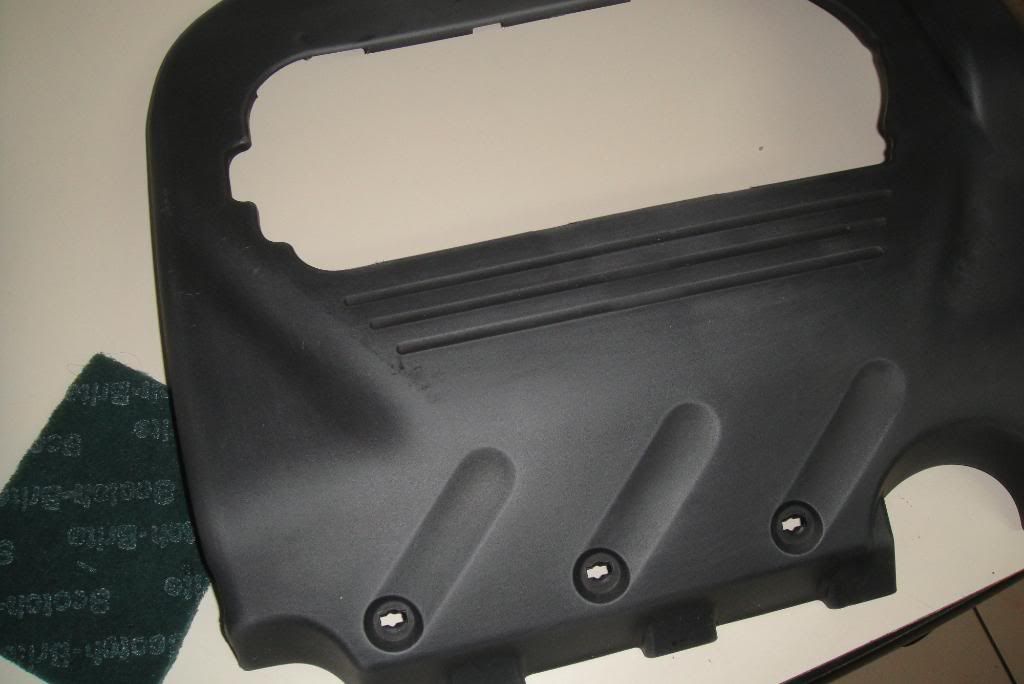
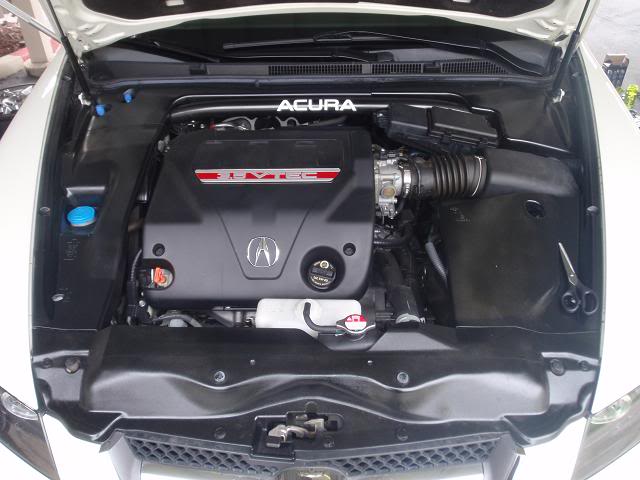
IDK if this counts as "ENGINE COVERS" per thread...But here is my additional work to my engine bay...almost done! 
Coats of clear were applied to the panels above ^ a few posts up...Then I moved on to the metal top plate mani cover...
After my EPIC FAIL and wast of time using the PARMA LIQUID MASK from RC model Hobby on the car paint, I immediately moved on to the next step. I sanded the raised letters down to a nickle brushed finish and sprayed everything black again.

Then I lightly sanded all the raised letters and logo to provide a new surface to adhere to for the teal.

Next I masked the outer perimeter of the raised design for my next attempt of masking with....VASELINE! Yep, the good Ol'Faithful lube!...lol! Because it of its properties, paint does not adhere at all to this stuff. (NOTE: Grease, oil,toothpaste...and other products can be ised for simular job/projects.)


Sprayed a very very light coat and second coat later on. Both coats were important to be a mist application to allow a good layer and foundation for the TEAL paint, especially since it was just goo'd with VASELINE! The raised surface was wiped repeatedly with Simply Green, Alcohol and sand paper...in different orders, whatever seem to work to get the surface true.

Next was a very tedious step, carefully removing the Vaseline and paint w/o lifting the paint on the raised surface. I used a combination of QTips, Razor Blade and even a toothpick for the fine corners and to break the paint away from paint lines I needed.


Now for the final product getting cleared and dried

The clear really helped cover the TAPE MASKING lines from the VASELINE steps. Another coat of clear was added even after this pic below:

as always, MORE TO COME!
Coats of clear were applied to the panels above ^ a few posts up...Then I moved on to the metal top plate mani cover...
After my EPIC FAIL and wast of time using the PARMA LIQUID MASK from RC model Hobby on the car paint, I immediately moved on to the next step. I sanded the raised letters down to a nickle brushed finish and sprayed everything black again.
Then I lightly sanded all the raised letters and logo to provide a new surface to adhere to for the teal.
Next I masked the outer perimeter of the raised design for my next attempt of masking with....VASELINE! Yep, the good Ol'Faithful lube!...lol! Because it of its properties, paint does not adhere at all to this stuff. (NOTE: Grease, oil,toothpaste...and other products can be ised for simular job/projects.)
Sprayed a very very light coat and second coat later on. Both coats were important to be a mist application to allow a good layer and foundation for the TEAL paint, especially since it was just goo'd with VASELINE! The raised surface was wiped repeatedly with Simply Green, Alcohol and sand paper...in different orders, whatever seem to work to get the surface true.
Next was a very tedious step, carefully removing the Vaseline and paint w/o lifting the paint on the raised surface. I used a combination of QTips, Razor Blade and even a toothpick for the fine corners and to break the paint away from paint lines I needed.
Now for the final product getting cleared and dried
The clear really helped cover the TAPE MASKING lines from the VASELINE steps. Another coat of clear was added even after this pic below:
as always, MORE TO COME!
09-01-2012, 03:14 PM
#101
Team Owner
iTrader: (2)
Join Date: Jan 2008
Location: Kansas City, MO (Overland Park, KS)
Posts: 36,545
Received 6,470 Likes
on
5,162 Posts
Nicely done!
The following users liked this post:
JayVee (09-01-2012)


 09-01-2012, 04:50 PM
#105
Team Owner
iTrader: (2)
Join Date: Jan 2008
Location: Kansas City, MO (Overland Park, KS)
Posts: 36,545
Received 6,470 Likes
on
5,162 Posts
Very nice-be sure to paint the front engine compartment cover in gloss black. Also consider doing the windshield washer fluid cap and the A/C covers in Teal too.
09-01-2012, 04:56 PM
#106
Moderator
iTrader: (3)
Damn that looks JayVee 
09-01-2012, 04:58 PM
#107
09-02-2012, 04:54 PM
#108
Team Owner
iTrader: (2)
Join Date: Jan 2008
Location: Kansas City, MO (Overland Park, KS)
Posts: 36,545
Received 6,470 Likes
on
5,162 Posts
Can't tell from the pictures. Overall, it looks really good.
 Like me.
 09-02-2012, 08:16 PM
#112
I Like turtles
iTrader: (4)
if it stops raining outside i can still take the pieces off and start
09-02-2012, 10:13 PM
#113
Racer
Looks very nice JayVee.
Just a tip though, there is a MUCH easier way to paint the raised lettering.
Step 1: Paint the whole piece with your lettering color (in your case teal)
Step 2: Cover the face of the lettering with masking tape:
Step 3: Use an xacto knife to cut the tape around the lettering (pretty easy).
Step 4: spray your base color (in your case black).
Step 5: remove masking.
The following users liked this post:
Undying Dreams (04-12-2013)
09-03-2012, 10:07 AM
#114
Looks very nice JayVee.
Just a tip though, there is a MUCH easier way to paint the raised lettering.
Step 1: Paint the whole piece with your lettering color (in your case teal)
Step 2: Cover the face of the lettering with masking tape:
Step 3: Use an xacto knife to cut the tape around the lettering (pretty easy).
Step 4: spray your base color (in your case black).
Step 5: remove masking.
Just a tip though, there is a MUCH easier way to paint the raised lettering.
Step 1: Paint the whole piece with your lettering color (in your case teal)
Step 2: Cover the face of the lettering with masking tape:
Step 3: Use an xacto knife to cut the tape around the lettering (pretty easy).
Step 4: spray your base color (in your case black).
Step 5: remove masking.
The reason why I ask is, no one does this technique when dealing with double lined detatils such as the circle around the ACURA logo or such small details such as the "POINT" in 3.2... GOOGLE IT... U will so NO ONE using this technique on a fine detail example.
Thanks for your suggestion, but I been dealing with sketching, drawing, shading, coloring, painting...etc for years! I can take pics of my drawings but I will leave you with more of a related example. I use to be HARDCORE RC Model Racer, Basher and builder. I will show u a few of my examples of painting with a RATTLE CAN paint job on my 1/4 scale 30cc STROKED HPI Baga 5B.
CARBON FIBER Flames (fading waving appearance as if moving) and Metallic Burnt Orange Pearl


Last edited by JayVee; 09-03-2012 at 10:18 AM.
 09-03-2012, 10:39 AM
#116
Moderator
iTrader: (3)
Dan I want to see pics
Damn JayVee, quite the artist aren't you?
Damn JayVee, quite the artist aren't you?
09-03-2012, 11:02 AM
#118
Maybe even a shop towel wrapped around your finger with a small amt on the towel rubbing it on the surface...Just trying to help
Why YES...Yes I am CLtotheTL
 I have so many examples of the work I have done. But we will keep it on point and topic "JACK OF ALL TRADES, Ace at none."
  09-03-2012, 01:55 PM
#120
Racer
That sounds all swell typed in black & white or on paper... But my question is to you is, have you actually done one with this technique? If so, pls provide pics of the finishing product.
The reason why I ask is, no one does this technique when dealing with double lined detatils such as the circle around the ACURA logo or such small details such as the "POINT" in 3.2... GOOGLE IT... U will so NO ONE using this technique on a fine detail example.
Thanks for your suggestion, but I been dealing with sketching, drawing, shading, coloring, painting...etc for years! I can take pics of my drawings but I will leave you with more of a related example. I use to be HARDCORE RC Model Racer, Basher and builder. I will show u a few of my examples of painting with a RATTLE CAN paint job on my 1/4 scale 30cc STROKED HPI Baga 5B.
CARBON FIBER Flames (fading waving appearance as if moving) and Metallic Burnt Orange Pearl
I don't have any pics of doing the process myself, but here's some pics of how it works. It's pretty well known in the Civic community. It works very well for making the small raised lettering on valve covers a different color than the cover itself.
Step 1, you start with the whole piece in whatever color you want your lettering color to be, in this case it's bare metal. In your case the whole thing would be painted teal. (Not my pics, but the same process)

Step 2, tape up the areas you don't want the base color to cover, like your lettering. This is actually pretty easy, you just lay the tape over the whole thing and use a knife to cut in the relief around the edges.

Step 3: Spray base color.

Remove masking:

By the way, I'm not trying to criticize your technique or expertise. I have some experience with painting engine parts and I've even a few full paint jobs on 1:1 cars, including custom work and color changes. In doing so I've learned a few tricks and I though I would share one.