
A-122: DIY - 105k Service: Timing Belt, Water Pump, Spark Plugs, Thermostat *PICS*
 01-16-2015, 03:18 PM
#1361
Off by one tooth should be fine on a SOHC since both intake & exhaust are effected the same. It's DOHC motors where you worry about "clicking" distance where the intake & exhaust valves might make contact.
Either way I've said a prayer for you.
Either way I've said a prayer for you.
Last edited by 94eg!; 01-16-2015 at 03:22 PM.

The following 2 users liked this post by 94eg!:
Mondo375 (01-16-2015),
rockstar143 (01-16-2015)
The following users liked this post:
Mondo375 (01-16-2015)
01-16-2015, 09:02 PM
#1363
Racer
iTrader: (3)
So yea looks off by a tooth with covers off as well. Much faster disassembling this time round. Too late for me to fire up my compressor to remove crank pulley so it have to wait till morning. Thanks guys!
 01-16-2015, 10:33 PM
#1364
Chapter Leader (Southern Region)
Thread Starter
sucks.. but you should be fine. I did mention in the DIY to double triple check the marks. 

 lol
lol
 01-17-2015, 05:41 PM
#1367
Chapter Leader (Southern Region)
Thread Starter
01-17-2015, 07:53 PM
#1368
Advanced

Got her apart and water pump, adjuster, tensioner, and idler back in. The Honda idler bolt did come with threadlock pre applied and I splurged on the rest of the bolts that the fsm suggested and I am glad I did, most were corroding after 130k in central Ohio. Let you guys know how it turns out.
Out of curiosity some items like the water pump call for 8.7 foot pounds, a few pounds extra won't hurt much correct? It was hard to fit even a 3/8 torque wrench in there. As long as they are pretty even all is okay correct?
Out of curiosity some items like the water pump call for 8.7 foot pounds, a few pounds extra won't hurt much correct? It was hard to fit even a 3/8 torque wrench in there. As long as they are pretty even all is okay correct?
01-17-2015, 09:27 PM
#1369
Race Director
I wouldn't push my luck. If the bolts didn't snap on you, you probably are OK. Try that on the valve cover bolts and you'll be sorry....
01-18-2015, 05:54 AM
#1370
Advanced
So as applying torque the wrench clicked but then still traveled less than a 1/3 turn. You're telling me this will "snap" the bolt?
01-18-2015, 06:30 AM
#1371
Race Director
 01-18-2015, 10:57 AM
#1372
You can always practice on a different bolt. Just set your torque wrench to the desired spec, and make it click over & over on some other fixed bolt. You should get a decent feel for that amount of torque. Then use your regular ratchet to apply the same feel to your hard to get to bolts. Just be sure to hold your ratchet handle at the same distance from the head as you did with your torque wrench.
hand closer = under-torqued
hand further = over-torqued
hand closer = under-torqued
hand further = over-torqued
The following users liked this post:
JD TL-S (03-04-2015)
01-18-2015, 11:22 AM
#1373
Chapter Leader (Southern Region)
Thread Starter
I'd be more worried about stripping out the threads. What a PITA it would be to helicoil it.
01-18-2015, 04:57 PM
#1374
I made sure to use a 1/4" ratchet on that...and held it kinda in my palm when tightening, not at the end...
when you hit the threshold on the bolt, you don't even need a quarter turn...it'll just snap off. Then you will cry.
when you hit the threshold on the bolt, you don't even need a quarter turn...it'll just snap off. Then you will cry.
The following users liked this post:
Mondo375 (01-19-2015)
The following users liked this post:
JD TL-S (03-04-2015)
01-18-2015, 11:38 PM
#1378
Chapter Leader (Southern Region)
Thread Starter


The following users liked this post:
JD TL-S (03-04-2015)


The following users liked this post:
rockstar143 (01-19-2015)
01-20-2015, 09:41 AM
#1382
Advanced
Figured I would post a few pics. I managed to get a shot of the ever elusive battery tie down adjuster step... A few notes on that, it seemed to be important to have in place before pulling the pin on the adjuster as it held this in place and slowly eased the tension onto the belt.
Thinking about it leads me to think if one were to grind the tip as suggested it would reduce drag when installing the tie down before belt removal. I mention this because I noticed once the top made contact it could not be hand tightened further I assume from the rough surfaces. The threads also seemed tighter at the end maybe to hold the nut on when it is in use as a battery tie down.
Thinking about it leads me to think if one were to grind the tip as suggested it would reduce drag when installing the tie down before belt removal. I mention this because I noticed once the top made contact it could not be hand tightened further I assume from the rough surfaces. The threads also seemed tighter at the end maybe to hold the nut on when it is in use as a battery tie down.
01-25-2015, 01:39 AM
#1384
Instructor

Finished up earlier this afternoon. Took about 6 hours which included a lunch break and misc gawking and beer breaks. I've done many Honda 4cyl TB replacements but this is my first V6. Reading the OP before starting coupled with my trusty Helms manual made everything smooth and painless.
01-25-2015, 08:18 AM
#1385
Advanced
Finished up earlier this afternoon. Took about 6 hours which included a lunch break and misc gawking and beer breaks. I've done many Honda 4cyl TB replacements but this is my first V6. Reading the OP before starting coupled with my trusty Helms manual made everything smooth and painless.
02-01-2015, 02:12 PM
#1386
Advanced

Just did Mine
A huge thanks to everyone on this post, I just did mine, it went very smoothly because of all the info I had from posts like this.
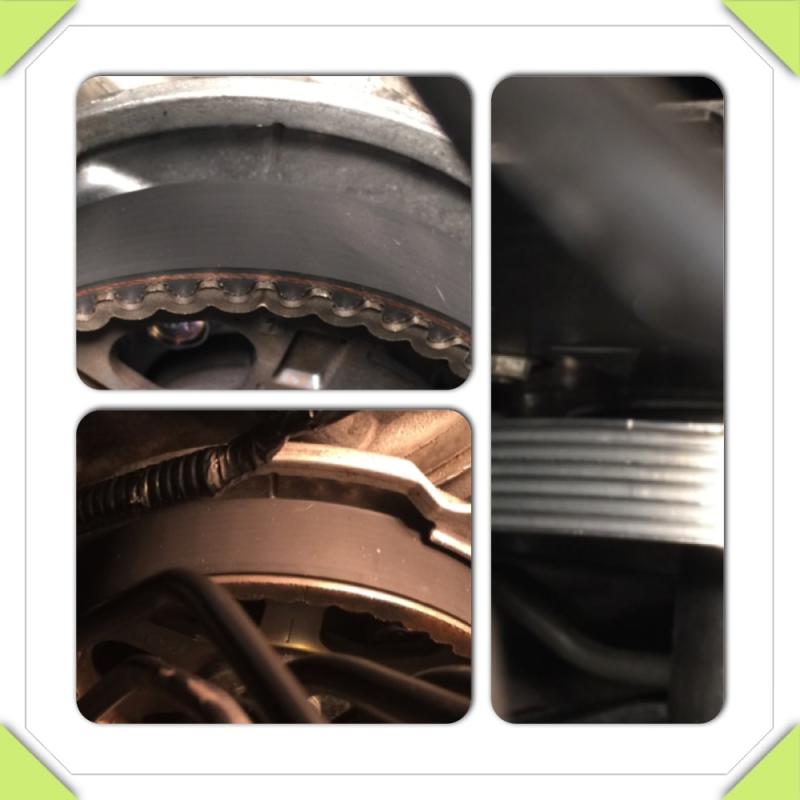
Here are some pics of the Aisin kit and the removed parts, identical as far as I could tell. Also a pdf of the Aisin instructions. My old parts looked very good, considering the mileage, and I understand what those plastic covers have all the bolts and gaskets. You can see how clean the belt/water pump area is.
I had to take the timing belt off the pulleys a couple of times to get the slack all at the tensioner, I think the new belt is a little stiff. Once in place I pulled the bracket ( 99 2nd Gen vehicle ) and the timing marks all lined up perfect.
The following users liked this post:
JD TL-S (03-19-2015)
03-02-2015, 03:08 PM
#1387
Just wanted to give a big thanks to Majofo for the write up and to everyone else who threw some info in and advice. I just did the major service yesterday as well as adjusted the valves. I was a little over 9k over due but the belts looked to be in pretty good shape, the tensioner and pulleys all looked to be in really good shape as well. Once I got around to changing the plugs I noticed the coil pack at valve two was really stuck, almost like it was rusted in. After I finally got it out I found the plug wasn't even cranked down as I was able to remove it by hand.
Also: Acura quoted me at $1400 to do the belt, valves and tune up. I did it myself and saved over $1100!! Thanks again to everyone in this thread
Also: Acura quoted me at $1400 to do the belt, valves and tune up. I did it myself and saved over $1100!! Thanks again to everyone in this thread
03-02-2015, 06:46 PM
#1388
Race Director
Just wanted to give a big thanks to Majofo for the write up and to everyone else who threw some info in and advice. I just did the major service yesterday as well as adjusted the valves. I was a little over 9k over due but the belts looked to be in pretty good shape, the tensioner and pulleys all looked to be in really good shape as well. Once I got around to changing the plugs I noticed the coil pack at valve two was really stuck, almost like it was rusted in. After I finally got it out I found the plug wasn't even cranked down as I was able to remove it by hand.
Also: Acura quoted me at $1400 to do the belt, valves and tune up. I did it myself and saved over $1100!! Thanks again to everyone in this thread
Also: Acura quoted me at $1400 to do the belt, valves and tune up. I did it myself and saved over $1100!! Thanks again to everyone in this thread
How far off were the valves?
03-02-2015, 08:49 PM
#1389

How would one measure how easily the feeler gauges slid back and forth between the valves? What would be an adequate response to keep the thread on topic? The topic is helping and achieving your own timing belt service. Your question doesn't do that, especially since the response will have to be "it slid back and forth real good and felt loose".
If there's another way to measure how far off, I apologize in advance.
Please stay on topic.
 03-02-2015, 08:55 PM
#1390
Race Director
Dude, really? Grow up. Post reported.
03-02-2015, 09:06 PM
#1391
So, you think you will come into a thread and tell me when/where I can post?
Then you mention growing up? Laughable.
You can't take your own medicine, bottom line.
Please, enlighten me as to what value you added with your very vague question that will require a very subjective response. How did that help with the course of this thread and staying on topic?
Report away...I hope the mods eventually tell you to quit your whining. Stop dishing it if you can't take it.
You're actually pretty helpful and knowledgeable. Drop the Napoleon complex and take it easy.
03-04-2015, 11:32 AM
#1392
So, you think you will come into a thread and tell me when/where I can post?
Then you mention growing up? Laughable.
You can't take your own medicine, bottom line.
Please, enlighten me as to what value you added with your very vague question that will require a very subjective response. How did that help with the course of this thread and staying on topic?
Report away...I hope the mods eventually tell you to quit your whining. Stop dishing it if you can't take it.
You're actually pretty helpful and knowledgeable. Drop the Napoleon complex and take it easy.
Then you mention growing up? Laughable.
You can't take your own medicine, bottom line.
Please, enlighten me as to what value you added with your very vague question that will require a very subjective response. How did that help with the course of this thread and staying on topic?
Report away...I hope the mods eventually tell you to quit your whining. Stop dishing it if you can't take it.
You're actually pretty helpful and knowledgeable. Drop the Napoleon complex and take it easy.
If you didn't take the time to do that extra work for your own understanding, then normally you would politely share that fact and move on.
I have never taken a "before" actual-measurement myself. Sounds like it would make the job take much longer. I just stick the "in-spec" gauge in there and adjust as necessary.
03-04-2015, 11:55 AM
#1393
Chapter Leader (Southern Region)
Thread Starter

 03-04-2015, 05:02 PM
#1395
Safety Car
iTrader: (1)
Join Date: Apr 2007
Location: Northern ILLINOIS
Age: 62
Posts: 4,848
Received 133 Likes
on
129 Posts
So many pages to search through.
Not complaining.
Q: I found a kit on Amazon called:
Aisin TKH-002 Engine Timing Belt Kit with water pump
Retail $466 for $204. Is this kit what I sould use ?
Or any suggestions would be great.
The Review states the Timing Belt is Mitsubushi, not Honda.
Also suggested is to get a New Goodyear Poly-V Drive belt
and New Motorad Fail-safe thermostat.
Thankyou for this great DIY. I am not sure I should do this myself.
I have great skills and all the tools needed. ?
03-04-2015, 09:24 PM
#1396
So many pages to search through.
Not complaining.
Q: I found a kit on Amazon called:
Aisin TKH-002 Engine Timing Belt Kit with water pump
Retail $466 for $204. Is this kit what I sould use ?
Or any suggestions would be great.
The Review states the Timing Belt is Mitsubushi, not Honda.
Also suggested is to get a New Goodyear Poly-V Drive belt
and New Motorad Fail-safe thermostat.
Thankyou for this great DIY. I am not sure I should do this myself.
I have great skills and all the tools needed. ?
Not complaining.
Q: I found a kit on Amazon called:
Aisin TKH-002 Engine Timing Belt Kit with water pump
Retail $466 for $204. Is this kit what I sould use ?
Or any suggestions would be great.
The Review states the Timing Belt is Mitsubushi, not Honda.
Also suggested is to get a New Goodyear Poly-V Drive belt
and New Motorad Fail-safe thermostat.
Thankyou for this great DIY. I am not sure I should do this myself.
I have great skills and all the tools needed. ?
The following users liked this post:
JD TL-S (03-07-2015)
03-04-2015, 09:47 PM
#1397
Race Director
So many pages to search through.
Not complaining.
Q: I found a kit on Amazon called:
Aisin TKH-002 Engine Timing Belt Kit with water pump
Retail $466 for $204. Is this kit what I sould use ?
Or any suggestions would be great.
The Review states the Timing Belt is Mitsubushi, not Honda.
Also suggested is to get a New Goodyear Poly-V Drive belt
and New Motorad Fail-safe thermostat.
Thankyou for this great DIY. I am not sure I should do this myself.
I have great skills and all the tools needed. ?
Not complaining.
Q: I found a kit on Amazon called:
Aisin TKH-002 Engine Timing Belt Kit with water pump
Retail $466 for $204. Is this kit what I sould use ?
Or any suggestions would be great.
The Review states the Timing Belt is Mitsubushi, not Honda.
Also suggested is to get a New Goodyear Poly-V Drive belt
and New Motorad Fail-safe thermostat.
Thankyou for this great DIY. I am not sure I should do this myself.
I have great skills and all the tools needed. ?
I used the Gates kit and it's been fine now for 85K miles (currently at 191K).
The following users liked this post:
JD TL-S (03-07-2015)
03-06-2015, 09:15 AM
#1398
Personally I will be doing the following so I will have a completely OEM setup for less money:
- OEM Honda Yamada (YNA) brand water pump (yes it's expensive ~$120)
- Gates TCK329 kit (includes same-as-OEM Gates/Unitta belt & same-as-OEM Koyo rollers ~$54)
- Aisin BTH-001 Tensioner (same-as-OEM ~$57)
Amazon seems to have the best price on TCK329 & BTH-001 right now. Some other places will match them though. Internet prices seem to fluctuate a lot lately. Amazon bumped up the price of Gates kit while it was in my cart once. It's now back down again.
Total cost is around $240 with shipping of the pump.
BTW: I do have the full Gates kit on my wife's 04 Pilot and it's been going well for 40k now
Last edited by 94eg!; 03-06-2015 at 09:25 AM.
The following users liked this post:
JD TL-S (03-07-2015)
