pics of morimoto hid set up

Thread Tools
 
Search this Thread
 
Old 04-10-2018, 10:54 AM
  #1  
Intermediate
Thread Starter
 
nj00tl's Avatar
 
Join Date: Apr 2018
Location: dirty jerz
Age: 38
Posts: 43
Received 1 Like on 1 Post
pics of morimoto hid set up

my oem stuff crapped out finally and i bought the xb35 kit from retro fit for my car. dealers prices in nj are crazy. 255 for igniter 460 for inverter plus 206 to install and 135 to diagnose. I am wondering if anyone has any pics of their set up. I wasnt expecting to have to seal the headlight but it is what it is. I can do it and have some resources at my expense. tool wise. thanks in advance.
Old 04-10-2018, 10:57 AM
  #2  
Senior Moderator
 
thoiboi's Avatar
 
Join Date: Apr 2010
Location: SoCal, CA
Posts: 46,869
Received 8,575 Likes on 6,626 Posts
Did you just buy the D2R bulb and ballast or did you get projectors too?
Old 04-10-2018, 11:04 AM
  #3  
Intermediate
Thread Starter
 
nj00tl's Avatar
 
Join Date: Apr 2018
Location: dirty jerz
Age: 38
Posts: 43
Received 1 Like on 1 Post
ballast and bulbs
Old 04-10-2018, 11:13 AM
  #4  
Senior Moderator
 
thoiboi's Avatar
 
Join Date: Apr 2010
Location: SoCal, CA
Posts: 46,869
Received 8,575 Likes on 6,626 Posts
Did you hopefully buy this one? https://www.theretrofitsource.com/hi...epair-kit.html

it has the pigtails so it's plug and play to the old input. I'd just leave the external ballast on the outside, keep the old one on there to steal the headlight, and just cut a hole in the cap to route the wire.
Old 04-10-2018, 11:14 AM
  #5  
Senior Moderator
 
thoiboi's Avatar
 
Join Date: Apr 2010
Location: SoCal, CA
Posts: 46,869
Received 8,575 Likes on 6,626 Posts
also you got D2R instead of D2S bulbs right?
Old 04-10-2018, 11:20 AM
  #6  
Intermediate
Thread Starter
 
nj00tl's Avatar
 
Join Date: Apr 2018
Location: dirty jerz
Age: 38
Posts: 43
Received 1 Like on 1 Post
i did but had the wrong connector selected. not that big of a deal to me. i need my car asap anyway so. just gotta get it all sealed up and back together. taking the bumper off is some bs tho
Old 04-10-2018, 02:43 PM
  #7  
Intermediate
Thread Starter
 
nj00tl's Avatar
 
Join Date: Apr 2018
Location: dirty jerz
Age: 38
Posts: 43
Received 1 Like on 1 Post
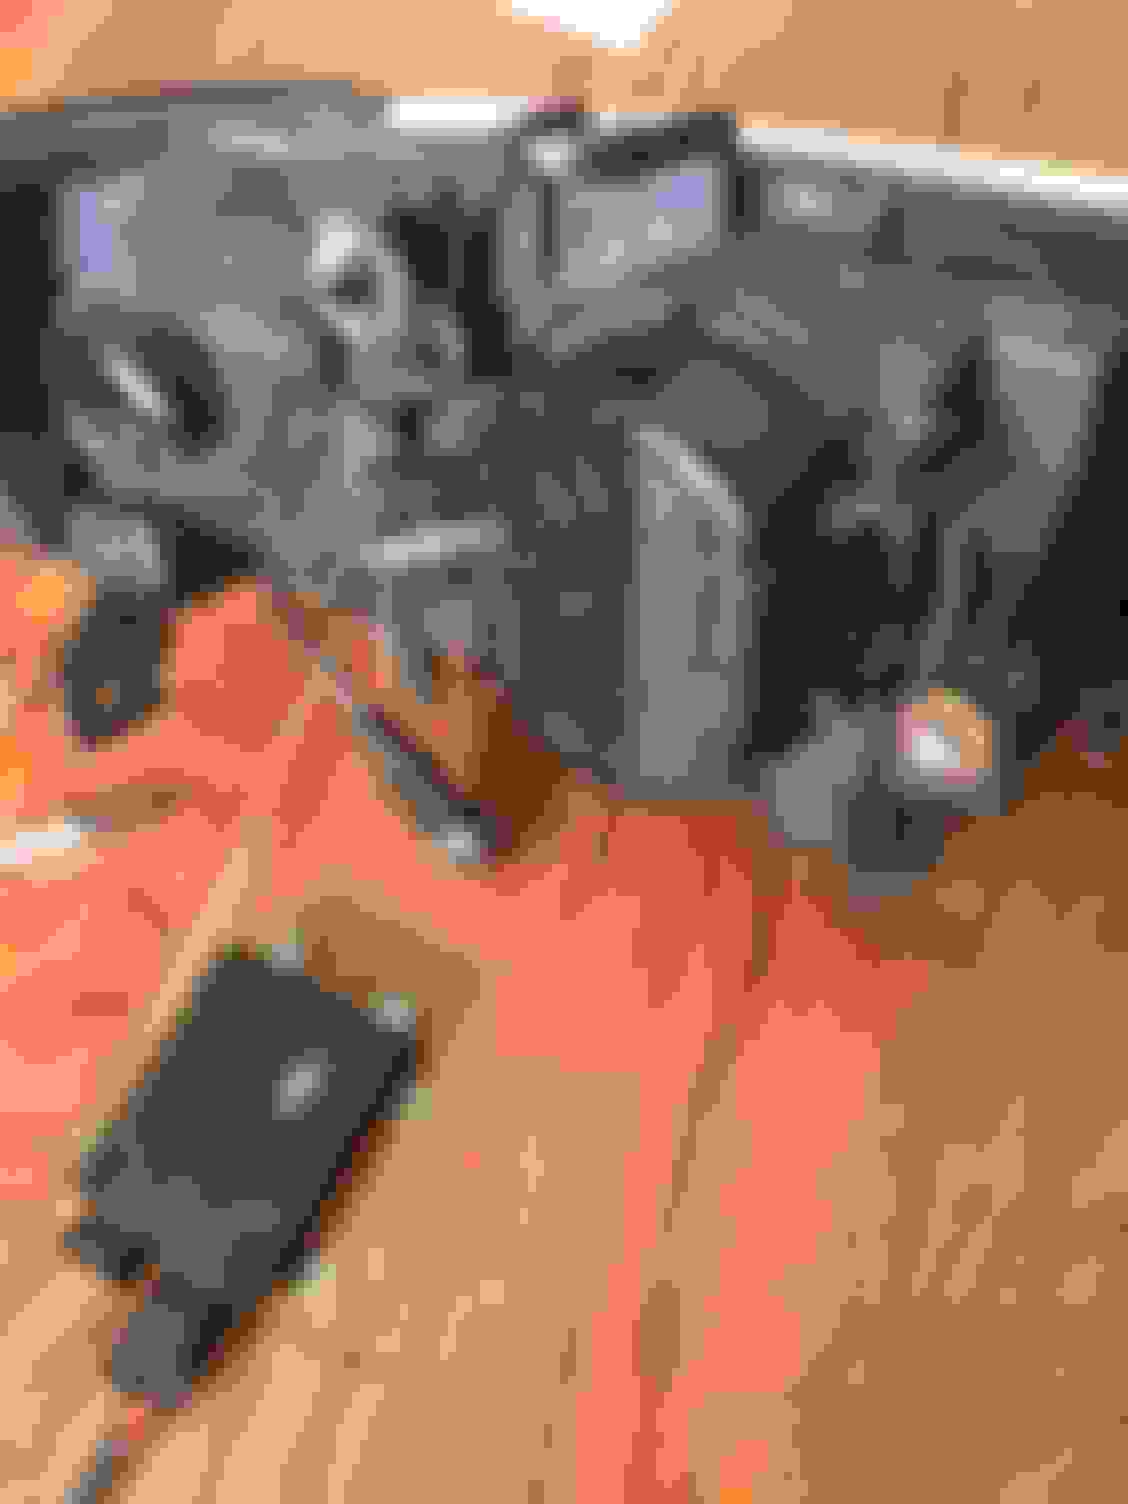
at first i was interested in how other ppl have done it. to get an idea. this is how mine turned out. I'm gonna make a bracket at work to mount the pass side ballast. driver just got mounted to the air filter box. i kinda had no choice. i don't want it just tucked somewhere. plus my axles vibrate right now so i don't wanna expose the new stuff to too much just yet. ill upload pics of under the hood when its complete.
Old 04-10-2018, 02:46 PM
  #8  
Intermediate
Thread Starter
 
nj00tl's Avatar
 
Join Date: Apr 2018
Location: dirty jerz
Age: 38
Posts: 43
Received 1 Like on 1 Post
one side kinda looks a little purple tho. its really bright out here so its also kinda hard to tell. I'm hoping the constant handling of the headlight shell didn't throw off the adjustment of the light. thinking about it now tho i wish i would've went with a brighter bulb cause i didn't like them before but ill see for sure tonight how they look. i have lights and didn't before so I'm happy. wife said they make a slight buzzing kinda sound. I'm a little deaf so i don't hear squat
Old 04-10-2018, 02:51 PM
  #9  
Senior Moderator
 
thoiboi's Avatar
 
Join Date: Apr 2010
Location: SoCal, CA
Posts: 46,869
Received 8,575 Likes on 6,626 Posts
buzzing sound is normal for HIDs. that's just the ballast working.

purple... you MAY have had a bad bulb .. keep driving for a few hours and see if the light settles a bit.


I personally would have cut the wire cap right in the center because OCD but yours works

just zip tie it to the engine bay and call it a day bud, don't overthink it
Old 04-10-2018, 03:02 PM
  #10  
Intermediate
Thread Starter
 
nj00tl's Avatar
 
Join Date: Apr 2018
Location: dirty jerz
Age: 38
Posts: 43
Received 1 Like on 1 Post
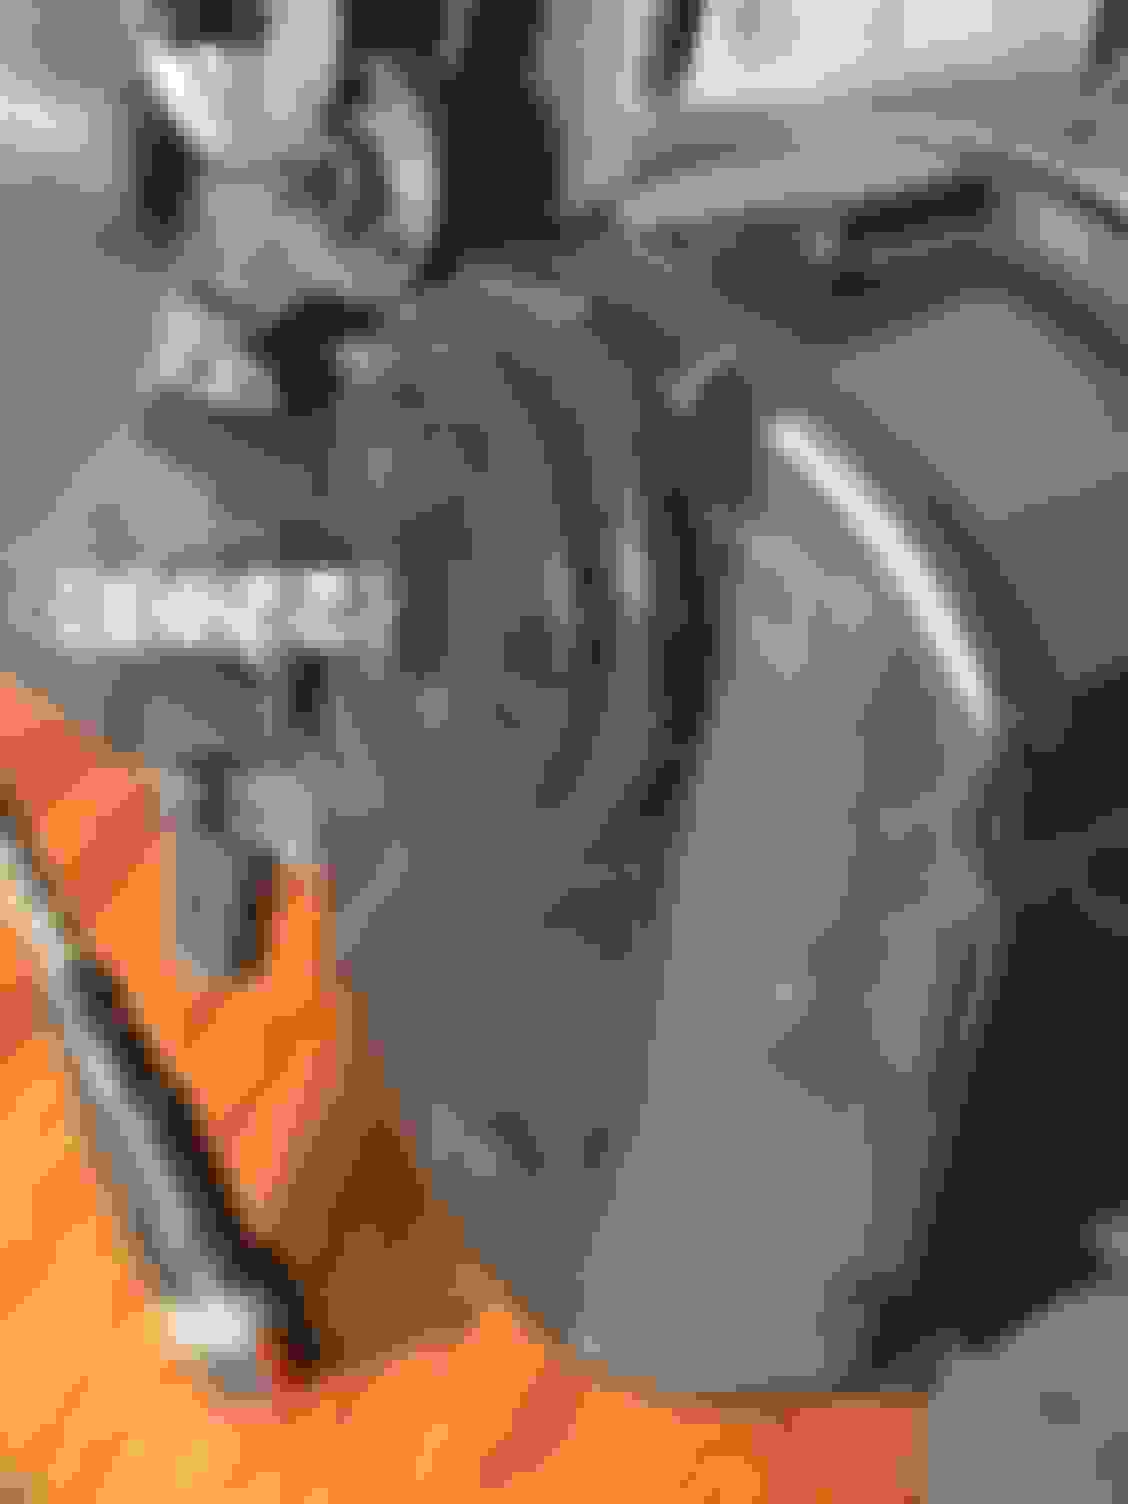
its offset cause the cap of the igniter is pretty bulky and thought the less crimping to the wire the better. i also had to cut the stock mounting tabs for the stock igniter away cause every time i closed the cap and opened it the igniter wire was loose. plus like you, ocd. its nice and clean on the inside now. i don't ever plan on selling the car so I'm ok with it.
Old 04-10-2018, 03:03 PM
  #11  
Intermediate
Thread Starter
 
nj00tl's Avatar
 
Join Date: Apr 2018
Location: dirty jerz
Age: 38
Posts: 43
Received 1 Like on 1 Post
it did however open my brain up to a whole new chapter of car mods that i honestly never thought of
Old 04-10-2018, 03:05 PM
  #12  
Senior Moderator
 
thoiboi's Avatar
 
Join Date: Apr 2010
Location: SoCal, CA
Posts: 46,869
Received 8,575 Likes on 6,626 Posts
fair enough!
Old 04-10-2018, 04:53 PM
  #13  
Intermediate
Thread Starter
 
nj00tl's Avatar
 
Join Date: Apr 2018
Location: dirty jerz
Age: 38
Posts: 43
Received 1 Like on 1 Post
Also my cars “lowered” a couple inches and did notice my lights were even less effective than before lowering it. Whats the process for adjusting the lights?
Old 04-10-2018, 04:55 PM
  #14  
Senior Moderator
 
thoiboi's Avatar
 
Join Date: Apr 2010
Location: SoCal, CA
Posts: 46,869
Received 8,575 Likes on 6,626 Posts


it's in your manual

https://www.google.com/search?client....0.SoefqeoeJAo
Old 04-10-2018, 05:06 PM
  #15  
Intermediate
Thread Starter
 
nj00tl's Avatar
 
Join Date: Apr 2018
Location: dirty jerz
Age: 38
Posts: 43
Received 1 Like on 1 Post
Of course it is. Thank you.
Old 04-11-2018, 11:43 AM
  #16  
Intermediate
Thread Starter
 
nj00tl's Avatar
 
Join Date: Apr 2018
Location: dirty jerz
Age: 38
Posts: 43
Received 1 Like on 1 Post


Pic taken from sunroof. In hdr mode. Driver side not projecting like the passenger side.
Here is how they looked last night. Driver side was pointing wayyyyyy to far into incoming traffic. Got it closer to being final. I dont know if my lenses are just that dirty or what but the driver side beam is way different than the passenger when projected on a wall. Any idea why?
Old 04-11-2018, 11:56 AM
  #17  
Intermediate
Thread Starter
 
nj00tl's Avatar
 
Join Date: Apr 2018
Location: dirty jerz
Age: 38
Posts: 43
Received 1 Like on 1 Post
Looking at pics again driver side looks a little high plus i think they both might be able to come in some. Im gonna mark a wall with tape accordingly tonight at work and see how they look. Its really hard to find a building that doesnt have the road slopped away from it.
Old 04-11-2018, 11:56 AM
  #18  
Senior Moderator
 
thoiboi's Avatar
 
Join Date: Apr 2010
Location: SoCal, CA
Posts: 46,869
Received 8,575 Likes on 6,626 Posts
bulb isn't seated properly into the housing.
Old 04-11-2018, 11:57 AM
  #19  
Senior Moderator
 
thoiboi's Avatar
 
Join Date: Apr 2010
Location: SoCal, CA
Posts: 46,869
Received 8,575 Likes on 6,626 Posts
make sure you're ~25-30 feet away from the wall to properly align.

Old 04-11-2018, 12:06 PM
  #20  
Intermediate
Thread Starter
 
nj00tl's Avatar
 
Join Date: Apr 2018
Location: dirty jerz
Age: 38
Posts: 43
Received 1 Like on 1 Post
I can confidently say the bulbs are in properly. I dont have anything to reference tho as far as comparison goes to determine if its always been like that. My lights have always been “less than what i thought they should be” especially on drivers side. Even worse as of late cause they never stayed on.
Old 04-11-2018, 03:39 PM
  #21  
Racer
 
MBP 03's Avatar
 
Join Date: Jun 2012
Location: New Jersey
Age: 50
Posts: 372
Received 84 Likes on 74 Posts
What kind of condition are your headlight lenses in?
Old 04-11-2018, 04:32 PM
  #22  
Senior Moderator
 
thoiboi's Avatar
 
Join Date: Apr 2010
Location: SoCal, CA
Posts: 46,869
Received 8,575 Likes on 6,626 Posts
if not headlight lens, than the reflector bowl in the headlight itself has started to deteriorate and gone to
Old 04-11-2018, 05:41 PM
  #23  
Intermediate
Thread Starter
 
nj00tl's Avatar
 
Join Date: Apr 2018
Location: dirty jerz
Age: 38
Posts: 43
Received 1 Like on 1 Post
This weekend ill drop the bumper again and open it up and verify the bulbs seated properly. Lenses are stock and hazy. I shouldve opened them up and cleaned them but the looked like they were opened and resealed with something so ill just save that for another day and dollar.
Old 04-11-2018, 05:45 PM
  #24  
Intermediate
Thread Starter
 
nj00tl's Avatar
 
Join Date: Apr 2018
Location: dirty jerz
Age: 38
Posts: 43
Received 1 Like on 1 Post

Driver no flash


Driver w/flash


Passenger no flash


W/flash
Old 04-15-2018, 10:47 AM
  #25  
Instructor
 
RONE's Avatar
 
Join Date: Jul 2005
Posts: 167
Received 14 Likes on 10 Posts
You can clean the headlights with them installed on the car. No big deal. The haziness is going to be on the outside surface. Get some rubbing compound and buff them.
Old 04-15-2018, 12:40 PM
  #26  
Three Wheelin'
 
Pair of TLs's Avatar
 
Join Date: Dec 2012
Location: SE WI
Age: 72
Posts: 1,969
Received 758 Likes on 463 Posts
Exclamation Do those headlisghts justice


I personally do (600# in this case) 800, 1000, 1200, 1500, 2000, 3000, 5000 and a buffer polish & wax.
They do come out nice...
Old 04-16-2018, 12:37 PM
  #27  
Intermediate
Thread Starter
 
nj00tl's Avatar
 
Join Date: Apr 2018
Location: dirty jerz
Age: 38
Posts: 43
Received 1 Like on 1 Post
Ive never thought about wet sanding them. I have used rubbing compound with my mothers power cone and it didnt really do much but that was before the change of ballast and bulbs. I didnt get a chance to drop the bumper and pull the headlight assembly to check the bulb is seated correctly but my lights are still better than what i had before. After further reasearch tho the new bulbs would do a hell of alot better with projector housings. Which will be coming one day soon. Ill drop the bumper and pull the headlight tho to verify. I appreciate all the input.
Old 04-16-2018, 05:37 PM
  #28  
Intermediate
Thread Starter
 
nj00tl's Avatar
 
Join Date: Apr 2018
Location: dirty jerz
Age: 38
Posts: 43
Received 1 Like on 1 Post
I just noticed in my low beams there is another pane of material before the bulb. Is that normal? The high beam isnt like that.
Old 04-17-2018, 04:06 PM
  #29  
5th Gear
 
theguybd630's Avatar
 
Join Date: Sep 2017
Age: 34
Posts: 5
Likes: 0
Received 0 Likes on 0 Posts
Originally Posted by Pair of TLs


https://youtu.be/e-VdwI7VHiw

I personally do (600# in this case) 800, 1000, 1200, 1500, 2000, 3000, 5000 and a buffer polish & wax.
They do come out nice...
Old 04-18-2018, 02:53 PM
  #30  
Senior Moderator
 
thoiboi's Avatar
 
Join Date: Apr 2010
Location: SoCal, CA
Posts: 46,869
Received 8,575 Likes on 6,626 Posts
Originally Posted by nj00tl
I just noticed in my low beams there is another pane of material before the bulb. Is that normal? The high beam isnt like that.
es normal.

it's effectively an anti glare shield
Old 04-22-2018, 09:39 AM
  #31  
Intermediate
Thread Starter
 
nj00tl's Avatar
 
Join Date: Apr 2018
Location: dirty jerz
Age: 38
Posts: 43
Received 1 Like on 1 Post
Bumpers off. Bulb was seated properly. So i guess until i can crack open the headlight and look at the reflector inside or retro them with some projectors (which will probably be thw same time) it is what it is. Still better than what i had.
Old 04-23-2018, 10:31 PM
  #32  
Intermediate
Thread Starter
 
nj00tl's Avatar
 
Join Date: Apr 2018
Location: dirty jerz
Age: 38
Posts: 43
Received 1 Like on 1 Post
I quick wet sanded my lenses with 5000 grit then hit it with my power cone with some rubbing compound and they actually look like clear lenses. One more final aiming session and she will be good to go. Not having that concentration of light on the driver side has bother me so thats why i did it “half ass”. Now its there. I feel better bout it and ill do the procedure fully and properly this weekend. It doesnt compare to projector lights but its even better now than yesterday.
Related Topics
Thread
Thread Starter
Forum
Replies
Last Post
TegoTL
Car Parts for Sale
7
11-08-2013 02:34 PM
ojmcduffie
2G RL Photograph Gallery
18
06-09-2013 06:28 PM
slowcl-s
2G CL (2001-2003)
44
06-09-2012 11:00 AM
k1x
3G TL (2004-2008)
3
07-23-2011 10:44 AM


Quick Reply: pics of morimoto hid set up


All times are GMT -5. The time now is 09:44 PM.