When you click on links to various merchants on this site and make a purchase, this can result in this site earning a commission. Affiliate programs and affiliations include, but are not limited to, the eBay Partner Network.
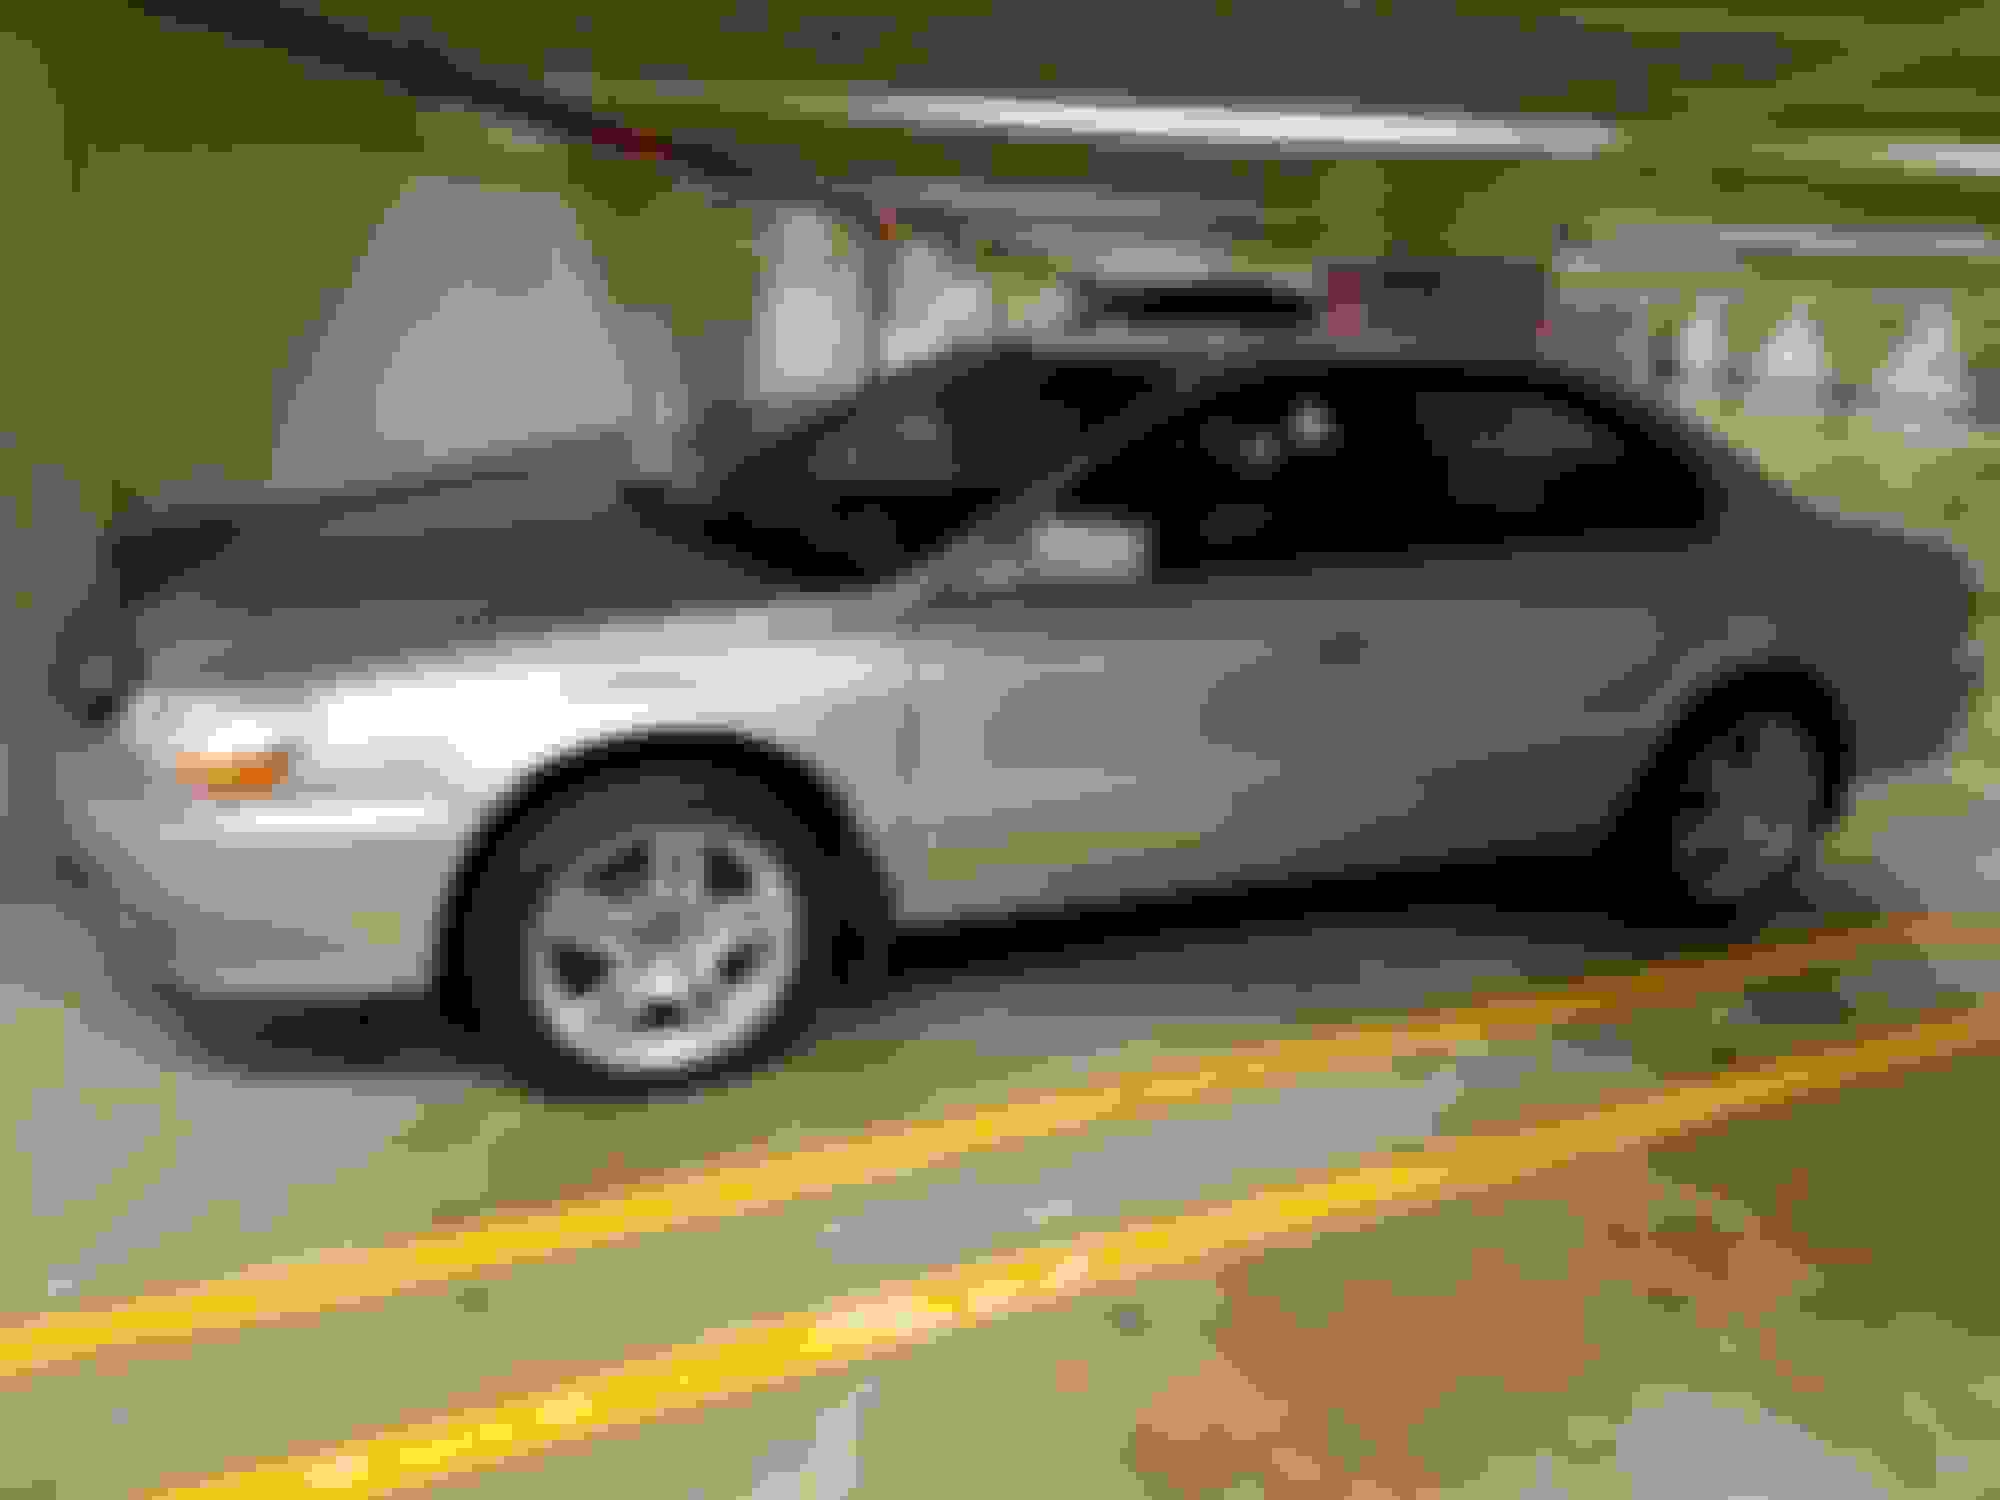
Bit of a play on Midori's popular posts, but I'm so much newer to the diy world and won't be doing any custom paint and body work. Heck, I learned how to do my own oil changes just last year on my Subaru's...I'm going to use this thread moreso as a diary to keep up with my maintenance and mods, but feel free to comment and provide suggestions.
I bought the TL from a friend who got it handed down through his family, dad, brother, then him. It was kept typical for a college kid with limited funds and no interest in cars outside of it getting you from point a to b. Needless to say I got a good deal, and had the benefit of learning the ins and outs as I helped him fix some nits and nacks while he still owned it. Here are some of those things below:
- rear taillight was cracked, bought a replacement from someone on Craigslist and took the old out. Upon removal realized that there was broken plastic from the taillight all over, found a bullet in the debris. Friend told me someone shot at his car while he was in a club one night. Guess it was because of his ugly ass rims (story to come on rims).
- rims were painted Seahawk blue, because of course everyone in the Seattle area super supports their pro teams. Rims were stock TL-Ps, in good shape, but just faded blue from his brother's high school days. We bought some plastidip and painted them gunmetal grey. Unfortunately I didn't care enough about them to do the paint job correctly, with index cards or taping off so plenty of overspray on the tires. Also overspray on the brake calipers but mostly faded as well.
- rear view mirror held up by tape, went and bought the proper glue, clean it up and put it on correctly
I then bought the car, it had 160k-ish miles. Then the fun began, my maintenance itch continued as I wanted a safe and reliable daily that also looked respectable. Little did I know that this would lead me down a path that made me want to relive my youth where I ignored all the riced out cars and drove the hand me down minivan.
- first order upon receipt was the brakes. All the pads were so low the indicators would scream when I put car in reverse. I ordered up some rotors and pads all around. I ordered Centric pads and rotors because a lot of Subie enthusiasts say it is a good daily driver brand. I'm not racing so kept it consistent. I did not do a drain, refill, bleed of the fluid as that is next level stuff I need to learn or get tools for. Would love to though.
- believe that his brother applied some ghetto tint. They were faded purple. I used a heat gun and removed all the tint. There was a lot of residue from the original tint glue, it took all night. Then had a shop apply new all around. Doesn't look perfect because I couldn't remove all the residue in the rear triangle windows and the shop didn't bother trying, even though I asked them. They other "issue" is the rear window has dots at the top so I elected not to tint the very top.
- the hvac fan had a very large rattle when on, sounded like leaves in the filter area. I first bought new cabin filters thinking it was something in there, only 1 leaf and certainly not big enough to cause that much noise. The filters come in 2s no idea why they designed that so poorly. Anyway the nose persisted so I followed the sound down to the fan circulator? There were 3 or 4 screws holding a circular thing in place. As I pulled it out realized the horrible smell of a dead mouse. Ironic thing is the circular thing actually looked like a hamster wheel. I think it had been months since it died. He lived in the city so probably more common thing to happen. The mechanic he took it to couldn't diagnose it, thought it was the cabin filter too. When I put it back, the damage had been done. But not that much, it just rattles a bit now when turned on high.
- the ac eventually gave, during one of the hottest Seattle summers this year. Too bad that was a diy I couldn't wait to learn. Took it to the Acura dealership and got a new condenser and flush and filled refrigerant. Kudos to them as they misdiagnosed, a couple of times I drove away with it cool then got as I got home. They didn't charge me for the condenser only a cheaper part, cost me $80, but I got to drive the new tl-xs for a week.
- ok this is getting lengthy, but all the good stuff coming
- oil change, got only genuine Honda filters, used rotella t6, but switched to Mobil 1 later, like Mobil 1 better. I had the rotella leftover from my Subaru, but turbos probably run that better. I put on a fumoto valve to make it easier. Also changed the transmission fluid. I've only done it twice, ran out of the Honda stuff so need more before I do my final for the 3x3. Did have few months between change of course.
- bought some 05 TL rims, didn't know that when you see a dent it means they aren't straight and you can't always fully balance them out. I drove on them with new Goodrich tires for a few months before getting tired of the vibration. I ended up finding a set of new 2012 accord rims 17". Same tires so limited funds. Sold the 05's so really only spent to get them mounted and balanced at Costco.
- speaking of rims, I ended up sanding off the plastidip and most of the blue paint from the stock rims. I'm considering those as a winter set if needed. Still in process.
- went through a couple of sets of fogs. Tried some yellows but ended up not liking how they unmatched from rest of the lights. Got good at removing the front bumper. When the oem hids went out, bought a set of aftermarket and had to do the front bumper again. Some good diys online here and YouTube. All works now. Ended up getting amber fog light covers and they look a lot closer. I couldn't find any amber lights anywhere. Ideas?
- did an led interior light change, this is probably the stupidest "mod". It looks very cheesy, if I could return I would. I like warmer temps, but they are brighter.
Here comes the big list...I spent the last two weeks on vacation reading here about all sorts of things. Right now the engine bay looks very busy.
- bought an injen cai, got it brand new cheap on eBay. $100 shipped. Seems to have all parts. I had removed the resonator and that is where all this recent wave of stuff started. In my opinion, the resonator did nothing. No sound difference at all. I'm hoping this will make a difference with sound and min gains.
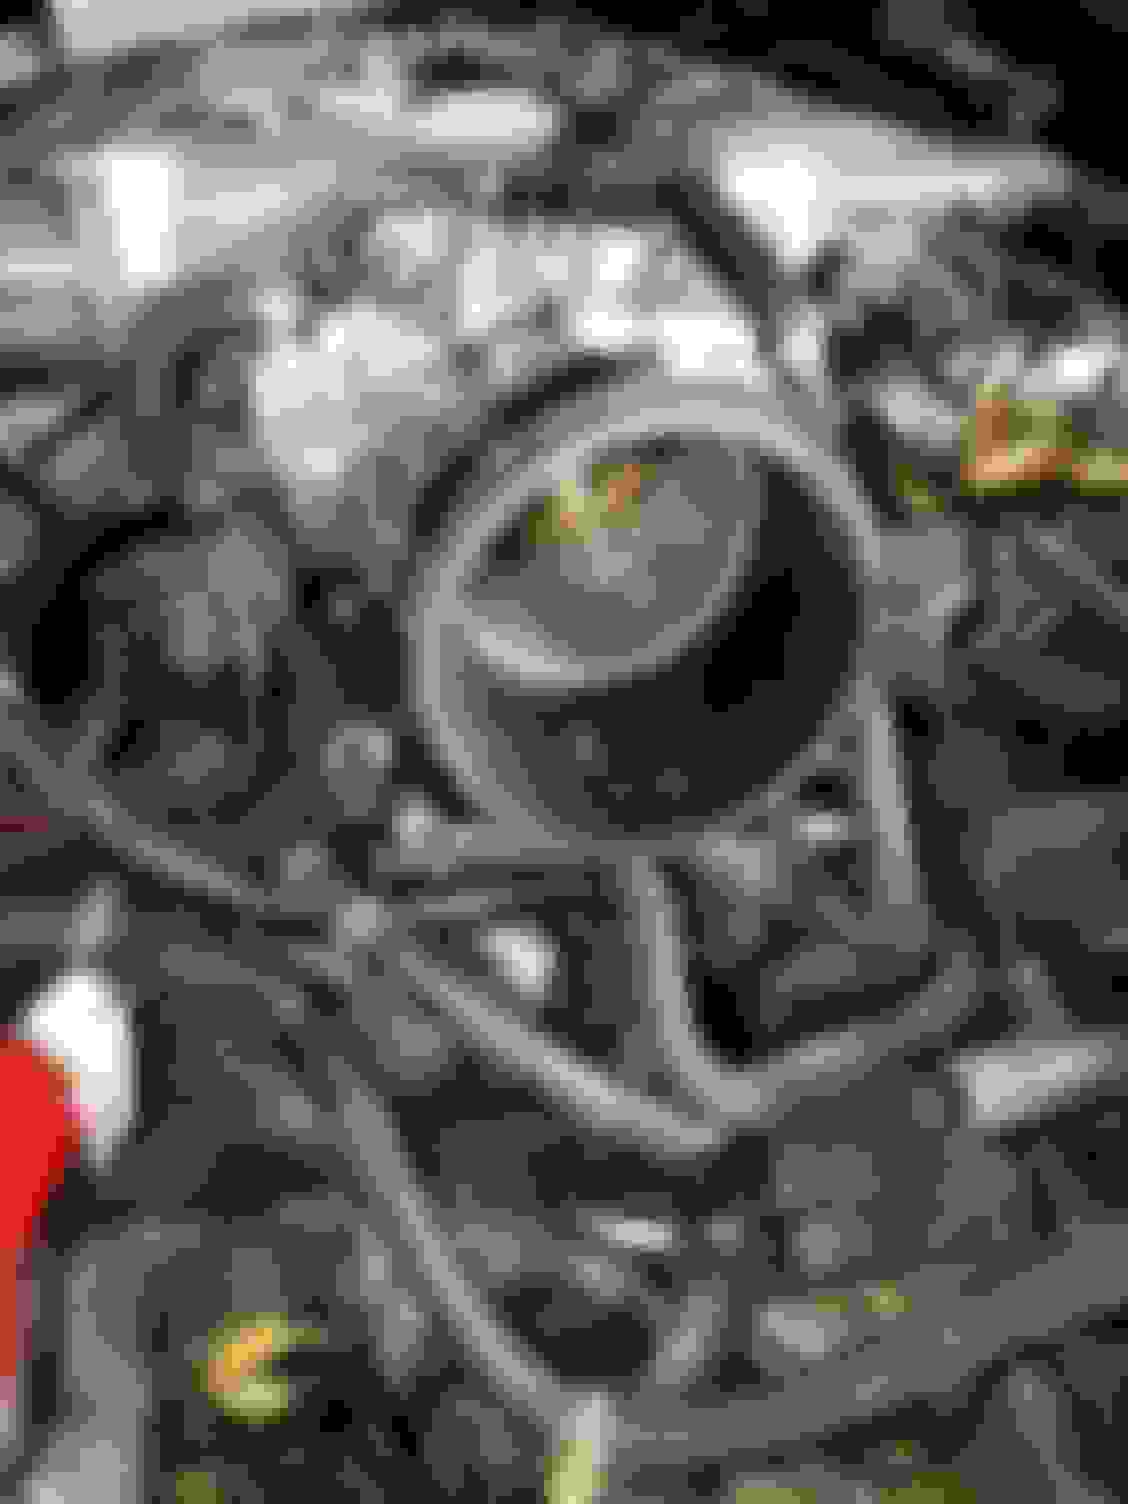
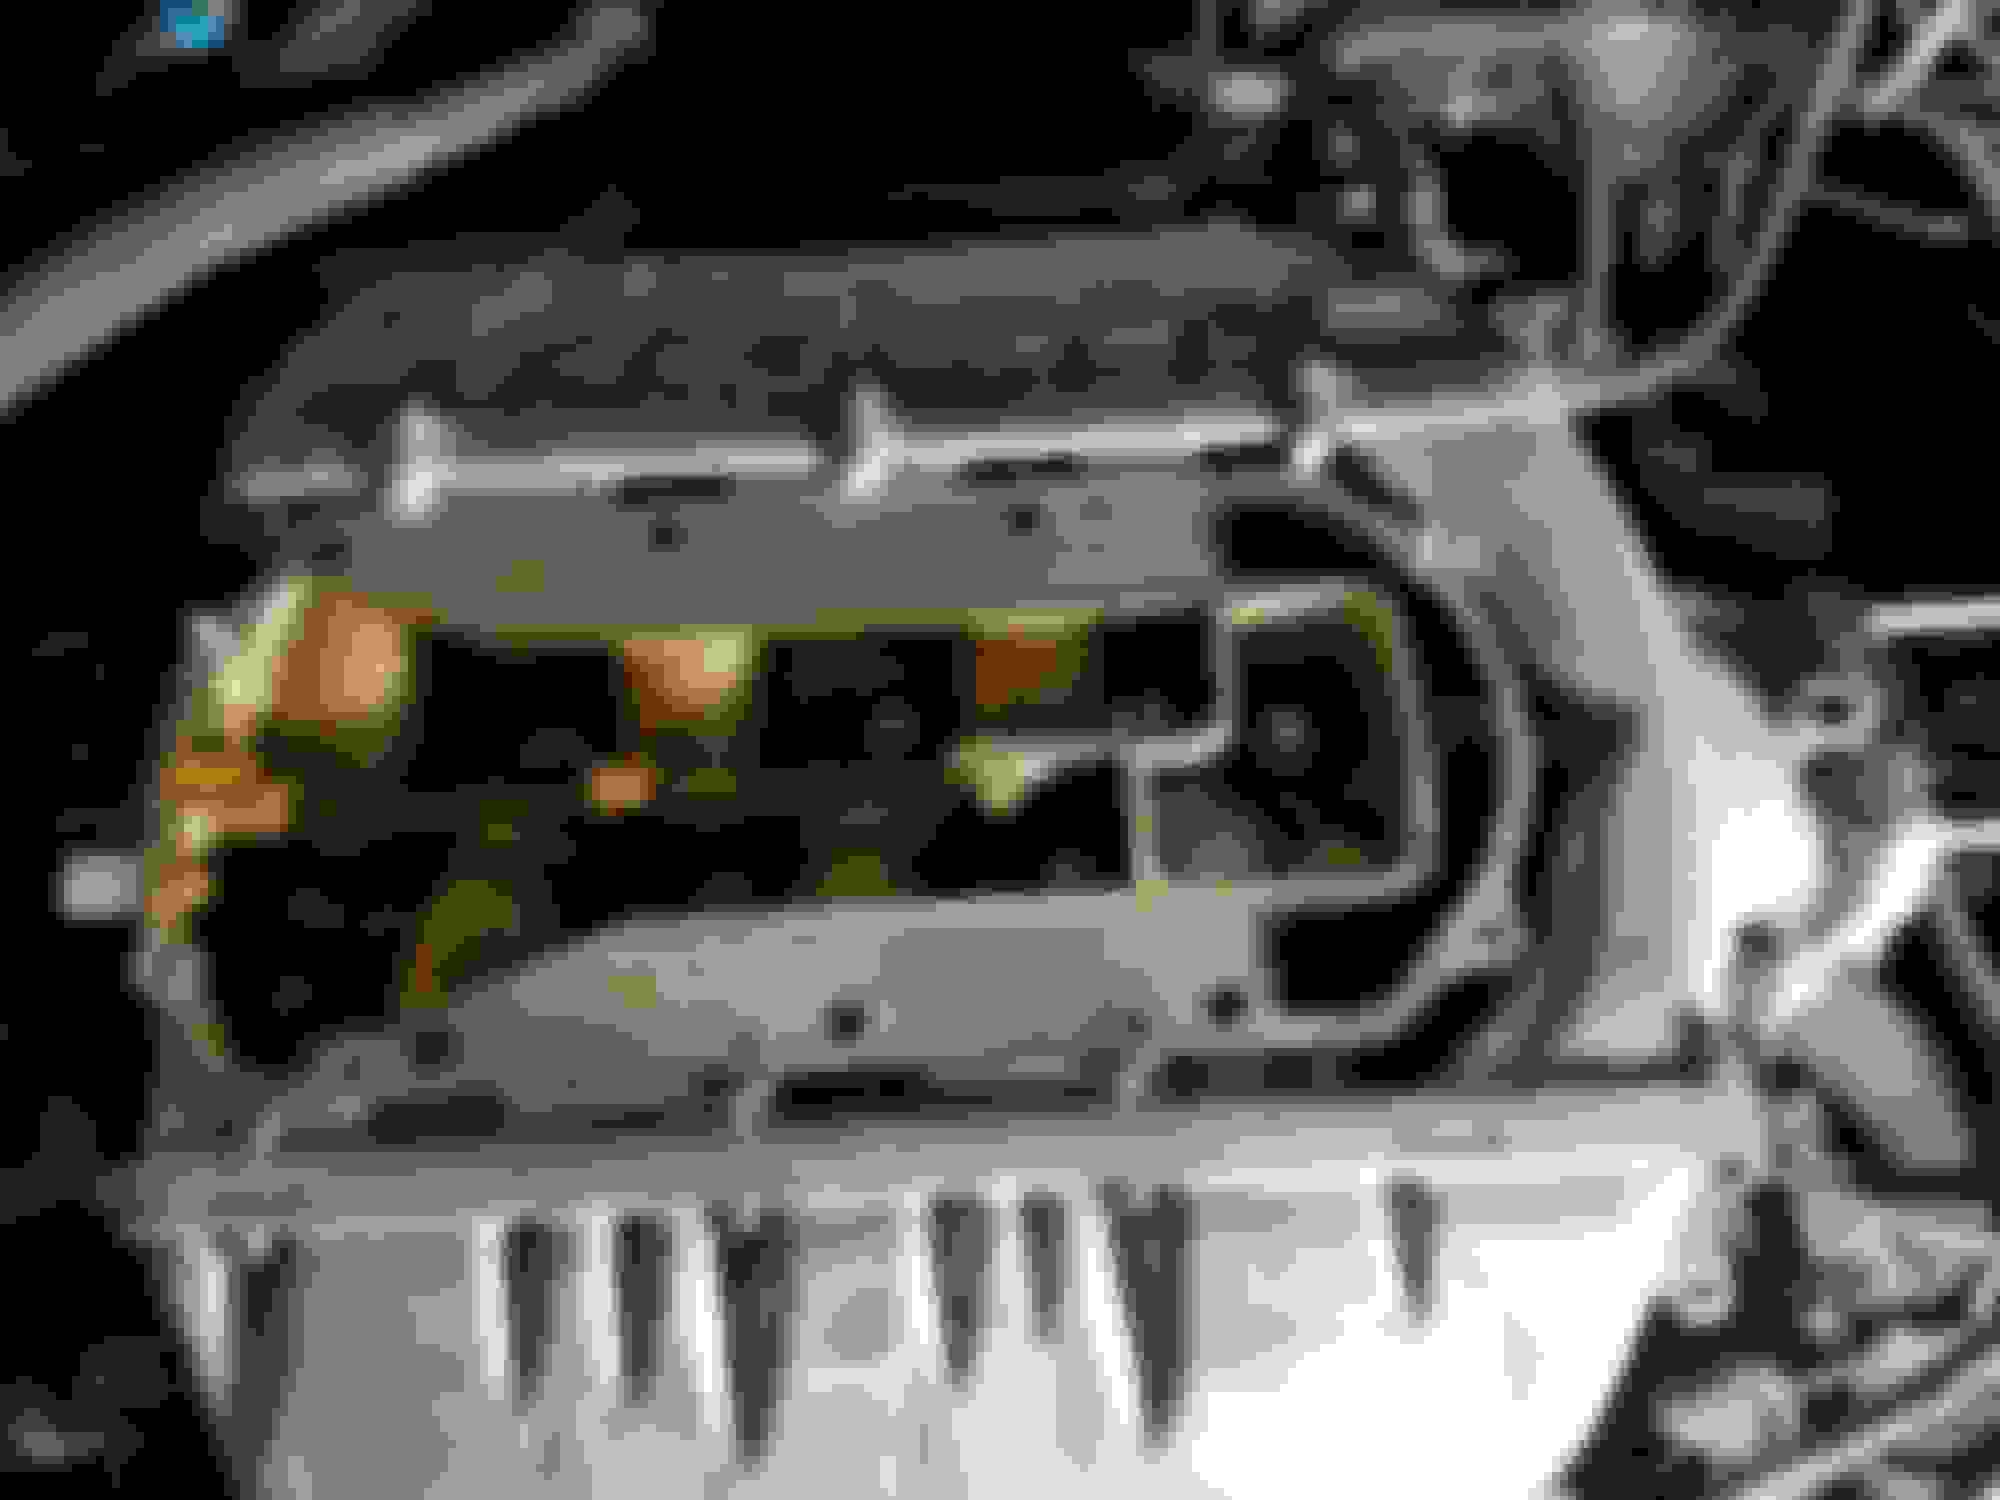
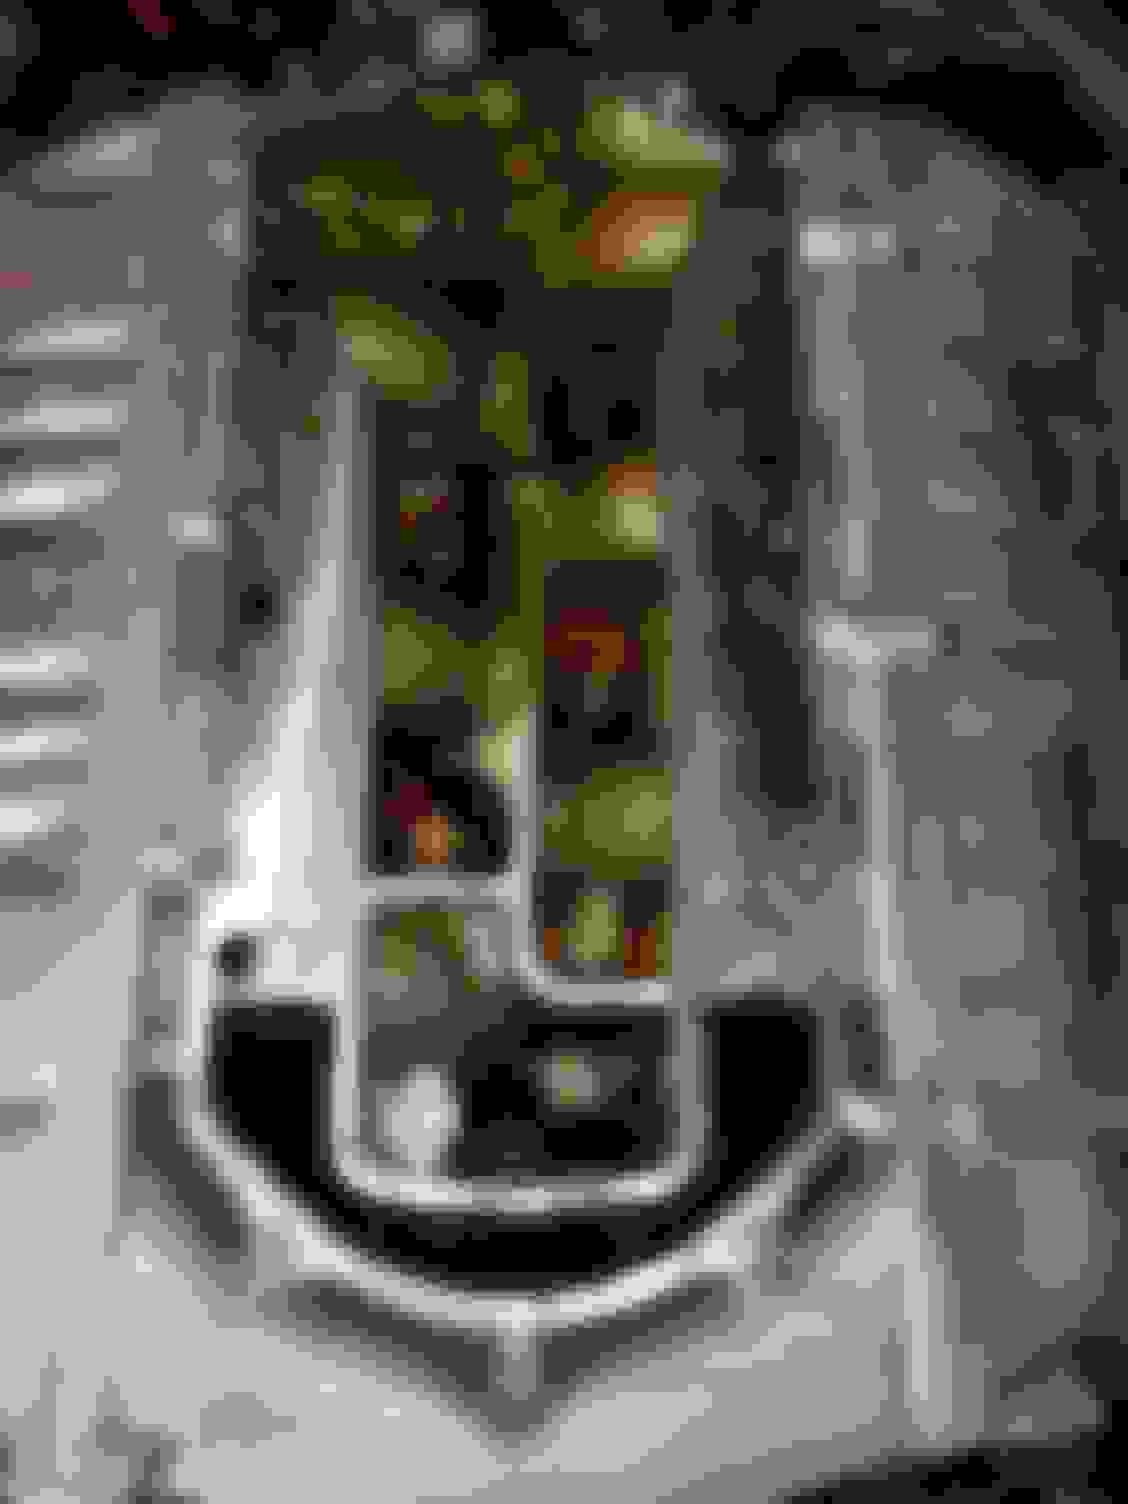
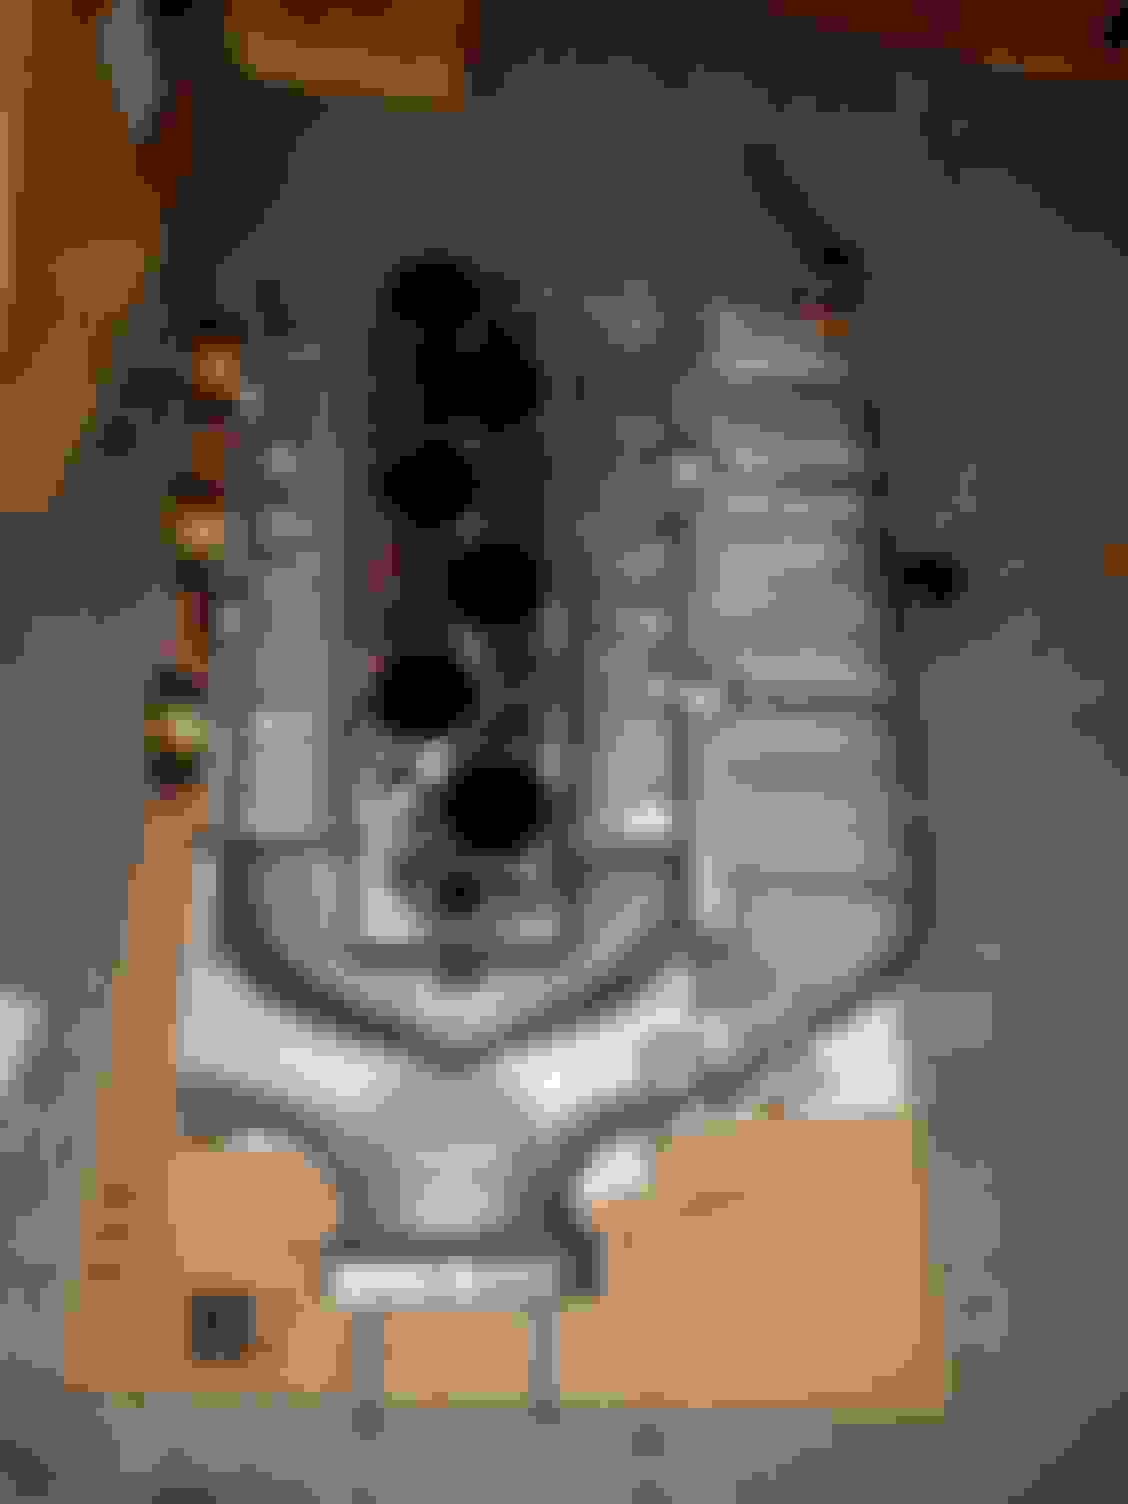
- removed the intake manifold, the upper cover (ant farm) was horribly gunked up, basically looked like no flow. The rest of the intake looked about as bad. I'm letting the egr passage sit overnight, but every time I blow air through more carbon comes out. Also I bought a set of wires and brushes from Amazon specific to clean, realized they suck and a screwdriver was the best tool to scrap off. I took apart the plenums (sides?) of the upper manifold, they are just hollow but allowed me to clean more thoroughly. It also took me like 6 cans of throttle body carb cleaner versus other people's recommendation of 3. Wal-Mart i find is the cheapest. Going to seafoam after all put back together. The other passages were pretty clogged but now fantastic, guessing it'll feel like a new car.
- the egr valve was the hardest for me because I rounded one of the nuts. Had to wait a day to get a special socket to remove. Lots of pb blaster too. Cleaned the valve up, wasn't that bad, but probably because the passage is so gunked up.
- since had all this off wanted to clean the fuel injectors. Bought a kit online (I can link later for all these parts of ppl want) that would help. A good YouTube diy and all 6 clean. They all had initial poor spray patterns so definitely will help. Biggest mistake I made was one of the rubber gaskets fell below the lower manifold. I couldn't fish it out so had to figure out how to remove. That was a big pita because the leftmost bolt is covered by the engine harness. No way to move but to force it off to the side as you jam a wrench in there. Finally got it off, decided against removing the front lower manifold because that was even worse, engine harness unmoveable and I had no clearance for any tool. I didn't find any diys on the lowers so my pictures might help someone later. 2 bolts 2 nuts for the rear, not sure about the front but did read that there is a 5th and you have to remove the rear first then front. Also think this is only way to get to the ___ sensor, forgot what it is called... apparently many had mice chew the wires to it.
- since I had the air box and battery removed, I took off the transmission solenoids, there are two easily accessible. None of my filters were that dirty but did it anyway. I used air gun instead of chemicals (throttle body cleaner or brake cleaner) like others. Bought transmission filter since i could see it and easily remove.
- I bought new gaskets for everything since I didn't know they shape of what was going to come off. I'm waiting for parts still so nothing is put back together. I'm going to clean the throttle body and iacv next. The tb gasket was completely stuck so had to remove by scraping. Hope I don't cause a leak.
- also got pcv valve and grommet, waiting for that.
- all will go back on with new injen cai
- bought dc sports headers and jpipe? Will need some research on that install. Also not sure if it comes with new gaskets or just reuse. All I got were some o rings...i got it brand new for $300ish.
- want to get coilovers next, diys seem ok. Probably go tien for economy but don't like having to reuse tophats mostly just don't want to deal with spring compression danger... want to stay in that $400ish price range.
Thoughts? Comments? Complaints? Suggestions?
I'll try to post pictures later. I'm also going to need torque specs for everything.
Actually one question I have is where you cannot use throttle body cleaner. I don't think anyone explicitly says it, but the lower intake manifold go into the "engine" you can see the piston things (I'm still learning). Can you spray throttle body cleaner down that? I wanted to clean the lowers with them attached but not if it kills the car. Isn't this the crankcase (engine oil) and where you pour seafoam into?
Not sure how to edit posts so I had to continue. Anyway, here are some pictures, realized I didn't take as many as I thought I did when I was doing the recent maintenance stuffs.
Here it is again but with the '12 Accord 17" rims. Not sure the look is great, but it definitely rides better than the curbed '04s I had on there previously
2G TL after '04 17" rims Trying to fill in the blank above...I tried Putco's jet yellow bulbs throughout, they didn't make every single bulb, so I had all but the side markers (IIRC was the 168s). I felt it was too ghetto, so went back to stock amber. Ended up getting Lamin-x amber film to cover to fogs, they are an okay match, will have to snap a picture when I get the car back together.
Haha, gross, excuse the hair in the picture...blame the dogs.
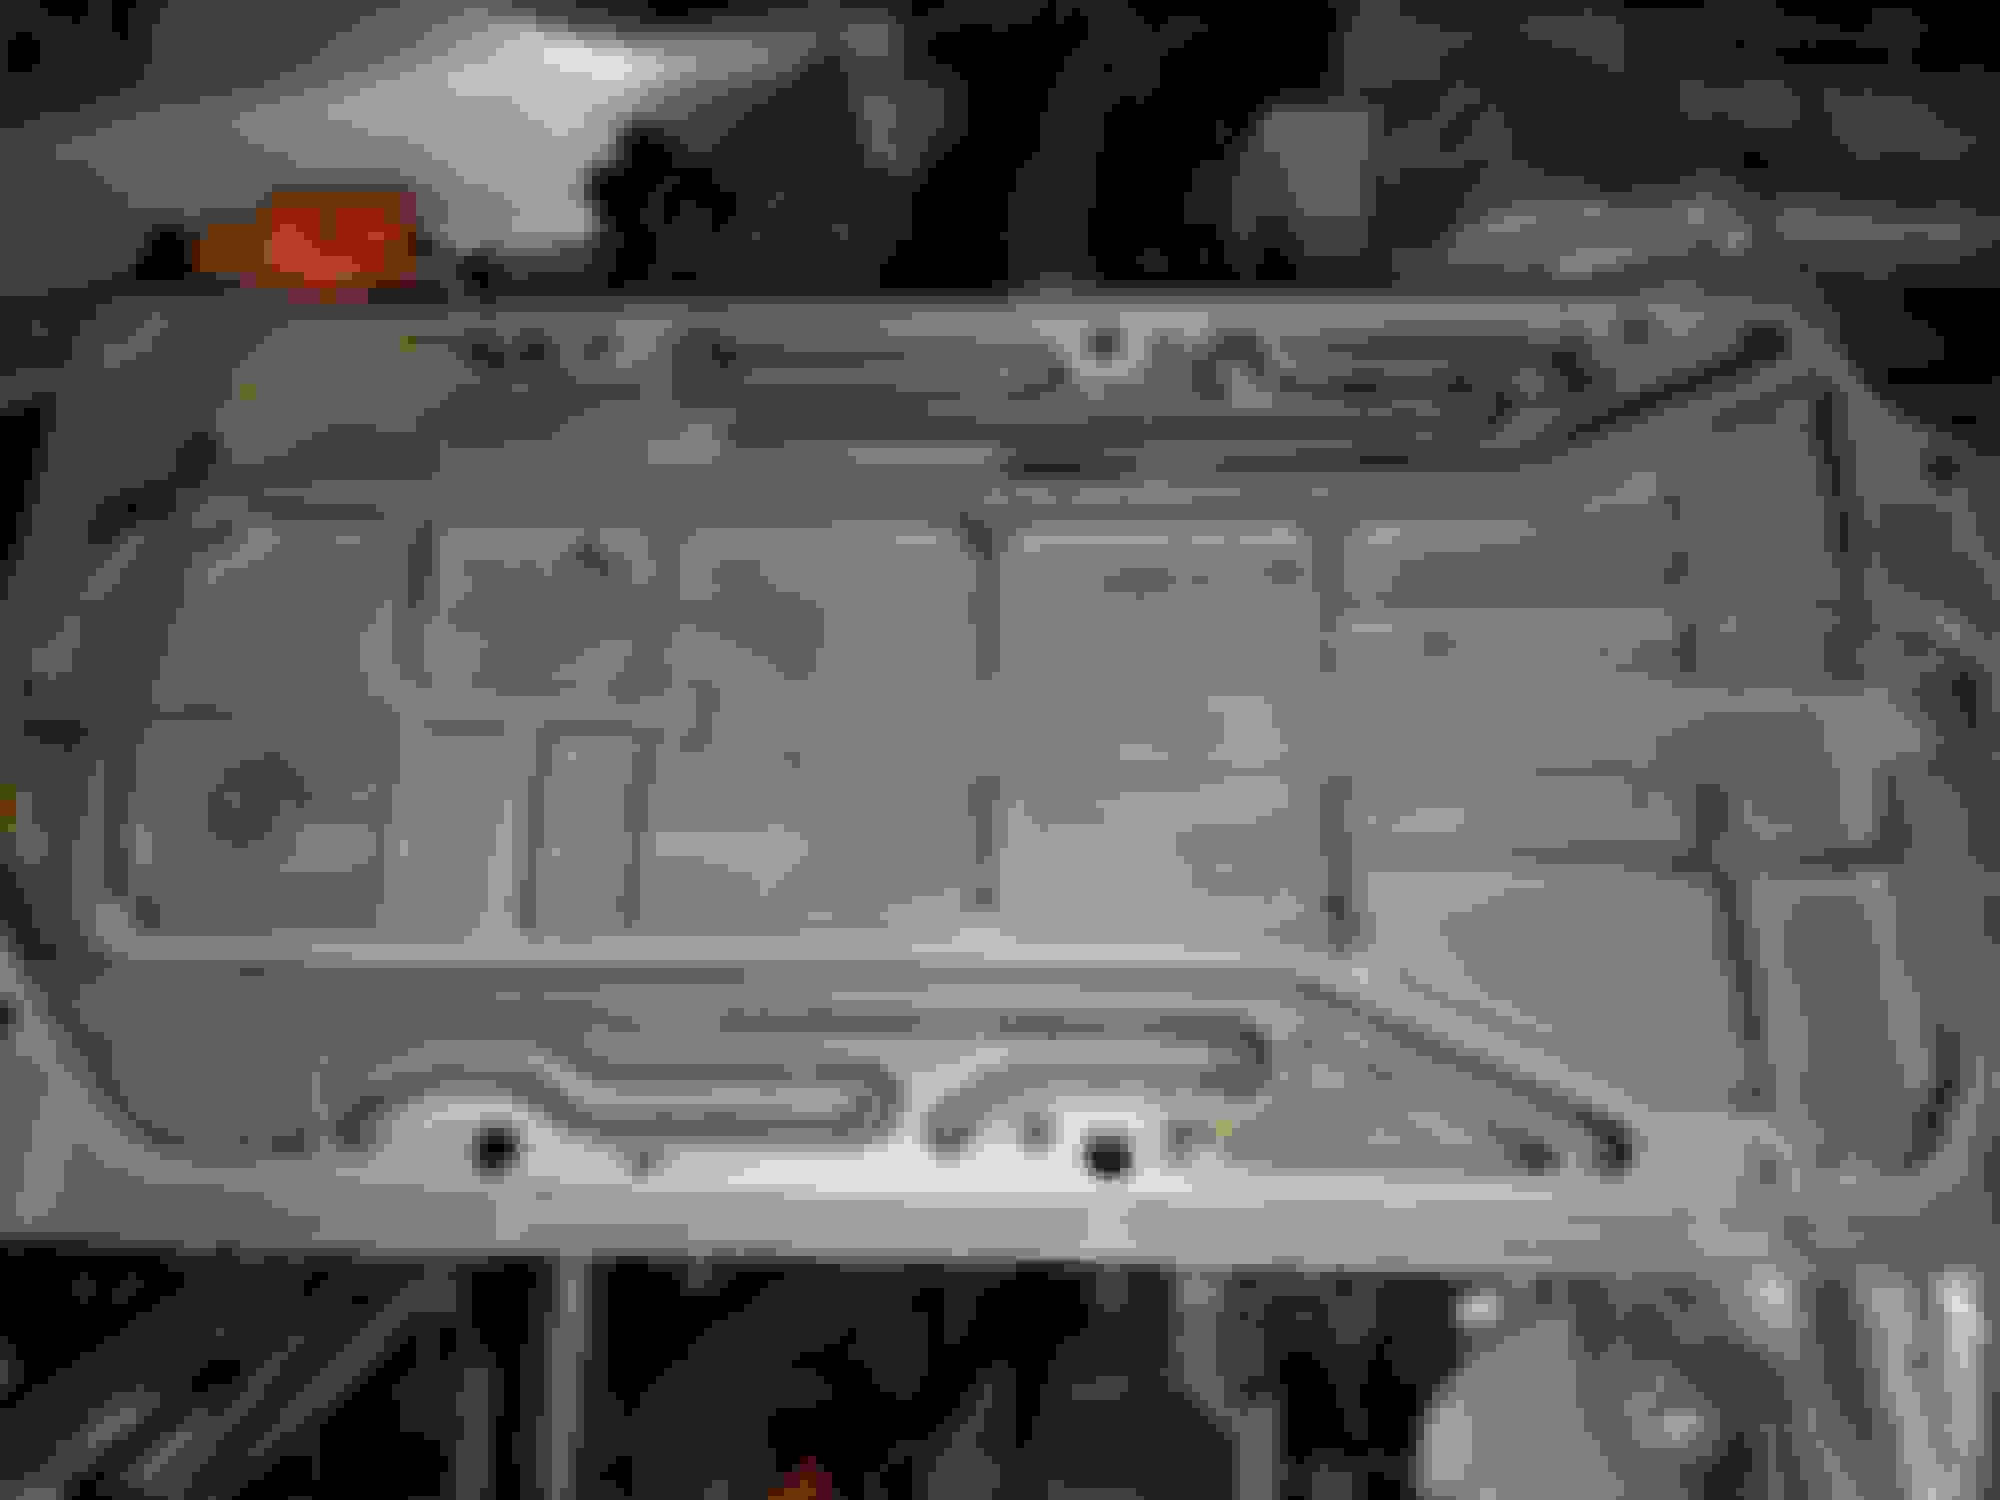
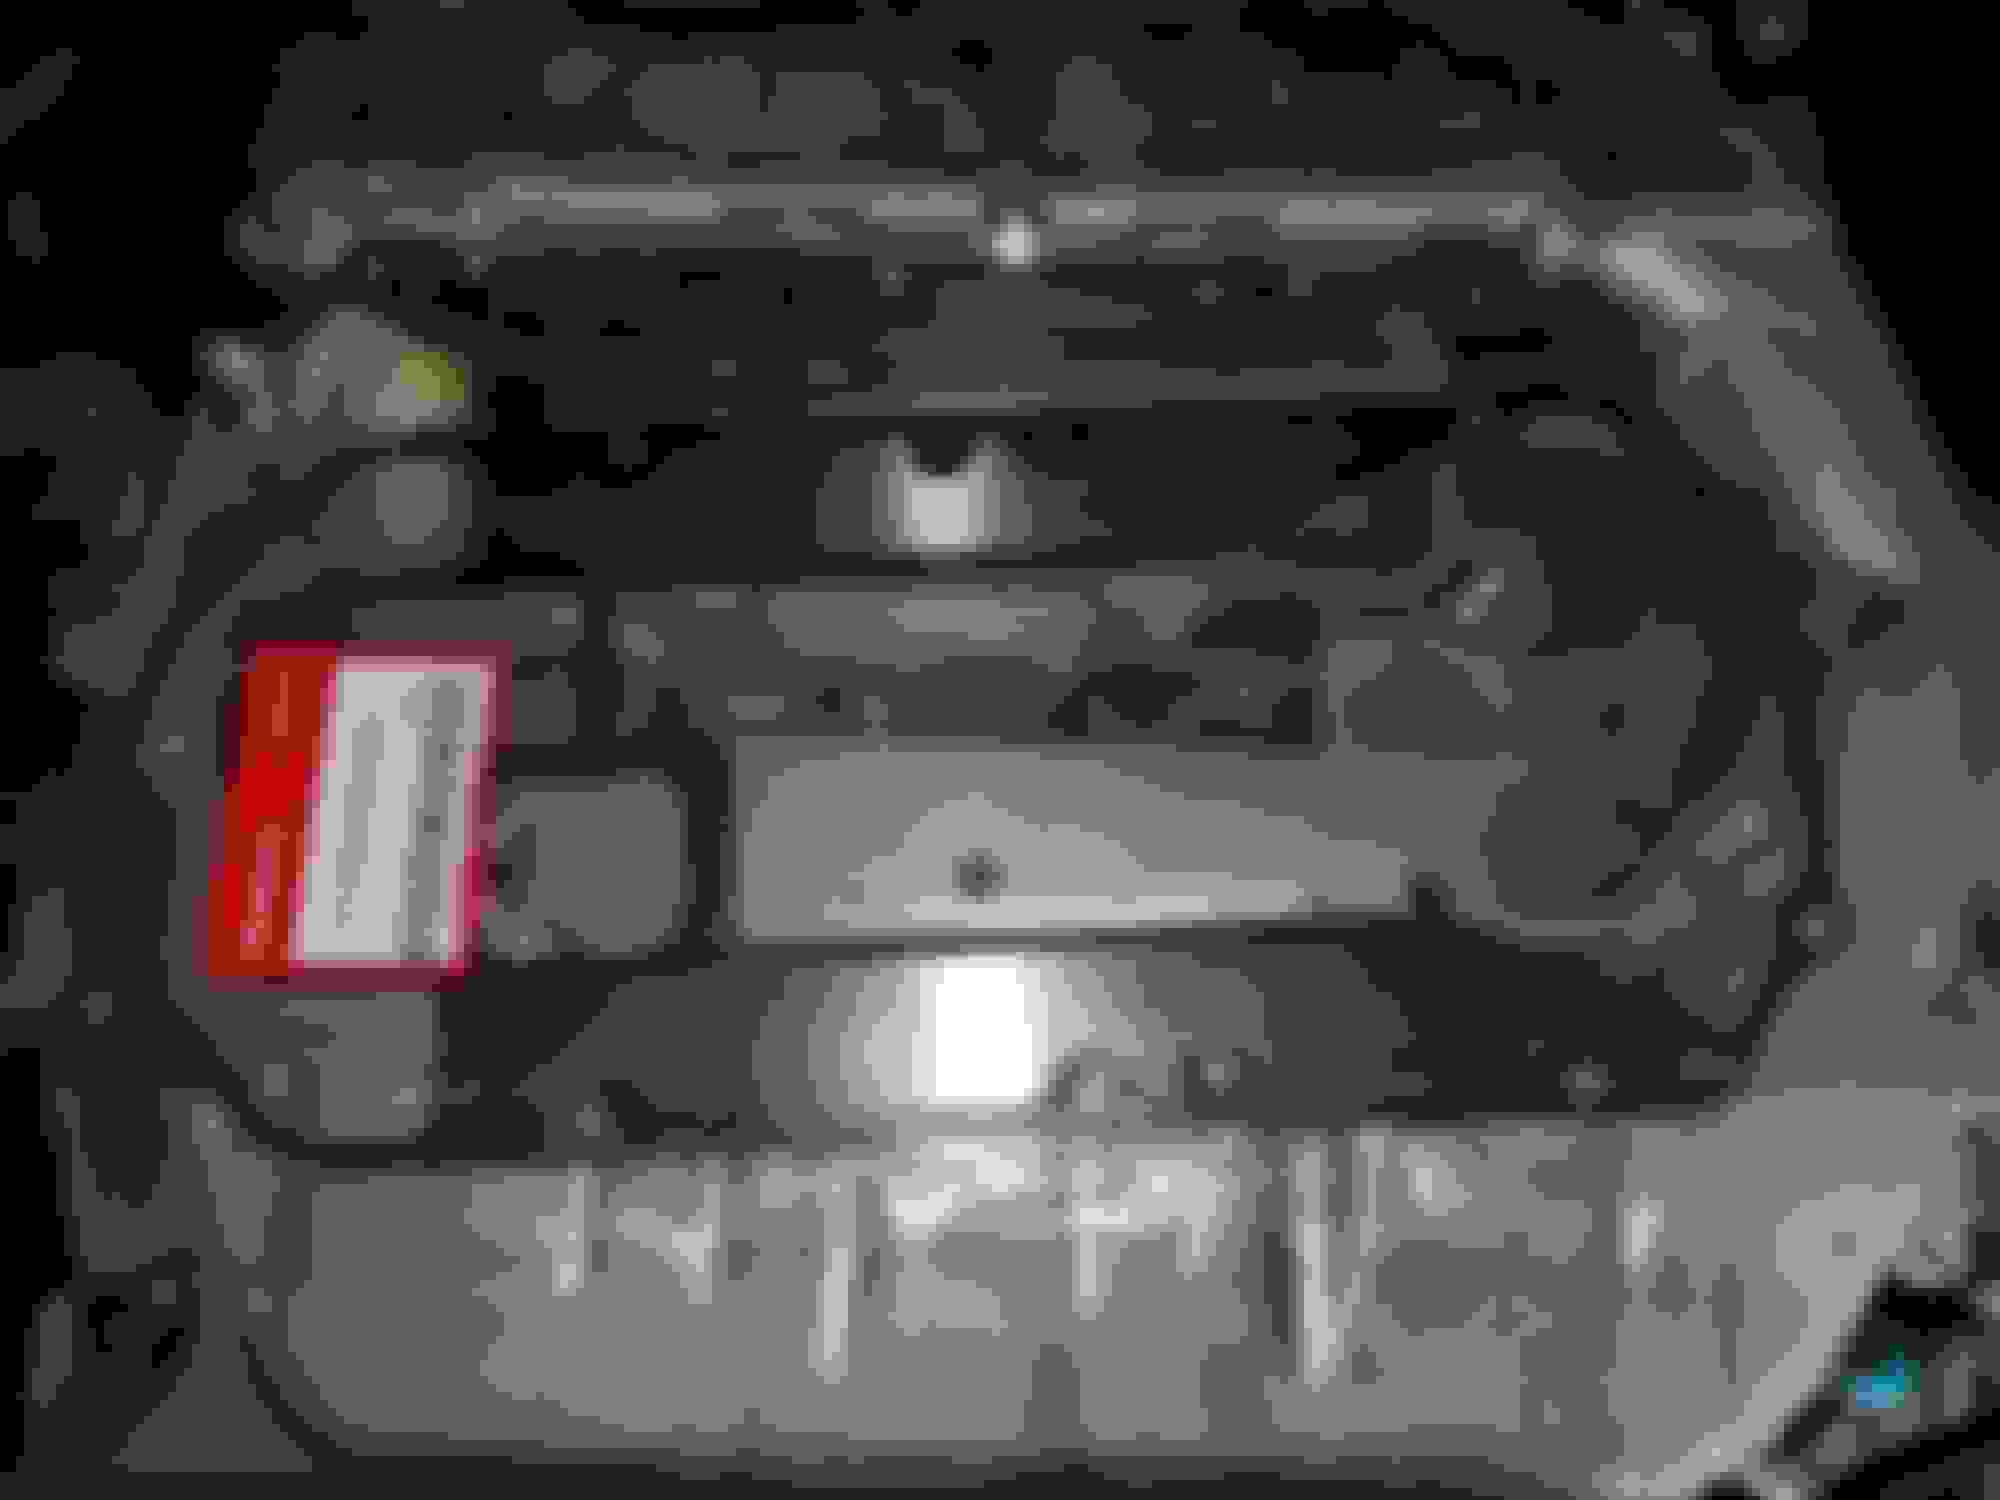
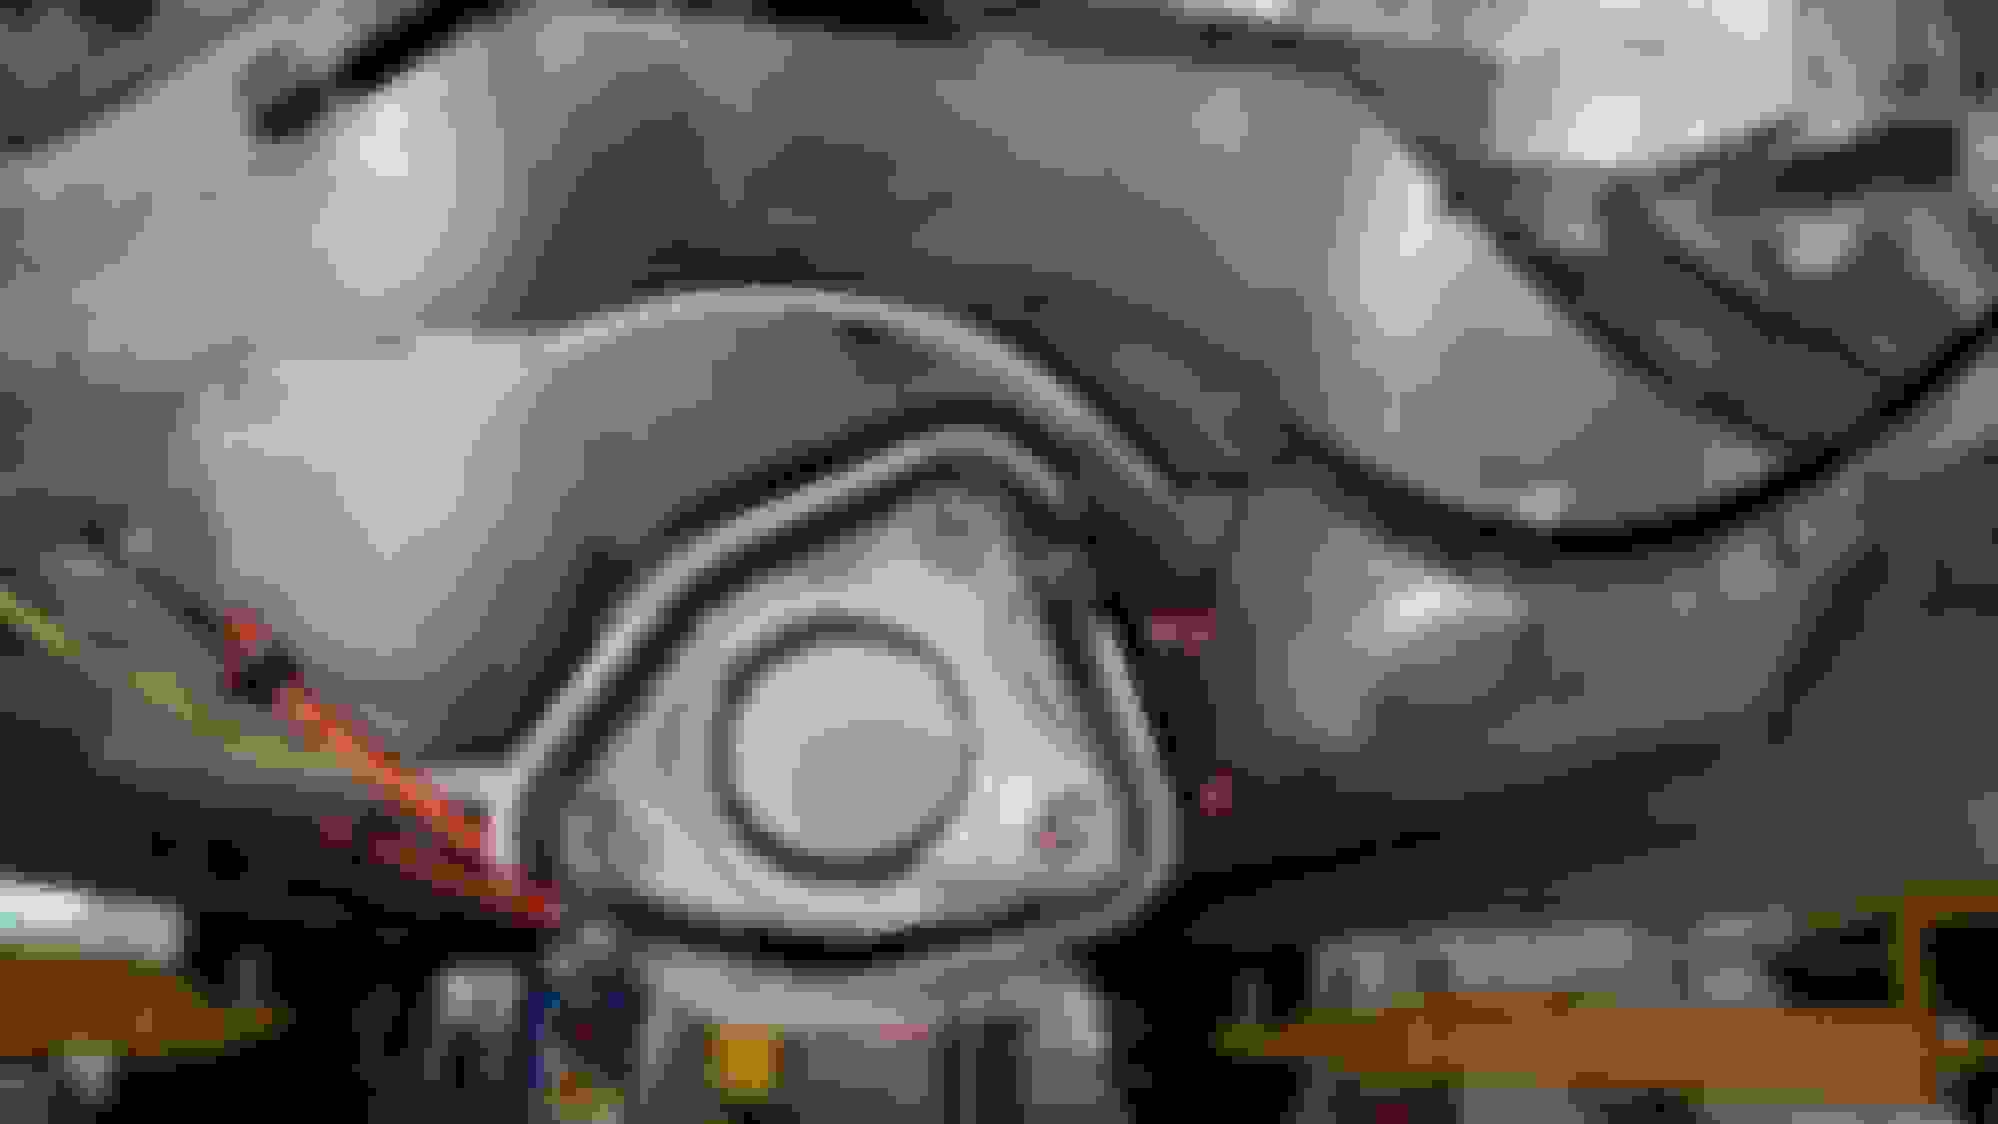
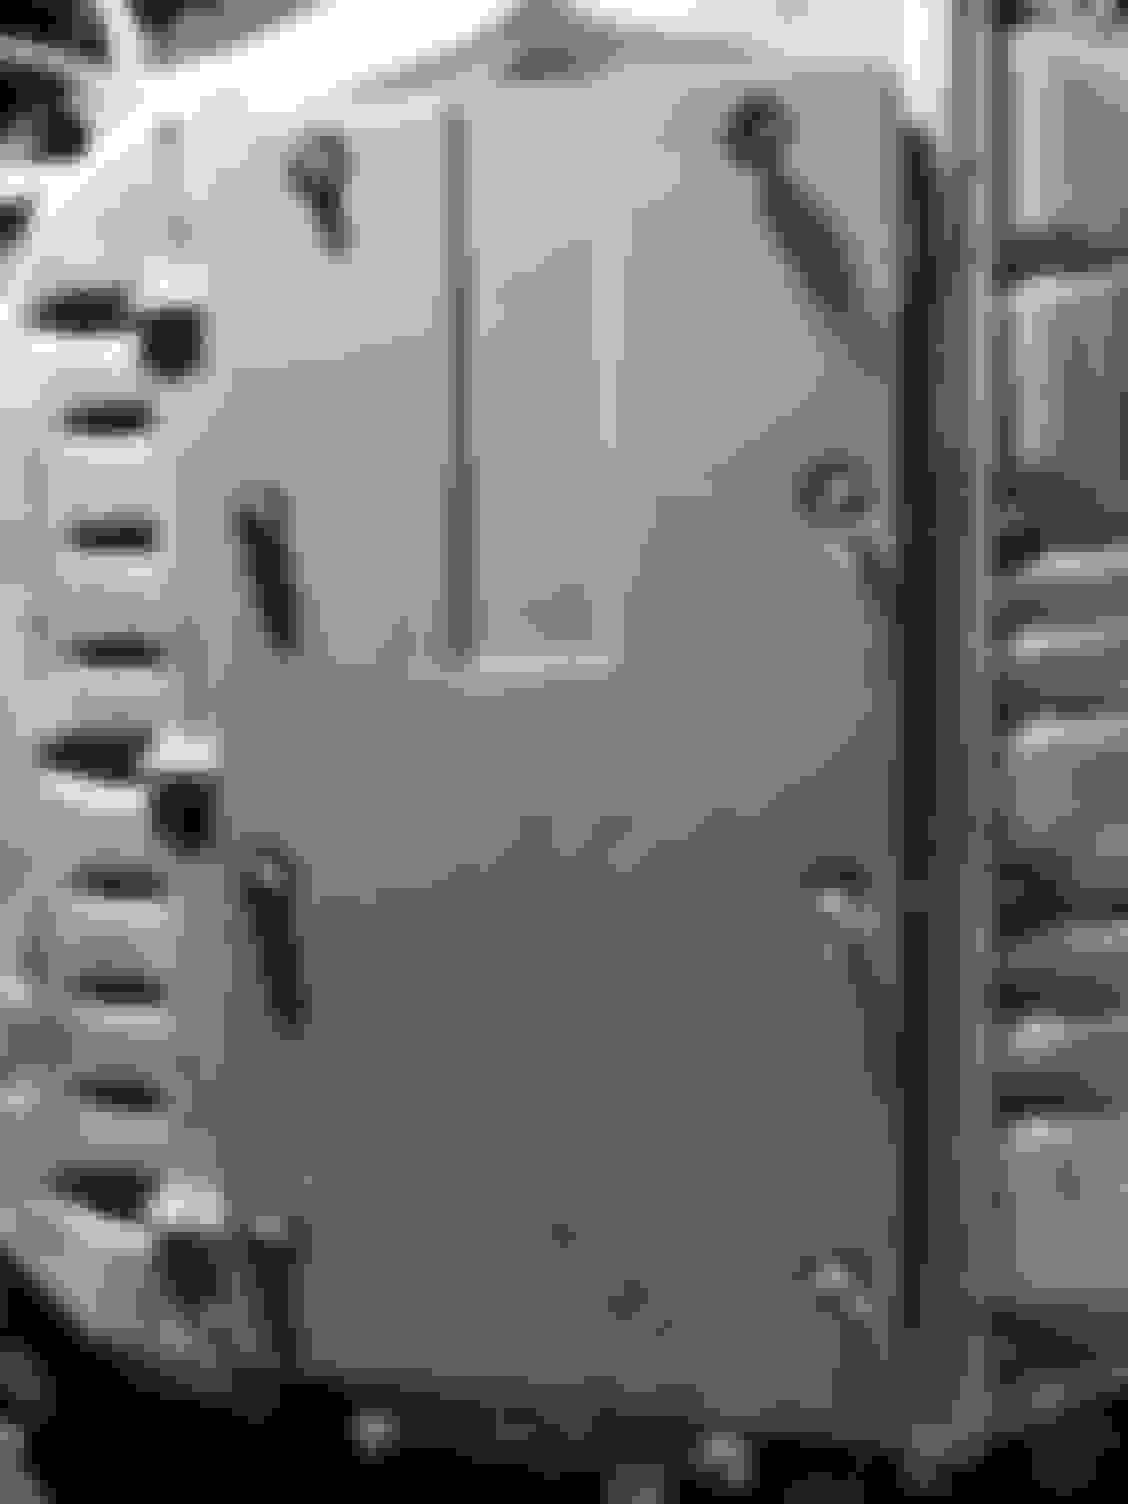
Here's the upper plate on the intake manifold, simple removal of the bolts. Look how disgusting the backside of this is. I'm waiting for the new gasket before putting it back on. It's been cleaned, but no picture of it yet. Here you can see all the ports are clogged, with the EGR port (right side of manifold) being the worst. I actually spend several days where I'd spray into the port and let it collect where the EGR valve is and let it soak overnight. Did this over two days and used air to blast all the carbon out. Stuff kept on coming, so I kept repeating this until nothing exited. I rounded one of the bolts on the EGR valve, there is very little clearance there, so also had to wait a day to get the socket. Look how much oil has creeped into here. Shouldn't it be completely dry? Does this mean a gasket is not doing its job? Throttle body was okay. The gasket was completely stuck, but I ended up replacing it anyways because I bought just in case. Like another AZ member, I had to use a razor blade to scrap off, probably not the best, but figured the gasket would fill in the imperfections. I used Seafoam clean/lube here as per another AZ member saying that his IACV would get stuck after just using throttle body cleaner. I pulled the IACV and replaced the gasket there too. IACV was more gunked up than the TB. Here's another shot of one of the plenums (?) removed. I recall reading that P2R used (or still does) make performance ones, thought of going that route, or getting a TL-S intake manifold. With the TL-S IM swap (upper and lower) I didn't get a great answer on the IMRC diy. They are cheap these days...
Question on the throttle body: isn't there a spacer already there? I noticed there were two gaskets and a spacer on mine. The spacers that people were buying for the TB, is it just a larger spacer? Not sure if there really is that big of a difference.
To remove the plenums (?) you need a hex5. I couldn't find torque specs on those bolts...so just tightened 1/4 turn after hit hand tight
The upper IM bolts/nuts I've read should be 16 ft lbs for torque specs (AutoZone has a tightening sequence, but I just crisscrossed)
TB is also the same as the upper IM at 16 ft lbs from what I read
Fuel injector cleaning. The kit only can clean one way, comes with two sizes for the injectors to connect to. All were poor spray patterns. A few jets with throttle body cleaner and they spray better. The fuel injectors were actually pretty easy to get to and get out. There are some good YouTube diys out there. I used this kit:
The lower IM were a b1tch to get out. Unfortunately I didn't take any good pictures of them, but in this picture you can see I only removed the rears. This is facing the car, the leftmost was an a$$hole to get out. It is almost completely blocked by the engine harness. Use force to get your socket in place. The other 3 were easy. This is 3 of them after cleaning. For me, there were 3 rubber gaskets, I pulled them all off and cleaned them. Before installing into rails, put motor oil to lube them up.
Fuel injectors - I couldn't pull the top of it off. A lot of the diys have said that is where the filter is, but I didn't want to risk breaking it since it is plastic. I just put them into the kit and sprayed a few times to clean them out until the spray pattern looked better.
The knock sensor, you are correct. That is easily accessible once you remove the rear lower IM. I wanted to remove the front lower IM as well to clean them both but the engine harness on the front was not moveable at all. I'm not sure how anyone could remove it unless they removed the harness. I didn't find an easy place to remove anything so kept the front on. I didn't clean the rears so as to keep them consistent (dirty). I did wipe all 6 cylinders in the lower IM though. Biggest question is could I have shot throttle body cleaning into the lower IMs? I could see the pistons (?) in the combustion chambers and didn't know if the cleaner was safe to use. Although, Seafoam goes in the crankcase, which I assume these go into. I elected to not spray, but let me know otherwise. I might take the upper IM off again to clean it if so.
If there was an award for worst EGR passage ever, I think yours gets it. That's crazy! It's any wonder the engine didn't run or idle like complete garbage. I'm willing to bet that the previous owner(s) did not run premium, tier-1 fuel through it. In the future try to use only 91 octane (minimum).
If there was an award for worst EGR passage ever, I think yours gets it. That's crazy! It's any wonder the engine didn't run or idle like complete garbage. I'm willing to bet that the previous owner(s) did not run premium, tier-1 fuel through it. In the future try to use only 91 octane (minimum).
definitely only use the highest grade fuel available to me...i sent him all of these pictures to show how ill-kept it was. i got zero response. hahaha
ugh, this lack of being able to edit posts are going to annoy me and everyone here...but hey this is my dairy!
forgot to mention i changed the spark plugs when i got it.
NGK 2477 Iridium Spark Plugs ZFR5FIX-11 ---- 6 PCS $38.50
rotors here:
2 of Centric 120.40046 Premium Brake Rotor $41.99
2 of Centric Parts 120.40047 Premium Brake Rotor with E-Coating $21.90
Akebono ACT536 Rear Ceramic Brake Pads $37.36
Akebono ACT787 Front Ceramic Brake Pads $41.16
needed two new hood struts - using a wood 2x4 is not convenient (only thing i haven't bought oe)
New 2Qty Front Hood Lift Support Strut Gas Spring Shock Prop For Acura TL 02 03 $10.23
fumoto valve - for easier oil changes
F106SX: New Generation Fumoto� Valve with 14mm-1.5 Thread Size $32.95
ADP-106SX Fumoto� Adapter 14mm-1.5 For F106SX $5.95 (think you need this for clearance on our TLs)
lol on the title but good job so far man keep it up!
and as far as edits you only get a 15 min window after first posting a comment to edit or change anything. they do it for admin reasons so ppl cant delete things if trouble comes up
oh snaps! i got a look from the king! read through your entire thread my friend, wish you were in seattle...i need a TL buddy...or just a hydraulic lift in my garage would be nice.
oh snaps! i got a look from the king! read through your entire thread my friend, wish you were in seattle...i need a TL buddy...or just a hydraulic lift in my garage would be nice.
The hoist wasn't to expensive, and thx man appreciate the love! Still got a long ways to go before I'm don't with it for sure!
AT filter replacement process was fairly straightforward, though clearance was difficult to get any tool other than a wrench in there.
1) unscrew two bolts holding the plug, pull plug
2) 2 bolts holding the filter bracket
3) remove filter
4) replace all the backwards order
5) i did use some transmission oil to lube the rubber gaskets (same as with oil filter and change)
posting another picture of the throttle body and hoses that i had a big question mark to earlier.
note the hose connected with two clamps to lower left of the TB? that is where you need to connect the water bypass for intake installs (i believe this is correct anyways). it becomes very obvious when you take off the hose that connects the crankcase to the OEM intake. that has some metal (i think metal) tubes - two are stuck together. one of them essentially connects the two hoses together in picpicture of cleaned upper intake manifold - all bolts/nuts torqued at 16 ft lbs picture of cleaning upper intake manifold cover backside - all bolts/nuts torqued at 8.7 ft lbs new upper intake manifold cover gasket - decided to get new in case the old was unusable when i removed.
i love this idea, i'm going to be doing my headers there since being under the car with just jackstands scares the sh1t out of me.
i tried to budge some of the nuts/bolts on the headers yesterday and they were on too tight. tried some pb blaster but still too tight, need clearance and leverage. let's hope the air tools will work better. my wireless torque wrench was low on batteries, but still would feel more comfortable under a lift. can't wait to schedule my garage day. going to be doing coolant flush/fill and headers.
then hopefully only thing left to do will be coilovers. =)
sorry, will seafoam later this week or early next, then do oil change with the headers and coolant. no one answered my questions on whether was safe to spray throttle cleaner in the crankcase, but assuming since seafoam goes in there, that TB cleaner is safe too?
Here's the car with the injen cai installed. The car idles so smoothly now and can definitely feel vtec. Before I couldn't really feel it but also now notice it pulling alot harder at lower rpm. Could be in my head. The cai is awesome, never driven a car with one so it is new to me. There's a whooshing sound at low and high rpm, kind of sounds like a blow off valve when you let go of the gas after hard acceleration, so not sure it should sound like that. At cruising speed cai sounds no different
Good work. I have a 02 tls silver with 220.000 miles and enjoy the heck out of it. I like that it has plenty of get up and it's economical. I installed the 06 av6 tranny a little over 2 years and 20.000 miles ago. Drives and runs better then ever. Good luck .
^ with him mentioning the av6 trans that is another thing to be cautious about. don't know how well youre trans works atm but if it does come to its end and you want to do the least amount of work (unlike myself ) go for the av6 trans. that's the trans from the 06-07 accord v6. after much testing that one seems to be the best one with least problems. just kinda a heads up is all. my auto trans seemed to be fine most of the time I have it but it had a couple hard shifts here and there, and would shift into neutral on cold morning when I first started to drive. once it warmed up it was fine. and then one day it just quit on me out of no where. anyways just be careful man best of luck and hopefully the trans will last a good while!
transmission is okay for now, the cleaning and replacement of solenoid and filter have made shifting a bit better. i know the car had a warranty replacement done years ago, but i also assume this goes one day. good to know about the year range of the av6, haven't yet come across that yet in my readings.
transmission is okay for now, the cleaning and replacement of solenoid and filter have made shifting a bit better. i know the car had a warranty replacement done years ago, but i also assume this goes one day. good to know about the year range of the av6, haven't yet come across that yet in my readings.
awesome, thanks iggy. i hate how the pictures always expire...those are absolutely necessary for first time diy'ers...
question on my CAI, and the noise from it. how much louder is it supposed to be? mine has a constant sucking sound (sounds really more like a vacuum leak). i can't figure out if it is from the intake manifold or the CAI. question is how can you tell if there is a vacuum leak in your car easily? the car does drive well, or as good as it did before i tore everything apart and put back together.
well, i seafoamed today. not much white smoke at all. followed the instructions from the other diy threads, but here it is again.
1) drove around for about 10-15 minutes to warm up the car
2) turned off engine
3) pulled vacuum line at TB
4) put new hose on nipple
5) started up the car and let idle for a minute
6) slowly hover hose to top of seafoam liquid, let it sip
7) i backed off as the car started to shudder, it died once, so i restarted no problem
8) sucked up half of the 16 oz bottle, shut off car and let sit for 15 minutes (during the sucking, i had to rev a little, this is the only time it smoked, but barely)
9) pour remaining half bottle into crankcase
10) started up after sitting for 15 minutes, it started no problem
11) drove around like the experts said, spiritedly (2k rpm for a few blocks, then wide open throttle at 4k, then at 5k) - repeat repeat repeat
12) ended up needing gas so filled tank - i had put a full bottle of seafoam in half tank of gas earlier in the week
13) changing oil in a few days, or under 100 miles to be safe
can already tell vtec kicks in even harder, but just a bit weary that it didn't smoke. i think someone mentioned that it isn't carbon flying off that causes smoke, it is the cat that is burning off the seafoam? so not sure what happened when i did it. i've read others not experiencing smoke either. i'll probably try the gas tank again just to make sure a few weeks from now.
awesome, thanks iggy. i hate how the pictures always expire...those are absolutely necessary for first time diy'ers...
question on my CAI, and the noise from it. how much louder is it supposed to be? mine has a constant sucking sound (sounds really more like a vacuum leak). i can't figure out if it is from the intake manifold or the CAI. question is how can you tell if there is a vacuum leak in your car easily? the car does drive well, or as good as it did before i tore everything apart and put back together.
Yeah, CAI will do that. It's the nature of the beast when the resonator is bypassed and you straight pipe intake air.
If it's idling and otherwise running fine I wouldn't worry about it, but if you think there is a vacuum leak you can spray some carb cleaner around the suspect area and watch for
RPM change.
tried this and no RPM change. someone else recommended soapy water to see if it bubbles. i was worried that i didn't torque enough b/c it definitely felt like i could torque a lot more than the specs.
at this point i don't have any power issues while driving.
called magnaflow today...these are for the TL-P cats
direct fitment has two part numbers:
- 27402 is the standard/hm - basically need to look at sticker under hood to see if California emissions or not (apparently the ECU is tuned differently - so part # matters)
- 49258 is the California emissions tuned version - both should direct fitment
- DC Sports headers installed
- oil and filter changed (went back to normal drain plug, realized the fumoto was leaking)
- ATF drained and filled 3 of 3 (though took a bit longer interval than 2 of 3)
- coolant drained and filled
OE front exhaust manifold to a-pipe connection a-pipe with O2 sensor removed, started soaking liquid wrench OE rear exhaust manifold to a-pipe connection O2 sensor removed, no way I could reach all the way up to disconnect, so just a few twists and out. I did disconnect the first secure connection of the O2 wire. Cat looked ok, tried to shake to see if I could hear anything, sounded okay. Made sure to use rope to secure cat-back so it wouldn't fall. DC header to new a-pipe connection. The rear OE exhaust manifold was an absolute bitch to get out. Couldn't get to all of the 5 bolts from the bottom, so little room to work from the top. Had to remove the strut brace at top to get both arms down in. Was horrible...The rear did just drop out the bottom and DC slipped up from bottom. I used all new OE gaskets for the headers. DC sent along 3 o-ring gaskets for the header to a-pipe and a-pipe to cat connections. The DC headers were a pretty good fit, didn't need to do much. The front headers needed to remove the top radiator hose to get in. Actually connected with Austin519 from the diy, his suggestion to use crush/lock washers was a good idea. Too bad I felt the bolt was too short and removed all the washers. Was difficult to get the nut tight on the bolt. Needed help from above to hold while I torqued. Here's another shot of the headers all installed
Last edited by elfnumber1; 01-20-2018 at 01:26 AM.
When you remove the a-pipe, the coolant drain nipple at the block is super easy to access. 12mm wrench, then a hose, I think it was a 1/4" ID hose. However, if you aren't changing the headers/a-pipe, then you'll definitely need to remove the passenger rim. Even with it in the air the angles are difficult. Then removed the plastic drain for the radiator, then overflow reservoir. Not sure that is correct order, or if it matters. Of course set temp to full H first.
Filled a full gallon first into the radiator, and to max line of overflow bottle. Then turned on car. Followed instructions on how to burp. Let is burp, then filled more. Squeeze radiator tubes. Wait for fan to turn on twice. Rev as needed.
My thoughts so far are that the headers definitely give more high end power, but it didn't wow me. The amount of effort and time put into the install, in my opinion is not worth it. But again, I'm not sure the ECU has fully adjusted. The sound also hasn't really changed. I will report back in a few days/week to see if I have a different opinion. I will probably not want to install the OE stuff back in, it took forever...
Right about now I wish I had a TL-S.
Oh, I did find out why the engine bay was making more of a leaky sound. The CAI actually was coming out of the TB connection. I moved the rubber tube out a bit from the TB and connected into more of the CAI tube. Then retightened. Definitely hear less hiss when accelerating. Can't wait to drive more. I am happy, don't get me wrong, but I wanted 30 HPs, do realize that that was for the TL-S.
The TL-S has a bigger exhaust pipe so it takes full advantage of the Headers.. Try to find a wrecked TL-S and get the full exhaust (Cat too since its higher flowing).
The TL-S has a bigger exhaust pipe so it takes full advantage of the Headers.. Try to find a wrecked TL-S and get the full exhaust (Cat too since its higher flowing).
how do exhaust things bolt up when the pipe diameters are different? TL-P have 2" and TL-S has 2.5"? what if i went custom, would they have to weld everything up, and therefore no more bolt on?
If you get the entire TL-S exhaust why would you need to cross-fit parts? That is why I told you to get the TL-S Full Exhaust = Cat + Resonators + Y Pipe + 2 Mufflers (Although you can go straight pipes from here). The hangers are in the same position AFAIK for the TL-p and TL-S so it should be bolt-on.
As for custom? Never seen a custom setup on a 2G its always ATLP or Axle-Backs..
I like this thread...
your writing is very literal and all over the place.
I can relate.
Great to see some new and fresh enthusiasm though!
Thanks for the thread, was a fun read...
that car I expected to look like dog shit...get to the pics and was pleasantly surprised.
She's gorgeous!
If you get the entire TL-S exhaust why would you need to cross-fit parts? That is why I told you to get the TL-S Full Exhaust = Cat + Resonators + Y Pipe + 2 Mufflers (Although you can go straight pipes from here). The hangers are in the same position AFAIK for the TL-p and TL-S so it should be bolt-on.
As for custom? Never seen a custom setup on a 2G its always ATLP or Axle-Backs..
guess my question was a bit more elementary. let's put it this way. i assume if i have a tl-p, then i have 2" pipes. so from header on through, there is 2" ID to mufflers. if i were to get a tl-s, again assume it is 2.5", then it wouldn't fit properly b/c of the obvious, i need to the "pipe" sizes to match.
based on your response, i am interpreting that i am totally wrong and that the pipe diameters do not matter. i'm not trying to round rude, but would appreciate the education. this is as much learning for me as anything. also want to make sure you keep coming back because have seen you well regarded and want you back in this thread to give me more advice!
my thought is that if going to buy something, might as well buy something better than stock. but i'll look around for a tl-s cat-back and see if prices are a no brainer vs going something aftermarket. i do like vroom vroom afterall.
@rockstar: yeah sorry about that, this was totally meant for stream of consciousness-type personal writing. as i started to get more in the weeds, realized would be very helpful to have people chime in and comment. not sure if sarcastic re: comment of being gorgeous, but either way, thank you thank you. i'm not putting in any money on the body, unless perhaps i want aspec body kit, but that's far away. i'm doing coilovers next and/or cat-back exhaust per skirms. like i told him, i like vroom vroom now!
 01-01-2018, 03:56 AM


 but good job so far man keep it up!