DIY: Replacing side engine mount 99-03 TL
 05-26-2008, 02:12 PM
#1
DIY: Replacing side engine mount 99-03 TL
Well I was bored today and decided to get around to installing my new redesigned Innovative side mount that Tim sent me for free. I hadn't even called to request the new one they just sent out new mounts to everyone that bought the original set.
This is the replacement of the Innovative mount but the OEM will be similar you will just have to deal with vacuum lines.
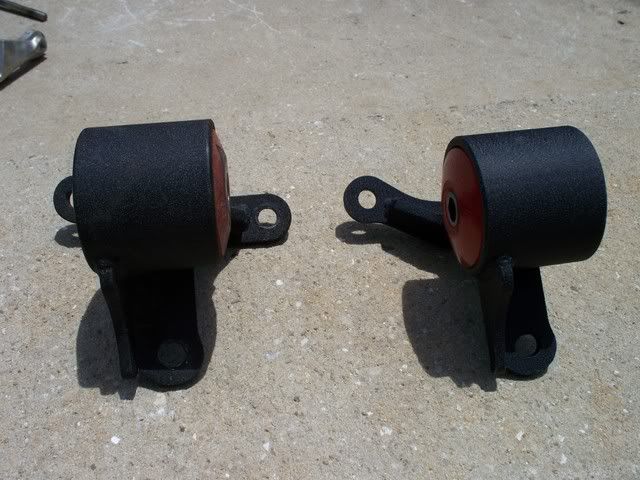
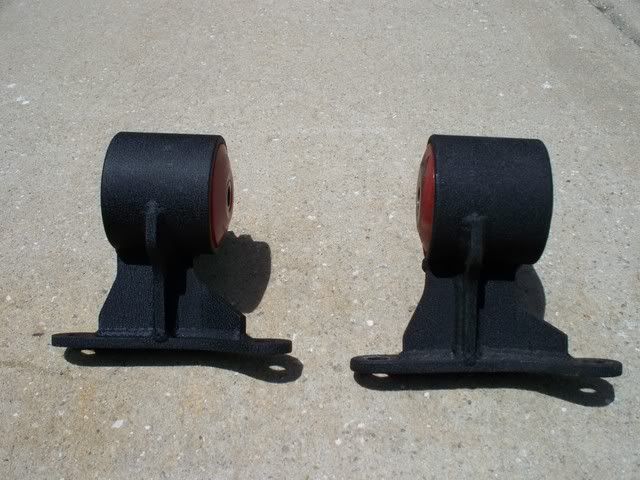
Here's a look at the new and old one there isn't really much of a visible difference but I noticed right away that the holes lined up a lot better than the original mount.
New on the right
New on the left
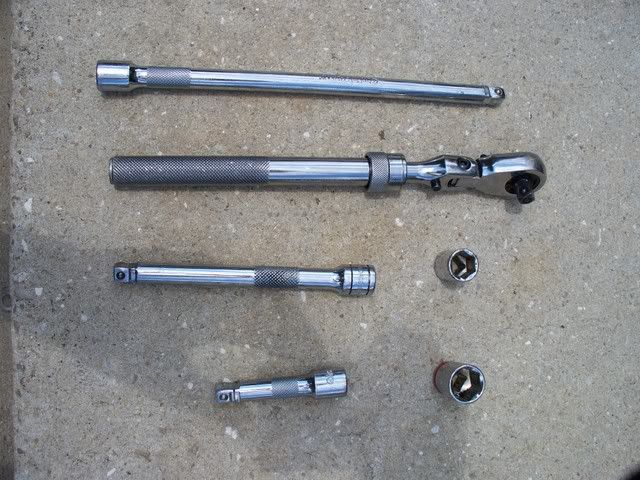
Here's the tools you will need (17mm for the big bolt, 14mm for all rest, various extensions and a ratcheting socket wrench)
Start by getting your cruise control module out of the way to get more room
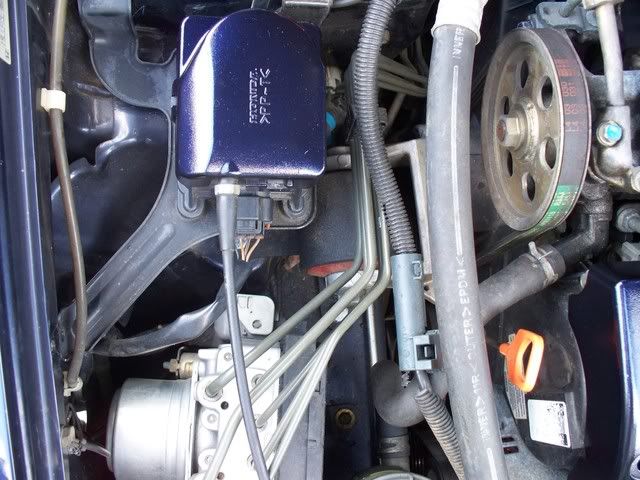
Unplug the wire from the module itself
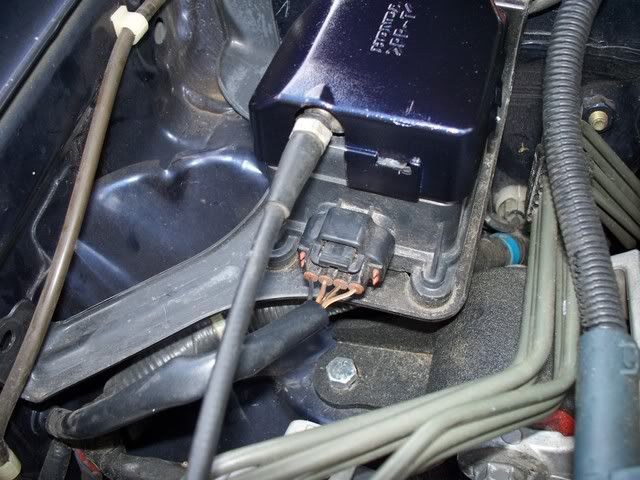
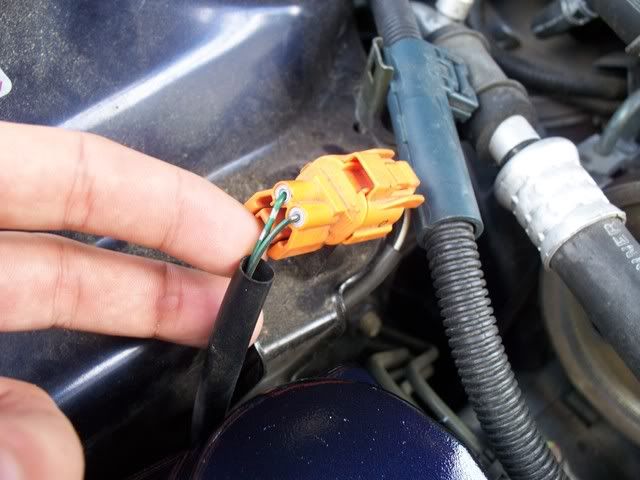
You will need to remove the orange connector from the bracket for the module
You do not need to disconnect the wires, just remove them from the bracket
Pull up on the clip as shown and slide the orange connector off
Take off the 3 bolts connecting the cruise control module to the chassis and move the whole assembly out of the way. I swung it around and set it on top of the radiator for now.
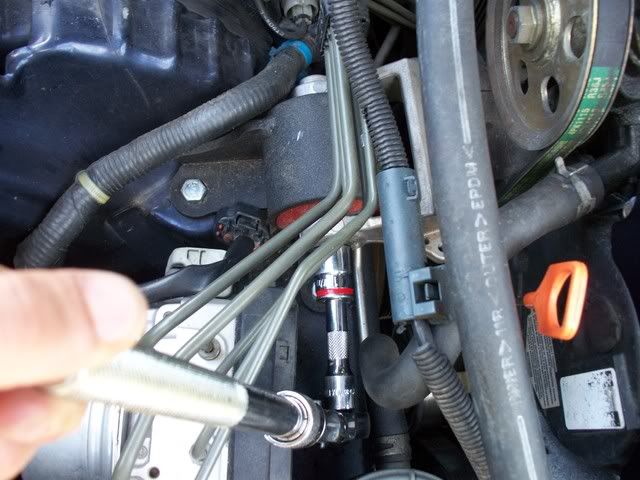
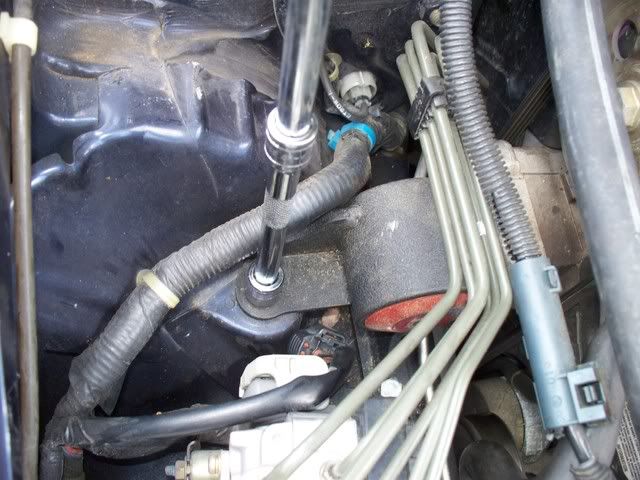
Now you want to take the big bolt from the middle of the mount.
Use a 17mm socket and small extension to get to it.
Make sure to hold it on there good because it likes to slip off and start stripping it.
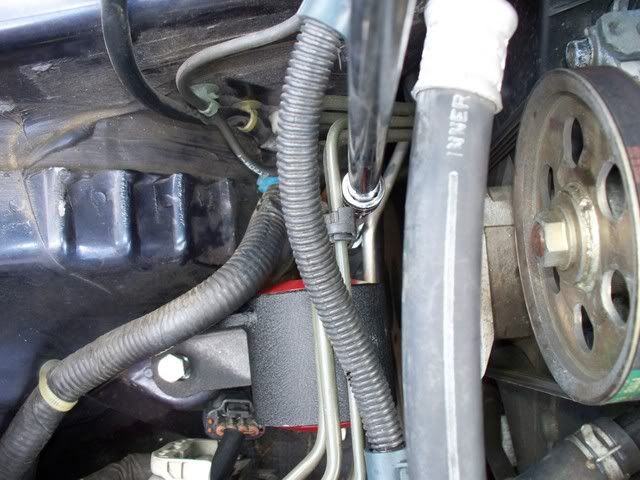
Next, remove the two bolts that connect the mounting bracket to the engine to remove the mounting bracket.
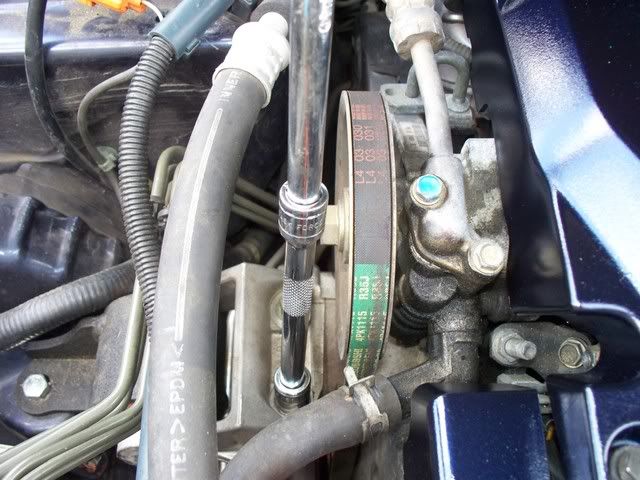
Now, remove the three bolts holding the mount to the chassis.
You will have to get some long extensions to get down there and have to finagle your way through the metal lines that are there. It is kind of tricky but can be done.
Put everything back together in reverse order.
After you bolt the engine mount in place, just put in the bolts attaching the bracket to the engine and do no tighten all the way. You want to slide in the big bolt through the bracket and mount to get it started so you know it will line up. If you don't do this and bolt down the bracket all the way you will have a hard time sliding in and getting that big bolt started.
Sorry for not doing the others, but I was just replacing the side mount today.
Hope this helps someone out a little
This is the replacement of the Innovative mount but the OEM will be similar you will just have to deal with vacuum lines.
Here's a look at the new and old one there isn't really much of a visible difference but I noticed right away that the holes lined up a lot better than the original mount.
New on the right
New on the left
Here's the tools you will need (17mm for the big bolt, 14mm for all rest, various extensions and a ratcheting socket wrench)
Start by getting your cruise control module out of the way to get more room
Unplug the wire from the module itself
You will need to remove the orange connector from the bracket for the module
You do not need to disconnect the wires, just remove them from the bracket
Pull up on the clip as shown and slide the orange connector off
Take off the 3 bolts connecting the cruise control module to the chassis and move the whole assembly out of the way. I swung it around and set it on top of the radiator for now.
Now you want to take the big bolt from the middle of the mount.
Use a 17mm socket and small extension to get to it.
Make sure to hold it on there good because it likes to slip off and start stripping it.
Next, remove the two bolts that connect the mounting bracket to the engine to remove the mounting bracket.
Now, remove the three bolts holding the mount to the chassis.
You will have to get some long extensions to get down there and have to finagle your way through the metal lines that are there. It is kind of tricky but can be done.
Put everything back together in reverse order.
After you bolt the engine mount in place, just put in the bolts attaching the bracket to the engine and do no tighten all the way. You want to slide in the big bolt through the bracket and mount to get it started so you know it will line up. If you don't do this and bolt down the bracket all the way you will have a hard time sliding in and getting that big bolt started.
Sorry for not doing the others, but I was just replacing the side mount today.
Hope this helps someone out a little

The following users liked this post:
AMart83 (09-11-2014)
05-26-2008, 02:56 PM
#4
hates the winter
Join Date: Oct 2006
Age: 43
Posts: 2,620
Likes: 0
Received 0 Likes
on
0 Posts
Nice write up. You don't have to use a jack to support the engine when replacing this? I would think to get the mount off/on you have to relieve some weight. If not, then this is damn easy.
05-26-2008, 03:08 PM
#5
Originally Posted by Rajca
do u feel a lot of vibrations like the guys over on the CL side were?

There is a little bit of vibration during hard acceleration, but nothing that isn't tolerable (and of course it's expected with the solid mounts). I am experiencing a little more vibrations with the new side mount in, but that's just because it is brand new and I need to break it in. I think for the $330 it's well worth it especially with the lifetime warranty.
Originally Posted by nguyen
awesome notice any difference while driving?
Originally Posted by ChrisQ1980
Nice write up. You don't have to use a jack to support the engine when replacing this? I would think to get the mount off/on you have to relieve some weight. If not, then this is damn easy.

Trending Topics
05-26-2008, 08:21 PM
#8
hates the winter
Join Date: Oct 2006
Age: 43
Posts: 2,620
Likes: 0
Received 0 Likes
on
0 Posts
Thanks Kris, I think I'll have to replace mine sometime soon and since my bumper to bumper warranty is up, I'll have to do it myself. Front was already done so I lucked out on that one. Thanks for the DIY.
05-26-2008, 08:40 PM
#9
Originally Posted by Acura2g
How bad were the bolt to get out, I know from experience on other cars that you really need a breaking bar on some of those motor mount bolts.
05-26-2008, 10:04 PM
#11
Senior Moderator
I really need to get the 3 mounts.
05-27-2008, 11:45 AM
#12
Originally Posted by Rajca
was the old side mount off by alot? also what r u gonna do with the old one, ship it back?
Originally Posted by fsttyms1
I really need to get the 3 mounts.
 05-27-2008, 12:31 PM
#13
'03 ABP YA4-S 6MT

Join Date: Mar 2007
Location: Edmonton, AB
Age: 37
Posts: 1,192
Likes: 0
Received 18 Likes
on
18 Posts
Originally Posted by KSuchdeve
No, not by a lot at all. It was kind of hard to get in there, but I would still be using it if they didn't send me the new one for free. I can probably let it go for cheap if someone wants it. I'm not going to discuss it here so shoot me a PM with an offer if you want it.


i don't consider that 'not by a lot' especially if it was the cause of the vibrations in everyones cars
 05-27-2008, 02:34 PM
#14
Registered Member
Join Date: Apr 2008
Location: NYC
Age: 39
Posts: 127
Likes: 0
Received 0 Likes
on
0 Posts
I called them today and they have it for $349 plus 18.80 for shipping. Is there someone I can talk to so I can get it for 330 like u said? I will order it today if they could
05-27-2008, 03:47 PM
#15
Originally Posted by rp_guy
i don't consider that 'not by a lot' especially if it was the cause of the vibrations in everyones cars
05-27-2008, 03:48 PM
#16
Originally Posted by TLGOD84
I called them today and they have it for $349 plus 18.80 for shipping. Is there someone I can talk to so I can get it for 330 like u said? I will order it today if they could
 01-07-2014, 07:31 AM
#19
Just remove the driver side wheel and you will see 2 small tranny mounts with rubber dampers.

Thread
Thread Starter
Forum
Replies
Last Post
Skirmich
2G TL (1999-2003)
37
09-15-2015 06:41 PM