Blacked out headlight progress
 01-01-2010, 11:49 PM
#41
like others say, the honeycomb grille netting needs to be black, it takes away from the front end, and also keep the bottom grille as is, but toeach his own, good job on the blacking out 
blacking out the fogs will ruin the visibility. it's the same idea as blacking out the reflective domes in your headlights. you could black the steel trim on the fogs
blacking out the fogs will ruin the visibility. it's the same idea as blacking out the reflective domes in your headlights. you could black the steel trim on the fogs
 01-01-2010, 11:52 PM
#42
DIY! Mods, feel free to do whatever, and please re-size the small pics!
Okay, so here goes! DIY.
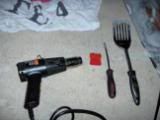
Materials: One can Brite Touch primer, One can black paint, one can Valspar clear coat, straight blade, Wagner Heat gun, GE Silicon II, metal spatula, Shurtape blue painters tape, screwdriver and ratchet, 100 grit sandpaper, 240 grit sandpaper, 1000 grit sandpaper, Dawn soap, plenty of rags, and TIME and PATIENCE(make sure you have plenty of this)!
Procedure:
I am going to start from having the bumper, grill and lights all ready removed. As stated in many other DIY's, if you do not know how do a simple search and you will be up to speed.
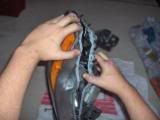
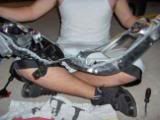
First off, find a spot on the light where you can see a little bit of the OEM silicone that has oozed out, and that will show you exactly where to apply the heat. Then use the heat gun, hold it approximately 3 inches away from the lights and in constant motion work about 2-3 inches at a time. The silicon melts really fast and dries even faster, so be quick yet patient. It took me about 40 minutes per light. When the silicon is melted, gently stick the spatula in the crack and pry apart. Go all the way around, once you get 3 sides apart you should be able to pull it completely apart using your hands.
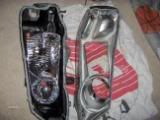
You will then see that the part of the housing you want to paint will be held in by only 2 screws. Philips head, to be exact. Remove the screws and place this piece aside, and separate the second headlight. (no pics)
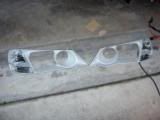
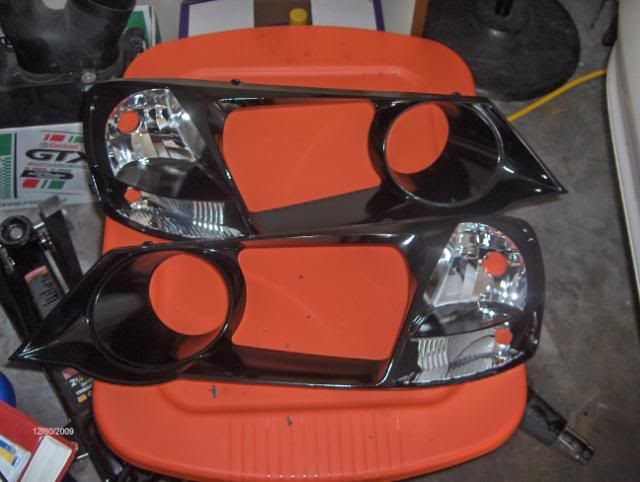
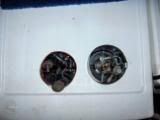
After both lights are separated, it is now time to sand off the chrome finish. However, if you are not painting the rippled turn signals, do not touch that chrome. Start sanding with the 100 grit then when all of the chrome finish is off, move on to the 240 grit, and then eventually to the 1000 grit. (The hardest part of sanding the housings is getting your fingers into the crevice around the high beam circle. But again, take your time and get it right the first time!) After the housing is sanded down, fill a small bucket with water and Dawn soap with a semi-abrasive shop towel, I used the blue Dawn soap because it is a de-greaser and it strips off any wax that may be in the plastic. Let them air dry, and then use a hair dryer on the cold setting to ensure a perfectly dry surface. Here is what they should look like after you sand them.

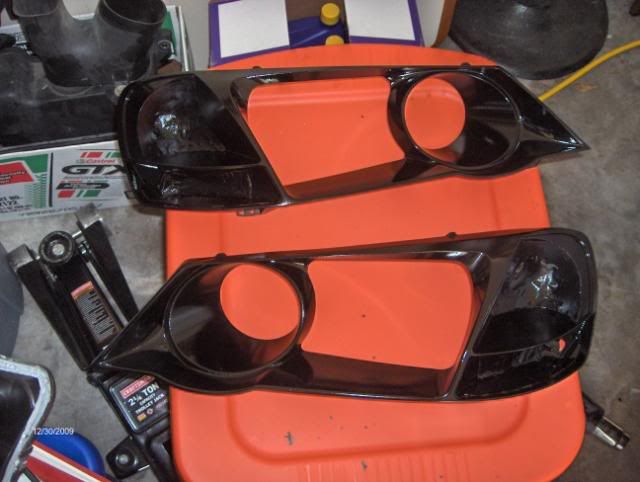
After you have cleaned the housings it is time to tape off the part of the housings that you do NOT want to paint, the parts you want to remain chrome. (In my case, the turn signals and the spot that the reflector was). Again, take your time with this as it requires a great amount of precision! The tape is hard to see in this pic, but its there!
Now the housings are ready for paint! I applied 2 coats red primer, 3 coats of color, and 2 coats of clear. Allow them to air dry for about 4 hours, so that they are dry to the touch.
Again, painted.
After they are dry, use your straight edge blade to cut around the edges of the tape (if applicable), to ensure that the tape does not peel the paint up when you remove the tape. And then remove the tape.
Put the housing back in place, and screw the 2 screws back in. (No pics)
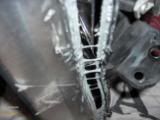
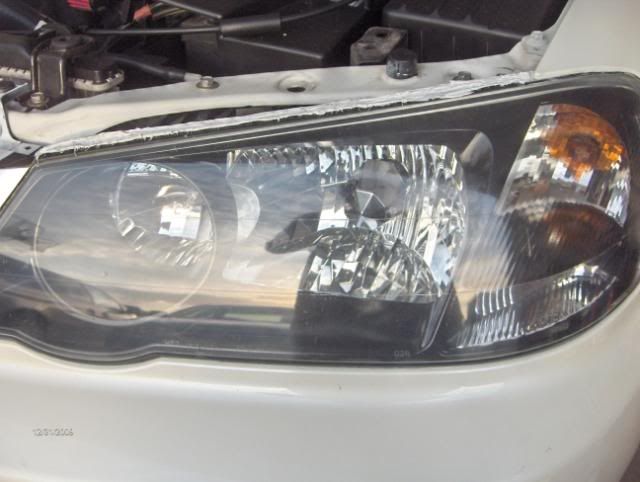
I opted not to remove the OEM silicone, because quite frankly, the more the merrier. So I put the lens side and the back side back together after heating the factory silicone and applied pressure. I then laid a 3/4 inch to 1 inch wide slick of silicone using my finger (this ensures that you do not miss a spot that will lead to a leak). Let dry overnight. The next day, trim the extra silcone and test fit on the car, you may have to trim more than once to get the right fit.
If you look closely, you can see the silicone go all the way around the headlight. I did not realize when I bought the silicone, but its white.
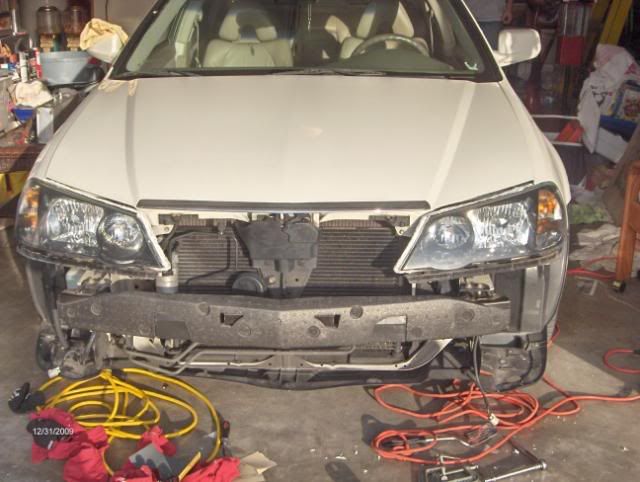
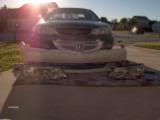
Now replace your bumper and grill, kick back and take some pics to share here on Azine! Enjoy!
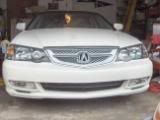
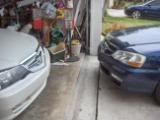
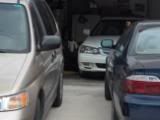
Papa vs. Son!
Looking fresh!
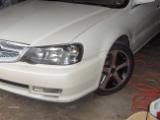
Looking mean!
***Remember to keep all of your screws, clips, and hardware together.....I like to use spray paint caps.
***Remember! Patience, Patience, Patience! Take your time now and do it right so you don't have to go back later to fix it.
Materials: One can Brite Touch primer, One can black paint, one can Valspar clear coat, straight blade, Wagner Heat gun, GE Silicon II, metal spatula, Shurtape blue painters tape, screwdriver and ratchet, 100 grit sandpaper, 240 grit sandpaper, 1000 grit sandpaper, Dawn soap, plenty of rags, and TIME and PATIENCE(make sure you have plenty of this)!
Procedure:
I am going to start from having the bumper, grill and lights all ready removed. As stated in many other DIY's, if you do not know how do a simple search and you will be up to speed.
First off, find a spot on the light where you can see a little bit of the OEM silicone that has oozed out, and that will show you exactly where to apply the heat. Then use the heat gun, hold it approximately 3 inches away from the lights and in constant motion work about 2-3 inches at a time. The silicon melts really fast and dries even faster, so be quick yet patient. It took me about 40 minutes per light. When the silicon is melted, gently stick the spatula in the crack and pry apart. Go all the way around, once you get 3 sides apart you should be able to pull it completely apart using your hands.
You will then see that the part of the housing you want to paint will be held in by only 2 screws. Philips head, to be exact. Remove the screws and place this piece aside, and separate the second headlight. (no pics)
After both lights are separated, it is now time to sand off the chrome finish. However, if you are not painting the rippled turn signals, do not touch that chrome. Start sanding with the 100 grit then when all of the chrome finish is off, move on to the 240 grit, and then eventually to the 1000 grit. (The hardest part of sanding the housings is getting your fingers into the crevice around the high beam circle. But again, take your time and get it right the first time!) After the housing is sanded down, fill a small bucket with water and Dawn soap with a semi-abrasive shop towel, I used the blue Dawn soap because it is a de-greaser and it strips off any wax that may be in the plastic. Let them air dry, and then use a hair dryer on the cold setting to ensure a perfectly dry surface. Here is what they should look like after you sand them.
After you have cleaned the housings it is time to tape off the part of the housings that you do NOT want to paint, the parts you want to remain chrome. (In my case, the turn signals and the spot that the reflector was). Again, take your time with this as it requires a great amount of precision! The tape is hard to see in this pic, but its there!
Now the housings are ready for paint! I applied 2 coats red primer, 3 coats of color, and 2 coats of clear. Allow them to air dry for about 4 hours, so that they are dry to the touch.
Again, painted.
After they are dry, use your straight edge blade to cut around the edges of the tape (if applicable), to ensure that the tape does not peel the paint up when you remove the tape. And then remove the tape.
Put the housing back in place, and screw the 2 screws back in. (No pics)
I opted not to remove the OEM silicone, because quite frankly, the more the merrier. So I put the lens side and the back side back together after heating the factory silicone and applied pressure. I then laid a 3/4 inch to 1 inch wide slick of silicone using my finger (this ensures that you do not miss a spot that will lead to a leak). Let dry overnight. The next day, trim the extra silcone and test fit on the car, you may have to trim more than once to get the right fit.
If you look closely, you can see the silicone go all the way around the headlight. I did not realize when I bought the silicone, but its white.
Now replace your bumper and grill, kick back and take some pics to share here on Azine! Enjoy!
Papa vs. Son!
Looking fresh!
Looking mean!
***Remember to keep all of your screws, clips, and hardware together.....I like to use spray paint caps.
***Remember! Patience, Patience, Patience! Take your time now and do it right so you don't have to go back later to fix it.

 01-06-2010, 06:07 PM
#46

and do you know if i can use a hair dryer i dont have a heat gun
Last edited by kdawg8526; 01-06-2010 at 06:10 PM.
01-06-2010, 09:28 PM
#48
Moderator
iTrader: (3)
Looking good man! WDP + black headlights FTW
The DIY is great but those pictures are tiny
The DIY is great but those pictures are tiny
01-07-2010, 02:31 AM
#52
Instructor

Join Date: Feb 2009
Age: 34
Posts: 109
Likes: 0
Received 0 Likes
on
0 Posts
Your headlights came out great! Good job man.
I have a question though. I blackhoused my headlights, but I accidentally primer'd and painted over the chrome on the corner bulbs. Is there anyway I can remove it? Would a clay bar work or anything else? Its gonna be such a bitch to take apart again. Ugh.
Can any members help me on this? Thanks.
I have a question though. I blackhoused my headlights, but I accidentally primer'd and painted over the chrome on the corner bulbs. Is there anyway I can remove it? Would a clay bar work or anything else? Its gonna be such a bitch to take apart again. Ugh.
Can any members help me on this? Thanks.
01-07-2010, 04:56 AM
#53
Banned
Join Date: May 2003
Location: Northwest/burbs, IL
Age: 39
Posts: 4,698
Likes: 0
Received 3 Likes
on
3 Posts
Like everyone else stated, should've left the black meshing in your grille black. Looks almost like my twin.. besides the fact that my grille+engine/battery cover was painted WDP. 

01-07-2010, 04:57 AM
#54
Banned
Join Date: May 2003
Location: Northwest/burbs, IL
Age: 39
Posts: 4,698
Likes: 0
Received 3 Likes
on
3 Posts
Your headlights came out great! Good job man.
I have a question though. I blackhoused my headlights, but I accidentally primer'd and painted over the chrome on the corner bulbs. Is there anyway I can remove it? Would a clay bar work or anything else? Its gonna be such a bitch to take apart again. Ugh.
Can any members help me on this? Thanks.
I have a question though. I blackhoused my headlights, but I accidentally primer'd and painted over the chrome on the corner bulbs. Is there anyway I can remove it? Would a clay bar work or anything else? Its gonna be such a bitch to take apart again. Ugh.
Can any members help me on this? Thanks.
01-07-2010, 10:52 AM
#55
Instructor
Join Date: Feb 2009
Age: 34
Posts: 109
Likes: 0
Received 0 Likes
on
0 Posts
Whoops, I meant the corner turn signal chrome. Yours is painted black like mine, I did not mean the bulbs, sorry. Just the housing I accidentally painted black instead of taping it off.
01-07-2010, 06:55 PM
#60
Yeah. 50 bucks a can plus primer and clearcoat.....How come the other colors are 25, but WDP is 50? Its the same size can. I thought maybe it was because its a pearl paint, but the other pearl paints are 25 as well.
Any idea as to why?
Any idea as to why?
 Common color maybe. Try calling customer service and see if you can try to have em lower it to 25.
01-08-2010, 05:46 AM
Common color maybe. Try calling customer service and see if you can try to have em lower it to 25.
01-08-2010, 05:46 AM
#64
Banned
Join Date: May 2003
Location: Northwest/burbs, IL
Age: 39
Posts: 4,698
Likes: 0
Received 3 Likes
on
3 Posts
SLushhYYY is semi-correct. You need to buy the base white, the pearl coat.. which is the mid-coat.. then clear-coat.
These do not come together and I did not purchase it from any paint-in-a-can place. All of my pieces were painted with professional automotive paint. Purchasing all the supplies shouldn't be too expensive. The most expensive part your looking at will be the pear/mid-coat.. and possibly clear-coat, depending on what brand you use.
These do not come together and I did not purchase it from any paint-in-a-can place. All of my pieces were painted with professional automotive paint. Purchasing all the supplies shouldn't be too expensive. The most expensive part your looking at will be the pear/mid-coat.. and possibly clear-coat, depending on what brand you use.
01-21-2010, 02:30 AM
#67
i just bought the heat gun today i decided i dont wanna bake the headlights in the oven
but theres 2 settings on the heat gun 250 degress celsius or 450 degrees celsius.. can someone tell me which one should i use and how long should i heat the area for before prying it apart
but theres 2 settings on the heat gun 250 degress celsius or 450 degrees celsius.. can someone tell me which one should i use and how long should i heat the area for before prying it apart
10-21-2010, 07:35 PM
#71

Hey ANC297, did you have to heat up the headlights when you put them back together with the silicone?
and just making sure but you taped off the parking light and turn signal after wet sanding right?
and just making sure but you taped off the parking light and turn signal after wet sanding right?
10-22-2010, 10:52 AM
#73
2003 TL-p
that will work, but you need a really good seal. after opening up mine 3 times i wasn't able to get a good seal on the oem glue, water got in. so i had to remove the oem glue and add all new fresh silicon, been water tight for 1.5 years now. clamp the edges down with 6 or so clamps to get a good seal.
 11-17-2010, 05:21 PM
#75
MechEng
iTrader: (9)

Thread
Thread Starter
Forum
Replies
Last Post
mrkingstonvi
Member Cars for Sale
2
02-22-2016 01:53 PM