
License Plate Light change
 05-22-2006, 05:01 PM
#1
5th Gear
Thread Starter

Join Date: Apr 2006
Age: 48
Posts: 5
Likes: 0
Received 0 Likes
on
0 Posts
License Plate Light change
Does anybody know how to change the light bulbs for license plate?
I am trying to change the light bulb with brighter LED lights but I can't open the cover.
Thanks!
I am trying to change the light bulb with brighter LED lights but I can't open the cover.
Thanks!

 05-23-2006, 02:26 PM
#3

According to the service manual (pg 22-227):
1. Slide the license plate light to the right and remove the license plate light.
2. Disconnect the connector from the license plate light.
3. Turn the bulb socket 45 degrees cllockwise to remove the bulb.
1. Slide the license plate light to the right and remove the license plate light.
2. Disconnect the connector from the license plate light.
3. Turn the bulb socket 45 degrees cllockwise to remove the bulb.
The following users liked this post:
aleo12 (07-22-2014)
05-23-2006, 07:02 PM
#4
5th Gear
Thread Starter
Join Date: Apr 2006
Age: 48
Posts: 5
Likes: 0
Received 0 Likes
on
0 Posts
Originally Posted by dadcat1
According to the service manual (pg 22-227):
1. Slide the license plate light to the right and remove the license plate light.
2. Disconnect the connector from the license plate light.
3. Turn the bulb socket 45 degrees cllockwise to remove the bulb.
1. Slide the license plate light to the right and remove the license plate light.
2. Disconnect the connector from the license plate light.
3. Turn the bulb socket 45 degrees cllockwise to remove the bulb.
There are two lights right above the license plate and there is no way I can slide the covers to the right.
Do you have any picture for removing the light's covers?
Thanks for your help.
06-01-2006, 11:23 AM
#6
5th Gear
Thread Starter
Join Date: Apr 2006
Age: 48
Posts: 5
Likes: 0
Received 0 Likes
on
0 Posts
Could anyone with service manual post a detailed instruction on how to change the two lights above the rear licens plate frame? 
I am still trying to find out how to change the light bulb.
Thanks!
I am still trying to find out how to change the light bulb.
Thanks!
06-01-2006, 06:13 PM
#7
Racer

Join Date: Jul 2005
Location: Mississippi
Age: 79
Posts: 449
Likes: 0
Received 0 Likes
on
0 Posts
Originally Posted by JJAMO
Could anyone with service manual post a detailed instruction on how to change the two lights above the rear licens plate frame?
I am still trying to find out how to change the light bulb.
Thanks!
I am still trying to find out how to change the light bulb.
Thanks!
Trending Topics
11-22-2006, 12:52 AM
#8
Instructor
Join Date: Aug 2006
Age: 47
Posts: 108
Likes: 0
Received 0 Likes
on
0 Posts
I figured out how to do it by figuring out how not to
I know this is an old thread, but I figured I shoudl post the obvious details I wish I would have found. The directions in the service are correct, but here's a little more detail that I like to think would've helped me avoid cracking the parts I did. First the parts diagram:

When you're pushing part nine to the right, you're only doing it enough to compress a clip/tab -- about an eighth of an inch. At that point it should be possible to pull the left side toward you slightly, which clears a tab from a slot.
Once you've got the left clip on part nine out of the hole you can't see, then head back toward the left to clear the clip on the right.
At this point you can pull part nine toward you while rotating it slightly down.
Ways to go wrong include pushing part nine too far to the right so as to crack/break-off the right clip and pushing too far to the right or the left without first pulling part nine toward you. At that point you're sheering part three within part nine and you're going to crack the arms off of three that hold three into nine.
The upside is the whole thing's very forgiving. When the trunks closed no one can see the scratches you'll almost certainly leave on the covers and even with the retaining clips cracked the housings hold into their recesses just fine. What's more, if you really screw up, replacement housings and bulb holders for both sides total less than $50.
11-22-2006, 04:51 AM
#9
Three Wheelin'
Originally Posted by Ry4an
I know this is an old thread, but I figured I shoudl post the obvious details I wish I would have found. The directions in the service are correct, but here's a little more detail that I like to think would've helped me avoid cracking the parts I did. First the parts diagram:
When you're pushing part nine to the right, you're only doing it enough to compress a clip/tab -- about an eighth of an inch. At that point it should be possible to pull the left side toward you slightly, which clears a tab from a slot.
Once you've got the left clip on part nine out of the hole you can't see, then head back toward the left to clear the clip on the right.
At this point you can pull part nine toward you while rotating it slightly down.
Ways to go wrong include pushing part nine too far to the right so as to crack/break-off the right clip and pushing too far to the right or the left without first pulling part nine toward you. At that point you're sheering part three within part nine and you're going to crack the arms off of three that hold three into nine.
The upside is the whole thing's very forgiving. When the trunks closed no one can see the scratches you'll almost certainly leave on the covers and even with the retaining clips cracked the housings hold into their recesses just fine. What's more, if you really screw up, replacement housings and bulb holders for both sides total less than $50.
NO! NO! NO.
DON NOT TAKE THE LENS COVER OFF! All you need to do, is open the trunk, remove the rubber stops on each side of the trunk.( the long strip ones). To do this, just pull the left end down and slide to the left or right. Remove the cover from the trunk light and then, pull the trunk liner down, just enough to get to the tag sockets. It took me all of 10 min to do this. There will be no scratches or anything if you do it the correct way.
11-22-2006, 10:07 AM
#10
Instructor
Join Date: Aug 2006
Age: 47
Posts: 108
Likes: 0
Received 0 Likes
on
0 Posts
Originally Posted by dwest1023
NO! NO! NO.
DON NOT TAKE THE LENS COVER OFF! All you need to do, is open the trunk, remove the rubber stops on each side of the trunk.( the long strip ones). To do this, just pull the left end down and slide to the left or right. Remove the cover from the trunk light and then, pull the trunk liner down, just enough to get to the tag sockets. It took me all of 10 min to do this. There will be no scratches or anything if you do it the correct way.
DON NOT TAKE THE LENS COVER OFF! All you need to do, is open the trunk, remove the rubber stops on each side of the trunk.( the long strip ones). To do this, just pull the left end down and slide to the left or right. Remove the cover from the trunk light and then, pull the trunk liner down, just enough to get to the tag sockets. It took me all of 10 min to do this. There will be no scratches or anything if you do it the correct way.
At that point I figured the soft plastic light housings would be more forgiving of my lack of delicacy than the trunk lid liner and its clips, so I moved back to my original tack. I'm happy with how things came out (no one can see up under there anyway) but others should almost certainly listen to dwest and not me.
 11-22-2006, 10:13 AM
#11
Three Wheelin'
Originally Posted by Ry4an
I tried that. I had the rubber bars off (popped/slid off exactly as you described) but then I couldn't figure out where to go from there. I kept running into what appeared to be single-use clips holding the liner in on the left and right of those bars and around the trunk latch.
At that point I figured the soft plastic light housings would be more forgiving of my lack of delicacy than the trunk lid liner and its clips, so I moved back to my original tack. I'm happy with how things came out (no one can see up under there anyway) but others should almost certainly listen to dwest and not me.
At that point I figured the soft plastic light housings would be more forgiving of my lack of delicacy than the trunk lid liner and its clips, so I moved back to my original tack. I'm happy with how things came out (no one can see up under there anyway) but others should almost certainly listen to dwest and not me.
You just have to pull hard, and the pins will pop out. There are some pins near the center, but these slide out. You will see this once you pop the end ones. I will admit, it seems like you could break something, but it will work out. I tried your approach on my TSX, and that would not work for me. So I went through the trunk and the worked real well. So when I did the RL, I tried to see how easy it was to pry the tag lens and that was not going to work either, without scratching something. Because I had experience from the TSX, the RL was a breeze.
12-04-2006, 11:28 AM
#12
1st Gear
Join Date: Jul 2006
Age: 70
Posts: 1
Likes: 0
Received 0 Likes
on
0 Posts
Love this car but many items that would be simple on a lesser vehicle look pretty tricky. My left fog lamp took a direct rock hit on our wonderful AZ roads and the entire assembly will need replaced. Unfortunately, I don't have a clue how to approach this. Anybody have any experience with these? 05 Lakeshore Silver/ Taupe
02-14-2009, 04:42 PM
#13

Ok, I just replaced my license plate lights with LED's and I went with removing the inner liner route. It's actually not that difficult and I found it easier than trying to get that unit out from the outside.
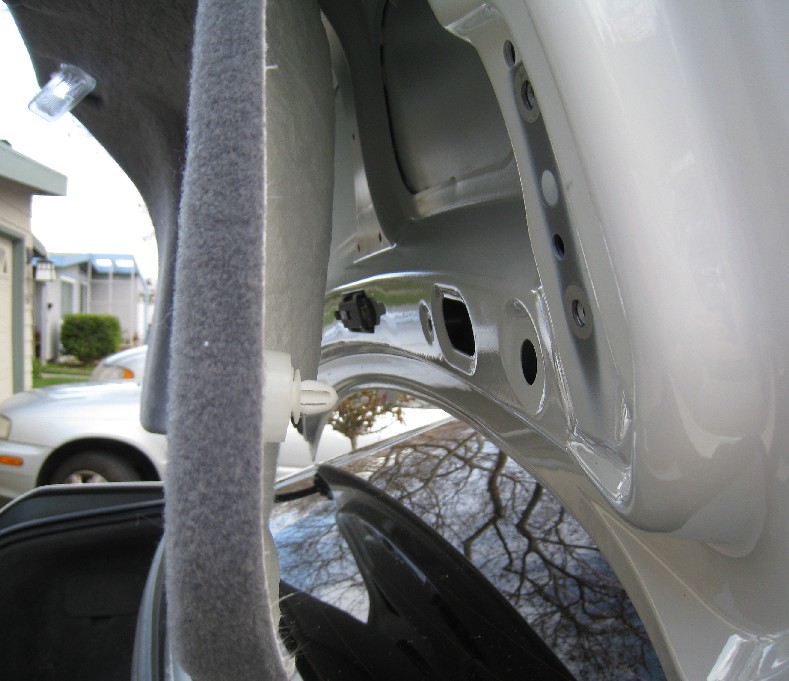
1. Remove the horizontal rubber stoppers from both side by pulling the outer end off and then sliding the stoppers towards the outside to remove. You can see from my pics below how it's mounted.
2. Pull off the trunk light on the left inside trunk by using a flat blade screwdriver and prying the outer side first then pull to left.
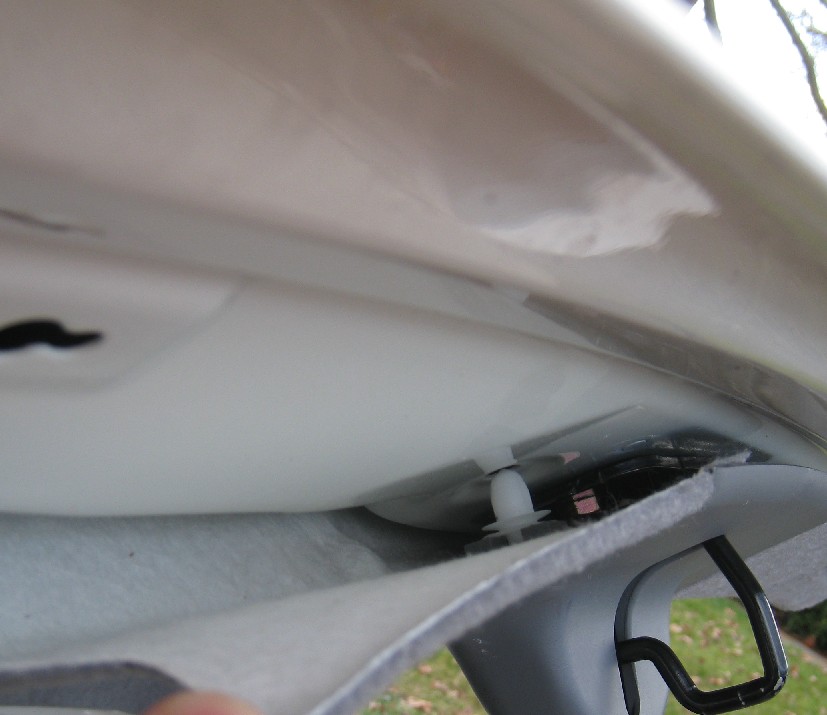
3. There are 4 tabs that need to be pulled down on the liner. 2 near the trunk hinge and 1 on each corner. You can probably use a flat blade screwdriver to help. A door panel removal tool helped me.
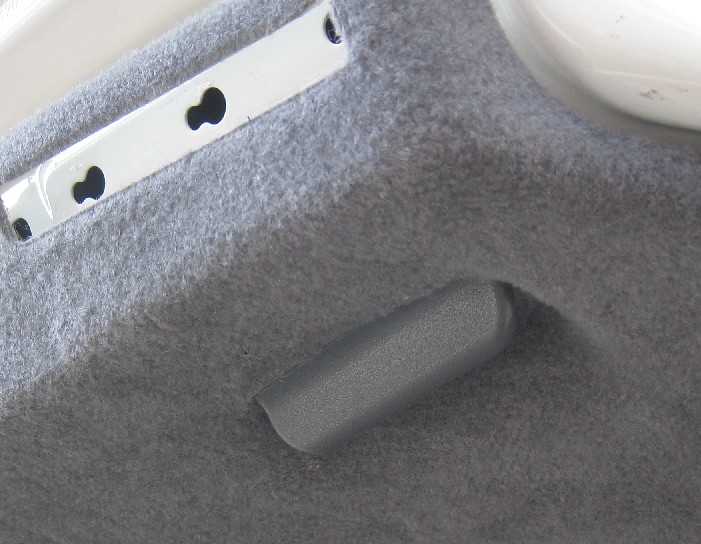
4. When pulling down the liner, the inner trunk handle can get in the way.
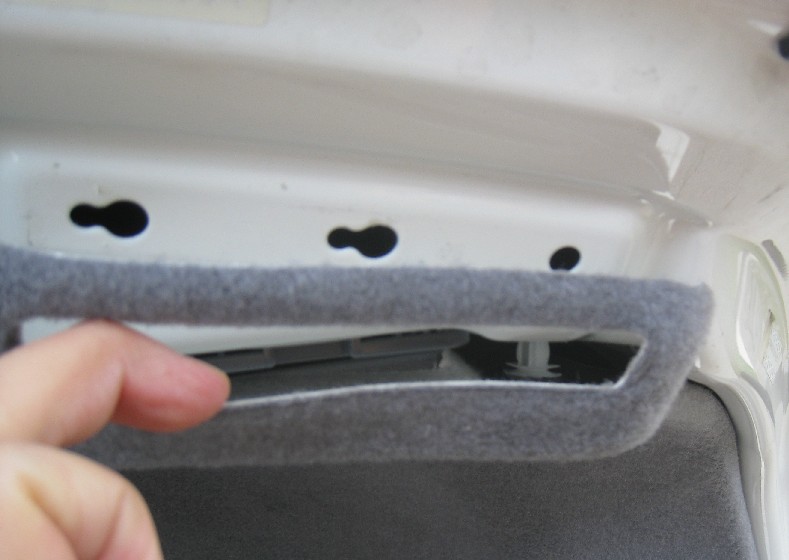
5. you can take off the whole liner by removing the remaining tabs on the bottom of the trunk.
Once removed you can easily access the license plate bulbs by twisting down and pulling out.
Some pics to visually see what I'm writing about...
Helps to have this tool.
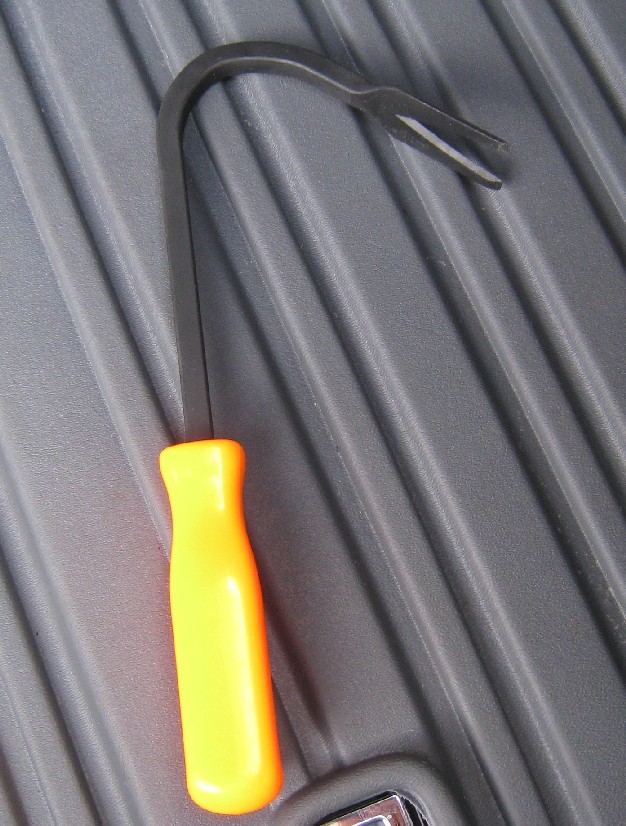
Thanks,
1. Remove the horizontal rubber stoppers from both side by pulling the outer end off and then sliding the stoppers towards the outside to remove. You can see from my pics below how it's mounted.
2. Pull off the trunk light on the left inside trunk by using a flat blade screwdriver and prying the outer side first then pull to left.
3. There are 4 tabs that need to be pulled down on the liner. 2 near the trunk hinge and 1 on each corner. You can probably use a flat blade screwdriver to help. A door panel removal tool helped me.
4. When pulling down the liner, the inner trunk handle can get in the way.
5. you can take off the whole liner by removing the remaining tabs on the bottom of the trunk.
Once removed you can easily access the license plate bulbs by twisting down and pulling out.
Some pics to visually see what I'm writing about...
Helps to have this tool.
Thanks,
The following users liked this post:
Maintenanceman (09-13-2012)
02-14-2009, 11:01 PM
#14
Burning Brakes
Love this car but many items that would be simple on a lesser vehicle look pretty tricky. My left fog lamp took a direct rock hit on our wonderful AZ roads and the entire assembly will need replaced. Unfortunately, I don't have a clue how to approach this. Anybody have any experience with these? 05 Lakeshore Silver/ Taupe

Once you get over the initial shock of that truth, I'll tell you that it's actually pretty easy and there's a good thread on here describing the process of pulling a bunch of pluggets and two screws. Then, the whole bumper/fascia comes off and you set it down on a towel while you replace the fog light.
03-20-2009, 04:00 PM
#15
Randy is the Future
So where can i actually pick up some of these bulbs rather than going somewhere online? I went to autozone and told them i wanted white lights and they gave me orange ones..... Maybe i didnt ask for it right??
03-20-2009, 04:41 PM
#16
Burning Brakes
the best place to get them is online.... stores always have limited selection and a bit pricey.....
you don't have to take out the entire housing to change the bulb.... remove/pill back the lining till your hands can fit through (you don't need to take off the entire lining).... feel for the light connector, twist the bulb holder, pull straight out of the housing, pull out the bulb, insert the new bulb (make sure they r settle in right +/-, otherwise, the bulb won't light up), insert it back to the light housing socket, cover up the lining..... you r done
as for the backup light.... take it to the dealer, they do that all day long and can do it with their eyes closed..... that's what I did.....
Last edited by psheu; 03-20-2009 at 04:43 PM.
05-02-2009, 04:42 PM
#17
Safety Car

Ok, I just replaced my license plate lights with LED's and I went with removing the inner liner route. It's actually not that difficult and I found it easier than trying to get that unit out from the outside.
1. Remove the horizontal rubber stoppers from both side by pulling the outer end off and then sliding the stoppers towards the outside to remove. You can see from my pics below how it's mounted.
2. Pull off the trunk light on the left inside trunk by using a flat blade screwdriver and prying the outer side first then pull to left.
3. There are 4 tabs that need to be pulled down on the liner. 2 near the trunk hinge and 1 on each corner. You can probably use a flat blade screwdriver to help. A door panel removal tool helped me.
4. When pulling down the liner, the inner trunk handle can get in the way.
5. you can take off the whole liner by removing the remaining tabs on the bottom of the trunk.
Once removed you can easily access the license plate bulbs by twisting down and pulling out.
Some pics to visually see what I'm writing about...
....pics removed.....
Helps to have this tool.
Thanks,
I also finally installed the hooks for the cargo net using the same technique to remove the clips.
Thanks so much!
05-03-2009, 02:19 AM
#18
Burning Brakes
I finally installed LEDs in the license plate lights. This was perfect advice, thank you! I ended up using a pry par that I have had for years to remove baseboards, etc. Had the right shape.
I also finally installed the hooks for the cargo net using the same technique to remove the clips.
Thanks so much!
I also finally installed the hooks for the cargo net using the same technique to remove the clips.
Thanks so much!
05-03-2009, 11:03 AM
#20
Safety Car

 05-05-2009, 09:10 PM
#22
05-05-2009, 09:21 PM
#23
Safety Car
http://www.hoen-usa.com/city2.htm
I am afraid the halogens will be too hot for a license plate, so the so called optional RLE (radial light emitting) diode would be best, but they are out of stock and have been for some time.
05-07-2009, 12:40 AM
#24
I did mine today! so easy 5 mins . all you need is the bottom 4 clips like the picture above and pull it back gently and you can reach from there. And the cabin airfilter also took 2 mins well worth it very dirty.
05-07-2009, 06:07 AM
#25
2013 RL or bust
Join Date: Nov 2007
Location: Titletown, MA
Age: 40
Posts: 830
Likes: 0
Received 0 Likes
on
0 Posts
 05-15-2009, 03:53 PM
#28
2013 RL or bust
Join Date: Nov 2007
Location: Titletown, MA
Age: 40
Posts: 830
Likes: 0
Received 0 Likes
on
0 Posts
I broke one of those white things that keep the trunk liner connected to the trunk. I was takin a look and started pulling on it and then the white thing is still in the hole, but now im left with the other end still attached to the liner and hangin on by a thread...
I suck at DIY.
EDIT: going outside now to replace cabin air filter, after locating the thread about it.. wish me luck with my stupid stp replacement filter....
I suck at DIY.
EDIT: going outside now to replace cabin air filter, after locating the thread about it.. wish me luck with my stupid stp replacement filter....
05-15-2009, 05:55 PM
#29
I broke one of those white things that keep the trunk liner connected to the trunk. I was takin a look and started pulling on it and then the white thing is still in the hole, but now im left with the other end still attached to the liner and hangin on by a thread...
I suck at DIY.
EDIT: going outside now to replace cabin air filter, after locating the thread about it.. wish me luck with my stupid stp replacement filter....
I suck at DIY.
EDIT: going outside now to replace cabin air filter, after locating the thread about it.. wish me luck with my stupid stp replacement filter....
Should be no problem.
05-15-2009, 10:30 PM
#30
Burning Brakes
 05-16-2009, 02:04 AM
#31
2013 RL or bust
Join Date: Nov 2007
Location: Titletown, MA
Age: 40
Posts: 830
Likes: 0
Received 0 Likes
on
0 Posts
cabin air filter is so easy i got angry that the stealership would want to charge me so much for so little work.. im gonna go apply for work as acura mechanic
but that was E-Z!
but that was E-Z!
05-17-2009, 07:22 AM
#32
Lu Diam
Join Date: May 2009
Location: strong island 516
Posts: 25
Likes: 0
Received 0 Likes
on
0 Posts
i agree, it was simple to change. my local ten minute oil change tried to charge $32 to replace, did it myself for $13. it needed it too very dirty had some leaves in there also
08-21-2009, 02:37 AM
#33
Banned

Join Date: Mar 2009
Posts: 55
Likes: 0
Received 0 Likes
on
0 Posts
Also, I started to pull it out from the inside. I wasn't able to take it out all the way. PLUS, now it won't snap back into its original position. Please help!
 08-21-2009, 12:04 PM
#37
I believe that piece snaps into the plastic base. Now if that plastic base where the push pin mounts came off, I'm not sure how that is mounted to the liner. I'm not sure until I take it apart again and look.
Make sure you pull easily or use a pry bar (or buy one if you don't have one). Makes it 10x easier.
08-21-2009, 12:17 PM
#38
Banned
Join Date: Mar 2009
Posts: 55
Likes: 0
Received 0 Likes
on
0 Posts
Are you talking about the plastic push pin that is shown in the pic?
I believe that piece snaps into the plastic base. Now if that plastic base where the push pin mounts came off, I'm not sure how that is mounted to the liner. I'm not sure until I take it apart again and look.
Make sure you pull easily or use a pry bar (or buy one if you don't have one). Makes it 10x easier.
08-21-2009, 12:59 PM
#40
I haven't taken a look at yet as I'm at work now. Probably this weekend sometime.