When you click on links to various merchants on this site and make a purchase, this can result in this site earning a commission. Affiliate programs and affiliations include, but are not limited to, the eBay Partner Network.
My back up camera got a little ice in it and then fried when we had a melt. I'm wondering if any could link a reasonable priced replacement. I have the tech package and was happy enough with the camera until the seal went.
My car had a similar issue since last month. The camera appeared really blurry at times but relatively clear afterwards. I�m suspecting some moisture inside. It�s going to the dealership tomorrow. Will keep you updated.
I Also had serious problems with the backup camera in my 2014 RDX, suspecting high pressure water that got in after i took the car to a hand wash place. Got blurry at the beginning but a few days later it stopped working (either white or black screen when putting the car in reverse mode).
I took out the camera (~1.5 hrs job) and put it in a sealed bag with silicate gel but it didn't seem to make any difference.
When i asked the dealer, they sell the backup camera for ~$300 CAD (part only), and ~$500 CAD with the install. I personally find the labor cost at Acura dealers stupidly high.
Right now i am settling on this:
Looks like you are very technically minded. How did you take apart the camera from the tailgate? Is it technically challenging or a beginner can do it without breaking something else? Can you give step by step instructions please. Thanks.
It was not really complicated, i spent that much time only because i was diving into the unknown (did not find anything about the process) and i did not want to break anything.
Right now i already assembled back everything while waiting for the camera to arrive and i took only a few pictures that i will attach here. Essencially you have to remove the interior panels starting from the top horizontal one, then the 2 side panels and finally the large panel piece in the bottom, make sure when you pull each panel to not flex it too much (particularely the large panel that requies a lit bit of force to remove).
Also make sure to remove the plastic part (the handle inside) with the liftgate button before removing the large panel otherwise the large panel will stick there.
Last thing, there is a platic connector for the camera that is attached to the metal frame (probably to prevent theft). Simply disconnect the camera connector then rotate the plastic part (like 45 degrees) to remove it from the frame.
Now the main issue at this stage is that the backup camera cannot be removed from the inside, rather you have to take it out from the outside. You will have to remove a small panel located on top of the license plate (it has openings for the license plate lights and the backup camera). I removed it by gently hamering the plastic screws that hold it in place from the inside.
Not sure if this explanation makes it easy to do but i will add a detailed tutorial once i open it again to install the camera.
That's really impressive. My car's dealer visit ended up in an anticlimax. My dad had gone there since I was busy. The dealership didn't find anything wrong with the camera since the blurriness had improved a lot since the cold weather and rain had subsided . They just showed my dad how to increase the brightness of the screen and advised to call back if the problem recurs. Whatever, .......if it saves me money I'm not going to complain... ha ha.
That's really impressive. My car's dealer visit ended up in an anticlimax. My dad had gone there since I was busy. The dealership didn't find anything wrong with the camera since the blurriness had improved a lot since the cold weather and rain had subsided . They just showed my dad how to increase the brightness of the screen and advised to call back if the problem recurs. Whatever, .......if it saves me money I'm not going to complain... ha ha.
Good stuff, of course you can't complain if nothing wrong with the camera
Good stuff, of course you can't complain if nothing wrong with the camera
i has previously started a thread with the issues with my camera with screen shots of the poor quality picture at that time. It�s better now but not like before the cold snap. https://acurazine.com/forums/second-.../#&gid=1&pid=4
i has previously started a thread with the issues with my camera with screen shots of the poor quality picture at that time. It�s better now but not like before the cold snap. https://acurazine.com/forums/second-.../#&gid=1&pid=4
Maybe the silicate Gel is still an option for you then. Mine started with the same blurriness issues before a complete blackout (i suspect the -20 degrees C at that time to be the leading factor).
My 2014 RDX has an access panel inside that pops off allowing me to get to the camera. The camera comes out by reaching from the outside and squeezing a lock lever at the front (toward front of car) of the camera and simply dropping it through the hole. I can't figure out how to got the connector undone. Is there a lock/latch on it or do I just pull the other harness out?
My 2014 RDX has an access panel inside that pops off allowing me to get to the camera. The camera comes out by reaching from the outside and squeezing a lock lever at the front (toward front of car) of the camera and simply dropping it through the hole. I can't figure out how to got the connector undone. Is there a lock/latch on it or do I just pull the other harness out?
There is a lock only on one side of the connector that you need to squeeze when pulling it off. Look at the last picture that i posted, the big white connector at the right side is what you have to keep connected to the camera when removing it (it may look like 2 connectors but actually it is a single block).
I know this thread is almost a year old, but wanted to chime in and say that the camera from ebay (https://www.ebay.com/itm/263753191834 for under $30) works great in my 2015 RDX. My old camera must've blown a seal somewhere and let the moisture in.
The downside is that the new camera doesn't seem to respond to the different view modes (e.g. wide vs normal) via the control panel. I'm OK with that as it's "set" at what I think is the wide angle mode which is what I always used anyway with the stock camera.
Also, I did not have to remove the whole set of inner trim as there are two access panels that you can pry out to give you access. You also need to release the exterior trim piece so you can fish out the camera after you pop free the spring tabs holding it in. All in all, a pretty easy fix. It took me about half an hour, mostly just figuring out all the bits that needed to be released, and could probably do it again in half that time.
Could you provide any additional information to help with this repair? Would you have an pictures possibly? What access panels? What spring tabs? Thanks Much!
I know this thread is almost a year old, but wanted to chime in and say that the camera from ebay (https://www.ebay.com/itm/263753191834 for under $30) works great in my 2015 RDX. My old camera must've blown a seal somewhere and let the moisture in.
The downside is that the new camera doesn't seem to respond to the different view modes (e.g. wide vs normal) via the control panel. I'm OK with that as it's "set" at what I think is the wide angle mode which is what I always used anyway with the stock camera.
Also, I did not have to remove the whole set of inner trim as there are two access panels that you can pry out to give you access. You also need to release the exterior trim piece so you can fish out the camera after you pop free the spring tabs holding it in. All in all, a pretty easy fix. It took me about half an hour, mostly just figuring out all the bits that needed to be released, and could probably do it again in half that time.
I am stuck With how to remove the trim above the license plate to free the disconnected camera. Please Help!
I am stuck With how to remove the trim above the license plate to free the disconnected camera. Please Help!
This is the most stubborn piece of them all and care must be taken to not damage the chrome piece above from prying. Use a placard (junk mail advertisement)and or some masking tape to protect the chrome. Myself I used a beefy flat head screwdriver and a metal prybar. Working from about center towards left, get the glatscrew driver wedged in then twist it to create a bigger gap, then use the pry to push down. Myself used my hands to pop out the first one. The left edge was more stubborn but it came out with some little force. By doing just the left side 2 brackets was enough to bend it down enough to move camera. Care must be taken as it can break/ snap easily especially in colder weather. When all done, bracket can be pushed back in with a few good palm twacks. For me it's easy because I've been ripping apart cars since a teen, but for any first timers, best of luck and be careful, perform at your own risk and be prepared to buy new parts if anything breaks, otherwise get your hands dirty and learn away
This is the most stubborn piece of them all and care must be taken to not damage the chrome piece above from prying. Use a placard (junk mail advertisement)and or some masking tape to protect the chrome. Myself I used a beefy flat head screwdriver and a metal prybar. Working from about center towards left, get the glatscrew driver wedged in then twist it to create a bigger gap, then use the pry to push down. Myself used my hands to pop out the first one. The left edge was more stubborn but it came out with some little force. By doing just the left side 2 brackets was enough to bend it down enough to move camera. Care must be taken as it can break/ snap easily especially in colder weather. When all done, bracket can be pushed back in with a few good palm twacks. For me it's easy because I've been ripping apart cars since a teen, but for any first timers, best of luck and be careful, perform at your own risk and be prepared to buy new parts if anything breaks, otherwise get your hands dirty and learn away
Thanks for you response. I am definitely trying to learn. It appears that I am able to pry the camera out, but I still not able to completely remove this piece of trim. Something appears to be holding both the right and left edge of this trim. I can not see any similar clips from the inside. What am I missing?
Thanks for you response. I am definitely trying to learn. It appears that I am able to pry the camera out, but I still not able to completely remove this piece of trim. Something appears to be holding both the right and left edge of this trim. I can not see any similar clips from the inside. What am I missing?
So hopefully we are speaking of the piece of trim above the licence plate, below the chrome trim that houses the backup Cam and trunk release button. If so, that piece has probably 4 (maybe 5?) Clips holding it in, and it is a real stubborn piece to pop out.
Hence why I only popped out the 2 (maybe 3) clips on one side. If you can find some sort of flatbar to wedge in there, it will come out eventually. If I recall they are metal clips. Might take some hefty controlled oomph and grit to pop em out, almost feels like it's gonna break something or that they are rusted in, but it will give eventually, best of luck amigo
Yes, that is exactly the piece we are talking about. I was able to pop out the clips from the inside, but I am having trouble with the corners of this piece. I do not see any other clips from inside and not sure what may be holding that corner in place. Any info specific to the corner?
My 2014 RDX has an access panel inside that pops off allowing me to get to the camera. The camera comes out by reaching from the outside and squeezing a lock lever at the front (toward front of car) of the camera and simply dropping it through the hole. I can't figure out how to got the connector undone. Is there a lock/latch on it or do I just pull the other harness out?
Same issue here, and thanks for the heads up about the access panel!
Apparently I missed the part about how you cleaned the lens from the inside? I'm thinking about taking the cover off, clean the lens, then use a light coat of gel glue...what do you think?
This was a relatively easy task as far as removing enough trim to get the camera out. I have a '14 RDX with the Tech pkg. There is an upper access panel in the hatch door, which is easy to remove. I pulled the plug for the camera out of it's security hole and unplugged it. I then reached up and pushed on the clip holding the camera in place and that allowed the camera to be free to pull out - but not yet! You will see some white push-in buttons that will release the black trim above the license plate. I pried it down from the outside and stuck a vinyl coated handle from needle nose pliers in the gap, creating tension. from the inside, I used a pair of small Channelocks to squeeze the button tabs together. Working carefully, I was able to pull the trim piece down enough to get the camera out. There IS another white, spindly button that is above and next to the opening where the camera is located. Once you get this one free the camera comes out pretty easily without having to do trim removal.
I thought I could try and take the cover off the camera and clean the lens, since the camera was still working...won't happen! It's a completely sealed unit! I took the micro screws out and literally unplugged the harness from the actual camera and, short of destroying it, you will not get it open! I drilled a 1/16 hole in the attempt to dry out the inside - again, to no avail. It was actually dry inside.
What I DID see was some white, kind of crystalline looking material somewhat surrounding most of the lens. At this point I knew ANY kind of repair was impossible and have to buy a new one. I have an extended warranty and am hoping it is still in effect! I will try and do an update as soon as I get some answers.
I have a 2014 RDX with a bad camera as well. Just wondering how the replacement worked out for you. Did it fit and bolt in to the RDX easily. Just wondering because the ad shows that is for a CRV so wanted to make sure before I buy the same one. Thanks
I recently replaced this camera assembly on my 2014 RDX and took some pictures I hope may be helpful to others. Contributing to this thread because it was the most helpful to me. See notes below.
A couple of bullet points:
I did not fully remove the outside trim at either end. I'm not sure what it would take to do so.
I didn't have to pry anything very hard or force anything. The clips are fairly easy to release from inside with a pliers by squeezing and pushing, though it's cramped.
I believe it should be possible to replace on the camera with an equivalent Honda part available on eBay (see details further on) for about $20, though I myself used the full camera assembly OEM part.
This took less than a half hour.
Tools required: a butter knife (for releasing the access panel), a flat blade screwdriver (for detaching the wiring), a smaller pair of needle-nosed pliers (for releasing clips, wiring clip), a small philips screwdriver (for taking apart the camera assembly), hands, a headlamp for good lighting.
Removing and replacing the camera assembly, unclipping it and re-clipping it to the door frame takes some delicacy. Go slow and make sure you're not mangling the foam seals or trying to force something out of place.
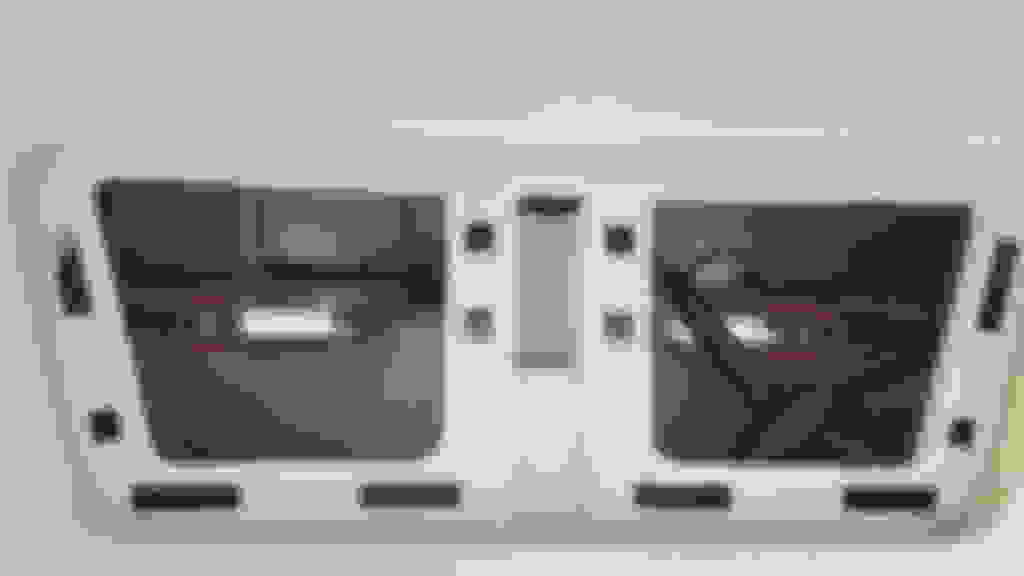
inside door view with access cover removed -- I used a butter knife to open the panel
outside view (clips already loose)
inside left view with two small clips and center large clip marked
inside center view with camera assembly and wire marked
inside right view with two small clips marked
detail view of center clip
outside view with template pulled back and camera unclipped
Once all 5 clips are release--one large center clip and two small white ones on each side, there is enough give in the outside panel to remove the camera.
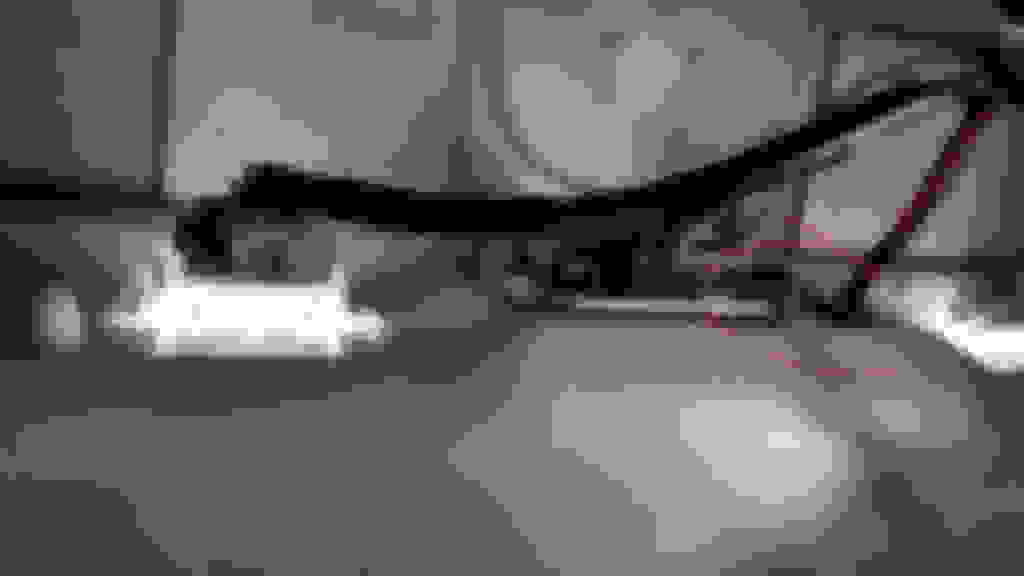
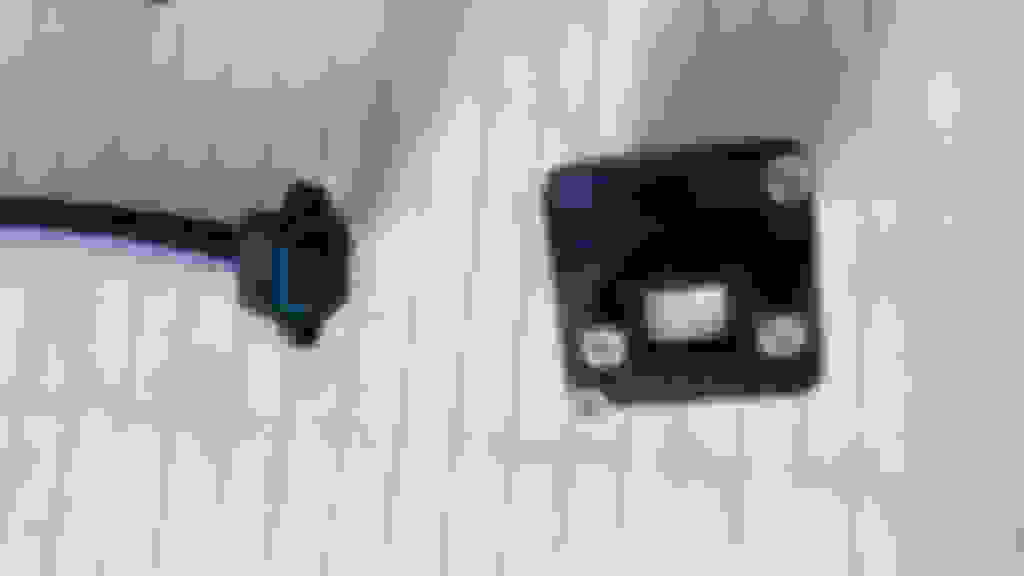
outside view of center clip replacement assembly with attachments marked
Camera assembly releases from inside via a clip at the rear end of the vehicle. The camera wire attaches via a clip to a metal bracket inside the door. The wiring harness snaps together on one side and can be released with a screwdriver. All of these attachment points should be released prior to removing the camera.
If you want to attempt a much less expensive repair, I suggest the following:
Watch this Youtube video about a camera-only repair on a CR-V:
In my mind, there's about a 99% certainty this repair could be completed for $20 by swapping only the camera. The a011-m1 component of the part number suggests that this is the identical part, but only available independent of the assembly (camera + bracket + wire) through the Honda supply chain. To be clear, I did not try this myself. By the time I discovered this option I was already finished and I'm not spending another week of my life on this problem.
Update: I WAS able to have this replaced under warranty! For those of you who are OUT of warranty, you can do this yourself - with the proper tools and not try to take short cuts. Simply, go slow and be methodical!
I would look up the part number - or call the Acura Dealer somewhere - and then see if the camera can be found on Ebay or other discount store. You might find it a little cheaper through a Honda dealer if they say can cross the part number over, or they may know from experience!
You will get what you pay for! I saw another post on here stating you could by buy one off Ebay for $20! Wouldn't do it.
You could also check salvage yards, like LKQ, and see if they have one.
Is it possible to upgrade the camera to a high resolution or better night vision? I'm not sure if the low resolution is due to the camera or the display screen in the car.
I think one of the easiest ways to improve the night operation of the rear camera is to upgrade the back up lights. Look at threads about LED upgrades.
I think one of the easiest ways to improve the night operation of the rear camera is to upgrade the back up lights. Look at threads about LED upgrades.
I think one of the easiest ways to improve the night operation of the rear camera is to upgrade the back up lights. Look at threads about LED upgrades.
I've put LEDs in my reverse lights on every vehicle I've owned and it is one of the best things that anybody can do. It definitely helps you see more with the backup camera.
What have people's experiences been with eBay replacement cameras? I just ordered one today for our RDX as the rear camera is almost useless right now. The lens looks clear, but the image is barely visible on the screen. I don't know if it's something on the camera lens itself or not. I ordered the full assembly since the last time I pulled the camera out it was too cold and the clip that holds it in place broke.
Hi. I replaced ours, on a 2014 RDX, about 3 years ago. As you probably found out, they are NOT repairable! Fortunately, our car has an extended warranty and it was replaced by the dealer, but not before I did take it out and tried to fix it. If you buy one from Ebay, I would make sure the seller offers returns. I was going to go this route also, but I also checked prices at a couple of online OEM dealers. I've used Acurapartsonline just to get the correct part number and pricing, and then go find that part, which is probably what you've already done. Just be VERY careful installing the new one, as the clips ARE breakable. Good luck!
Well, the eBay camera came in today. Quality of construction for the clip/housing portion isn't great compared to OEM. There's a big opening in it, so water/dirt/etc could get into the lift gate, but since my OEM camera clip broke previously, not much different. The wiring coming from it also isn't as nice, but that shouldn't be an issue. Considering it only cost me $102, I'm not going to complain. After getting it installed, put the vehicle in reverse and all camera views work and I can actually see again. Hopefully it lasts a few years.
That's what I saw with the after-market cameras as well...BUT, you saved $150 and it works! Good for you! Like I said...I was fortunate enough to have mine under warranty!
I think one of the easiest ways to improve the night operation of the rear camera is to upgrade the back up lights. Look at threads about LED upgrades.
I already did the LED reverse lights change. Didn�t really help. My backup camera is so bad at night. It�s odd because it�s clear in the daytime. I really want to upgrade it. I�m probably going to have the guy who installed my aftermarket CarPlay, LEDs and remote start do it. It�s frustrating that the 2019 RDX had CarPlay as standard and I have the 2018. Not trading in/selling my car as it�s only got 50k miles and I�m retired so I don�t want a bigger loan. I�m not going to try it myself. Too inexperienced.
i followed these steps and was able to replace the camera with one off eBay. But the picture came out flipped (so the image is upside down), I even bought a second to be sure and got the same result. The camera only has 2 screws and can only go in one way, would appreciate any advice or comments if anyone encountered a similar situation and figured it out.
Thank you in advance and appreciate all this advice I found!
I have discovered a way to fix the foggy and water inside the cameras lens. It prevents water from going inside when it rains or weather is cold.
Thanks for the input, you have probably saved many here a lot of time with the discovery you have made. Hope someday you might document just what and how you
made this great piece of work happen.
 02-27-2018, 06:11 PM


 . They just showed my dad how to increase the brightness of the screen and advised to call back if the problem recurs. Whatever, .......if it saves me money I'm not going to complain... ha ha.