Dspr_02's Spark Plug DIY
 06-26-2012, 06:55 PM
#1
Racer
Thread Starter
So you want to change your spark plugs...
Well I sure did and I wasn't going to pay my mechanic $65 for the job
Step 1: Open the hood. Stare at the J32A1/A2 menacingly, if you stare at it menacingly enough it will play nice.
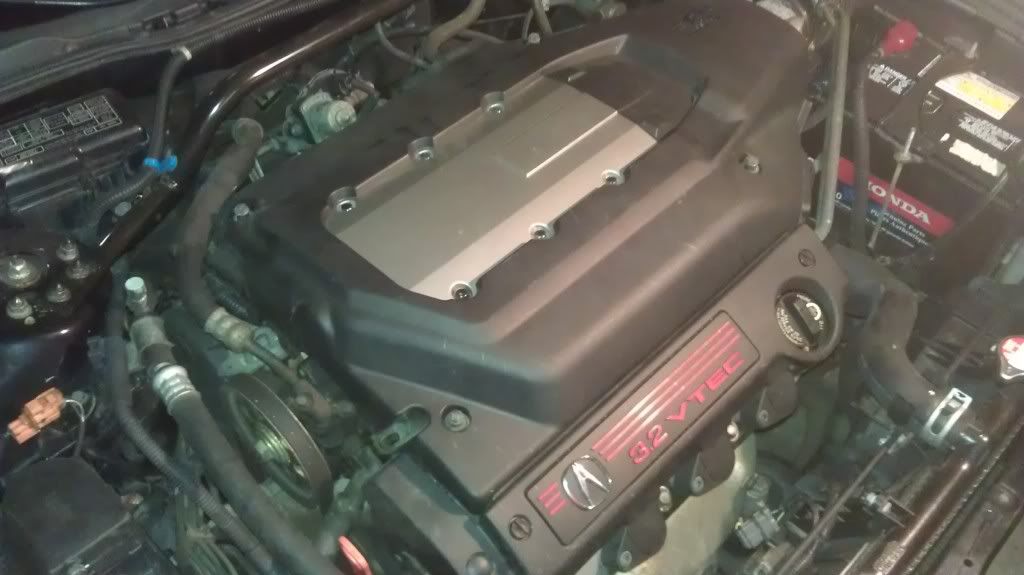
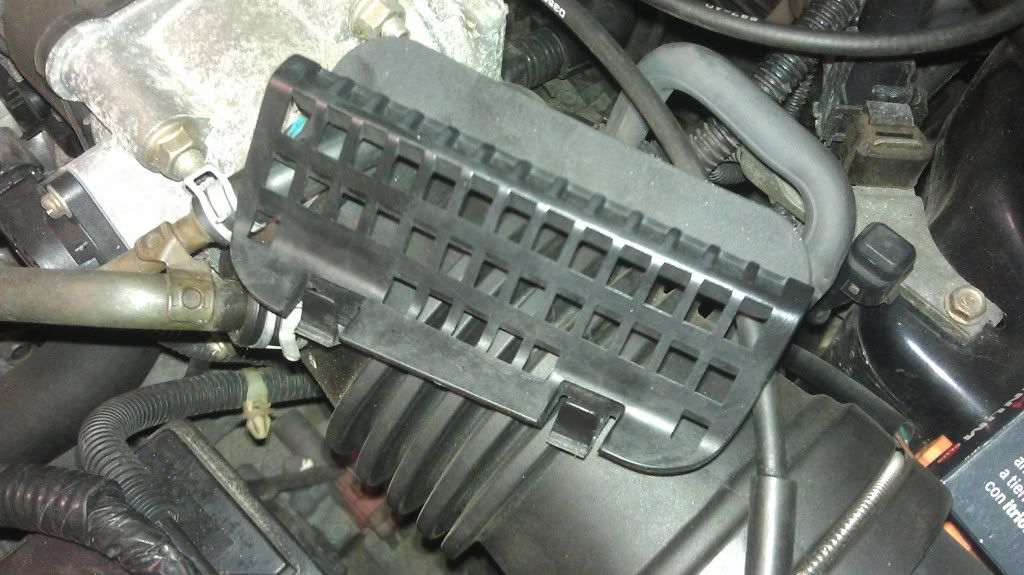
Step 2: Remove engine covers. They are useless and do nothing to help performance (no, shiny plastics do not add 10 horsepower, sorry).
There are two parts, one that covers the ignition coil wires and another that rests on top of the block.
In total there are 4 10mm bolts on the engine block and two plastic screws and a pushy-clippy thingy (accept it Civicdrivr ). Turn the two plastic screws (flat blade) on the plastic cover that is over the ignition coil wires counter clockwise, they will stop by themselves. Grab the left and right side of the cover and pull towards the bumper and up, with a bit of force it comes off easy.
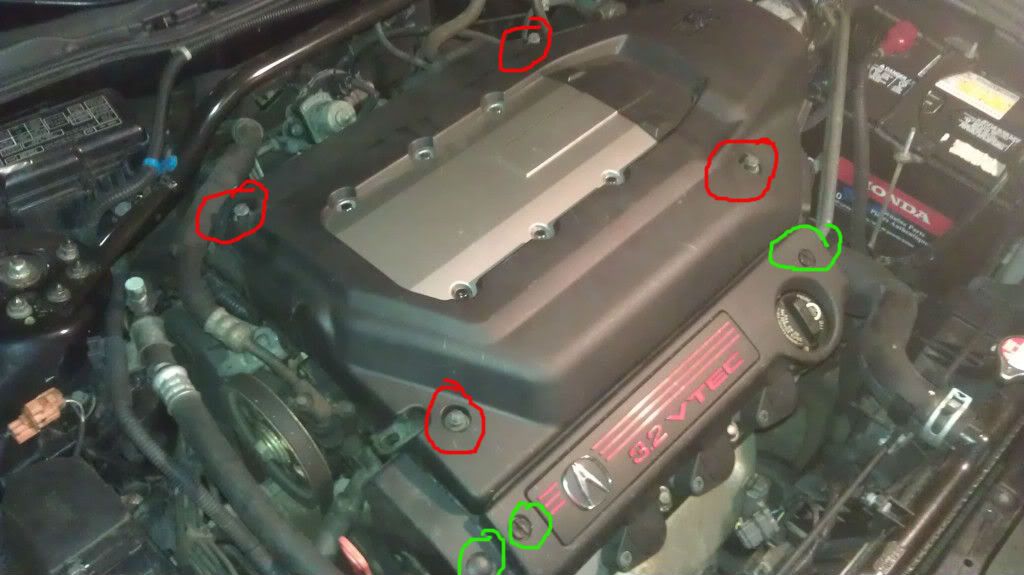
The four engine cover bolts are circled (poorly) in red. The two plastic screws and the pushy-clippy thingy are circled in green (again, poorly).
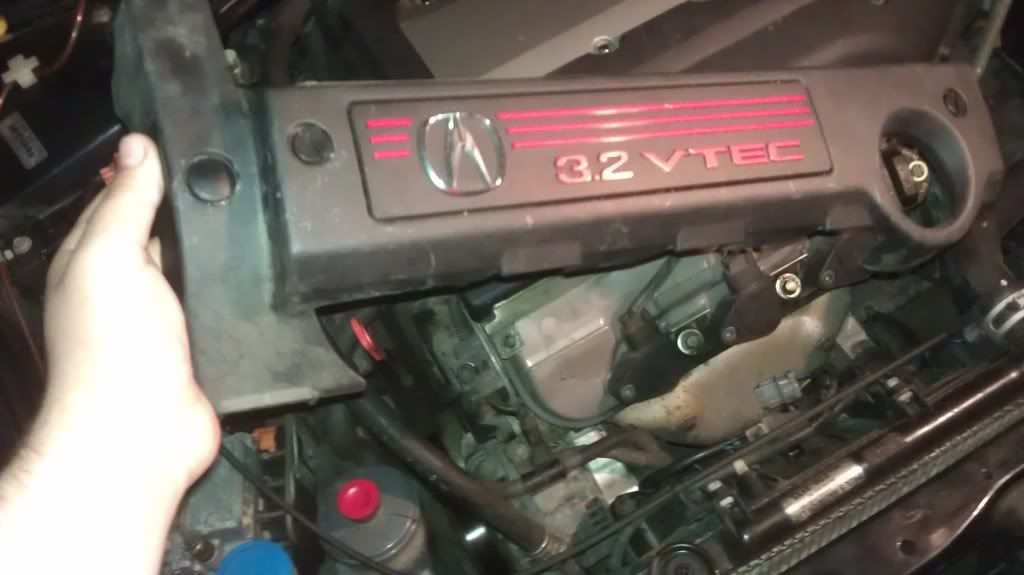

You should see the above once you are done. The bare J32 engine.
Step 3: Uncoil the ignition. In other words, you are now going to remove the ignition coils from the engine. I suggest doing it one by one as not to have debris from the engine bay or environment fall into the spark plug well and cause headaches.
I would recommend you start off by removing the ignition wires from the coils before unscrewing the bolts as they wiggle around make it harder. I did it after and I am still alive so...
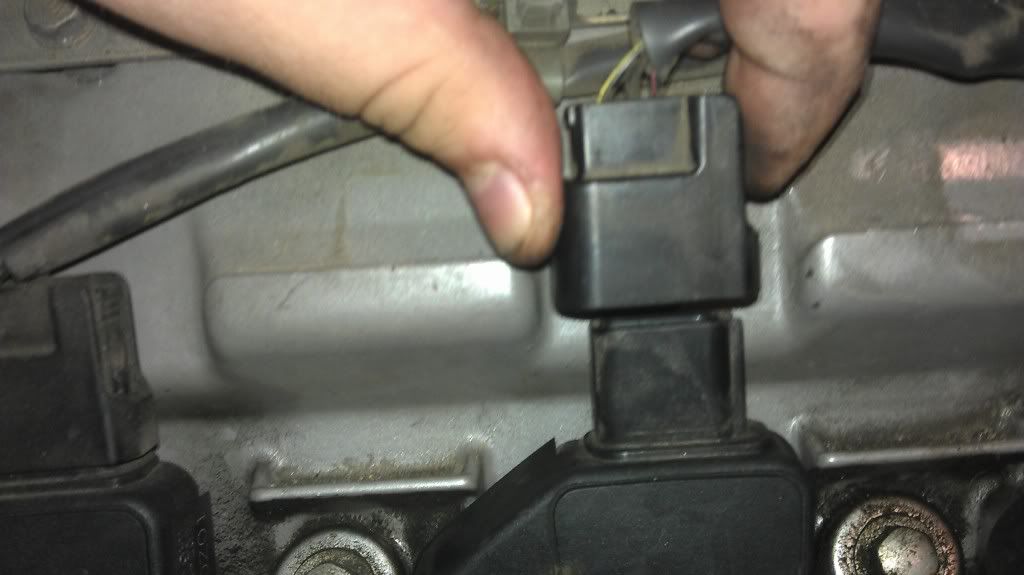
There is a tab on one side (right I think) that you need to push in (with some force) and wiggle the cable connector up.
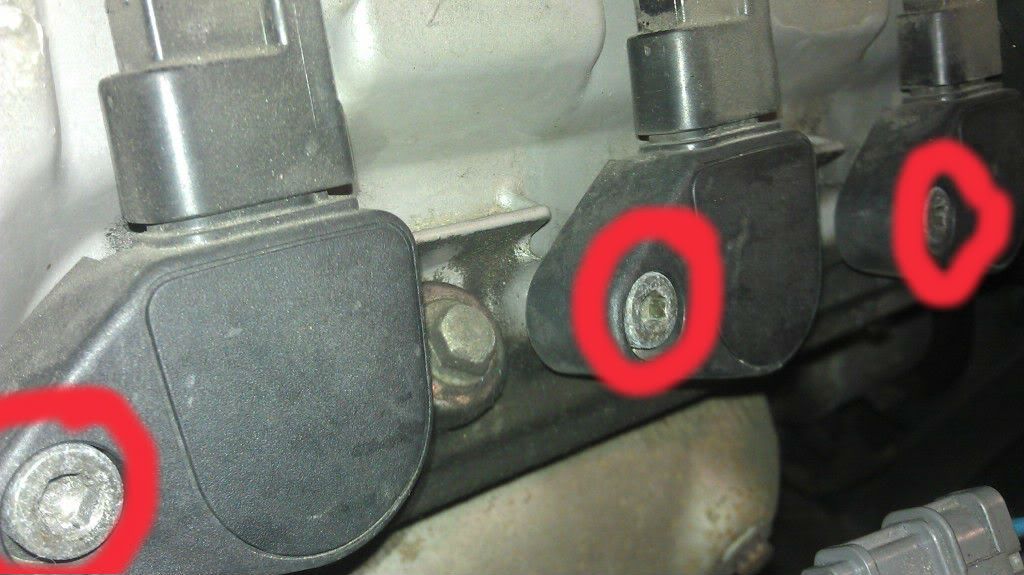
Circled in red (still poorly) you will see a bolt on each of the ignition coils. This hole will take a 6mm hex bit. I used a 3/8" socket that had a 6mm hex bit factory welded on. A set of 7 ranging from 3 to 9 mm cost like $8 at the auto parts store.
You can see the bit below.
Once you have the bolt out, pull the coil upwards. You end up with this:
DO NOT DROP THE COIL, DO NOT TOSS THE COIL SOMEWHERE UNDER THE HOOD, DO NOT TOSS THE COIL SOMEWHERE AGAINST THE WINDSHIELD AND DO NOT YELL AT THE COIL.
These things are somewhat fragile and cost $50 a pop if you find em cheap. About $75 or so from Acura. I put mine on my passenger seat as it was a soft and safe place for it, it was also out of the elements.
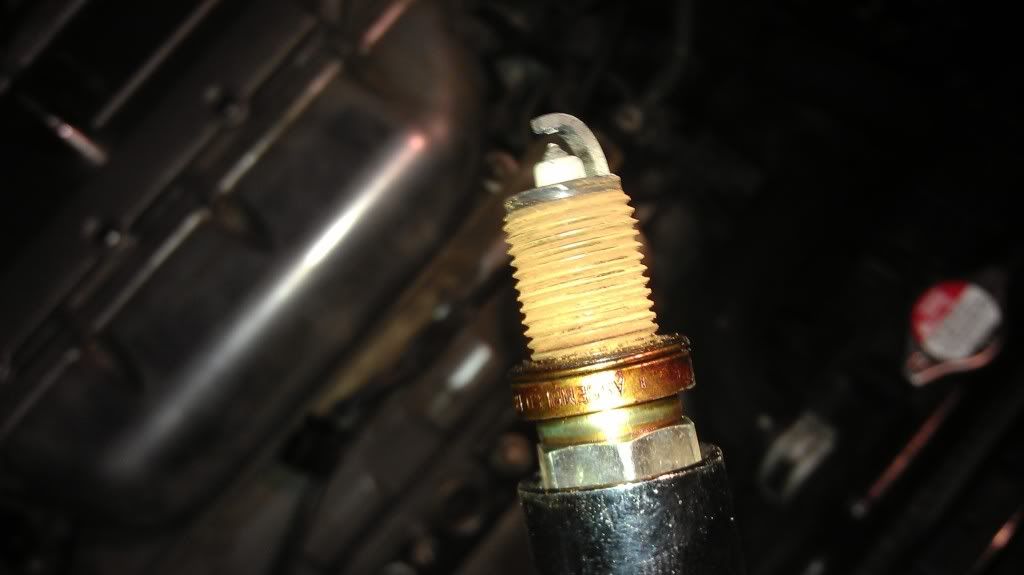
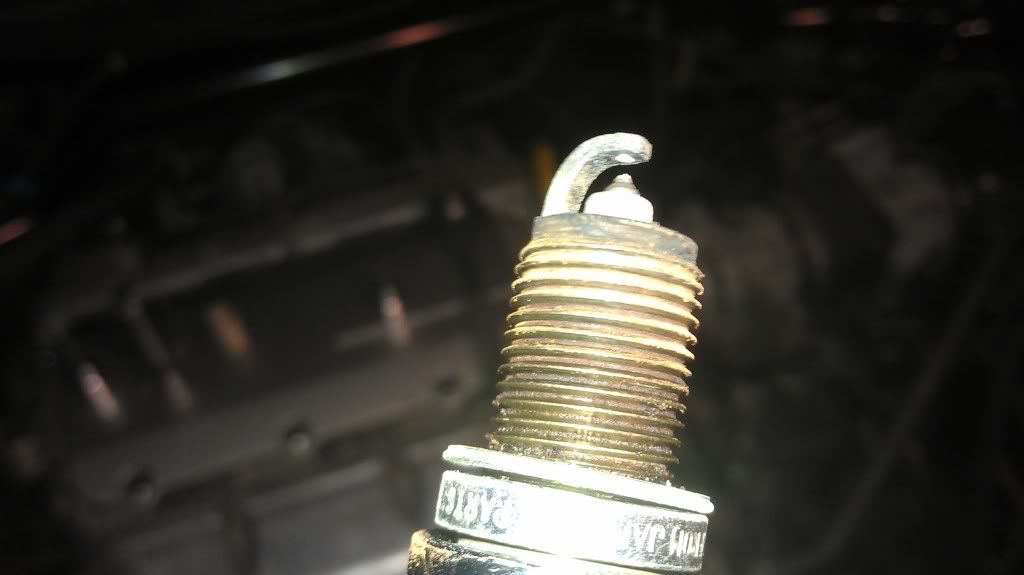
Step 4: Removing the plugs.
I do not have extensive pictures on this, but it is straightforward. I used a 5/8" spark plug socket on a 6" extension to my ratchet. My spark plug socket was kinda crappy and the rubber ring inside got stuck to the plugs a few times so beware of this. I checked the socket after every plug to make sure it was still there.
I also recommend unscrewing the plug with a ratchet until you feel it let go then remove the ratchet and slowly spin the extension counter clockwise while you slowly pull up. I found this to be the only way to pull the plug out without it falling out of the spark plug socket.
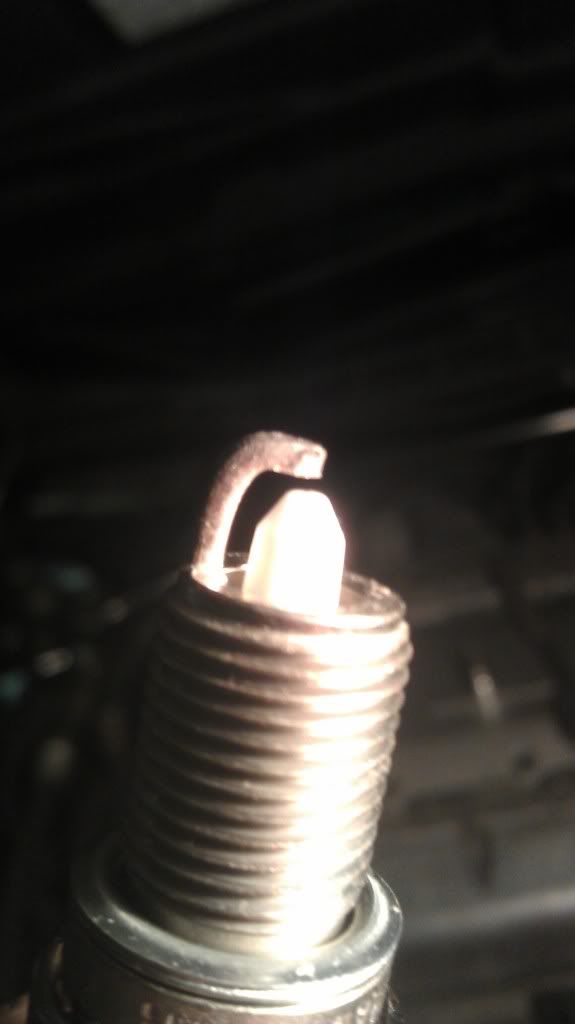
And a 1:
And a 2:
And a 3:
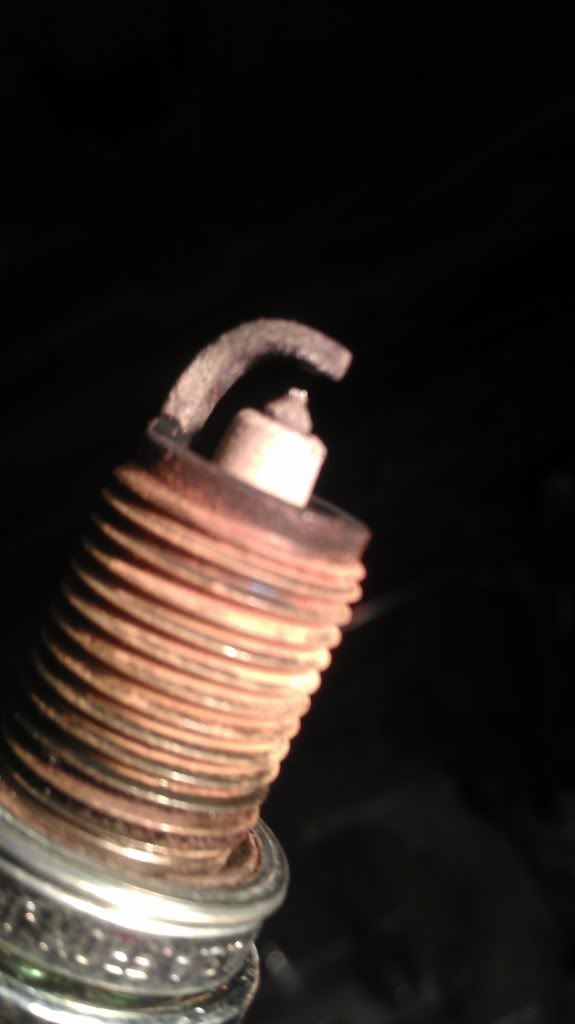
And a brand new plug for comparison's sake:
Putting in the new plugs:
Dropping the new plugs in was easy as they grip onto the spark plug socket and you can lower them in using the reverse of taking them out. Save yourself a lot of trouble, start the plugs by hand, turn them by hand until you cant turn them anymore THEN use a ratchet to snug them up. This way you won't cross thread since you will feel if they go in nicely or if they screw up.
Put the coils back on, screw in the bolt on the ignition coil, connect the electrical cable and you are done, do the same for all the plugs.
Step 5: This part is optional, it made my life easier when I was fighting with the rear middle plug.
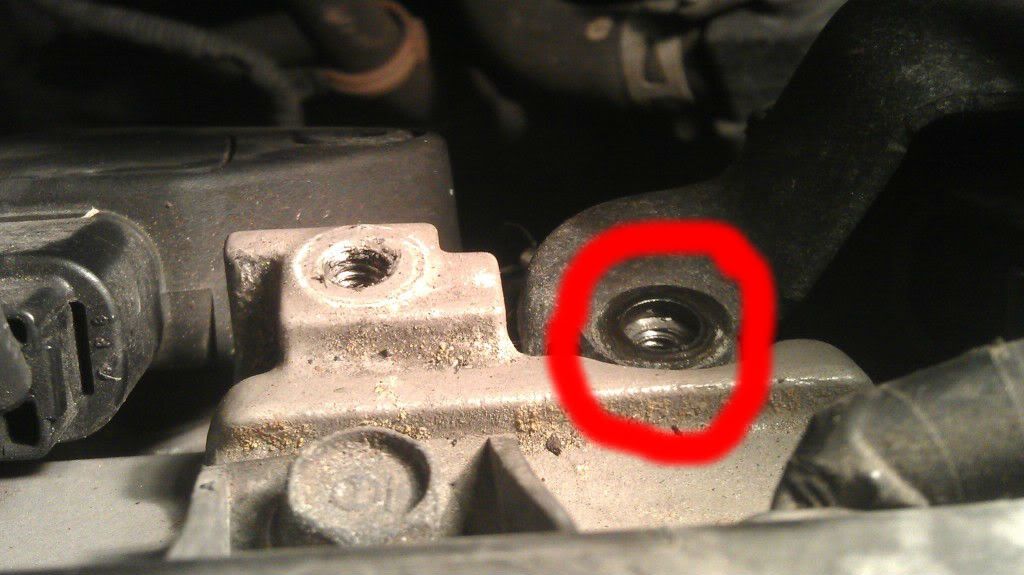
This step is removing the nuts on the strut bar. This allows the strut bar to move up and down so you can shuffle stuff around. If you have larger hands, go do this. You'll thank me (and yourself) later.
There are 9 nuts you need to remove.
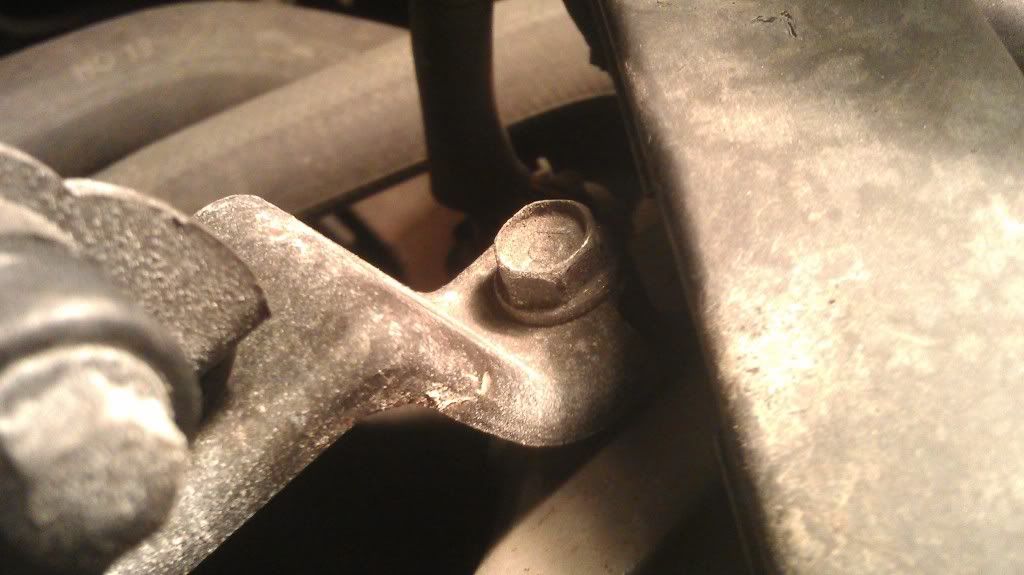
2 on either side of the engine bay, in plain sight, 2 on either side of the engine bay hiding under the perforated plastic thingy in-front of the windshield and one near the passenger side fuse box. This fuse box one allows the strut bar to move more freely.
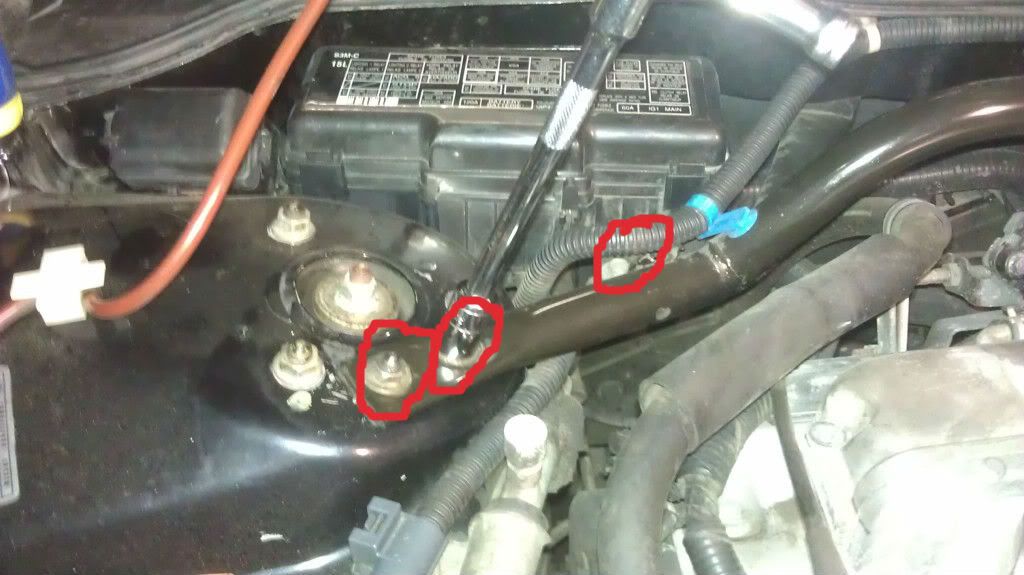
This is the passenger side (still poorly circled). You need to remove those three nuts.
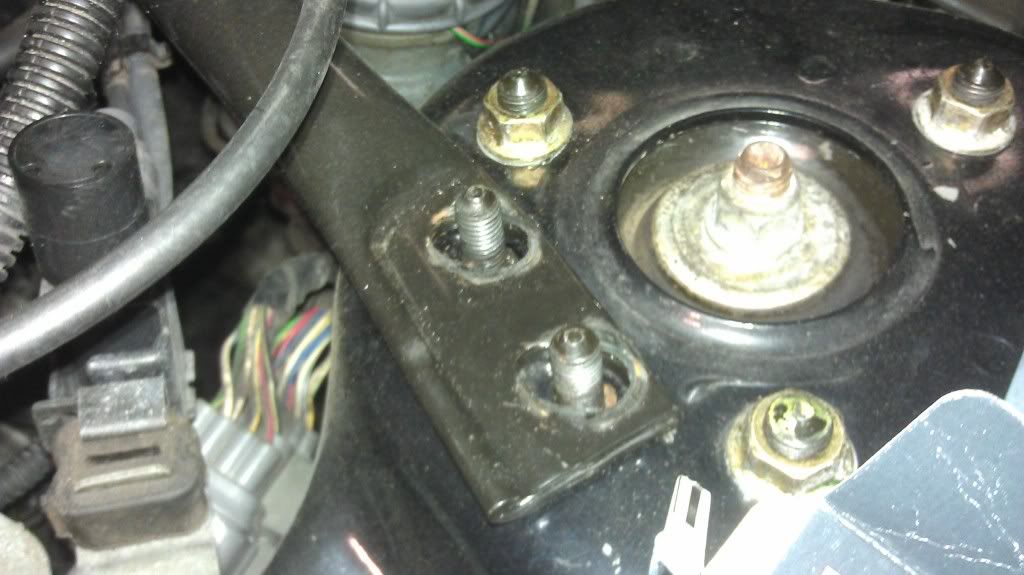
That is the driver side. You need to remove the same nuts on this side. I didn't bother circling them because they are obvious.
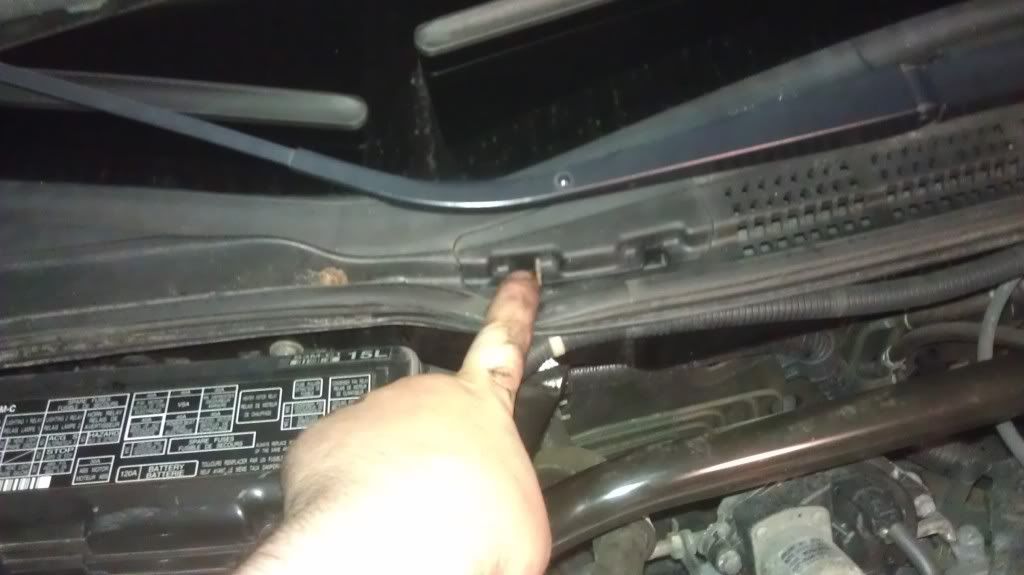
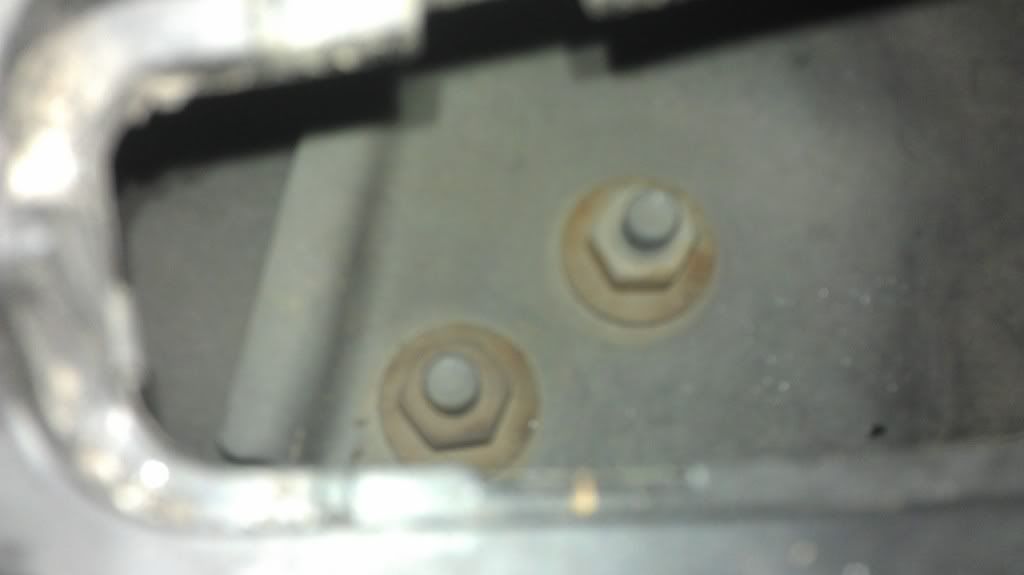
THAT. Is where the other two passenger side under-windshield-thingy strut bar nuts are.
And this is the close up:
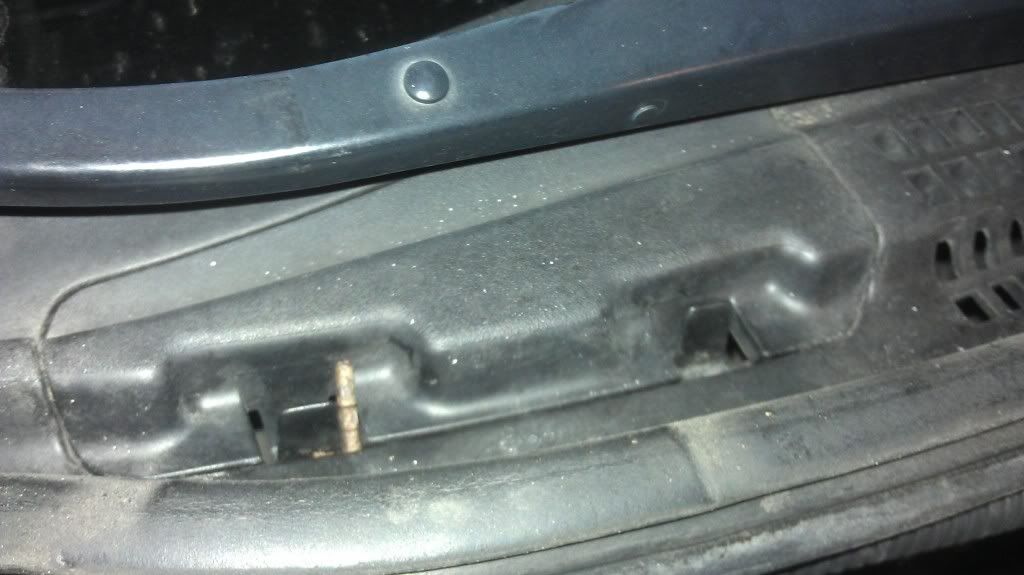
And what is underneath:
I forgot to take a pic of the driverside location but you can find it if you can count to two. The driver side cover looks like this :
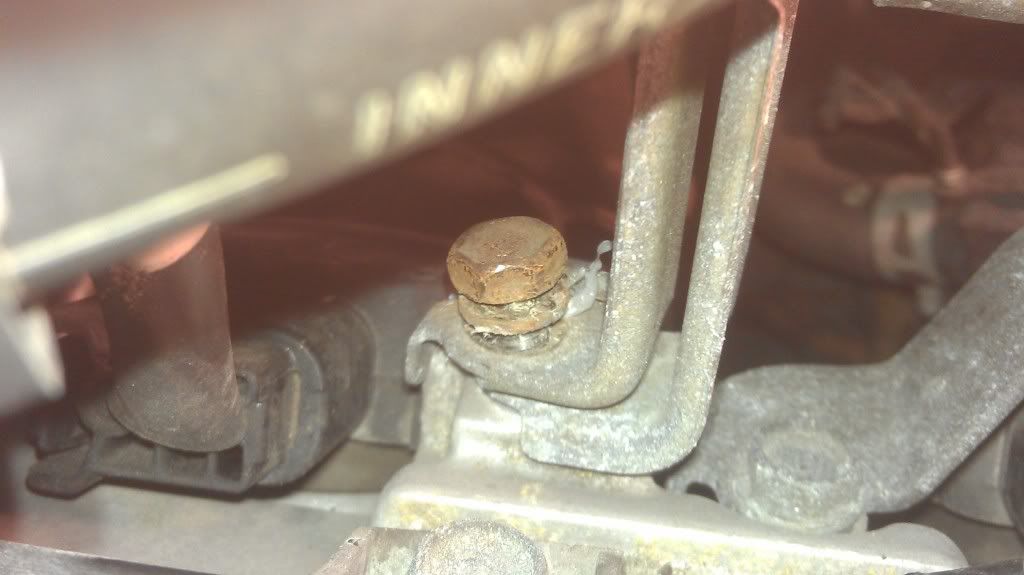
It was a slight pain to get these two bolts out since there was a metal pipe in the way, but I got em out, getting them back will be equally fun.

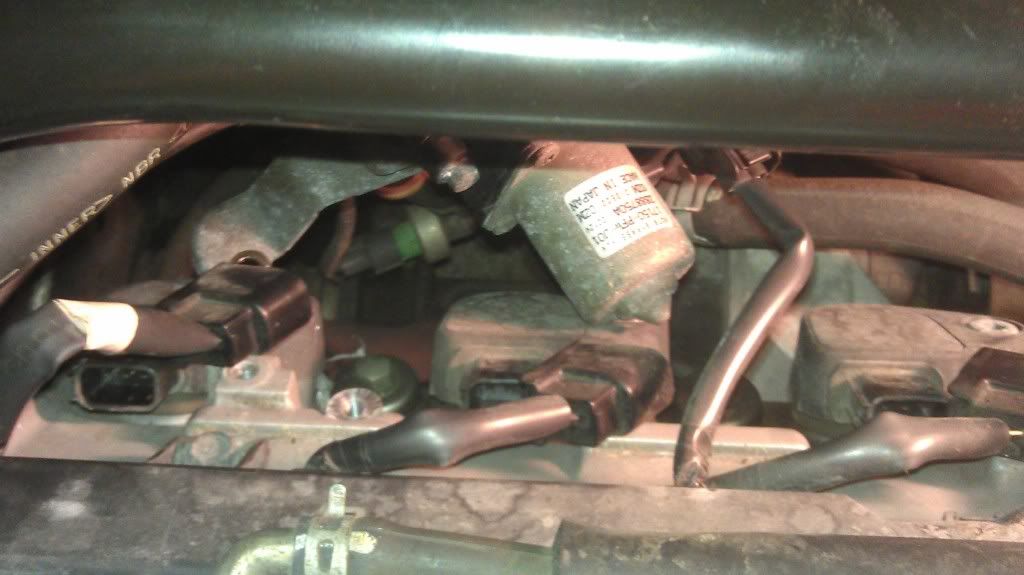
Step 6: Now that the ignition coils and the optional step 5 are done, you can move on to removing what I believe to be the Low Idle Air Control thingymabobber.
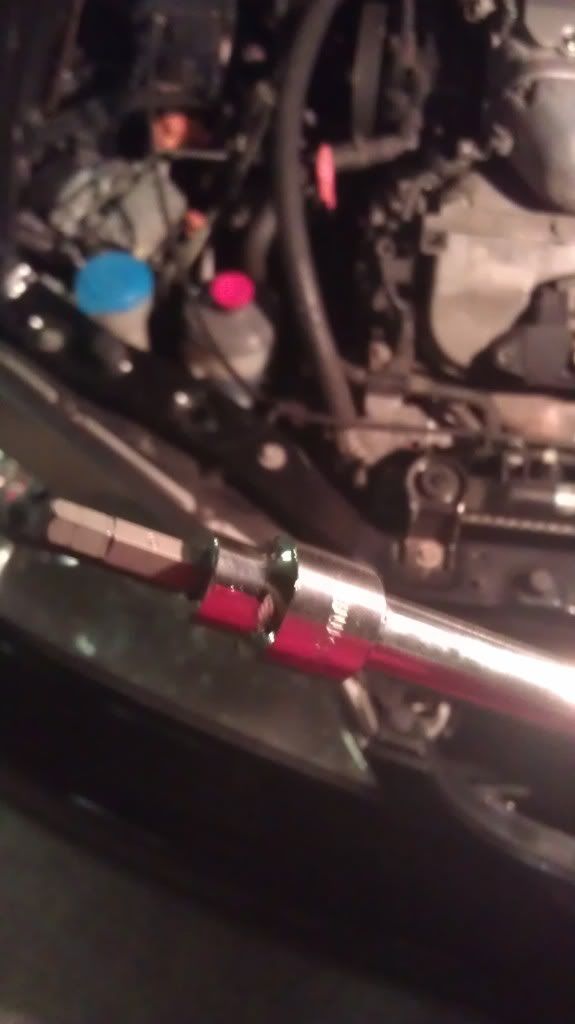
You will need to unbolt the large hose in the way first. I think it was a 10mm socket or a 9mm to get this bolt off.
It is the rusted brown one, too lazy to circle (poorly).
I used a 6 in extension to get it off. I then took the bolt off and put is someplace safe (sunroof ) then tucked the metal base thing under a wire sheathing near the passenger side fuse box:
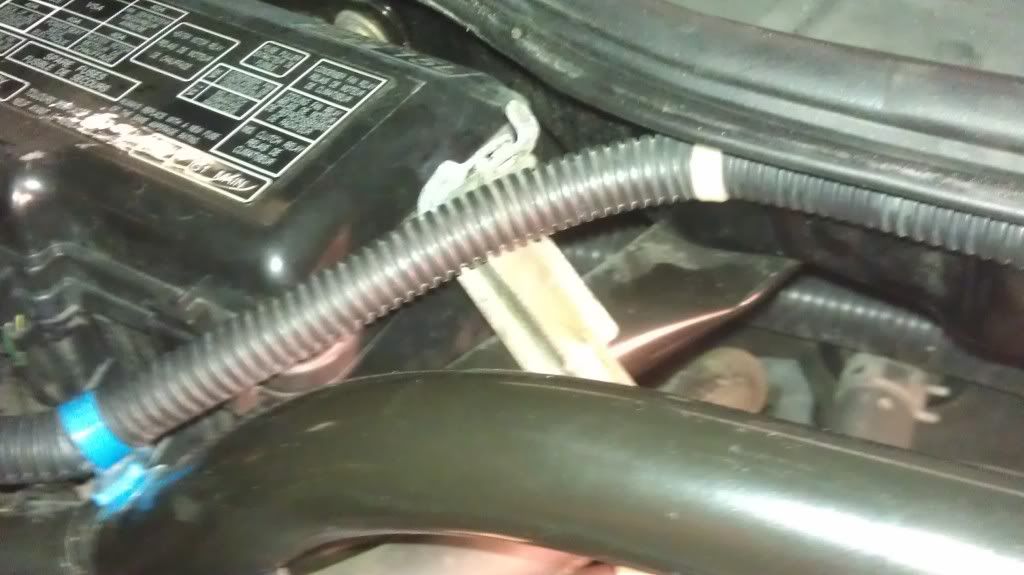
This helps keep it out of the way and minimizes cuts from the damn thing.
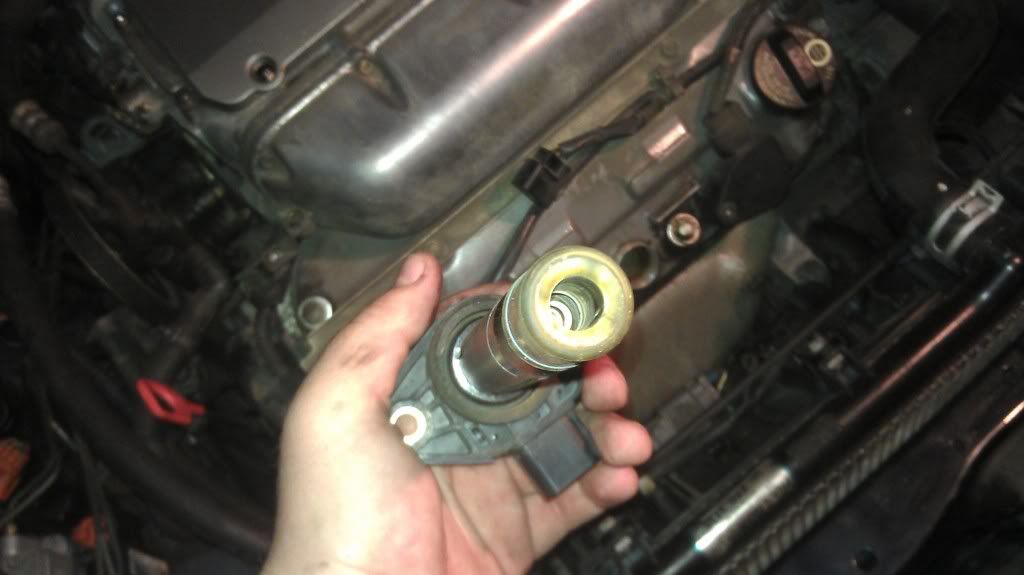
Now to the main attraction of this step, removing the Idle Air Control thingymabobber.
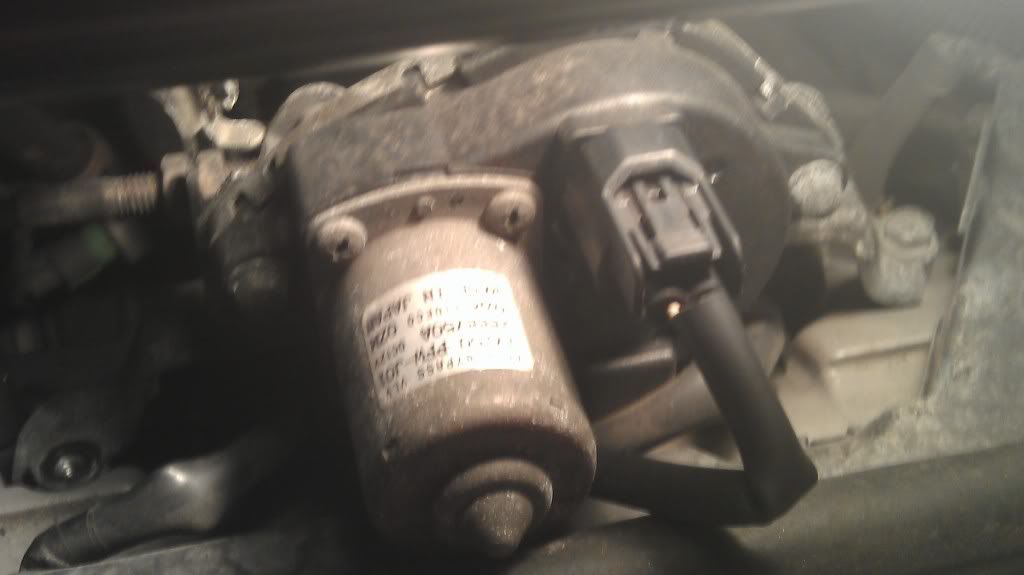
Two bolts on either side of it. 12mm if I do recall correctly.
I had to (poorly) circle the area where the bolt was because I took it off before I took the picture...
Here is the other bolt.
Now I unplugged the electrical connector to it and tucked the thing down under the ignition coil closest to the passenger side against the firewall, it is resting on some cables.
This picture is before I found the better position stated above, this is just an idea.
Step 7: Removing the ignition Coils
What I did is I just used the 6mm hex socket bit, placed it in the hole and ran my hand under the strut bar with the ratchet and attached it there. I then just went about unscrewing the bolt normally.
Pulling out the ignition coils is a bit tricky and you might need to use two hands to not drop them, I had no problems with this. I pulled the coil up and towards the firewall, slowly arcing it so that it would clear all the cabling and hosery. The most difficult one is the one closest to the passenger side as it is a VERY close fit and I had less than a mm of clearance between it and the cables in my CL.
Step 8 : Pulling the plugs.
For the plugs, I used the 6" extension with the spark plug socket attached at the end. I got it to go in very easily by holding the spark plug socket in my hand and pushing the extension towards the firewall, under the strut bar and then angling the area where the ratchet attaches upwards towards the windshield. There is an area that works perfectly for this and allows the socket with extension to very easily slide into the spark plug well. Check the video at the end.
I ran into great difficulties with the middle rear spark plug where it decided to cement its self in place with rust. I have at the time of this writing still got the spark plug exposed and WD40 is eating away the rust. Do not try to super-force it out, it should come out nicely. Stripping the threads will cost you dearly.
Step 9: New Plugs Part 2
Dropping the new plugs in was easy as they grip onto the spark plug socket and you can lower them in using the reverse of taking them out. Save yourself a lot of trouble, start the plugs by hand, turn them by hand until you cant turn them anymore THEN use a ratchet to snug them up. This way you won't cross thread since you will feel if they go in nicely or if they screw up.
Again, put the ignition coil back, screw in the bolt, connect the electrical and repeat for the rest of the plugs.
Step 10: Put the car back together.
Put the car back together in the reverse of how you tore it apart. Idle Air Control, then the line that we took the bolt off, then the strut bar, then whatever else I forgot to list here, then the engine covers if you want. I left mine off.
Step 11: Curse or Laugh...
Close everything up, sit in the driver seat, say a prayer or six, turn the key.
If it starts, shout with joy, laugh, express your happiness.
If it doesn't start, choose your favorite curse words and start shouting.
Others on this forum will help troubleshoot if need be, I am too inexperienced to be of any use, sorry.
Step 12: Have a beer. Wait a while before you drive... (don't drink and drive please).
You're done. You did it. You changed your Spark Plugs. Yay you! We knew you could do it.
Step 13 is purely optional :

Video as promised a billion steps ago:
Turn off the sound, seriously, I don't speak (have a cold) and the phone's mic picks up the ratchet and amplifies it like mad...
Enojoy folks
Well I sure did and I wasn't going to pay my mechanic $65 for the job
Step 1: Open the hood. Stare at the J32A1/A2 menacingly, if you stare at it menacingly enough it will play nice.
Step 2: Remove engine covers. They are useless and do nothing to help performance (no, shiny plastics do not add 10 horsepower, sorry).
There are two parts, one that covers the ignition coil wires and another that rests on top of the block.
In total there are 4 10mm bolts on the engine block and two plastic screws and a pushy-clippy thingy (accept it Civicdrivr
). Turn the two plastic screws (flat blade) on the plastic cover that is over the ignition coil wires counter clockwise, they will stop by themselves. Grab the left and right side of the cover and pull towards the bumper and up, with a bit of force it comes off easy. The four engine cover bolts are circled (poorly) in red. The two plastic screws and the pushy-clippy thingy are circled in green (again, poorly).
You should see the above once you are done. The bare J32 engine.
Step 3: Uncoil the ignition. In other words, you are now going to remove the ignition coils from the engine. I suggest doing it one by one as not to have debris from the engine bay or environment fall into the spark plug well and cause headaches.
I would recommend you start off by removing the ignition wires from the coils before unscrewing the bolts as they wiggle around make it harder. I did it after and I am still alive so...
There is a tab on one side (right I think) that you need to push in (with some force) and wiggle the cable connector up.
Circled in red (still poorly) you will see a bolt on each of the ignition coils. This hole will take a 6mm hex bit. I used a 3/8" socket that had a 6mm hex bit factory welded on. A set of 7 ranging from 3 to 9 mm cost like $8 at the auto parts store.
You can see the bit below.
Once you have the bolt out, pull the coil upwards. You end up with this:
DO NOT DROP THE COIL, DO NOT TOSS THE COIL SOMEWHERE UNDER THE HOOD, DO NOT TOSS THE COIL SOMEWHERE AGAINST THE WINDSHIELD AND DO NOT YELL AT THE COIL.
These things are somewhat fragile and cost $50 a pop if you find em cheap. About $75 or so from Acura. I put mine on my passenger seat as it was a soft and safe place for it, it was also out of the elements.
Step 4: Removing the plugs.
I do not have extensive pictures on this, but it is straightforward. I used a 5/8" spark plug socket on a 6" extension to my ratchet. My spark plug socket was kinda crappy and the rubber ring inside got stuck to the plugs a few times so beware of this. I checked the socket after every plug to make sure it was still there.
I also recommend unscrewing the plug with a ratchet until you feel it let go then remove the ratchet and slowly spin the extension counter clockwise while you slowly pull up. I found this to be the only way to pull the plug out without it falling out of the spark plug socket.
And a 1:
And a 2:
And a 3:
And a brand new plug for comparison's sake:
Putting in the new plugs:
Dropping the new plugs in was easy as they grip onto the spark plug socket and you can lower them in using the reverse of taking them out. Save yourself a lot of trouble, start the plugs by hand, turn them by hand until you cant turn them anymore THEN use a ratchet to snug them up. This way you won't cross thread since you will feel if they go in nicely or if they screw up.
Put the coils back on, screw in the bolt on the ignition coil, connect the electrical cable and you are done, do the same for all the plugs.
Step 5: This part is optional, it made my life easier when I was fighting with the rear middle plug.
This step is removing the nuts on the strut bar. This allows the strut bar to move up and down so you can shuffle stuff around. If you have larger hands, go do this. You'll thank me (and yourself) later.
There are 9 nuts you need to remove.
2 on either side of the engine bay, in plain sight, 2 on either side of the engine bay hiding under the perforated plastic thingy in-front of the windshield and one near the passenger side fuse box. This fuse box one allows the strut bar to move more freely.
This is the passenger side (still poorly circled). You need to remove those three nuts.
That is the driver side. You need to remove the same nuts on this side. I didn't bother circling them because they are obvious.
THAT. Is where the other two passenger side under-windshield-thingy strut bar nuts are.
And this is the close up:
And what is underneath:
I forgot to take a pic of the driverside location but you can find it if you can count to two. The driver side cover looks like this :
It was a slight pain to get these two bolts out since there was a metal pipe in the way, but I got em out, getting them back will be equally fun.
Step 6: Now that the ignition coils and the optional step 5 are done, you can move on to removing what I believe to be the Low Idle Air Control thingymabobber.
You will need to unbolt the large hose in the way first. I think it was a 10mm socket or a 9mm to get this bolt off.
It is the rusted brown one, too lazy to circle (poorly).
I used a 6 in extension to get it off. I then took the bolt off and put is someplace safe (sunroof
) then tucked the metal base thing under a wire sheathing near the passenger side fuse box:This helps keep it out of the way and minimizes cuts from the damn thing.
Now to the main attraction of this step, removing the Idle Air Control thingymabobber.
Two bolts on either side of it. 12mm if I do recall correctly.
I had to (poorly) circle the area where the bolt was because I took it off before I took the picture...
Here is the other bolt.
Now I unplugged the electrical connector to it and tucked the thing down under the ignition coil closest to the passenger side against the firewall, it is resting on some cables.
This picture is before I found the better position stated above, this is just an idea.
Step 7: Removing the ignition Coils
What I did is I just used the 6mm hex socket bit, placed it in the hole and ran my hand under the strut bar with the ratchet and attached it there. I then just went about unscrewing the bolt normally.
Pulling out the ignition coils is a bit tricky and you might need to use two hands to not drop them, I had no problems with this. I pulled the coil up and towards the firewall, slowly arcing it so that it would clear all the cabling and hosery. The most difficult one is the one closest to the passenger side as it is a VERY close fit and I had less than a mm of clearance between it and the cables in my CL.
Step 8 : Pulling the plugs.
For the plugs, I used the 6" extension with the spark plug socket attached at the end. I got it to go in very easily by holding the spark plug socket in my hand and pushing the extension towards the firewall, under the strut bar and then angling the area where the ratchet attaches upwards towards the windshield. There is an area that works perfectly for this and allows the socket with extension to very easily slide into the spark plug well. Check the video at the end.
I ran into great difficulties with the middle rear spark plug where it decided to cement its self in place with rust. I have at the time of this writing still got the spark plug exposed and WD40 is eating away the rust. Do not try to super-force it out, it should come out nicely. Stripping the threads will cost you dearly.
Step 9: New Plugs Part 2
Dropping the new plugs in was easy as they grip onto the spark plug socket and you can lower them in using the reverse of taking them out. Save yourself a lot of trouble, start the plugs by hand, turn them by hand until you cant turn them anymore THEN use a ratchet to snug them up. This way you won't cross thread since you will feel if they go in nicely or if they screw up.
Again, put the ignition coil back, screw in the bolt, connect the electrical and repeat for the rest of the plugs.
Step 10: Put the car back together.
Put the car back together in the reverse of how you tore it apart. Idle Air Control, then the line that we took the bolt off, then the strut bar, then whatever else I forgot to list here, then the engine covers if you want. I left mine off.
Step 11: Curse or Laugh...
Close everything up, sit in the driver seat, say a prayer or six, turn the key.
If it starts, shout with joy, laugh, express your happiness.
If it doesn't start, choose your favorite curse words and start shouting.
Others on this forum will help troubleshoot if need be, I am too inexperienced to be of any use, sorry.
Step 12: Have a beer. Wait a while before you drive... (don't drink and drive please).
You're done. You did it. You changed your Spark Plugs. Yay you! We knew you could do it.
Step 13 is purely optional :
Video as promised a billion steps ago:
Turn off the sound, seriously, I don't speak (have a cold) and the phone's mic picks up the ratchet and amplifies it like mad...
Enojoy folks

The following 5 users liked this post by Dspr_02:
Catfisha (06-27-2012),
civicdrivr (06-27-2012),
INSPIRE 32V (06-27-2012),
mikebikelife (06-27-2012),
TinyNugs (01-04-2016)
06-26-2012, 10:50 PM
#3
Racer
Thread Starter
06-27-2012, 11:25 AM
#4
Hot Ass!
Well poo....some of the pictures are MIA....
Did that bastard plug release it's rusty grip yet?
I watched the video and noticed the yellow stripe on the ground. Since my mind thinks the dumb things first, I kinda thought of how funny it'd be if you did all that in the middle of the road!!
I know how it feels to not have a garage; it f'n SUCKS!!!
06-27-2012, 02:37 PM
#6
Racer
Thread Starter
Well poo....some of the pictures are MIA....
Did that bastard plug release it's rusty grip yet?
I watched the video and noticed the yellow stripe on the ground. Since my mind thinks the dumb things first, I kinda thought of how funny it'd be if you did all that in the middle of the road!!
I know how it feels to not have a garage; it f'n SUCKS!!!
Did that bastard plug release it's rusty grip yet?
I watched the video and noticed the yellow stripe on the ground. Since my mind thinks the dumb things first, I kinda thought of how funny it'd be if you did all that in the middle of the road!!
I know how it feels to not have a garage; it f'n SUCKS!!!
Who says I didn't do the spark plugs in the middle of the road, at night...

Yea, it sucks. I will let the mechanic blow up my engine, that way he can rebuild it and I don't have to foot the cost

I might invest in a small air compressor and some air-tools later down the road if I get more serious in automotive repairs...
06-27-2012, 03:29 PM
#7
Hot Ass!
Plug is so stuck, it makes *insert remainder of cheesy joke here*.
Who says I didn't do the spark plugs in the middle of the road, at night...
Yea, it sucks. I will let the mechanic blow up my engine, that way he can rebuild it and I don't have to foot the cost
I might invest in a small air compressor and some air-tools later down the road if I get more serious in automotive repairs...
Trending Topics
06-27-2012, 04:27 PM
#9
Racer
Thread Starter
We don't get much more than a week of light flurries here and very little road salt (if any) but my CL was neglected for ~ 10 years so it got pretty bad. Took it to the mechanic and back (on holiday till the 2nd) on 5 new plugs and it seems like the RPM's dropped by about 500 or so (now cruise at 1500 instead of 2000) and the acceleration is slightly better, though these may just be me imagining things... the voices tell me I'm crazy all the time.
The WD40 I sprayed in the plug well didn't ignite or smoke so that was a plus.
Well, being the bawss that I am, I will "let him" charge me ~$10 for a single plug on top of the coolant flush and oil change I plan on doing. I'll see if I can get under the car to do the flex pipe measurements while he's working on it so I can get that fixed too.
Also all of the bolts to remove the Idle Control thingy and the thick hose were 10mm bolts, the strut bar had 9 12mm bolts. So you only really need :
- 10mm socket
- 12mm socket
- 6mm hex head socket
- 5/8" spark plug socket
- ratchet
- 6" extension
- flat blade screwdriver
Last edited by Dspr_02; 06-27-2012 at 04:34 PM.
06-27-2012, 05:08 PM
#10
Hot Ass!
Hope it will be helpful
We don't get much more than a week of light flurries here and very little road salt (if any) but my CL was neglected for ~ 10 years so it got pretty bad. Took it to the mechanic and back (on holiday till the 2nd) on 5 new plugs and it seems like the RPM's dropped by about 500 or so (now cruise at 1500 instead of 2000) and the acceleration is slightly better, though these may just be me imagining things... the voices tell me I'm crazy all the time.
The WD40 I sprayed in the plug well didn't ignite or smoke so that was a plus.
Well, being the bawss that I am, I will "let him" charge me ~$10 for a single plug on top of the coolant flush and oil change I plan on doing. I'll see if I can get under the car to do the flex pipe measurements while he's working on it so I can get that fixed too.
Also all of the bolts to remove the Idle Control thingy and the thick hose were 10mm bolts, the strut bar had 9 12mm bolts. So you only really need :
- 10mm socket
- 12mm socket
- 6mm hex head socket
- 5/8" spark plug socket
- ratchet
- 6" extension
- flat blade screwdriver
Aww...aren't you nice! I usually "schmooze" to get things free or discounted. Being female has it's perks!!
 06-27-2012, 05:50 PM
#11
Whats up with RDX owners?
iTrader: (9)

Well written.
Theres really no need to remove the stock strut tower bar though.
Theres really no need to remove the stock strut tower bar though.
06-27-2012, 05:55 PM
#12
Racer
Thread Starter
It did come in handy to have it loose like I did where it could shift up and down to squeeze tools/hands/arms in there.

Greatly helped when my breaker bar rolled off of the valve cover and fell against the firewall...
 01-04-2016, 04:24 AM
#14
2nd Gear

Hey dude - great DIY and clear pictures.
I went ahead and did my plugs and coils. But I also want to change out the wires and clips connecting to the coil. Do you know what they are called/best kind to get?
I am new but quickly learning and want to do it right. Thanks for any help.
-N
__03CLS__
I went ahead and did my plugs and coils. But I also want to change out the wires and clips connecting to the coil. Do you know what they are called/best kind to get?
I am new but quickly learning and want to do it right. Thanks for any help.
-N
__03CLS__

Thread
Thread Starter
Forum
Replies
Last Post
acuratl26
2G TL (1999-2003)
24
04-23-2020 07:30 PM
ITSJESTER
4G TL Audio, Bluetooth, Electronics & Navigation
17
12-06-2018 02:29 AM
Joe Avesyan
3G TL Performance Parts & Modifications
9
09-29-2015 03:57 PM