DIY: 2004-2008 3G TL Clutch Master Cylinder Replacement
 08-16-2013, 05:39 PM
#1
First off, check out this thread: https://acurazine.com/forums/3g-tl-problems-fixes-114/my-clutch-slipping-short-video-893436/
These are the problems that I was having, as shown in this video:
After taking my vehicle into the Acura dealership for a PPI (pre purchase inspection), they told me that three different techs agreed that my clutch was not slipping and that the master cylinder was bad and at fault for the problems that I was experiencing.
You should consider changing your clutch master cylinder if:
1) You experience inconsistencies in your clutch pedal feel. Random stiffness, inconsistent engagement points, etc.
2) You lose your clutch pedal and have to pump it a couple times before you are able to shift into gear again.
3) You experience what seems like the clutch slipping at high RPMs as seen in the video above.
Changing out my clutch master cylinder solved all these problems for me made the clutch feel so much better.
Clutch master cylinder can be purchased by clicking here for only $65.65 with free shipping. OEM and cheaper than anywhere else.
On to the DIY...I'll include the service manual scans at the bottom for reference. Just as a little side note, this was my third least favorite install behind PCDs and rear camber kits.
1. First thing you will need to do is turn the wheel all the way to the left. You're doing this now with the vehicle started so that you don't have to do it after the battery is disconnected during your clutch bleeding process and have to turn it without the vehicle started which is not good for the rack or PS system.
2. Next disconnect the battery and unbolt the fuse box. You can remove your strut tower bar to get more room to work but I did not and was able to do everything just fine. If you have a stock air filter on the car, you're going to need to remove the lid so that you have more room to work and move things out the way. I have a CAI so I didn't have to do this step.
3. Next thing you will need to do is remove the driver under dash covers. I'm not going to go into details of this because it's very easy and I'm assuming you already know how to do this. It's a couple of clips that you need to pop out is all. Here's a picture of the panel for reference:


4. Next you will need to use a syringe or turkey baster and suck all of the brake fluid out of the clutch fluid reservoir pictured here.

After sucking the fluid out the reservoir, unbolt the reservoir from the car.

On the back of the reservoir, there will be a rubber hose attached via a clamp. After unbolting the reservoir, you will need to use needle nose pliers and squeeze the clamp and slide it down the hose away from the reservoir. This will allow you to remove the hose from the reservoir and pull the reservoir out.
5. Go back inside the car and look up underneath the dash where the clutch pedal connects to the end of the master cylinder as seen in this picture:

Go ahead and remove the cotter pin and dowel.
6. Remove nuts holding clutch master cylinder to firewall using a 12mm socket and extension.

7. Remove clutch line that attaches to the clutch master cylinder by removing the pin holding the line in.

Here's a picture of the clip in daylight for reference. This is all the further you should need to pull it out to release the clutch line.

After removing this line, remove the clutch master cylinder. You will have to remove it by first pulling it towards the passenger side of the car and then up and out where the fuse box is normally mounted to the strut tower bar. It should come out very easily.

8 Reinstall the clutch master cylinder in reverse order. There is nothing fancy that needs to be gone over, simply follow my instructions in reverse order. Follow the clutch bleeding procedure as detailed in the scans.
To limit fork travel on the slave cylinder, I cut a piece of broomstick to length (per rockstar's suggestion) and wedged it between my tire and the slave cylinder fork. You have to do this to bleed the clutch properly! Here's the bleeding process in short.
1) Fill up clutch reservoir with new DOT 3 or 4 brake fluid. I used the Valvoline synthetic brake fluid from Advance Auto Parts.
2) Have your helper pump the clutch 10-15 times and then on the last time hold it completely to the floor. Quickly open the bleeder screw on the slave cylinder with an 8mm wrench and then close it once the air/fluid has came out. Before having your helper release his foot from the clutch, remove the cap from the clutch fluid reservoir and top up with fluid. Reinstall cap and have him raise his foot from the clutch pedal and also lift the clutch back up with his foot since it will not have any pressure.
3) Repeat this process until no air comes out of the bleeder screw and it's just straight fluid. The two times that I have bled my clutch it has taken me at least 6 rounds of this to get all of the air out. It's a very simple and straight forward process.
If I missed anything, feel free to let me know. Hopefully this helps as a supplement to the service manual scans. I didn't like this install at all. Cut up my arms and hands all over.
One last thing to note, don't get brake fluid on the paint and if you do immediately wash it off with soap and water!


These are the problems that I was having, as shown in this video:
After taking my vehicle into the Acura dealership for a PPI (pre purchase inspection), they told me that three different techs agreed that my clutch was not slipping and that the master cylinder was bad and at fault for the problems that I was experiencing.
You should consider changing your clutch master cylinder if:
1) You experience inconsistencies in your clutch pedal feel. Random stiffness, inconsistent engagement points, etc.
2) You lose your clutch pedal and have to pump it a couple times before you are able to shift into gear again.
3) You experience what seems like the clutch slipping at high RPMs as seen in the video above.
Changing out my clutch master cylinder solved all these problems for me made the clutch feel so much better.
Clutch master cylinder can be purchased by clicking here for only $65.65 with free shipping. OEM and cheaper than anywhere else.
On to the DIY...I'll include the service manual scans at the bottom for reference. Just as a little side note, this was my third least favorite install behind PCDs and rear camber kits.
1. First thing you will need to do is turn the wheel all the way to the left. You're doing this now with the vehicle started so that you don't have to do it after the battery is disconnected during your clutch bleeding process and have to turn it without the vehicle started which is not good for the rack or PS system.
2. Next disconnect the battery and unbolt the fuse box. You can remove your strut tower bar to get more room to work but I did not and was able to do everything just fine. If you have a stock air filter on the car, you're going to need to remove the lid so that you have more room to work and move things out the way. I have a CAI so I didn't have to do this step.
3. Next thing you will need to do is remove the driver under dash covers. I'm not going to go into details of this because it's very easy and I'm assuming you already know how to do this. It's a couple of clips that you need to pop out is all. Here's a picture of the panel for reference:
4. Next you will need to use a syringe or turkey baster and suck all of the brake fluid out of the clutch fluid reservoir pictured here.
After sucking the fluid out the reservoir, unbolt the reservoir from the car.
On the back of the reservoir, there will be a rubber hose attached via a clamp. After unbolting the reservoir, you will need to use needle nose pliers and squeeze the clamp and slide it down the hose away from the reservoir. This will allow you to remove the hose from the reservoir and pull the reservoir out.
5. Go back inside the car and look up underneath the dash where the clutch pedal connects to the end of the master cylinder as seen in this picture:
Go ahead and remove the cotter pin and dowel.
6. Remove nuts holding clutch master cylinder to firewall using a 12mm socket and extension.
7. Remove clutch line that attaches to the clutch master cylinder by removing the pin holding the line in.
Here's a picture of the clip in daylight for reference. This is all the further you should need to pull it out to release the clutch line.
After removing this line, remove the clutch master cylinder. You will have to remove it by first pulling it towards the passenger side of the car and then up and out where the fuse box is normally mounted to the strut tower bar. It should come out very easily.
8 Reinstall the clutch master cylinder in reverse order. There is nothing fancy that needs to be gone over, simply follow my instructions in reverse order. Follow the clutch bleeding procedure as detailed in the scans.
To limit fork travel on the slave cylinder, I cut a piece of broomstick to length (per rockstar's suggestion) and wedged it between my tire and the slave cylinder fork. You have to do this to bleed the clutch properly! Here's the bleeding process in short.
1) Fill up clutch reservoir with new DOT 3 or 4 brake fluid. I used the Valvoline synthetic brake fluid from Advance Auto Parts.
2) Have your helper pump the clutch 10-15 times and then on the last time hold it completely to the floor. Quickly open the bleeder screw on the slave cylinder with an 8mm wrench and then close it once the air/fluid has came out. Before having your helper release his foot from the clutch, remove the cap from the clutch fluid reservoir and top up with fluid. Reinstall cap and have him raise his foot from the clutch pedal and also lift the clutch back up with his foot since it will not have any pressure.
3) Repeat this process until no air comes out of the bleeder screw and it's just straight fluid. The two times that I have bled my clutch it has taken me at least 6 rounds of this to get all of the air out. It's a very simple and straight forward process.
If I missed anything, feel free to let me know. Hopefully this helps as a supplement to the service manual scans. I didn't like this install at all. Cut up my arms and hands all over.
One last thing to note, don't get brake fluid on the paint and if you do immediately wash it off with soap and water!
Last edited by JJH; 08-16-2013 at 05:44 PM.

The following 8 users liked this post by JJH:
azeezp13 (07-07-2014),
bluetl04 (08-27-2013),
BxTrini_TL (01-30-2014),
HQTL6SPD (08-20-2013),
LGcbp8 (04-18-2016),
and 3 others liked this post.

 08-18-2013, 02:10 PM
#7
Burning Brakes
iTrader: (1)
I'll be picking up Heeltoe's clutch/FW kit soon when it is officially for sale and will definitely use this DIY as a reference because I planned on doing the master cylinder at the same time. Thanks
The following users liked this post:
FGbG-Tech CyberModz3D (05-07-2020)
Trending Topics
08-19-2013, 03:08 PM
#8
Drifting
iTrader: (1)
Join Date: Nov 2010
Location: Salt Lake City, UT
Age: 42
Posts: 3,490
Received 849 Likes
on
605 Posts
It's good to hear I'm not the only one. I've been having random stiffness of the clutch occasionally. Right now it's very seldom, maybe once or twice a month. My first thought was the master cylinder as well but I thought it could be something goofy with the TL's self adjusting clutch. I'll probably give this a try soon.
08-19-2013, 03:11 PM
#9
Race Director
iTrader: (1)
Dude. Nice DIY.
MY advice is wear latex/neoprene gloves when wrenching. Lol
MY advice is wear latex/neoprene gloves when wrenching. Lol
The following users liked this post:
JJH (08-19-2013)

 08-27-2013, 02:22 PM
#12
Burning Brakes
iTrader: (4)
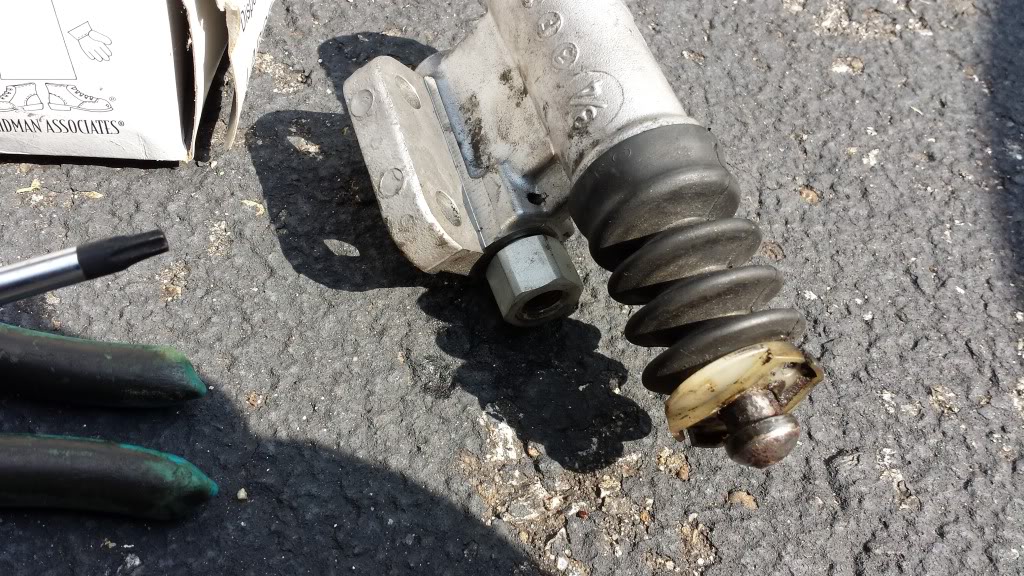
Hey man, have changed out your slave cylinder?. I'm asking cause I'm doing mine and taking the old one out and looking at it, it seems to have a white plastic piece at the end but the new one doesn't. And it doesn't come off the old one..here is the pic...
09-16-2013, 01:12 AM
#15

thanx a lot for posting this bro I actually have the same problem but I never though it was my clutch cause it still grips really good I asked a few mechanics and they told me it was the clutch but I still never agreed with them I watched a episode of wheeler dealer the other day and they replaced a master cylinder due to the same problems so I stated looking into it and saw this post so now basically u just fully confirmed it for me .... thank you
great right up ill be doing this soon...
great right up ill be doing this soon...
09-18-2013, 04:32 PM
#16

This awesome post. I just purchased a second 6mt an I got guy take grand off thevasking price cuz the clutch just didnt feel right, but it grips real good. After seeing this post I was positive my clutch master cylider is the cause, parts come in tomarrow
10-24-2013, 02:11 AM
#17

Hi all, I just recently purchased a 2005 TL 6spd. Love the car!
However I saw the video, I have the same thing as seen in the video. I went ahead and ordered a new MC from O'Reillys. Replaced it, bled it, took it out, still the same.......
I know its not the clutch because it grabs no problem. If I time the clutch release it will grab and spin both tires in 2nd shifting from 1st no problem.
I'm thinking maybe the MC I got is lower grade or something? The one the OP got is from ebay and it states its JDM from japan.
I'm not sure what to do.. Order that one from ebay? or try the slave cylinder?
10-24-2013, 02:30 PM
#19
It does have 150,000 miles on it... I guess I'll have to start saving up on for a new clutch and flywheel.
But how does a clutch self adjust? I looked at a TL clutch online, I don't see how it can self adjust. It looks same as other MT clutches I have replaced in the past.
But how does a clutch self adjust? I looked at a TL clutch online, I don't see how it can self adjust. It looks same as other MT clutches I have replaced in the past.
10-24-2013, 02:40 PM
#20
It does have 150,000 miles on it... I guess I'll have to start saving up on for a new clutch and flywheel.
But how does a clutch self adjust? I looked at a TL clutch online, I don't see how it can self adjust. It looks same as other MT clutches I have replaced in the past.
But how does a clutch self adjust? I looked at a TL clutch online, I don't see how it can self adjust. It looks same as other MT clutches I have replaced in the past.
You'll have to ask someone more knowledgeable on the subject to get a better explanation.
10-24-2013, 03:06 PM
#21
Is there a non self adjusting clutch kit out there? Or are all the TL replacement clutches even performance ones already self adjusting?
Also other thing, I was reading around the forum (tons of information) I ran into a thread about removing slave cylinder check valve.
After reading, its purpose is to slow down the fluid flow for a better smoother shifting. That would affect high rpm fast shifting... Has anyone with the same symptoms I am having done the check valve removal and did it help? I could do that tonight get it out and see how it turns out.
10-24-2013, 10:08 PM
#23
 11-30-2013, 02:25 AM
#26
the overexplainer
looking into this again, and a source for a new MC.
JJH, just a heads up that link you posted links to a part that was succeeded (newest part is A04). A03 apparently has a clicking/popping issue, at least according to TSBs. Could be why it was so cheap, but that should be pretty much the only thing wrong with it. the clicking isnt a sign of premature failure i dont think.
JJH, just a heads up that link you posted links to a part that was succeeded (newest part is A04). A03 apparently has a clicking/popping issue, at least according to TSBs. Could be why it was so cheap, but that should be pretty much the only thing wrong with it. the clicking isnt a sign of premature failure i dont think.
01-06-2014, 12:49 PM
#27

I still think a stiff pedal and moving engagement is due to self adjusting clutch. The 3.5L luk flywheel is finally back in stock and mine arrived last week so I'm looking forward to getting it installed. For anyone with the moving engagement point issue, I found that you can "reset" the self adjusting clutch by using more throttle and a higher gear to let the clutch slip until the pedal is further out.
07-06-2014, 10:51 PM
#28
Registered Bike Offender
iTrader: (3)
Just replaced the MC on my 08. Wanted to add something to this thread. I generally follow the service manual instructions religiously. But if you look at step 11 on page 12-9 from the instructions above, it says to remove the hose from those clips. On the 08, there are two such clips, one of them recessed deep on the clutch pipe underneath the brake booster making it impossible to get to.
The fact that there are two clips also make it impossible to remove the MC by disconnecting the pipe from it by removing the U clip. (Step 7 in OP instructions). To save everyone some frustration and time, I strongly suggest simply cutting the clips off with a knife/boxcutter and removing the pipe/MC while they're still attached to each other, then removing the cut clips from the chassis and replacing the clips and rubber grommets that go around the pipe.
I honestly have no fucking idea how they expect to remove those clips with the pipe still attached. I tried this and ended up bending the pipe a bit.
Specifically, if you plan to replace the MC on an 07-08, get 2 #30's and 2 #18's from this diagram: http://www.oemacuraparts.com/auto-pa...6-speed-manual
The following users liked this post:
JJH (07-08-2014)
05-13-2015, 11:41 PM
#29
4th Gear

Join Date: May 2015
Location: StL, MO
Posts: 4
Likes: 0
Received 0 Likes
on
0 Posts
First let me say that this write up saved me a ton of heart ache. I was having the exact same issues and they were solved by replacing the MC. The only thing that I had to do differently was removing the hardline fittings from the MC. I could not get the U-pin out for the life of me. Instead I used two stubby wrenches, 17mm and 10mm, to remove the hardline from the fitting. Then I was able to put the old MC in a vice and drive out the U-pin. I was careful enough not to damage it and I was able to reuse it on the new MC.
Be forewarned it took me about an hour total to remove the fittings and reattach them. The male fitting is brass and can easy cross thread or strip if you don't get it lined up and started properly.
Be forewarned it took me about an hour total to remove the fittings and reattach them. The male fitting is brass and can easy cross thread or strip if you don't get it lined up and started properly.
07-24-2015, 11:40 AM
#30
6th Gear

Join Date: Jul 2015
Posts: 6
Likes: 0
Received 0 Likes
on
0 Posts
Just wanted to update this DIY because I am performing the same work on my TL. The updated part version for the Clutch Master Cylinder is now 46920-S7A-A04. It has been this for sometime but I see no one mentioning it.
Also I would like to add that you want this part and this part only! Dont make the mistake I made in being cheep and going through Autozone or any place of that sort. My CMC failed (not completely, but its shit none the less) after less than 2000 miles.
Also I would like to add that you want this part and this part only! Dont make the mistake I made in being cheep and going through Autozone or any place of that sort. My CMC failed (not completely, but its shit none the less) after less than 2000 miles.
 10-25-2015, 03:06 PM
#32
Just changed my MC and as Vlad said above, those plastic clips to the body are a PIA. I had to cut them with dikes. The job isnt too difficult but takes a while since they buried the MC behind the brake MC and there isn't much room.
This updated unit (tsb about the older ones) seems much smoother and eliminated my creaking and clicking that would seem to get worse when warm out. Greasing the push rod would last awhile but would slowly stop working.
This updated unit (tsb about the older ones) seems much smoother and eliminated my creaking and clicking that would seem to get worse when warm out. Greasing the push rod would last awhile but would slowly stop working.
 12-04-2017, 07:25 AM
#34
10th Gear

Join Date: Mar 2015
Posts: 14
Likes: 0
Received 0 Likes
on
0 Posts
I wanted to add my experience to this thread wrt my 2006 TL with 200K miles on original clutch. I was having similar issues with the clutch first getting very hard after accelerations followed by a progressively worsening clutch pedal feel and engagement. After reading a lot of threads on the topic, including this one, I decided to replace the master. My first attempt following this DIY failed because I could not remove the tubing from the master to remove the part behind the firewall. I then decided it was best to follow the Acura shop manual which says to remove the master and the tubing as one. This required additional removal of the battery tray. It was still a huge pain in the ass but I was able to get it out, and eventually, install the new master along with the old tubing.
It turned out that the old fluid was rancid - I mean really bad. That was certainly part of the problem. After bleeding the system thoroughly the clutch was improved but really still not right.
After some discussions with my mechanic he told me that 90% of the time it's the slave not the master. Since my old master was not leaking he believes I replaced the wrong component and should've just done the slave at first along with a full fluid flush. Also, I think it was stated before that replacing these components will not alleviate the stiff pedal on hard acceleration - that is due to the self adjusting weights moving outboard on the pressure plate thus increasing inertia on the rotating mass. After all these miles I'm likely near the end of clutch material.
So, I'll replace the slave next and I wish I had at least done both master and slave while I was in there. Hope this helps someone.
11-08-2018, 12:05 PM
#36
Cruisin'

Join Date: Jun 2018
Location: St. Louis, MO
Age: 37
Posts: 19
Likes: 0
Received 0 Likes
on
0 Posts
WARNING: Long post. Read at your caution.
2004 TL Sport 6MT
184k miles
So I decided to tackle the clutch master cylinder replacement last night. Already did the Luk slave cylinder replacement a while back including delay valve delete. GREAT mod, honestly made such a huge difference in the feel of clutch engagement. So much more direct and feels like a manual should. I get the idea of trying to soften drivetrain wear when shifting a manual, especially considering the possibility of improper driving and shifting technique, but not being too bad at driving a manual myself, I feel the delay actually hurts the drivetrain and clutch system more because it makes my shifting WORSE. Much smoother now.
Back on topic. I've been having the intermittent stiff clutch pedal problem and sometimes weird clutch engagement feel. Also have a slight rattle coming from inside the trans which I think is either pilot bearing or springs inside the DMF. I know the clutch pedal feel could very well be the pressure plate wearing out or friction disk material being low (current clutch and flywheel have almost exactly 100K miles on them), but I decided I'd try the CMC replacement first, considering it's very inexpensive and (theoretically) easy. I also decided to do the "upgrade" for the CMC and put in a unit for the 01-05 Civic, meaning no delay valve in the master cylinder as well. HOLY HELL I can't believe how difficult it was to get the old CMC out and the new one in. It is wedged so far back against the firewall behind the brake booster and strut tower I can't even believe it. Almost no visibility, no room to wiggle your hand around and twist the CMC to get it out/in. I eventually did get it all done though. Probably was at the car for 3 1/2 hours. Insane amount of time for a CMC replacement. I still haven't bled the system yet because I was too tired late last night to get under the car and compress the slave cylinder/clutch fork to properly perform the task. Hopefully that goes well tonight and the car drives somewhat better.
Some tips I will add for the procedure, some of which have been mentioned already, but I will just reiterate and emphasize:
Definitely unbolt the fuse box. You will need to wiggle it around as you work. You won't be able to completely remove it without a lot of extra work and disconnecting wire harnesses. Don't bother trying to do that. DO unhook the battery though FOR SURE. Just unhook the negative terminal if you don't already know that's the way to do it.
I took the whole airbox and intake tube out. Gave me the necessary room to reach my arm into the horrible dark corner that is the CMC's home. The intake tube specifically was right in the way for me.
If you can, remove the strut brace bar. Only six nuts. I, unfortunately, rounded ONE of the nuts off and was too lazy to attempt to remove it with one of my bolt extractor sockets. Was able to do the job with it in the way, but considering how easy it would be to remove, it's worth it. On the other hand the strut bar makes a good support to lean on while doing this job, so take your pick.
Make sure to undo the clutch line where it goes from rubber line to hard line (the hard line that then snakes back to the CMC) underneath the fuse box area. You will need this loose to wiggle the line around and the CMC around. Make sure to use a line wrench/flare nut wrench on this 10mm fitting, and go SLOW. You don't want to round off the fitting nor do you want to break any part of it. It very well may and probably will be old and rusty. Have a rag underneath the area to catch brake fluid. Not much should come out.
Now, for those of you like the OP who were somehow, completely unknown to me, able to disconnect the clutch line from the CMC with the CMC still back in its hidey-hole, go for it. I cannot fathom how you did that. I was all but completely unable to get back there with a screwdriver or needle nose to get the U-clip out, and even if I could have done that, I don't think I would have been to able to pull the clutch line up out of the CMC to free it. I opted to go for the service manual's recommendation and remove the CMC and hardline as one piece. Now the nightmare there is that the clutch line is held down on the body by two rubber insulators inside of plastic clips pushed through holes. These are the kind of clips you see everywhere when it comes to electrical harnesses and whatnot on cars. The kind that if you can get to the backside and squeeze the two tabs together they come out fine. The problem here is you cannot access the other side of the metal holes these are pushed through. So you either have to cut them or painstakingly slowly pry them out. This is what I did in the hopes of being able to reuse the clips to hold the clutch line down. I eventually accomplished that goal, but it was almost the hardest part of the job. The first clip is somewhat easy, but the back one is underneath the brake booster. You almost can't even see it. This took forever to get loose. I didn't even care if I broke it. FYI use long needle nose pliers or long wire cutters to get to it and get it out. Possible a long a trim/push pin removal tool. Once these two clips are loose, you're going to feel this huge rush of emotion. Those are endorphins in the form of a massive sense of accomplishment and releif. Now you can wiggle out the CMC with hard line attached. This also isn't the easiest thing, but way easier than several other steps of the process. Route the hard line behind the engine first until you get the CMC in an open spot, then pull up on the CMC and point the hard line down so you can then pull both up and out.
Now a few reasons I see this method as far superior to the other method of removing the line from the CMC while it's still in place, aside from the previously mentioned reasons. Firstly you're going to want to be sure to seat the line and fitting properly in the new CMC. This is much easier to do correctly with the two parts sitting out in the open in front of you rather than in a tiny horrible corner of the engine bay with very little visibility. You don't want to do this whole job and screw up a fitting, or leave it loose and get air in the system. Make sure you put the new o-ring included with your new CMC down in the hole where the hard line fitting sits. Seat it straight, make sure it's not crooked and going to block fluid or allow leaks. If you did not get a new o-ring, get it. Do not use the o-ring from the old CMC as this will most likely be crushed flat and will not make a good seal in the new unit. Before attaching the fitting, put brake lube (I used Sil-Glyde silicone lube) on the fitting ABOVE the hole where fluid passes. DON'T put the lube down in the CMC. You don't want this lube getting in with clutch fluid, but you do want it above the fitting to help keep any possible air and moisture from entering the system. A few dabs will do, just make sure the circumference of the fitting is covered. When putting the U-clip back in to hold the line down, make sure the line is oriented as close to the same position as it was before in old CMC. Once the clip is in and you're trying to install the CMC, it doesn't move very easily. You don't want to be prying and pulling on it when you're back in the engine bay and risk breaking it (or breaking your brain). I put the clip on mine almost as far as it would go in, leaving just a small gap in the event it ever needs to be pried out again. The manual says to bend one of the ends of this clip once it's in so it can't work loose, but mine went in so tight I did not bother with this step. Also, attach the rubber hose for the clutch fluid reservoir in the same orientation as before. Again, this will be very difficult to move side to side once you have the CMC back near it's home.
Next, but certainly not least, is getting the CMC installed. The only hard part about this for me was getting the two studs and piston rod of the CMC lined up with the holes in the firewall. I don't have any tricks for this step. I just did my best to have one hand on the CMC to rotate and push it, and a small flashlight in the other hand trying my damndest to illuminate the area and see the holes through a couple tiny slivers of empty space. After 10 or 15 mins I managed to get it just right and it slid in. I quickly went inside the car to the floorboard and carefully got the two nuts started so the assembly couldn't pop back out. Once you tighten the nuts, you'll have to pull the piston rod down at an angle to be able to spin the connecting bracket in or out so the hole for the retaining pin will line up with the pedal. As long as the pedal stopper hasn't been adjusted before and it's where it should be, don't mess with it. I know people talk about adjusting the pedal position for better feel, but in my experience it only causes headache. That is unless of course it's been adjusted before and is already in the wrong position.
At this point, if this has been as much of a pita for you as it was for me, have a drink. Have a smoke. Whatever you want, just take a break. You need it.
The rest of the installation is hopefully at this stage self-explanatory. Do the bleed procedure with the clutch fork/slave cylinder depressed of course, and do it however you want. I hate that there is such limited room in that area, it's a little difficult to even get a little 8mm wrench on the bleeder and turn it. I haven't tried the piece of wood wedged between the tire and clutch fork method, but I was able to get a clamp up in there from underneath the car and put one end on the back side of the slave cylinder and the other end on the clutch fork, then obviously tighten the clamp until the slave cylinder is fully depressed. A little precarious, as neither of those surfaces is quite flat, but under compression, the clamp stayed in place.
Final parting thought: If you have big forearms and/or hands, don't bother. I don't see how in the world this would be possible, other than removing the brake master cylinder and booster to gain access. Feel free to prove me wrong, but that's my conclusion.
I've done plenty of master cylinder replacements before and wasn't expecting this to be as difficult as I found it. It's all about access, and in this case there's as close to zero of that as I've ever had on almost ANY automotive job. And I have skinny arms/hands too. Just wanted to share all of this for the next person tackling this job, just so they're prepared for what they very well may encounter. I don't mean to scare anyone away from doing it themselves, but it's definitely not for the impatient people out there. If you read this and still think you can do it, you're probably the type of person who can so go for it. If you're really really unsure, don't attempt it or have someone more experienced and confident do it. If you get halfway through and are flustered and don't want to continue, then you have an undriveable car. Don't put yourself in that position.
11-13-2018, 09:08 AM
#38
Cruisin'
Join Date: Jun 2018
Location: St. Louis, MO
Age: 37
Posts: 19
Likes: 0
Received 0 Likes
on
0 Posts
Good call. Fun thing is I have to get back in there a bit and try and feel if my hydraulic line is touching the body and/or brake master cylinder, because now I have vibration through the clutch pedal when the engine is revving. I know I need a new clutch, and it's possible that with the new delay valve-less master cylinder, I'm feeling more of the vibration and stiffness from the worn out clutch/pressure plate. It's also possible the hydraulic line that snakes up under and between the brake booster and body is touching somewhere, and vibrations from the engine through the chassis are then making it to the clutch pedal. UGGGGGHHH what a nightmare! I still like this car though.
11-13-2018, 09:37 AM
#39
Cruisin'
Join Date: Jun 2018
Location: St. Louis, MO
Age: 37
Posts: 19
Likes: 0
Received 0 Likes
on
0 Posts
Does anyone know if the panel underneath the wiper cowl and underneath the wiper motor is removable? I'm talking about what the wiper motor mounts to. If that was removable, even partially, this job would be SO MUCH easier. Definitely worth the extra work if it's possible.
04-27-2019, 09:29 PM
#40
2nd Gear

Join Date: Mar 2019
Age: 35
Posts: 2
Likes: 0
Received 0 Likes
on
0 Posts
this post hands down helped me so much seriously great write up. I did the check valve delete and for the last 3 days I've been trying and trying to bleed the system. Decided to go for the CMC and when I took the pin out of the pedal assembly the plunger literally fell out. I'm still baffled at how I even had a clutch before all of this. But after new cmc and check valve delete,I've never has such a firm pedal nor grabbed so firmly.