RonJon 4th Gen Acura TL Body Kit Thread! **pg. 16 updated pics*


 05-04-2011, 02:11 AM
#282
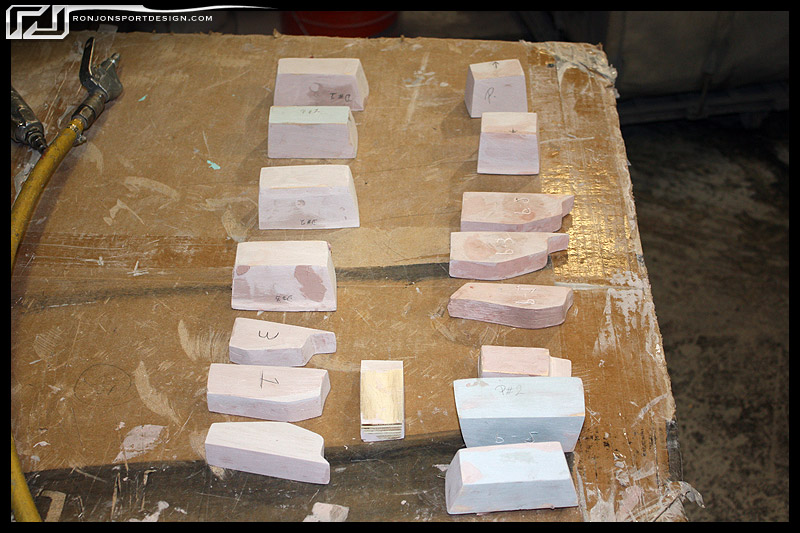
this is just preliminary testing of the first articles, the mounting points and hardware will be worked into thiese baseline parts or shells with no attachments points. THese do not represent the fitment, they are just shots of the process. surfaces and edges all have to be worked on a bit more, so these parts are about 80% done.
 05-05-2011, 11:48 PM
#288
COTM Coordinator
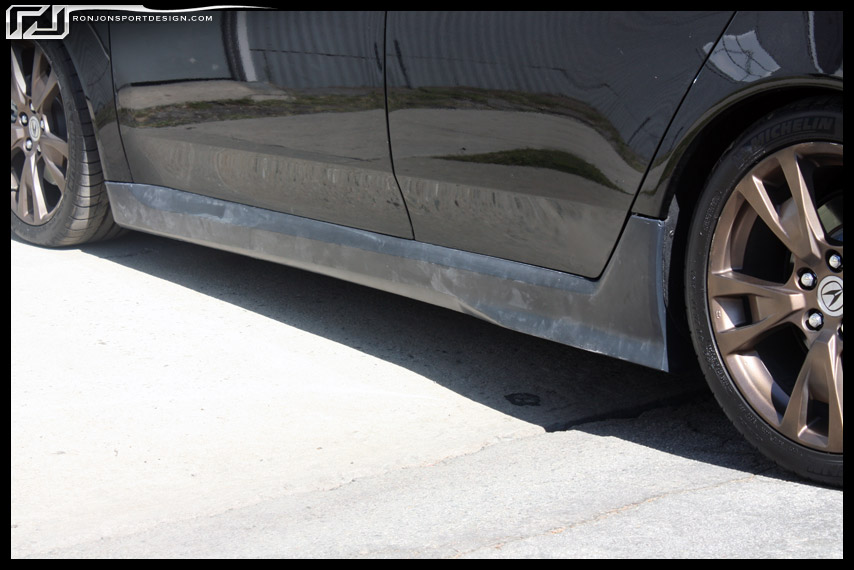
This kit has gone from decently aggressive to completely toned down. The sides dont even look the same as to what they were in the concept and the first test fit. I have to admit that I am a little disappointed with it and can only hope that the final product will bring the kit back to life.
Last edited by MurkyRiversTL; 05-05-2011 at 11:53 PM.
05-06-2011, 07:01 AM
#289
Easy Easy, the kit is not even shot properly, or painted. Wait until the final product is fitted, painted and shot professionally. Also, the front is going to have an optional splitter installed in the middle to add a little more aggressiveness. The kit has all the same exact features with dimensions to suite daily driving. 1.5" lower than the factory sides, front and rear, any lower would be a problem. I've seen this 100 times, the prototype looks too subdued, but in the end, it will be amazing, nothing really has changed if you compare it to Ryan's grigio TL with test fitted the mock up on...
95% the same kit:


95% the same kit:
05-06-2011, 08:24 AM
#290
COTM Coordinator
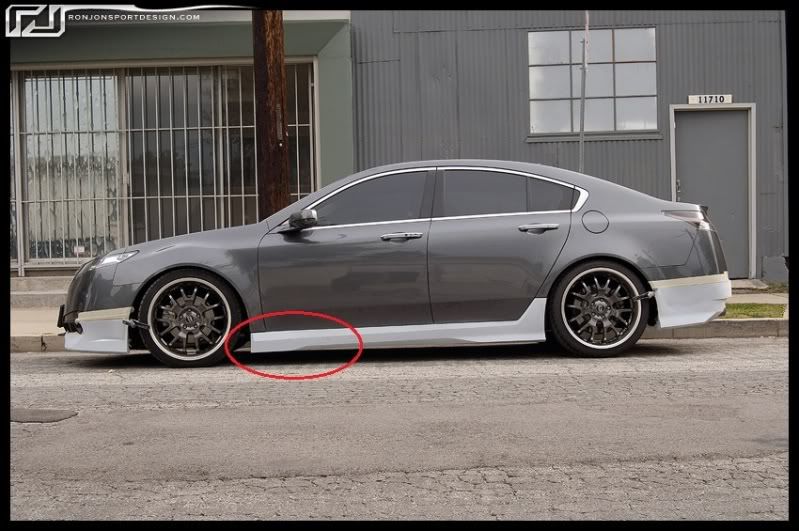
The cuts and angles are more defined on Ryan's test fit, mainly for the sideskirts. I know about the splitter and the fron looks great as well as the rear. Its the sides that I am concerned with. If you look at the forward most part of the sides on Ryan's compared to Del's you can see where that lower flare is removed and gives the sides a plain look.
If the final product looks more like the test fit on Ryan's car it will be perfect.
If the final product looks more like the test fit on Ryan's car it will be perfect.
05-06-2011, 08:28 AM
#291
Suzuka Master
The cuts and angles are more defined on Ryan's test fit, mainly for the sideskirts. I know about the splitter and the fron looks great as well as the rear. Its the sides that I am concerned with. If you look at the forward most part of the sides on Ryan's compared to Del's you can see where that lower flare is removed and gives the sides a plain look.
If the final product looks more like the test fit on Ryan's car it will be perfect.
If the final product looks more like the test fit on Ryan's car it will be perfect.


 05-06-2011, 10:08 AM
#293
COTM Coordinator
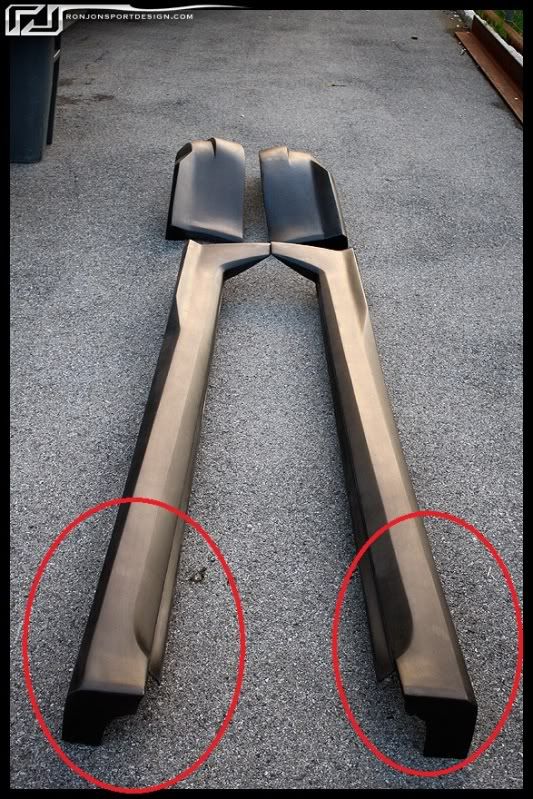
The aft bevel is there. The forward bevel is not. The part that brings the line of the front lip into the sides. Give me a few and I will circle the part in the pics I am talking about. They do look much better after theyre cleaned up.
 05-06-2011, 10:39 AM
#296
COTM Coordinator
I completely agree that the top of the skirt looks better since it lines up and makes sense with the door line, but its the bottom part directly underneath that is missing the drop from the test fit on Ryan's car.
Surely I cant be the only one seeing this. Do I need to make my circles smaller???
Surely I cant be the only one seeing this. Do I need to make my circles smaller???
05-06-2011, 11:14 AM
#298
Moderator
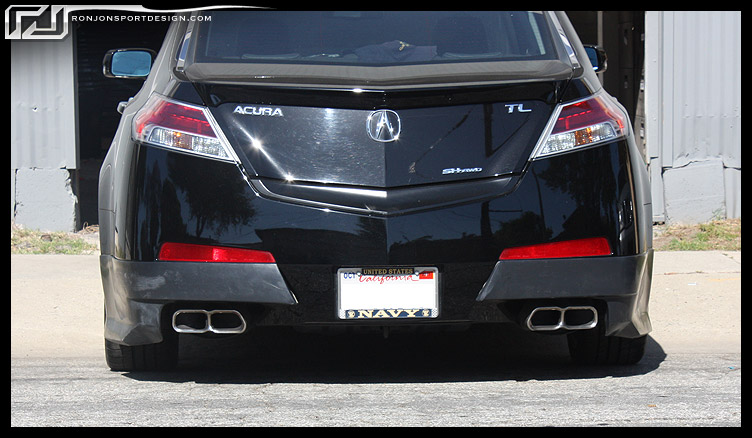
i think that OEM looks much better.. due to that it wraps the inner side of the exhaust as well.
will the rear lip stick out from the bumper as it does not wrap around the licnese plate area?
how will the inner sides of the rear lip hold on to bumper? double sided tape? inner clips? it look like you can easily bump into something and it can come snap off. i can only say that the strongest mounting point you can have are near the inner fender area.

now if you incorporate the inner exhaust piece to your design, it would be fantastic
this is not to bash, just an opinion.
will the rear lip stick out from the bumper as it does not wrap around the licnese plate area?
how will the inner sides of the rear lip hold on to bumper? double sided tape? inner clips? it look like you can easily bump into something and it can come snap off. i can only say that the strongest mounting point you can have are near the inner fender area.
now if you incorporate the inner exhaust piece to your design, it would be fantastic
this is not to bash, just an opinion.
 05-06-2011, 07:41 PM
#303
COTM Coordinator
I think it should have the centerline so it flows with the bumper centerline. Its not a deal breaker but its not exactly matching the concept in design. I just hope there arent corners being cut to expedite the production. I promise if its built right and takes a bit longer it will be a huge hit. If corners are cut and it looks too plain it wont be as big of a success.
 05-07-2011, 02:30 PM
#305
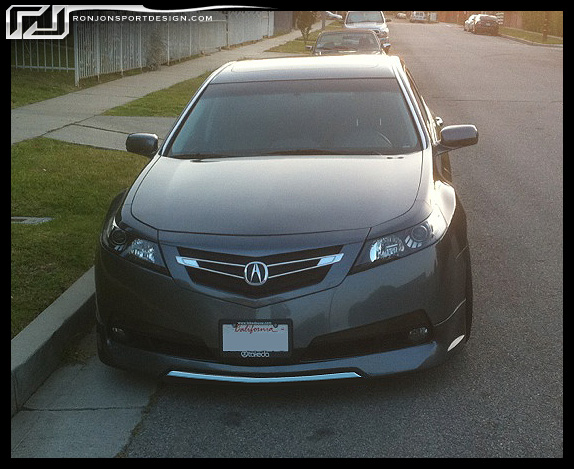
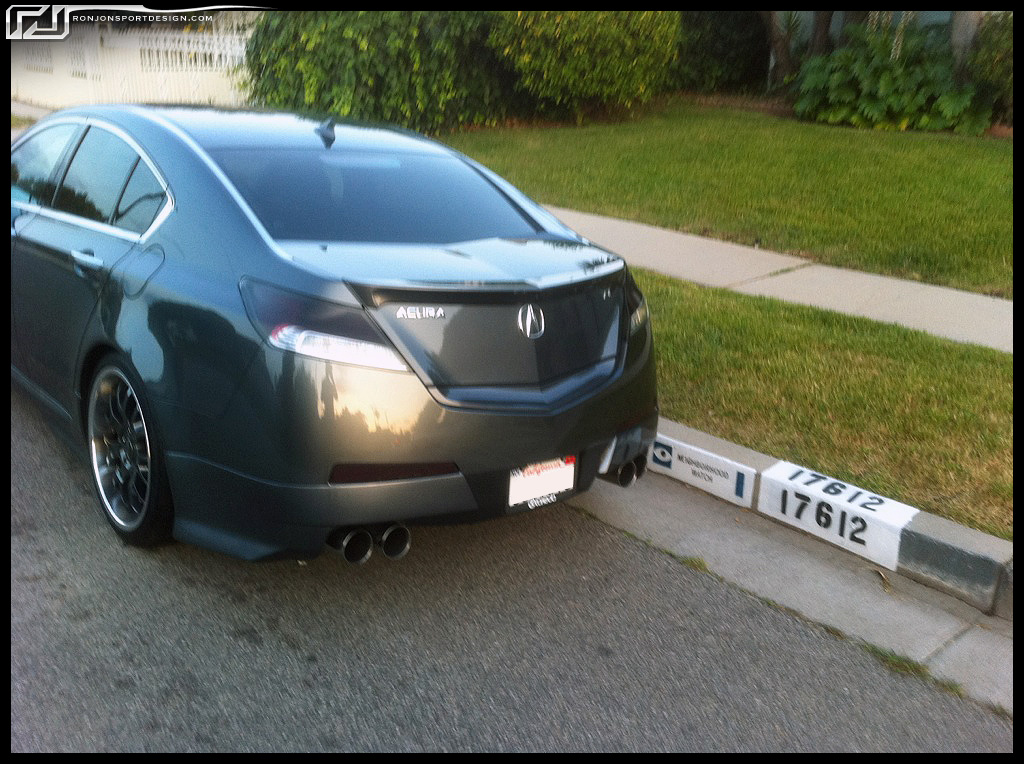
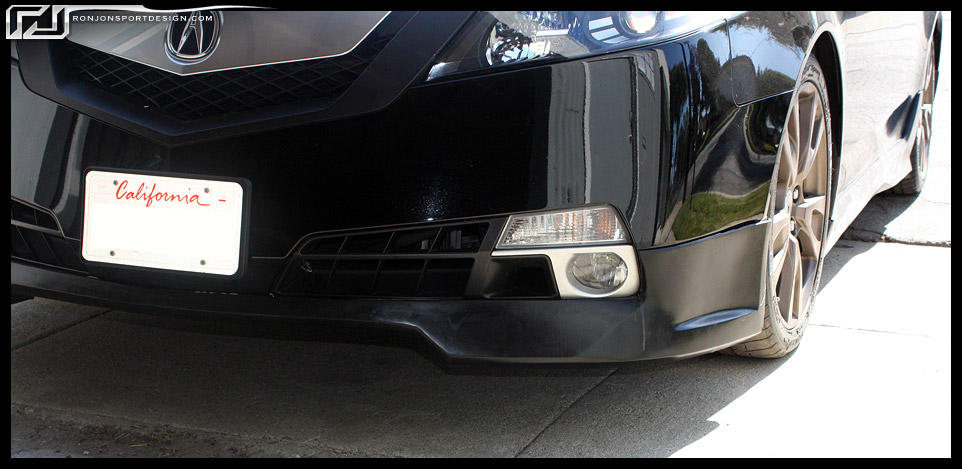
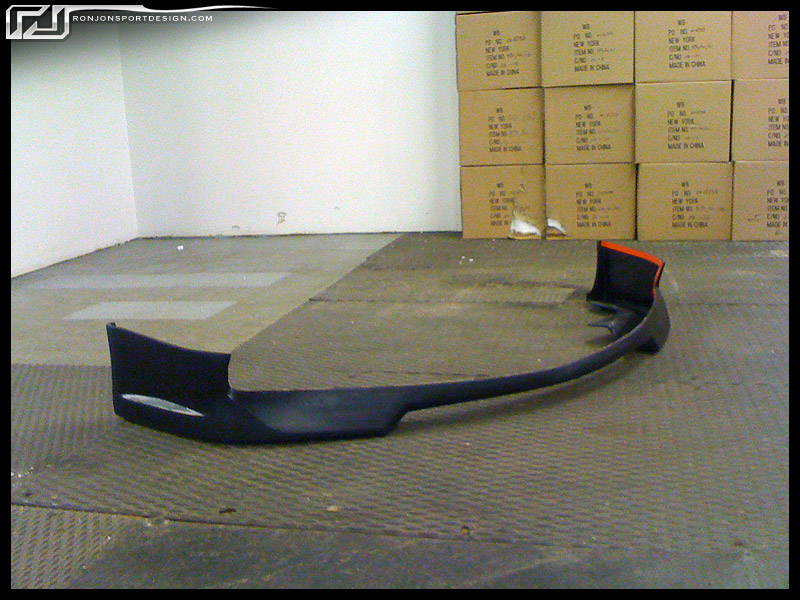
The fin on the sideskirt toward the front was taken out because it didn't flow into anything on the front lip, I tried to incorporate it into the front and it looked too forced in there. So we flowed the sides into the front and the entire flow of the kit from front to back seems alot more thought out and classy, not like it belongs on a civic, but rather a luxury sport sedan.
The front centerline was turned into an optional piece made from ABS that can be installed separately or left out all together to the owners' discretion. No lose situation.\
Cutting corners and RonJon Name brand do NOT belong in the same sentence. if we do something, it's because we tried it many different ways and the end result was the best way to us as a whole. We can't consult with all the board members on every little characteristic decision we make, we would never get it down with the different tastes everybody shares.
Last edited by rondog; 05-07-2011 at 02:39 PM.
05-07-2011, 06:40 PM
#306
The fin on the sideskirt toward the front was taken out because it didn't flow into anything on the front lip, I tried to incorporate it into the front and it looked too forced in there. So we flowed the sides into the front and the entire flow of the kit from front to back seems alot more thought out and classy, not like it belongs on a civic, but rather a luxury sport sedan. The front centerline was turned into an optional piece made from ABS that can be installed separately or left out all together to the owners' discretion. No lose situation.\
Cutting corners and RonJon Name brand do NOT belong in the same sentence. if we do something, it's because we tried it many different ways and the end result was the best way to us as a whole. We can't consult with all the board members on every little characteristic decision we make, we would never get it down with the different tastes everybody shares.
Cutting corners and RonJon Name brand do NOT belong in the same sentence. if we do something, it's because we tried it many different ways and the end result was the best way to us as a whole. We can't consult with all the board members on every little characteristic decision we make, we would never get it down with the different tastes everybody shares.
You can't make everyone happy.
 05-08-2011, 08:01 AM
#307
Grandpa
Join Date: Dec 2003
Location: Virginia, Besieged
Age: 68
Posts: 7,596
Received 2,609 Likes
on
1,475 Posts
You've picked a design that is reasonably conservative but still makes the car stand out from the others. The kit hints at the sporty nature of the car without making an overt statement or appearing tacky.
:-)
05-08-2011, 11:00 AM
#308
i think that OEM looks much better.. due to that it wraps the inner side of the exhaust as well.
will the rear lip stick out from the bumper as it does not wrap around the licnese plate area?
how will the inner sides of the rear lip hold on to bumper? double sided tape? inner clips? it look like you can easily bump into something and it can come snap off. i can only say that the strongest mounting point you can have are near the inner fender area.
now if you incorporate the inner exhaust piece to your design, it would be fantastic
this is not to bash, just an opinion.
05-08-2011, 07:03 PM
#309
i think that OEM looks much better.. due to that it wraps the inner side of the exhaust as well.
will the rear lip stick out from the bumper as it does not wrap around the licnese plate area?
how will the inner sides of the rear lip hold on to bumper? double sided tape? inner clips? it look like you can easily bump into something and it can come snap off. i can only say that the strongest mounting point you can have are near the inner fender area.
now if you incorporate the inner exhaust piece to your design
it would be
fan
this is not to bash, just an opinion.
I disagree I think the Ronjon kit looks much better than the OEM rear. The Ronjon kit blends better with the lines on the car where the OEM version seems like an after thought. I see what you are saying about the RonJon kit not wrapping around the exsaust but I think once the kit is painted it will look
much better.I think when installed correctly you will not have to worry much about it popping off, adhesive technology has come a long
05-20-2011, 10:30 AM
#311
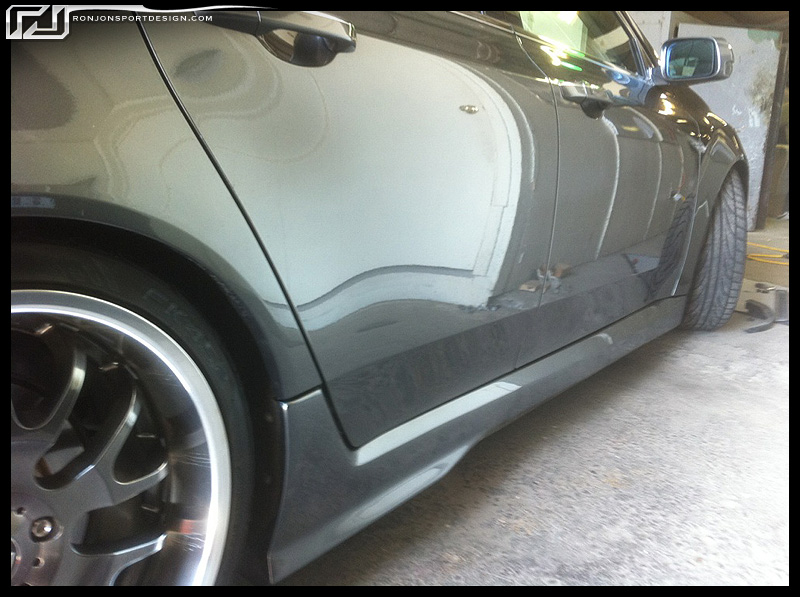
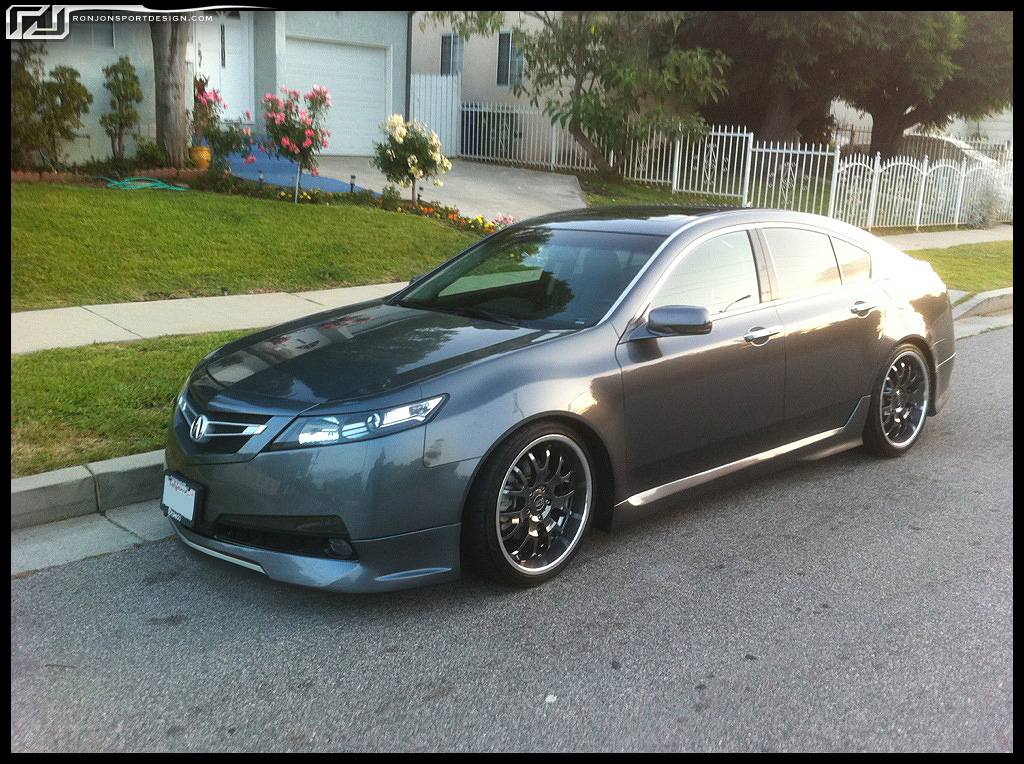
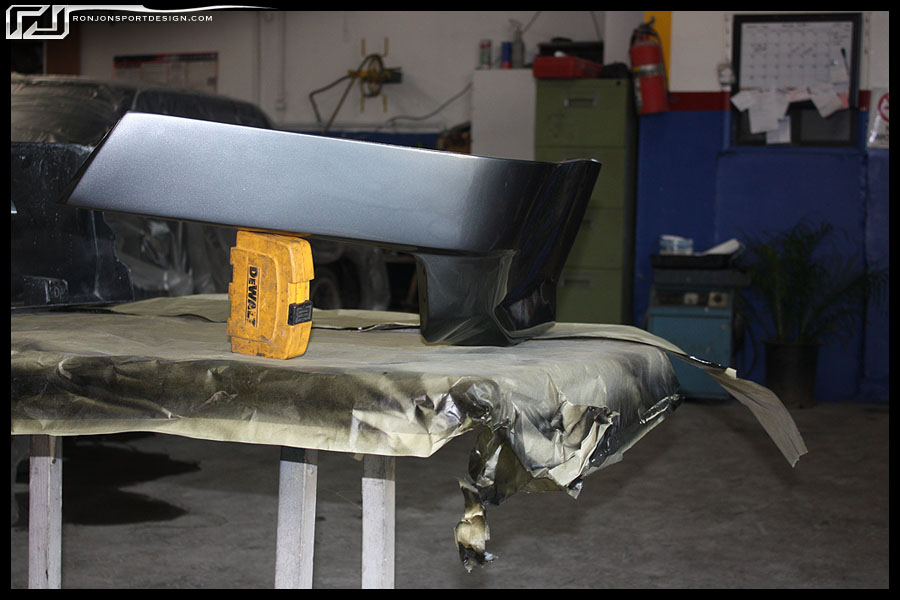
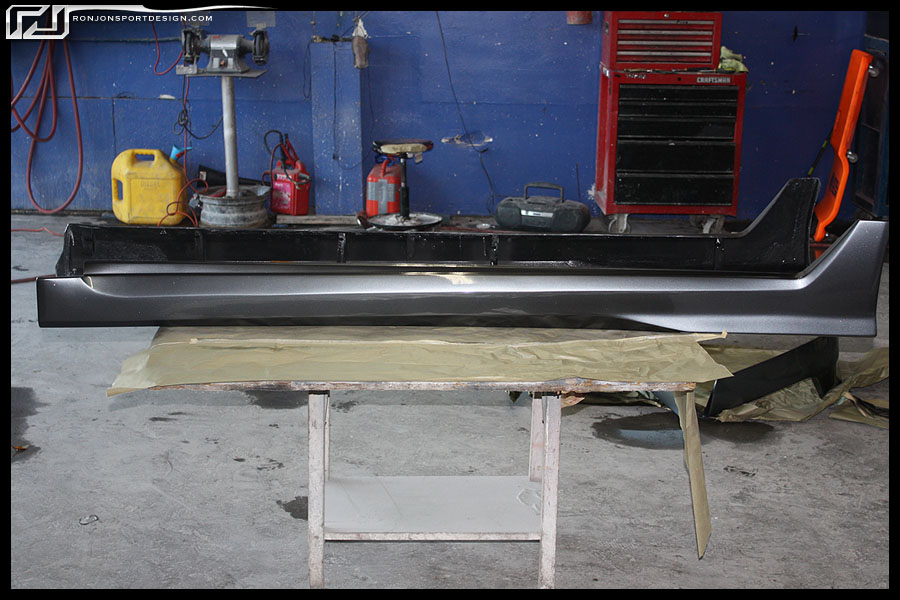
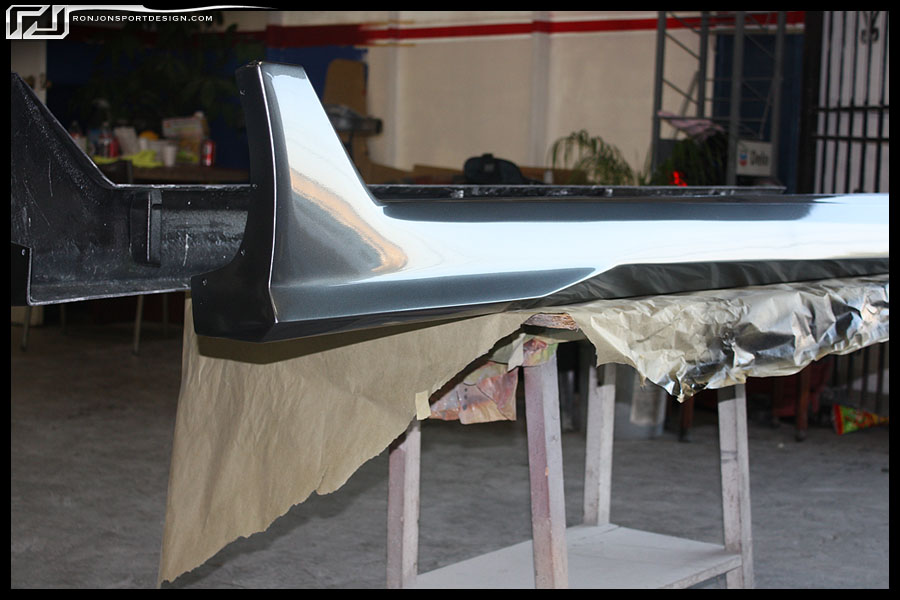
Been a while, but Ryan's car is coming in on Monday with the shoot happening that same day. The kit is painted and ready to install, the splitter that goes in the front bottom is not finished, but we are crunching to complete that in time for the shoot, even if it's a prototype. Here are some pics of the kit painted before installation:

05-20-2011, 10:42 AM
#312
COTM Coordinator
Looks beautiful now. Cant wait for install pics. Im thinking that the side skirts may actually look better this way after seeing it painted.
Good job Rondy.
Good job Rondy.
 05-23-2011, 08:23 AM
#317
Drifting
Well, I was all fine with my car finally being "complete". I even spent like 6 hours washing/clay bar/sealant/waxing it this weekend. I pulled into an downhill parking spot and put a healthy gouge in my front lip. Look like I may be replacing that with this piece...