DIY: Valve Cover Removal and Valve Cover Gasket Replacement
 03-27-2011, 01:38 PM
#1
Moderator
Thread Starter
DIY: Valve Cover Removal and Valve Cover Gasket Replacement
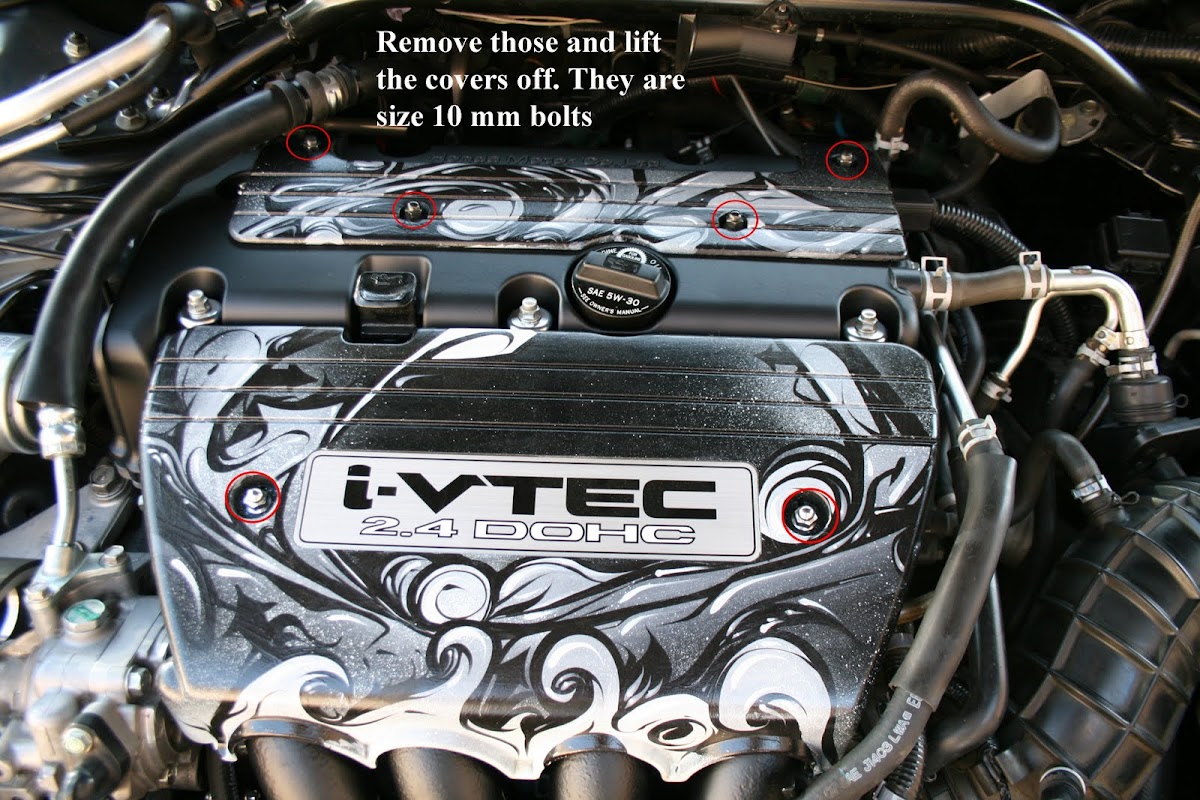
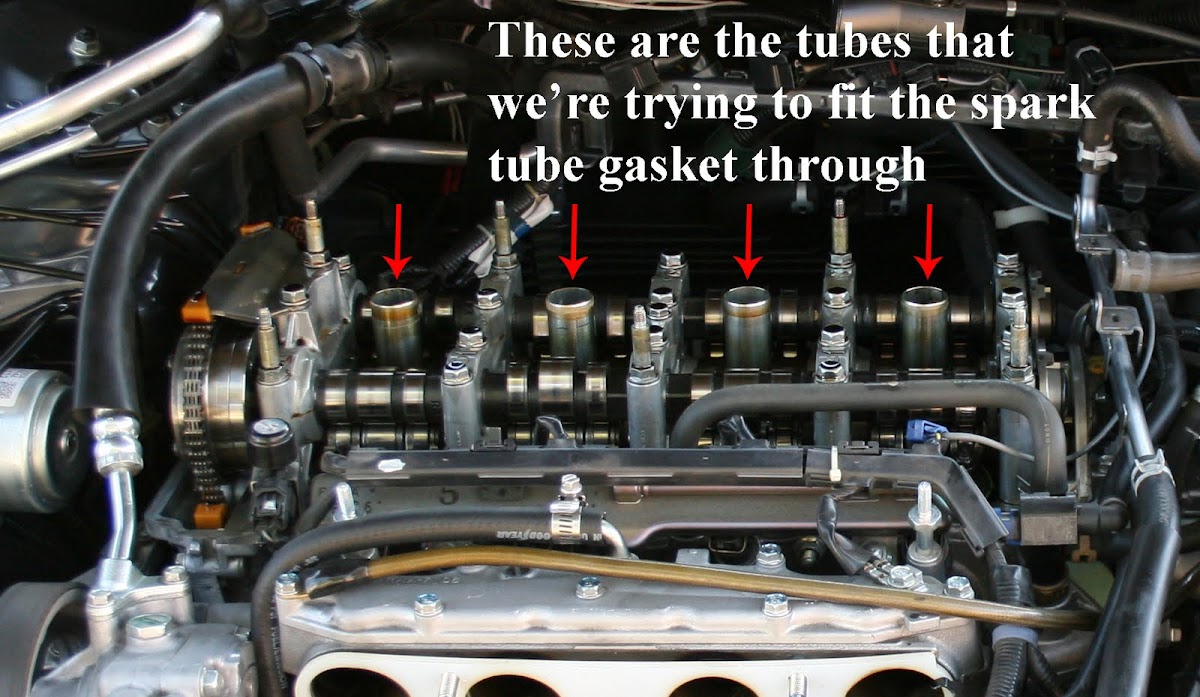
Before removing your VC (Valve Cover) for the first time, I recommend buying a VC gasket replacement. If you want, you can replace all of the gasket and get a VC gasket kit, which includes: VC gasket, spark tube seal, and washer gaskets. Heeltoeauto sells it. I don't know of other dealerships, but my dealership has the kit in stock so check your dealership if they have it just in case you mess up on the spark tube gasket installation (which will be shown below).
Gasket Kit: Honda Genuine Gasket Kit, Valve Cover K20 K24 - HeelToe Automotive
Individual Gaskets (VC gasket #3, Spark Tube Seal #4, Washer and Washer gasket #16: Acura Parts @ AcuraOEMparts.com - Genuine Acura OEM Parts from Delray Acura
This is a two part DIY. First is the VC removal, and second is the gasket replacement.
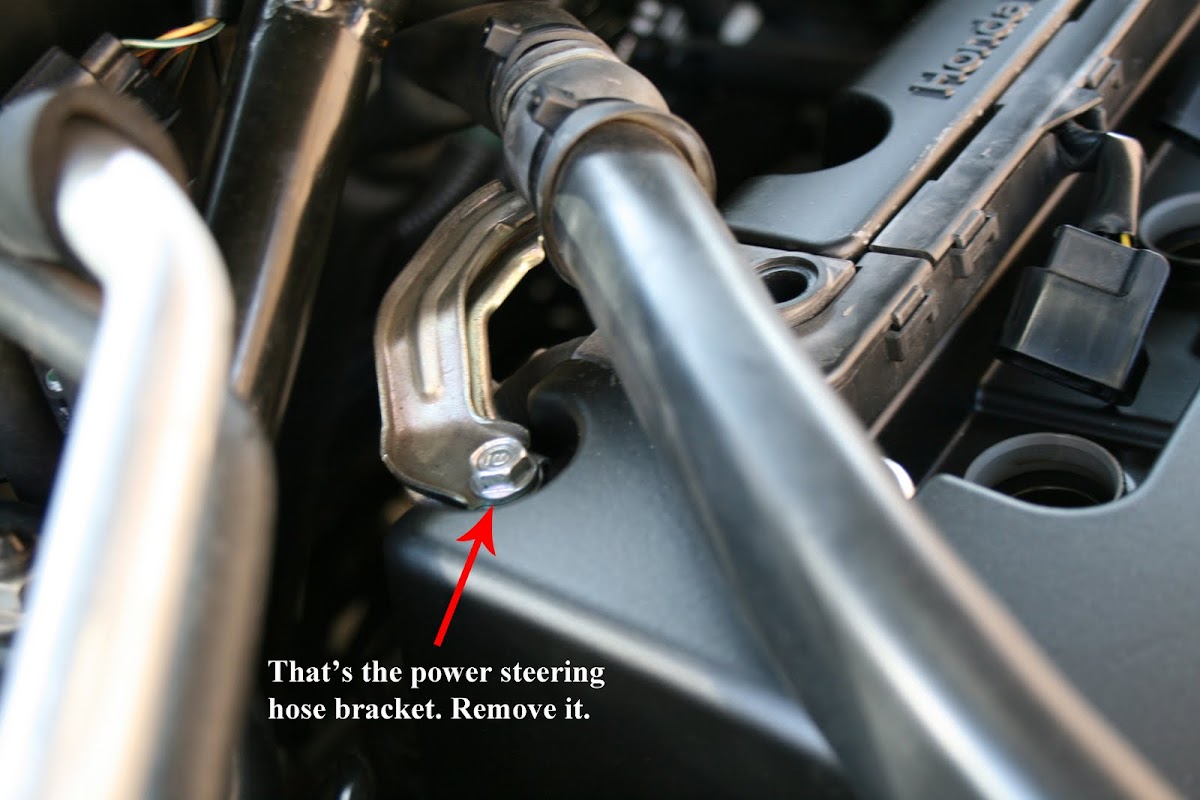
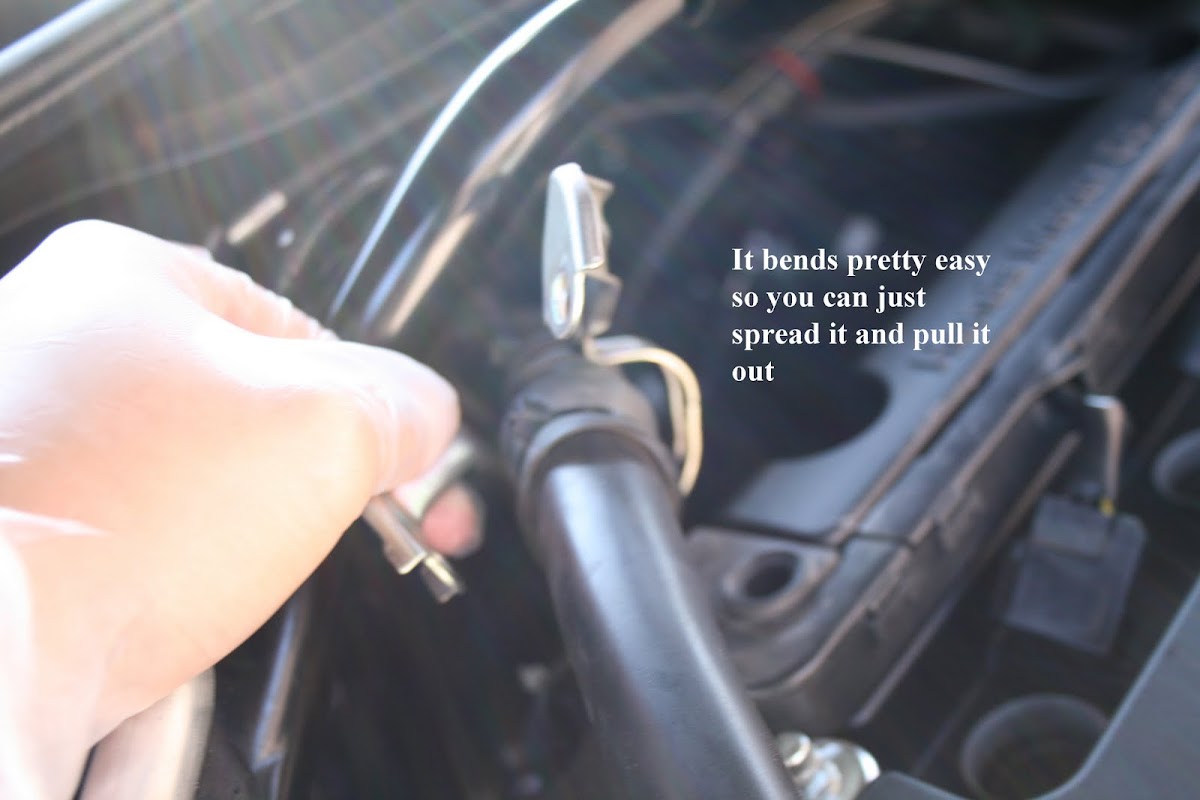


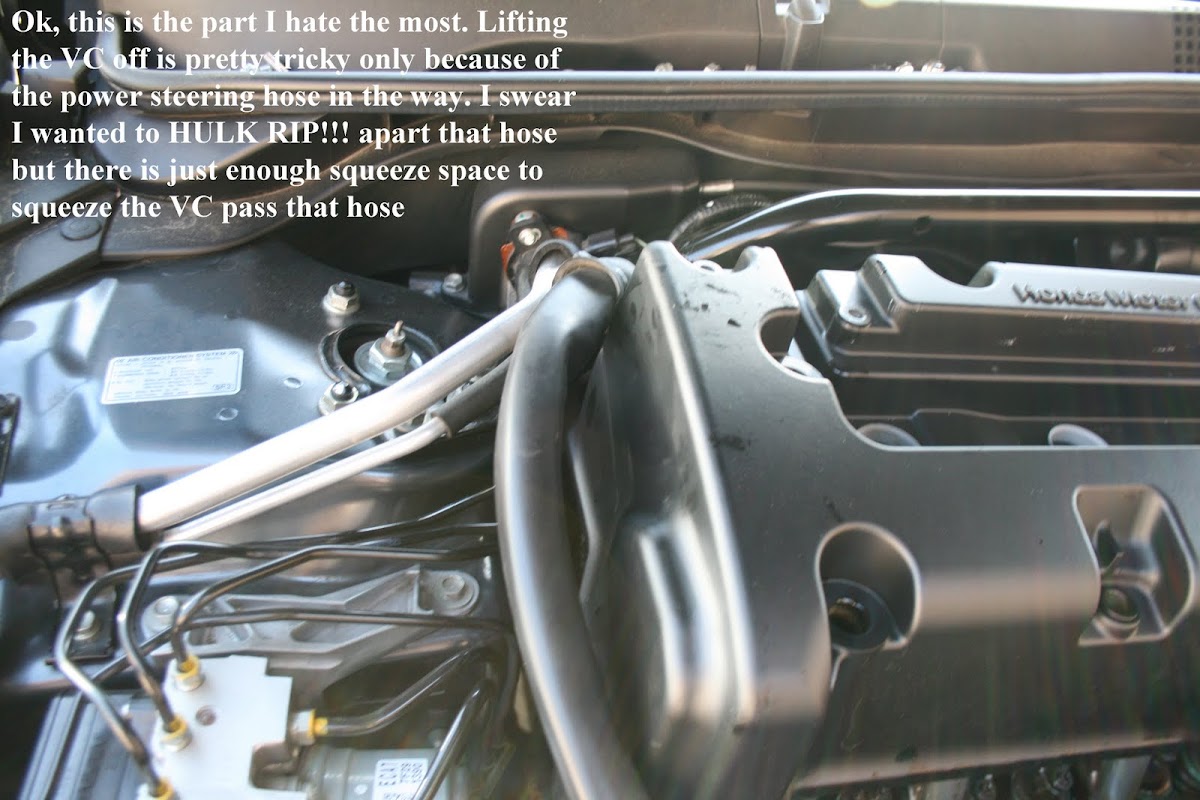
And that's it. If you have another person that can help you, then taking off the VC will be a lot easier when lifting it pass through the power steering hose.
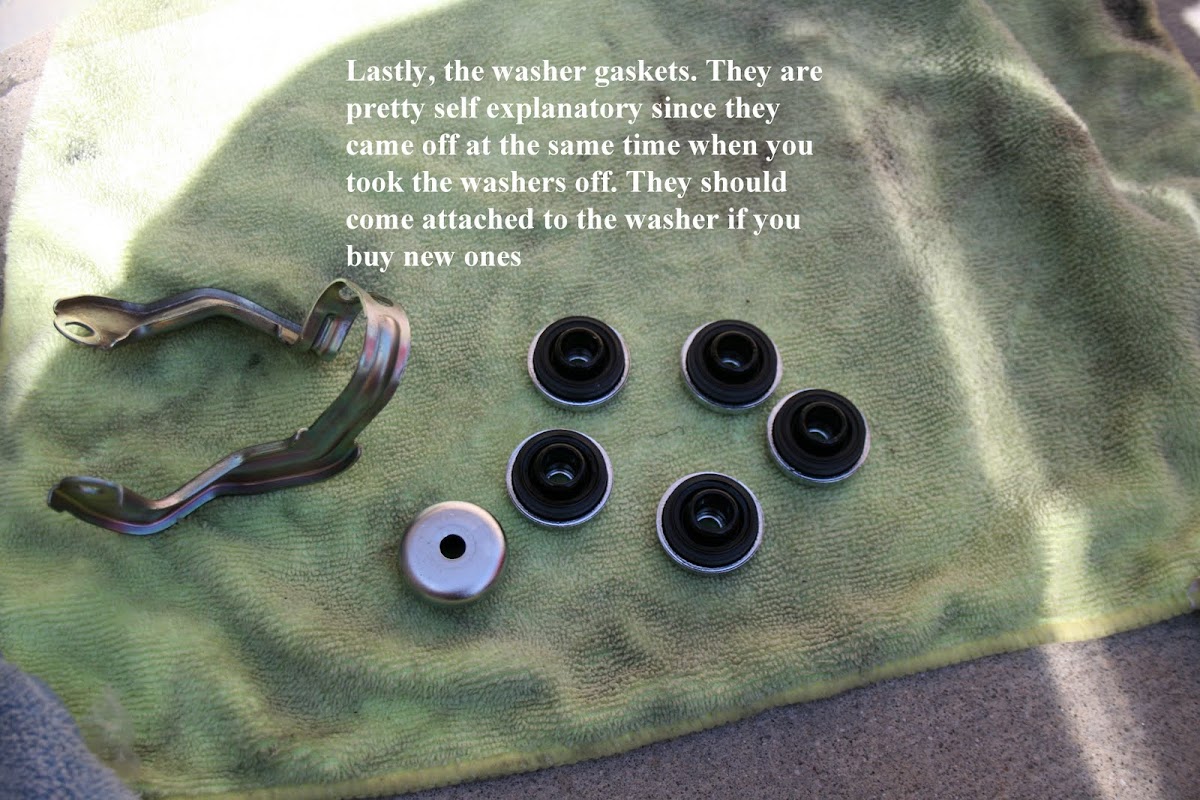
I don't know the recommendations on replacing the washer and spark tube seal gasket, but it is highly recommended that you replace the VC gasket if you remove the VC for the first time. I wanted to be safe so I replaced all gaskets on the VC.
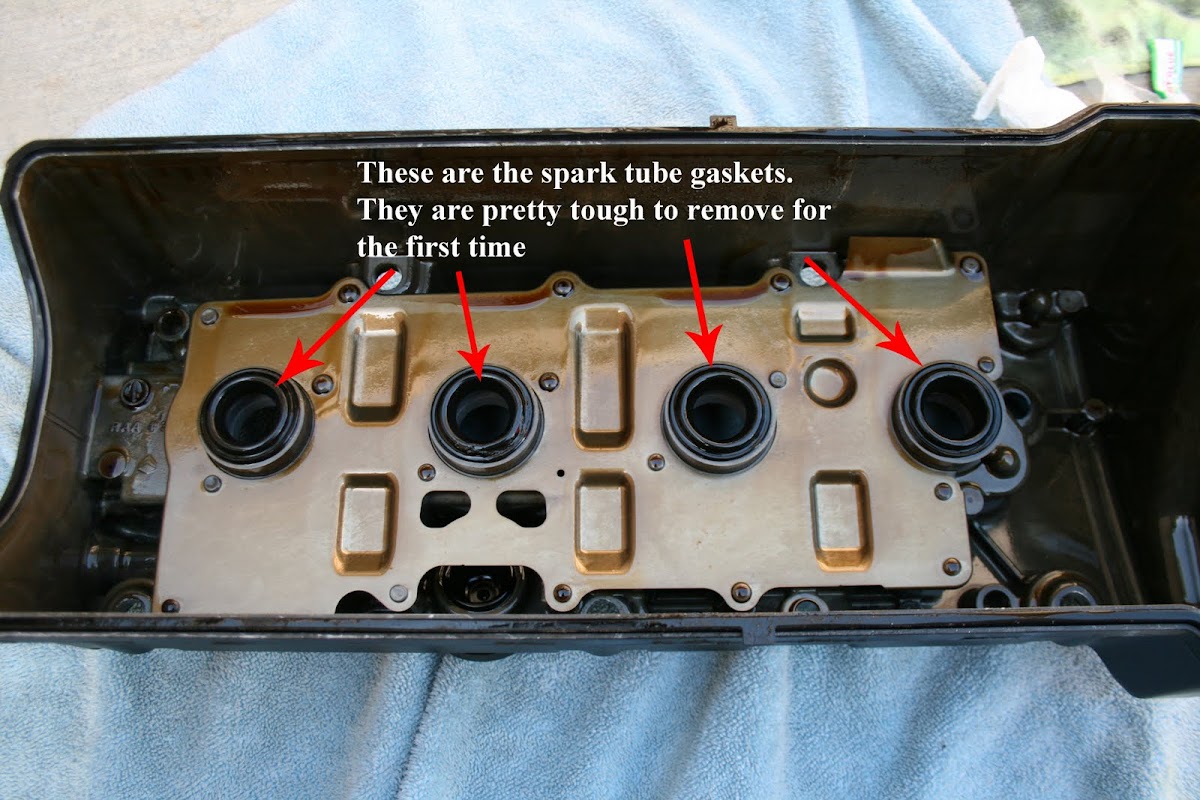
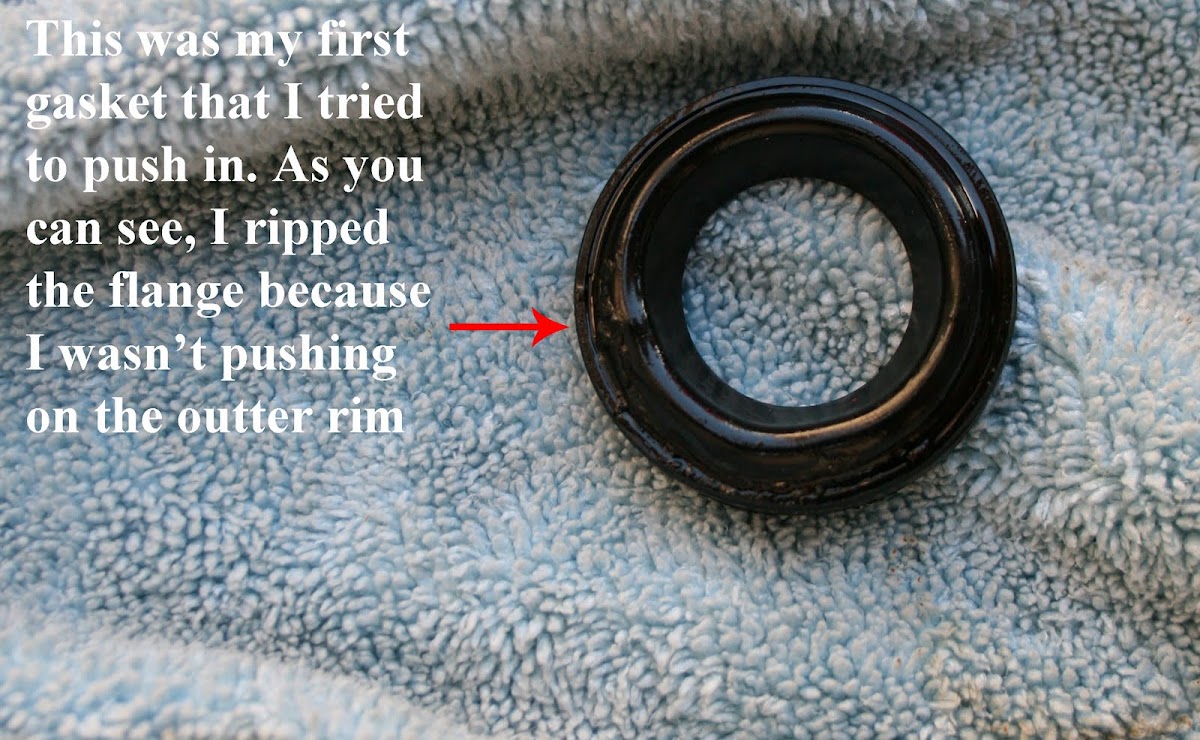
If you decide you want to replace the spark tube seal, I recommend buying 8 instead of four, just in case you mess up. I was in a frantic when I messed up a spark tube gasket because without it, driving the car would be a bit dangerous because you don't want oil going into the spark tube. I thought I had to wait another week through online order but luckily my dealership had some in stock. So I thanked God and drove to the dealership (in my bro's car) and got 4 more.
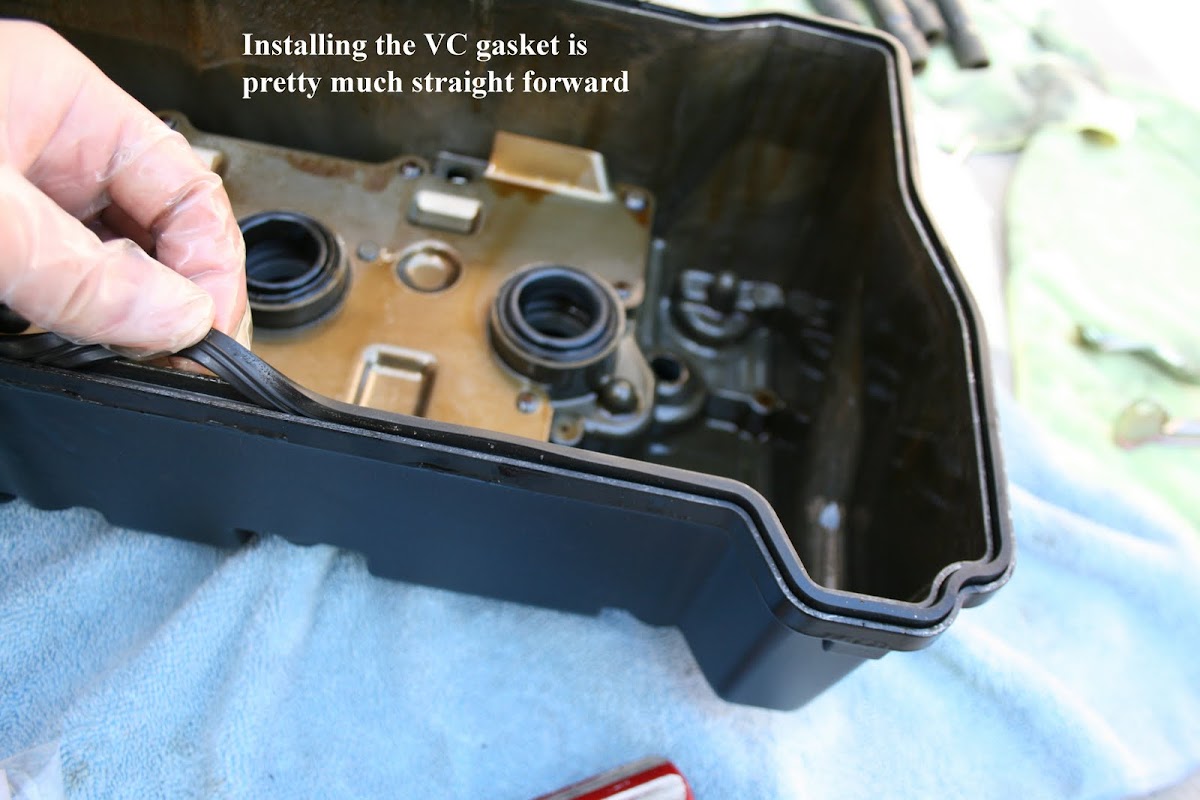
So with that being said, onto the gasket replacement.

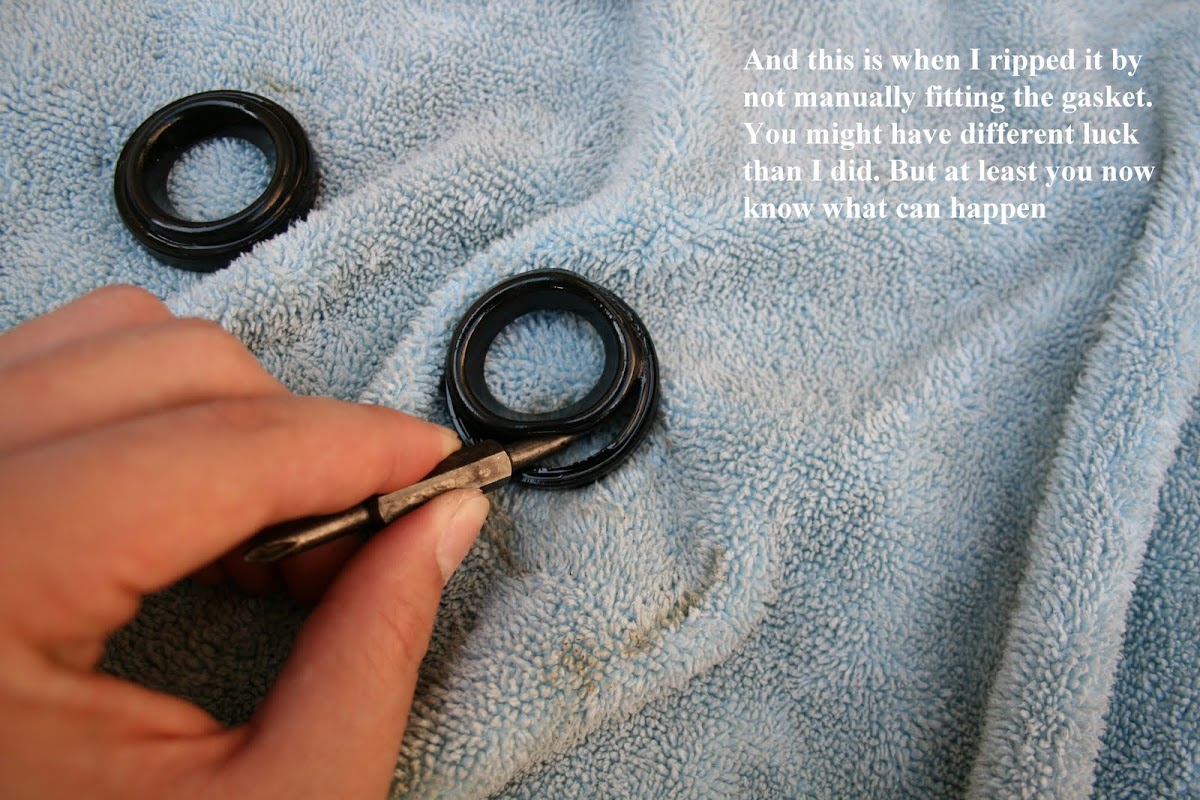
And that's it. After that, periodically check the outside of your VC so see if you have any oil leaks coming from the bottom of the VC and around the washers. I would also check the ignition coils and see if oil splashed on it. I checked mine one day after my VC removal and I had oil on my ignition coil, that's how I knew that my spark tube seal ripped.
Gasket Kit: Honda Genuine Gasket Kit, Valve Cover K20 K24 - HeelToe Automotive
Individual Gaskets (VC gasket #3, Spark Tube Seal #4, Washer and Washer gasket #16: Acura Parts @ AcuraOEMparts.com - Genuine Acura OEM Parts from Delray Acura
This is a two part DIY. First is the VC removal, and second is the gasket replacement.
And that's it. If you have another person that can help you, then taking off the VC will be a lot easier when lifting it pass through the power steering hose.
I don't know the recommendations on replacing the washer and spark tube seal gasket, but it is highly recommended that you replace the VC gasket if you remove the VC for the first time. I wanted to be safe so I replaced all gaskets on the VC.
If you decide you want to replace the spark tube seal, I recommend buying 8 instead of four, just in case you mess up. I was in a frantic when I messed up a spark tube gasket because without it, driving the car would be a bit dangerous because you don't want oil going into the spark tube. I thought I had to wait another week through online order but luckily my dealership had some in stock. So I thanked God and drove to the dealership (in my bro's car) and got 4 more.
So with that being said, onto the gasket replacement.
And that's it. After that, periodically check the outside of your VC so see if you have any oil leaks coming from the bottom of the VC and around the washers. I would also check the ignition coils and see if oil splashed on it. I checked mine one day after my VC removal and I had oil on my ignition coil, that's how I knew that my spark tube seal ripped.

The following 2 users liked this post by mdkxtreme:
GWEEDOspeedo (02-13-2014),
rockstar143 (04-25-2014)
 03-30-2011, 03:15 AM
#4
Moderator
Thread Starter
03-30-2011, 02:43 PM
#5
06-12-2012, 12:57 AM
#6

great write up! how long would it take for a novice DIY'er to do this? I have an oil leak and the dealership said to replace the valve cover gasket...
06-12-2012, 02:18 AM
#7
Moderator
Thread Starter
I don't remember how long it took me, but definitely be prepared to give yourself a few hours to remove and put back. You can rush the VC removal, but you definitely don't want to rush the gasket replacements. After all, your VC is basically covering the heart of your engine.
The following users liked this post:
DELIRIOUS_09 (06-12-2012)
Trending Topics

 01-14-2014, 10:46 AM
#10
Moderator
Thread Starter
On the other forum I was able to edit my original post and add more useful information so I'll just add it here.
The following 2 users liked this post by mdkxtreme:
Angelito (02-12-2014),
GWEEDOspeedo (02-13-2014)
 02-12-2014, 12:03 PM
#12
Moderator
Thread Starter
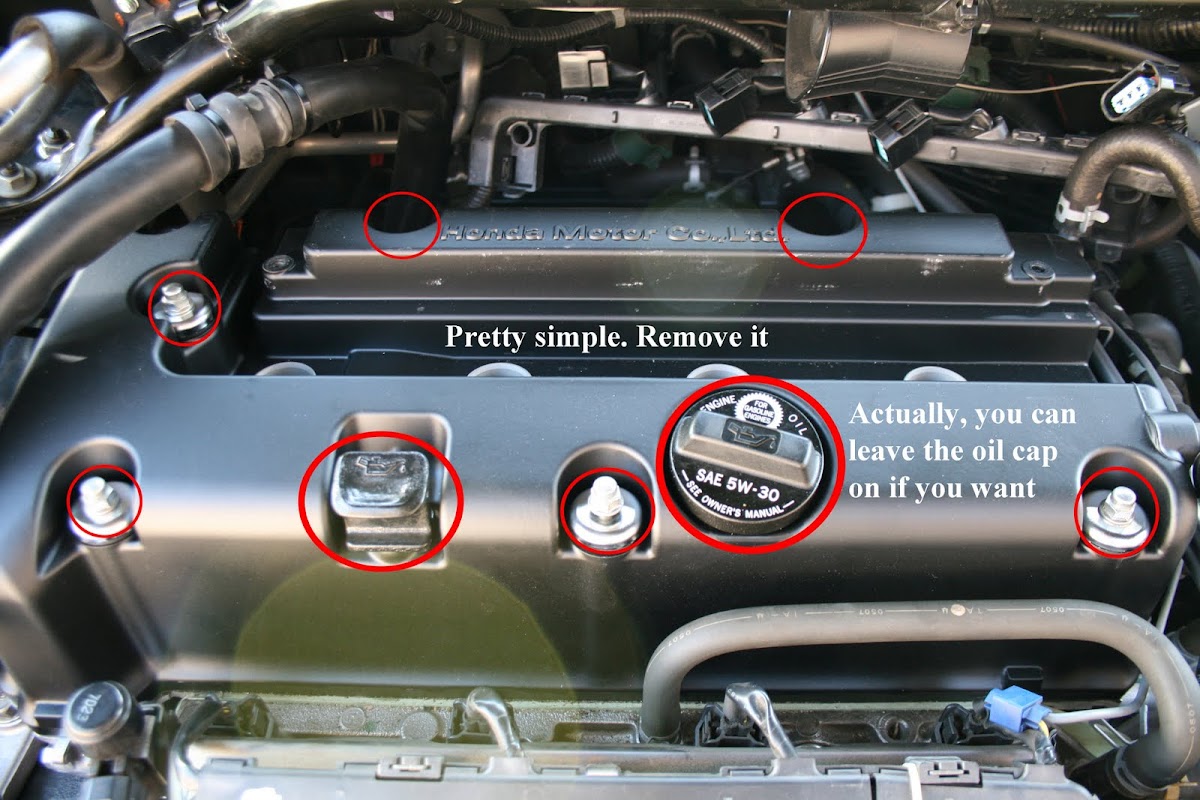
One very important tip that I didn't mention in here is to never torque down the valve cover bolts (the 10mm) with a lot of force. I was a rookie and made this mistake thinking the tighter the better, but I snapped the bolt putting too much force and my car was inoperable. And the thing is, these valve cover bolts are special bolts, you can't get it in hardware stores. So don't make the mistake I did. A good tip is when you're bolting down the valve cover, hold the wrench near the head of the wrench. That way you won't wrench it down with more force than needed.
11-08-2015, 10:02 PM
#13

I just finished this job and have a couple more tips.
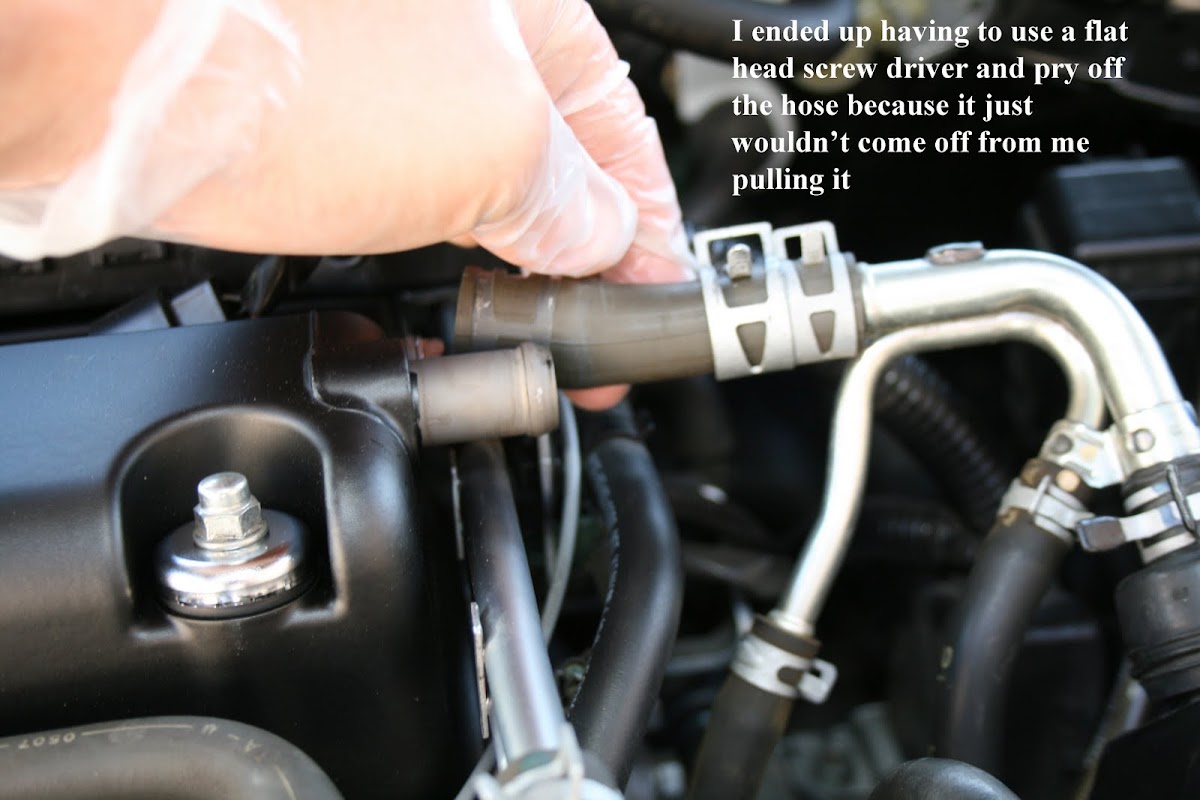
Remove the power steering hose fom the pump, then just tuck the hose under the strut brace.
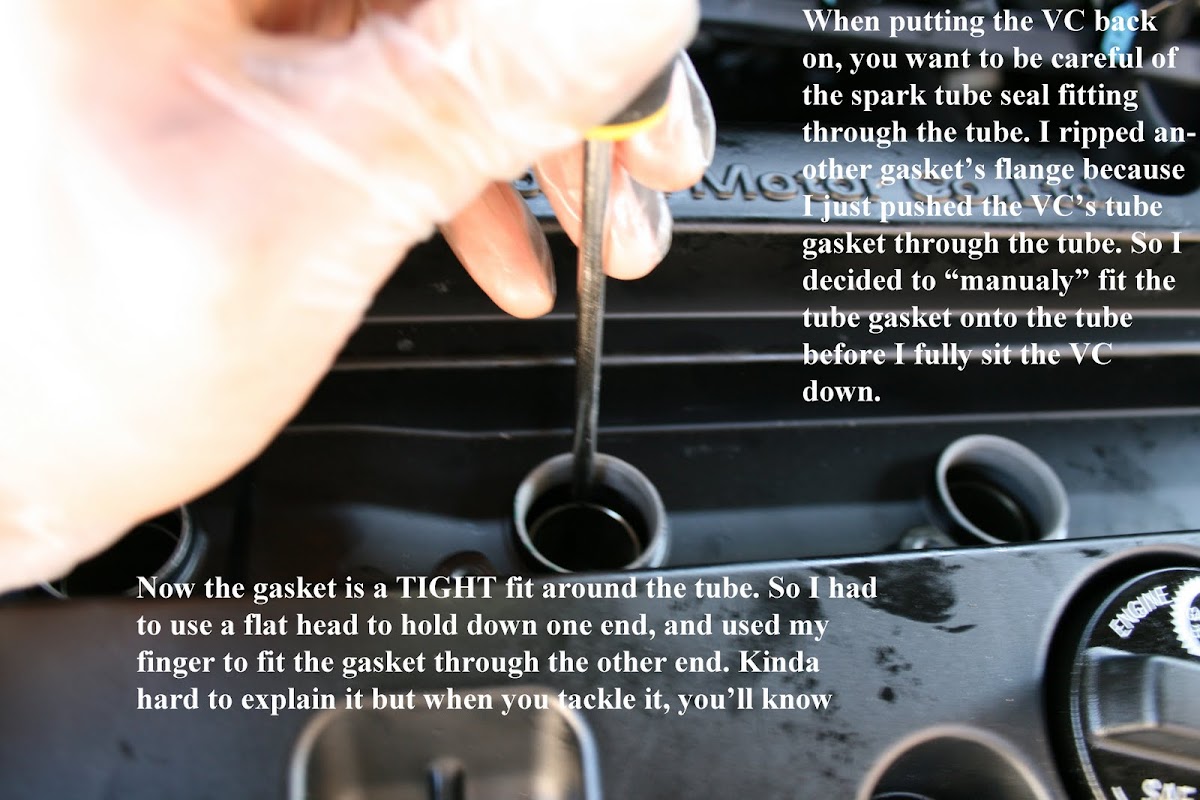
Use plastic trim removal tools to help fit the tube seals. The tubes are easy to damage with a screwdriver.
Use a torque wrench set to 8.7 ft/lbs and tighten the valve cover nuts in the proper sequence per the repair manual.
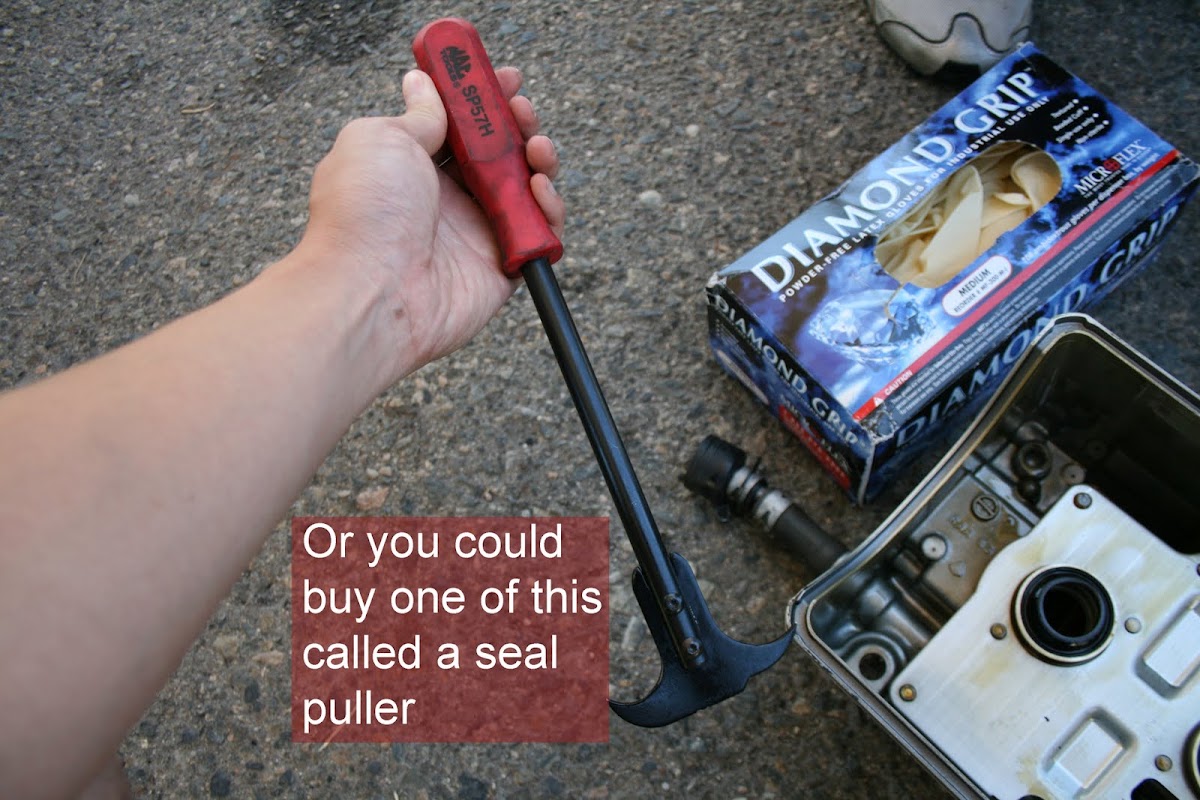
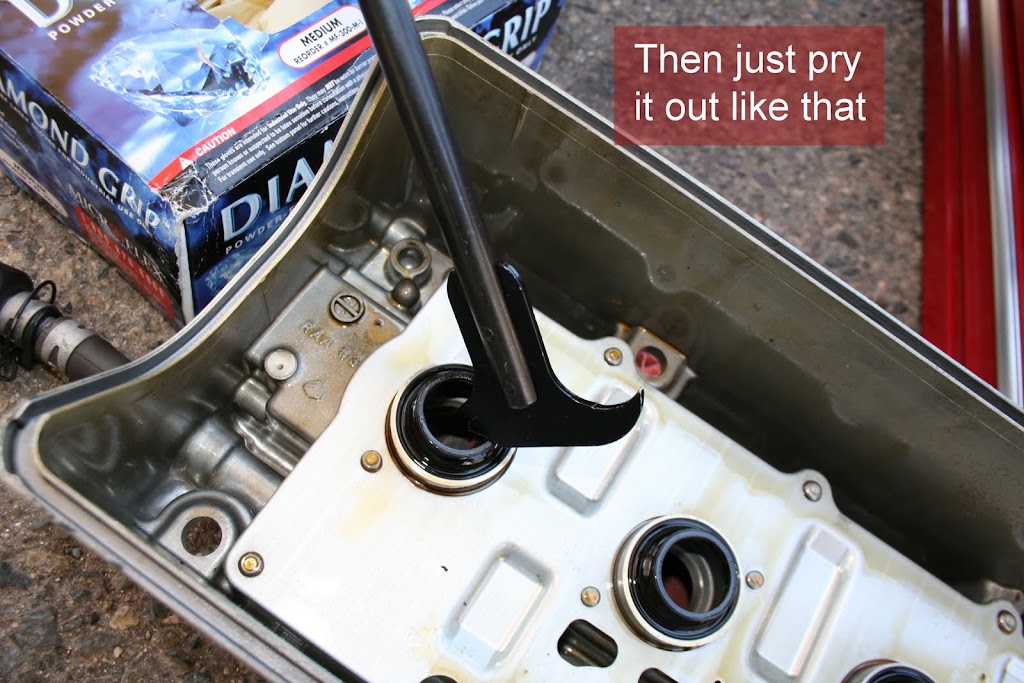
Be very careful when removing the old tube seals, it is easy to scratch the surfaces with a seal removal tool.
Remove the power steering hose fom the pump, then just tuck the hose under the strut brace.
Use plastic trim removal tools to help fit the tube seals. The tubes are easy to damage with a screwdriver.
Use a torque wrench set to 8.7 ft/lbs and tighten the valve cover nuts in the proper sequence per the repair manual.
Be very careful when removing the old tube seals, it is easy to scratch the surfaces with a seal removal tool.

Thread
Thread Starter
Forum
Replies
Last Post
cycdaniel
1G TSX Performance Parts & Modifications
8
12-17-2019 10:58 AM
wusty23jd
3G TL Audio, Bluetooth, Electronics & Navigation
4
09-24-2015 11:41 AM