1993 Vigor GS 5MT Build
 08-31-2017, 11:03 PM
#41
Burning Brakes
Thread Starter
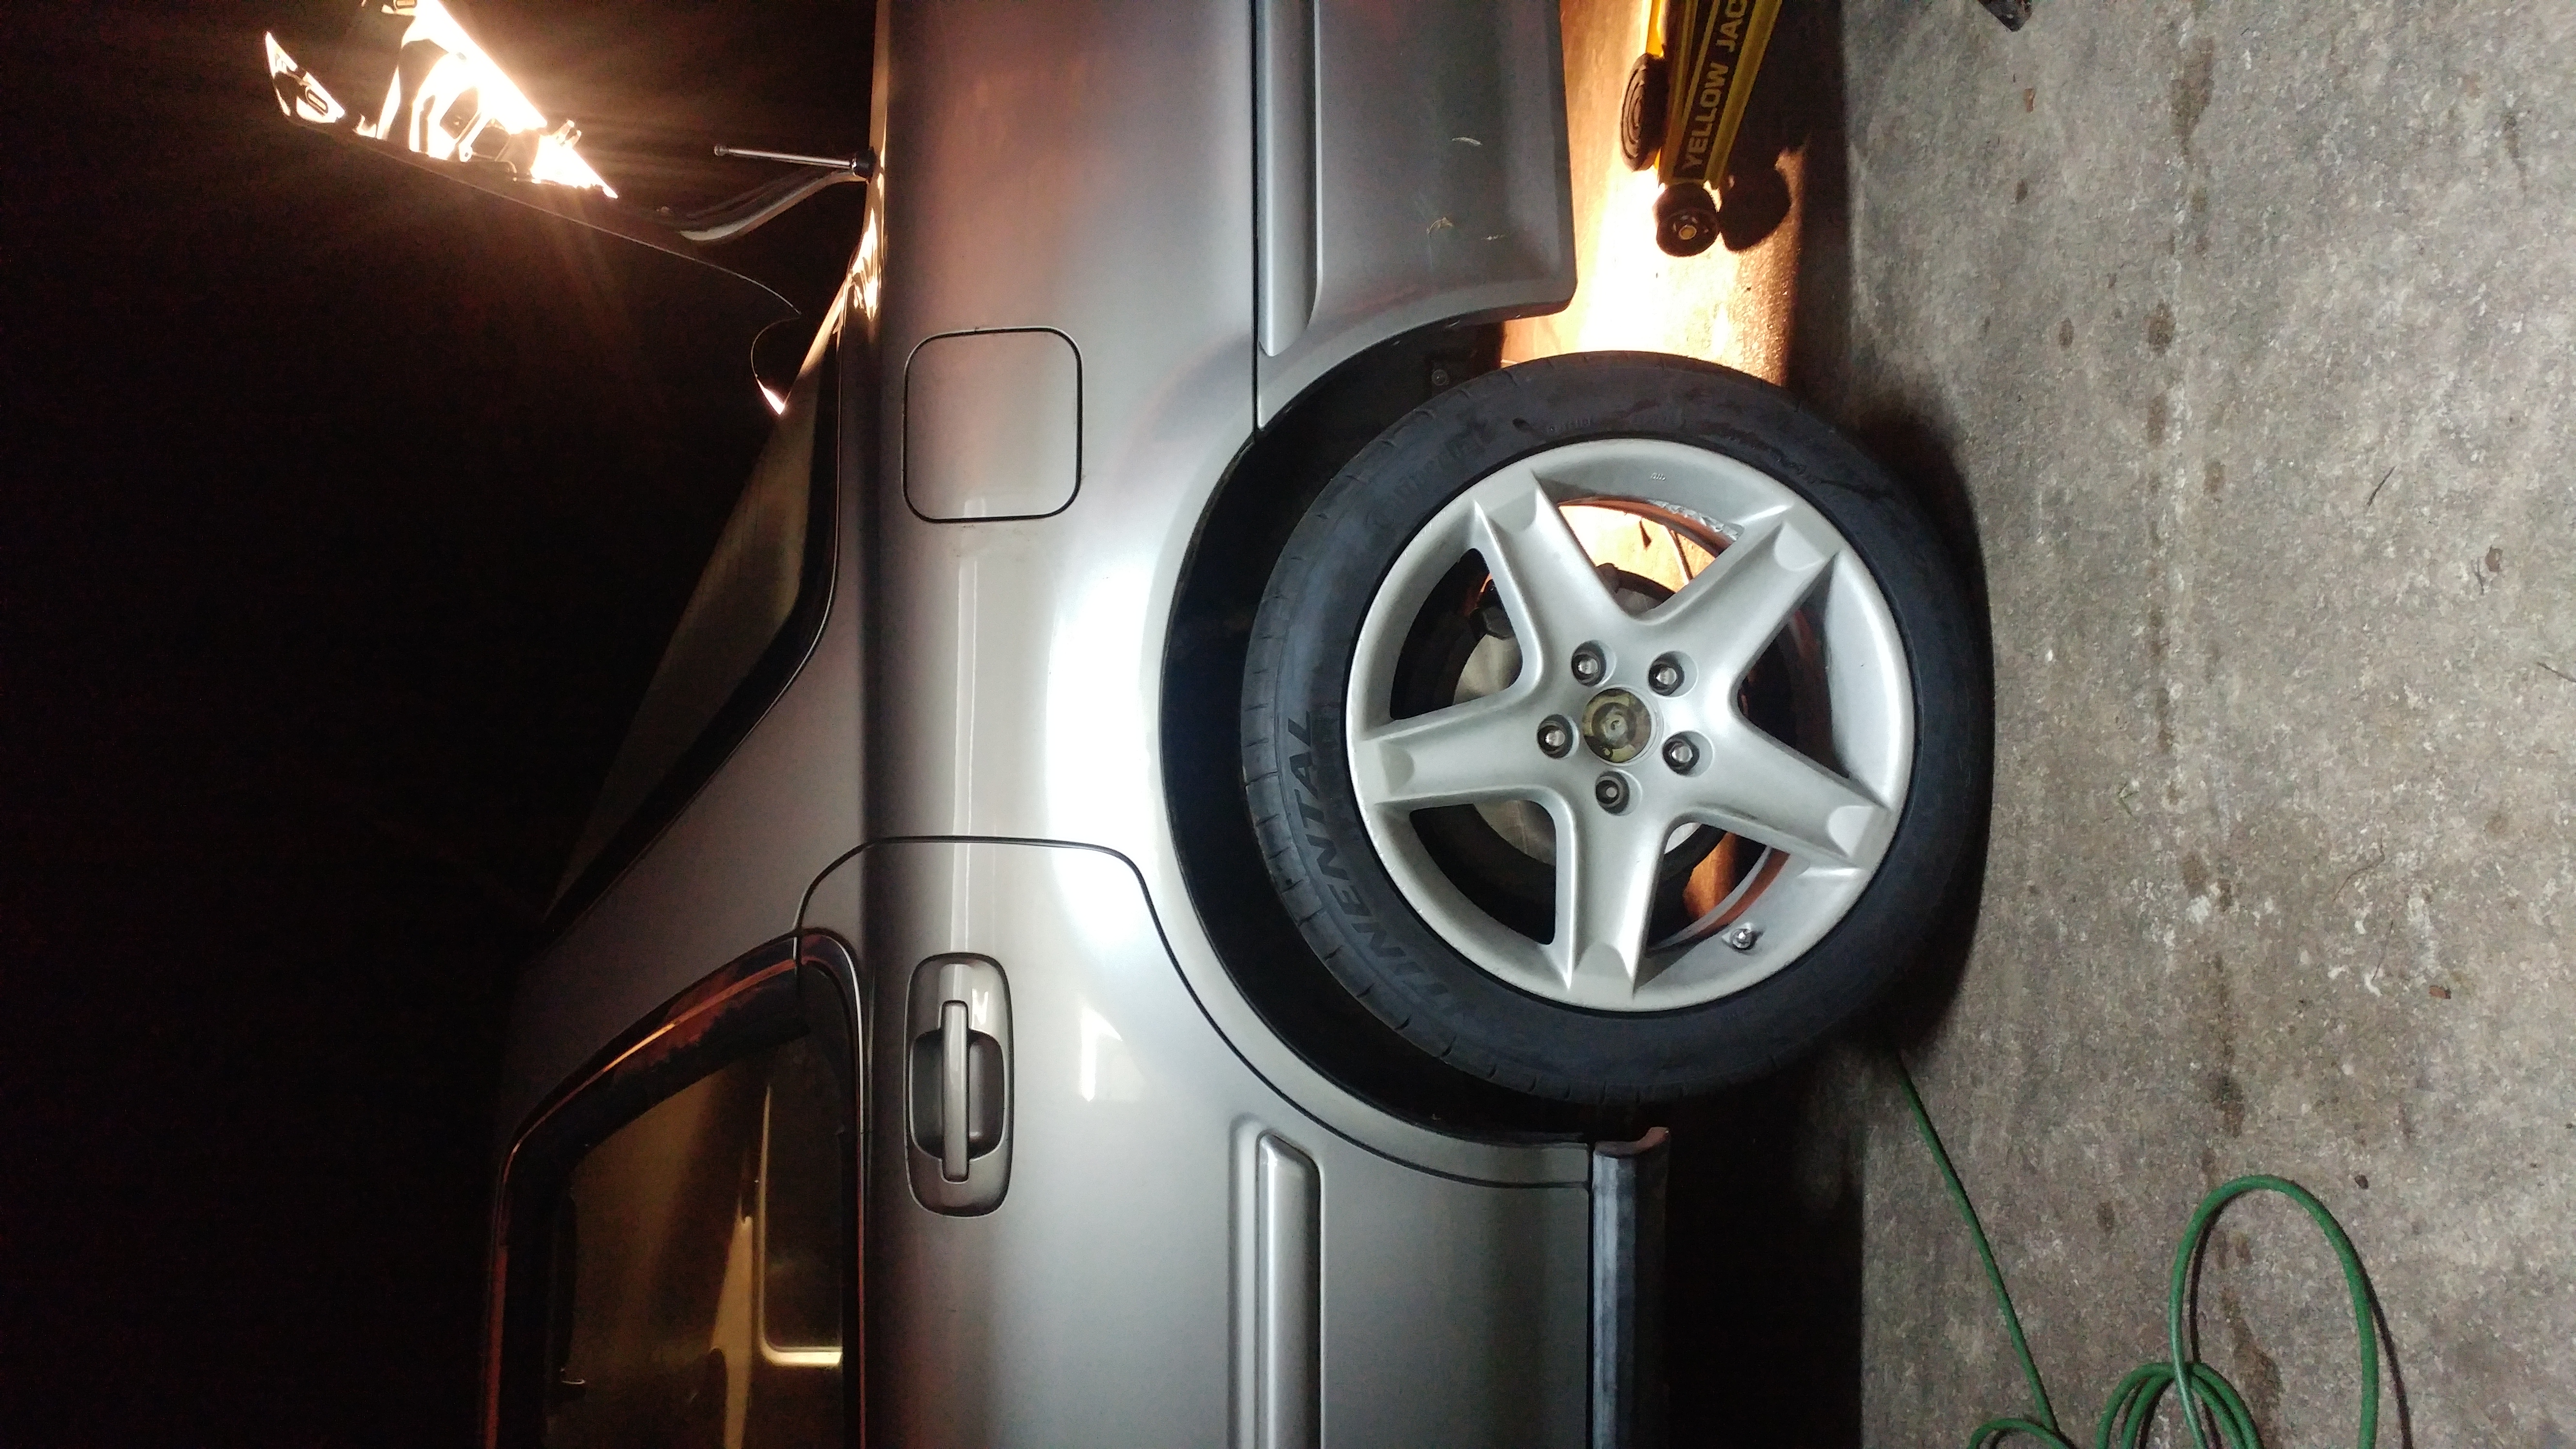
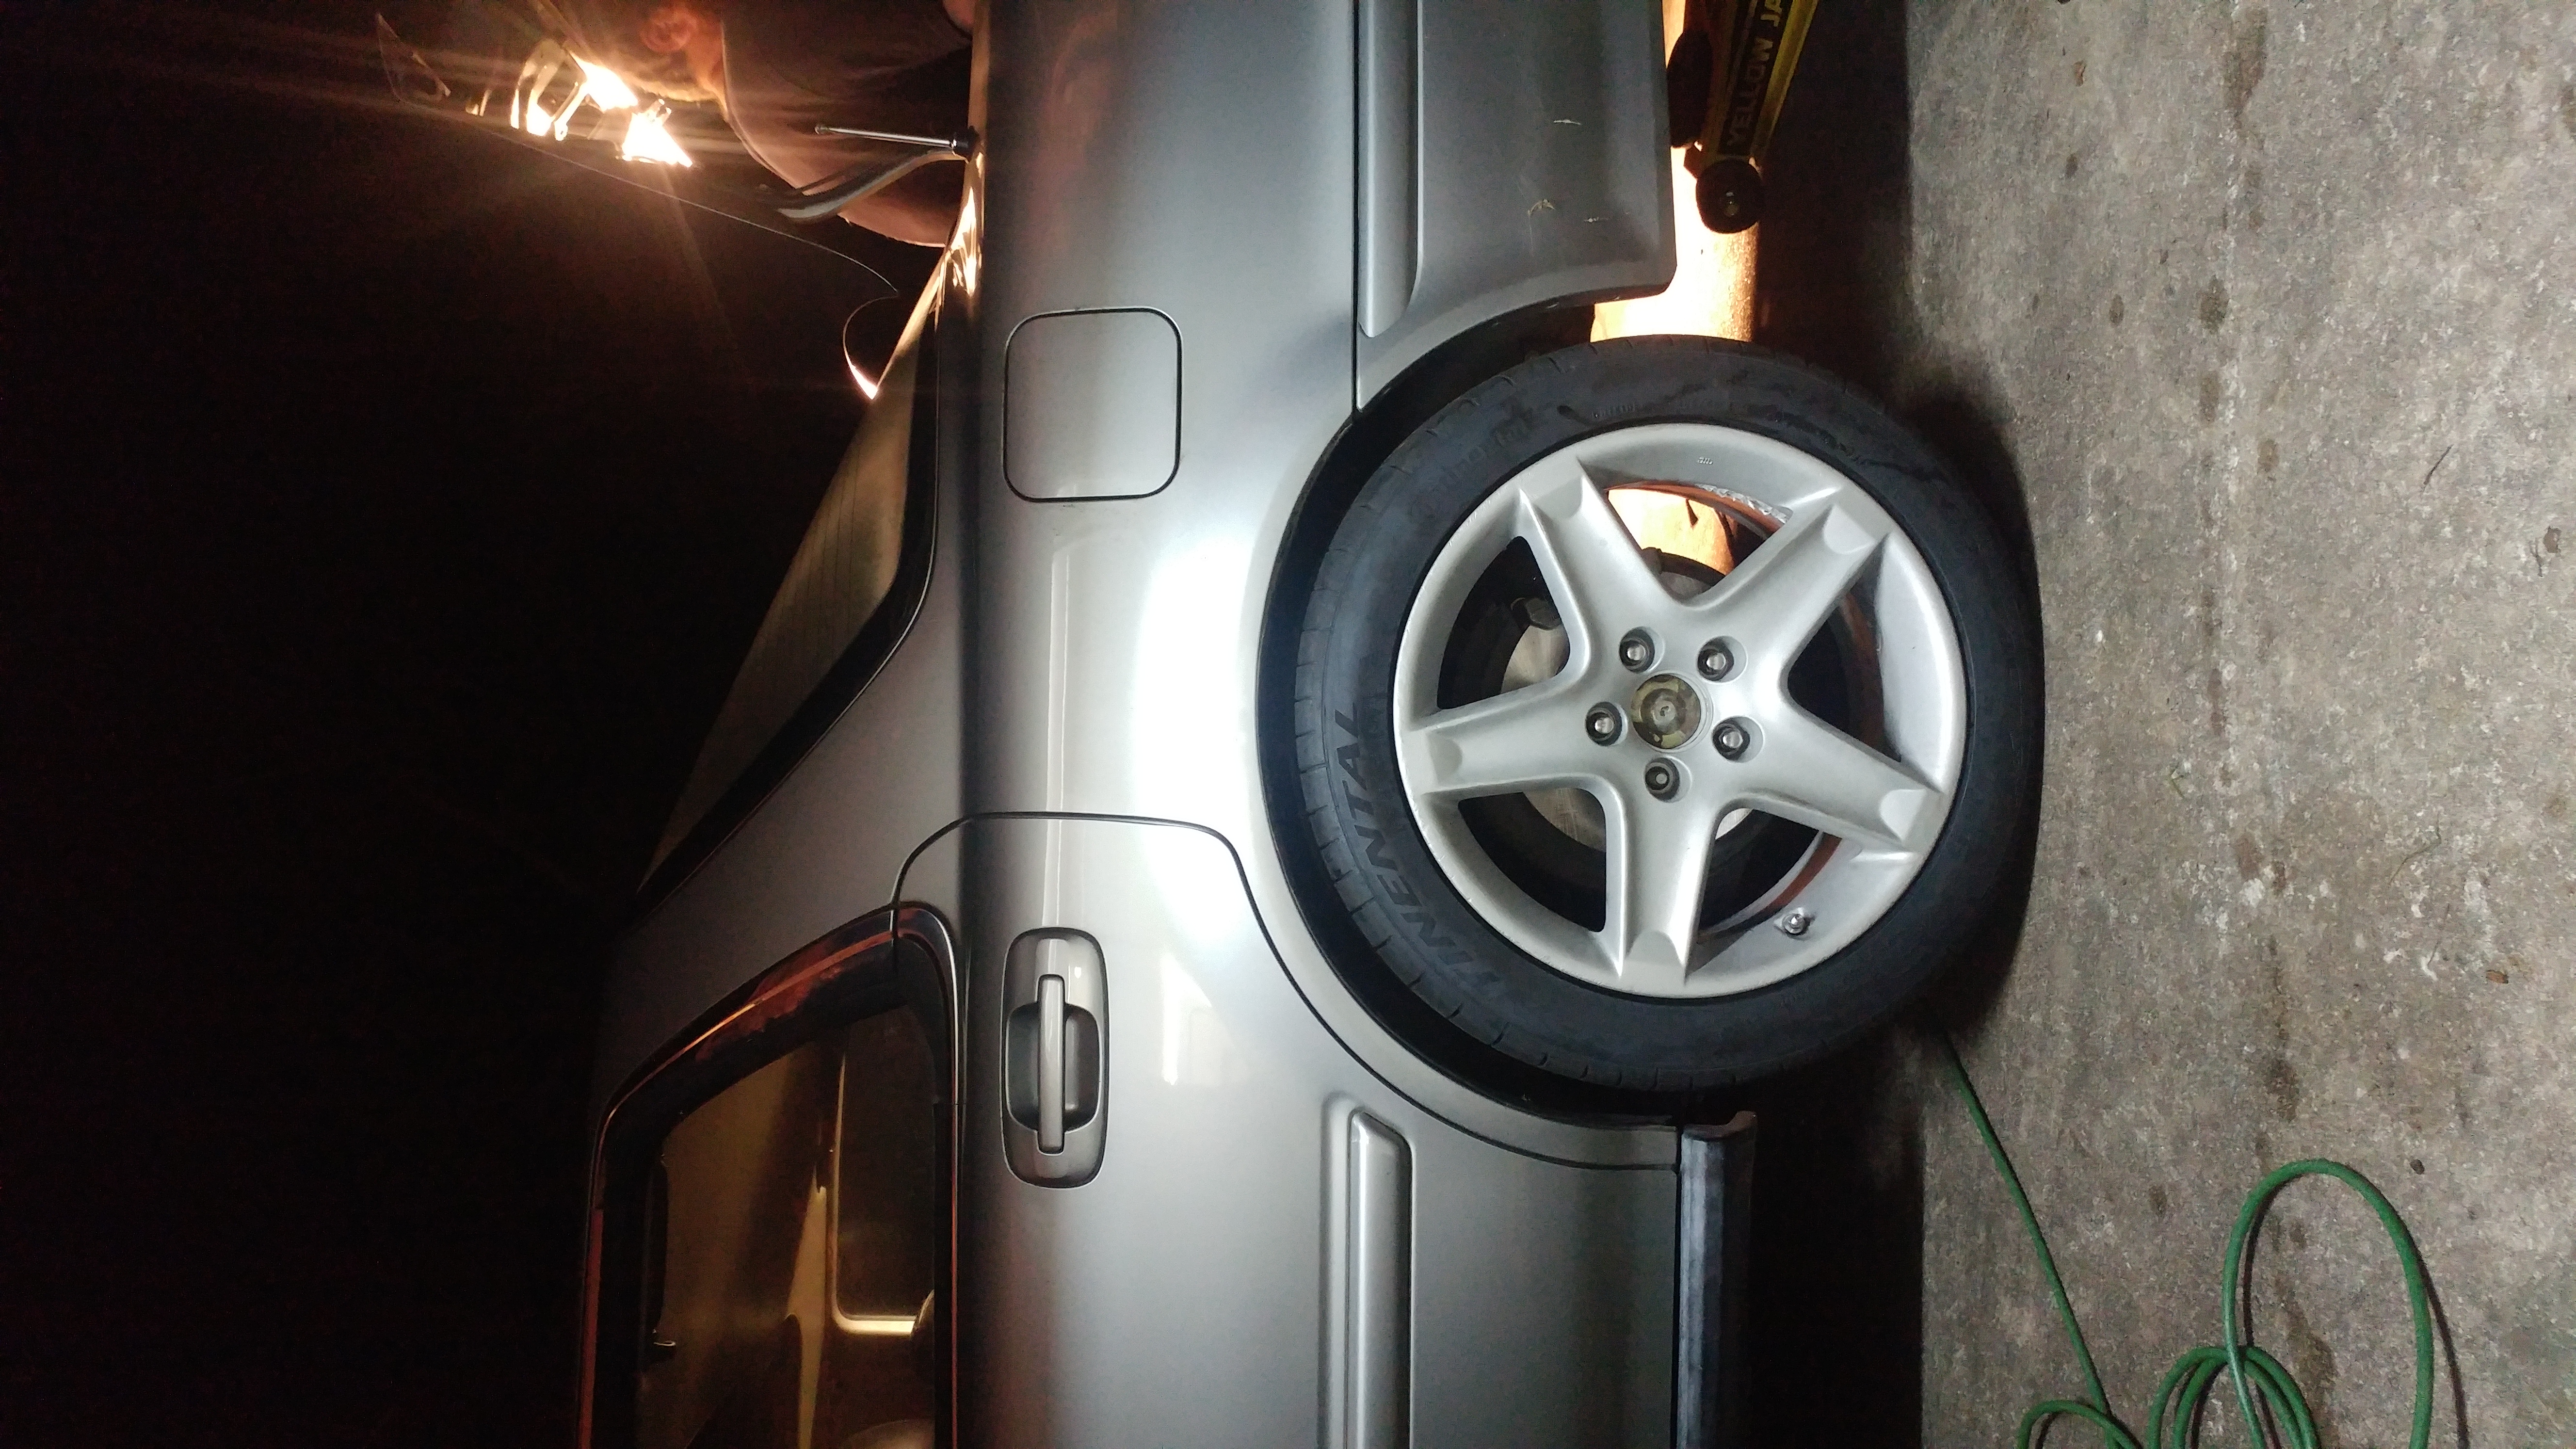
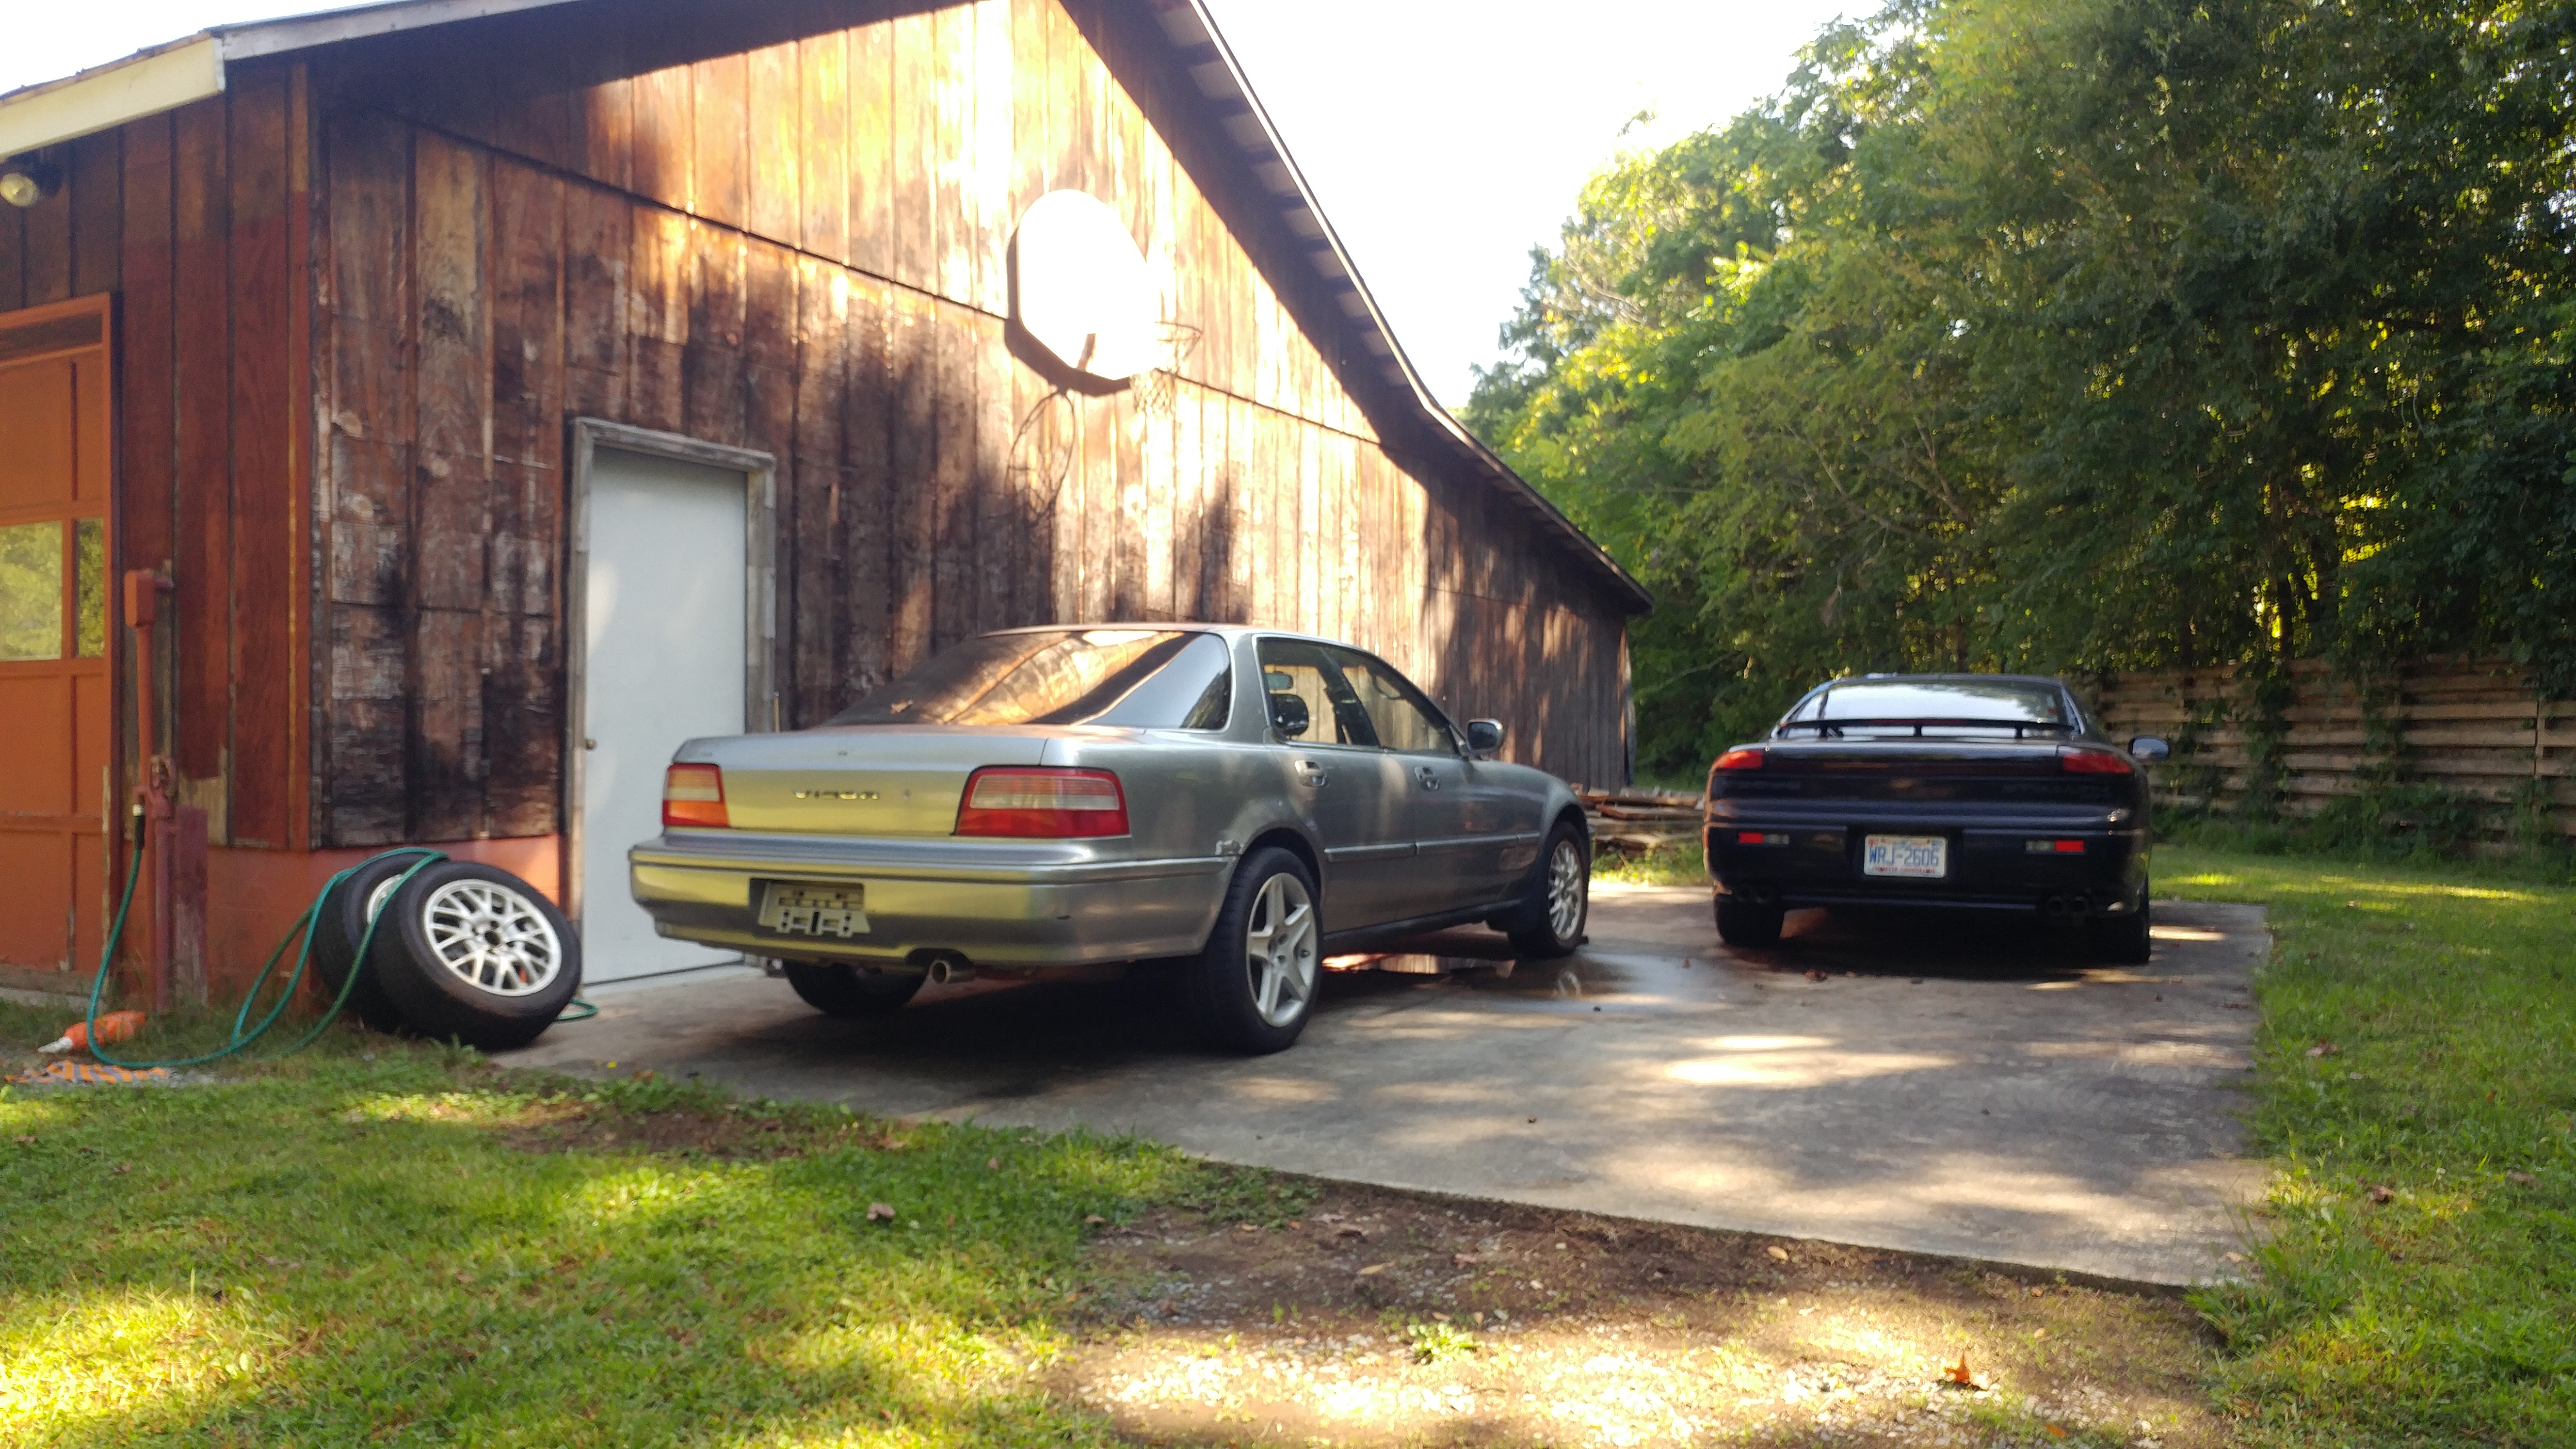
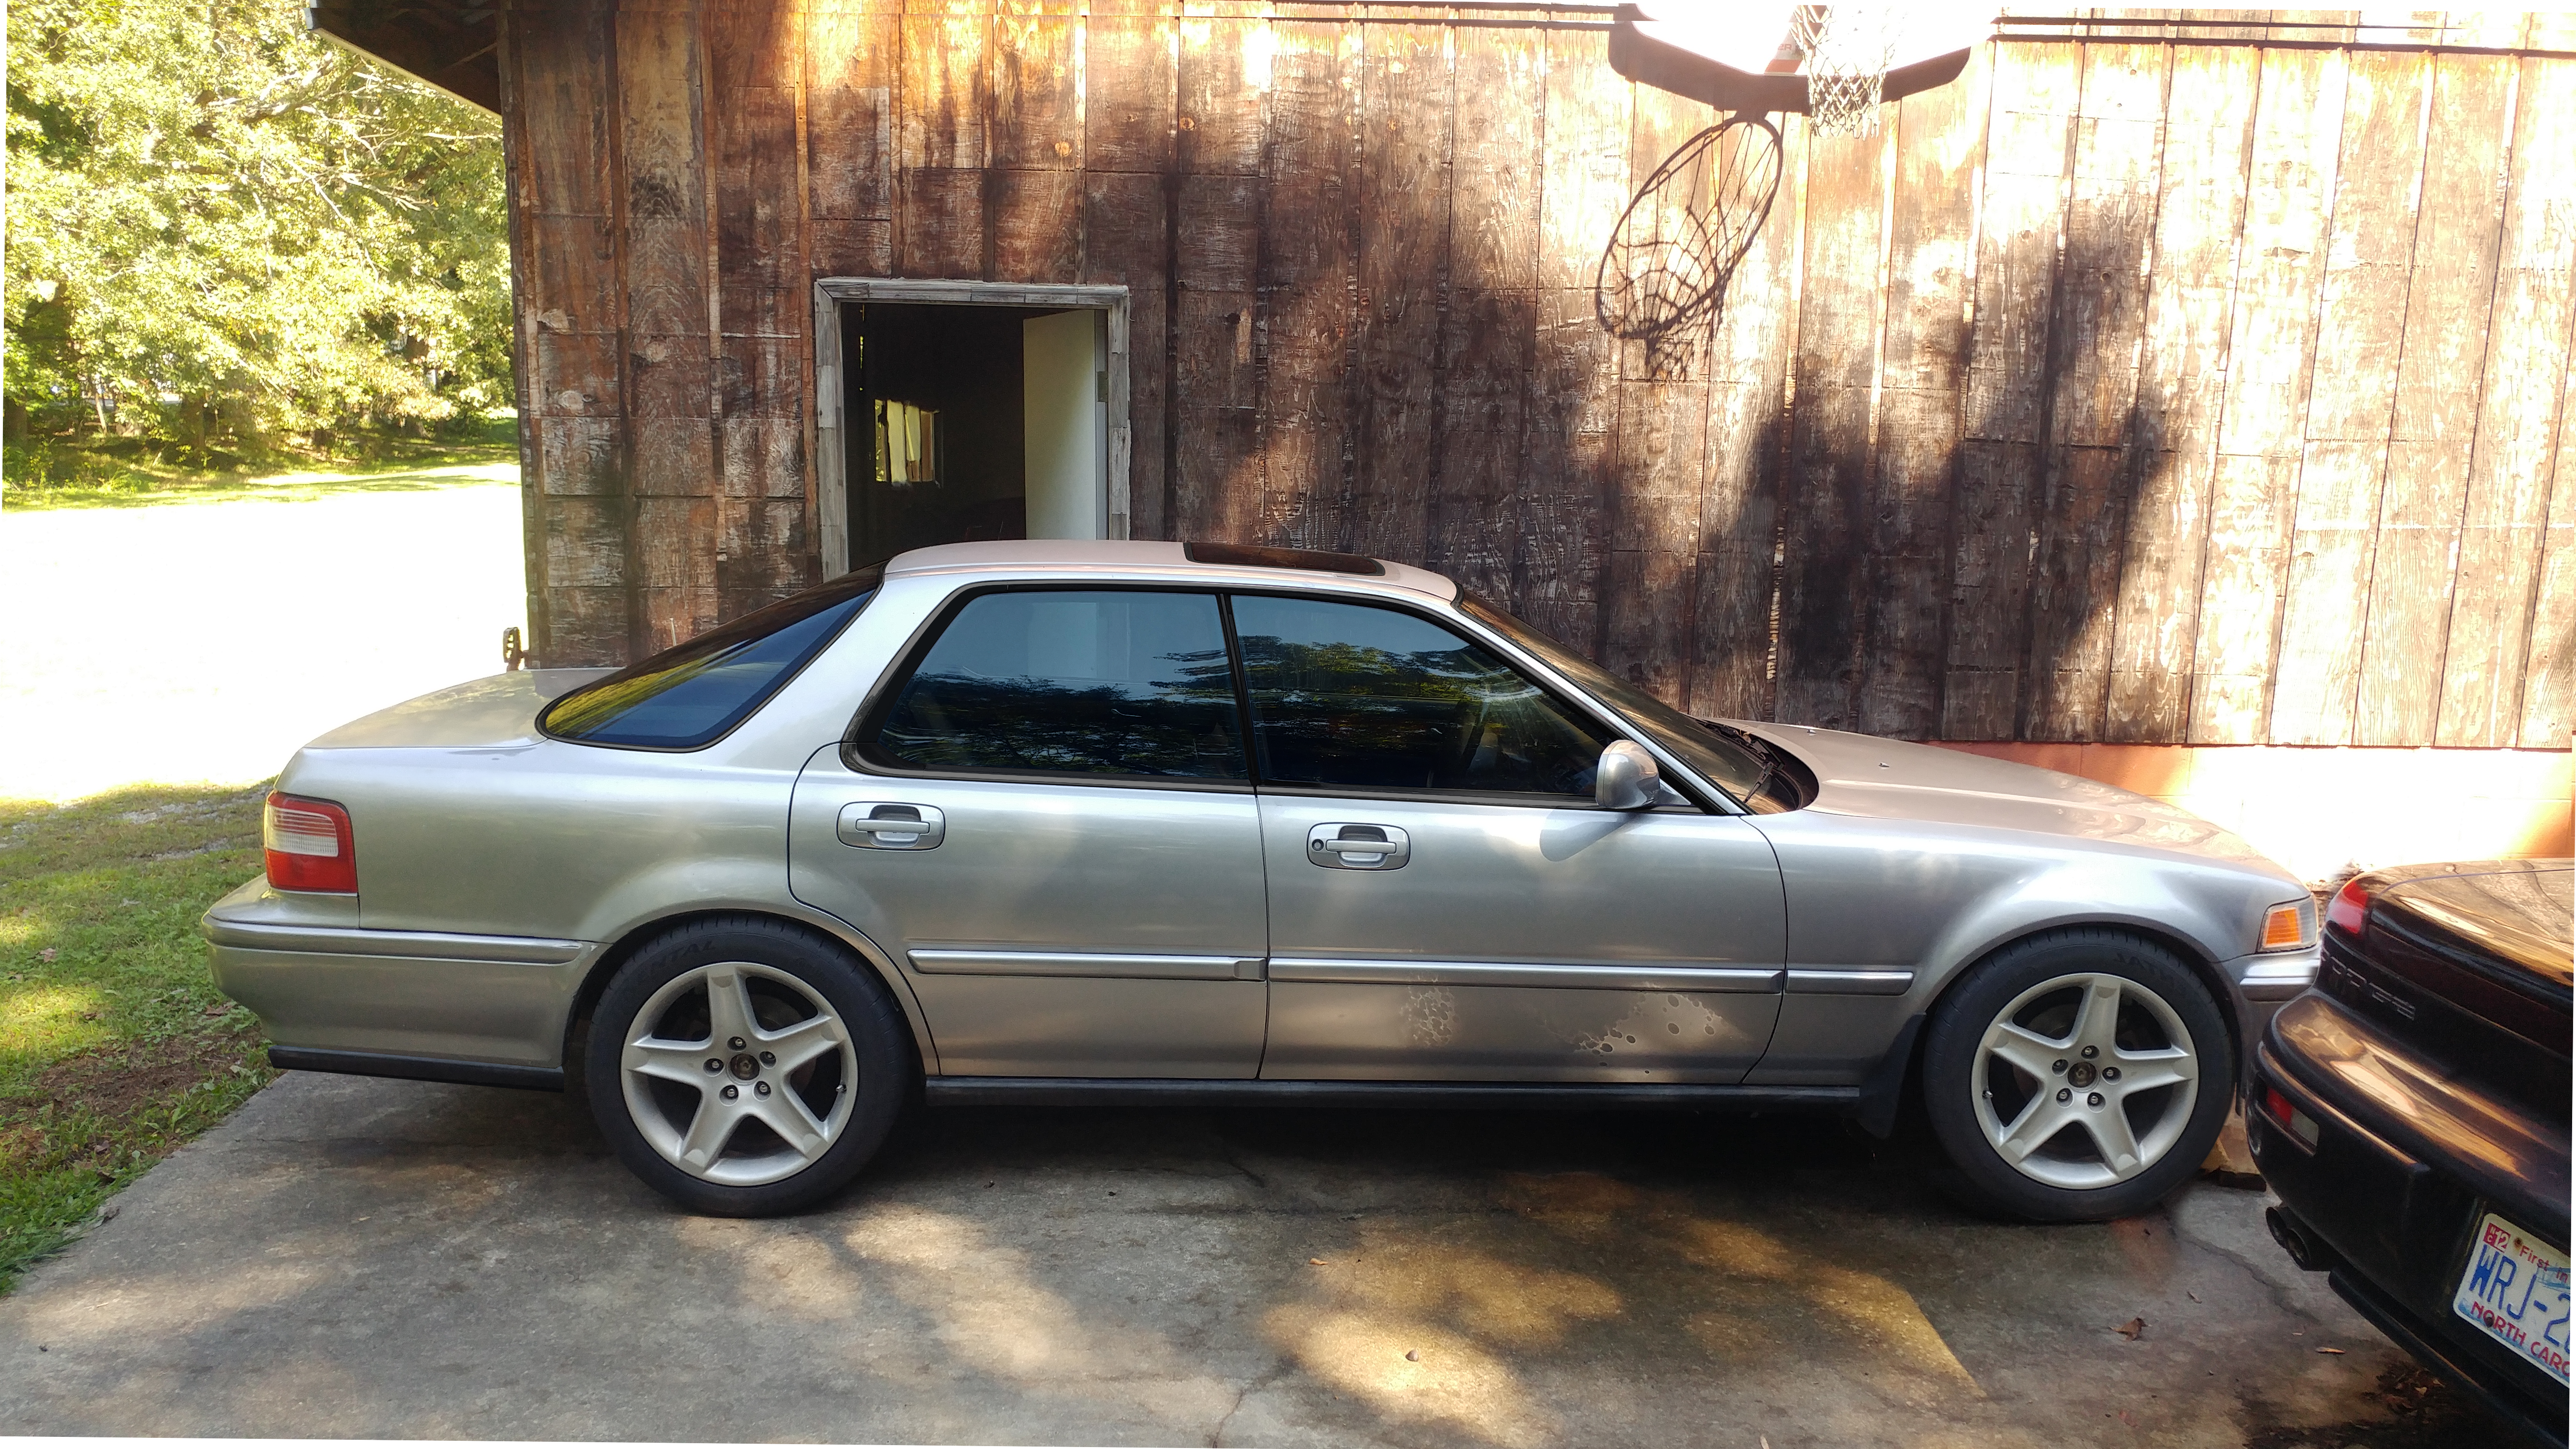
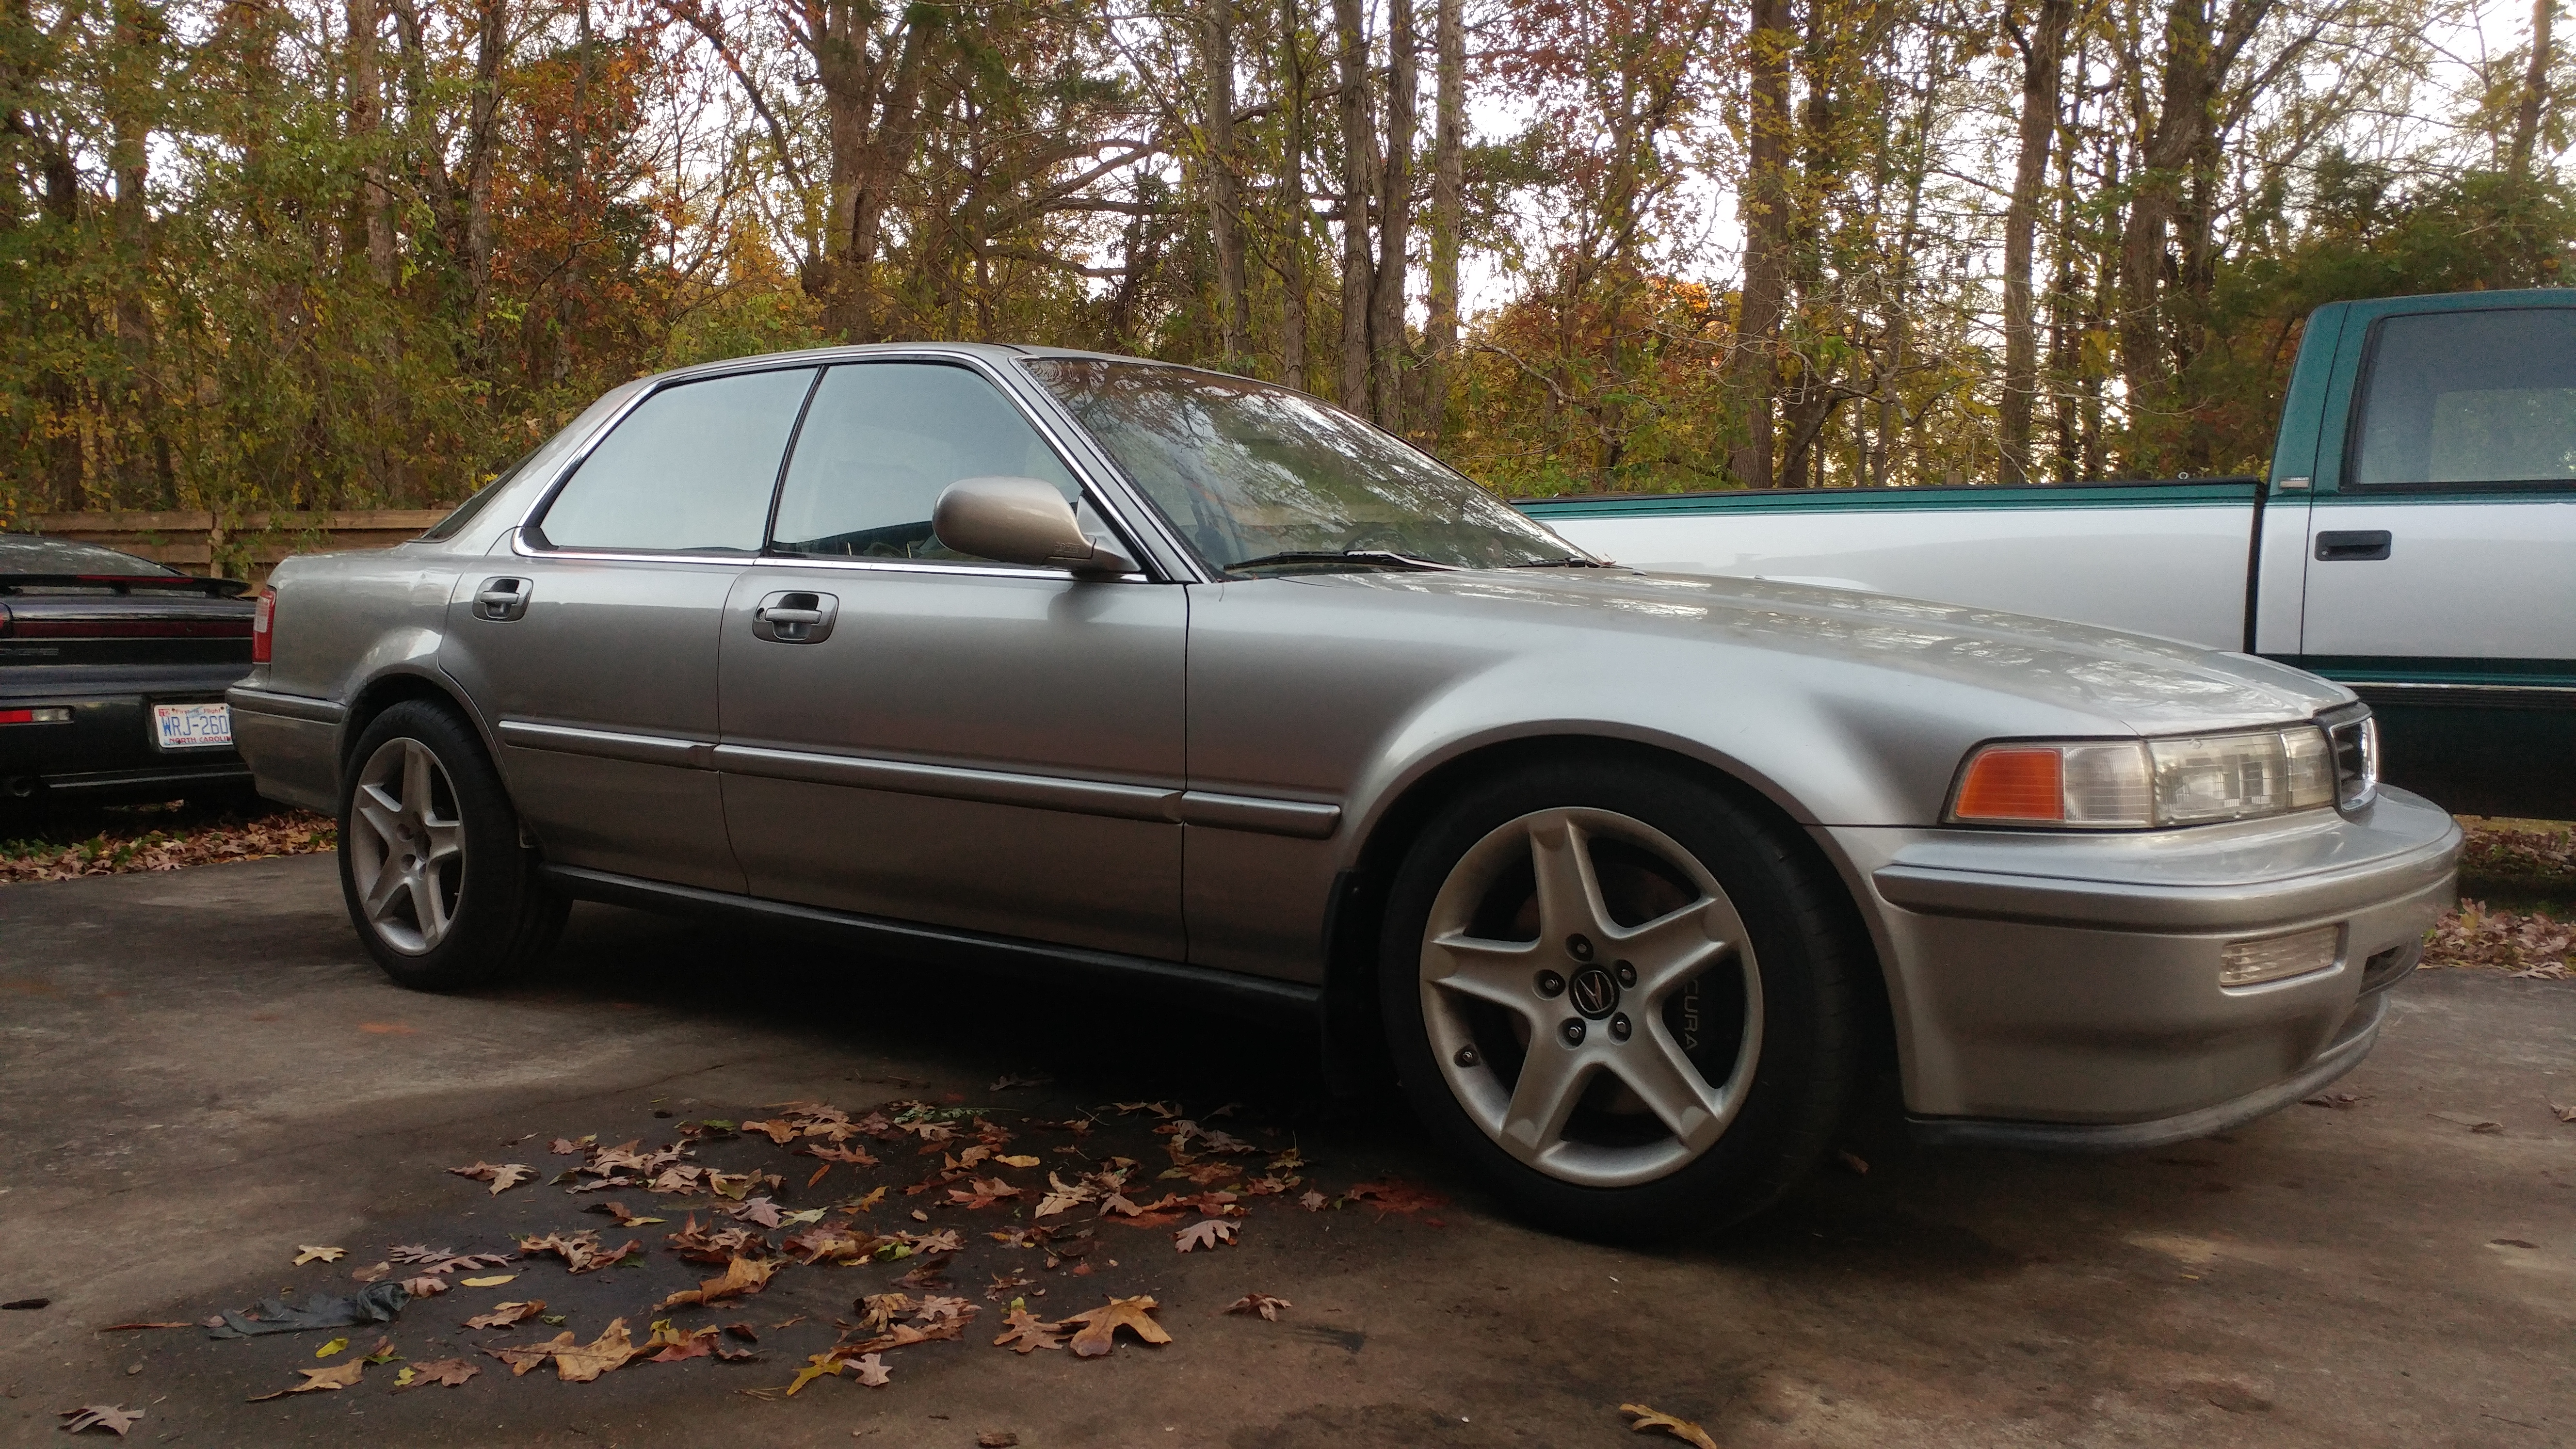
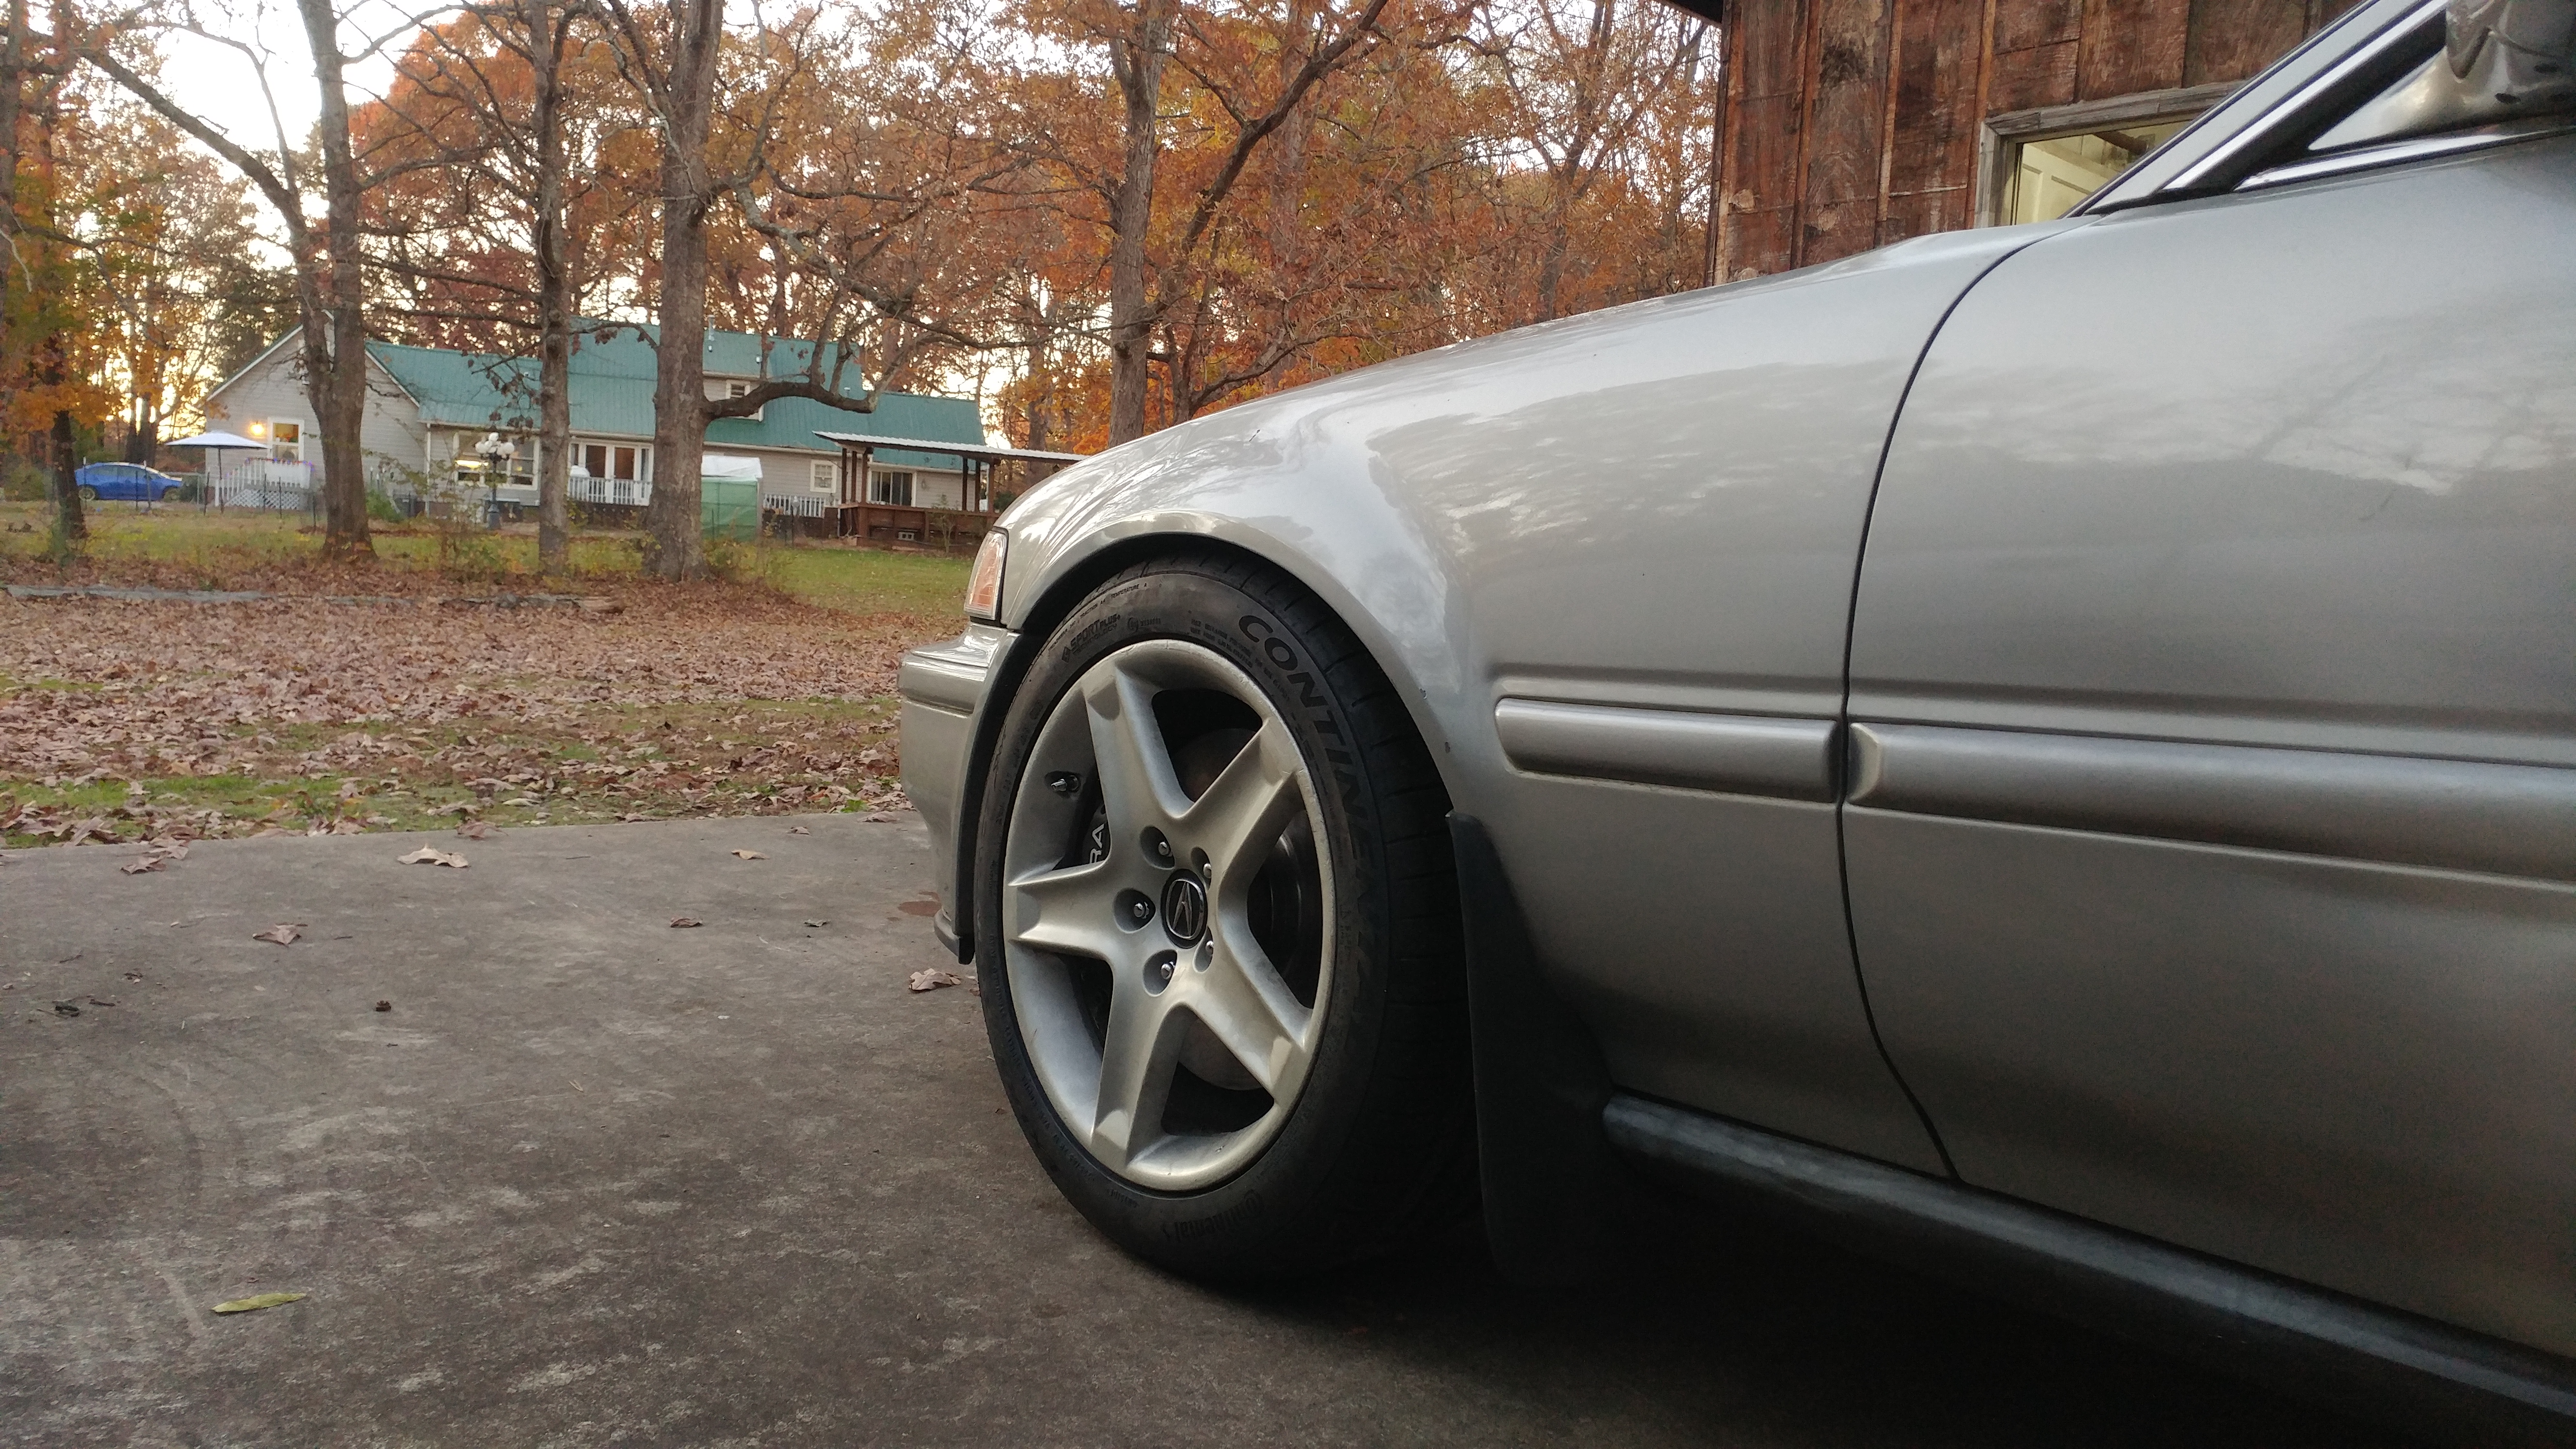
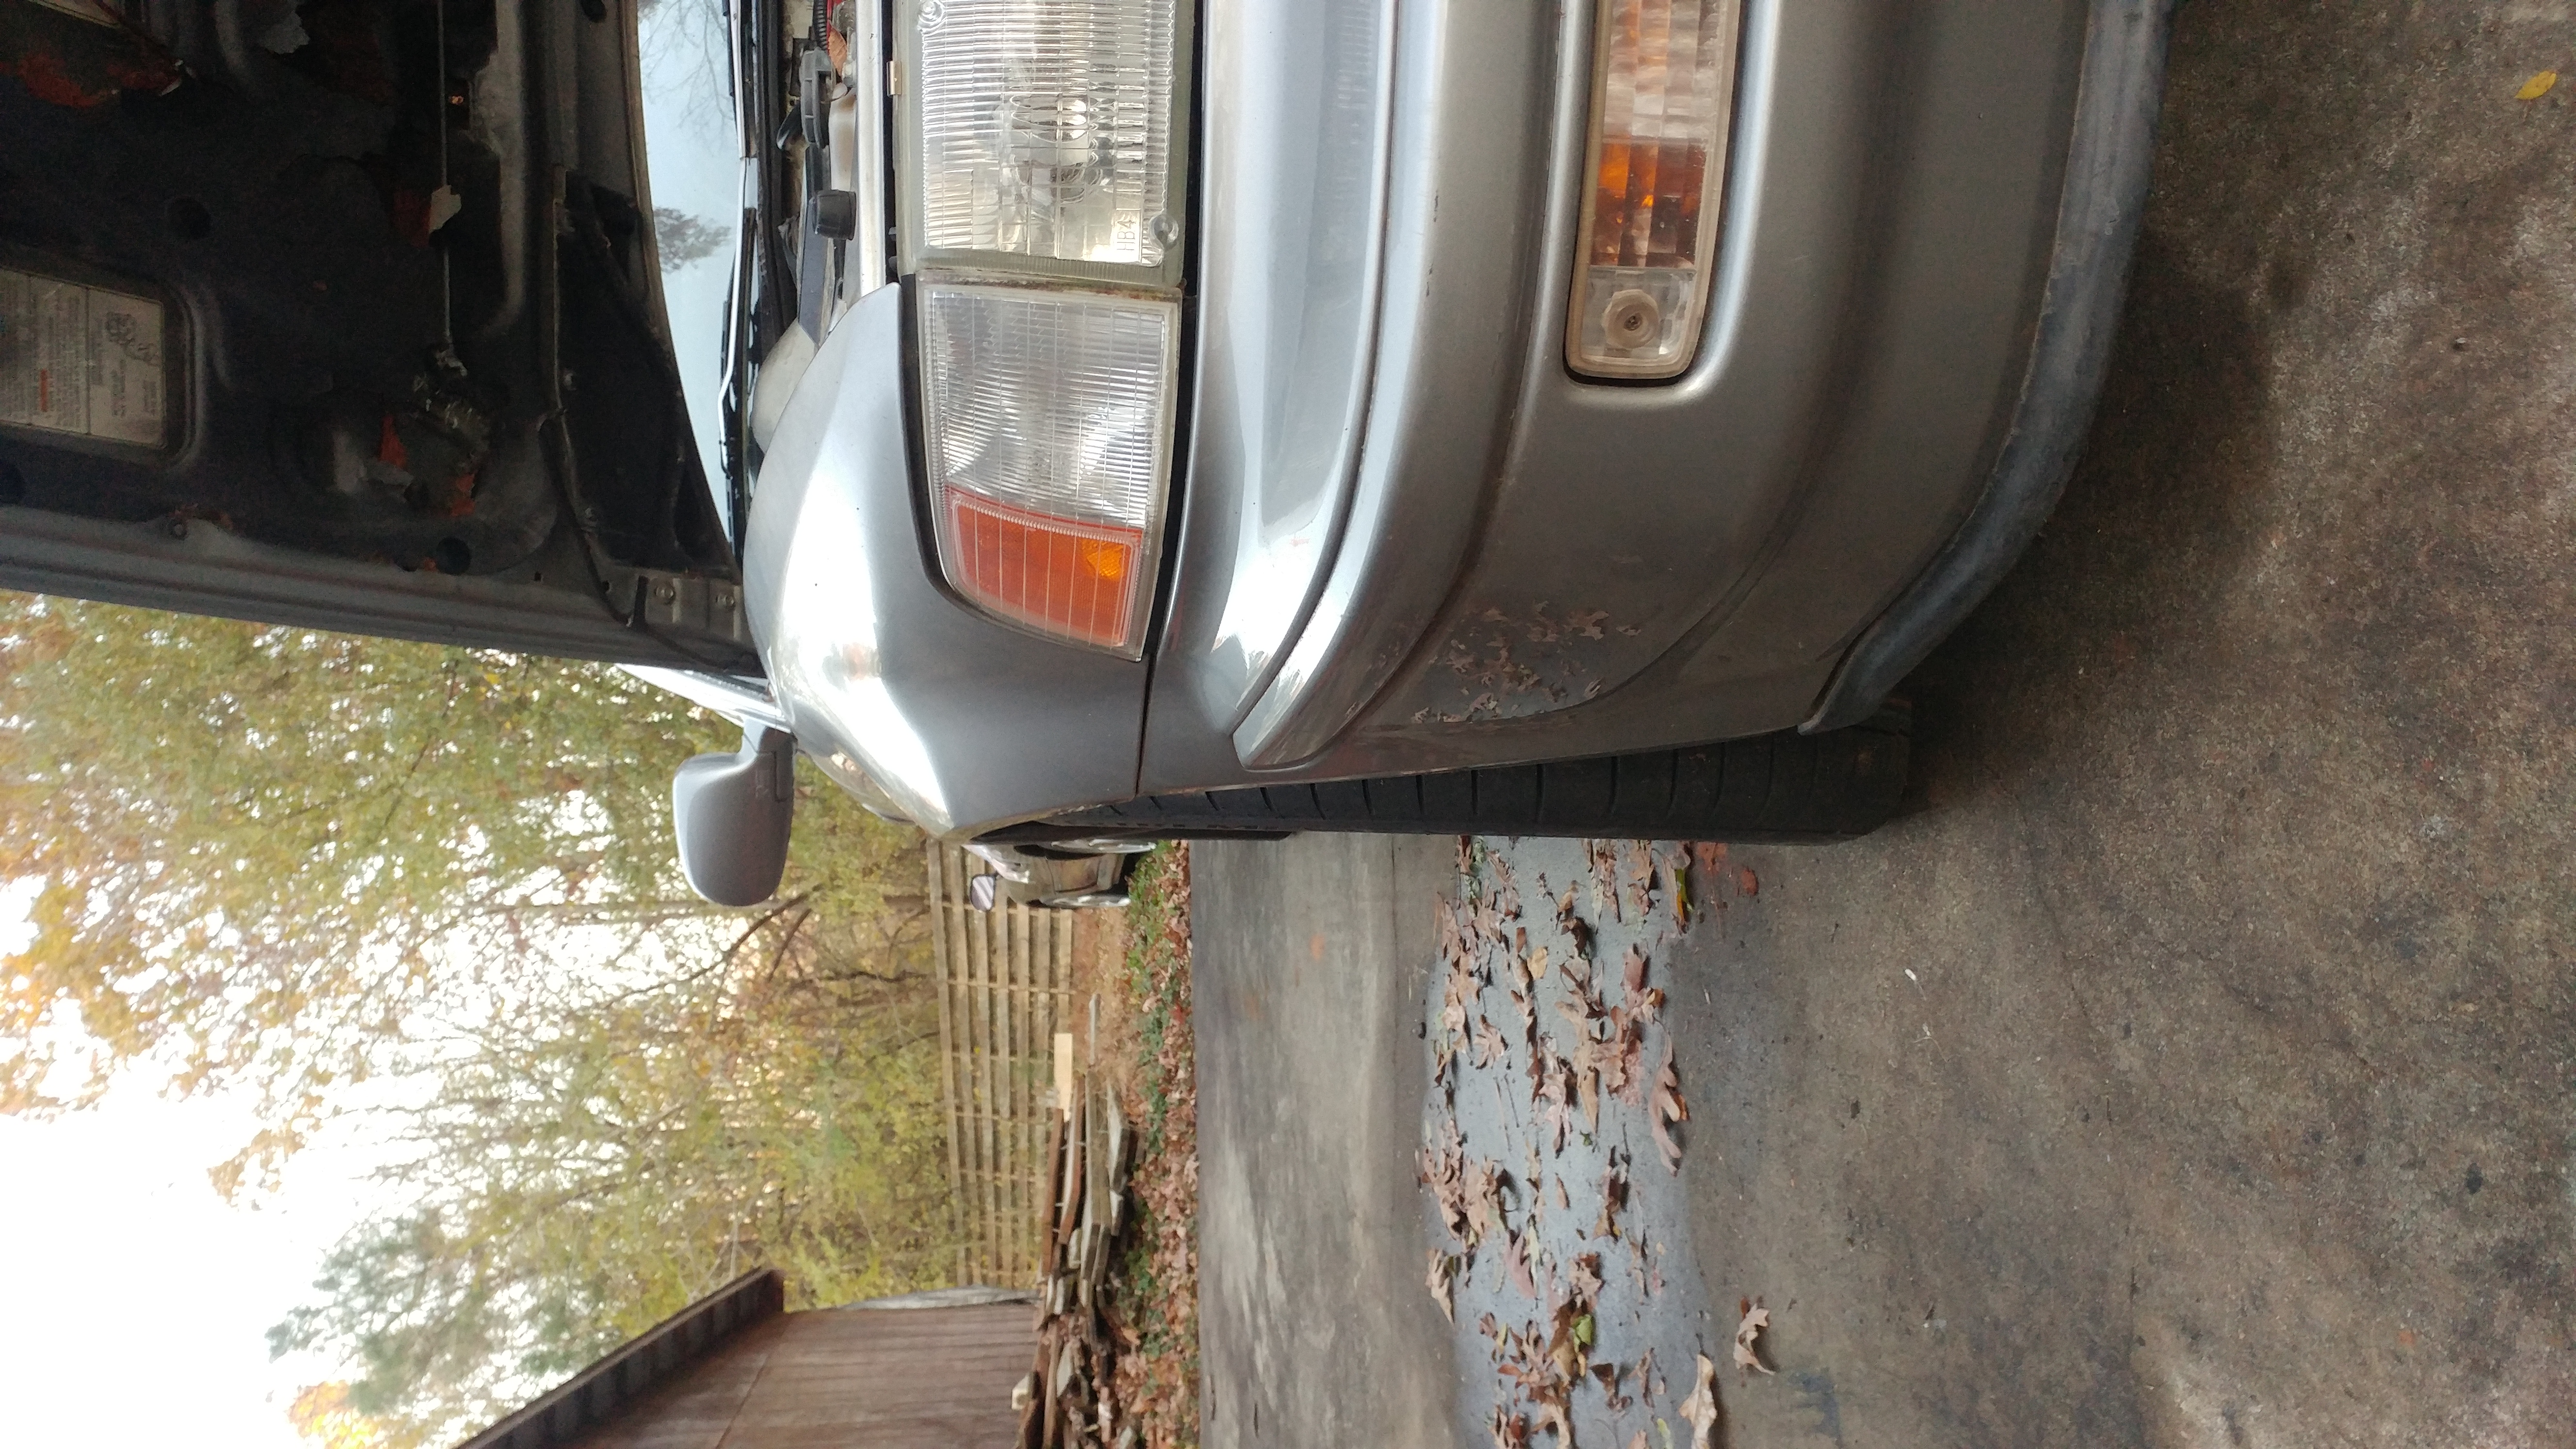
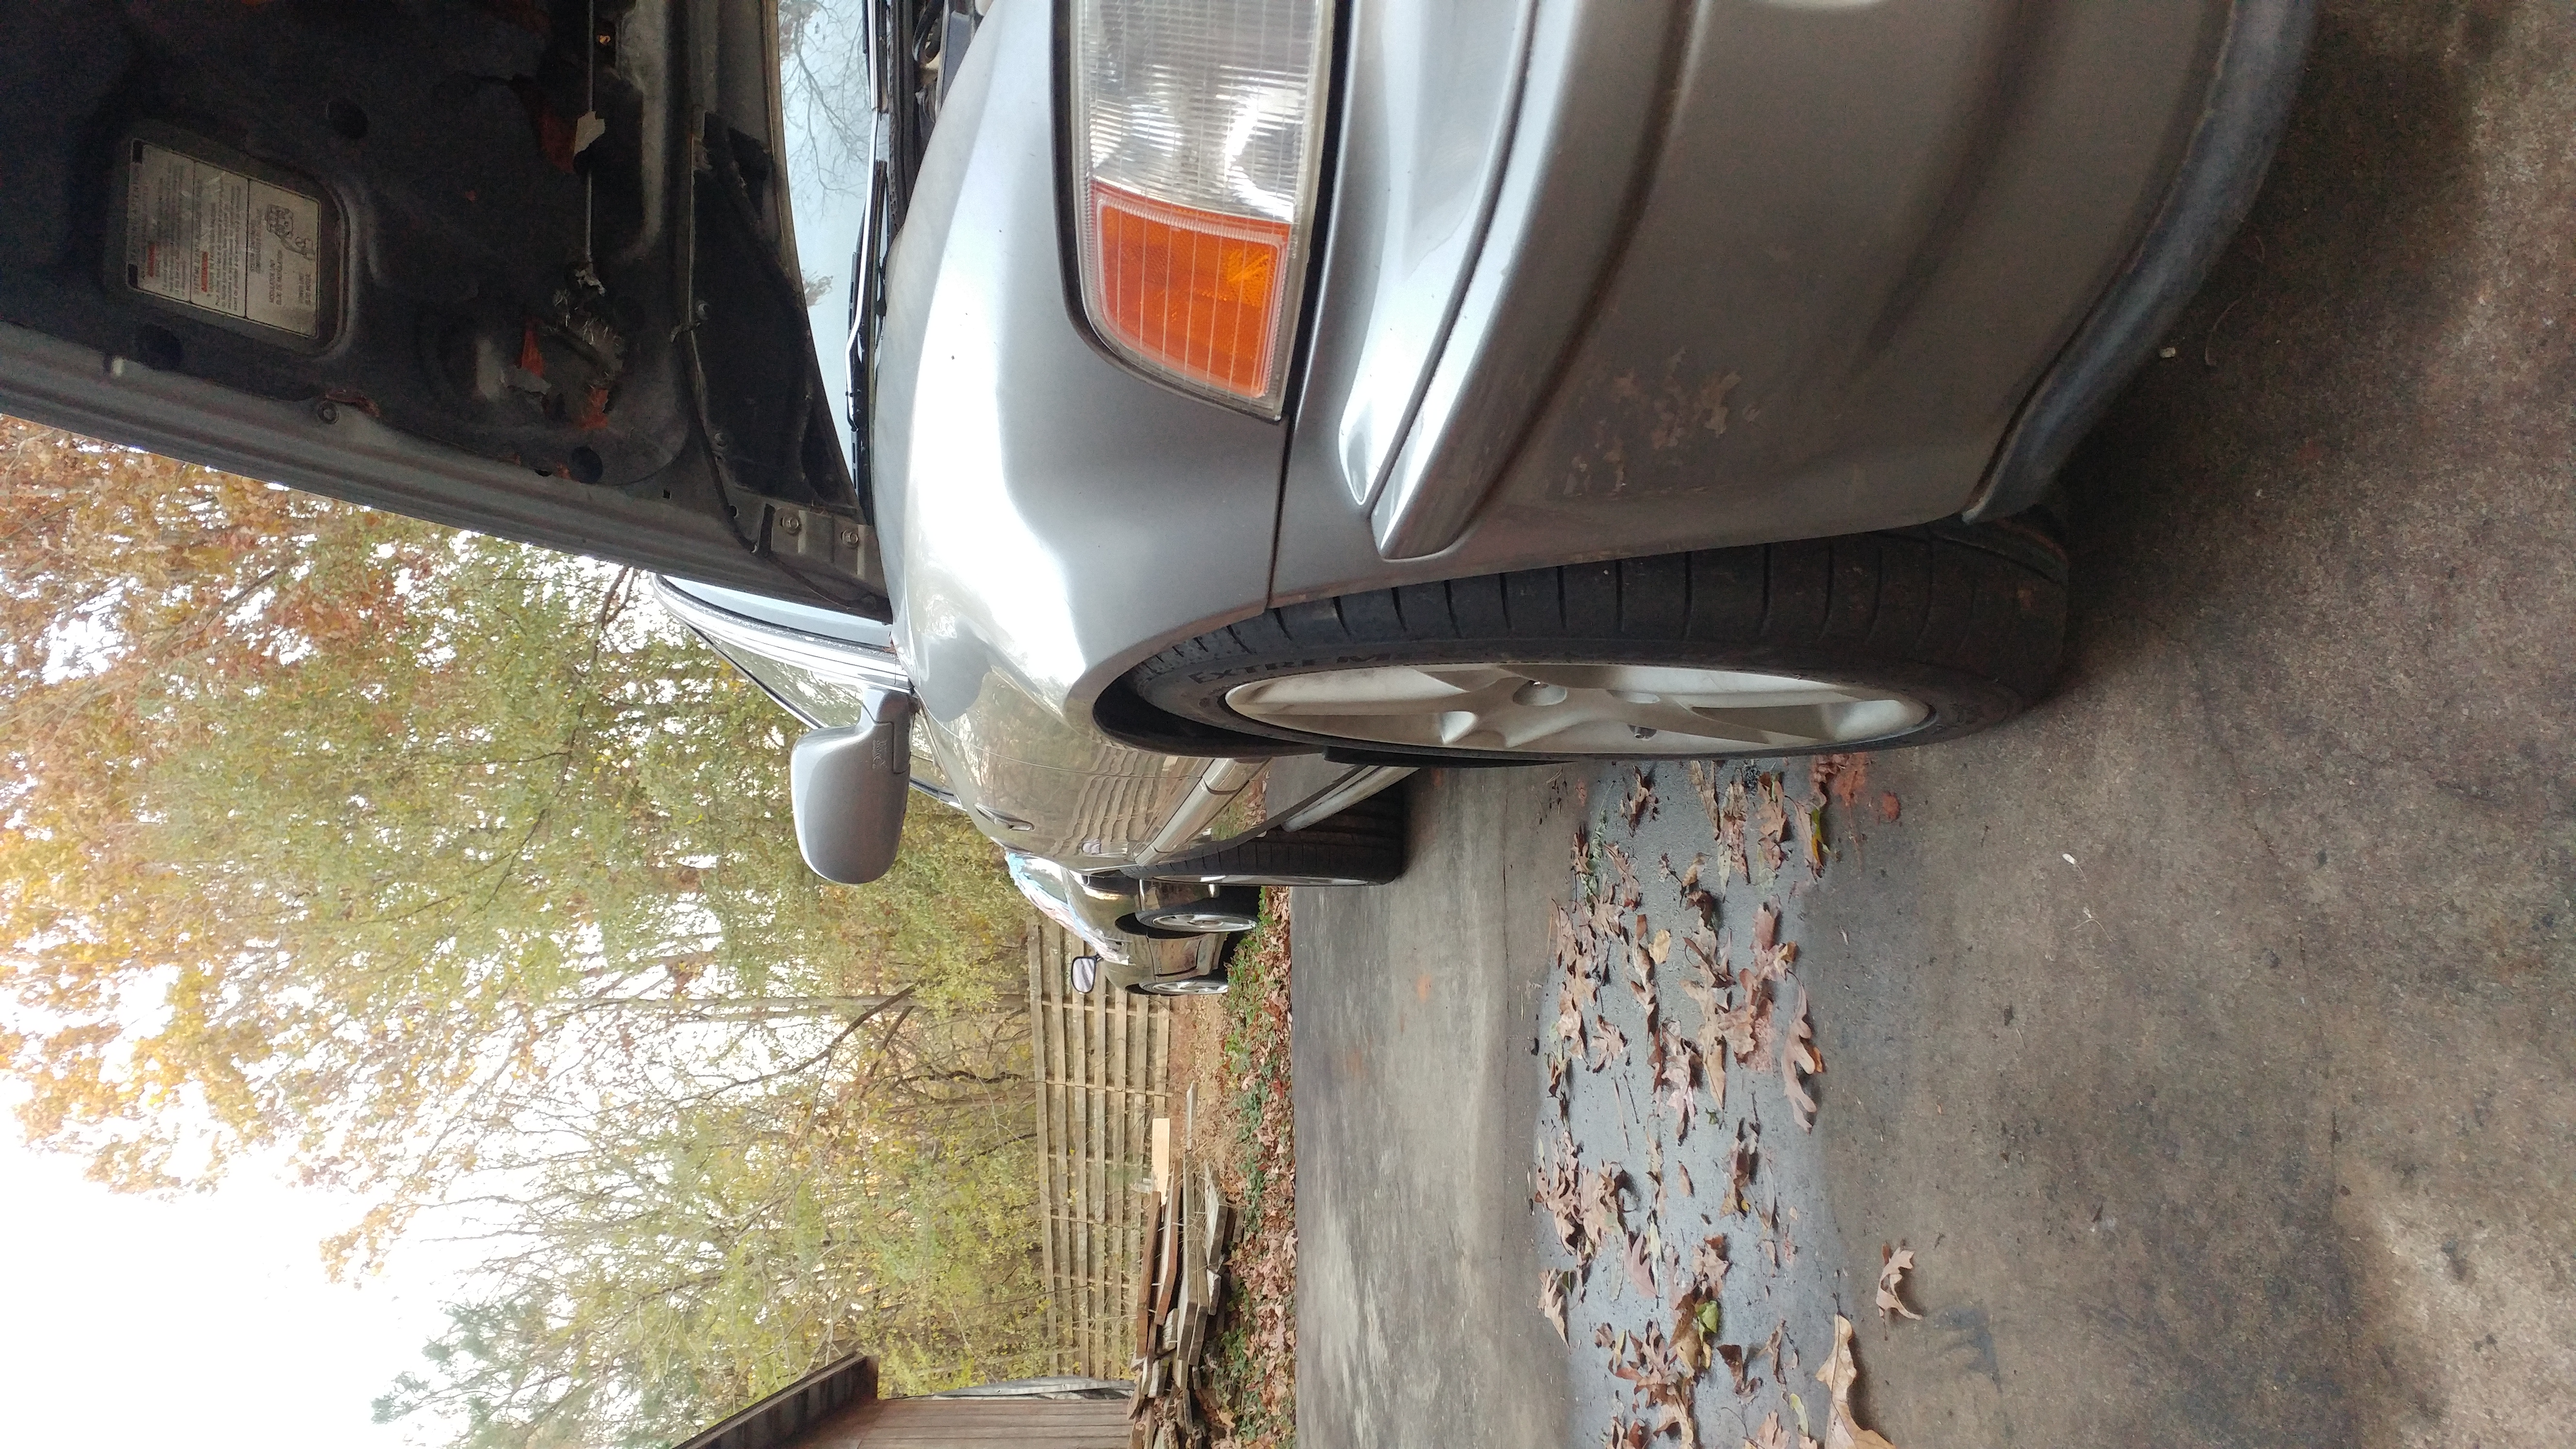
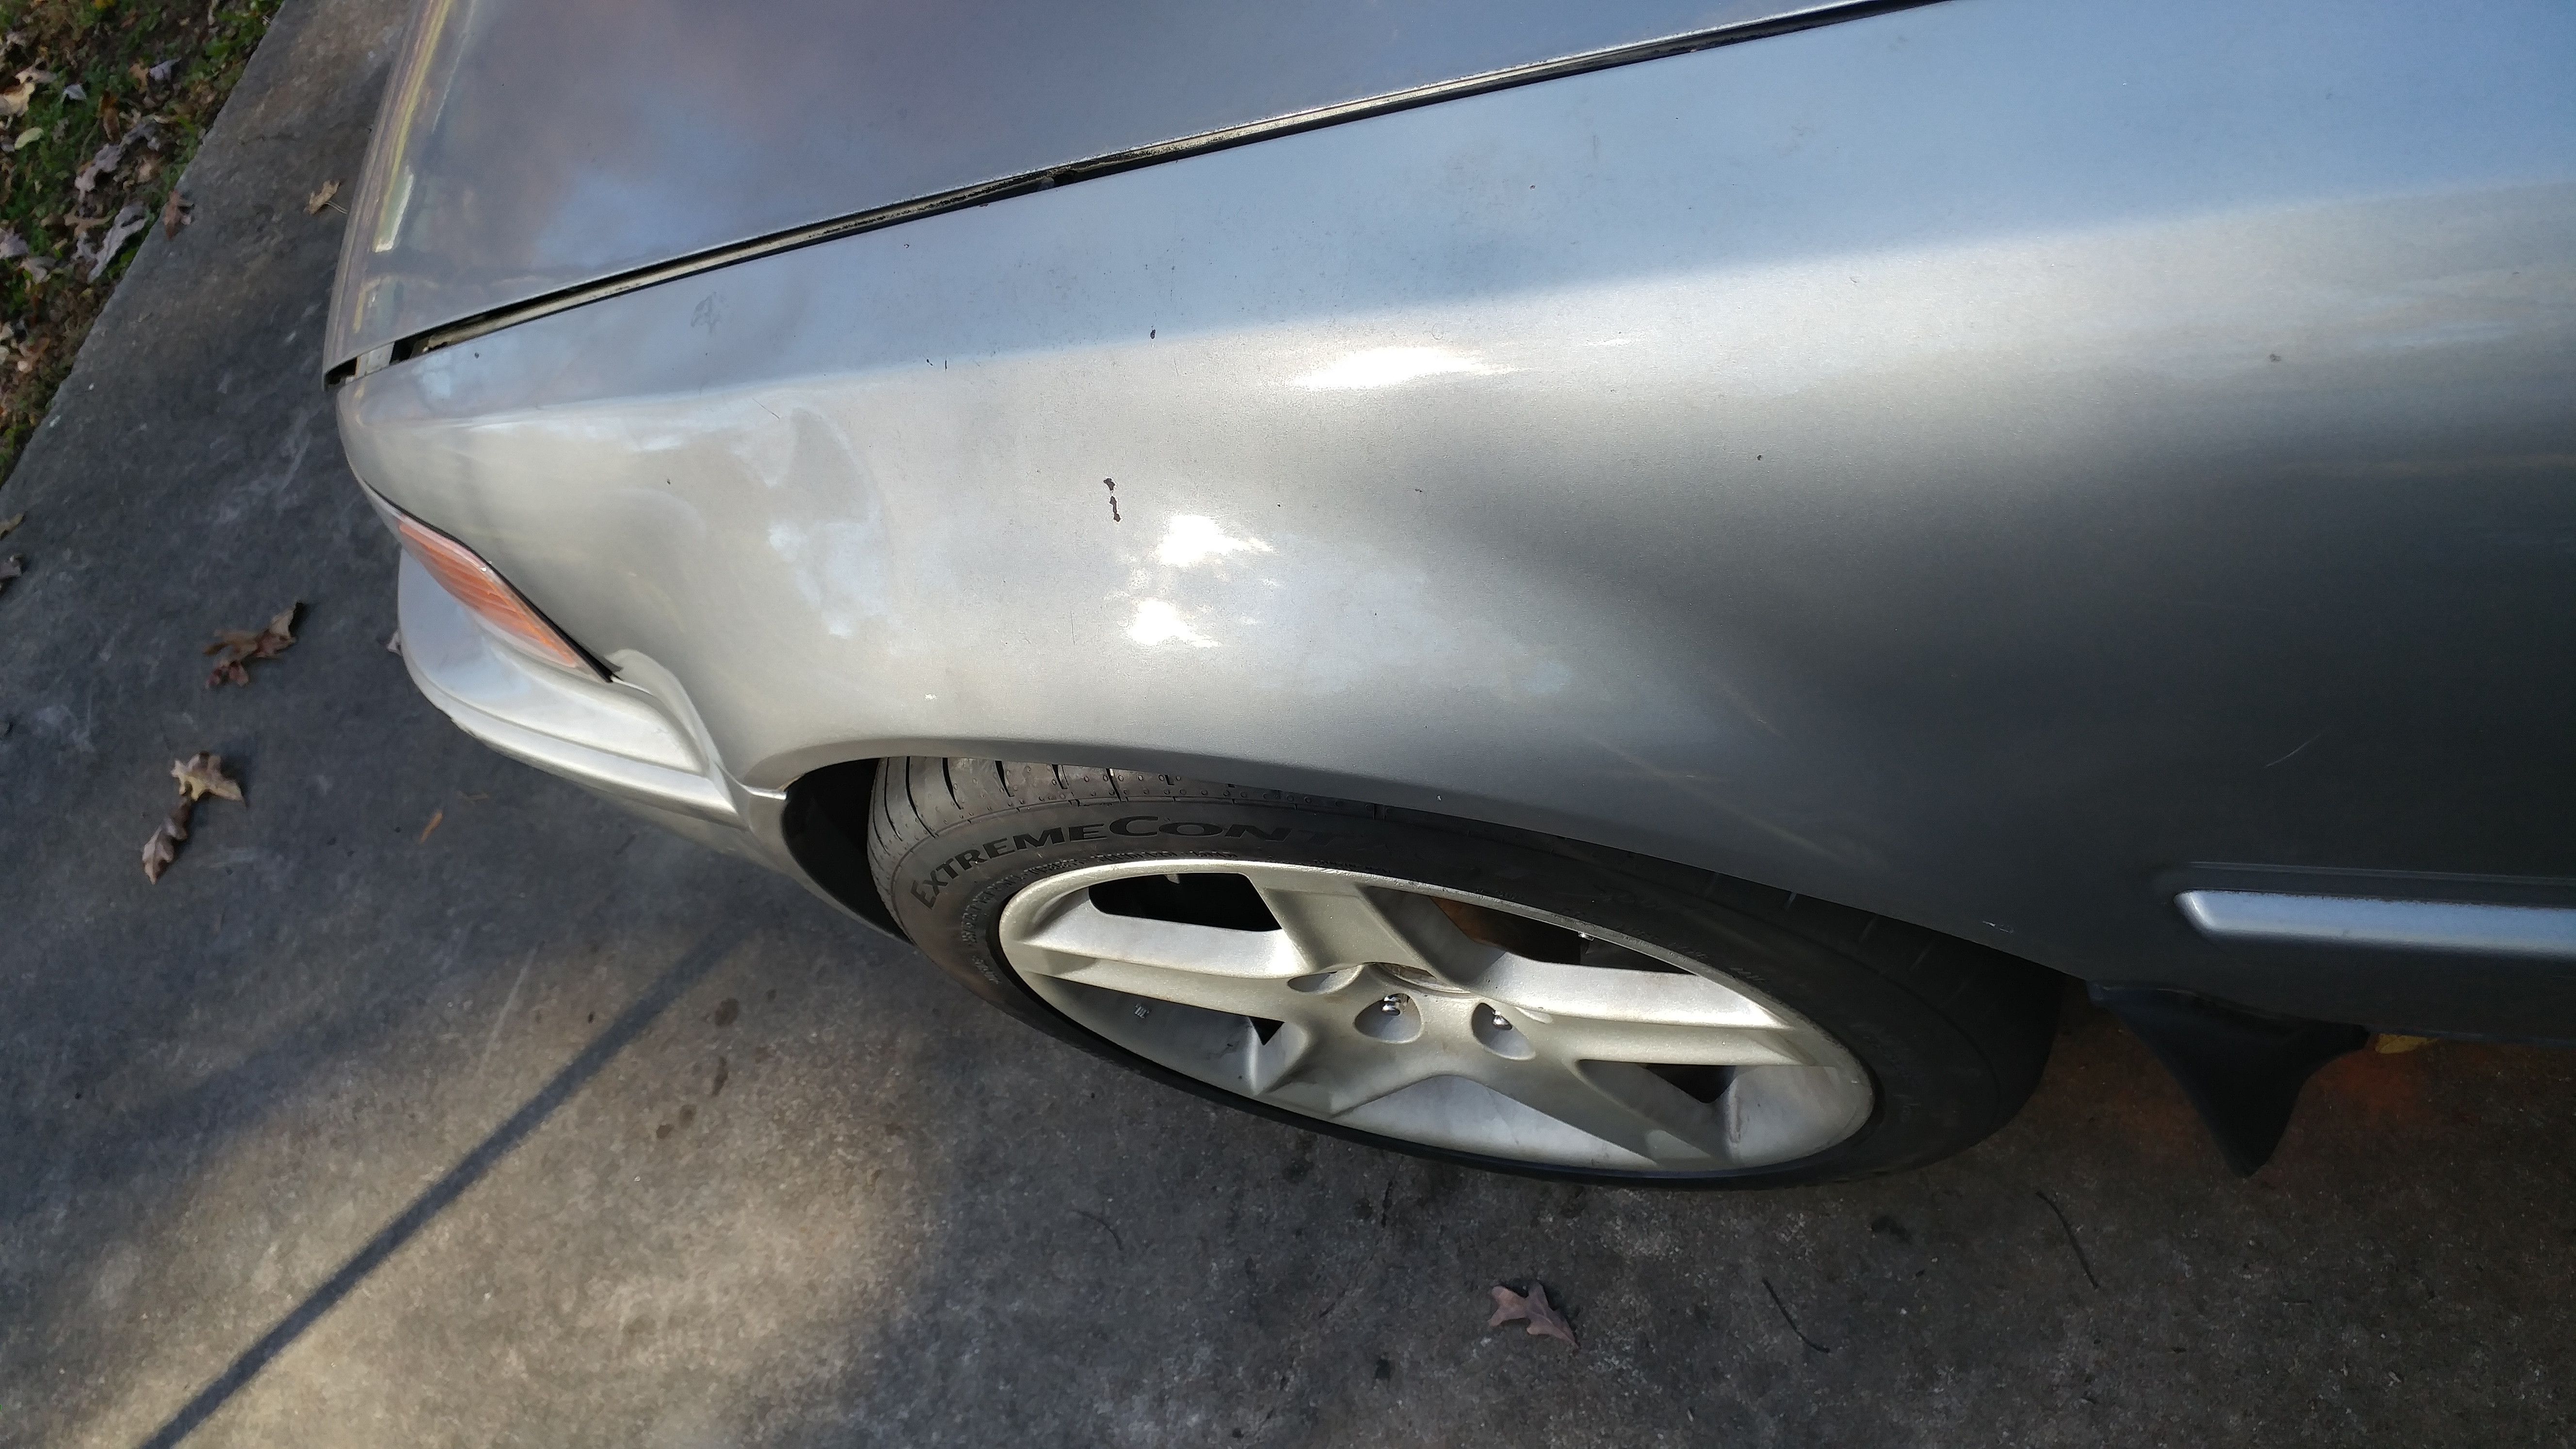
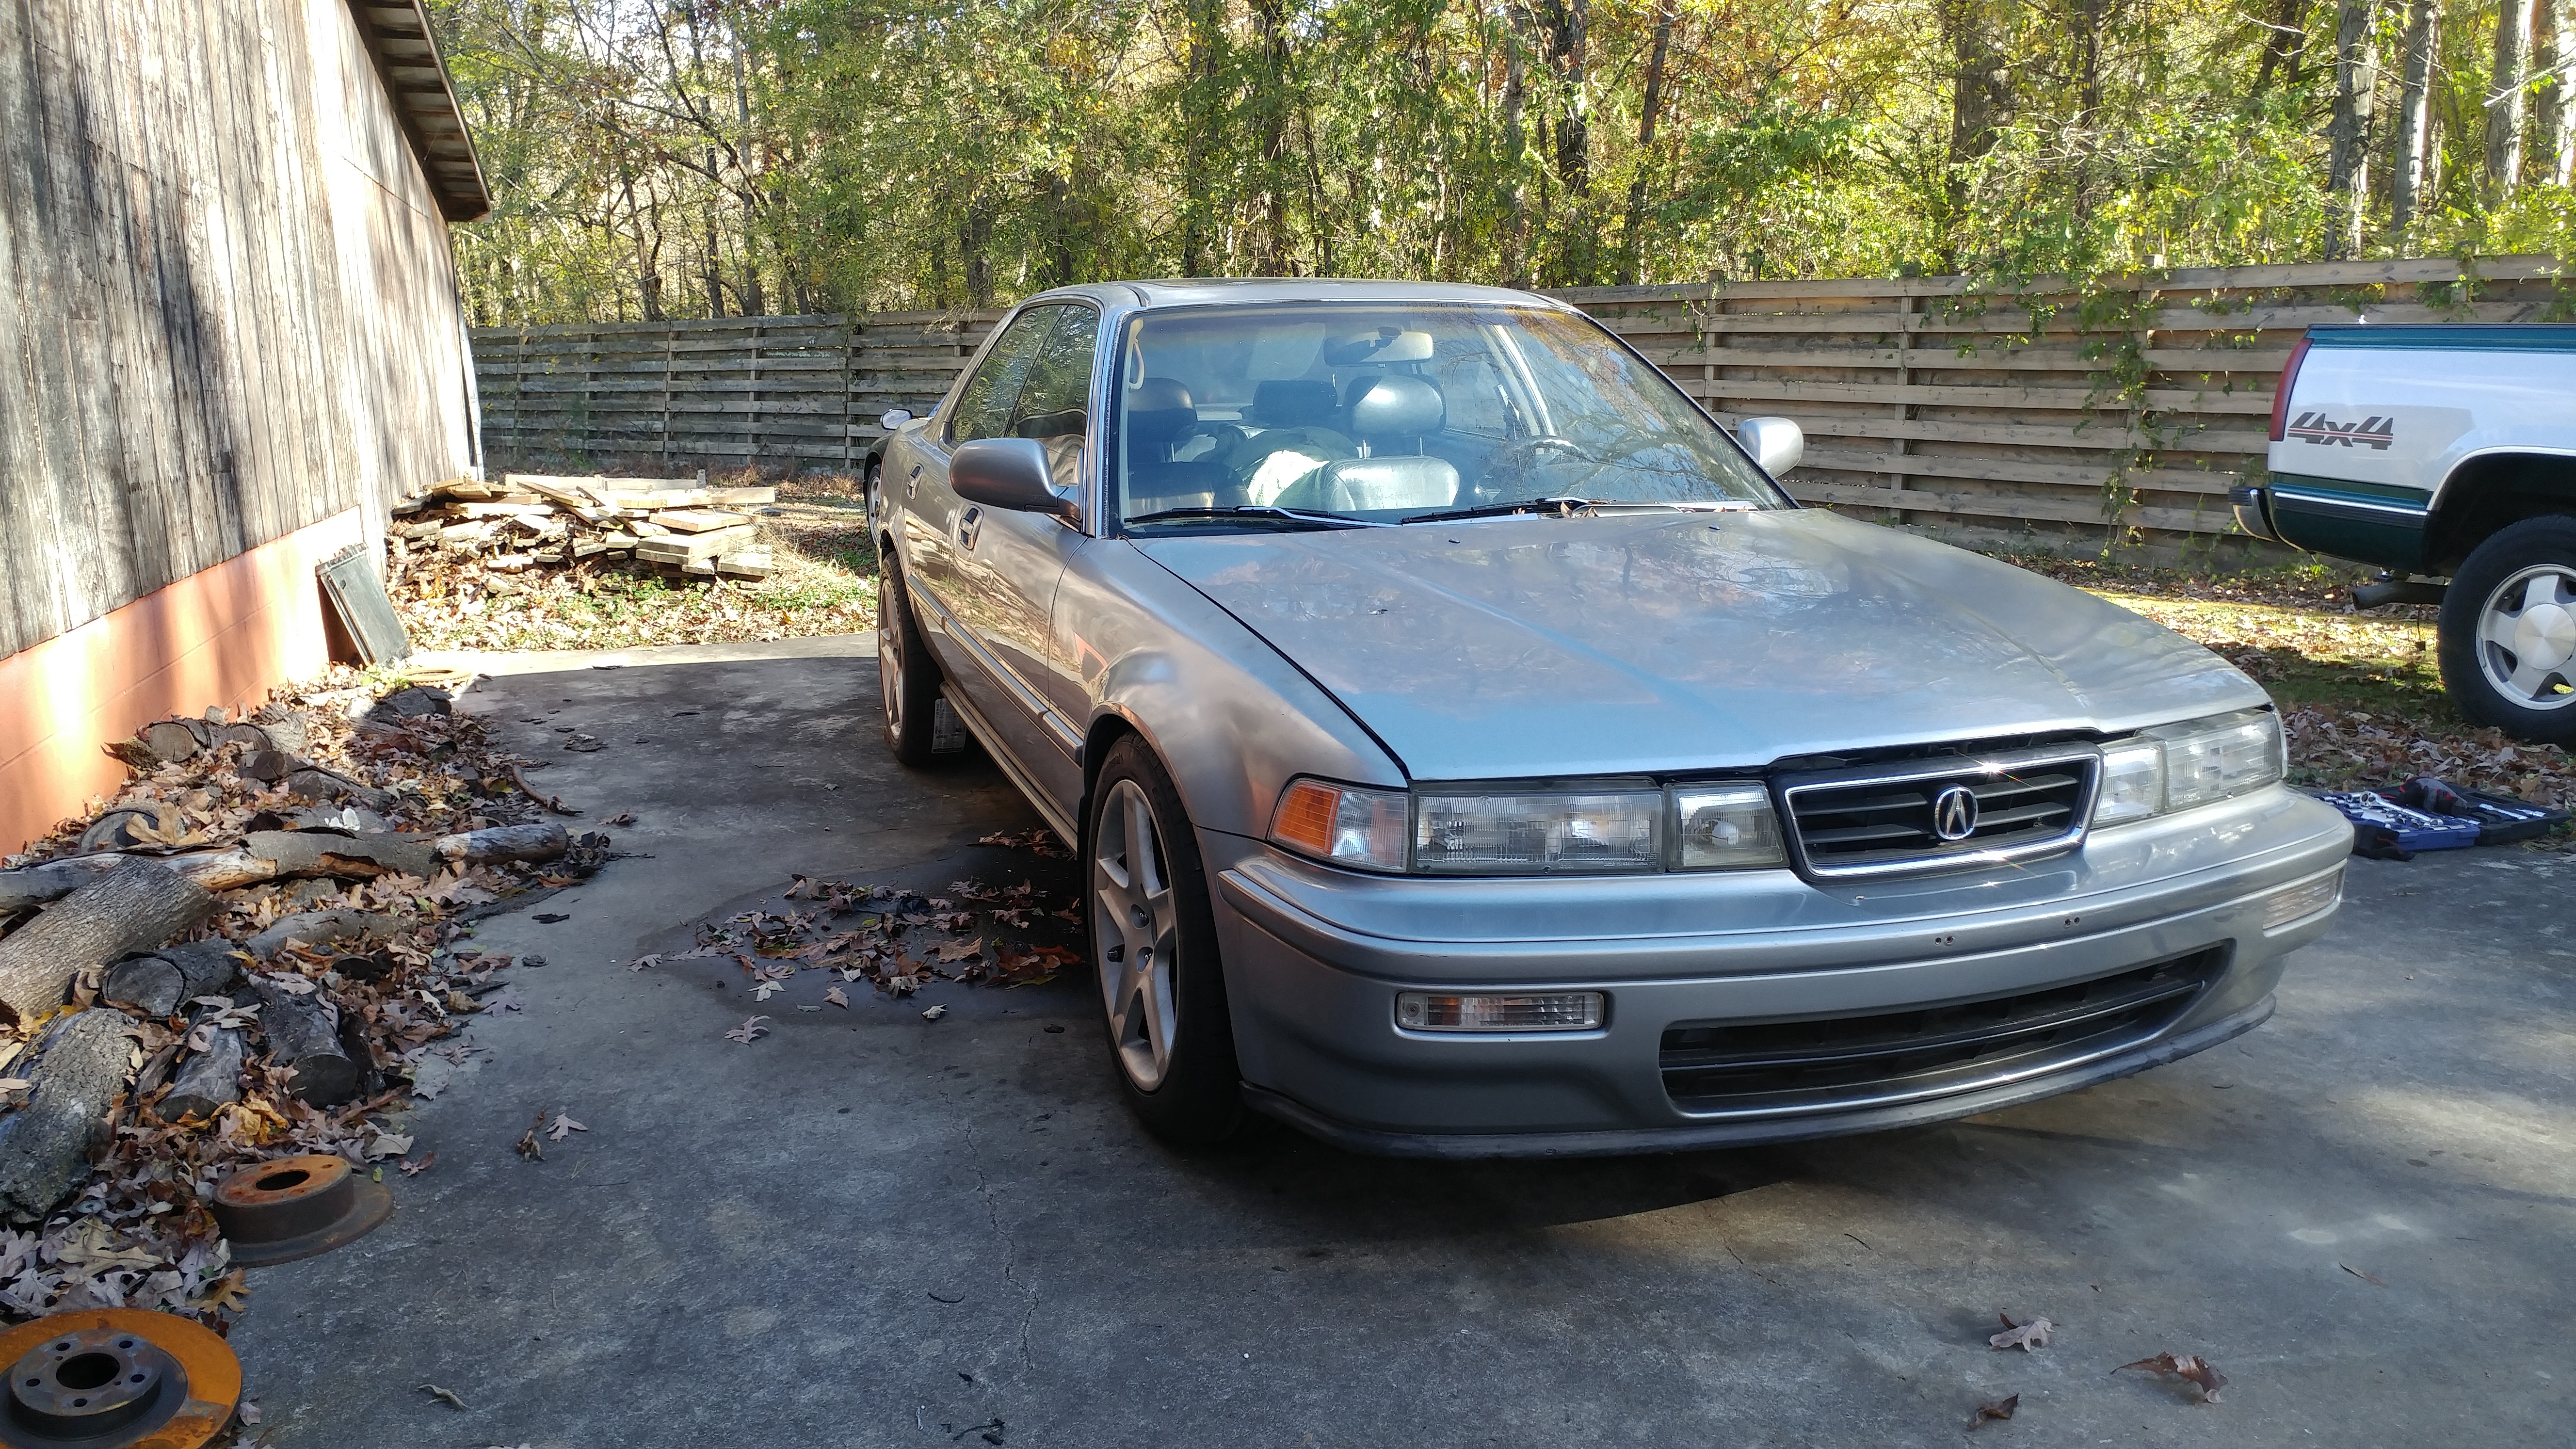
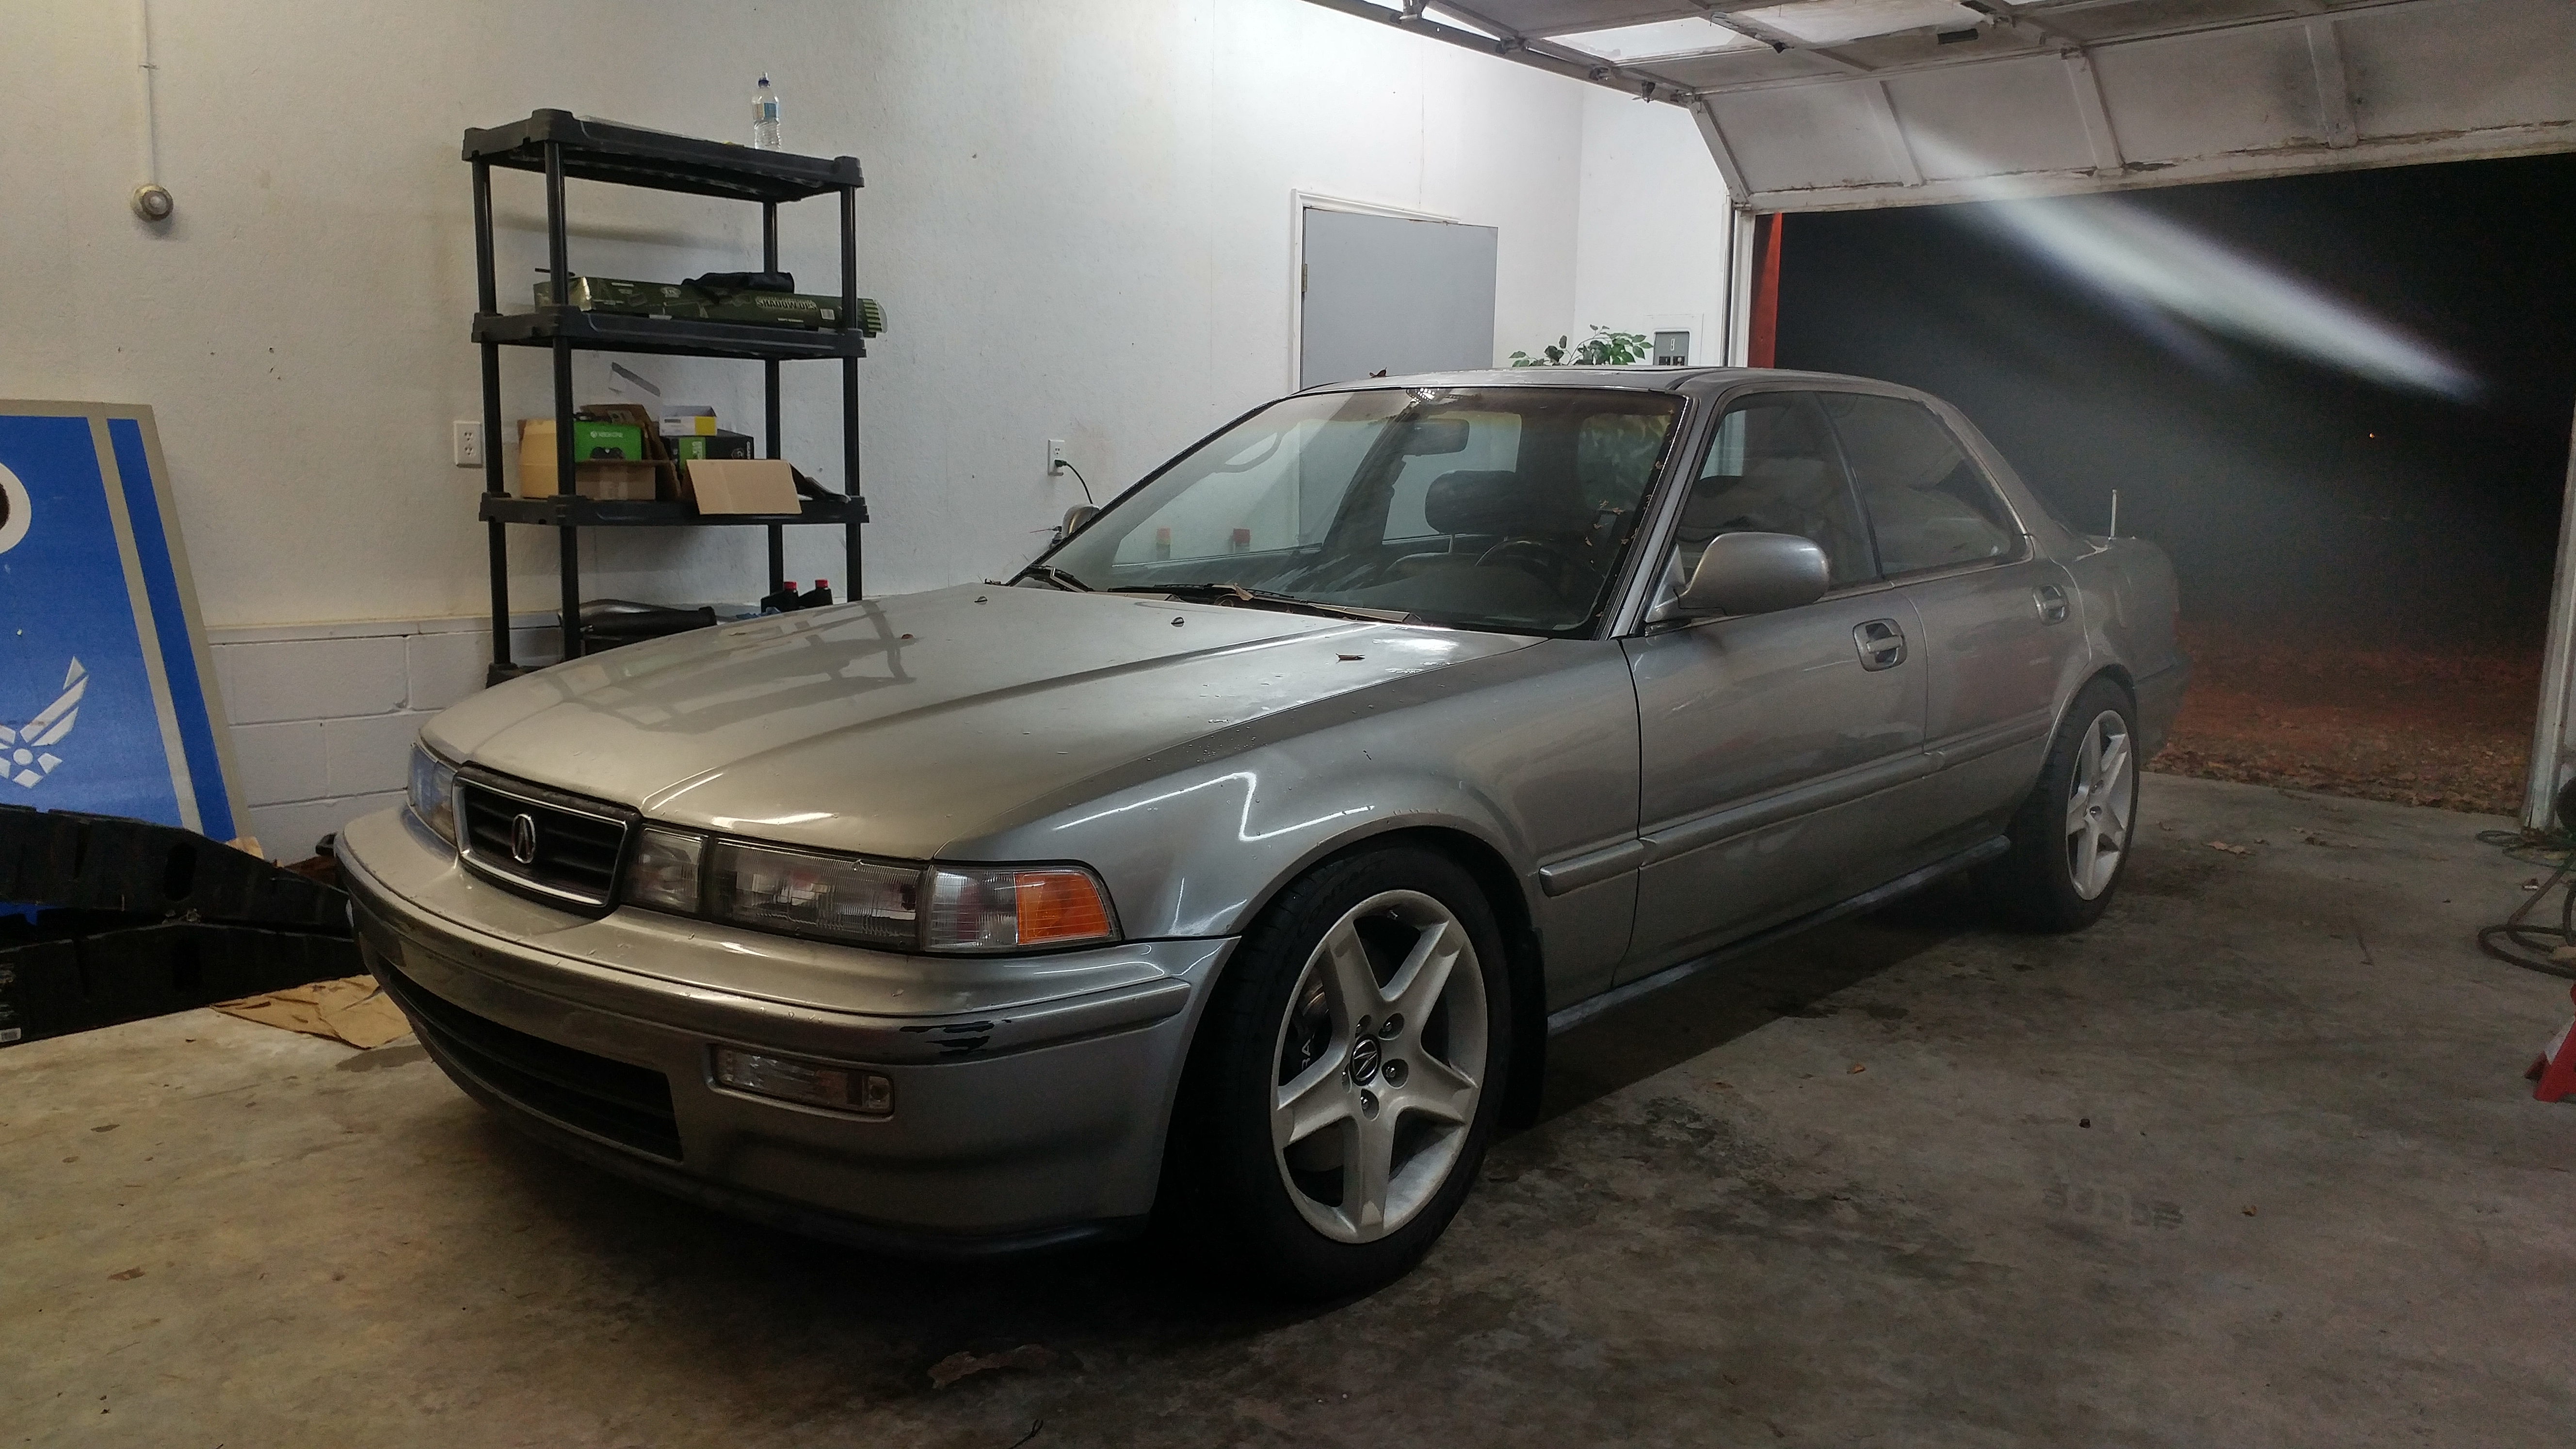
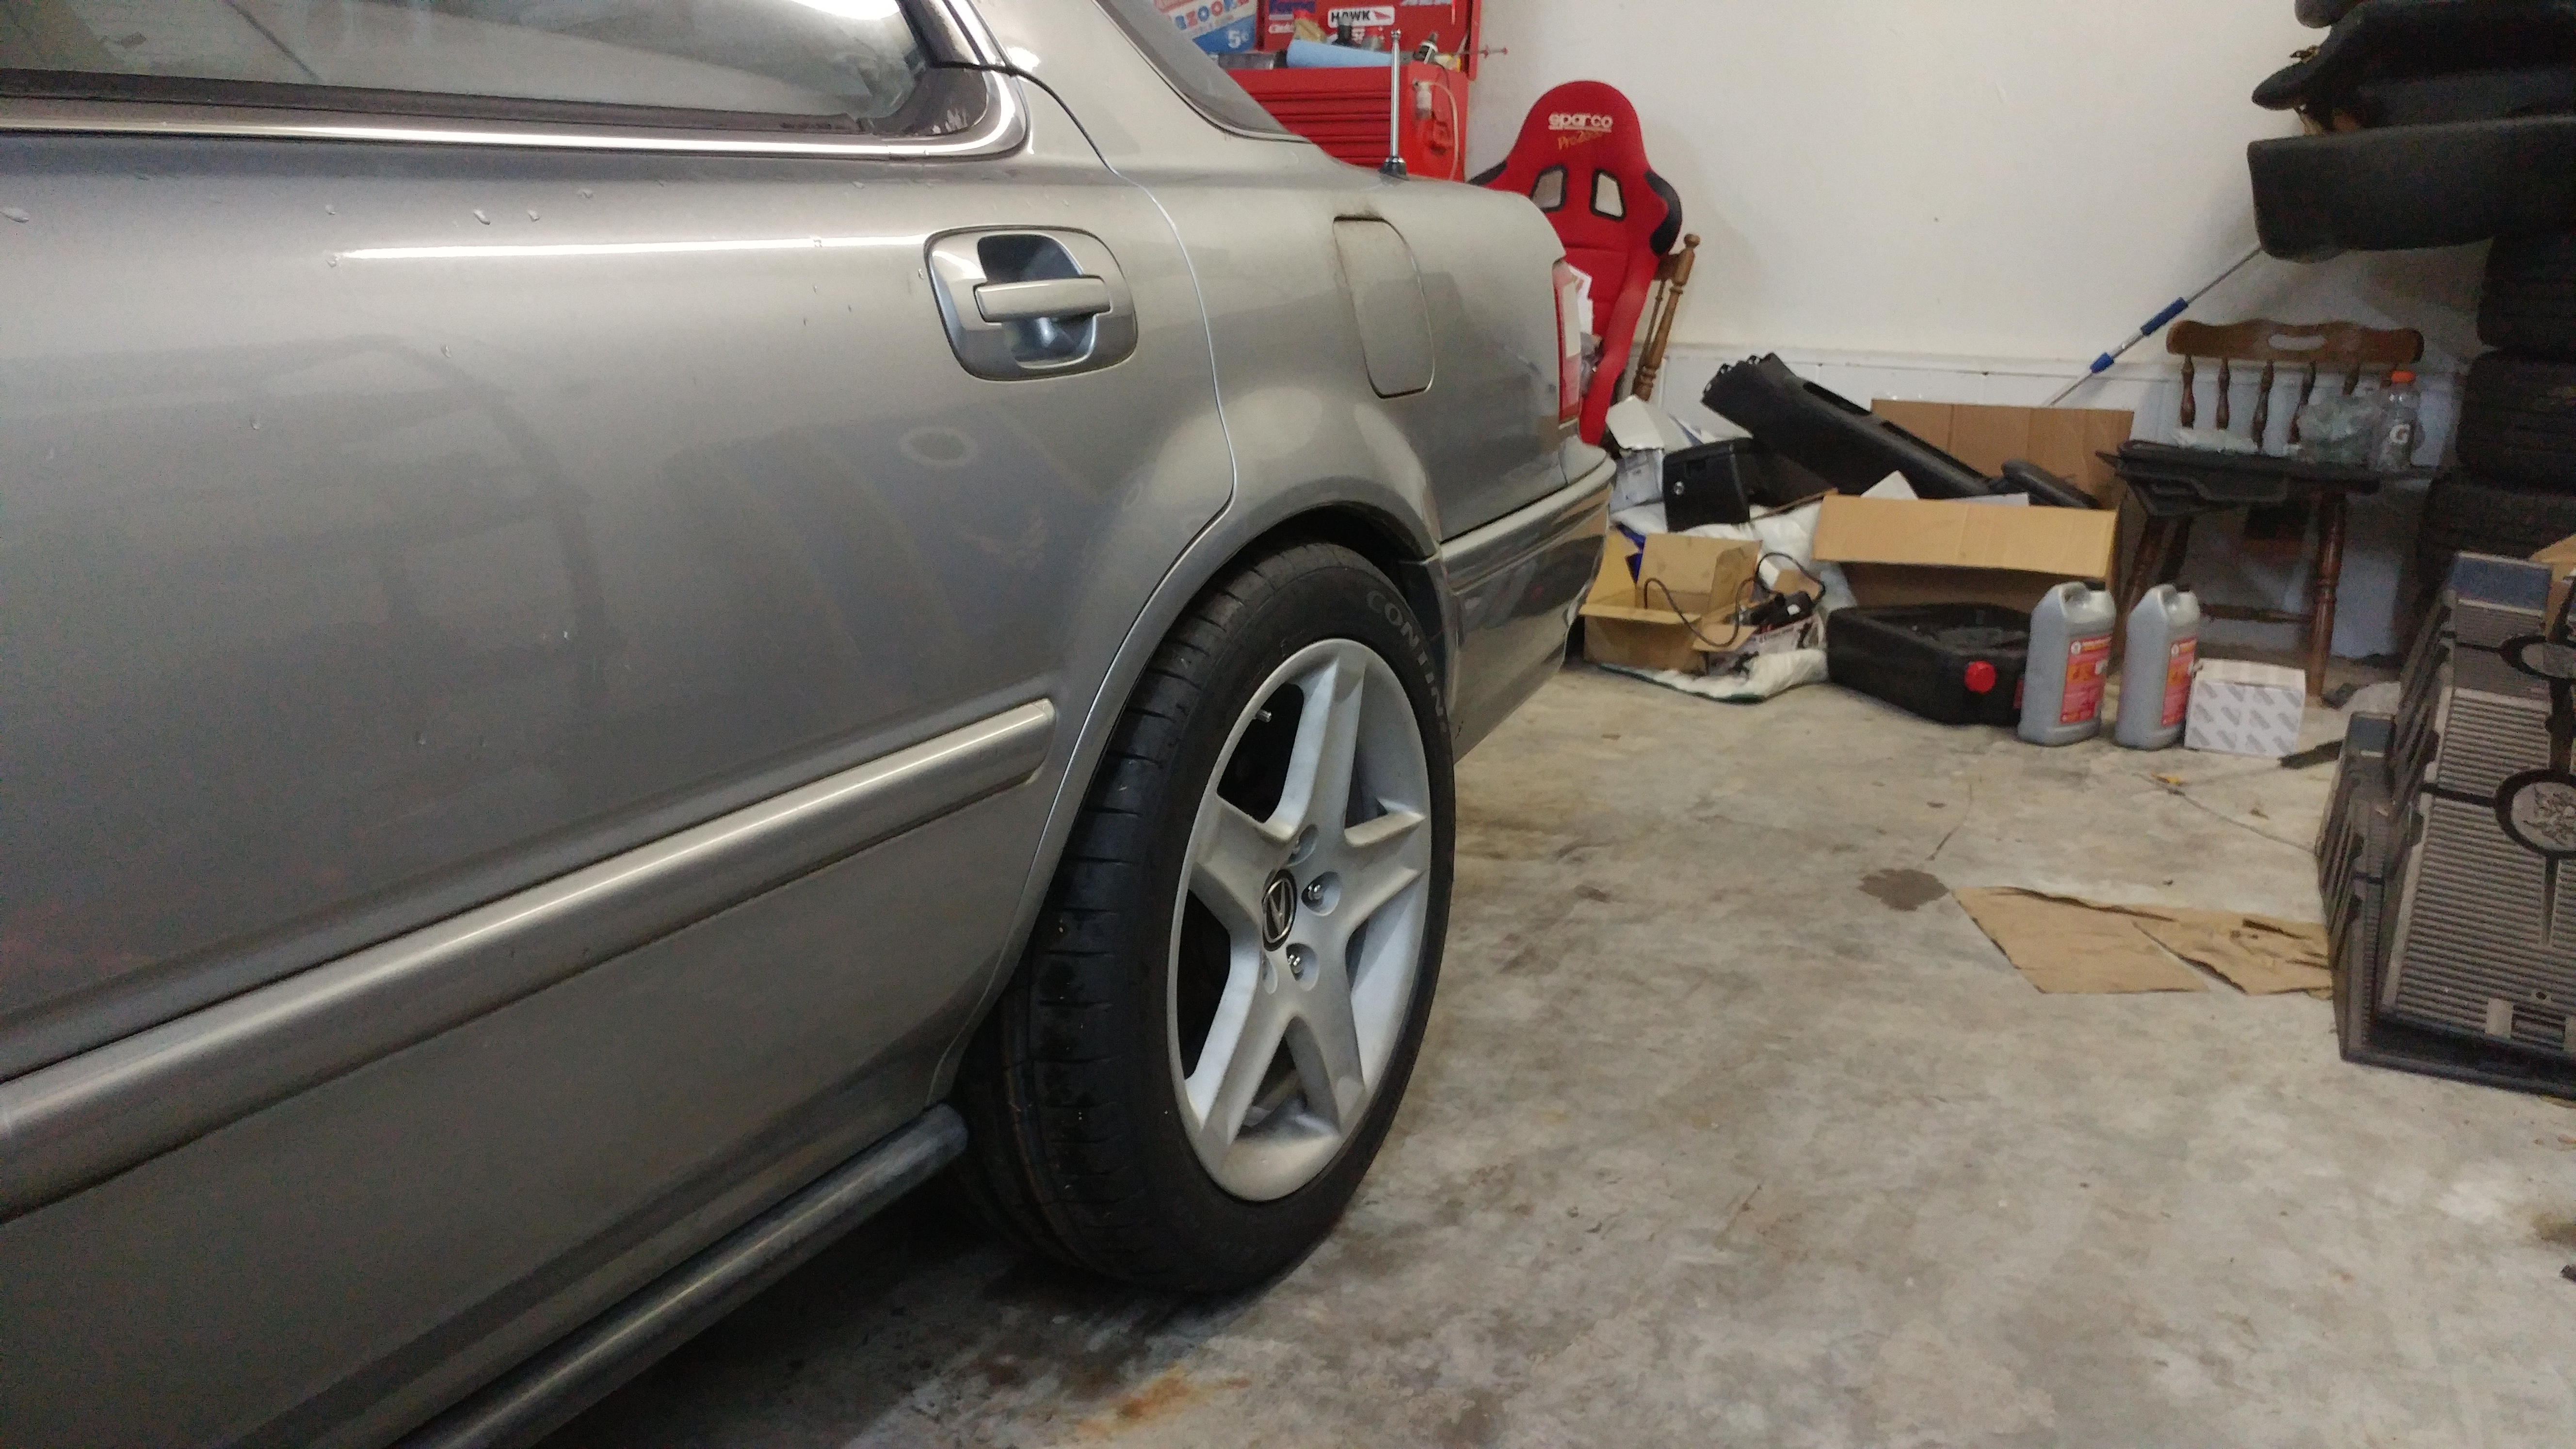
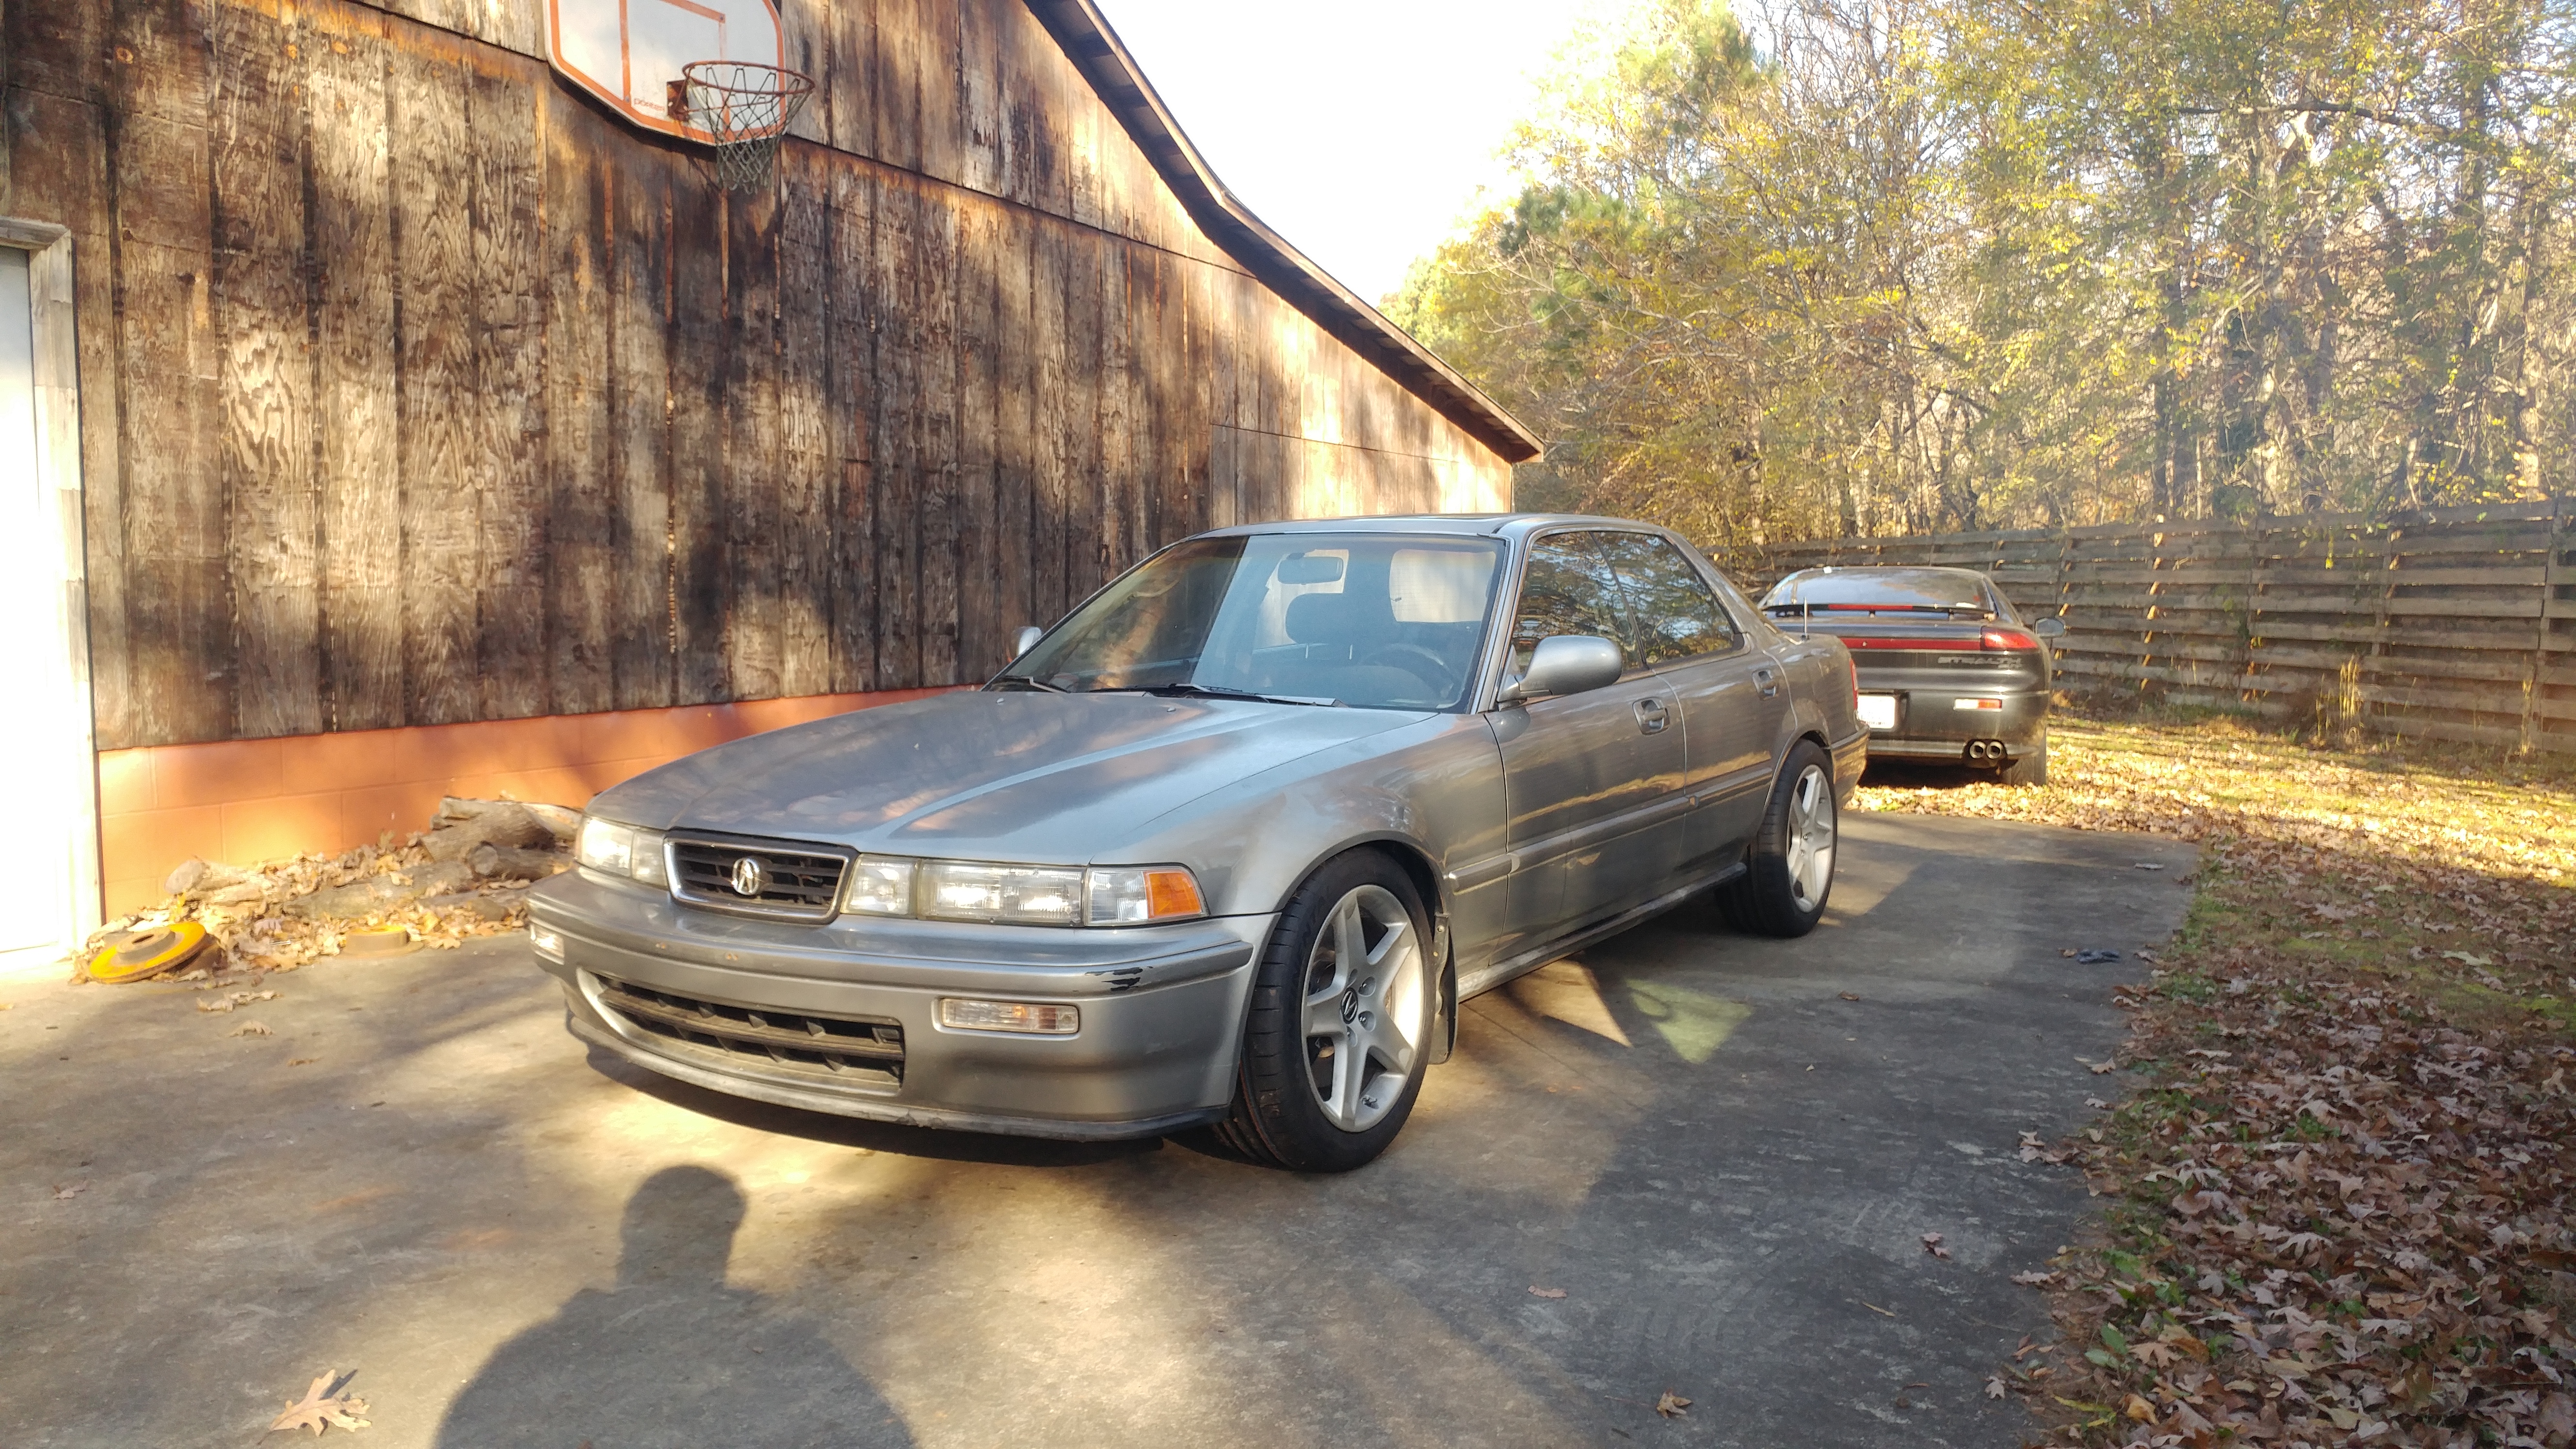
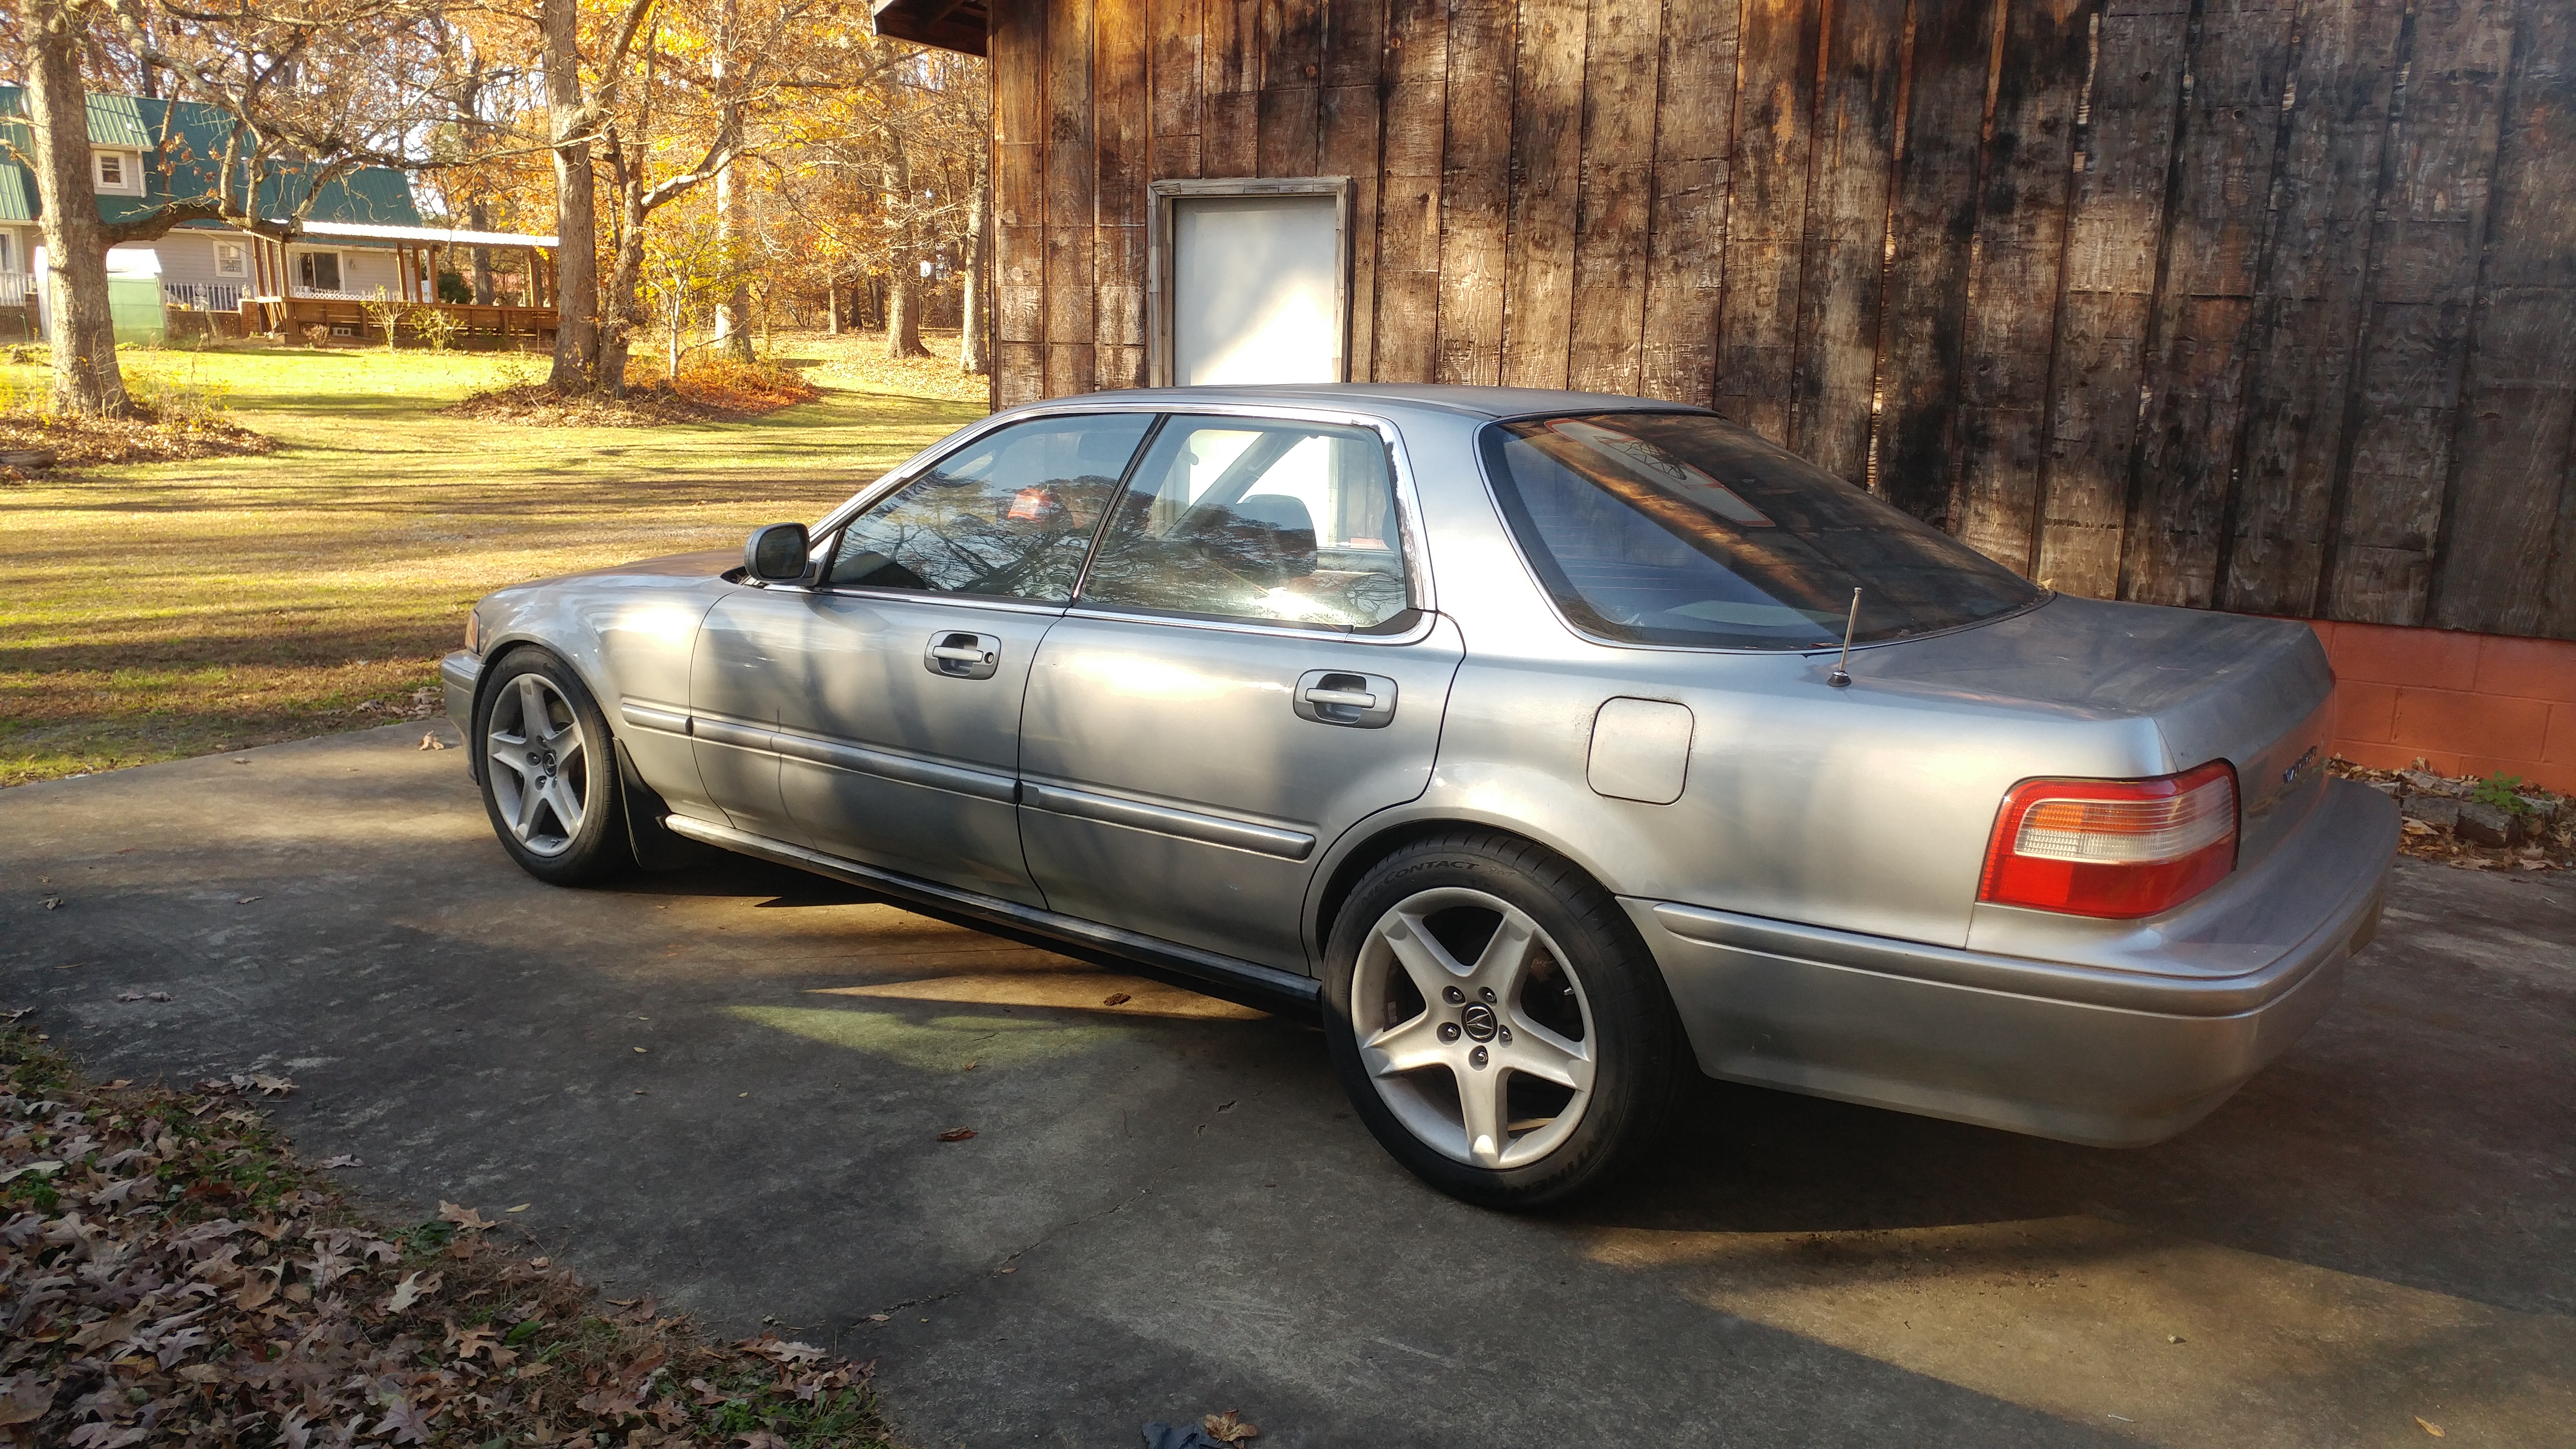
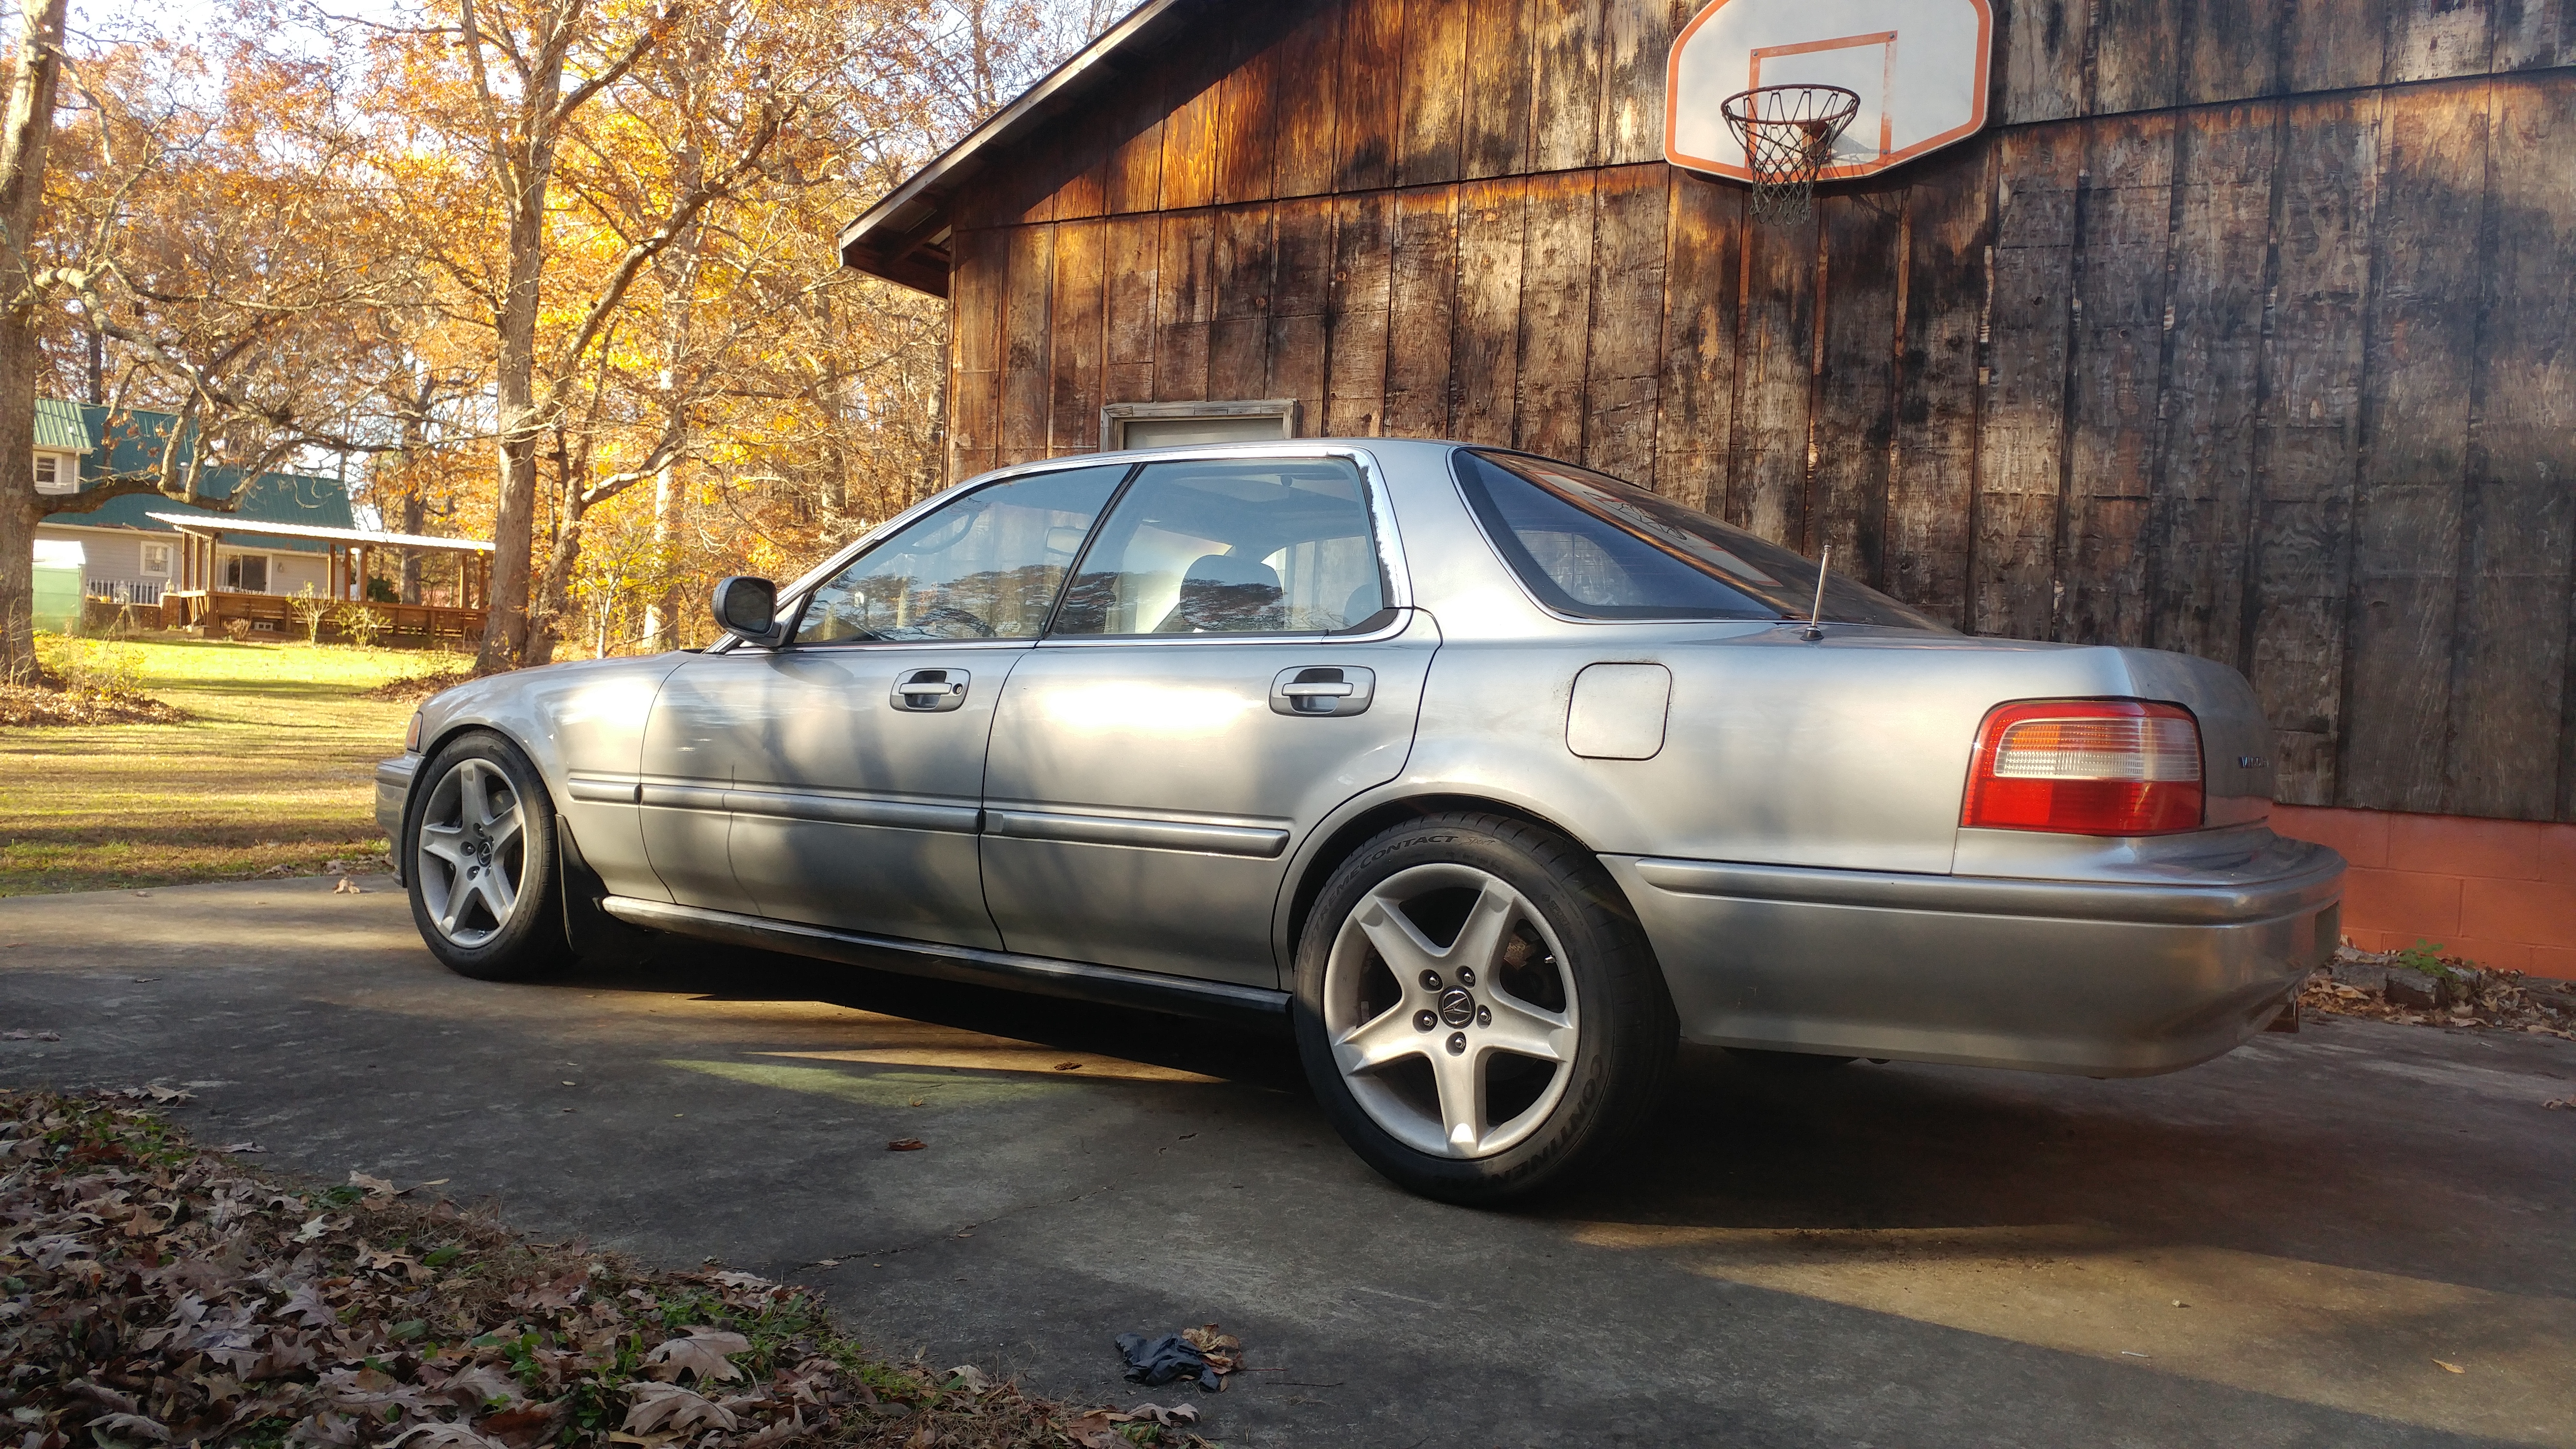
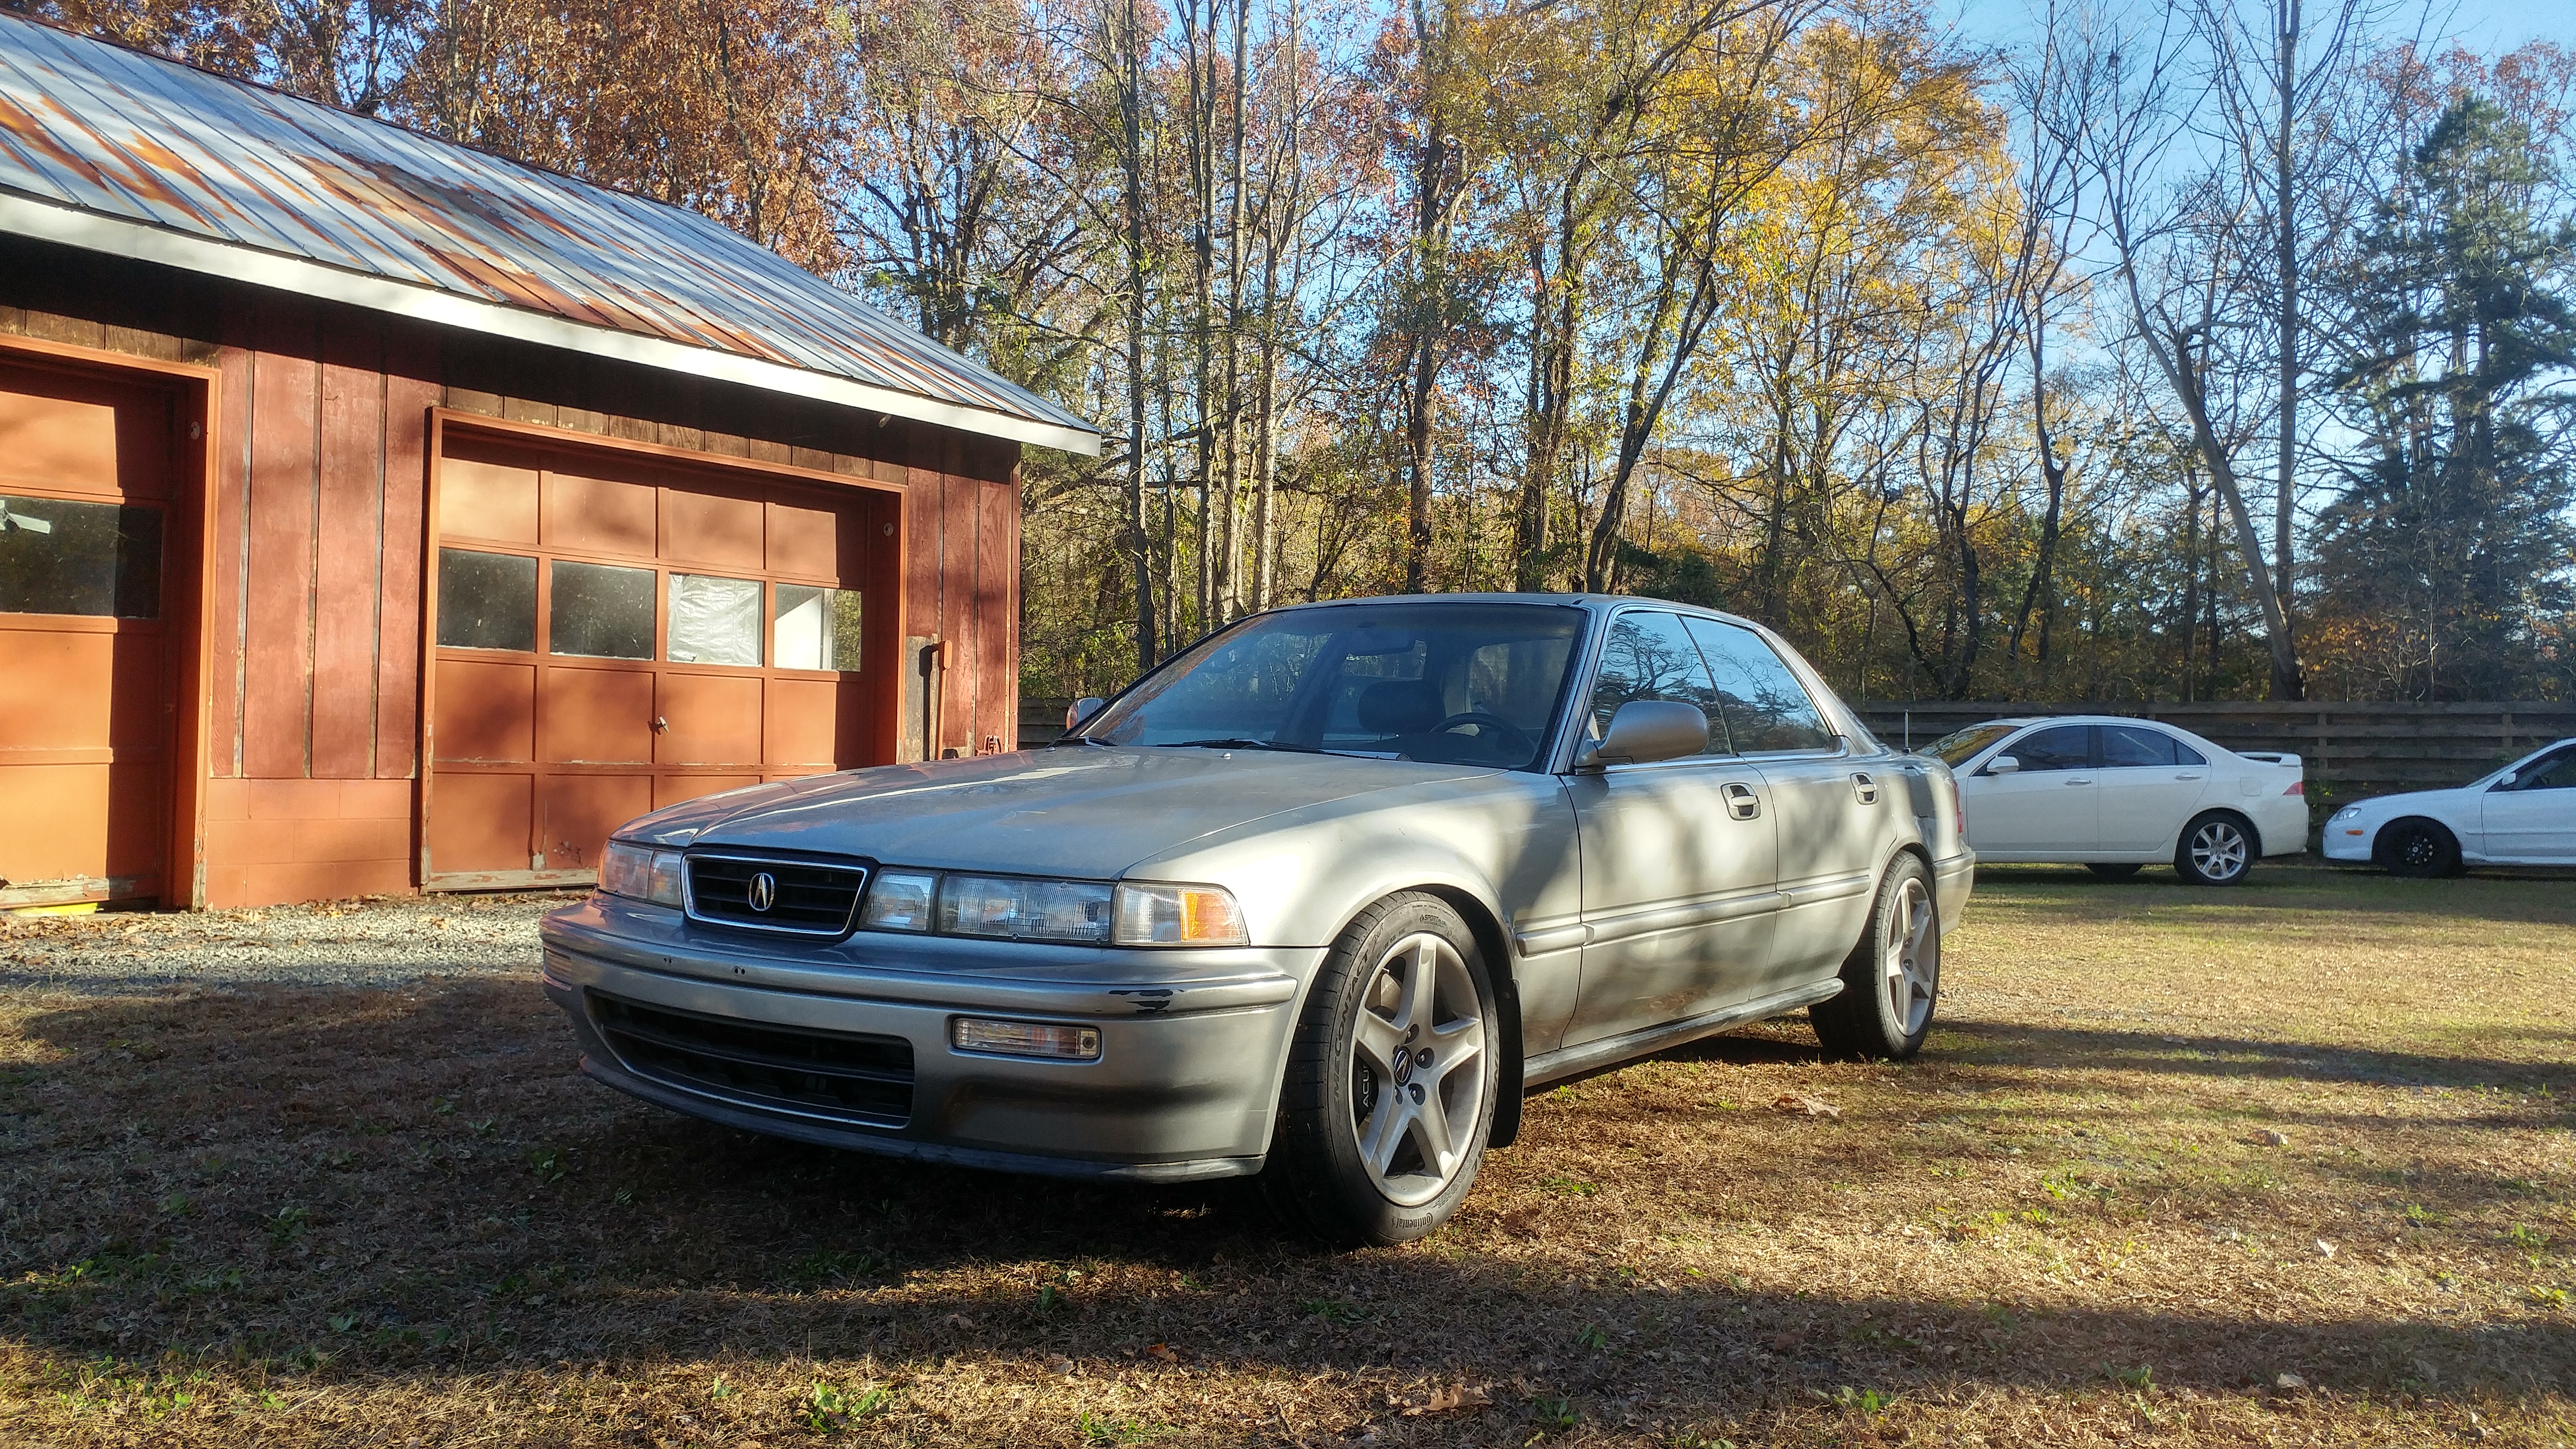
You guys are gonna say. I "over wheeled the car" with these. And I agree a little. Looks fine in person but the pictures are hard to justify.
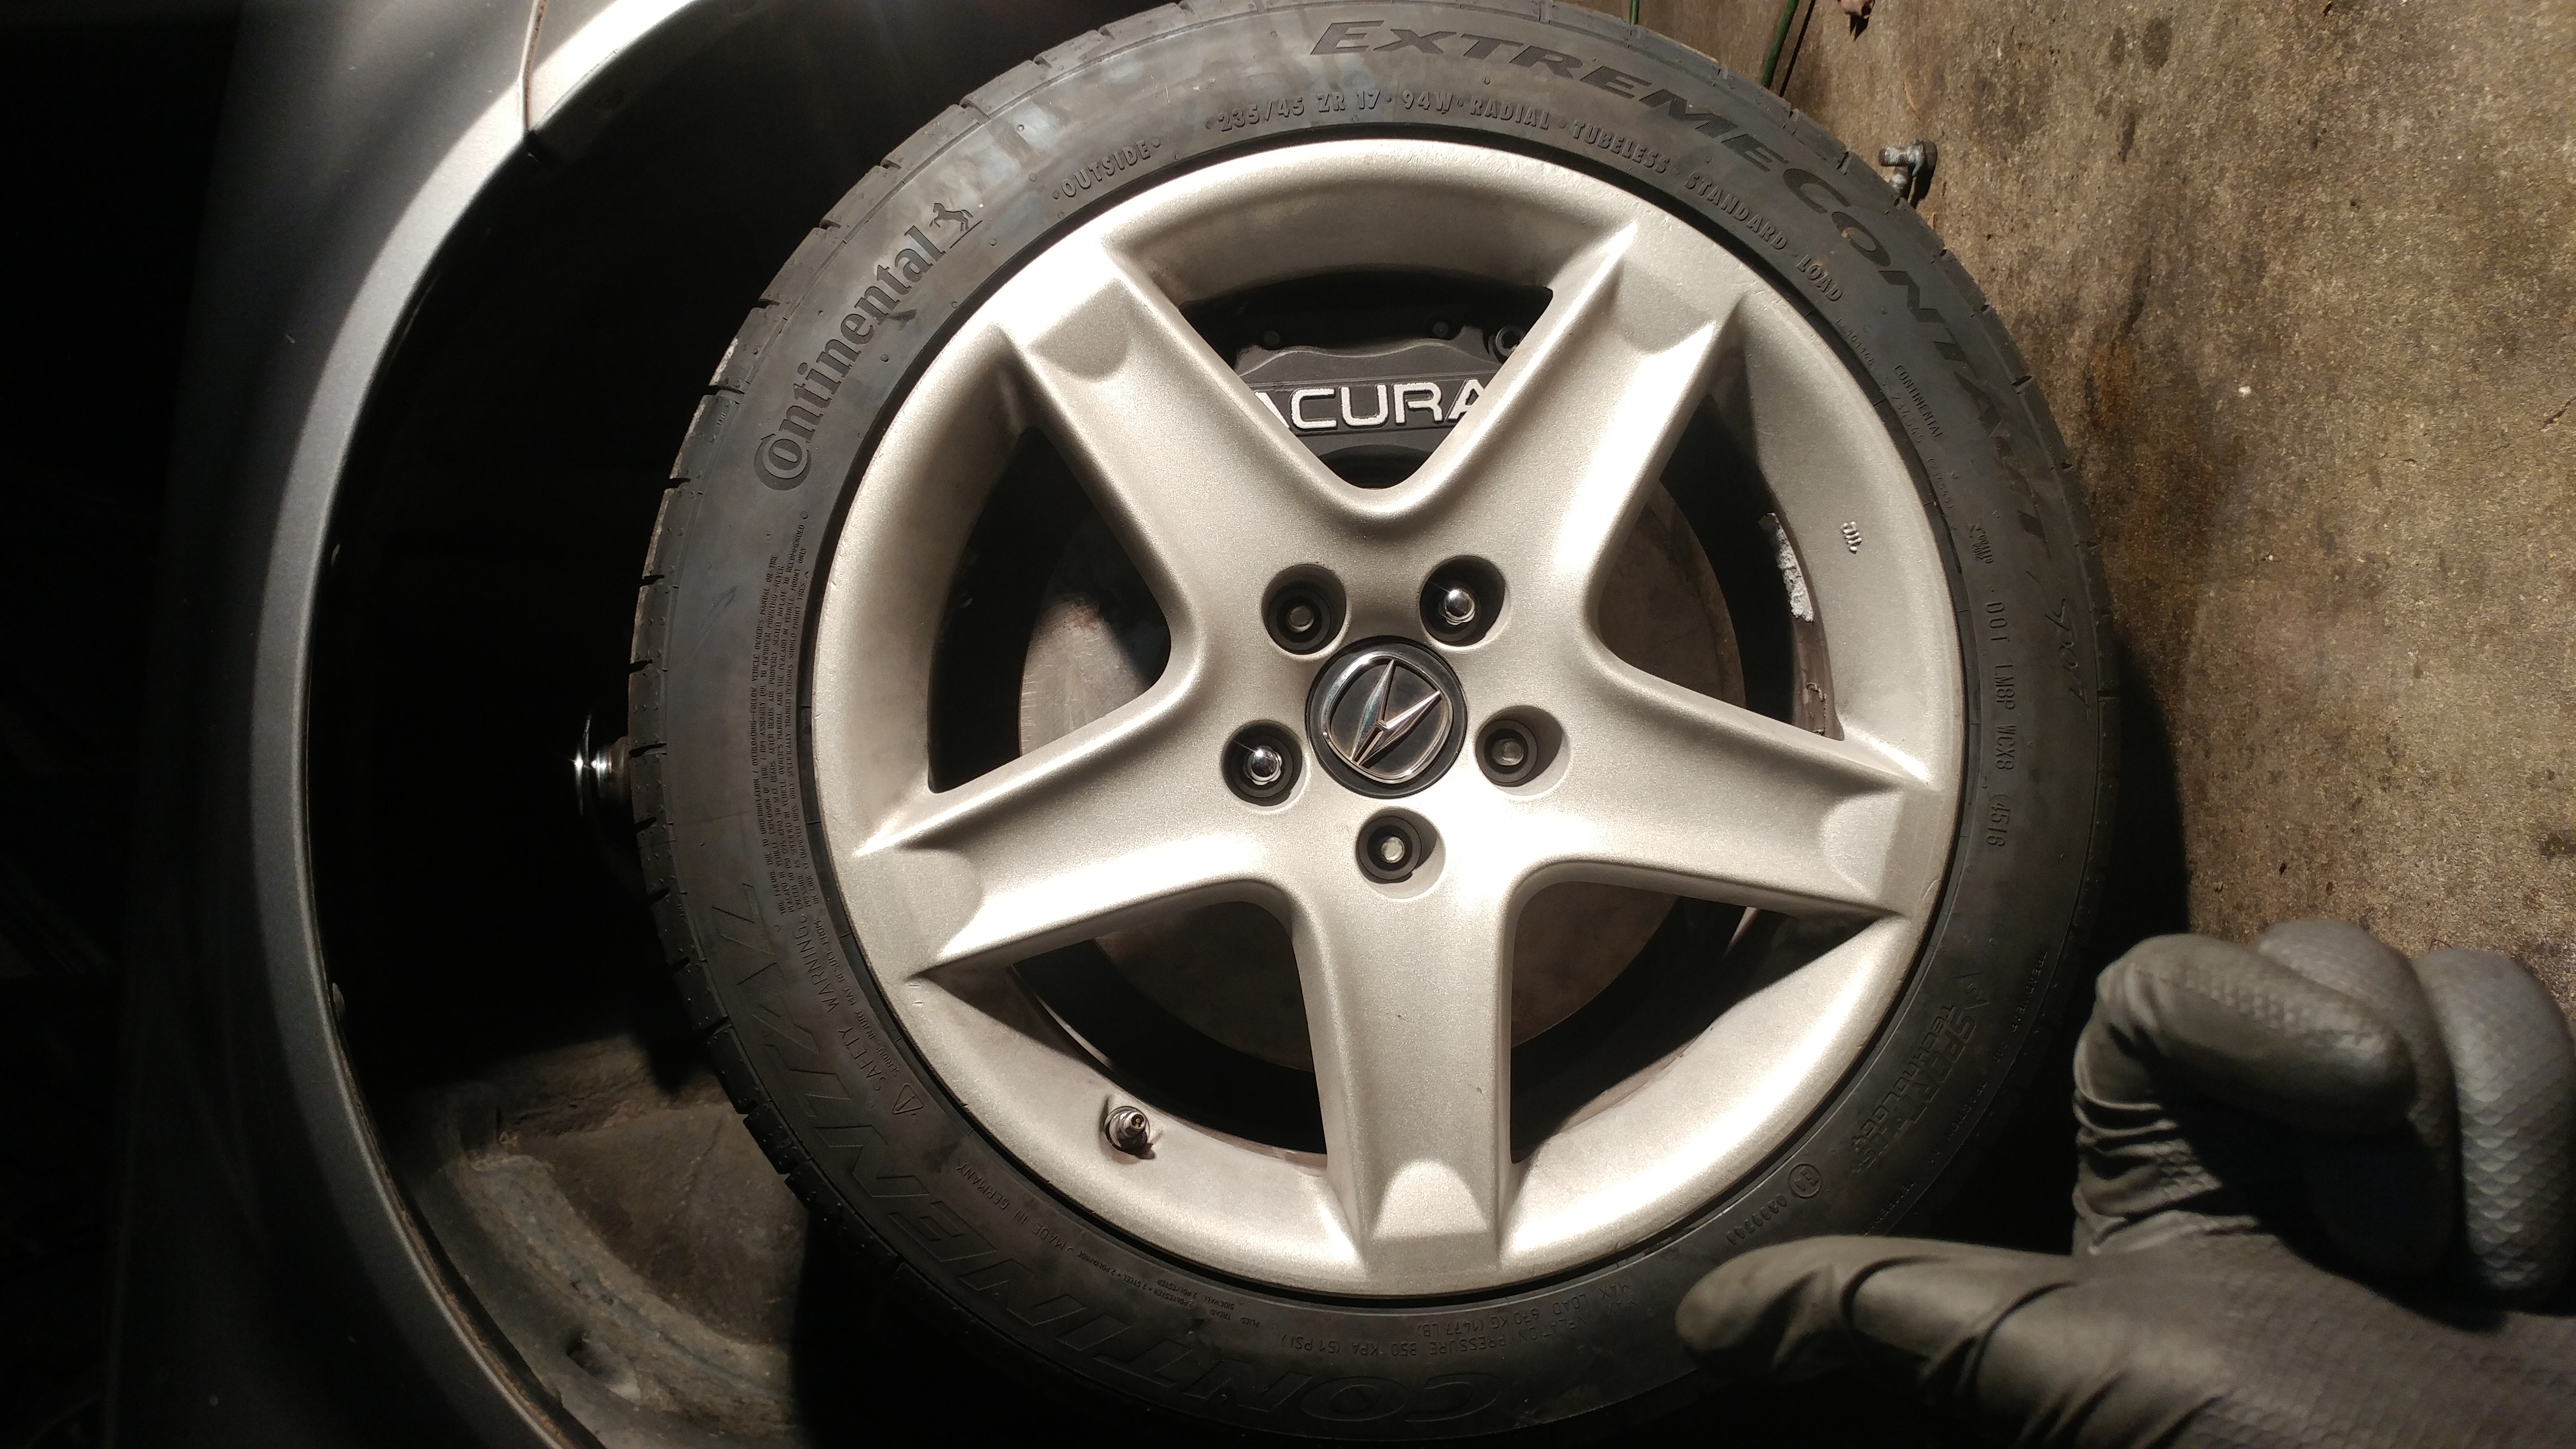
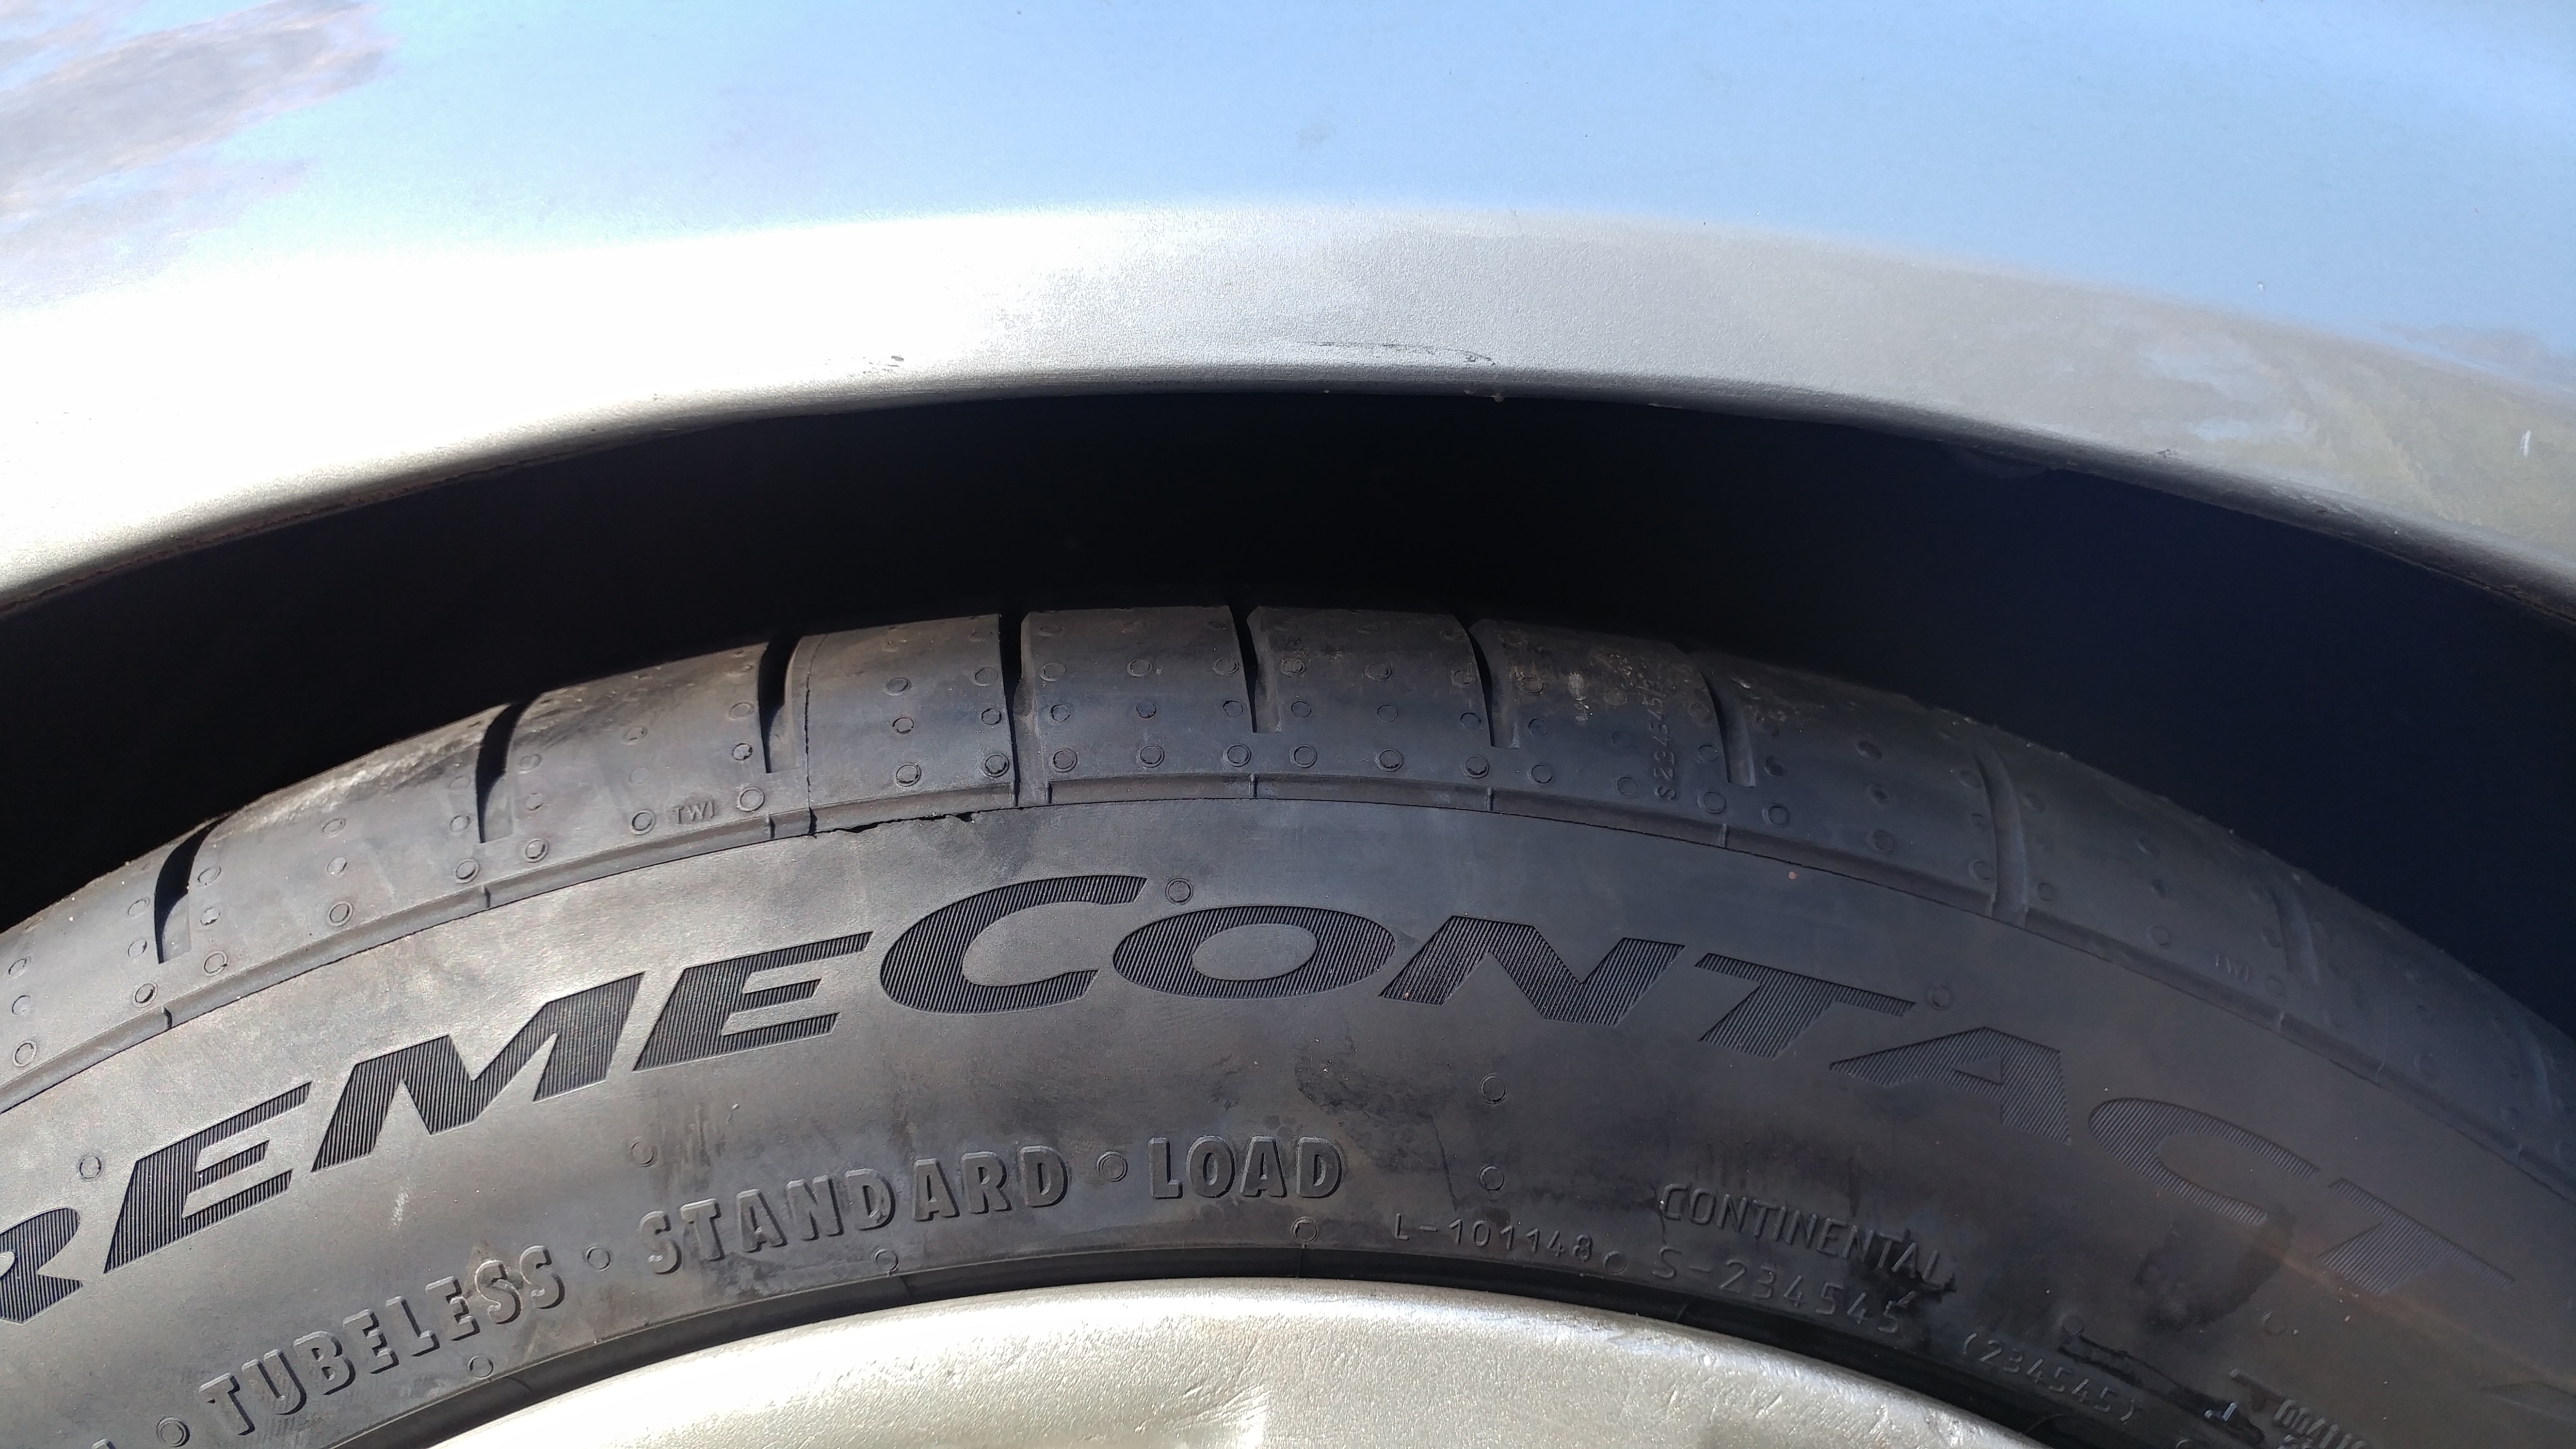
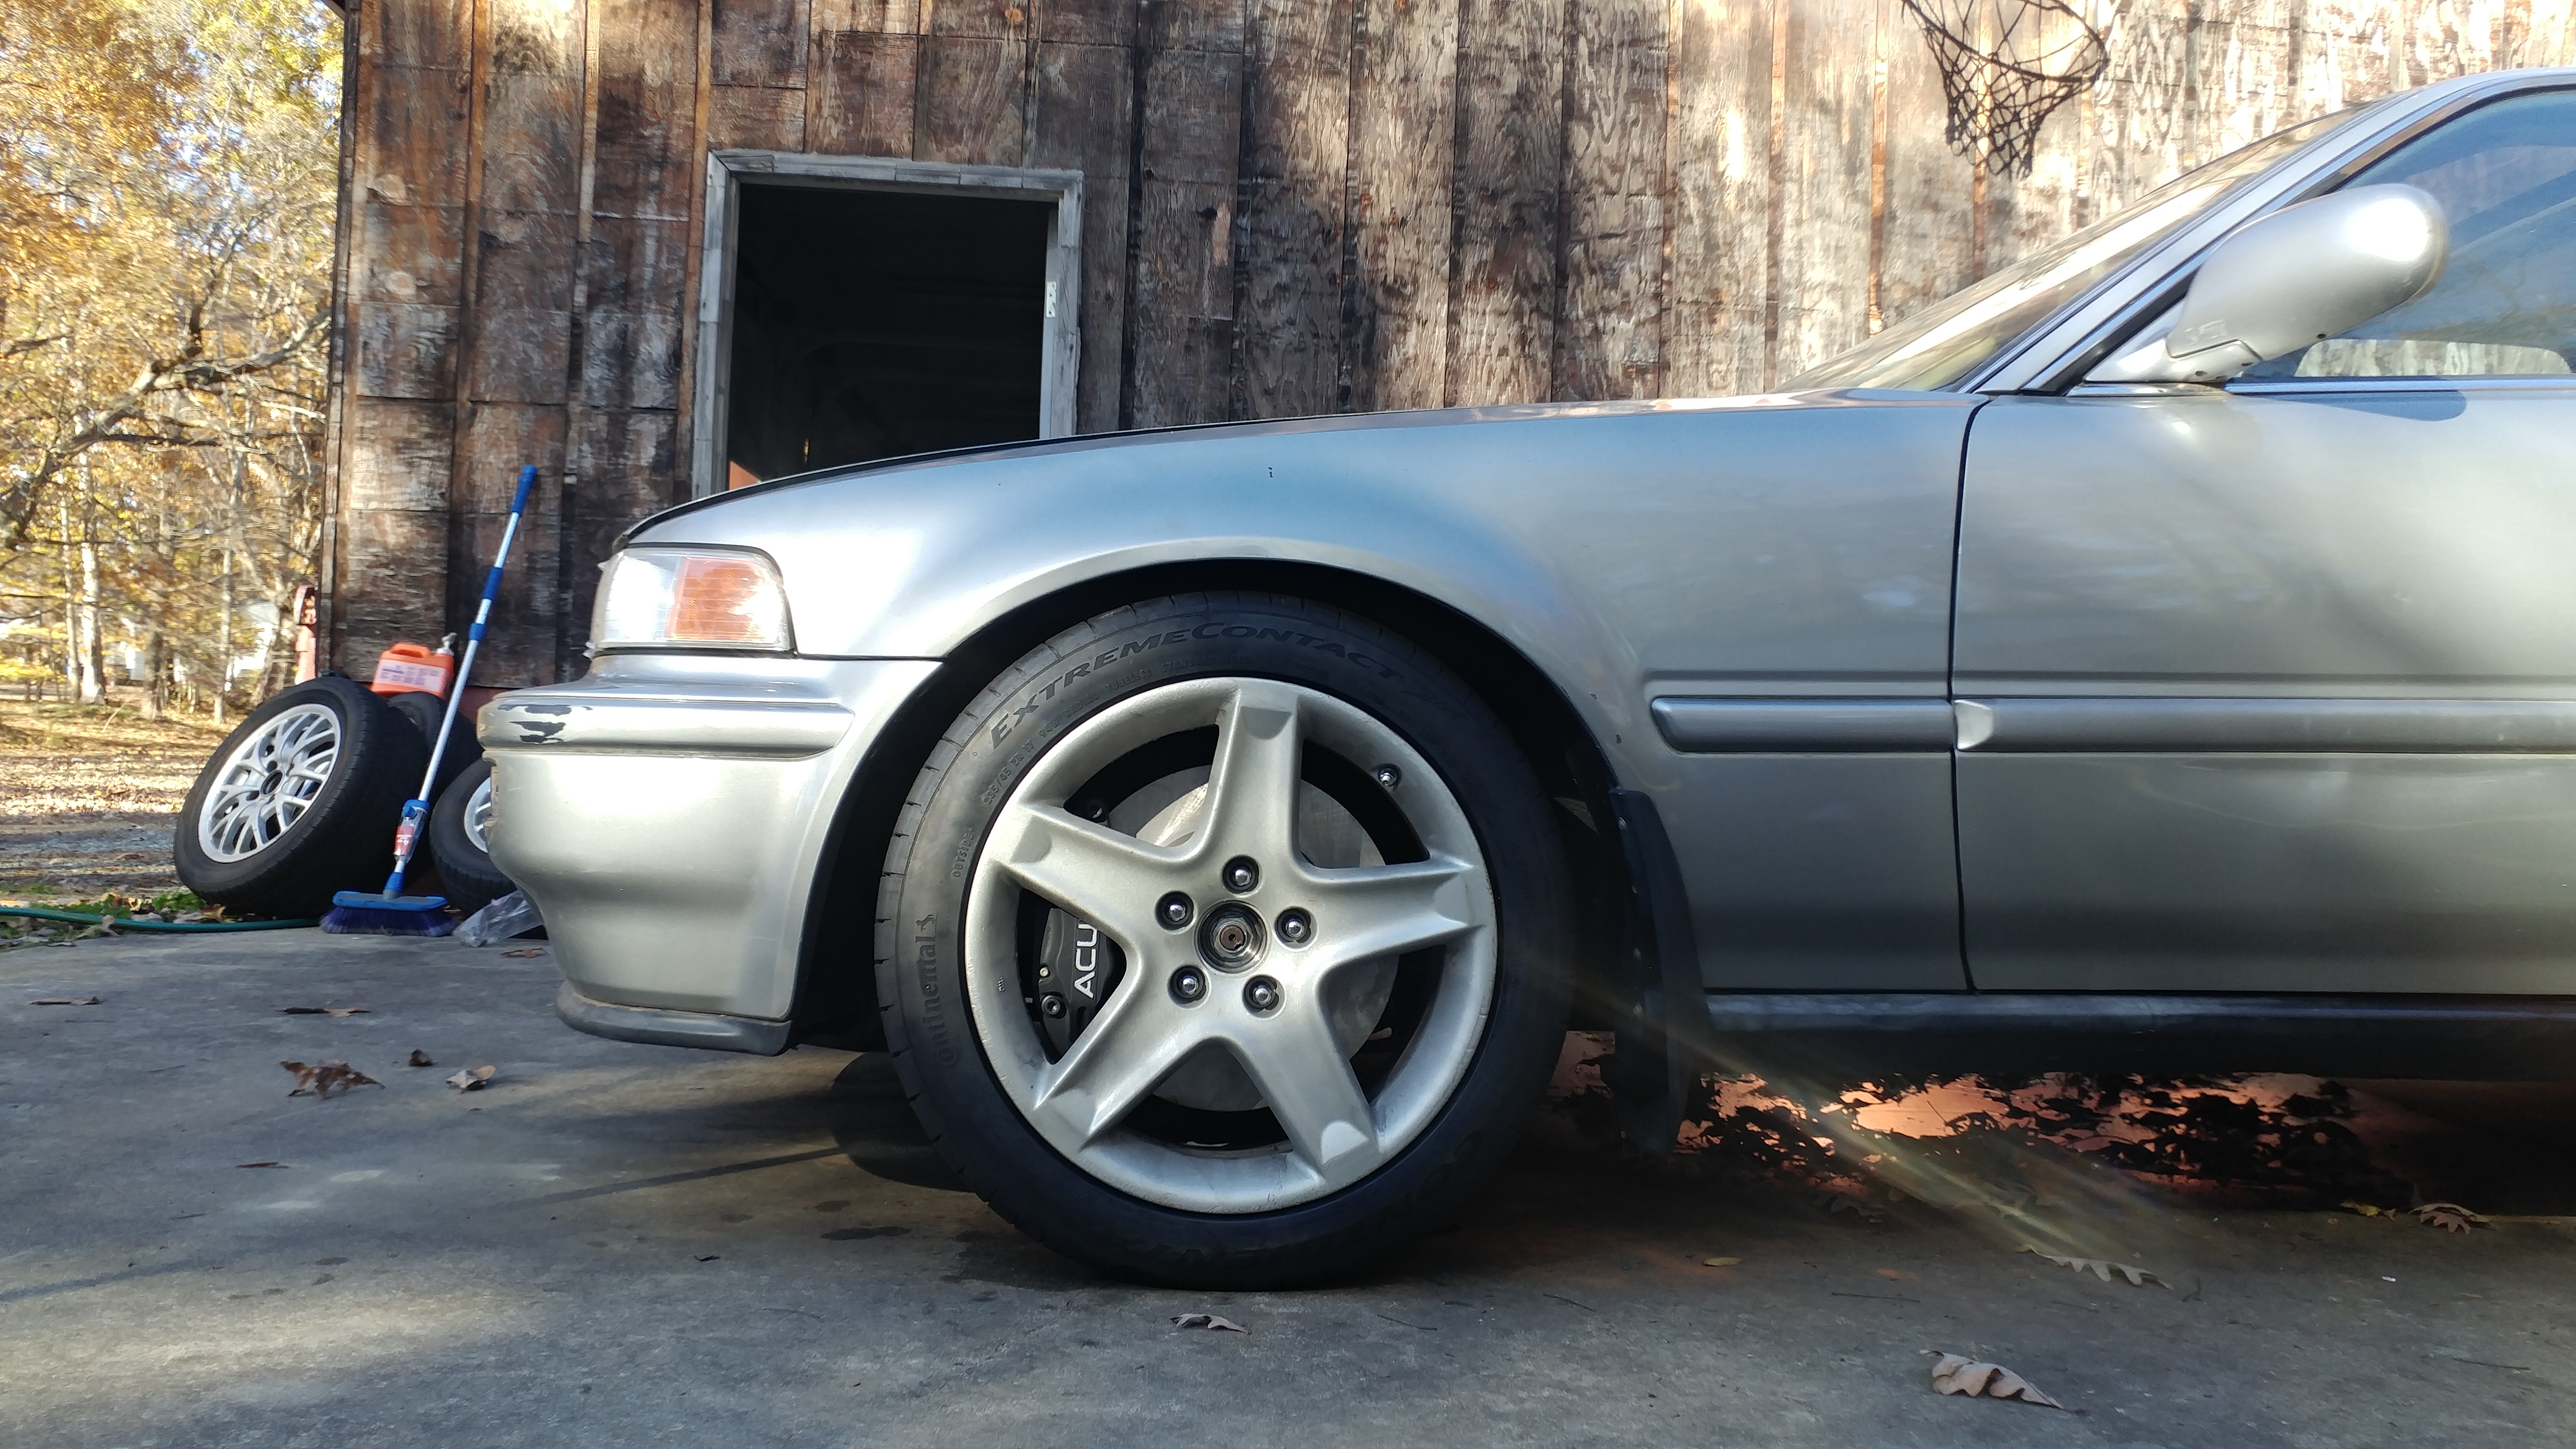
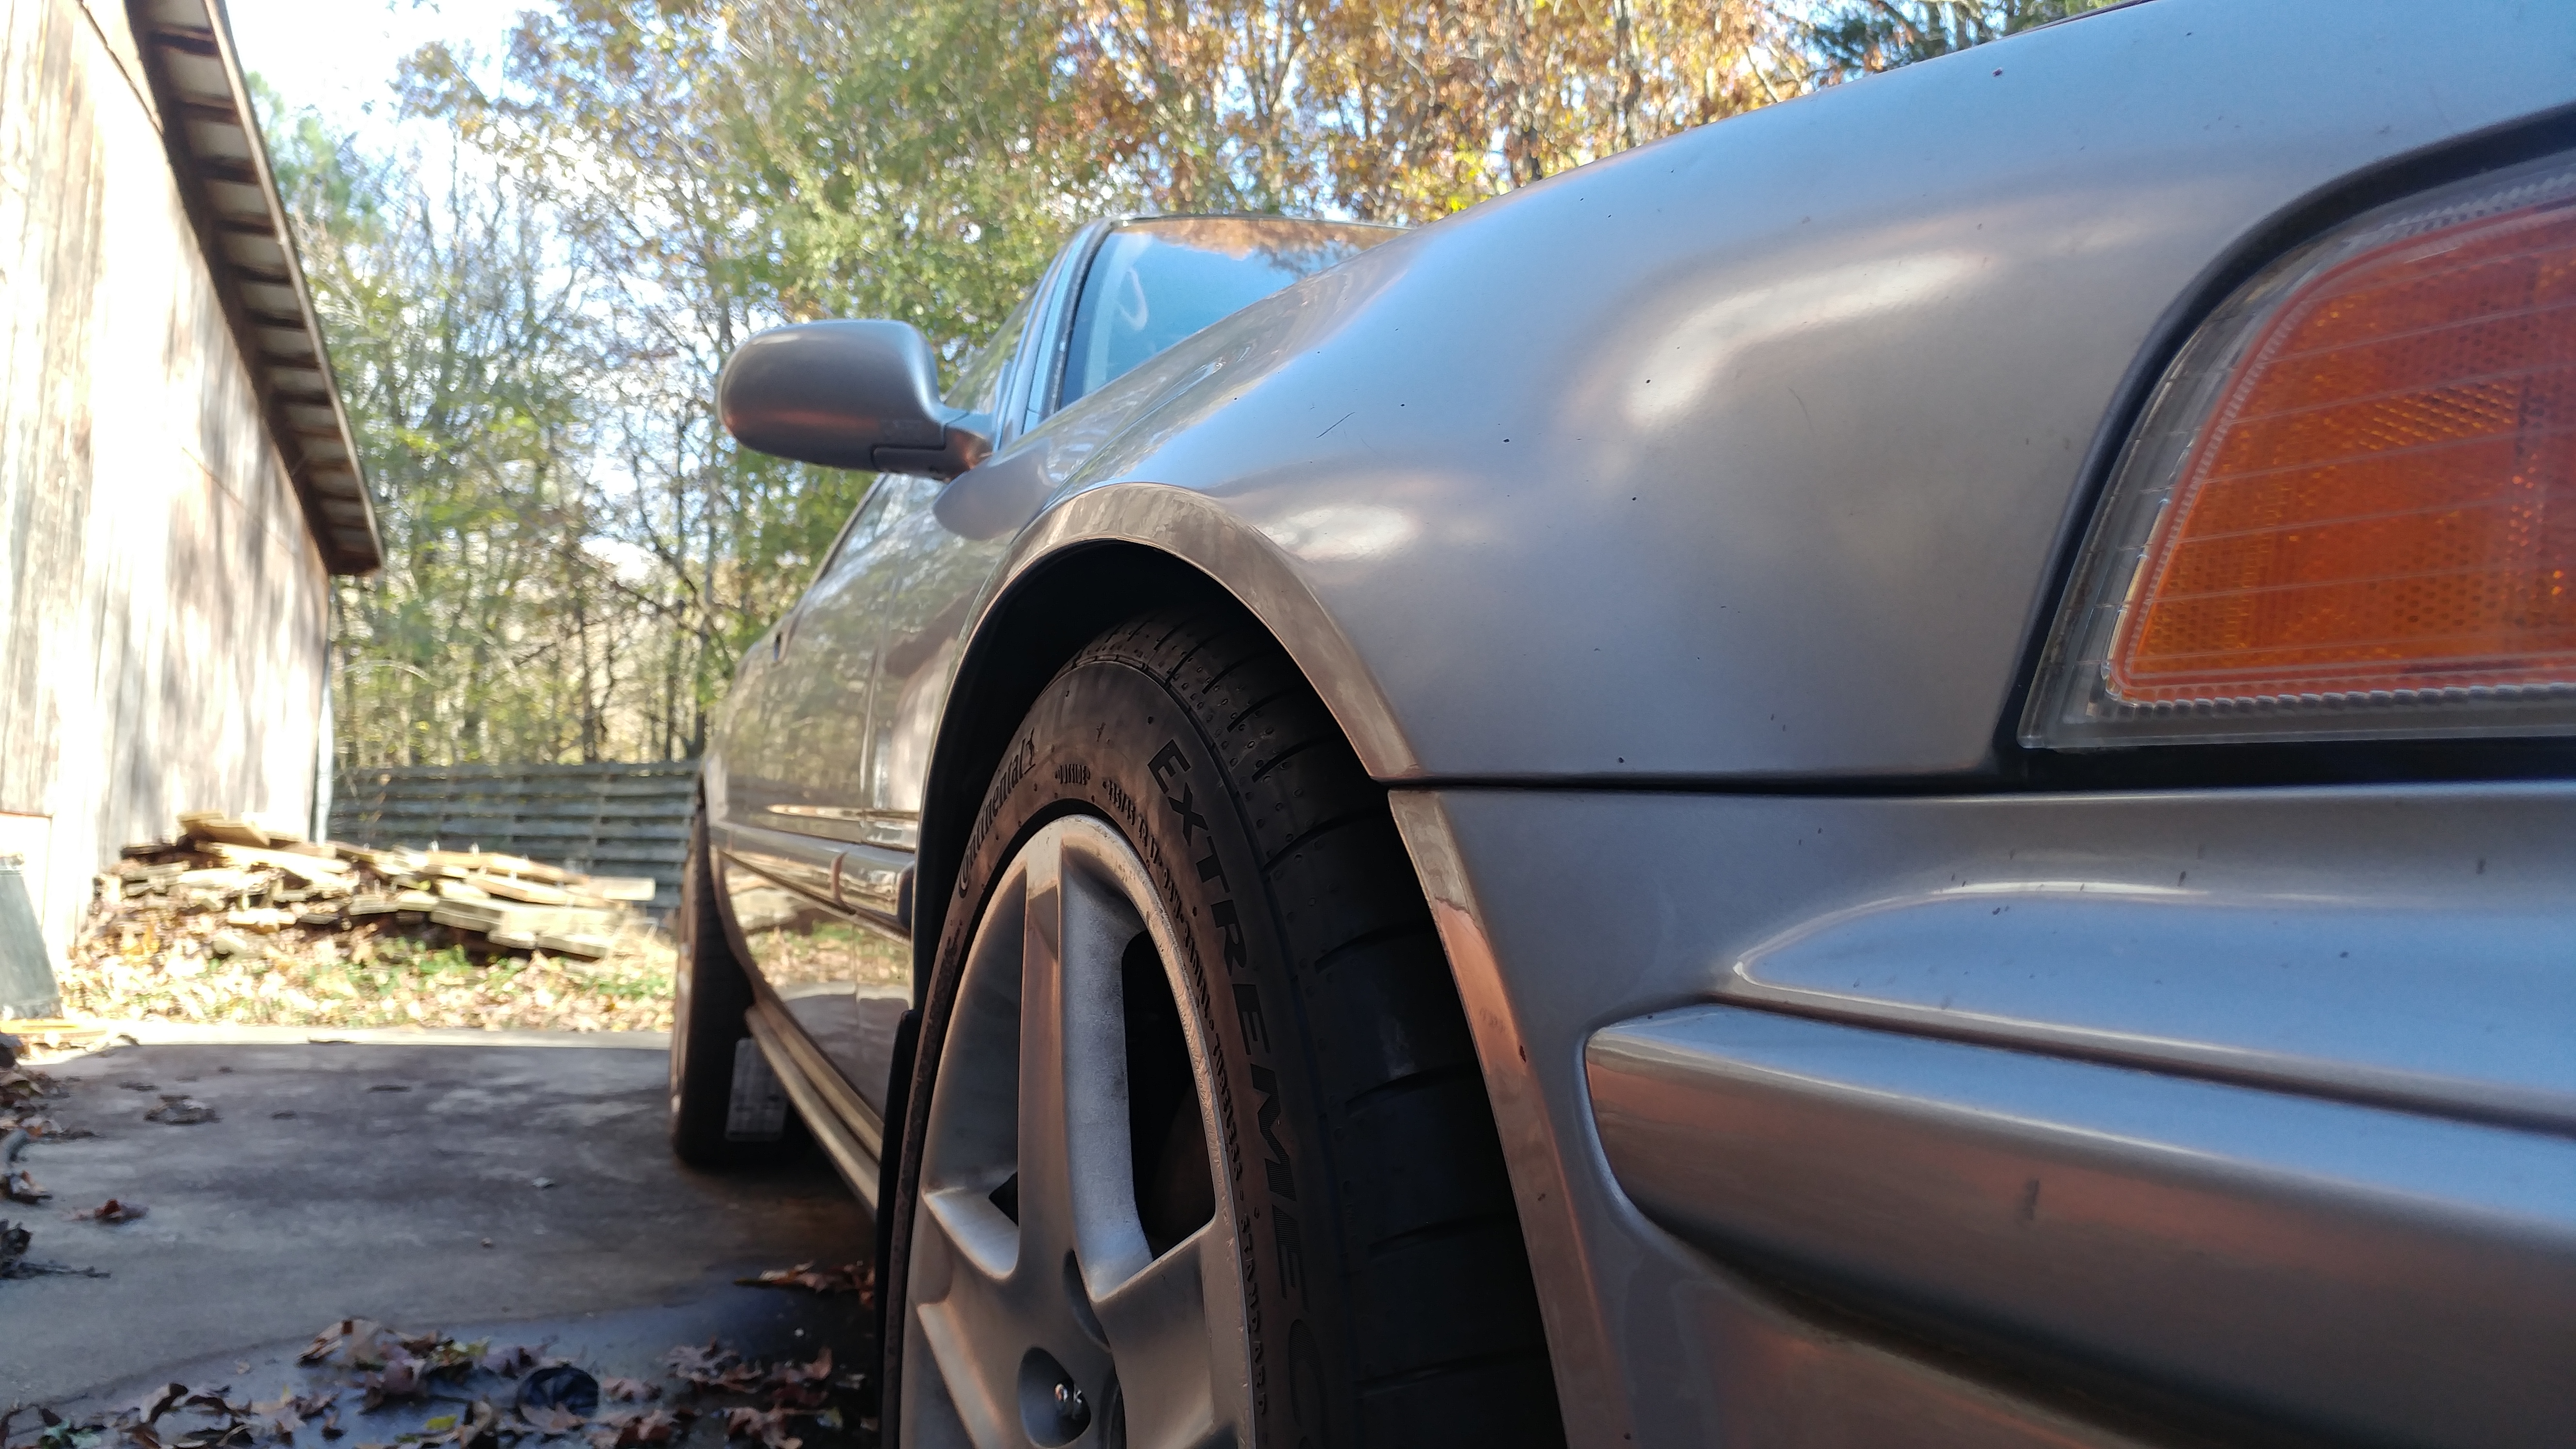
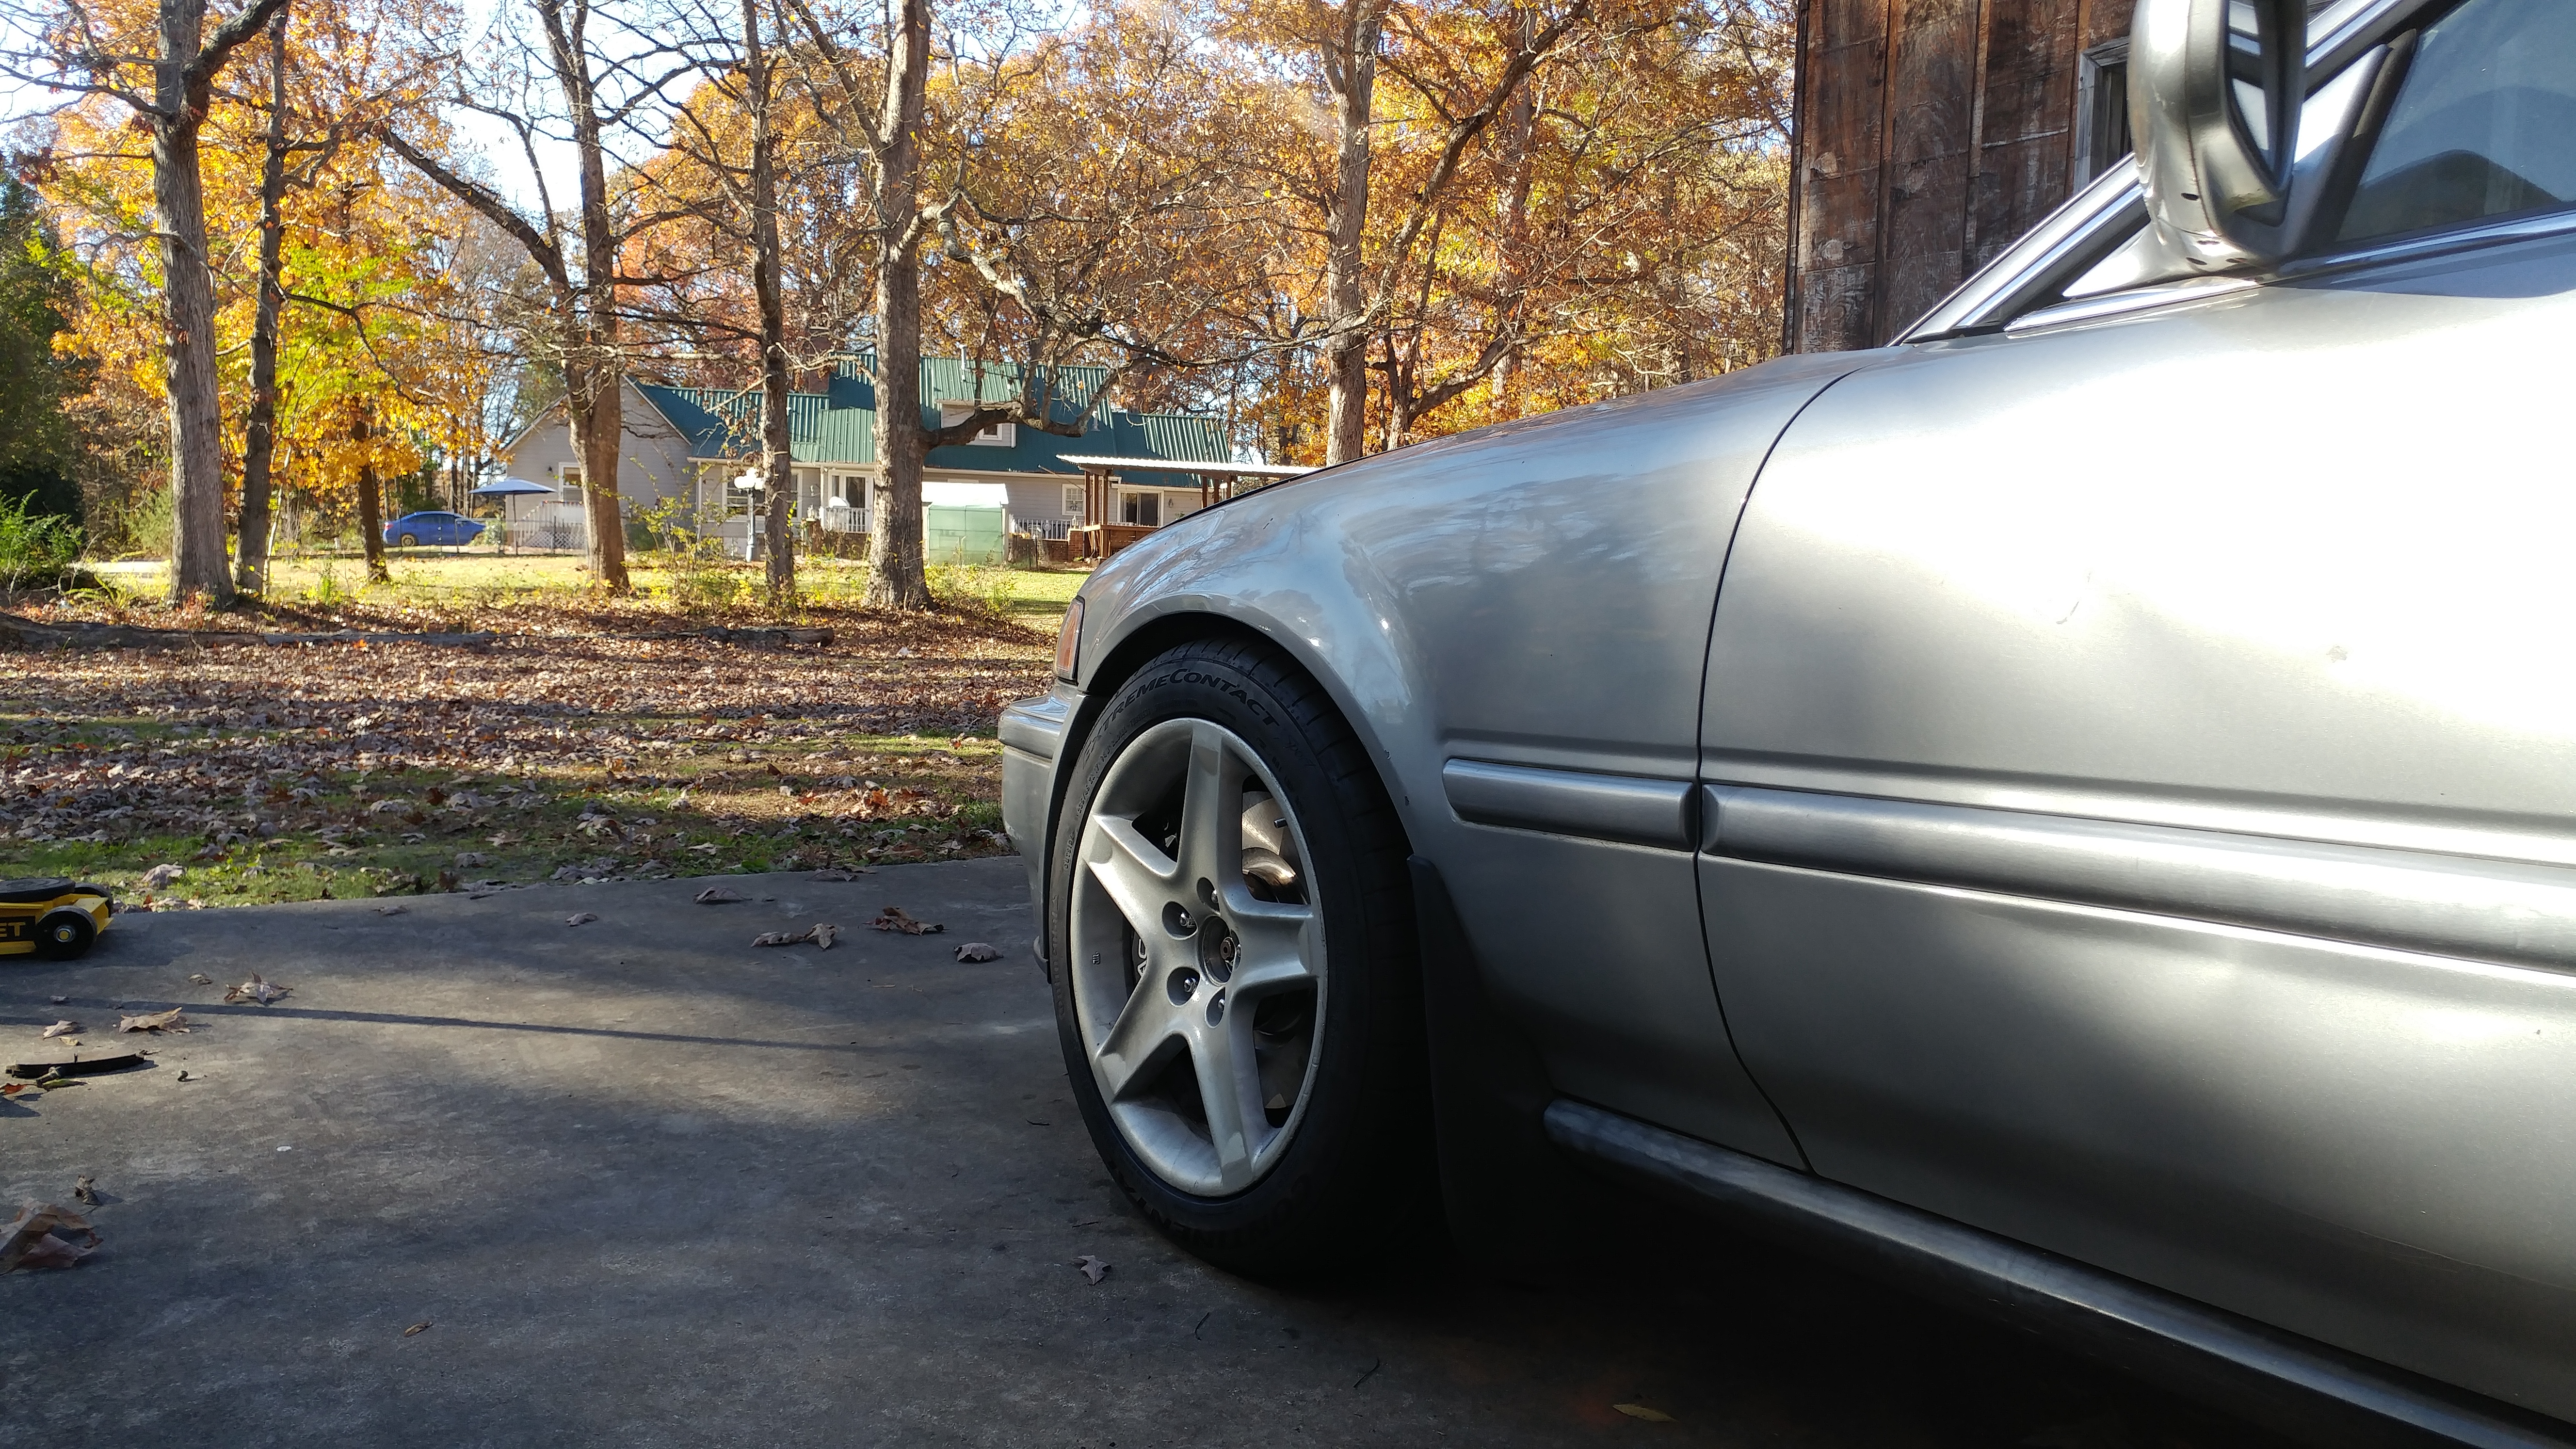
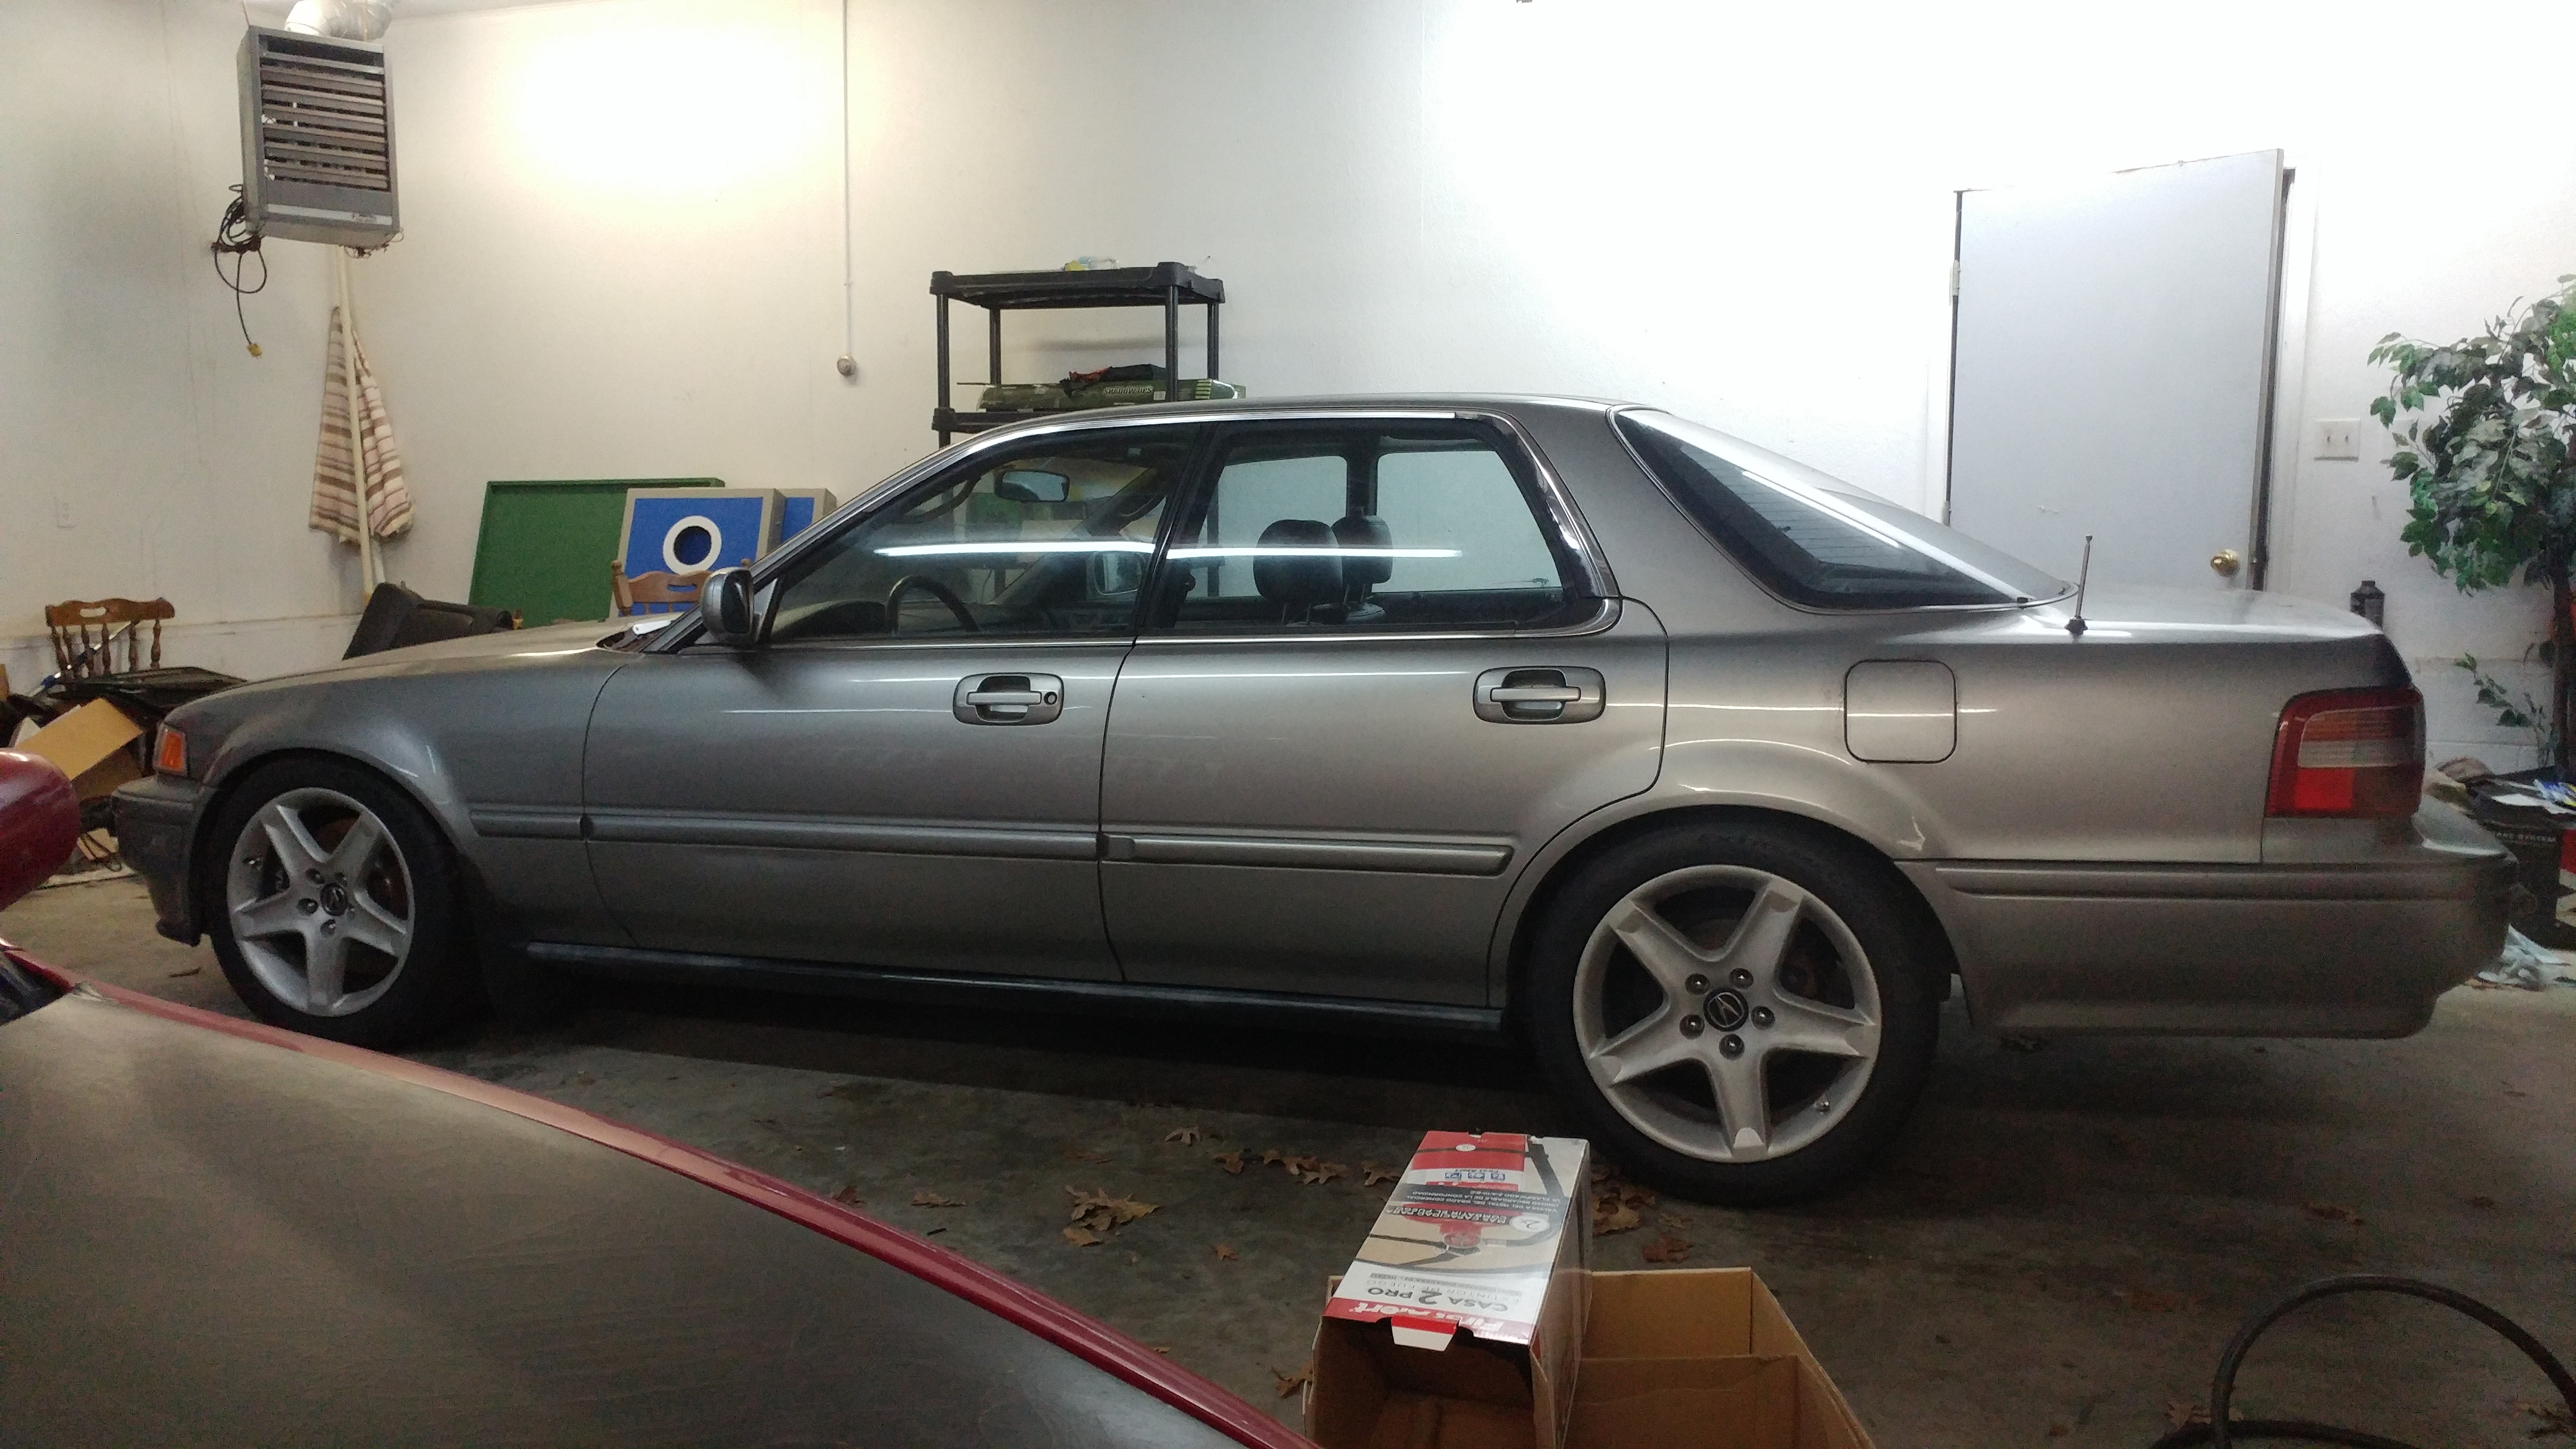
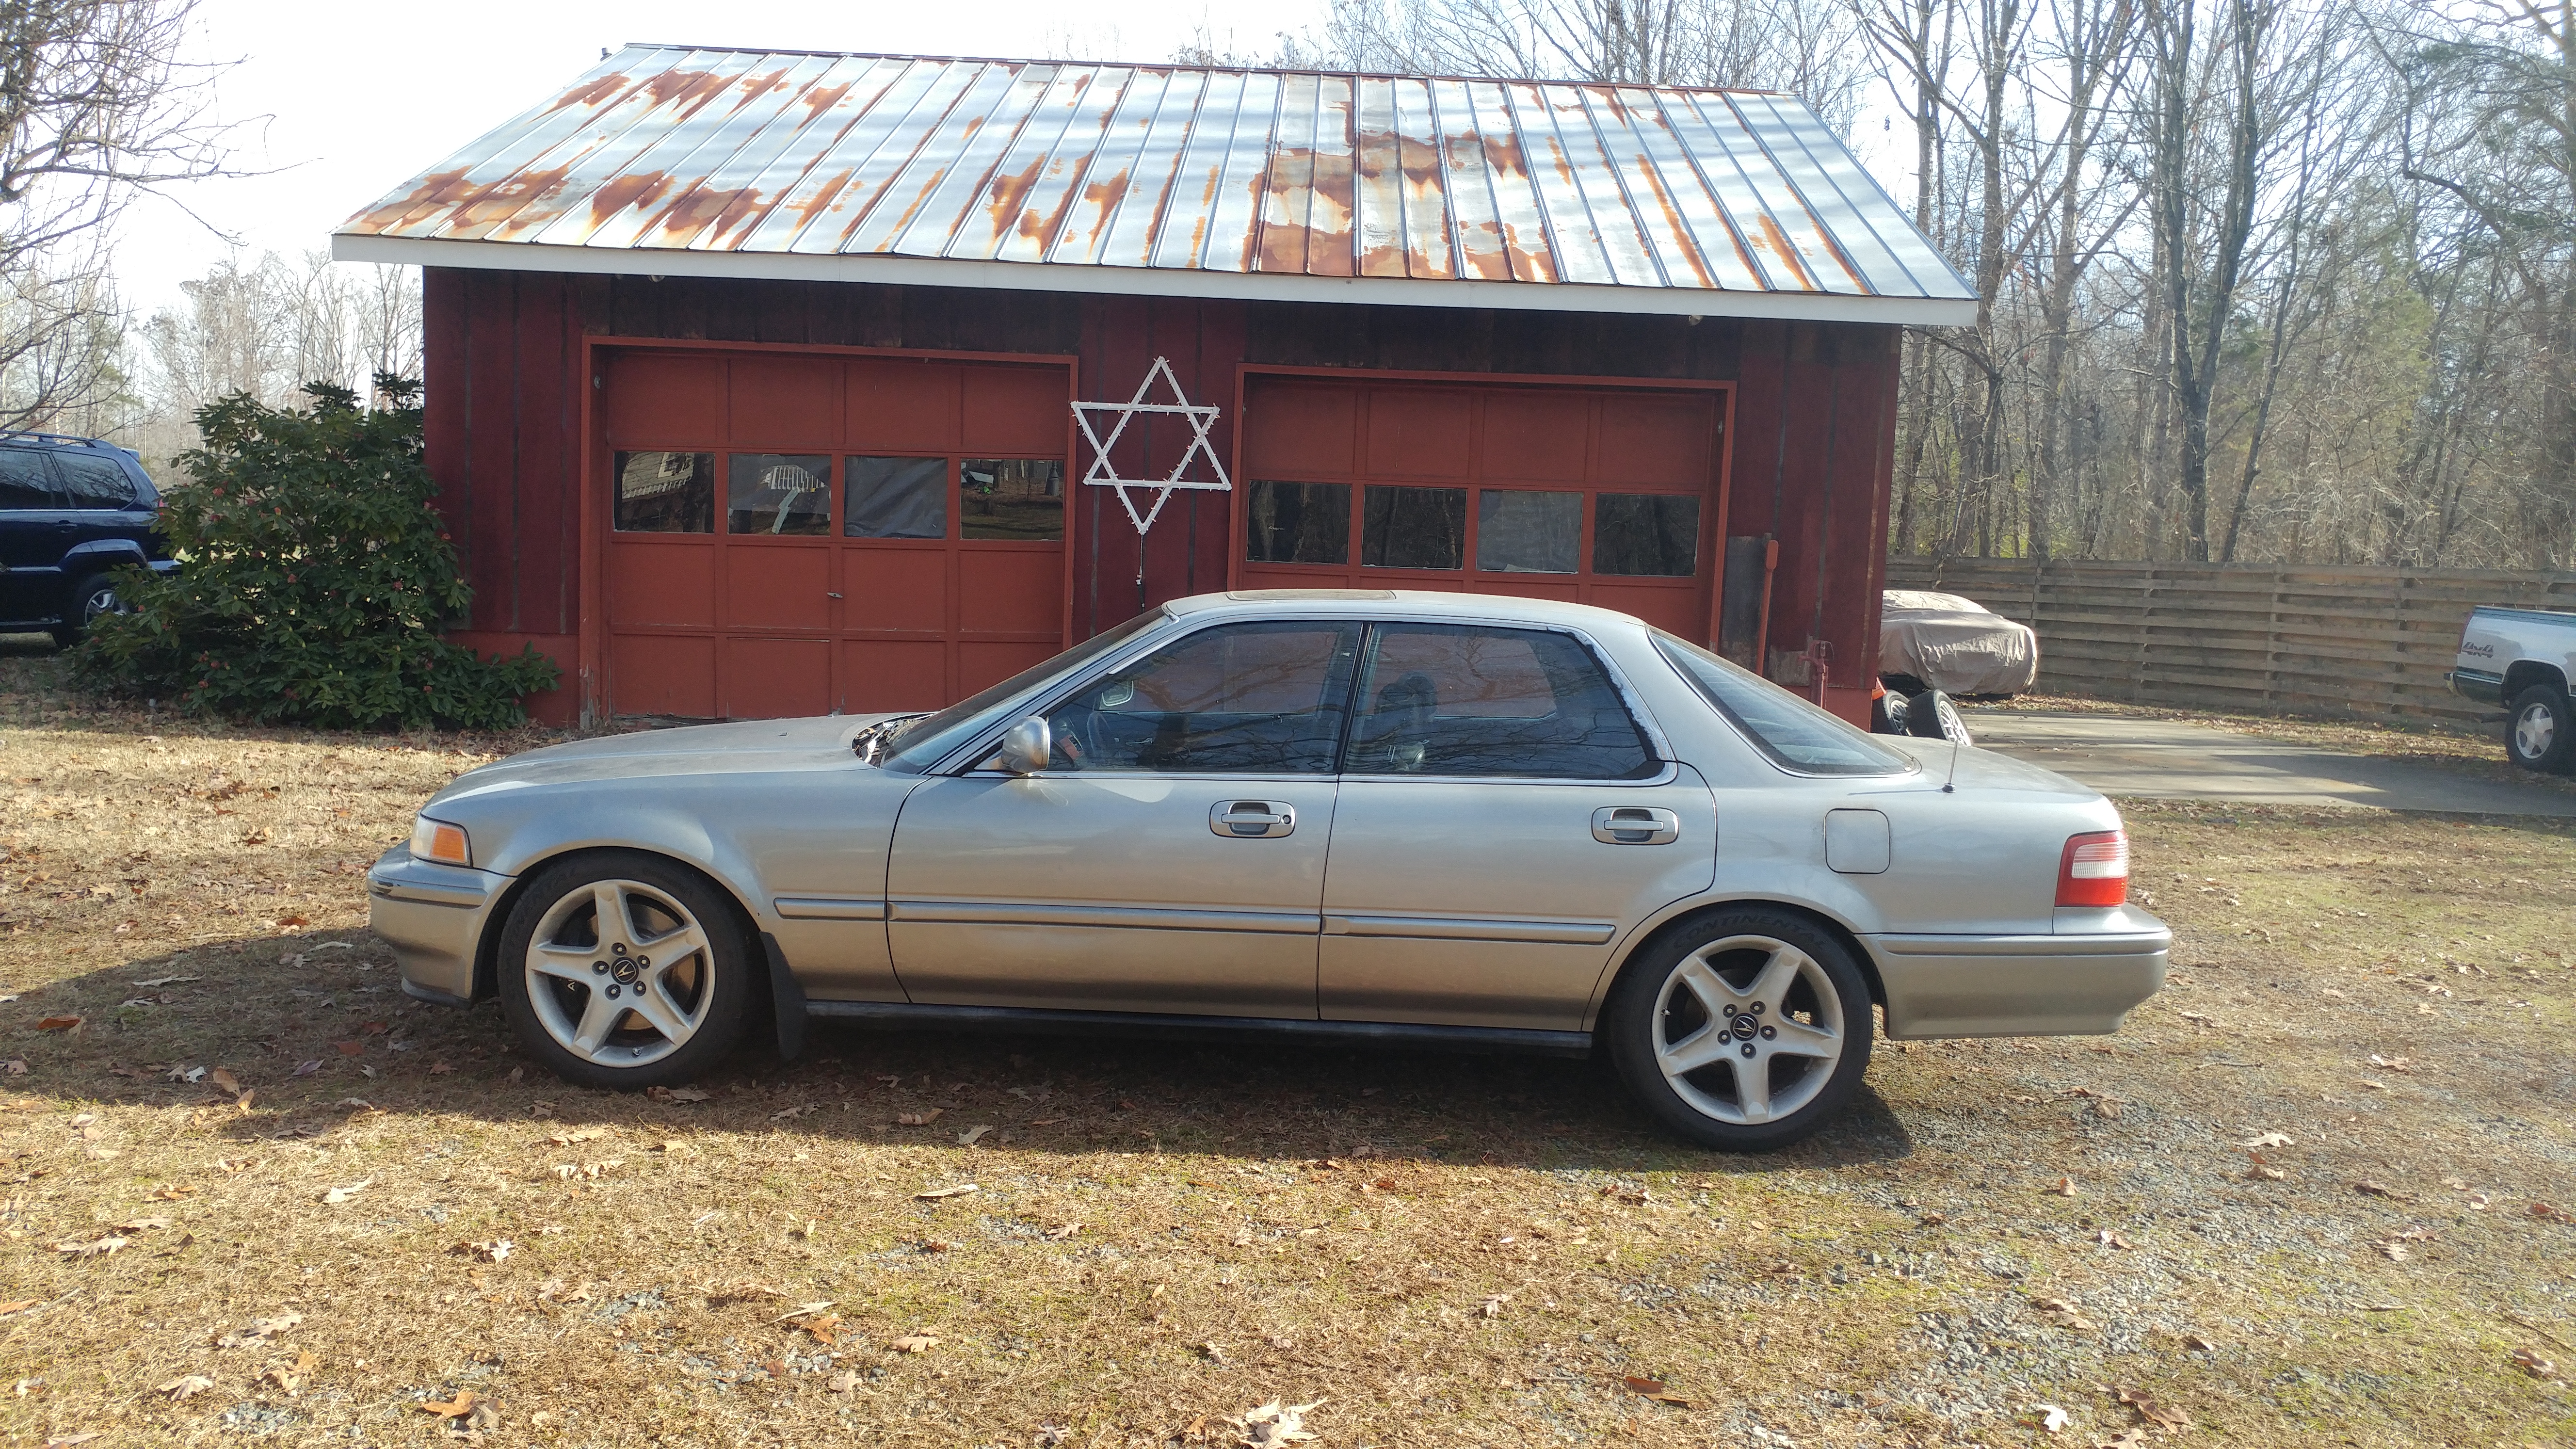
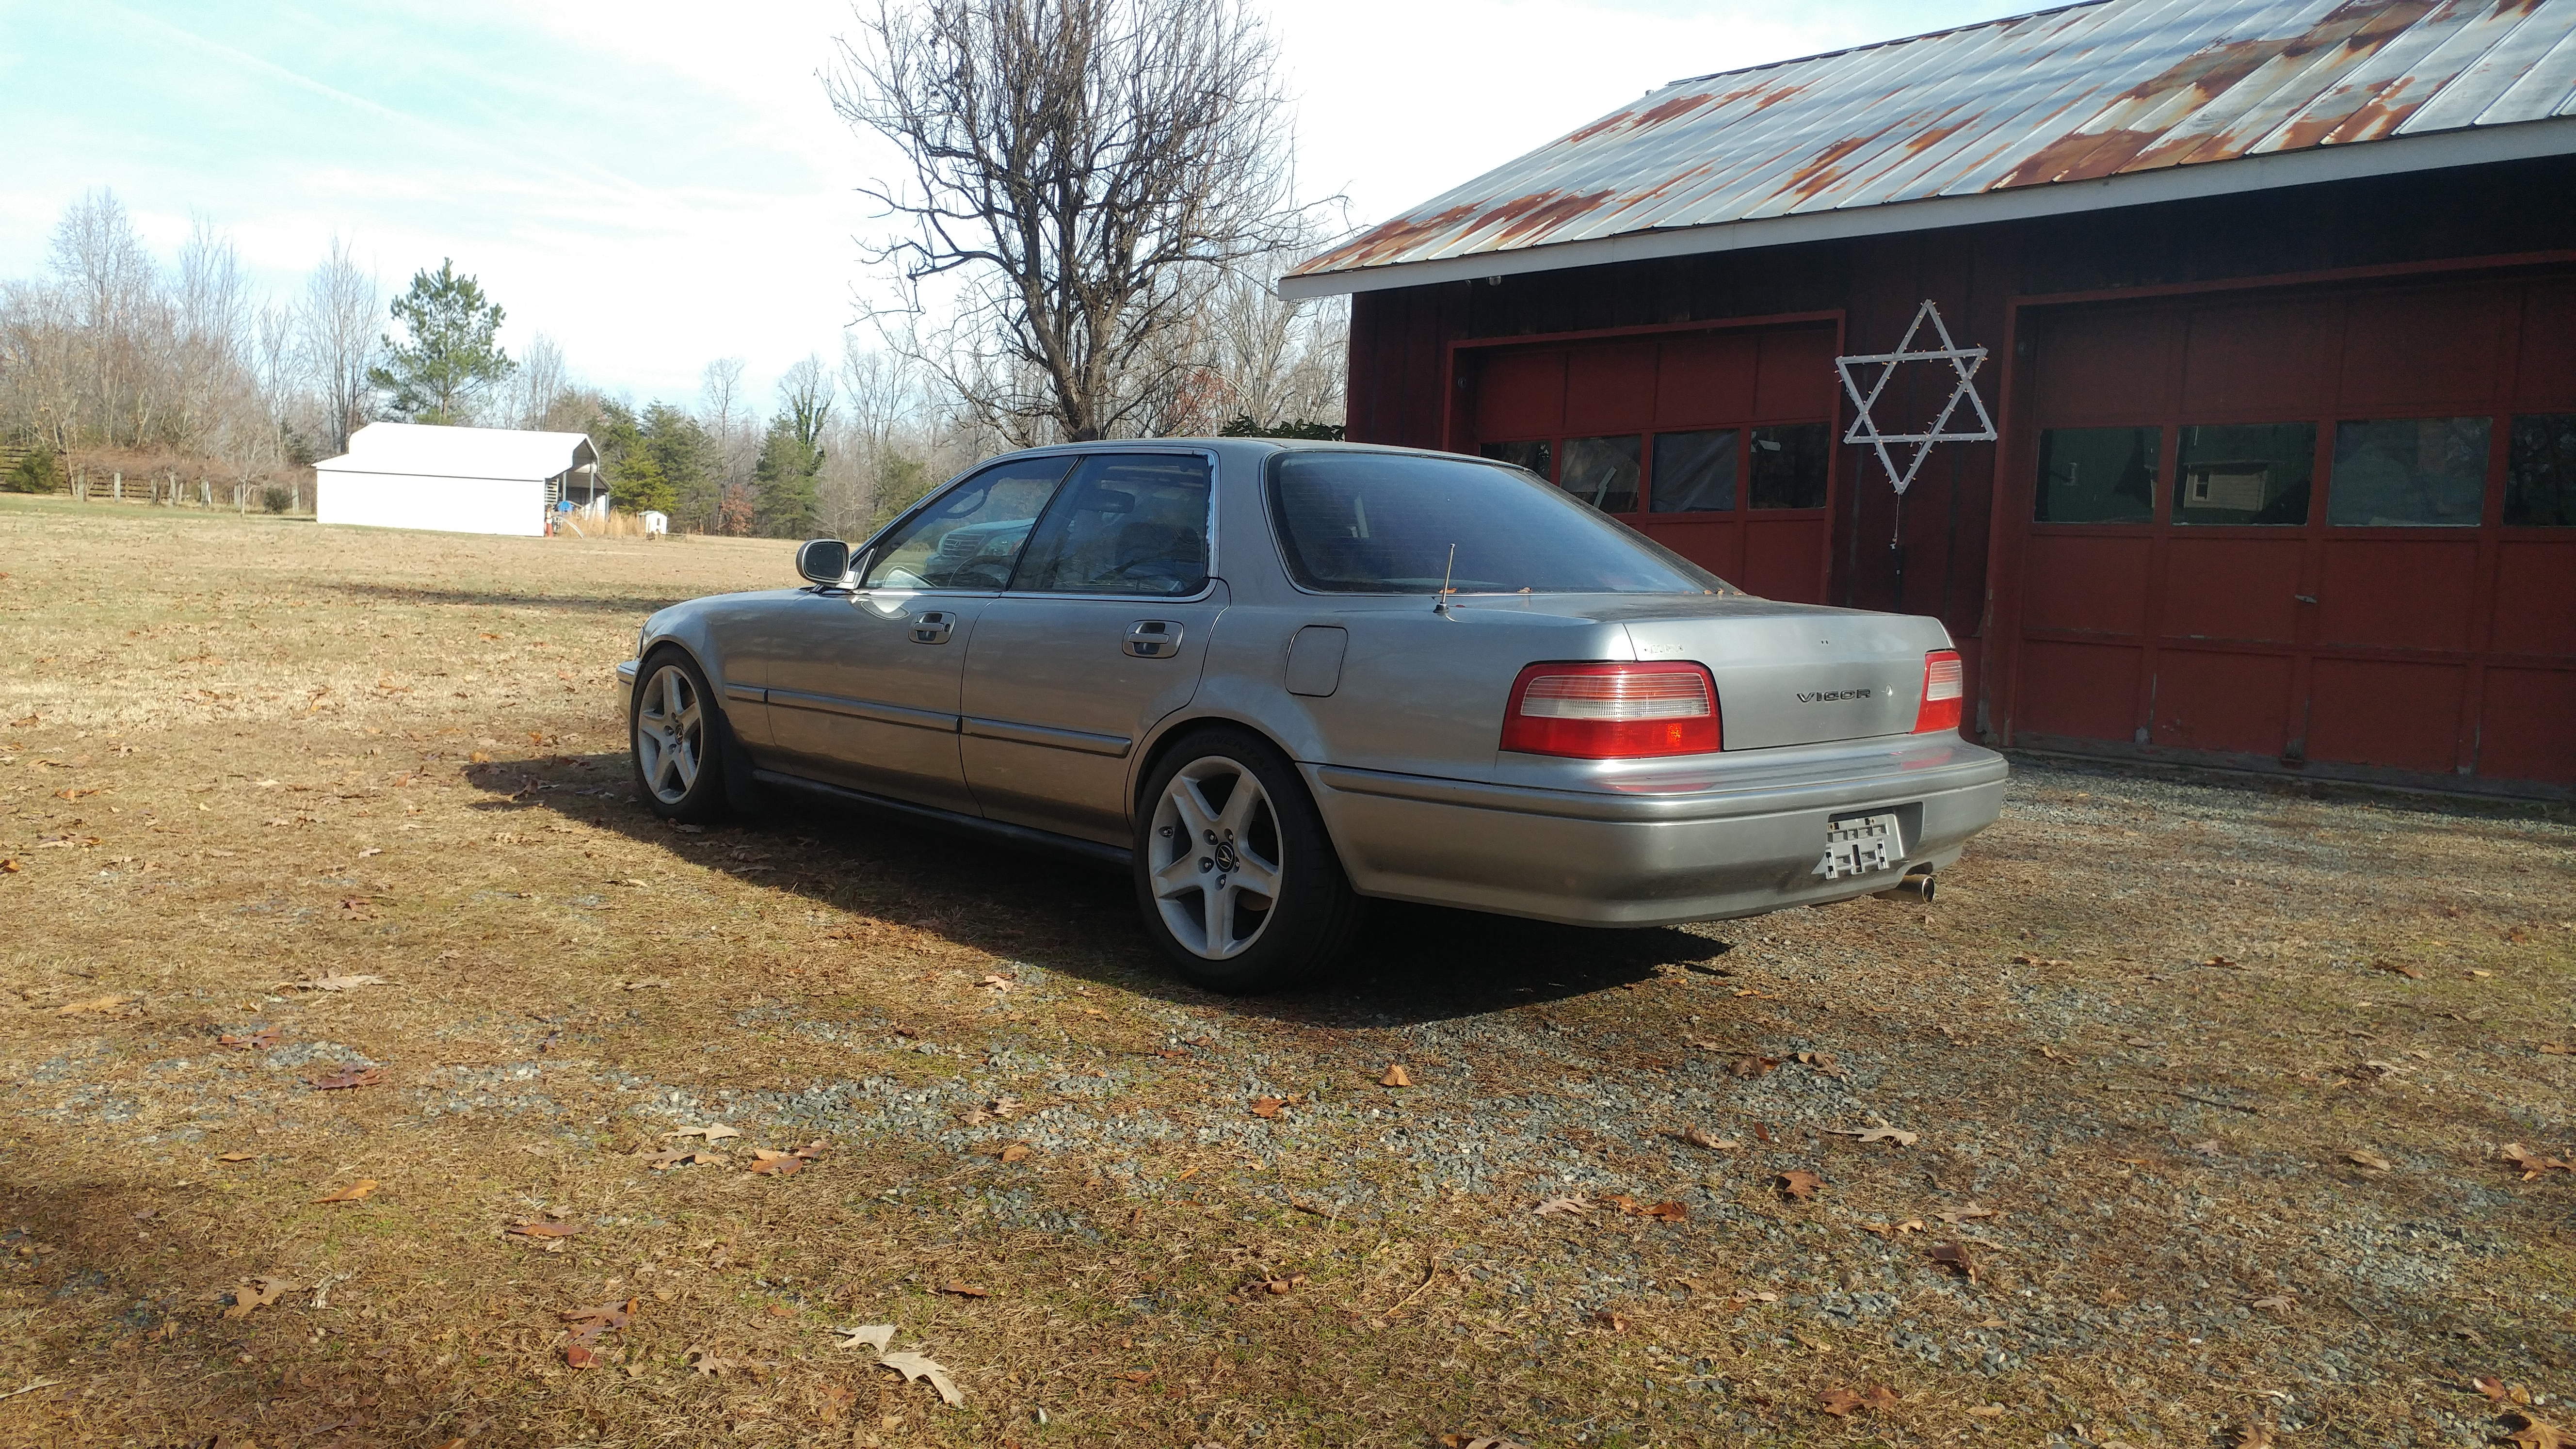
235/45/R17 +45
Needs 1-1.5 degrees negative camber and probably to roll the fender lip inside.
Pics with/without my friend (heavier weight) sitting in the trunk.
235/45/R17 +45
Needs 1-1.5 degrees negative camber and probably to roll the fender lip inside.
Pics with/without my friend (heavier weight) sitting in the trunk.
 08-31-2017, 11:08 PM
#42
Burning Brakes
Thread Starter
9/1/17
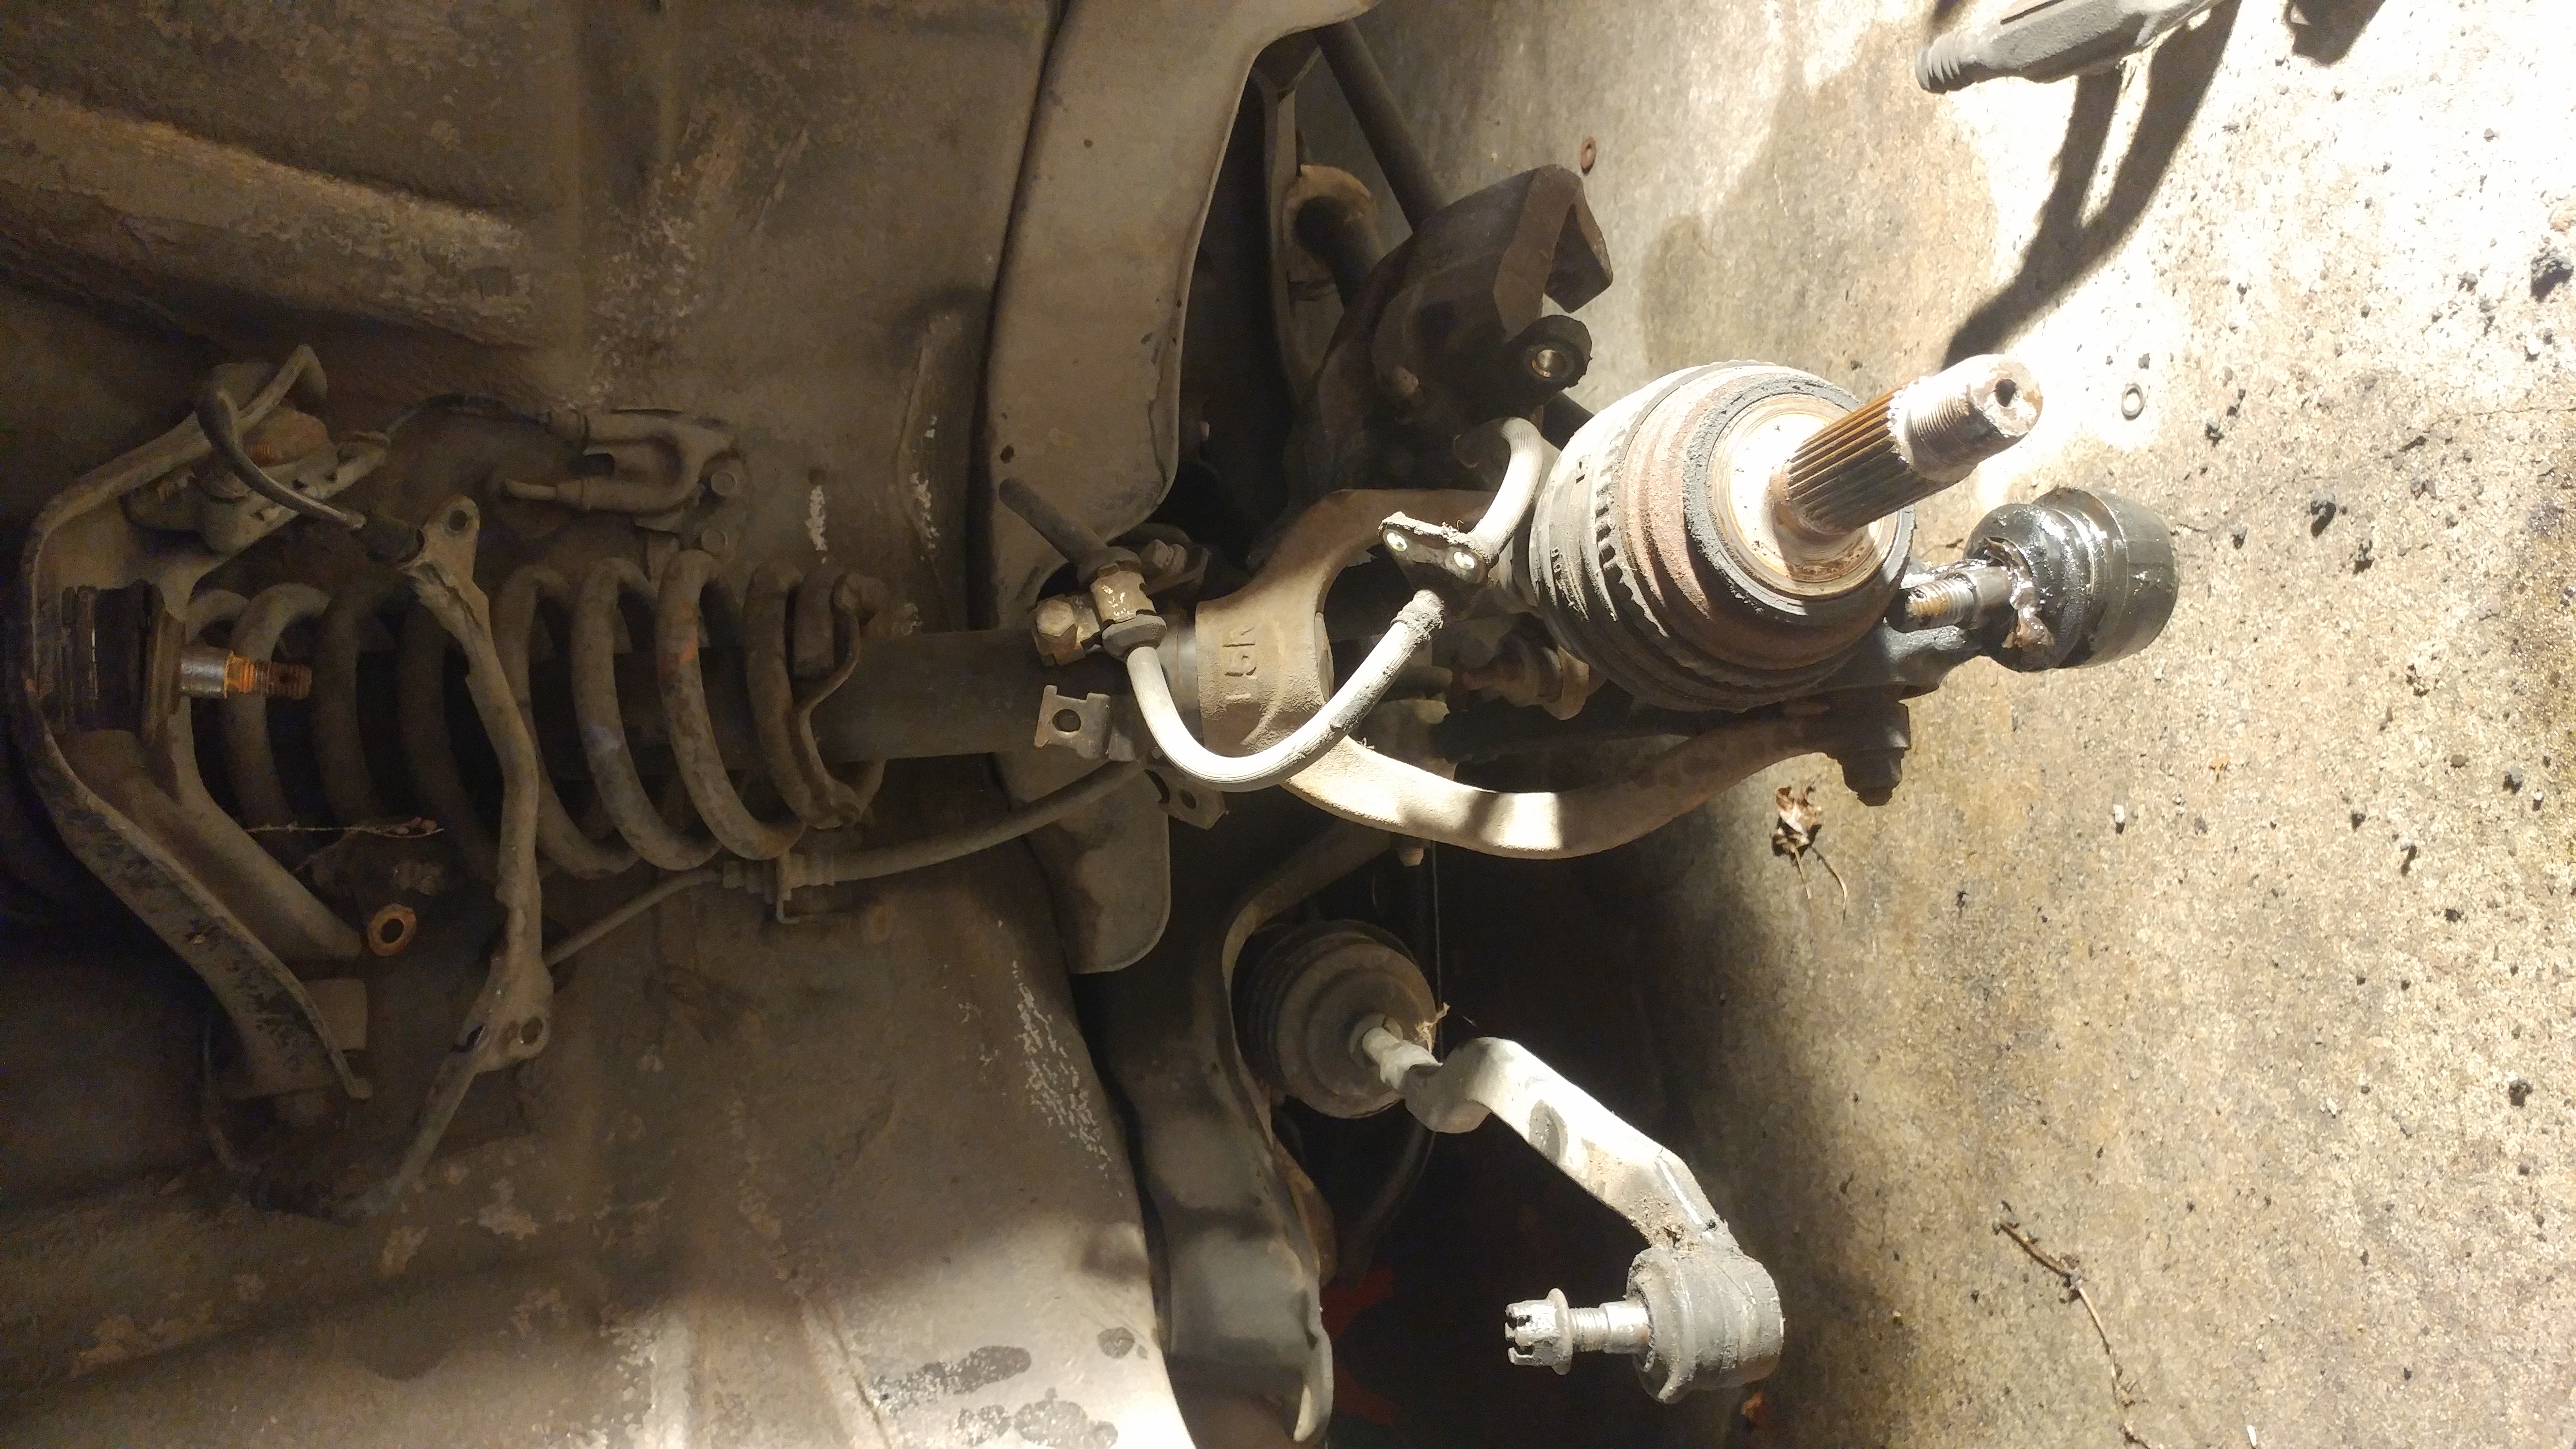
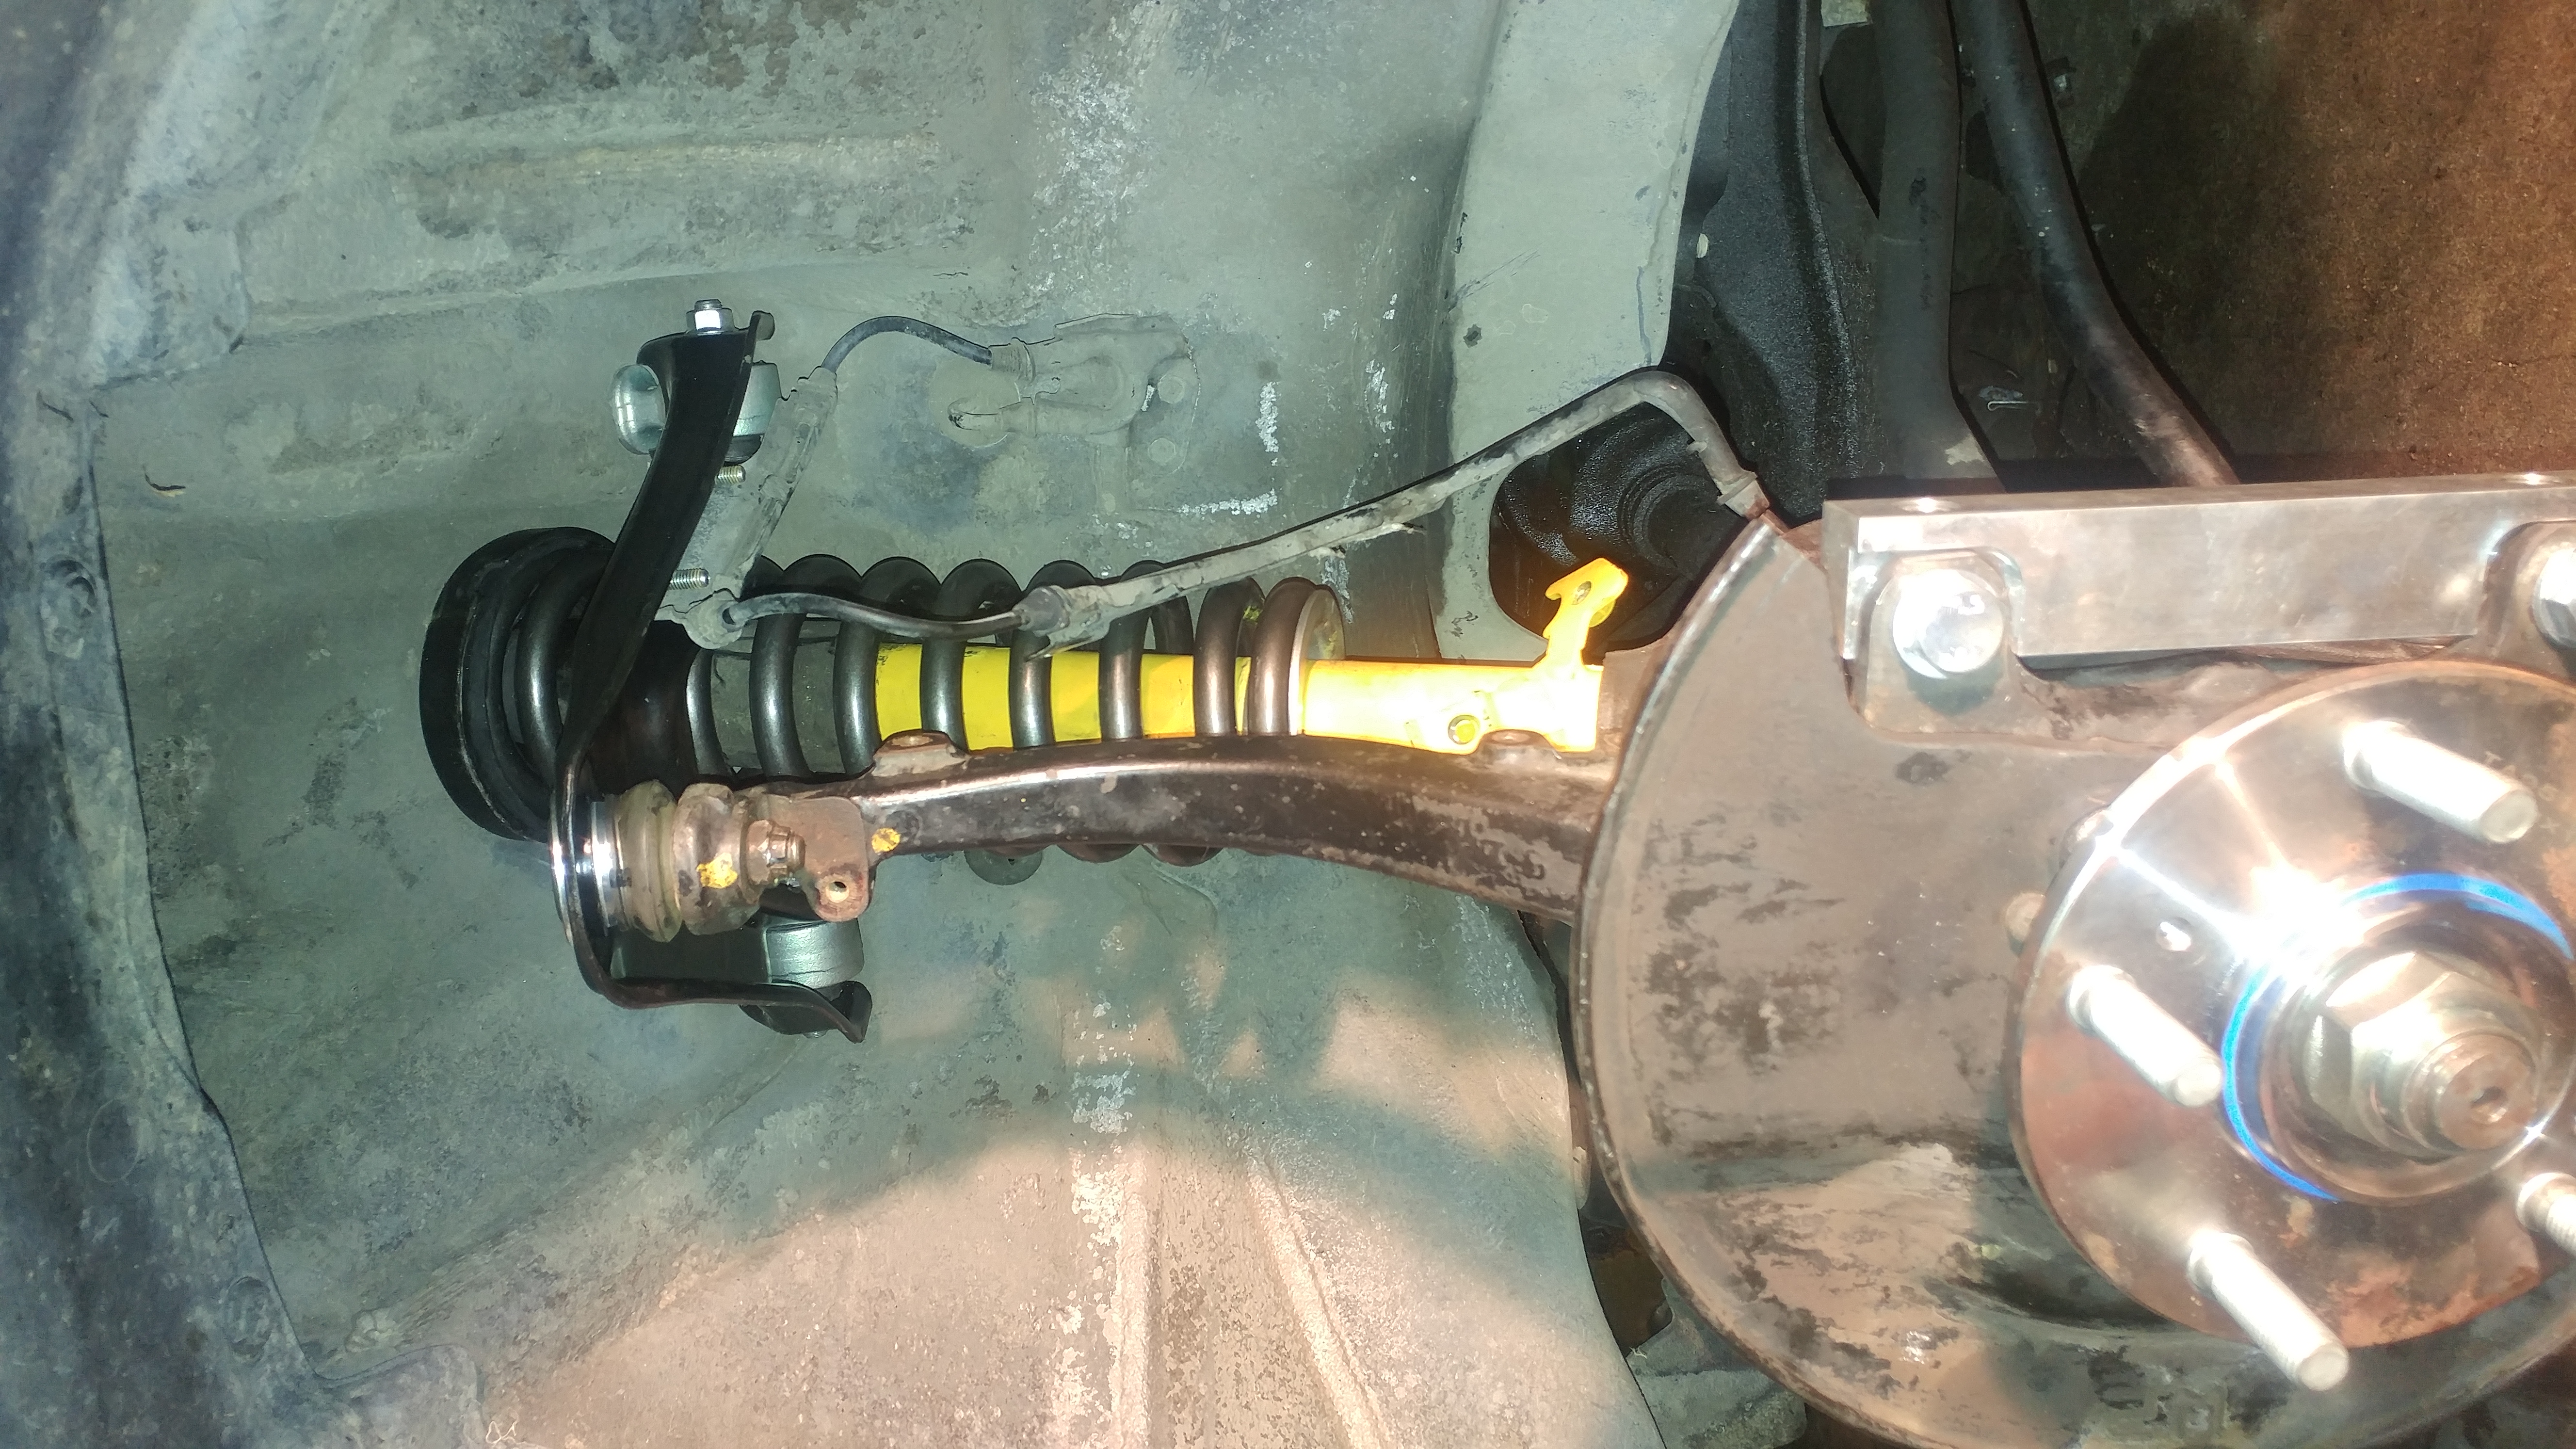
Going to order new front and rear upper and lower ball joints since the knuckle has to come off of the car to get the bearing assembly unbolted. The Axle is in the way. These ball joints are trashed and if I'm going to drive this car and open up the suspension I might as well get the ball joints taken care of while I'm in there. After all it is a safety thing.
Still haven't done any engine work but all of the parts are still waiting around. Car runs great but currently the valve cover pours out oil and the cooling system is open. Work has been crazy busy (hence why all of the progress is taking place from 9pm to 2am) but it will be done!
The interior, paint and NVH is still on the list. But I'm loving this so far. Couldn't be happier.
Anyway I hope you guys enjoyed the update! Sorry it has been so long!
09-02-2017, 11:56 PM
#43
Burning Brakes
Thread Starter
9/3/17
Front upper and lower + rear upper ball joints/ control arms ordered.
Honestly idk why because I'm more than likely going to need to add some slight camber. Like -1 degree all around.
I'm so stupid.

Front upper and lower + rear upper ball joints/ control arms ordered.
Honestly idk why because I'm more than likely going to need to add some slight camber. Like -1 degree all around.
I'm so stupid.

The following users liked this post:
Timmy18 (09-23-2017)
09-12-2017, 10:20 PM
#45
Burning Brakes
Thread Starter
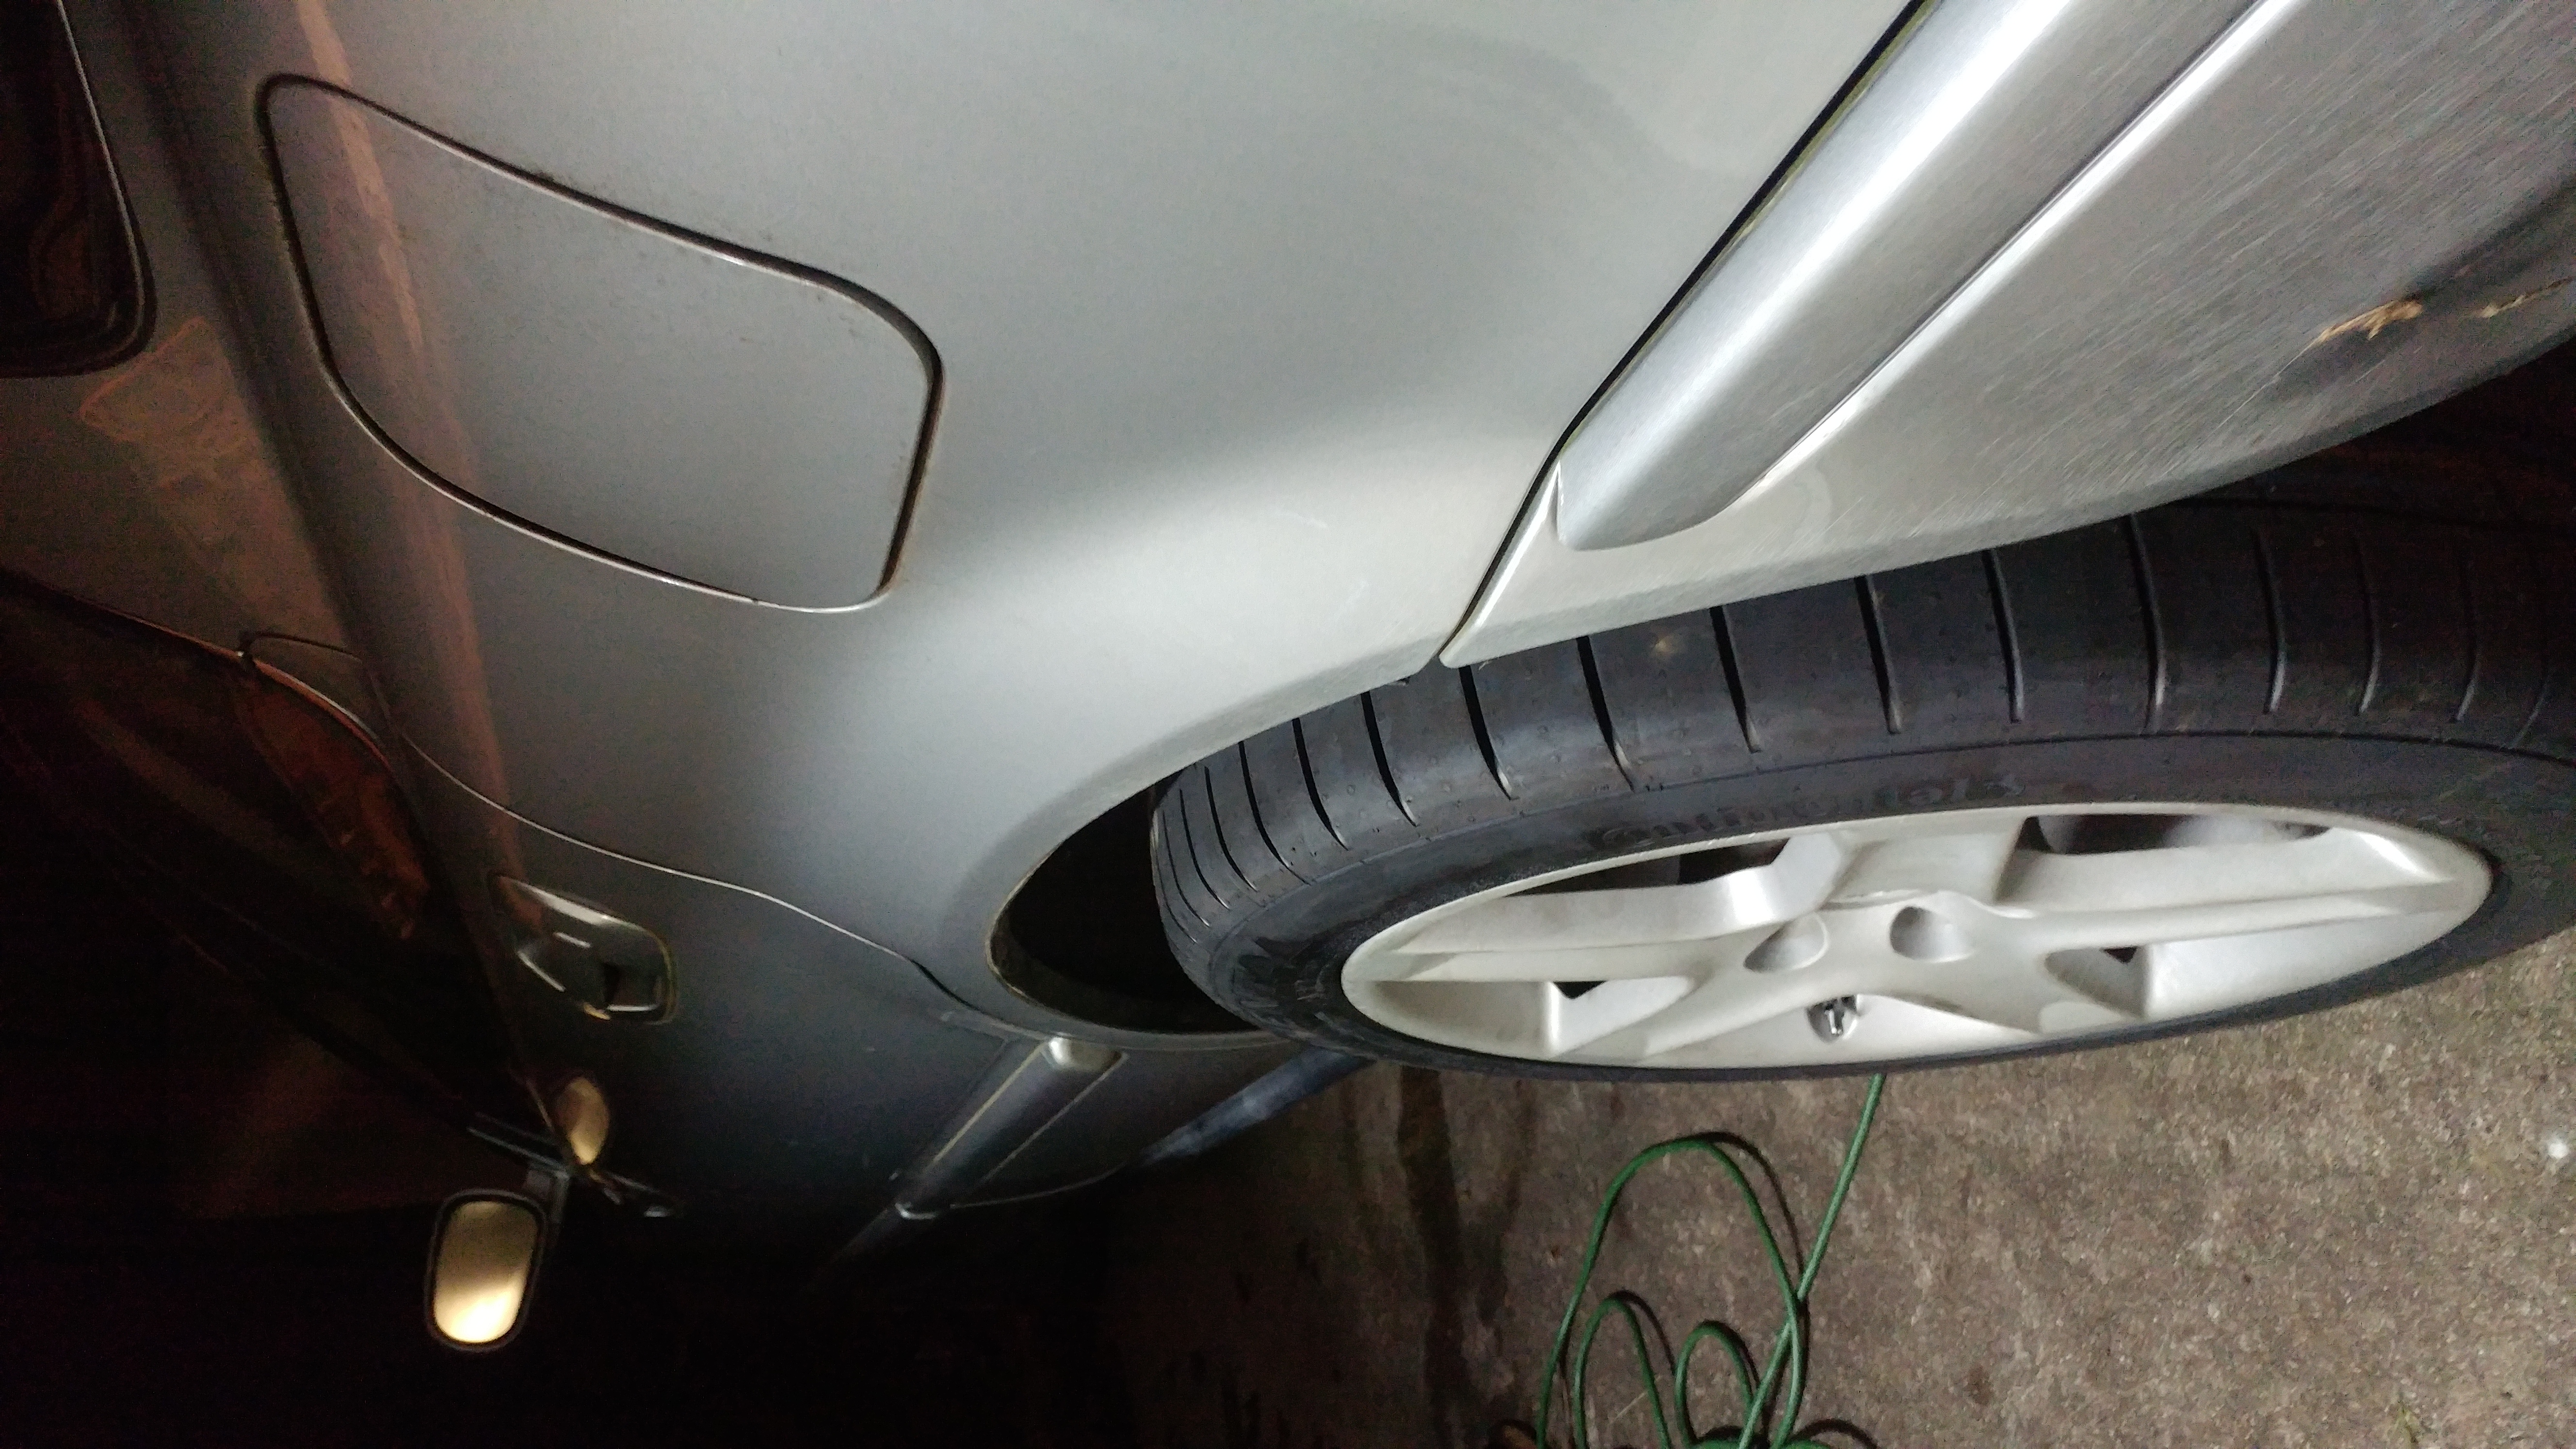
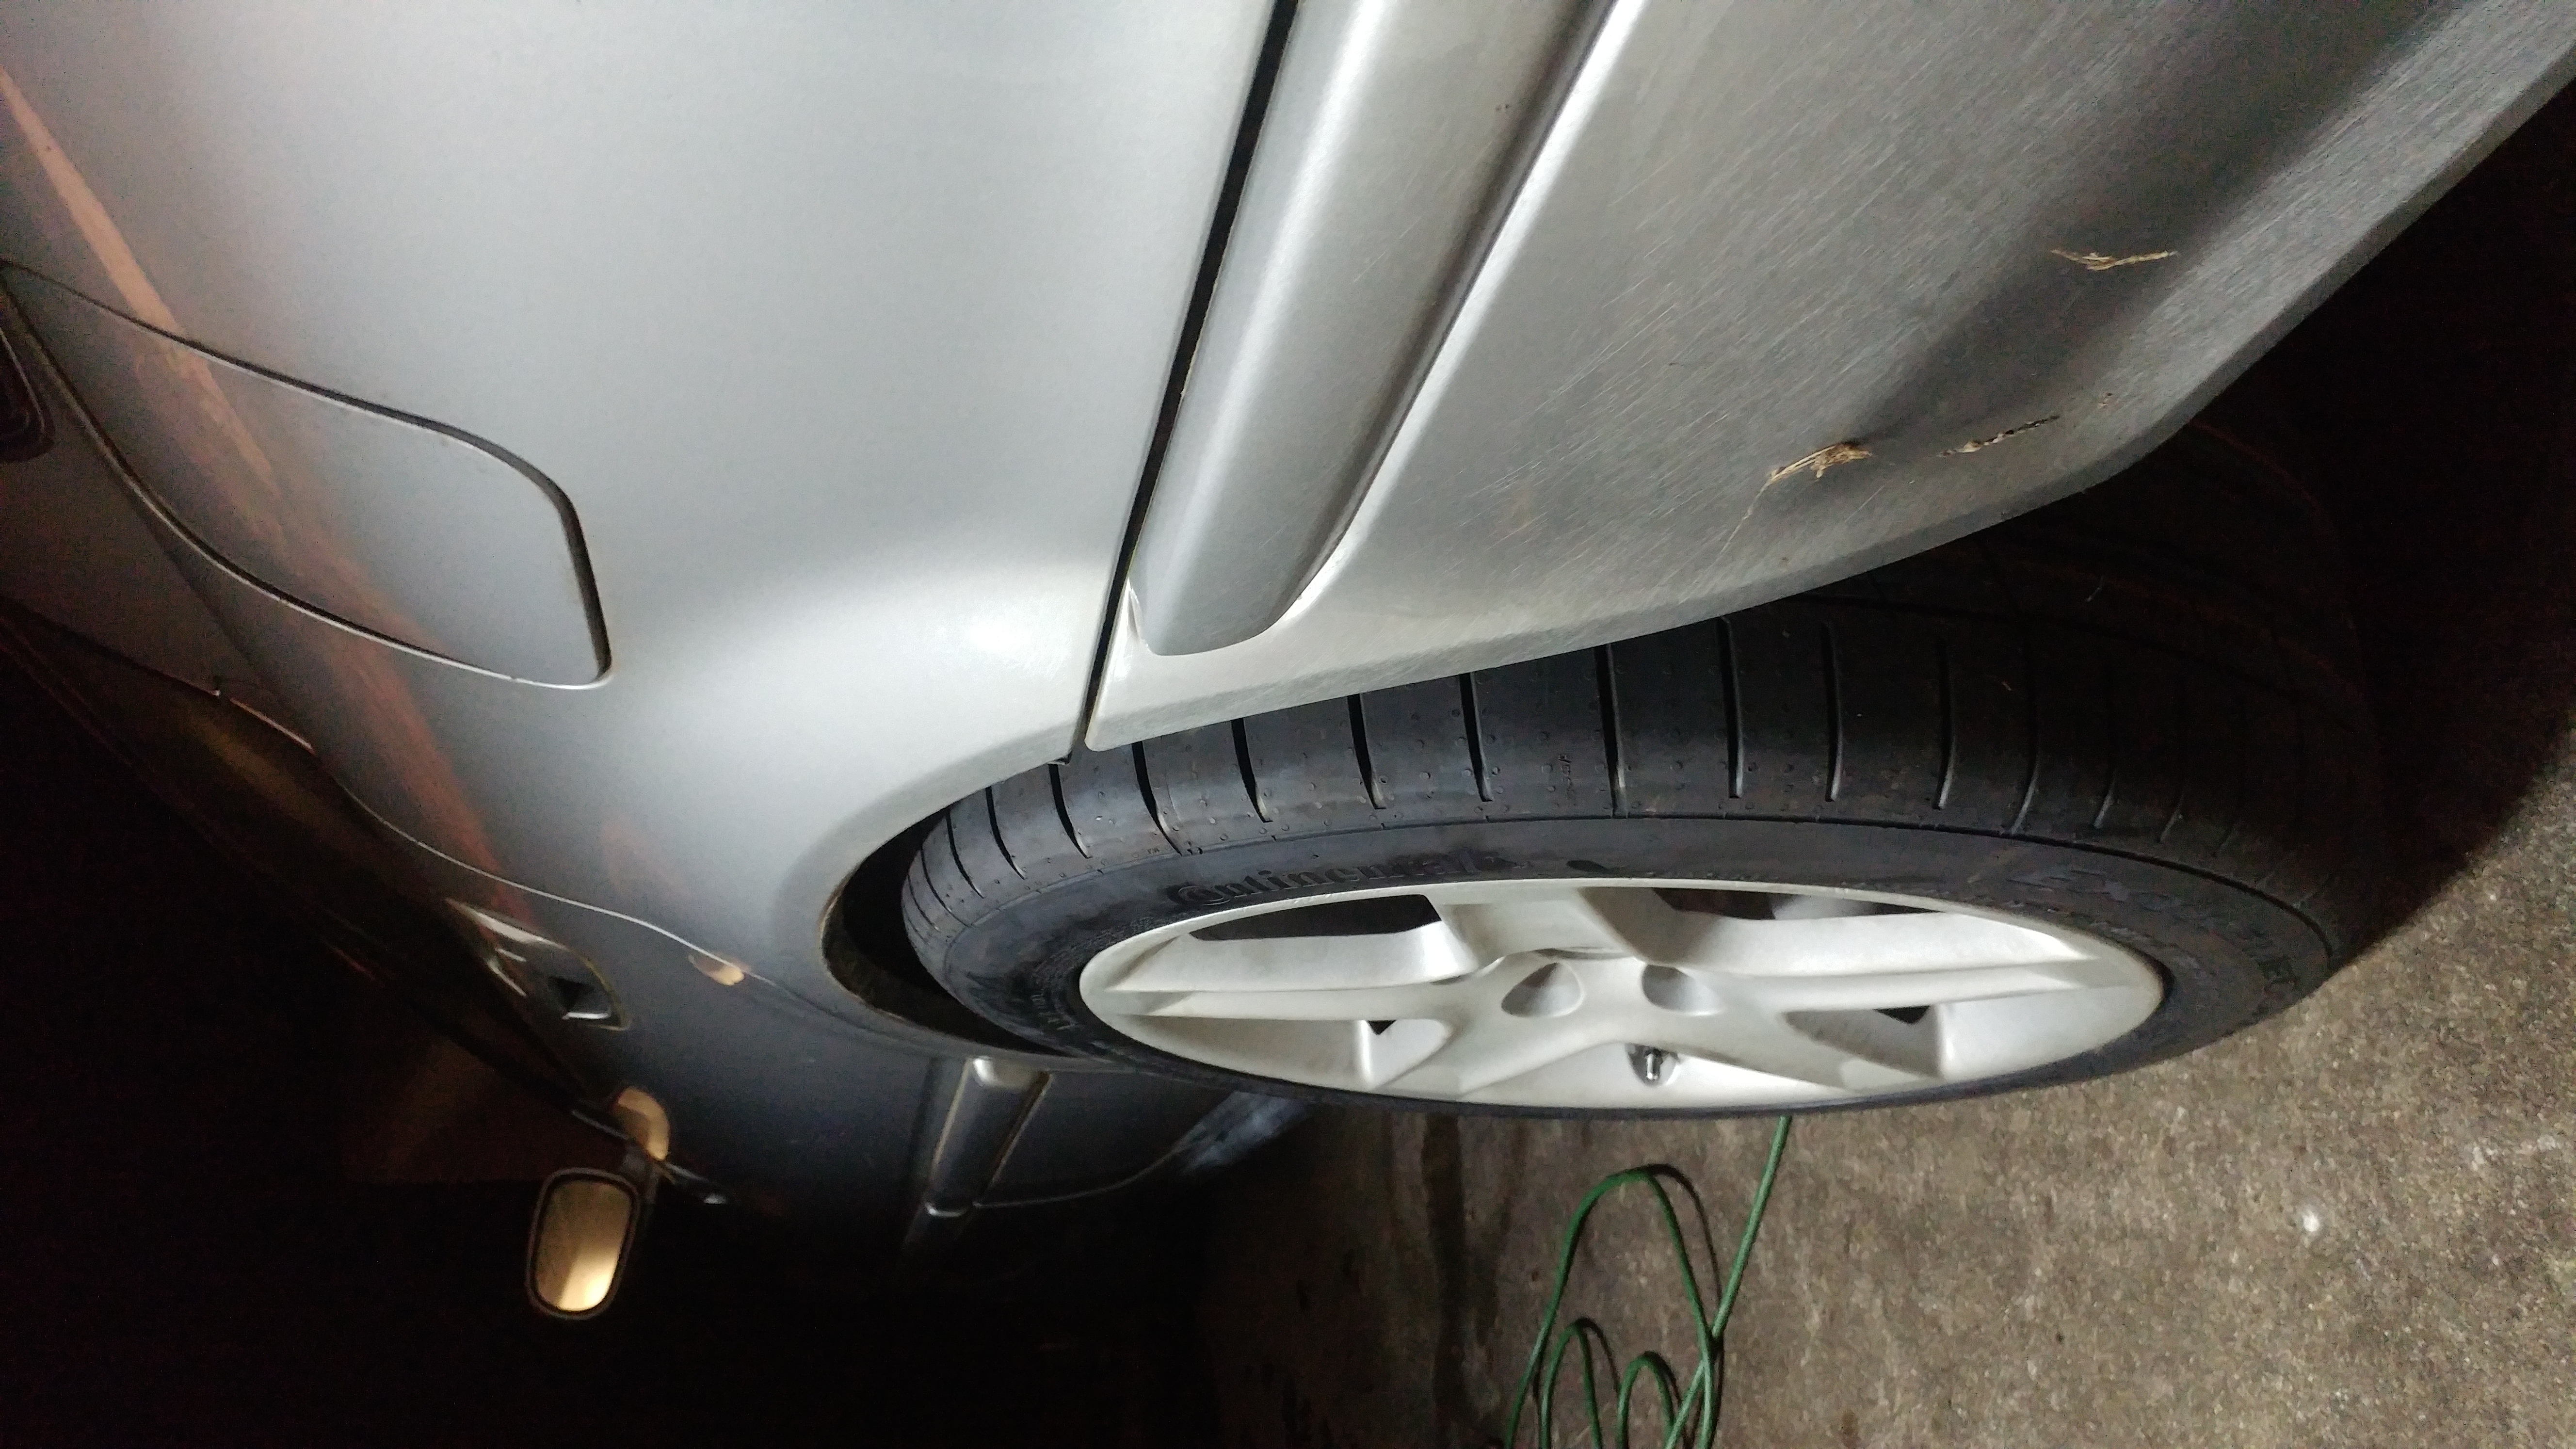
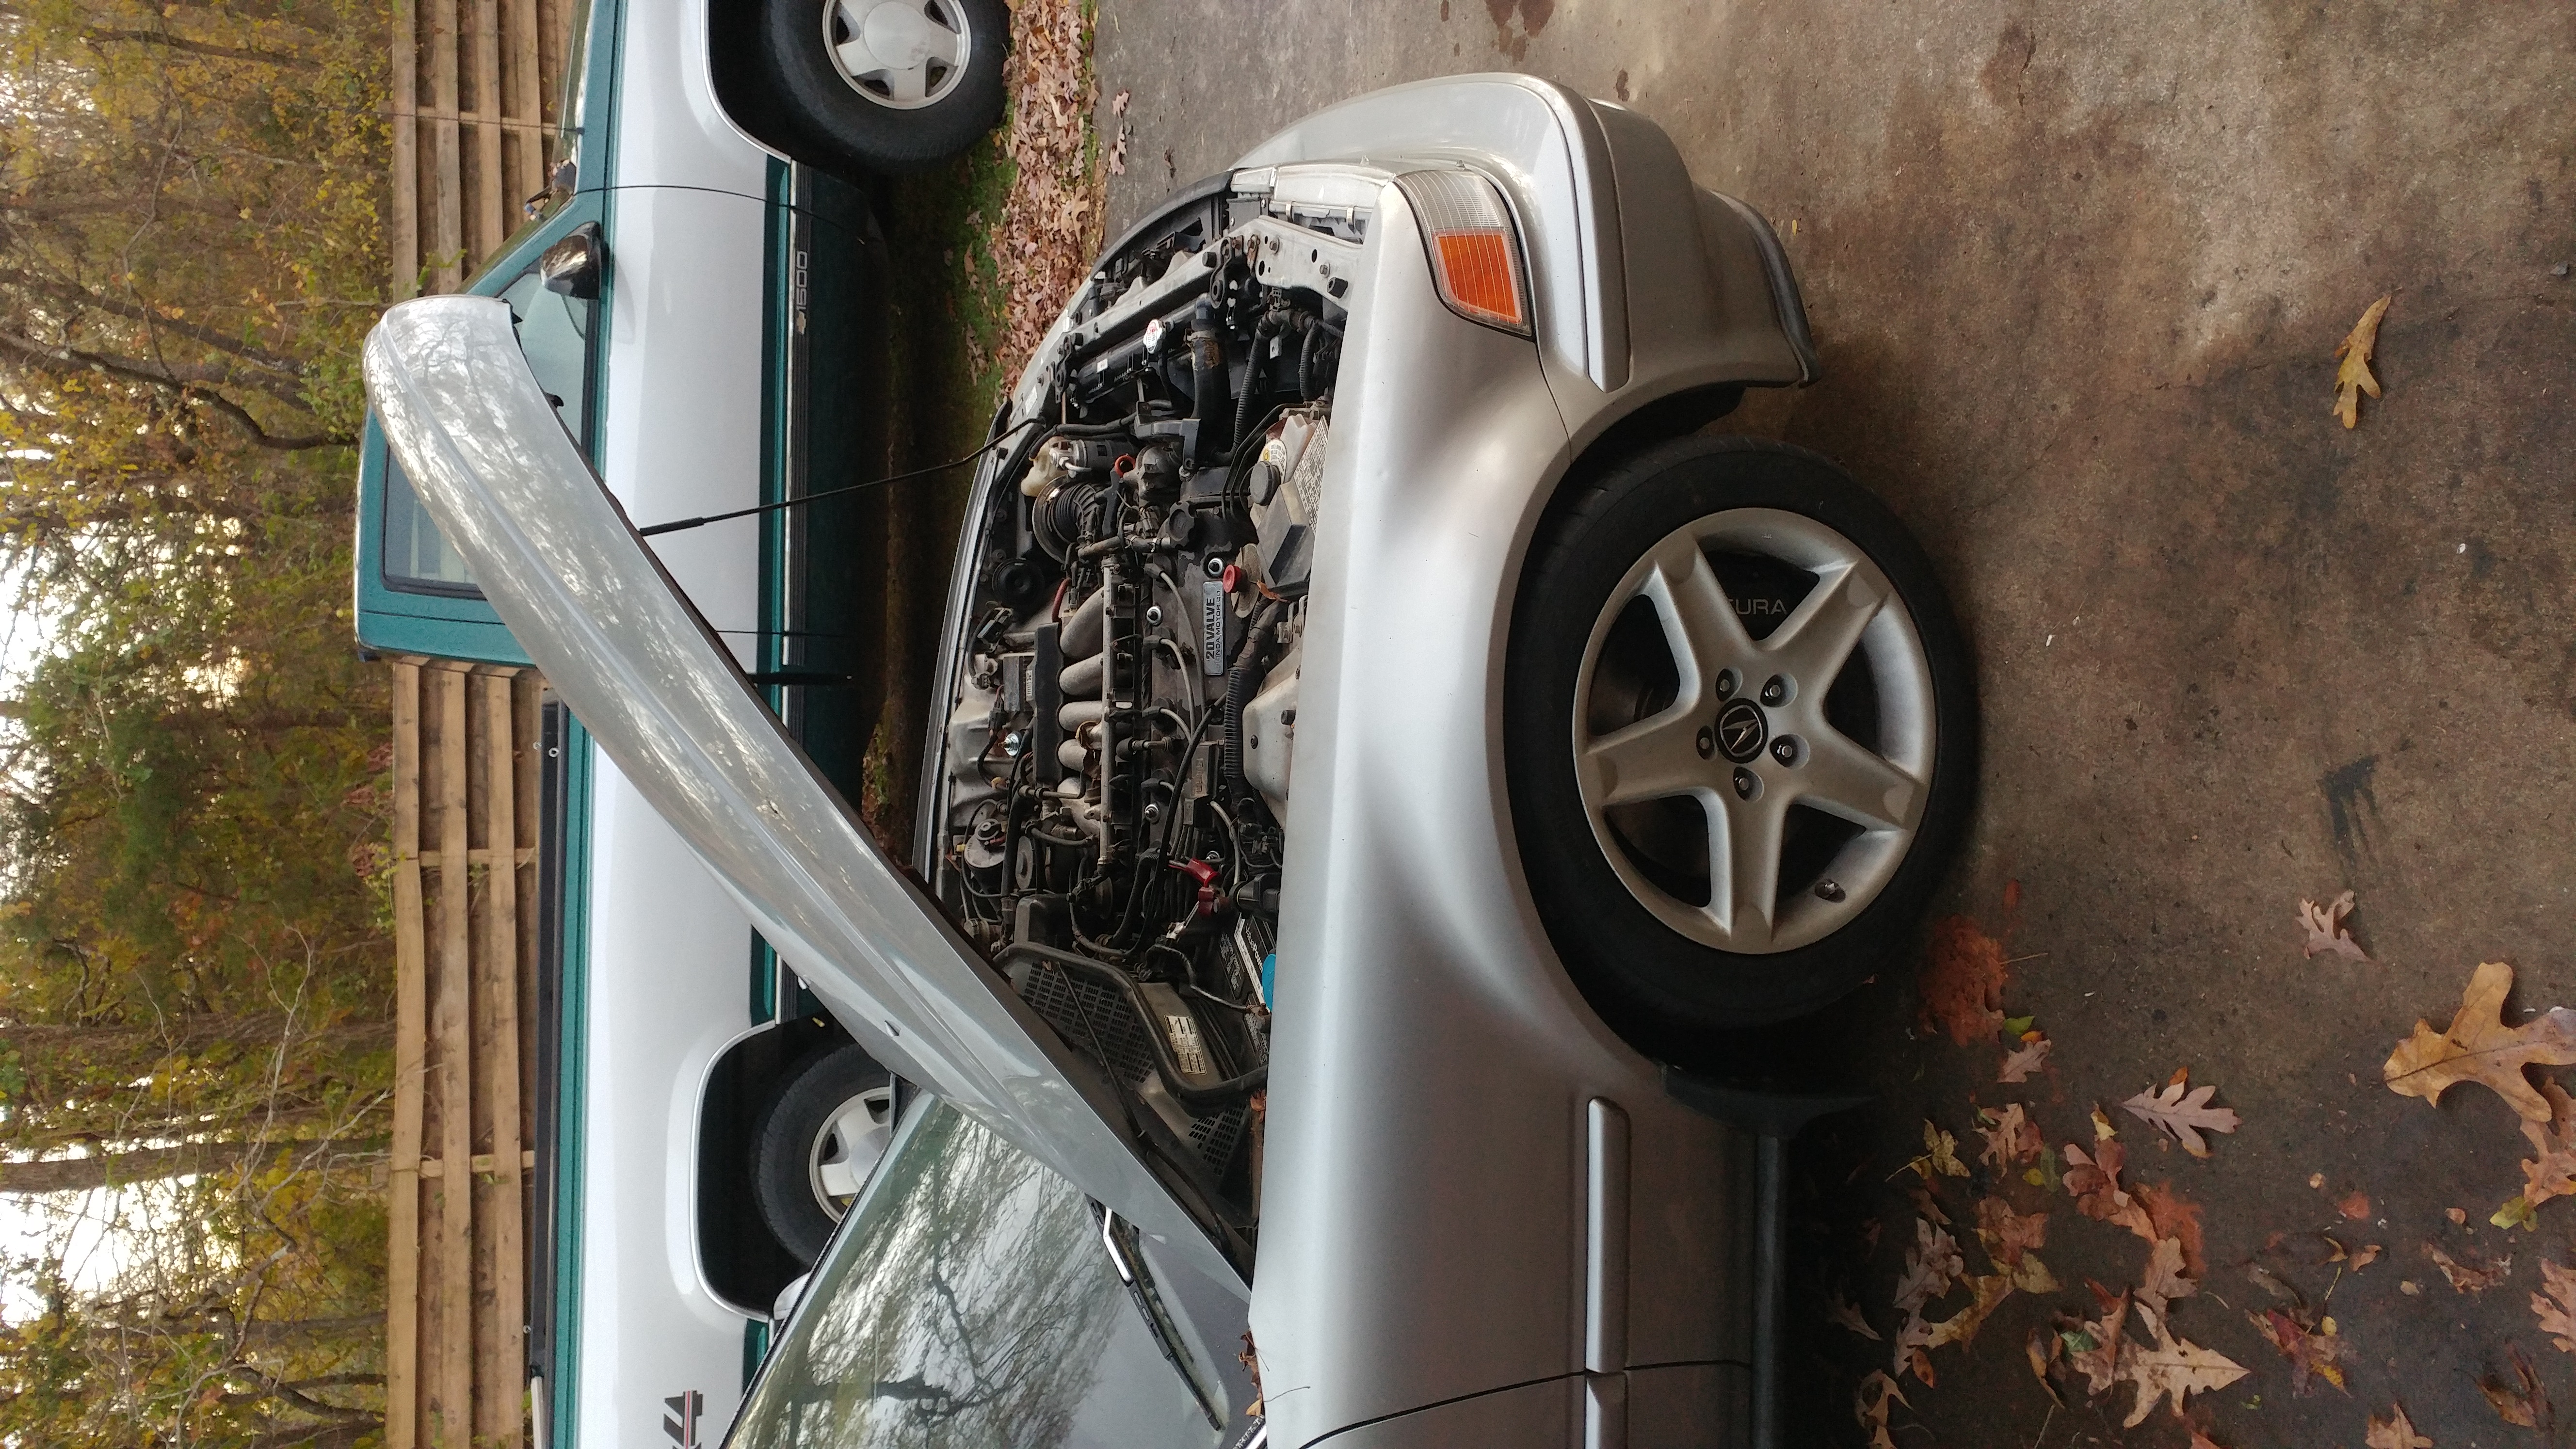
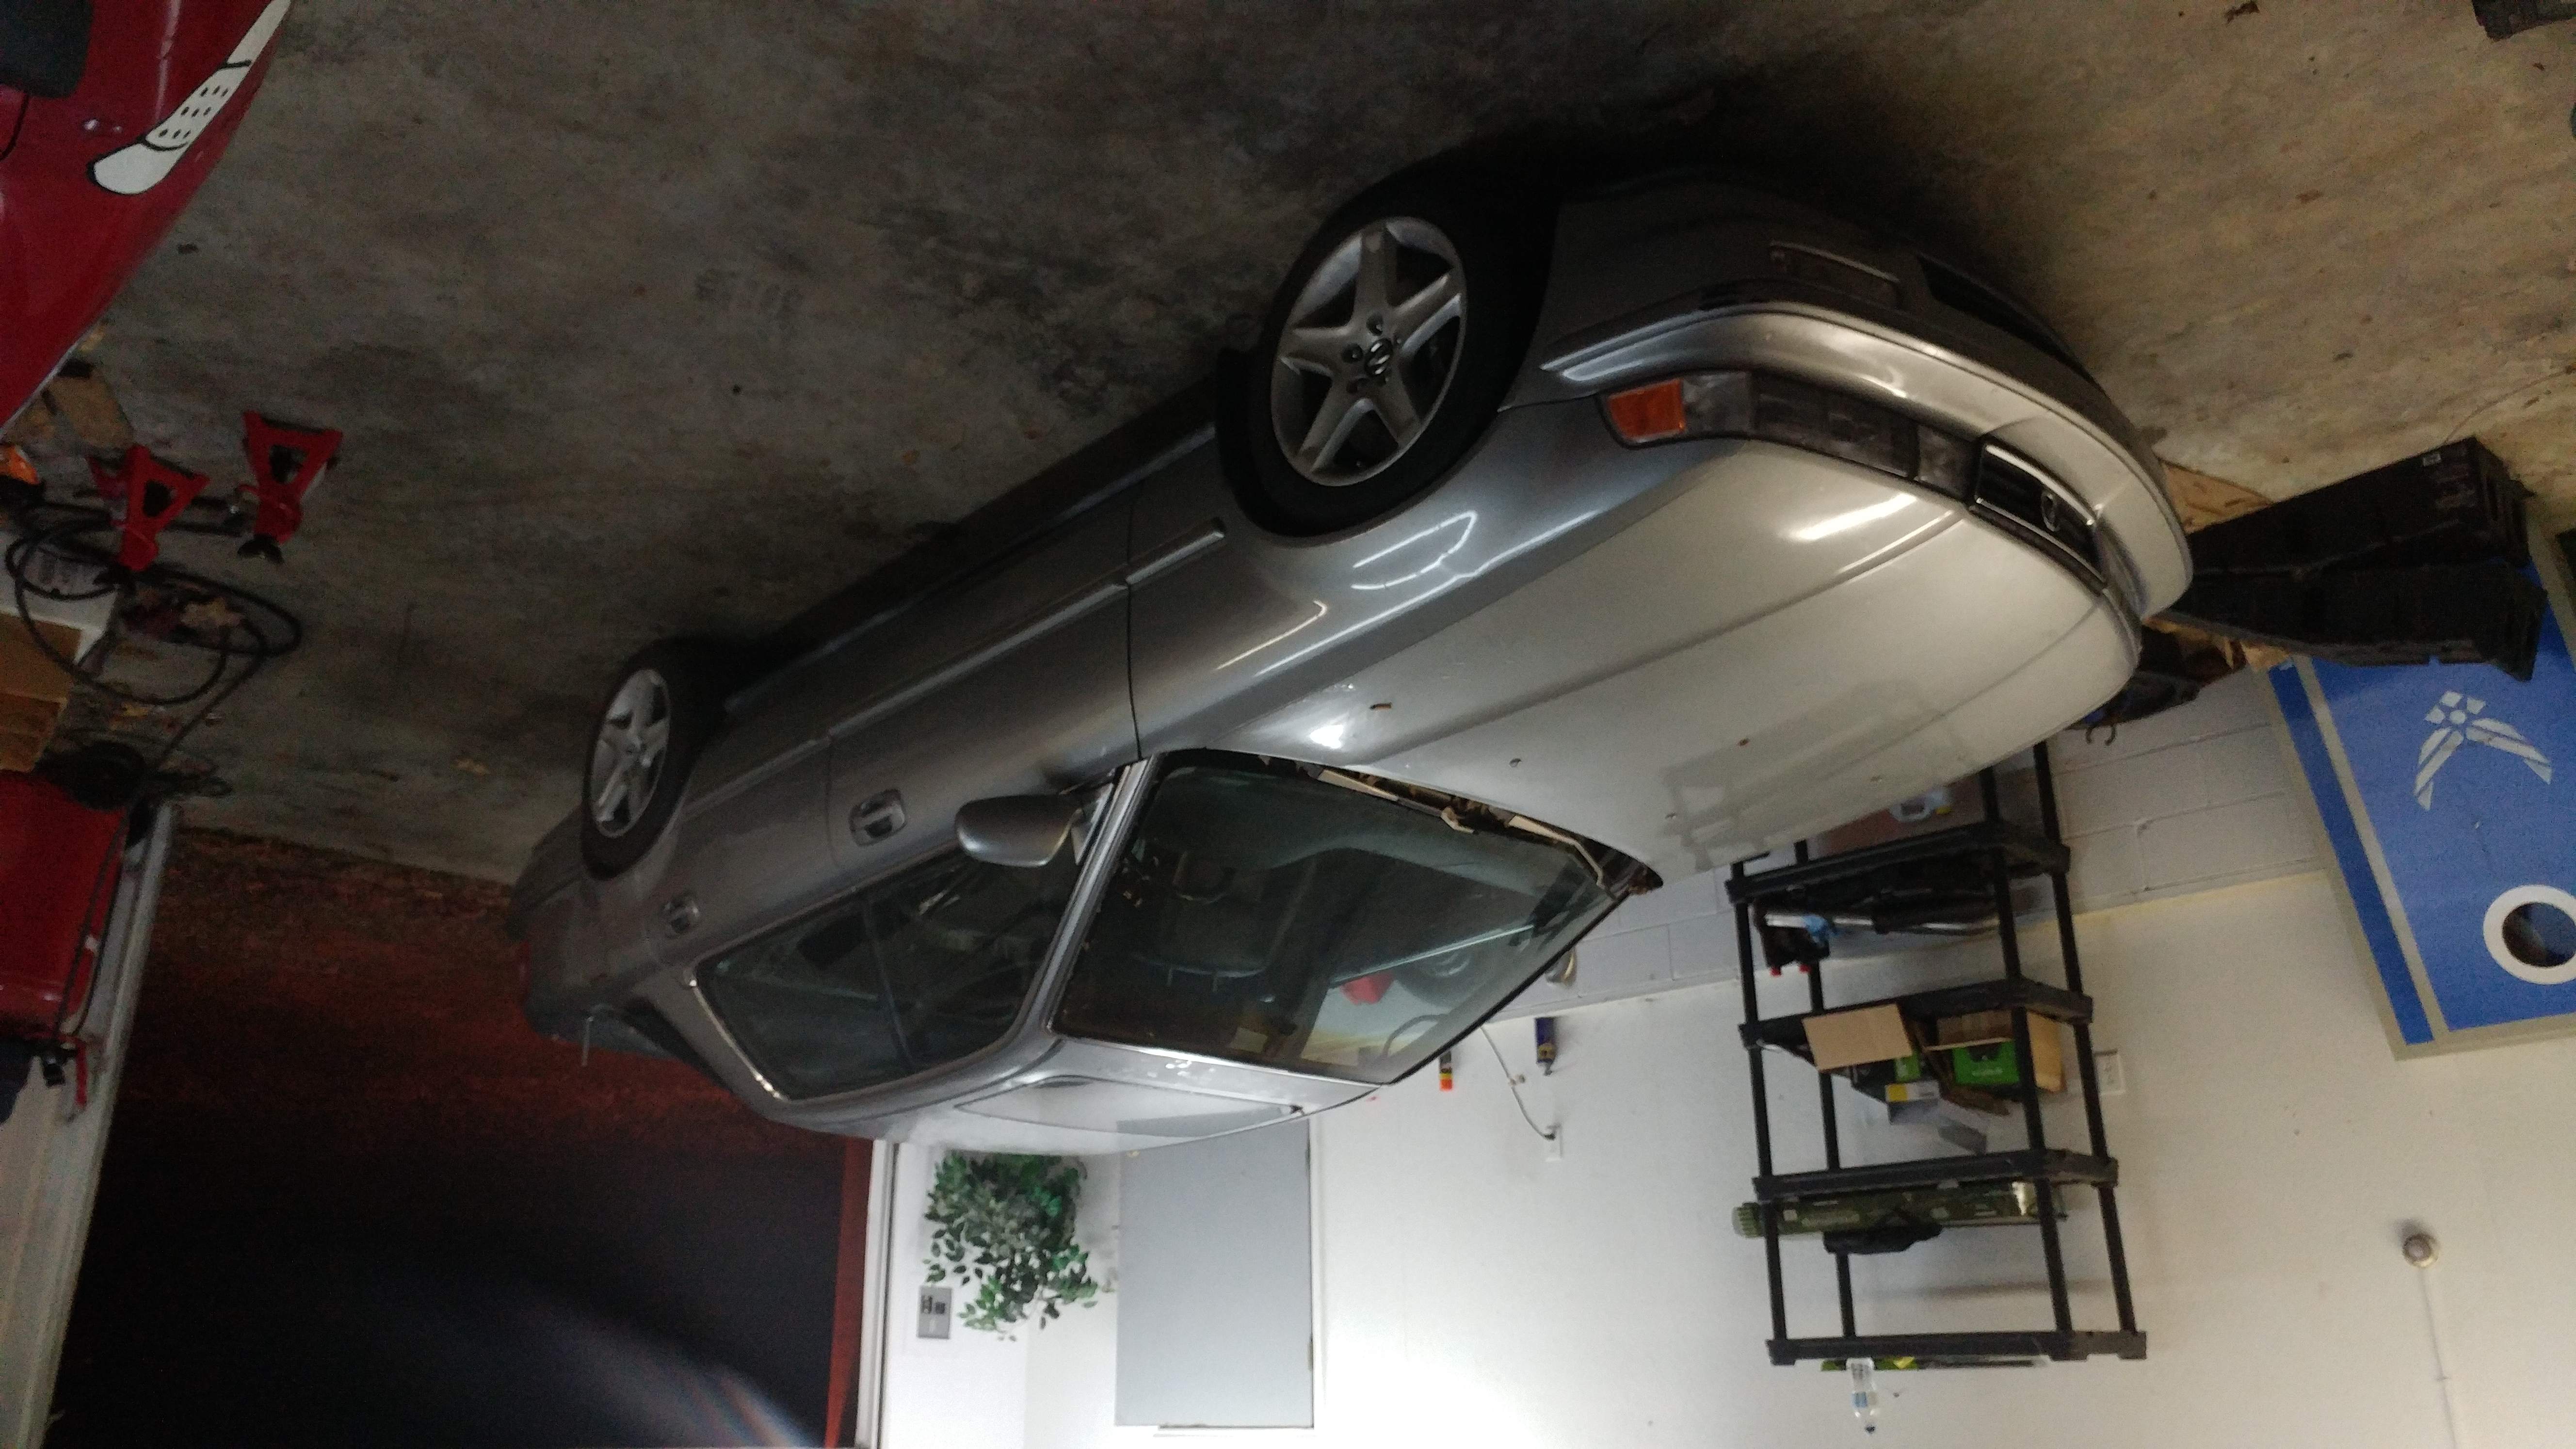
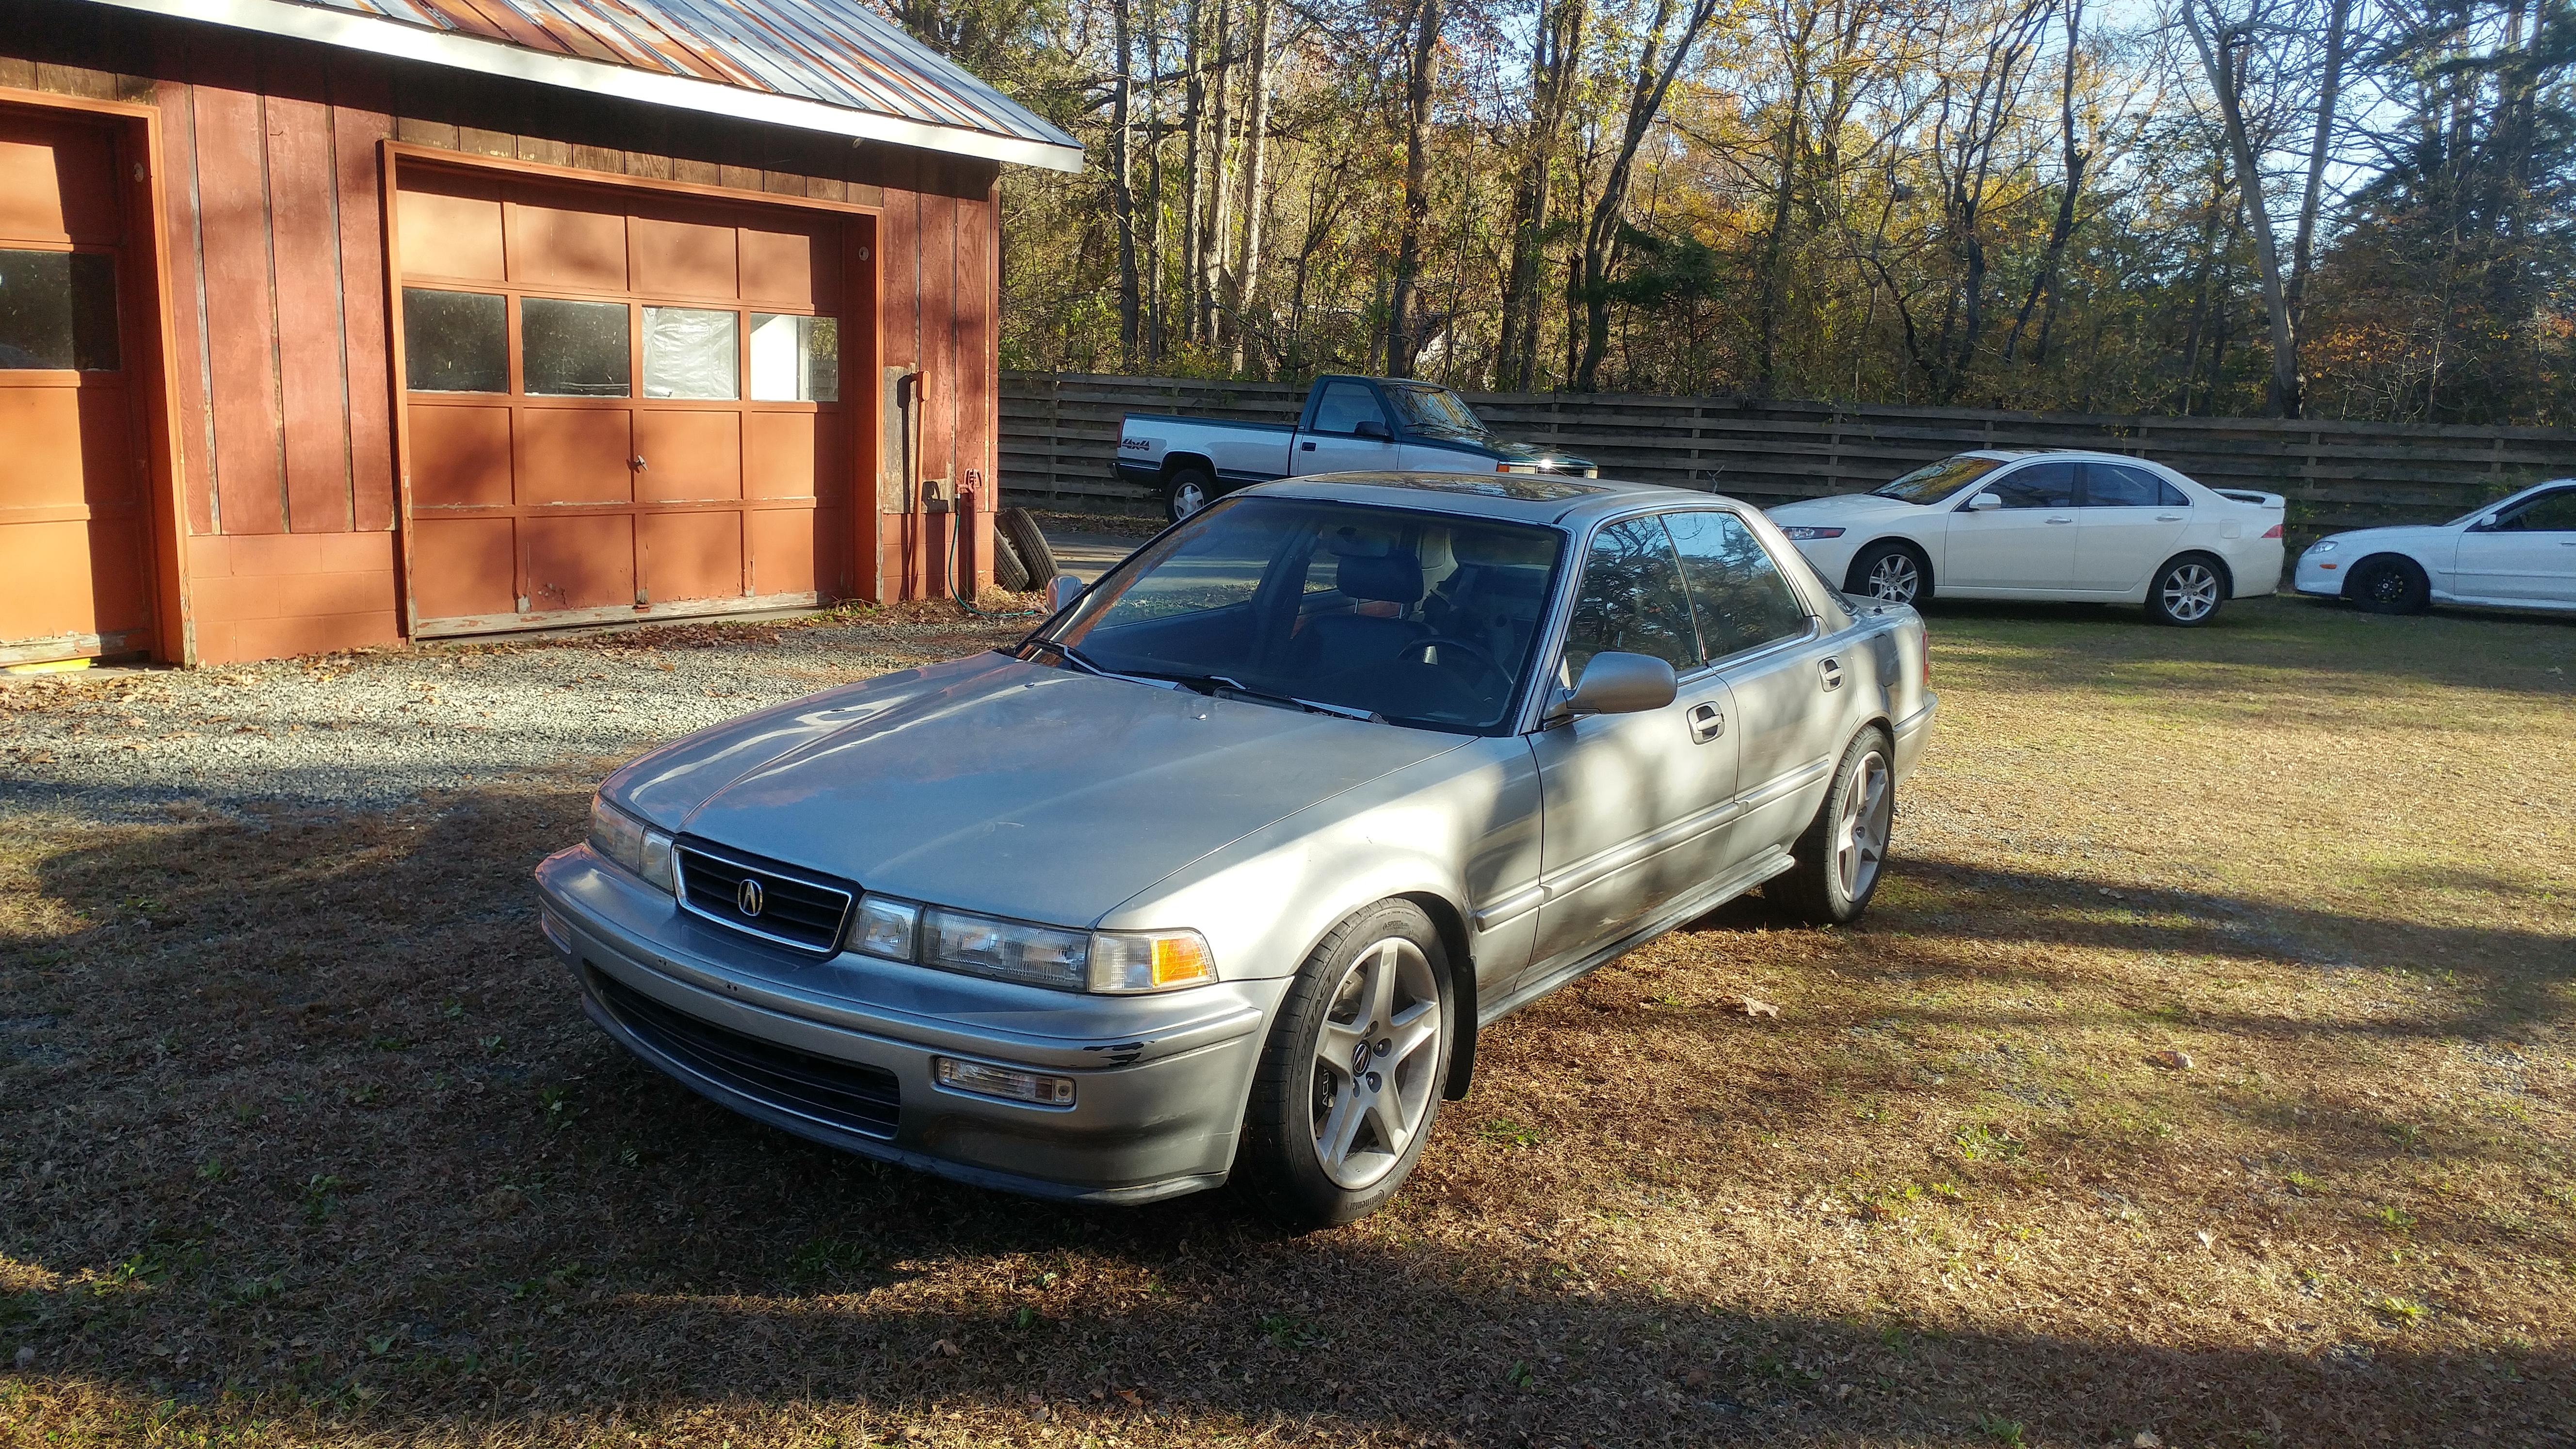
Went and checked on it after work tonight. Starts up immediately and the interior and trunk are dry even after all the rain we got.  ��
��
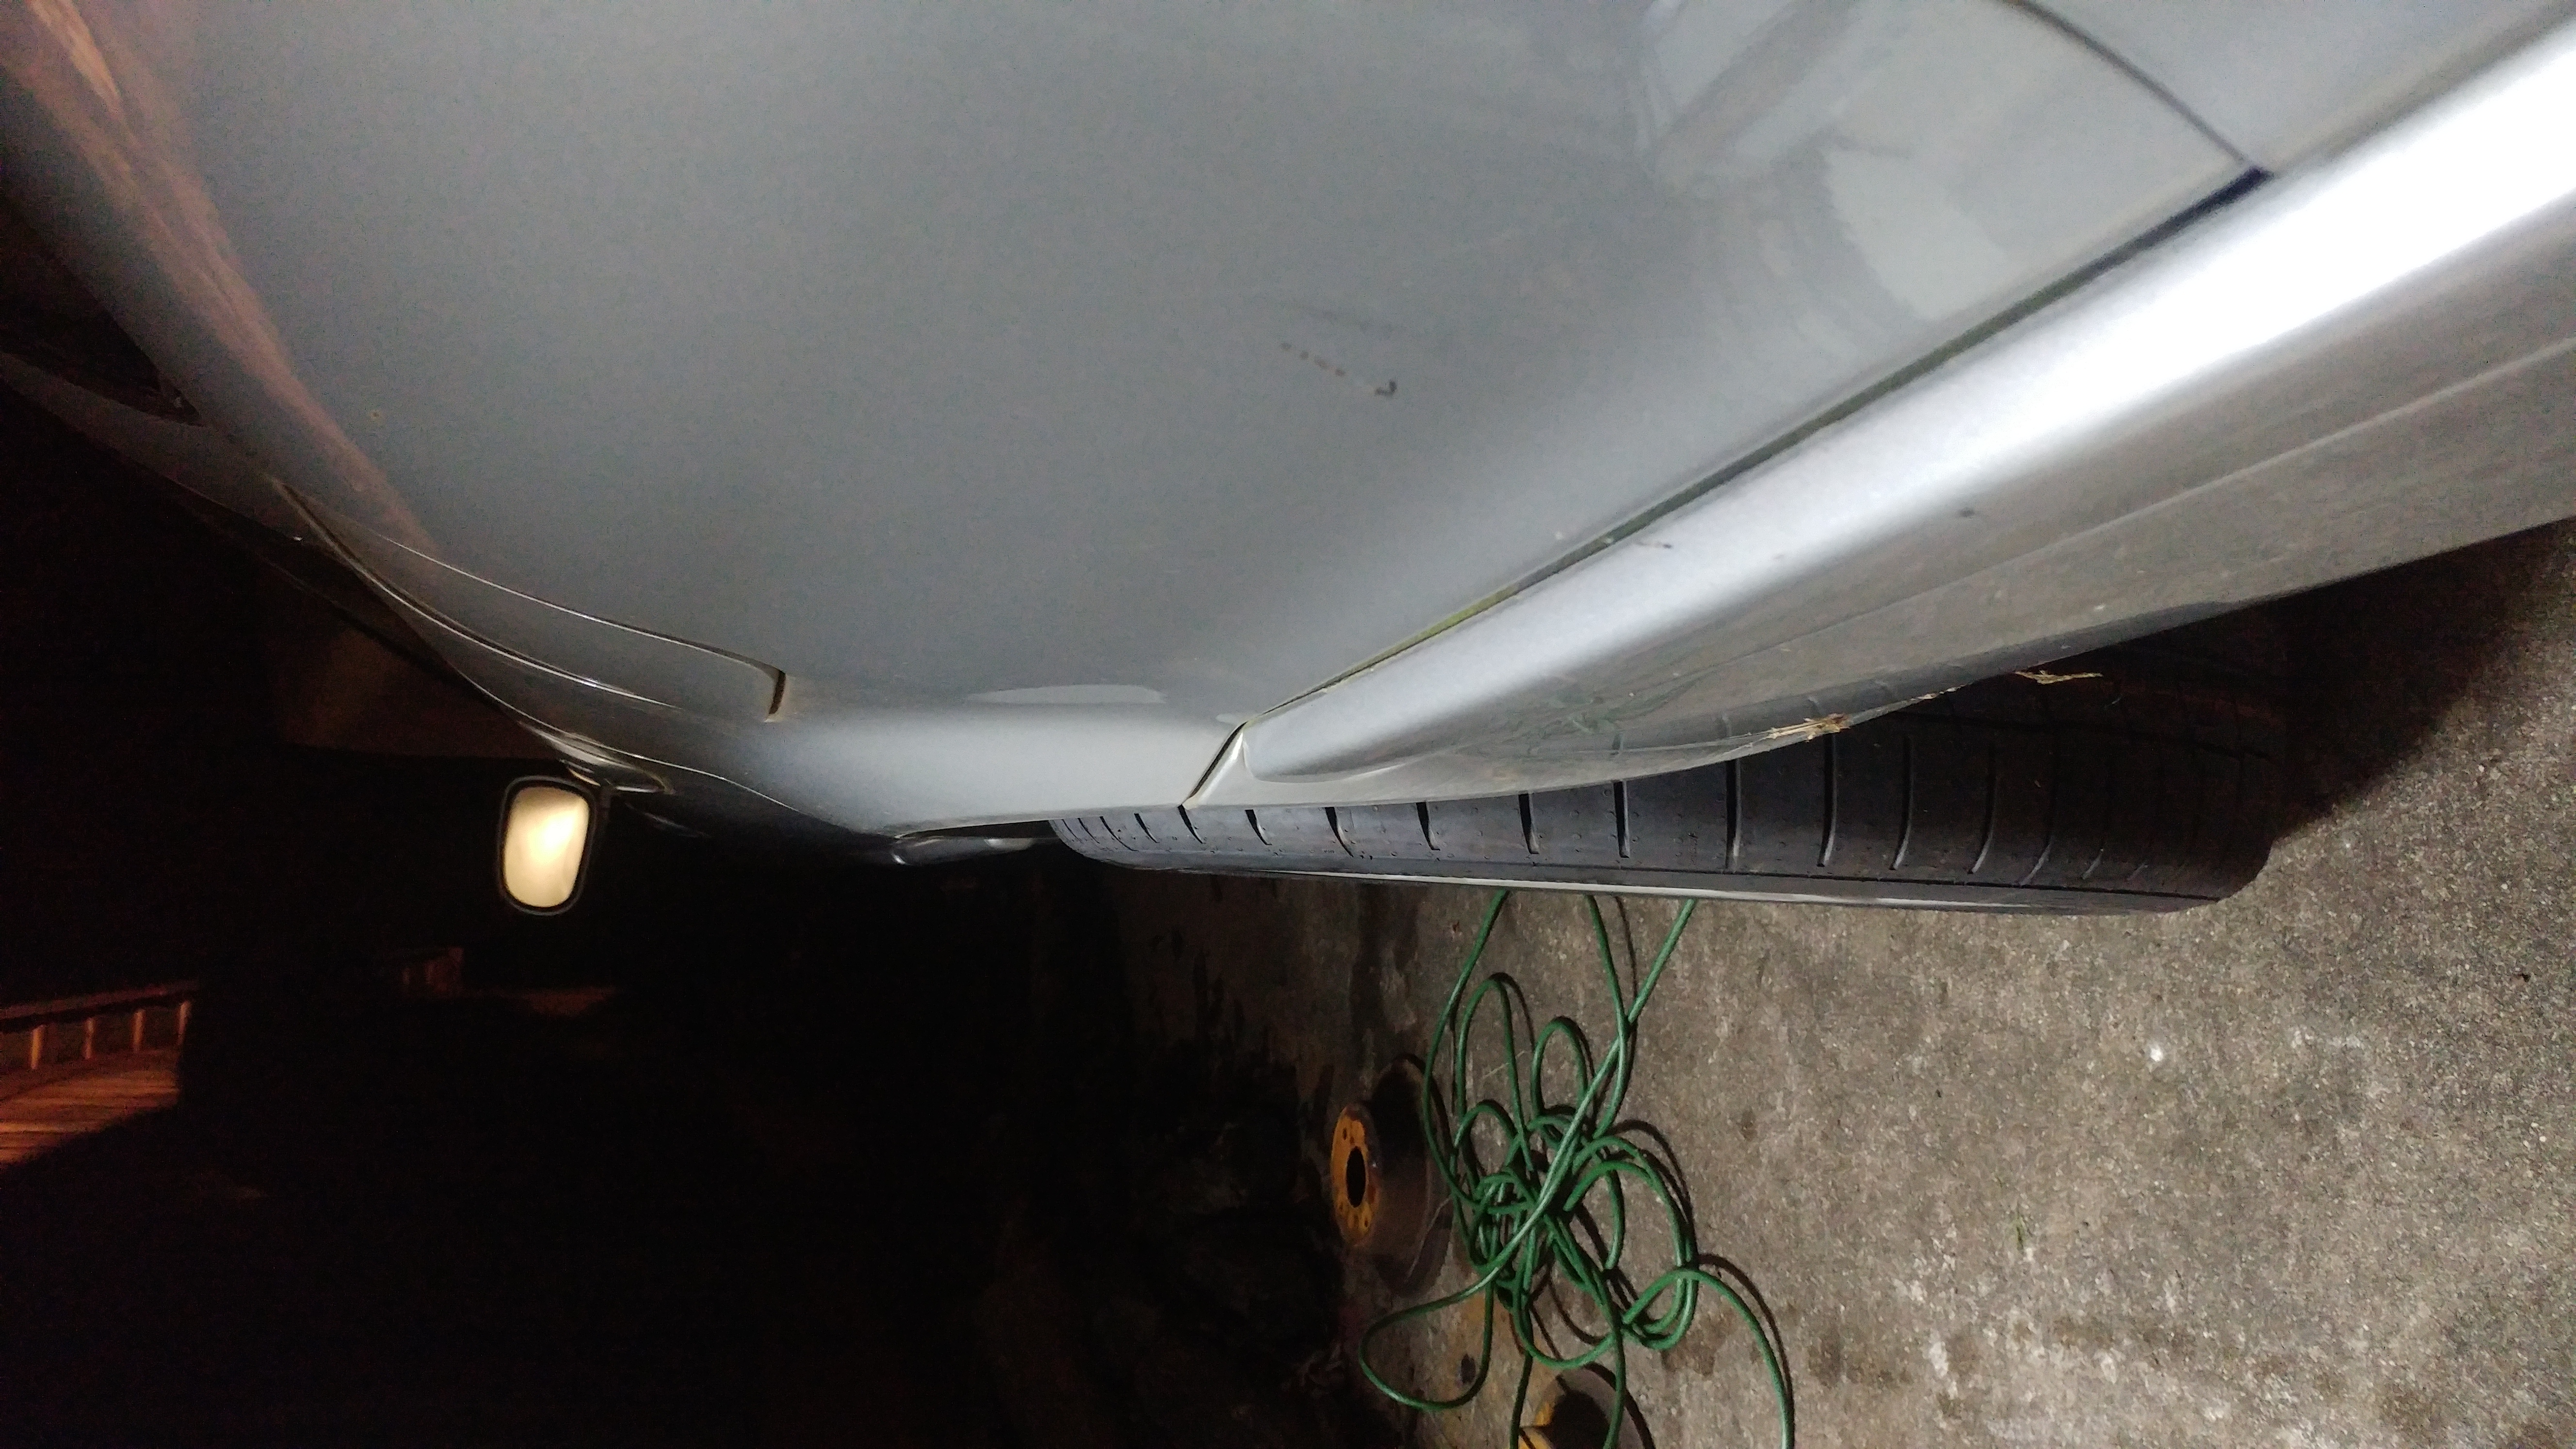
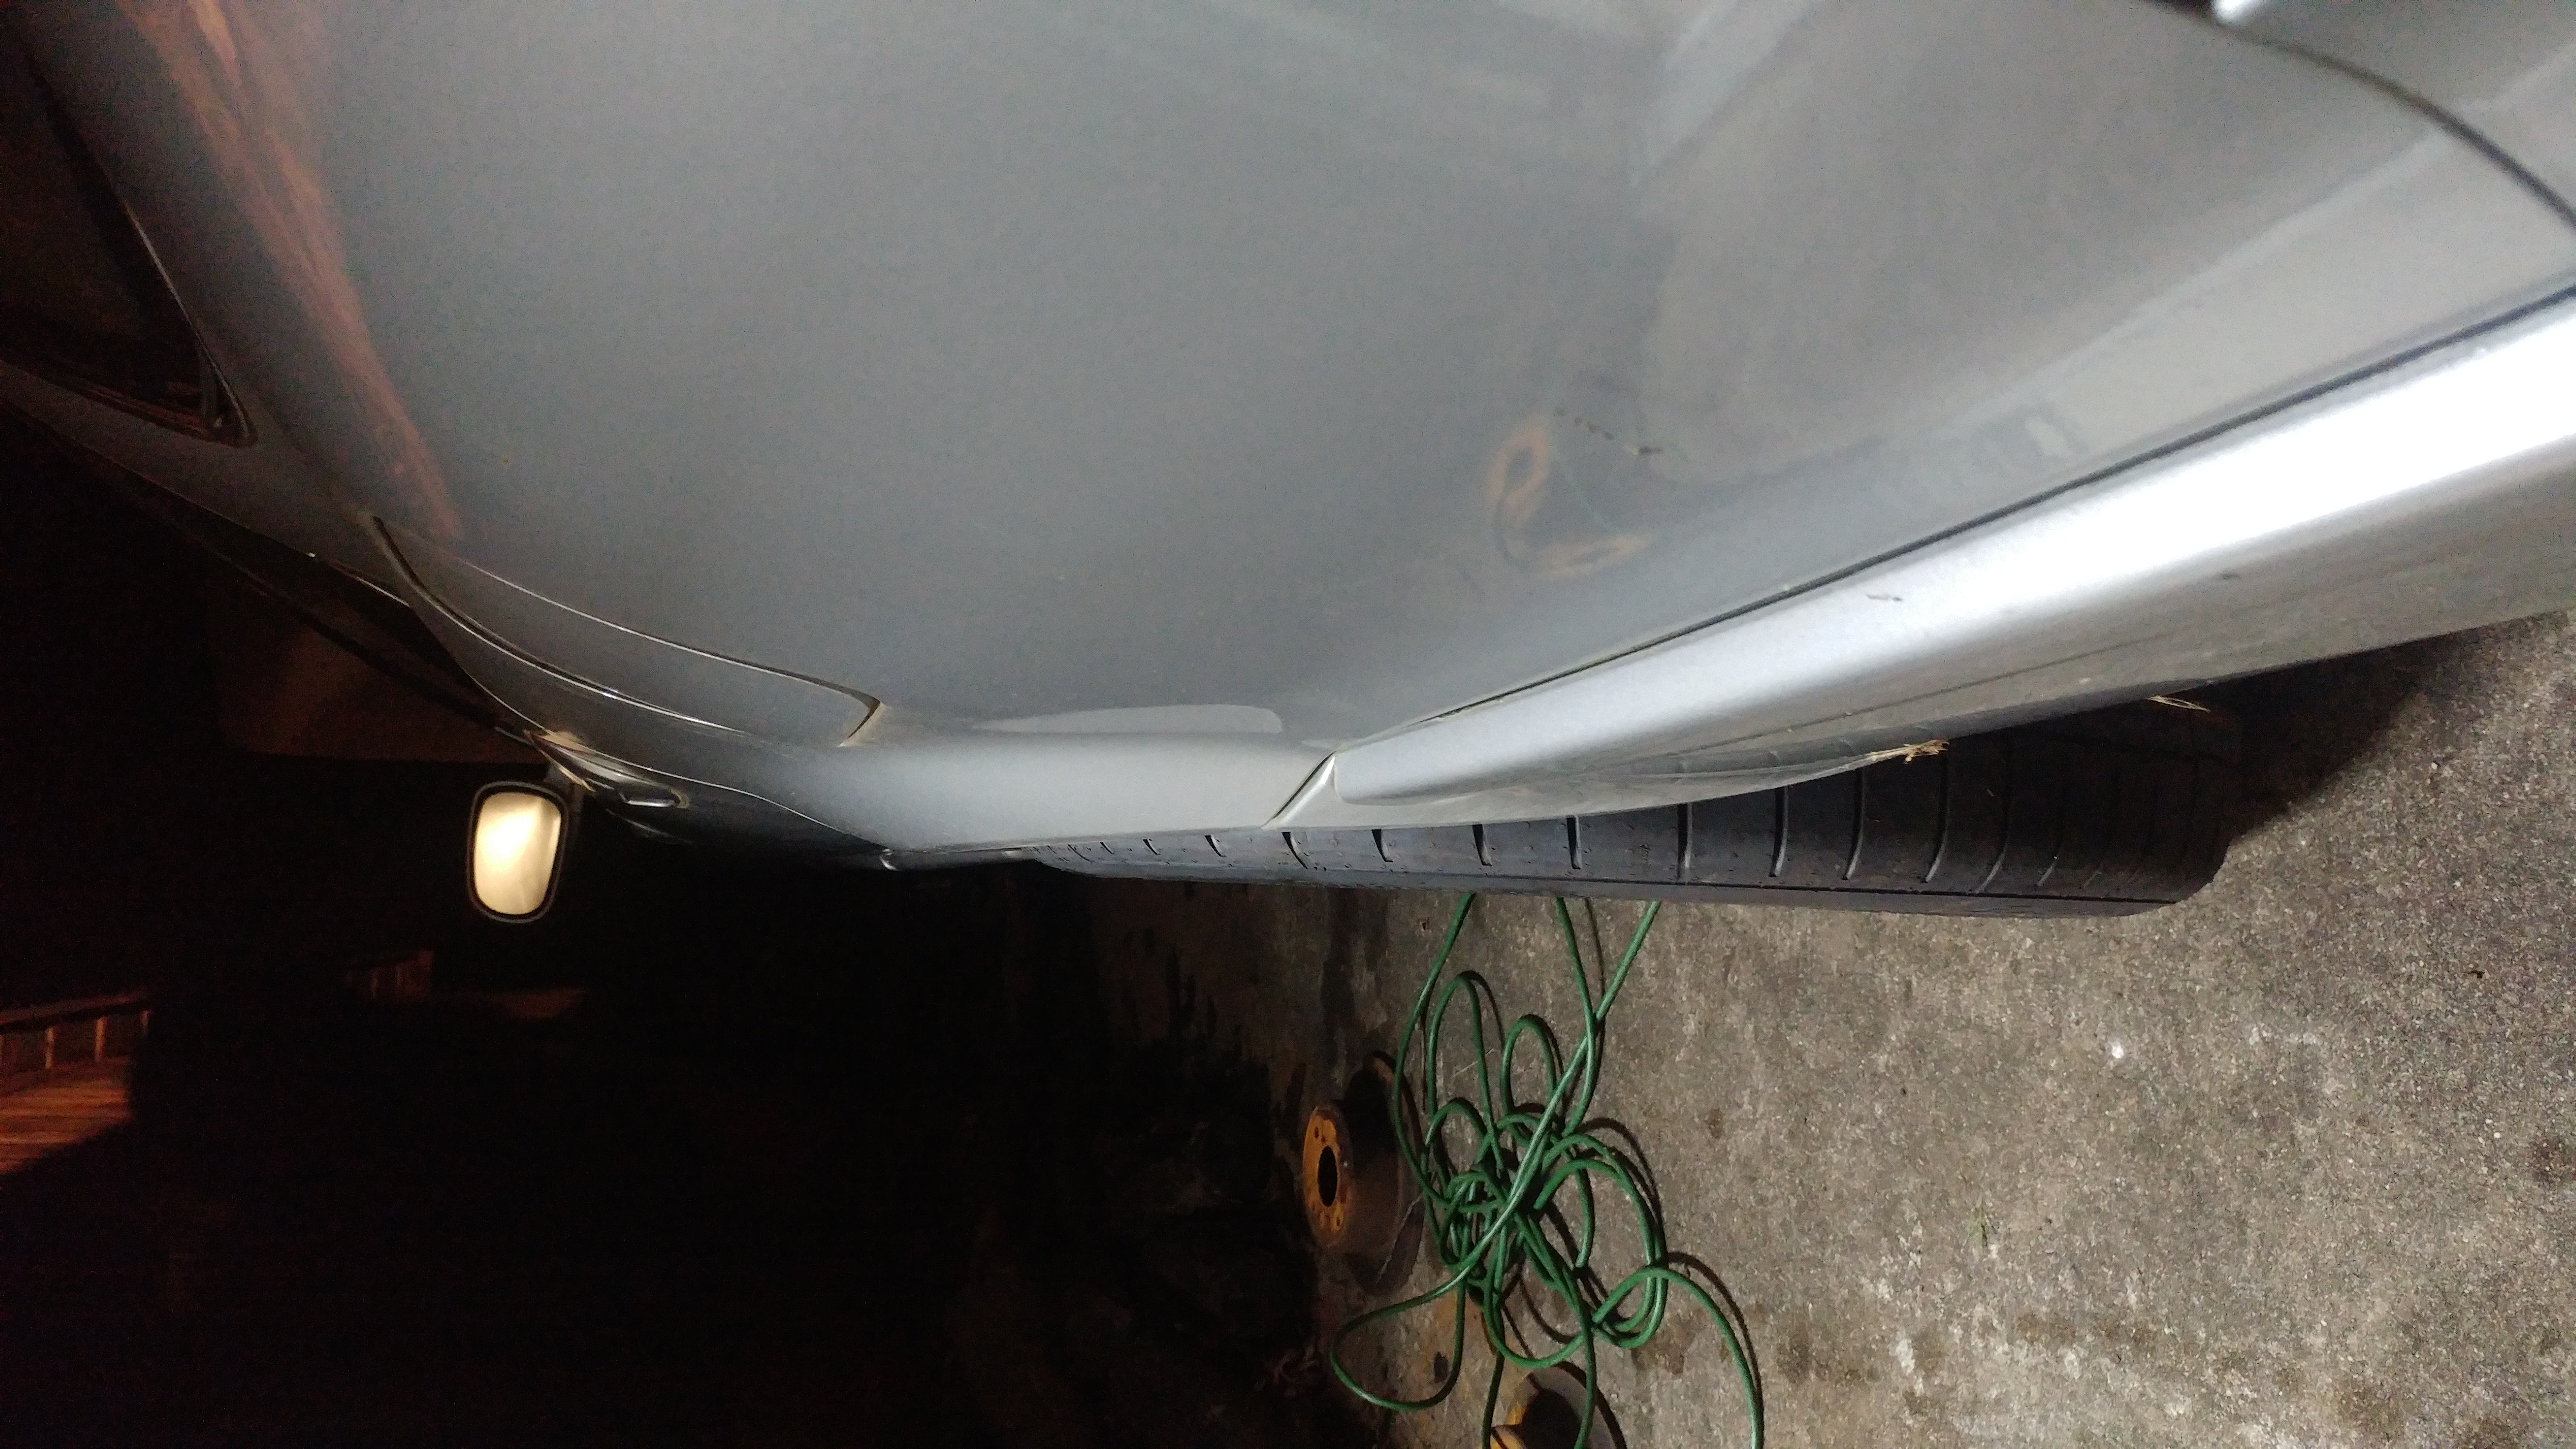
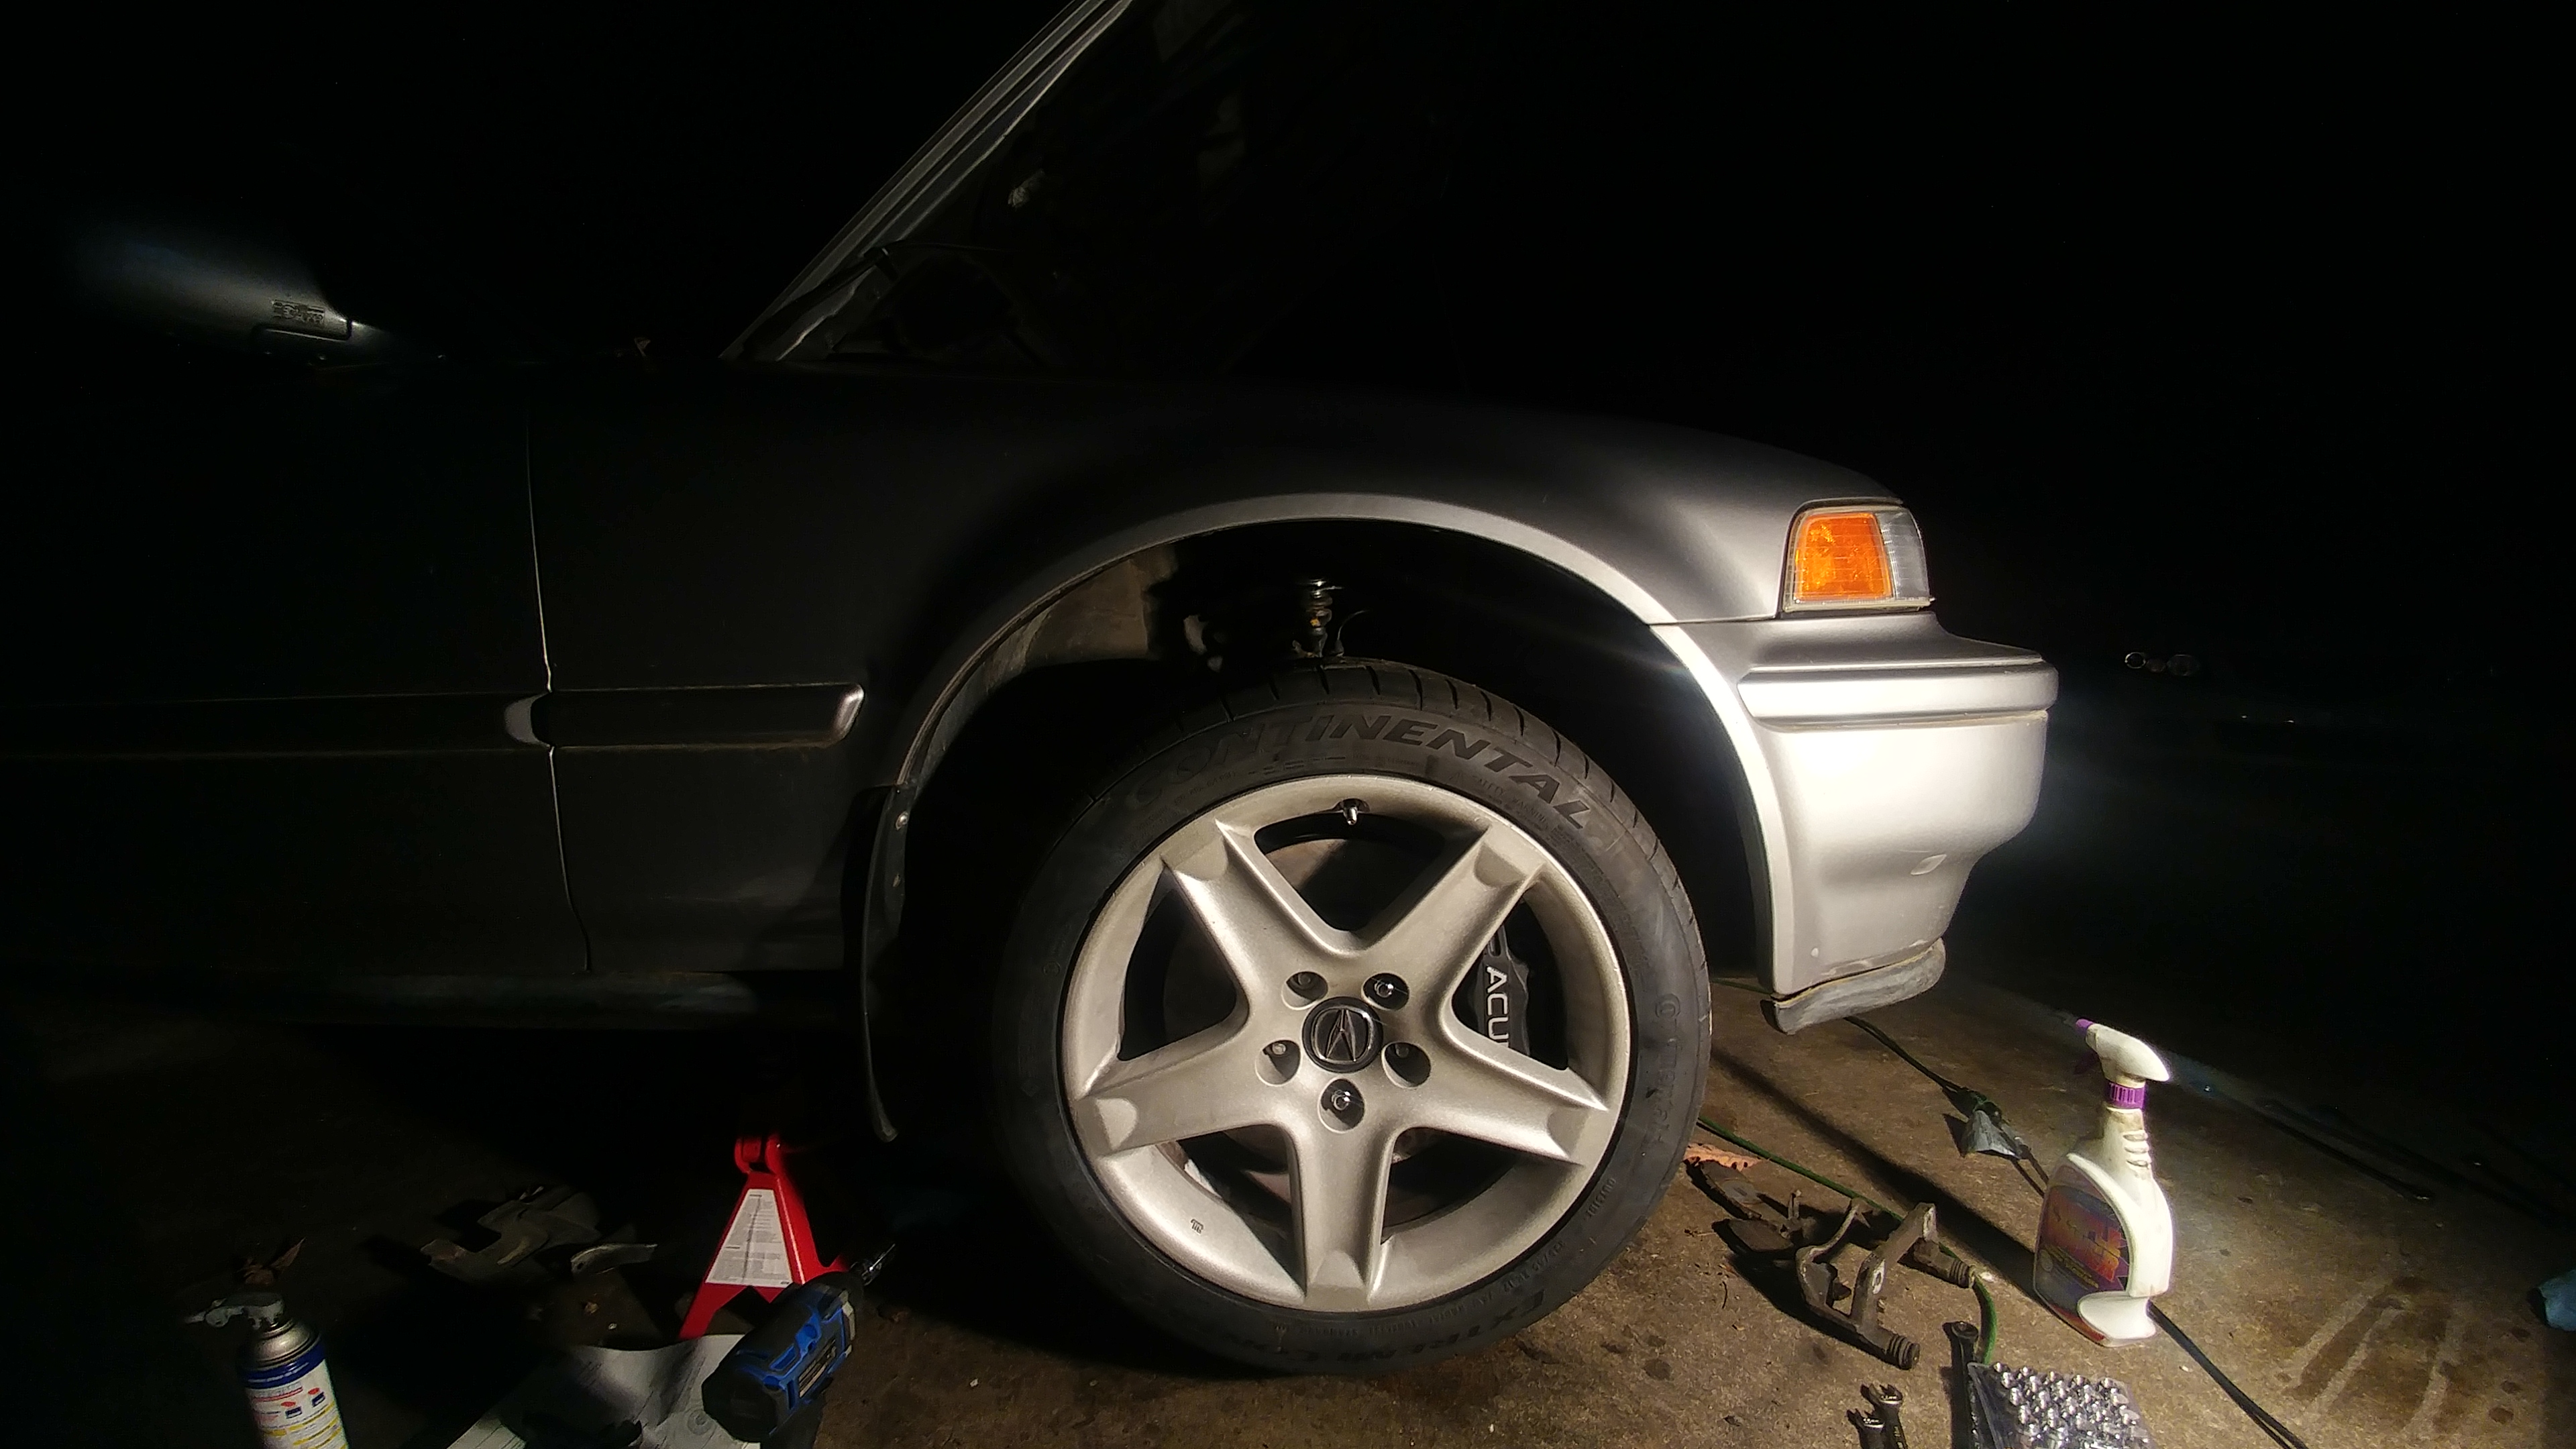
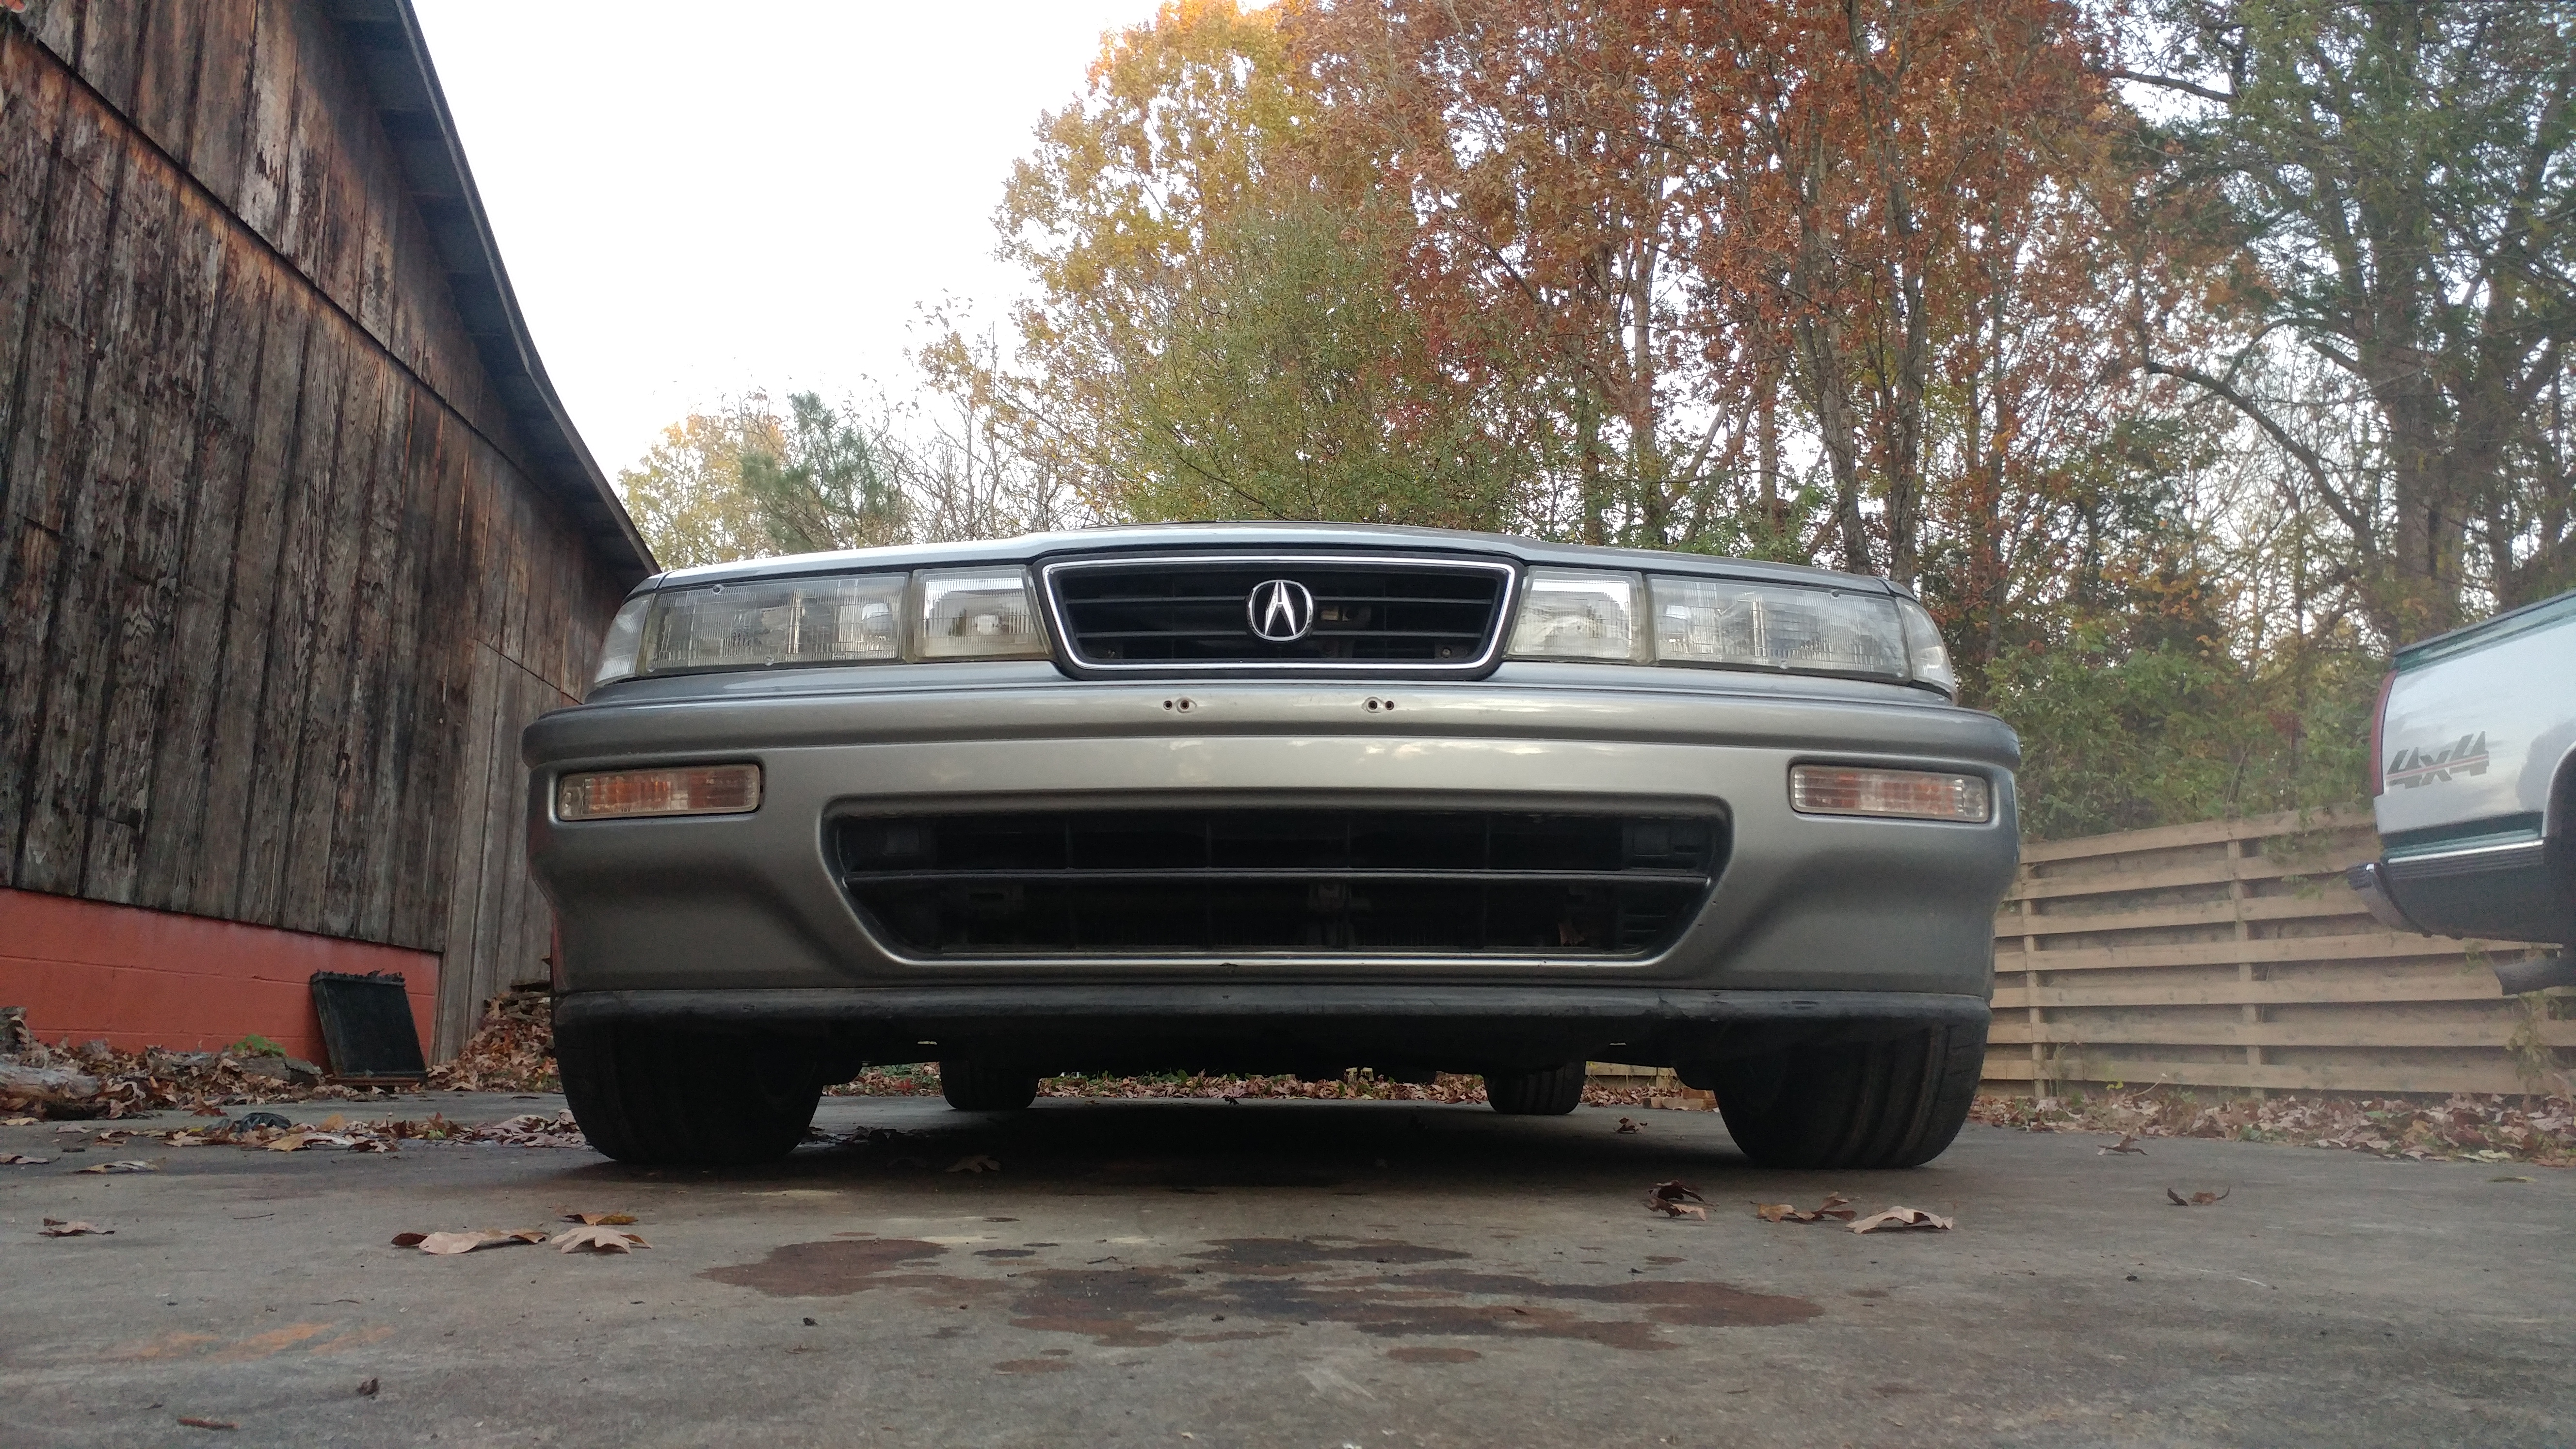
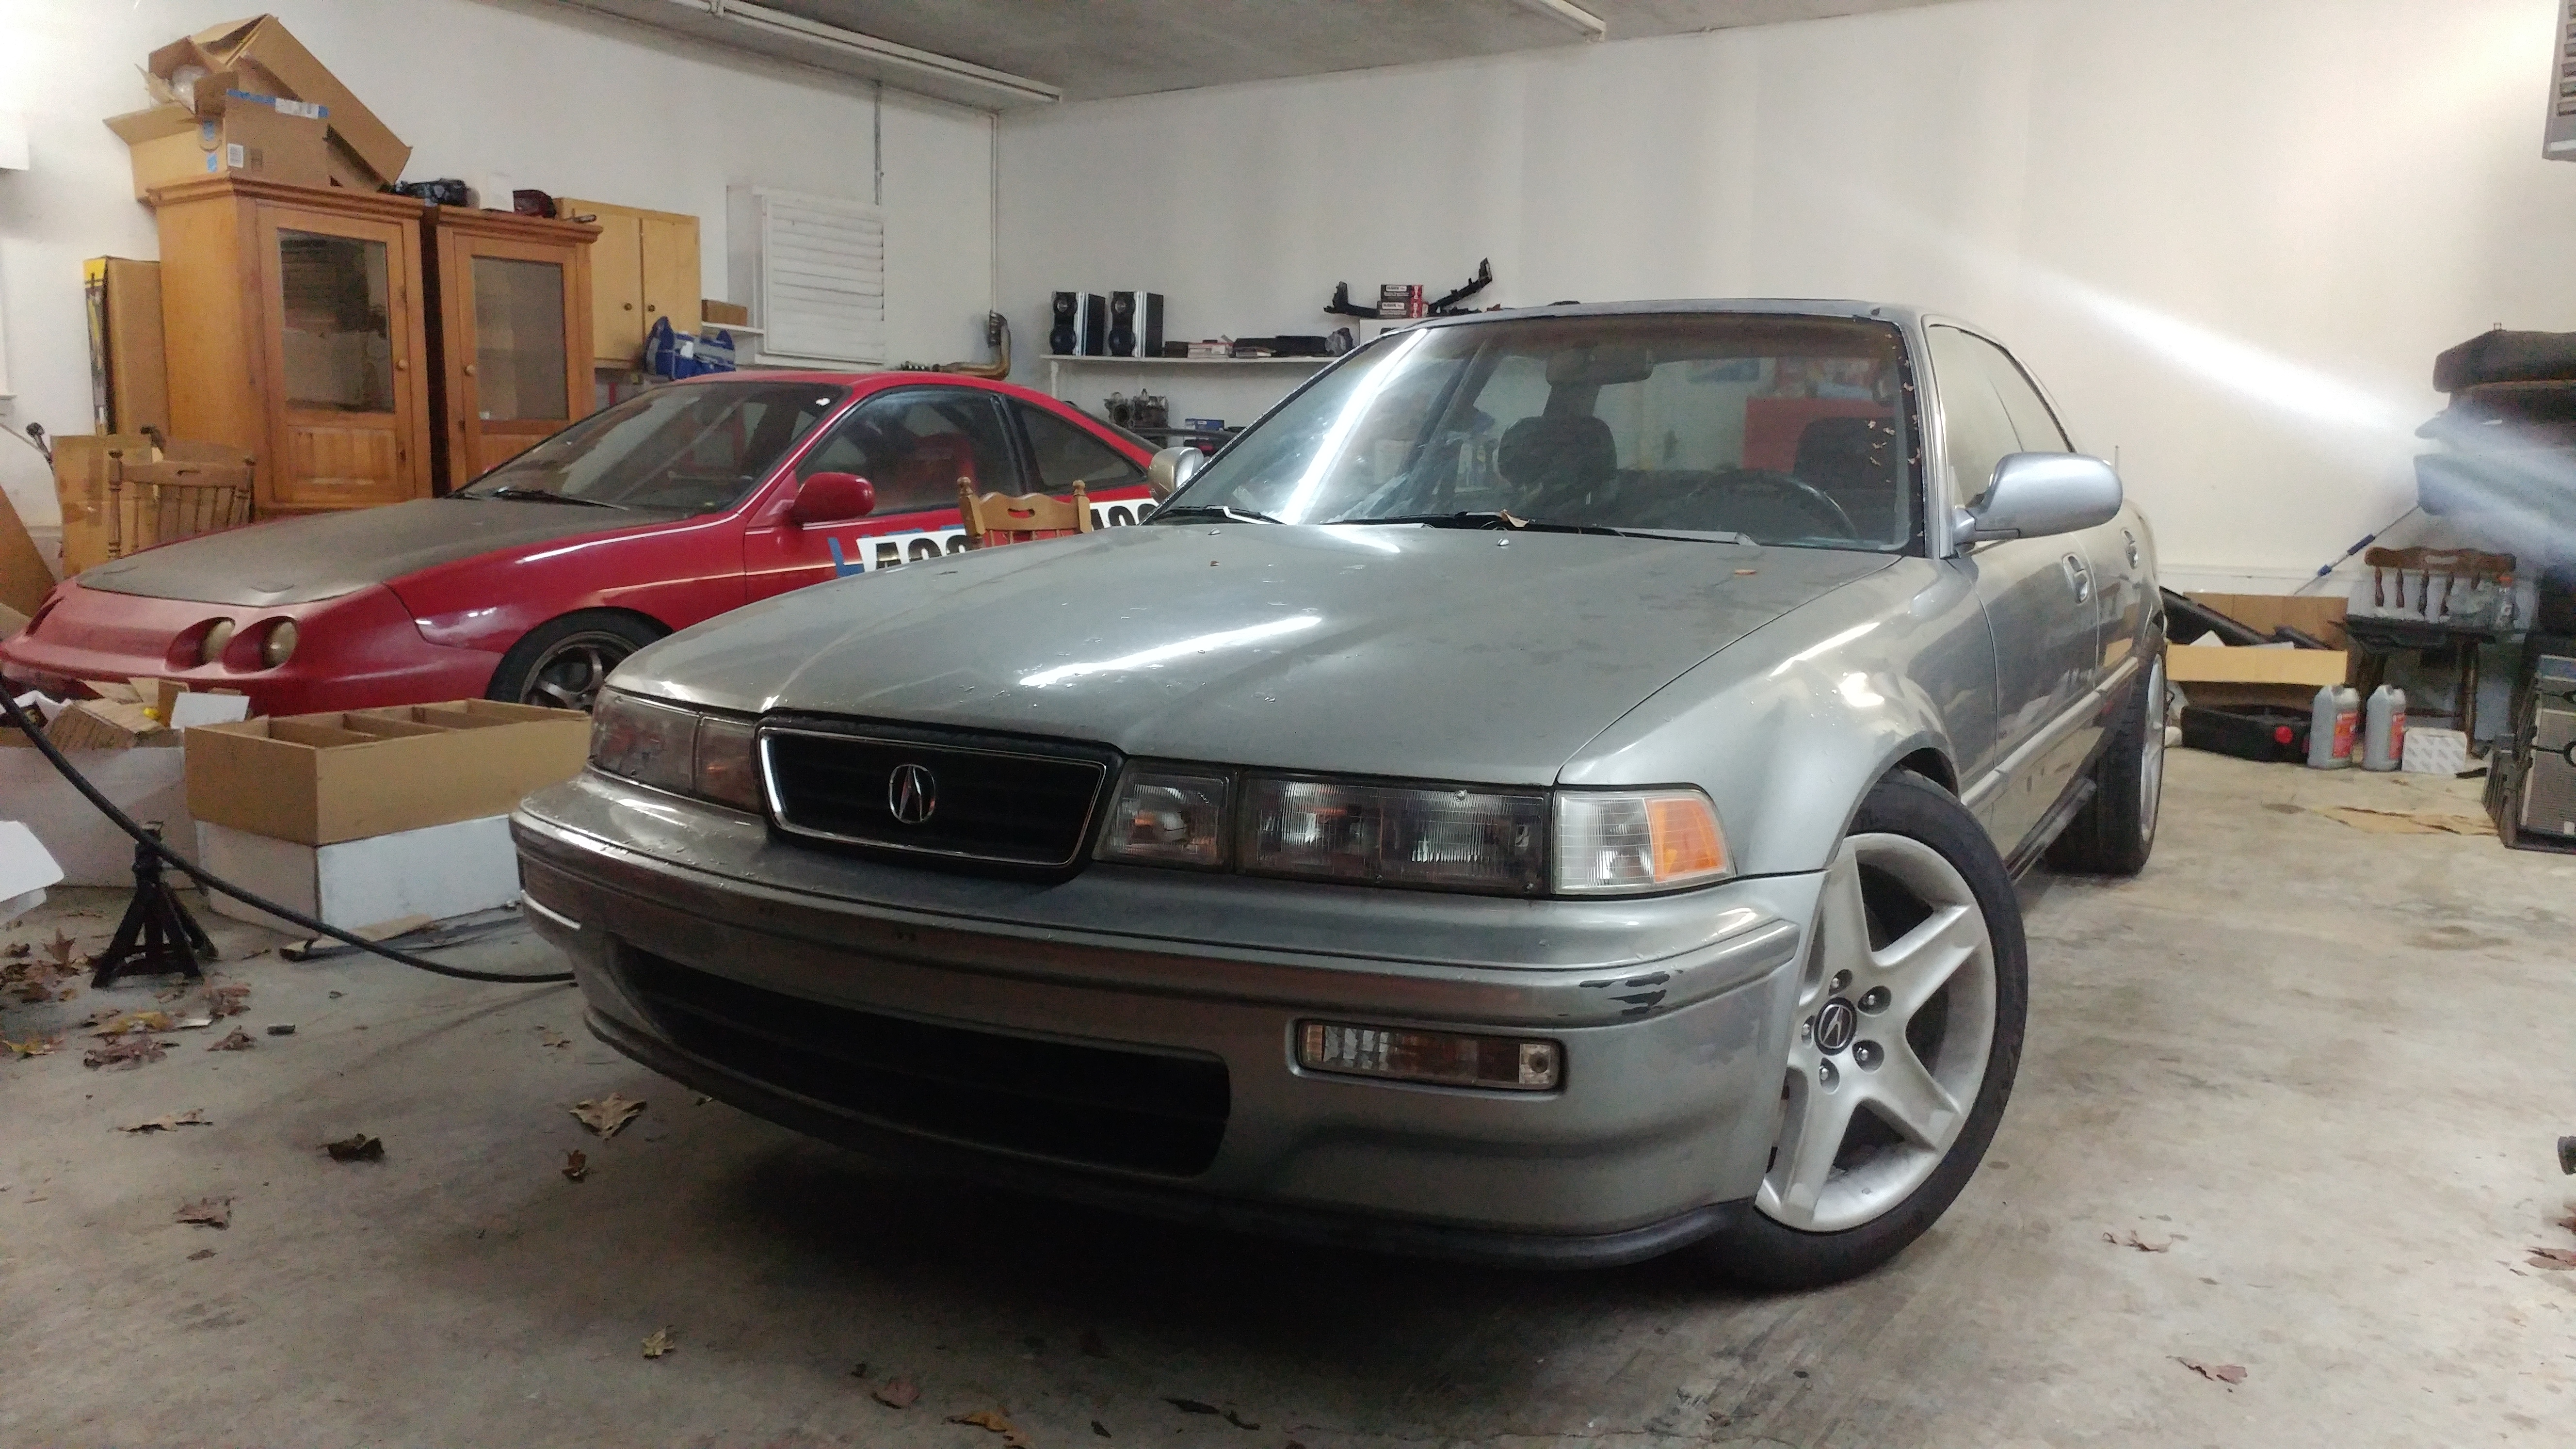
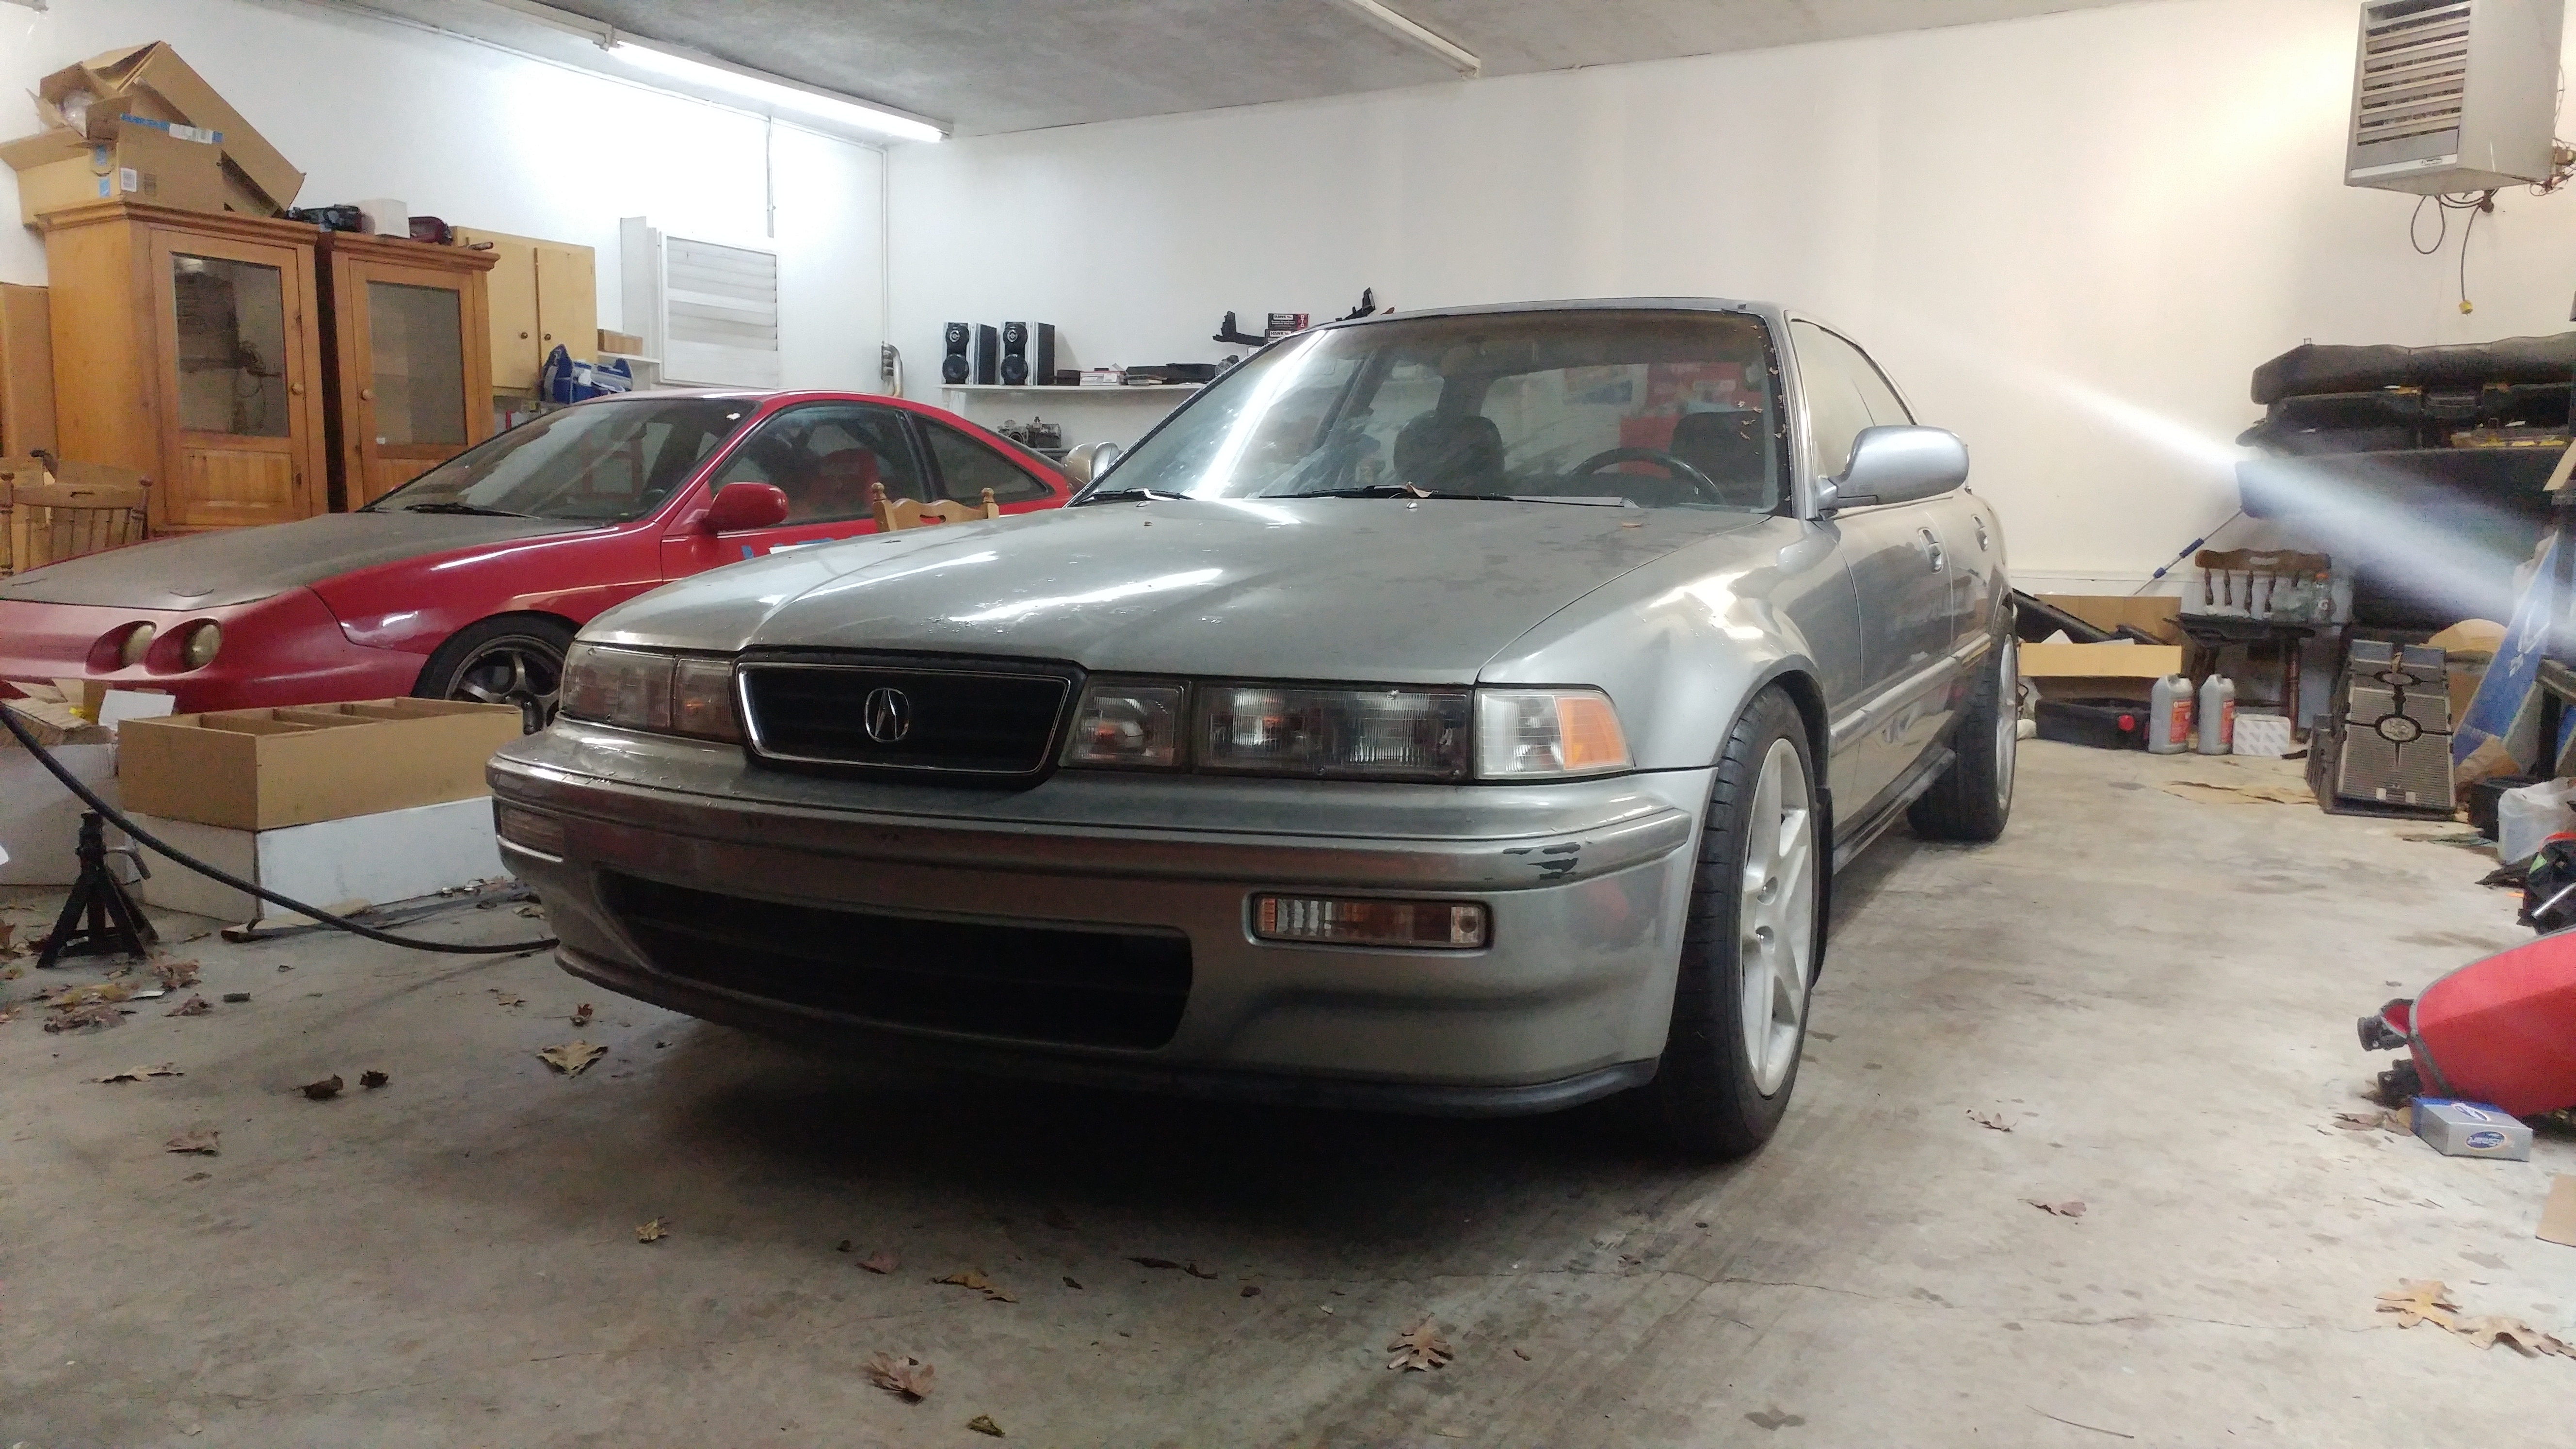
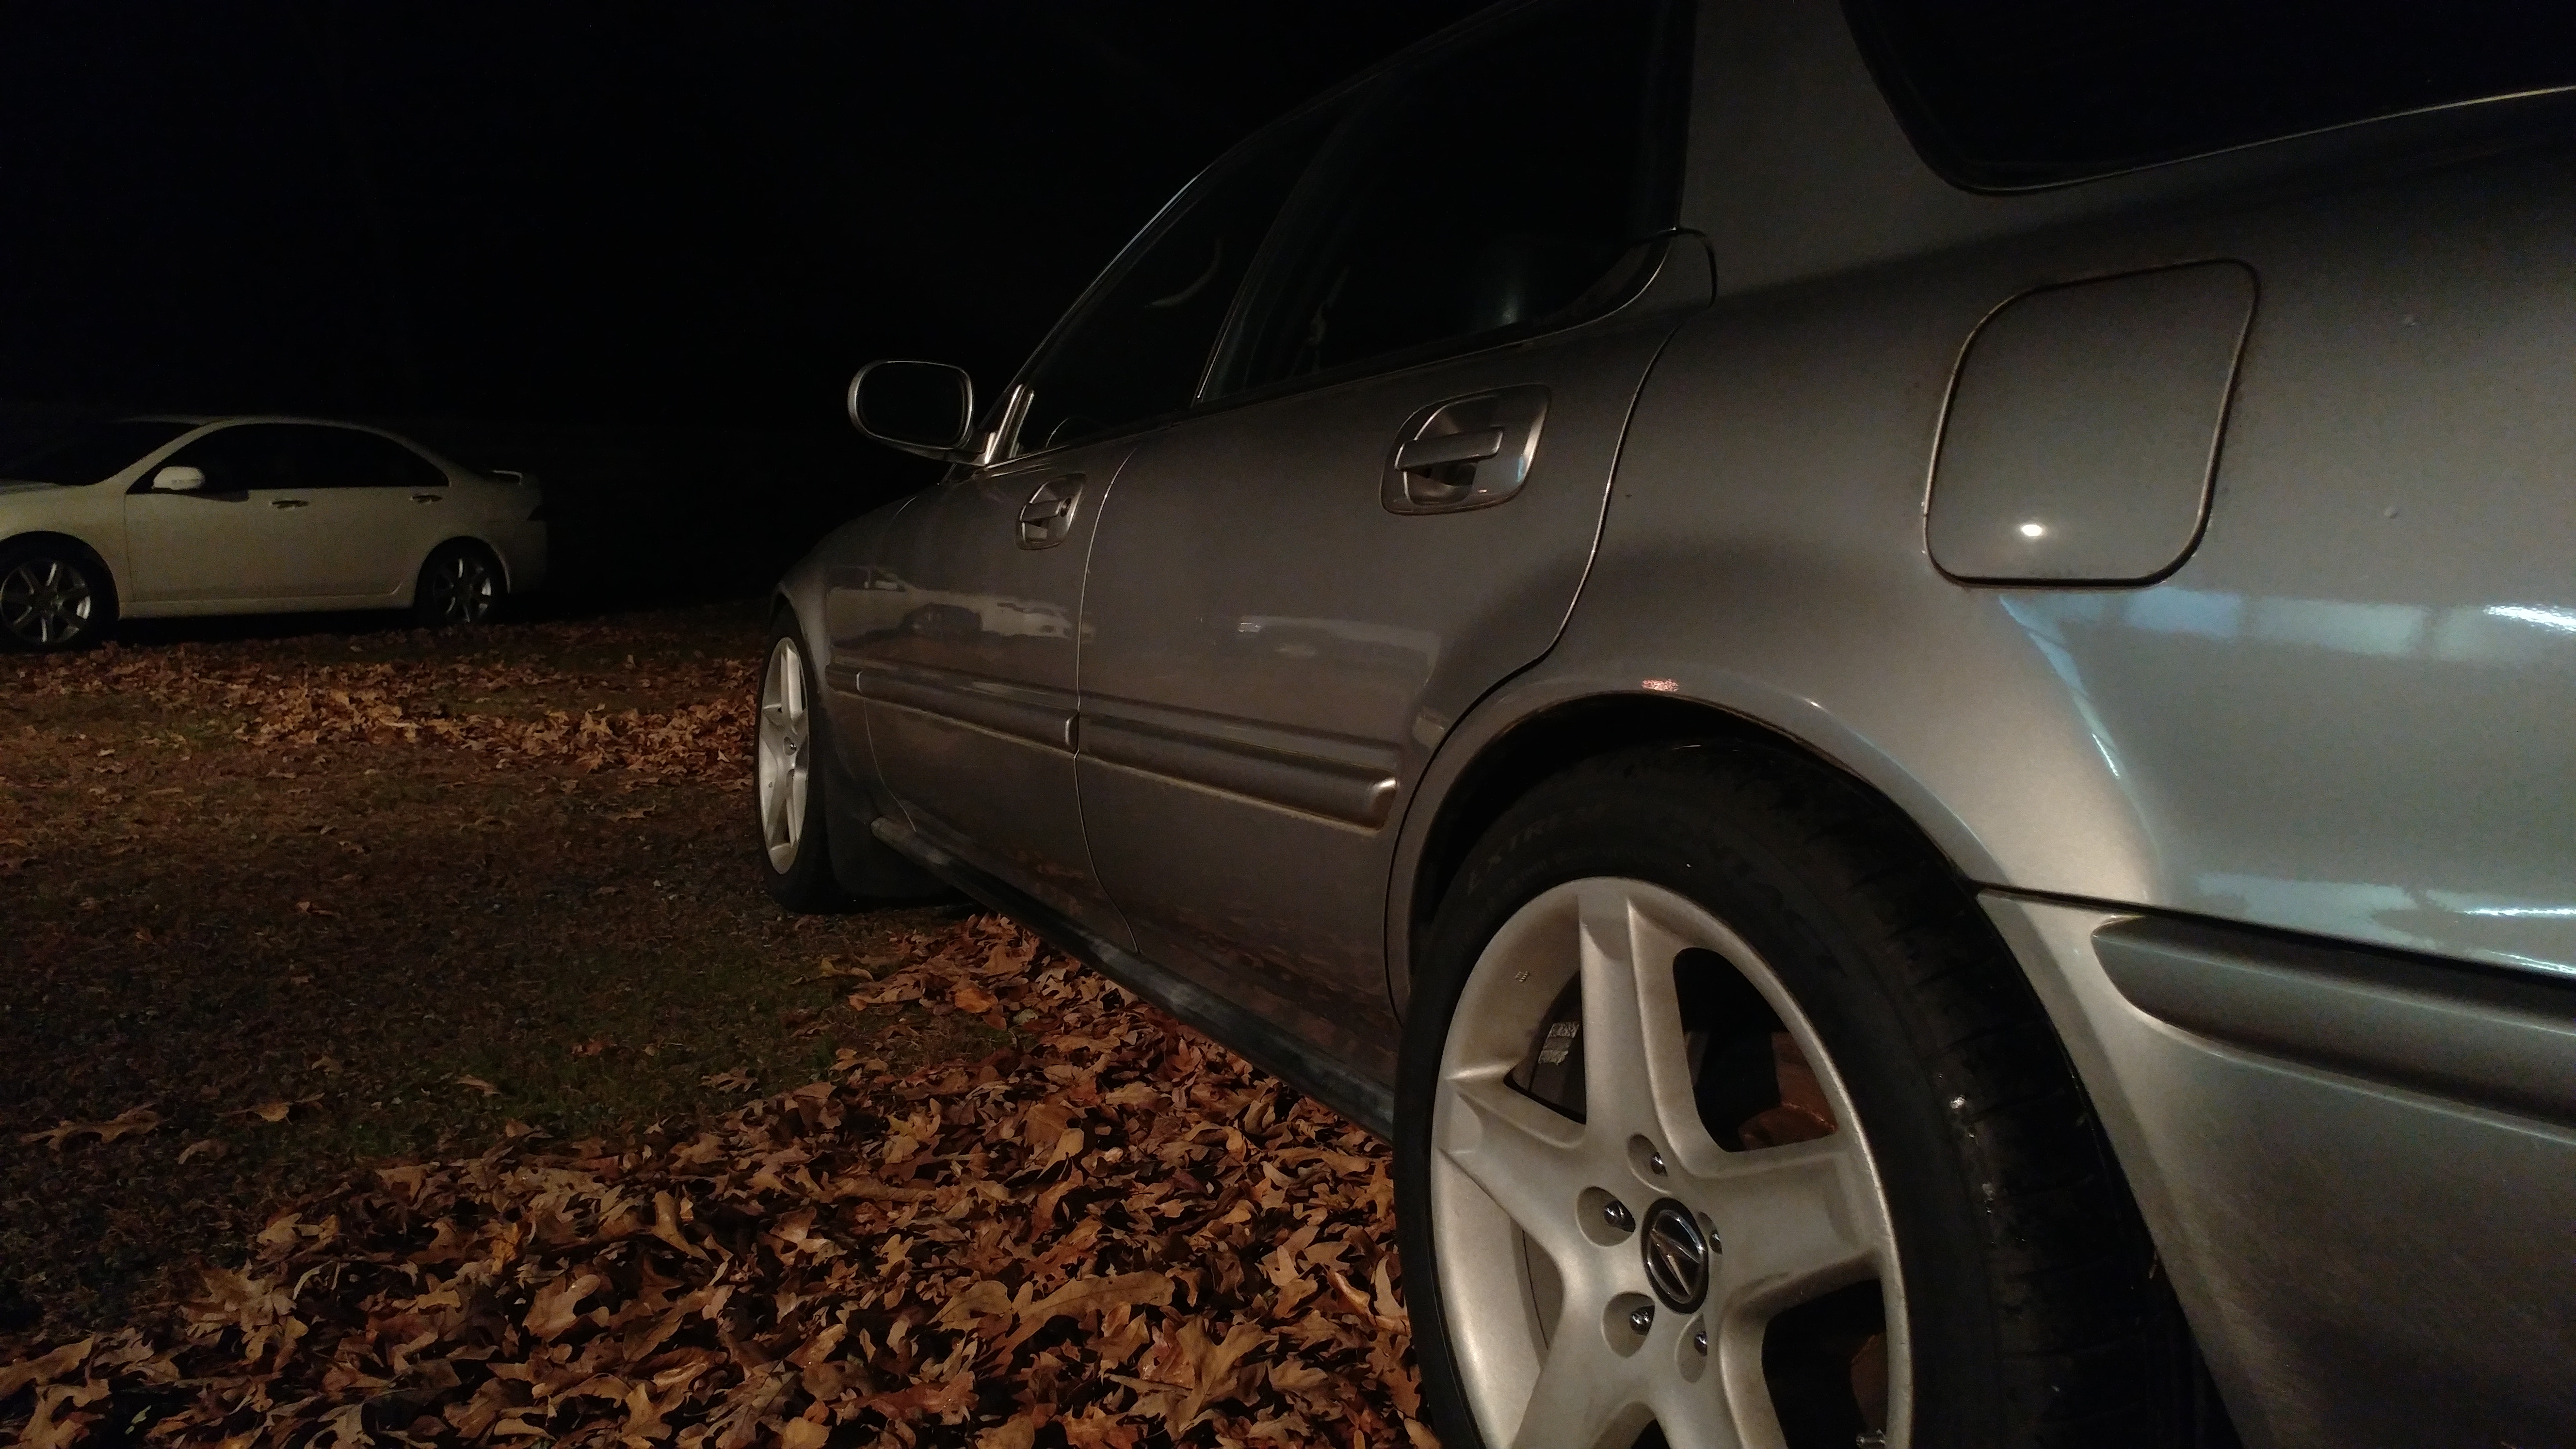
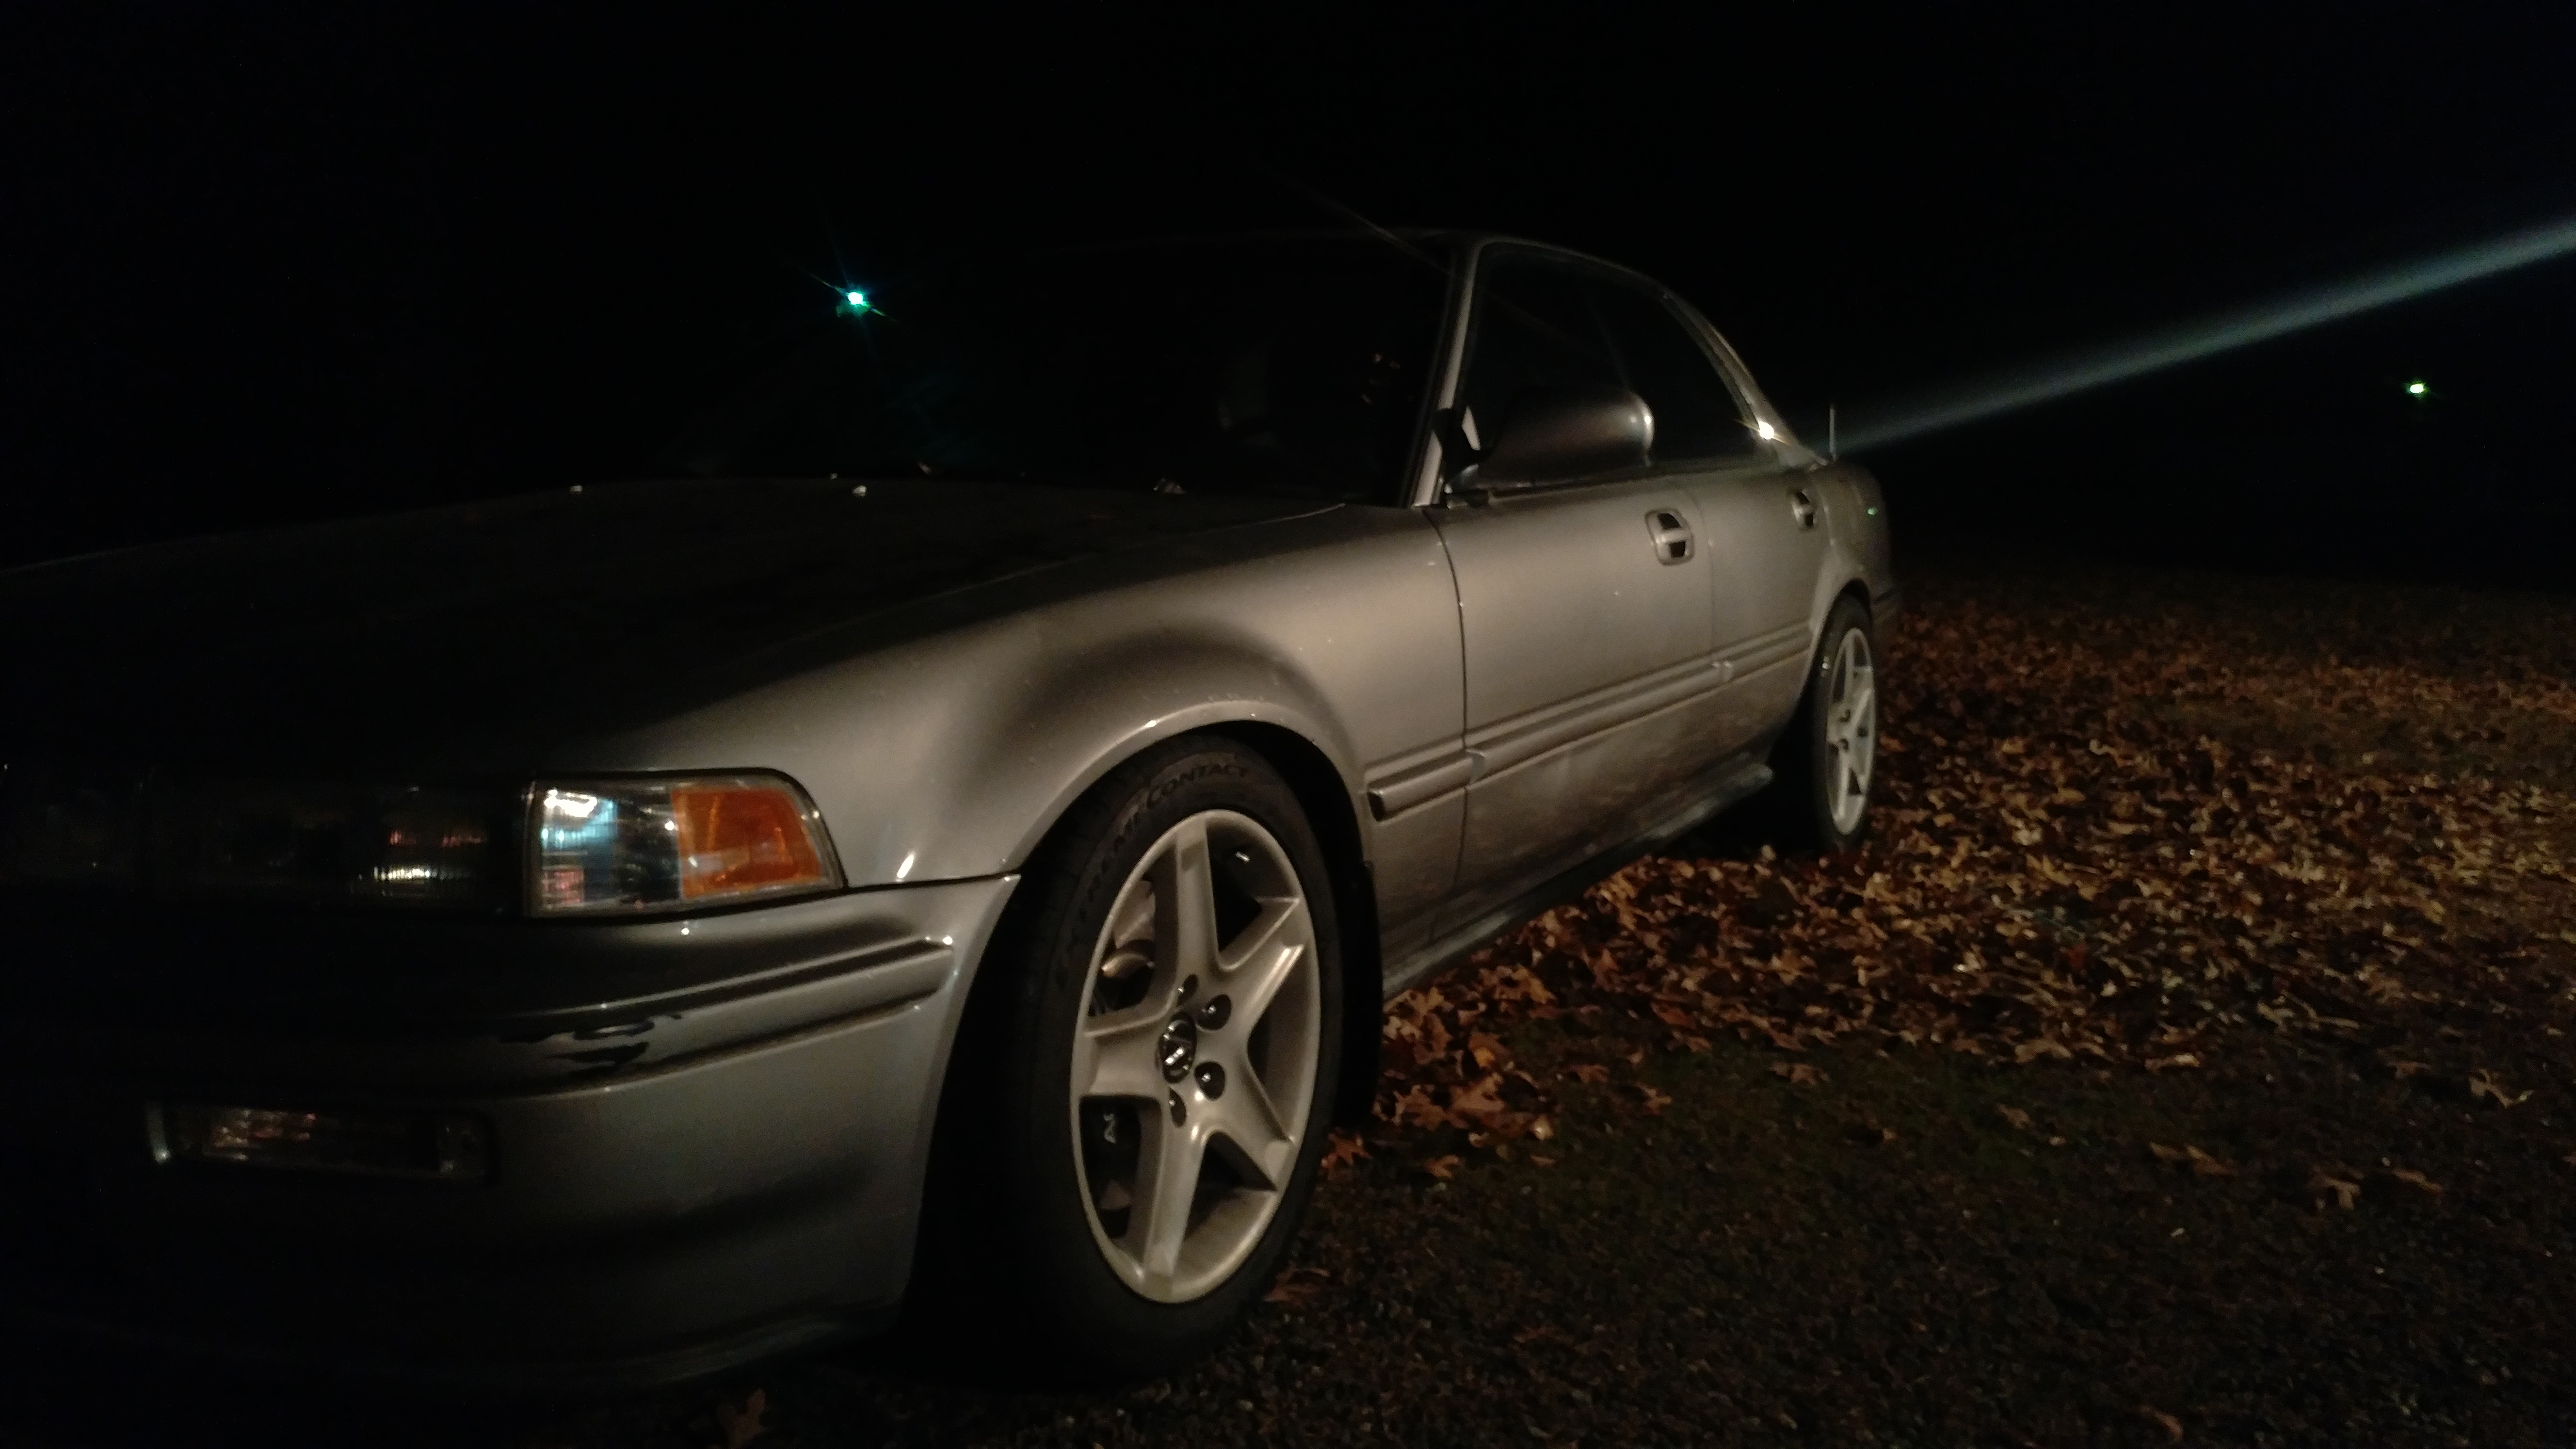
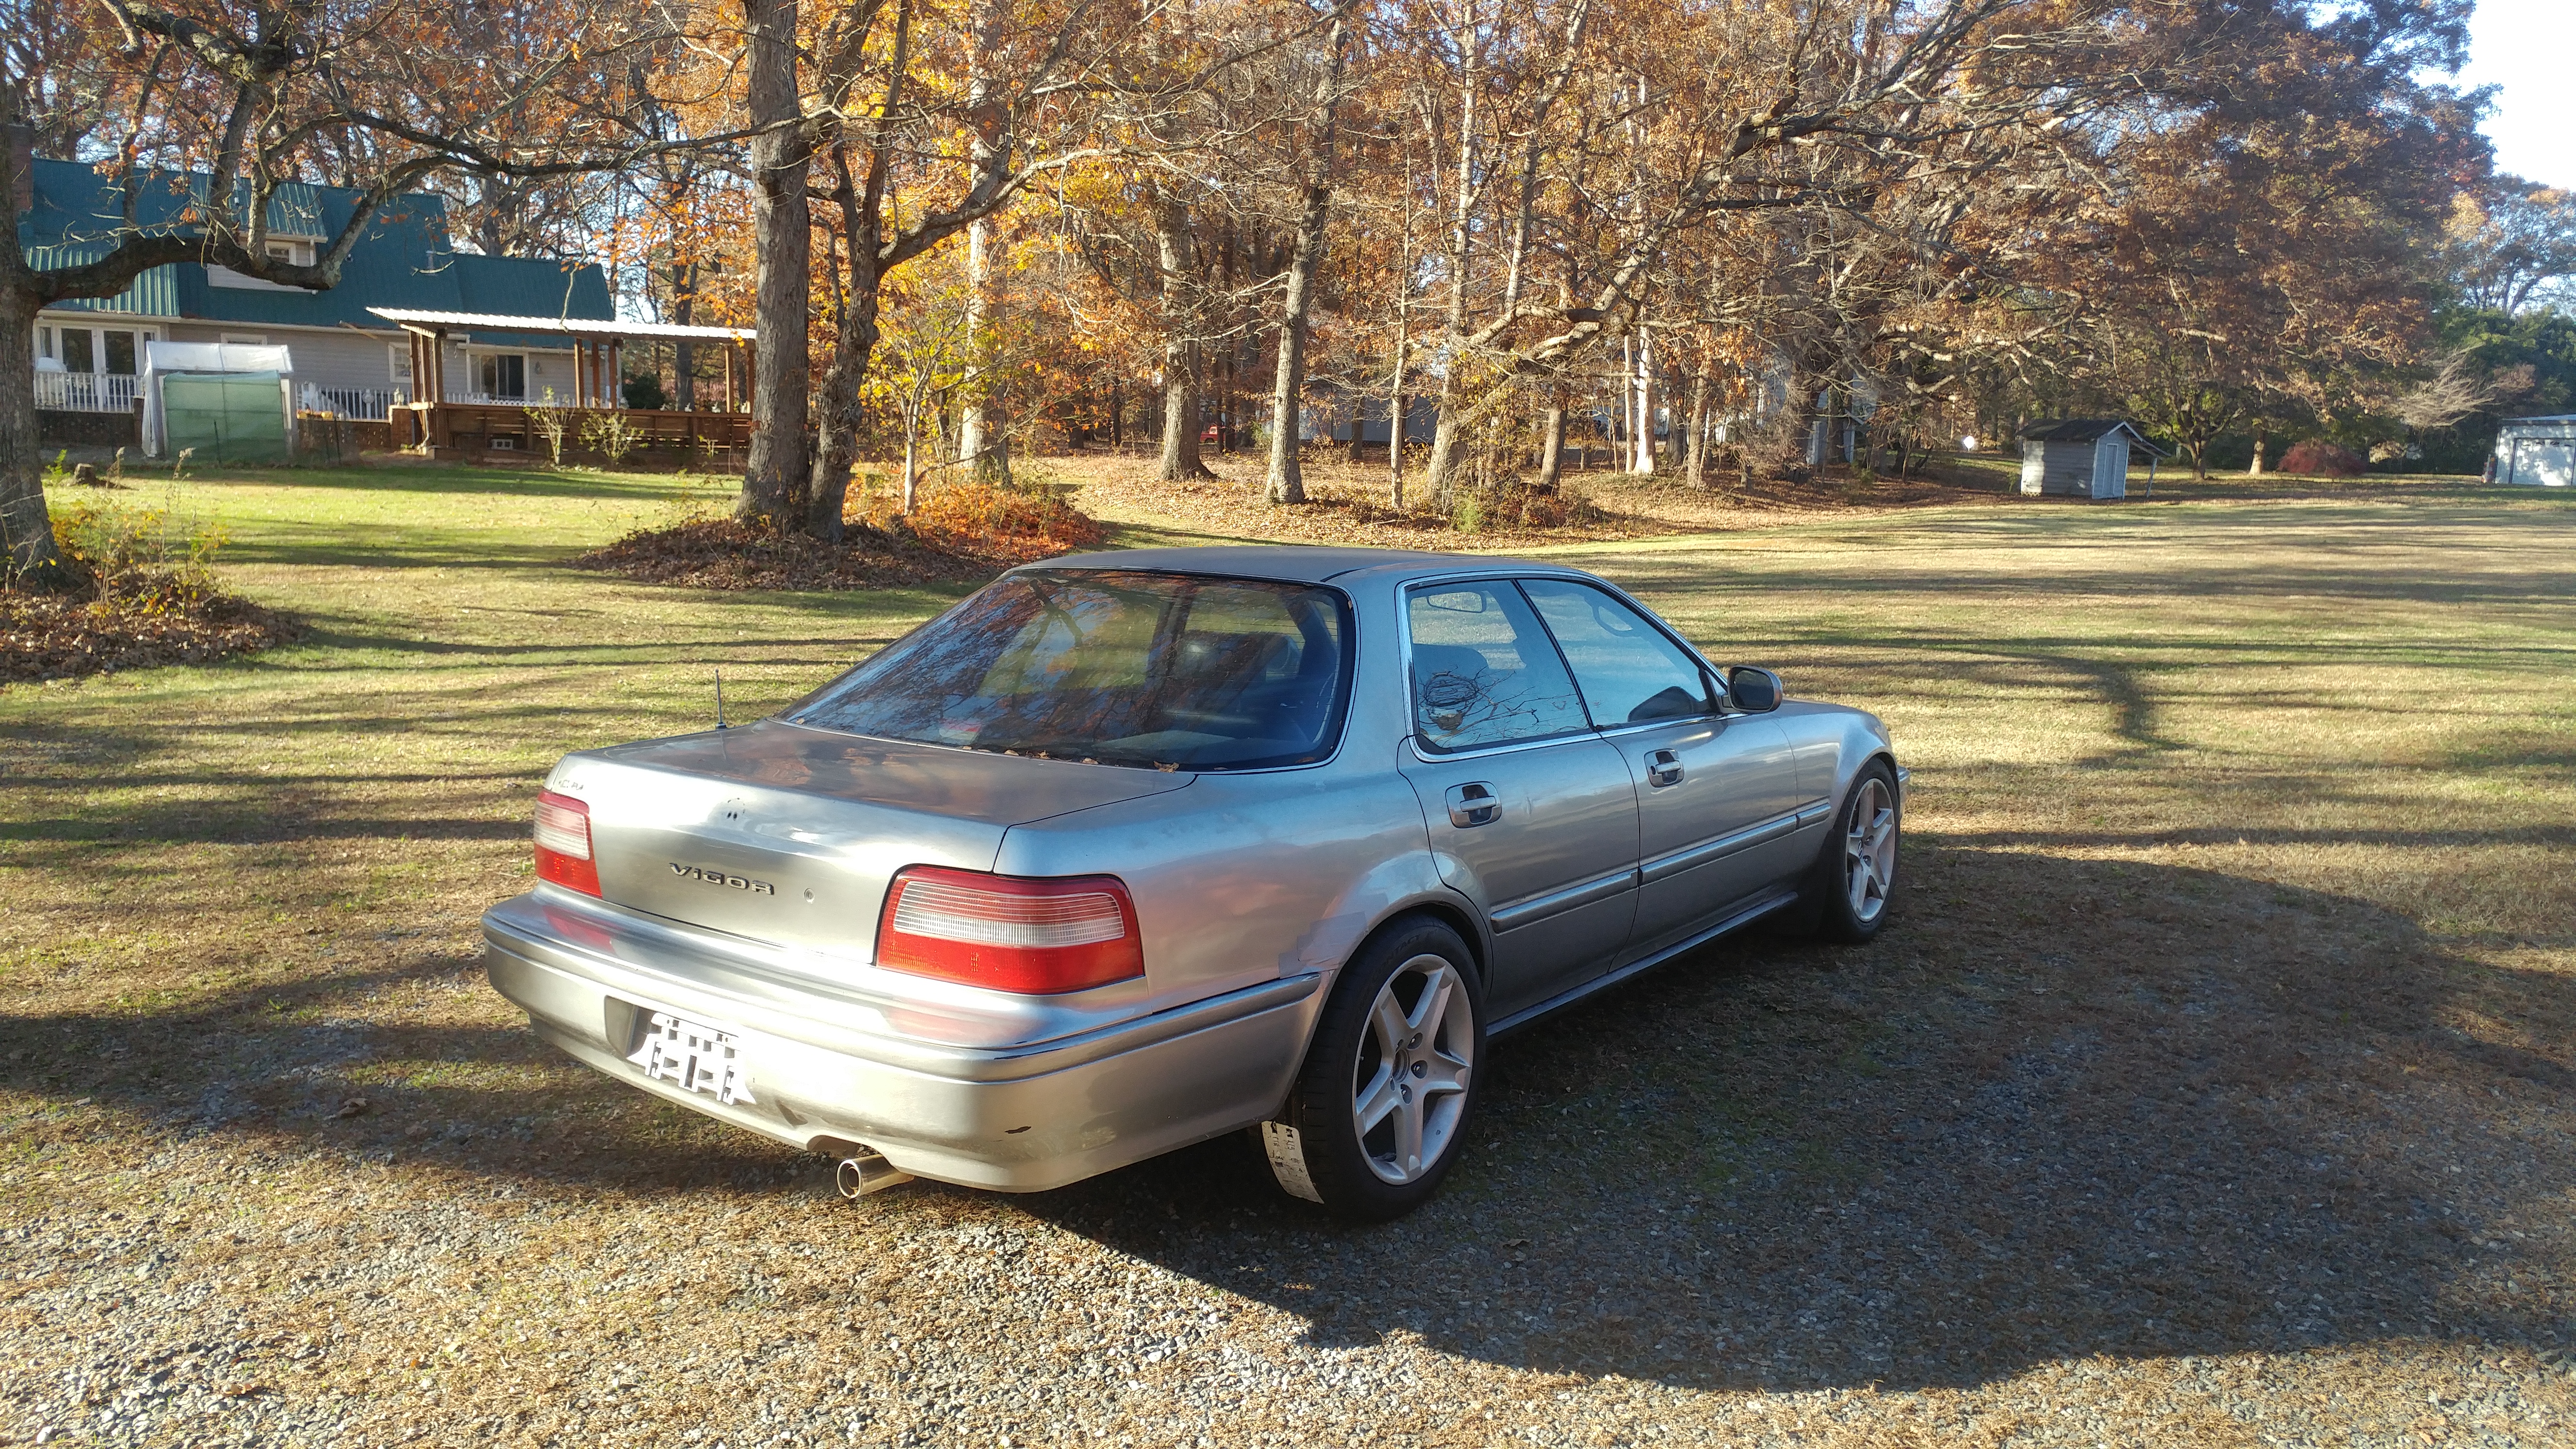
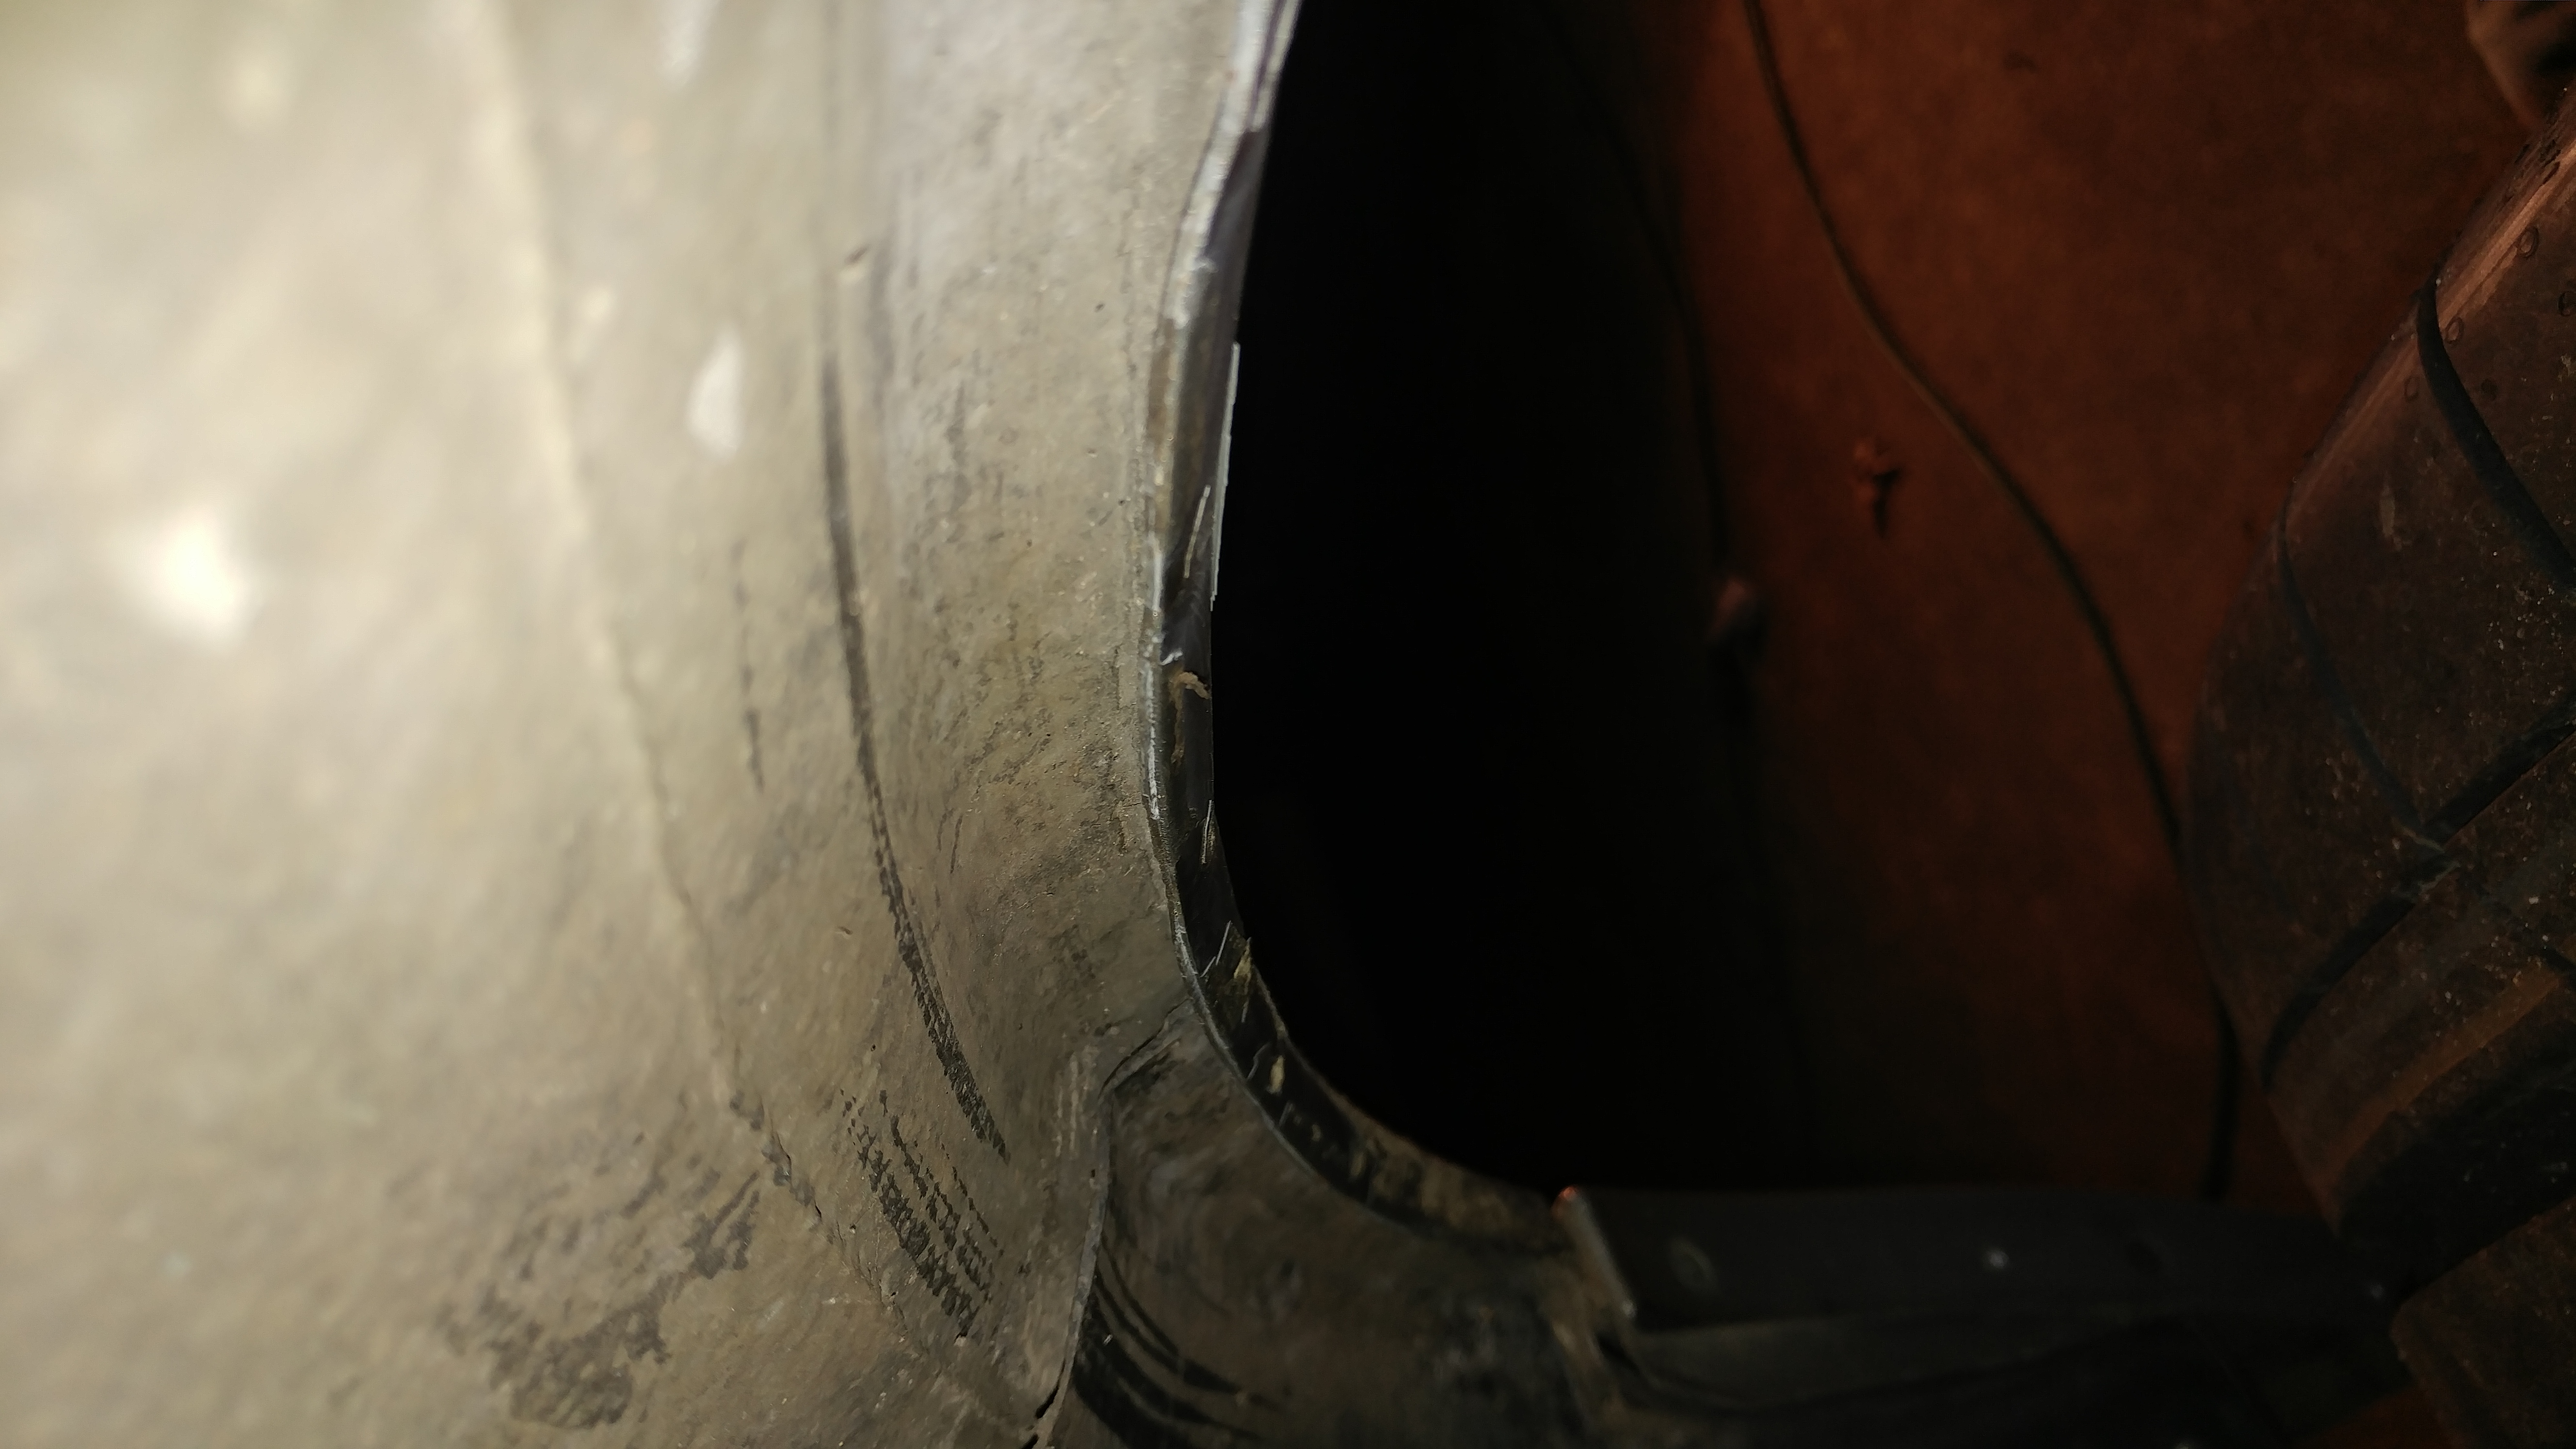
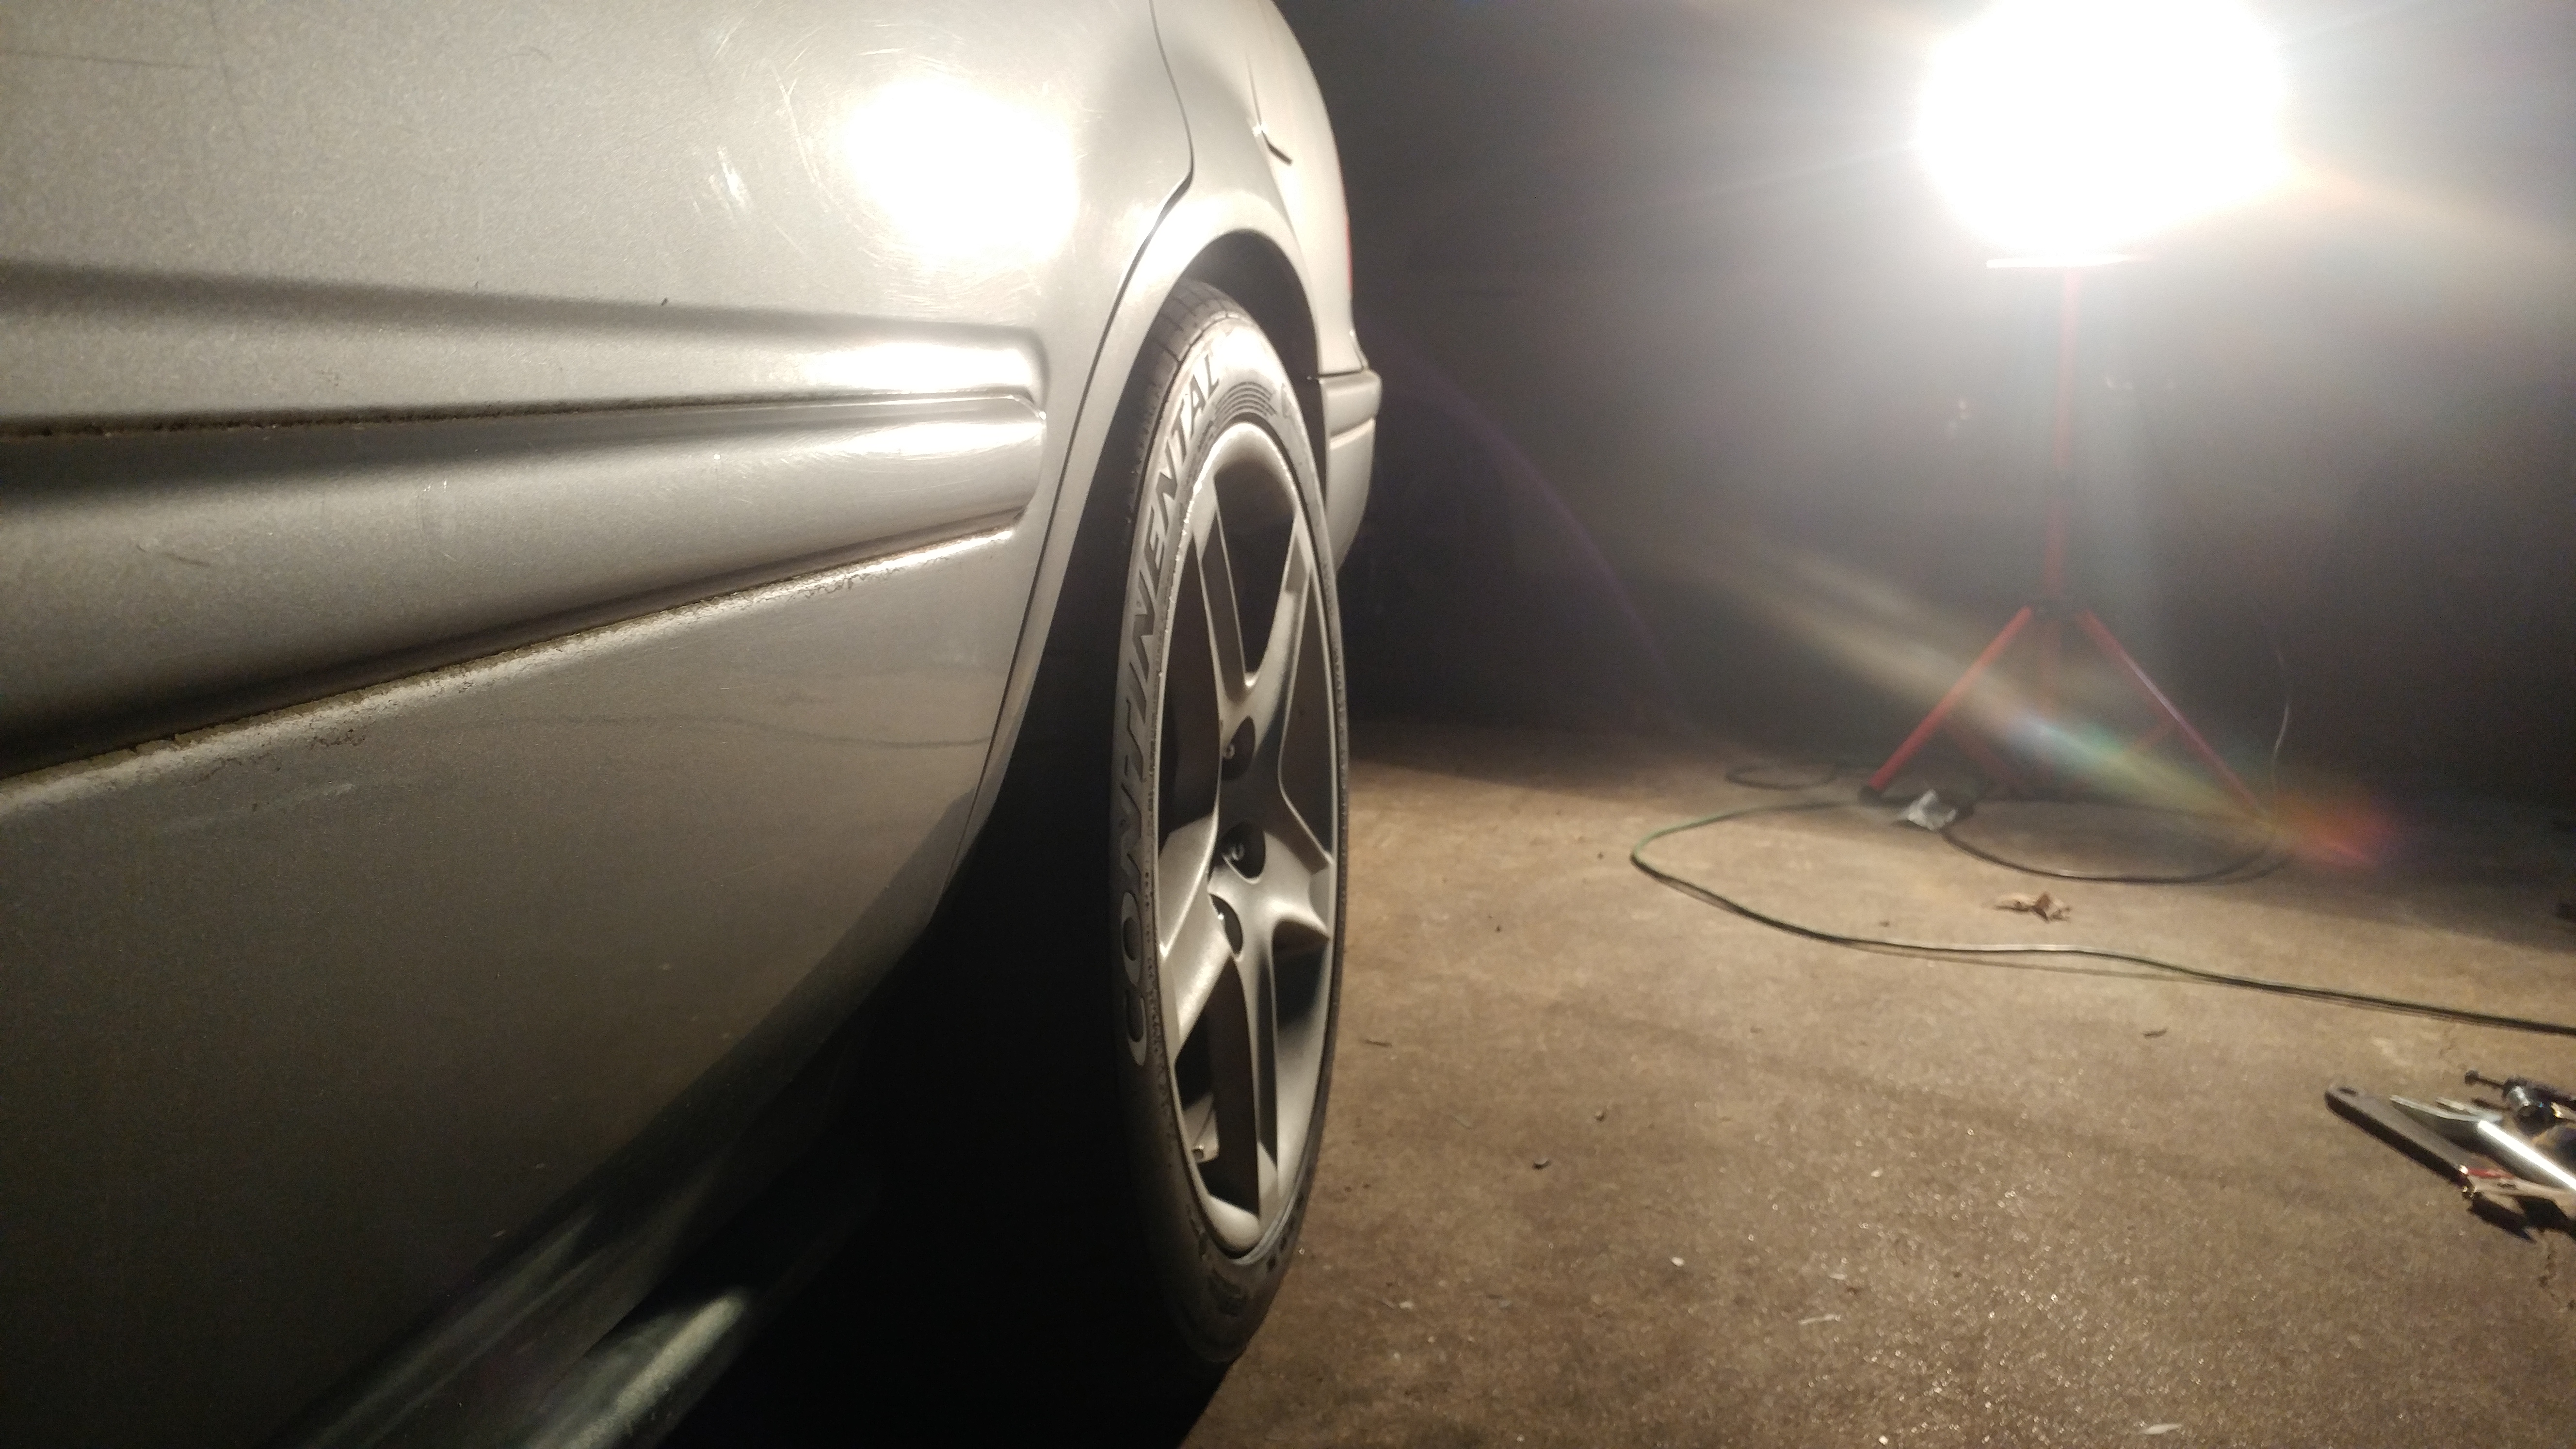
Wheels don't look too over sized from this angle. The 235/45R17s are only 1" larger in total size than the 205/50R16s. From tire to fender, right under 3 inches of clearance rear, right over 3 inches clearance front.
Still waiting on camber and suspension kits before I start the front and finish it up.
I called Delray Acura (In Florida) to see how they were doing after the hurricane nd to check about my order. Probably a few more weeks until they send the parts which are front L and R upper control arm (ordered for the ball joint) and L and R Legend front lower ball joints (will have to press the Vigors out).
I already have Moog rear upper control arms but I'm not installing them. I want some slight camber. About -1.2 rear, -.08/-1 front ideally.
So basically aside from the front lower ball joints I'm restarting all over on sourcing aftermarket CB/CD Accord camber kits.
I can't believe I ordered all that stock stuff without realizing I have to order the same things but aftermarket and adjustable... damn it.
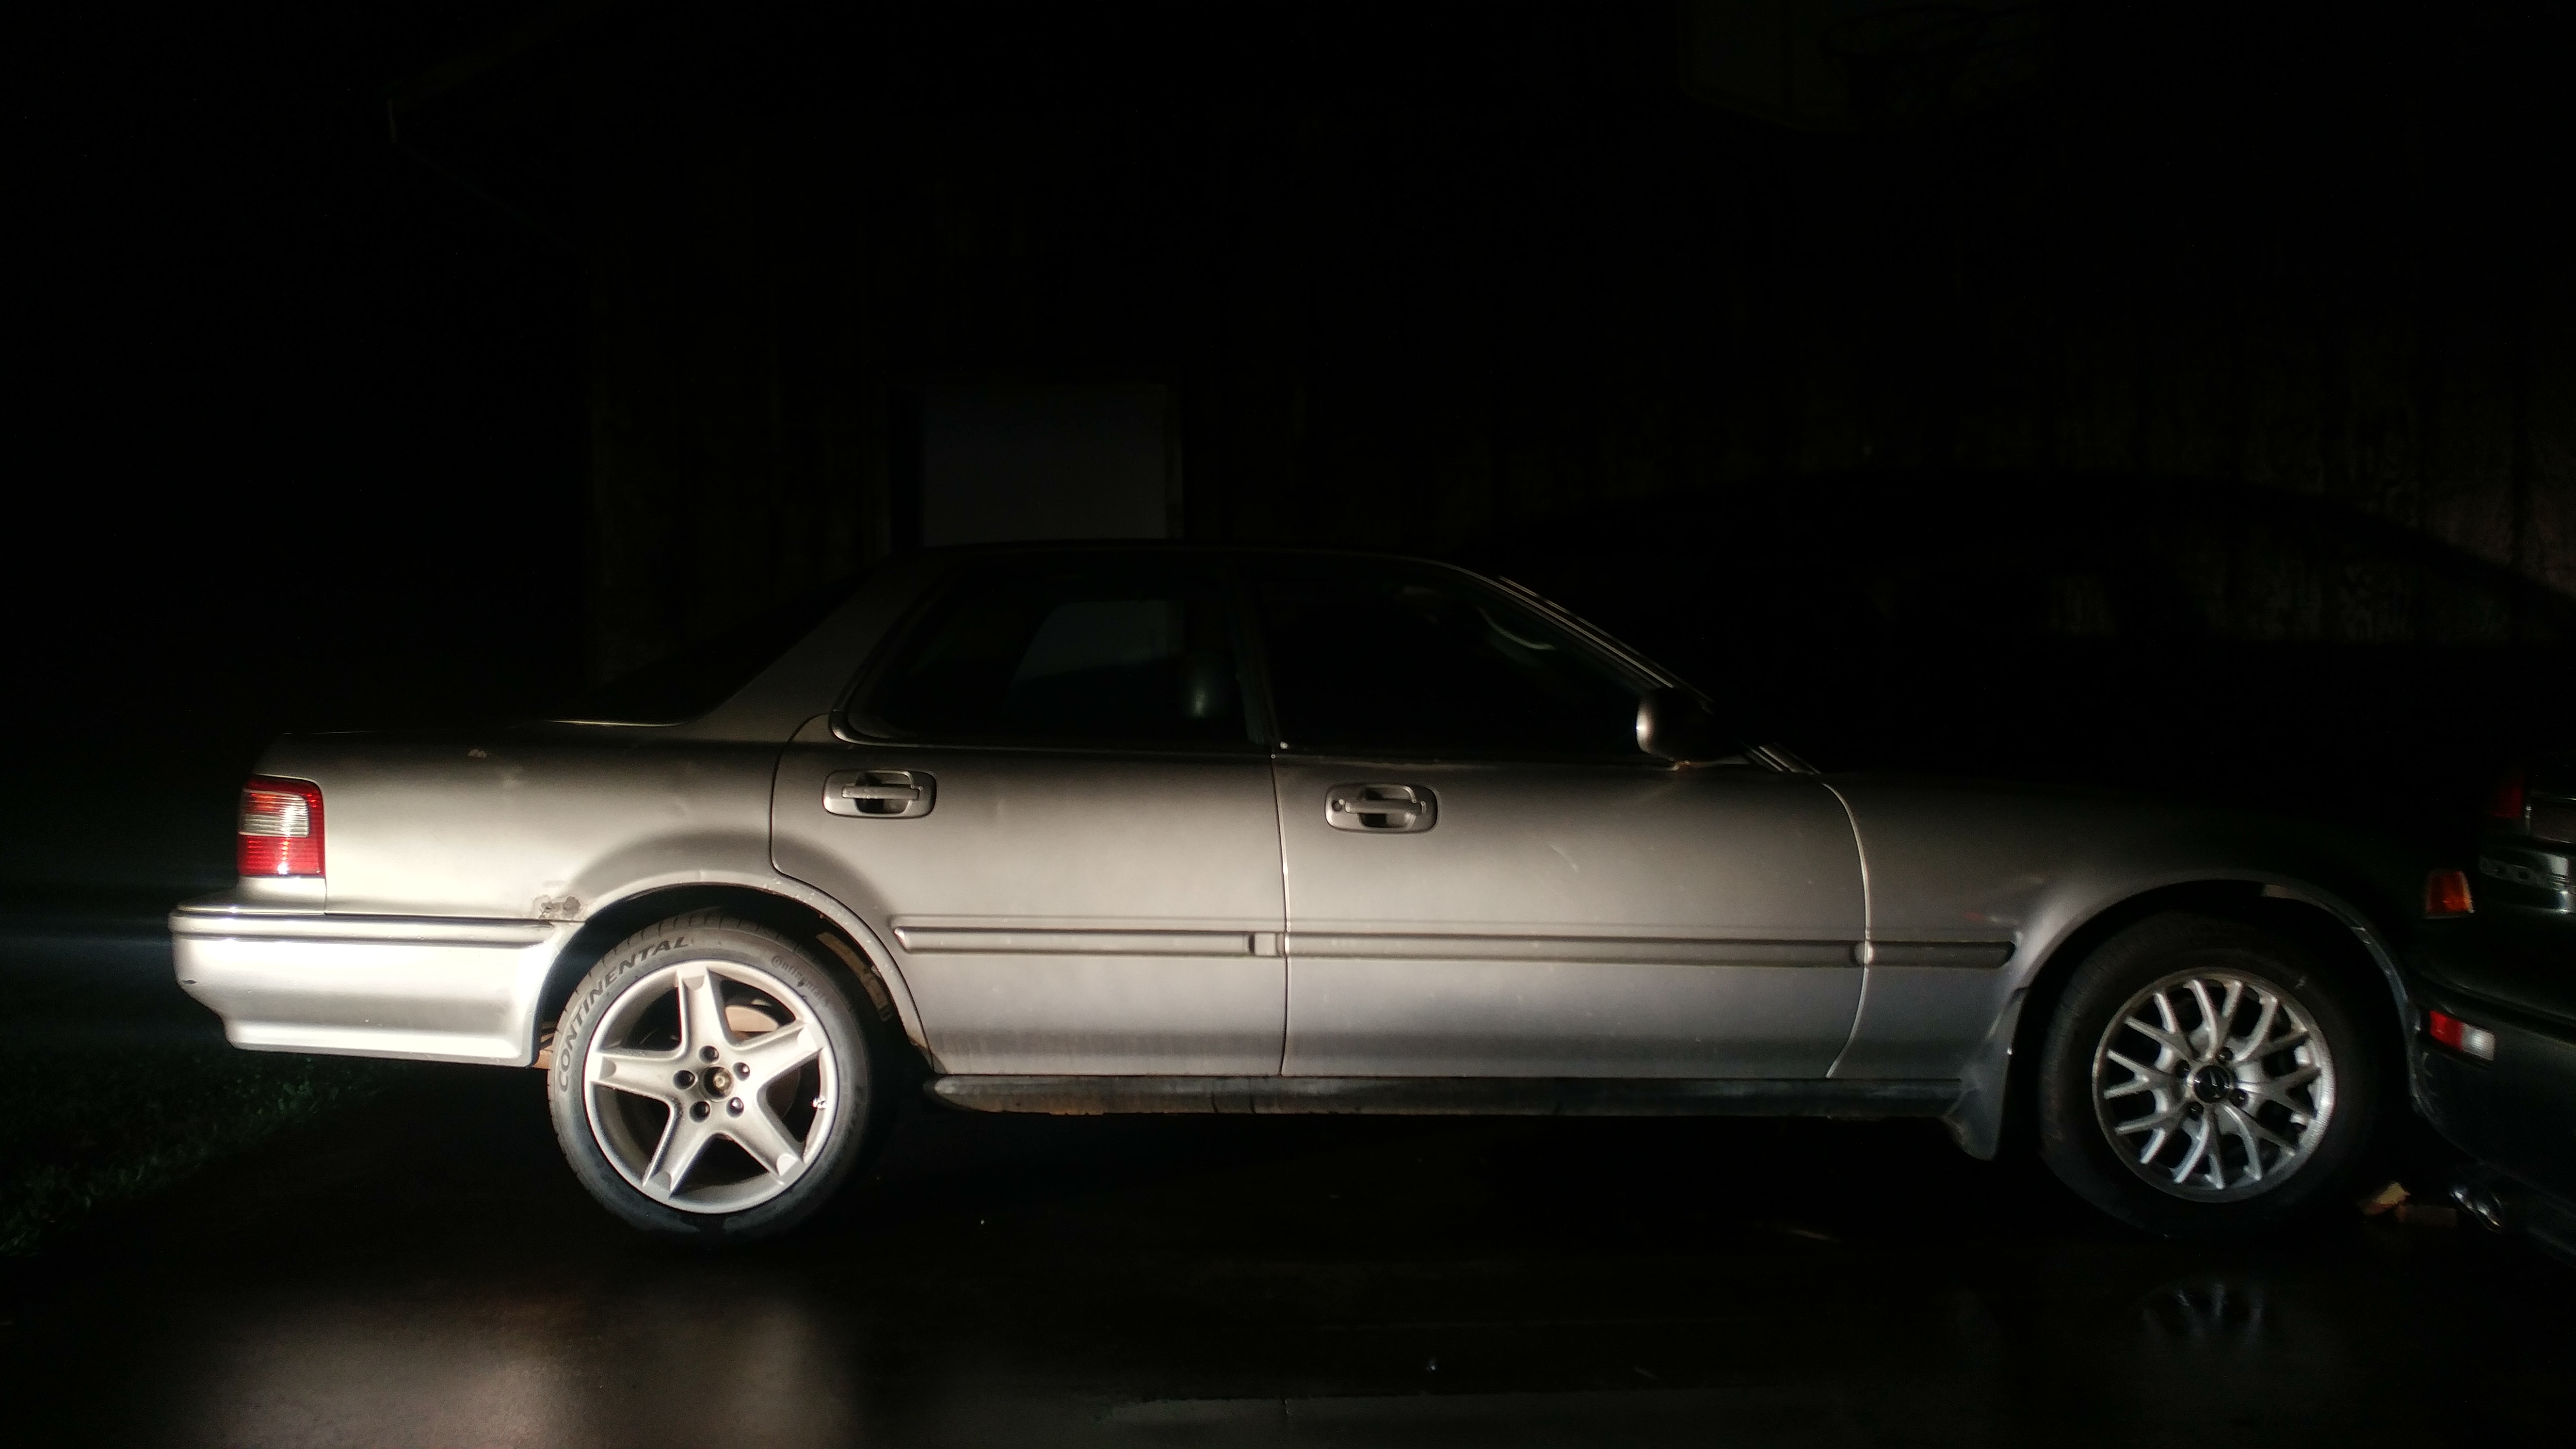
��Wheels don't look too over sized from this angle. The 235/45R17s are only 1" larger in total size than the 205/50R16s. From tire to fender, right under 3 inches of clearance rear, right over 3 inches clearance front.
Still waiting on camber and suspension kits before I start the front and finish it up.
I called Delray Acura (In Florida) to see how they were doing after the hurricane nd to check about my order. Probably a few more weeks until they send the parts which are front L and R upper control arm (ordered for the ball joint) and L and R Legend front lower ball joints (will have to press the Vigors out).
I already have Moog rear upper control arms but I'm not installing them. I want some slight camber. About -1.2 rear, -.08/-1 front ideally.
So basically aside from the front lower ball joints I'm restarting all over on sourcing aftermarket CB/CD Accord camber kits.
I can't believe I ordered all that stock stuff without realizing I have to order the same things but aftermarket and adjustable... damn it.
09-23-2017, 01:42 AM
#46
Burning Brakes
Thread Starter
9/23/17
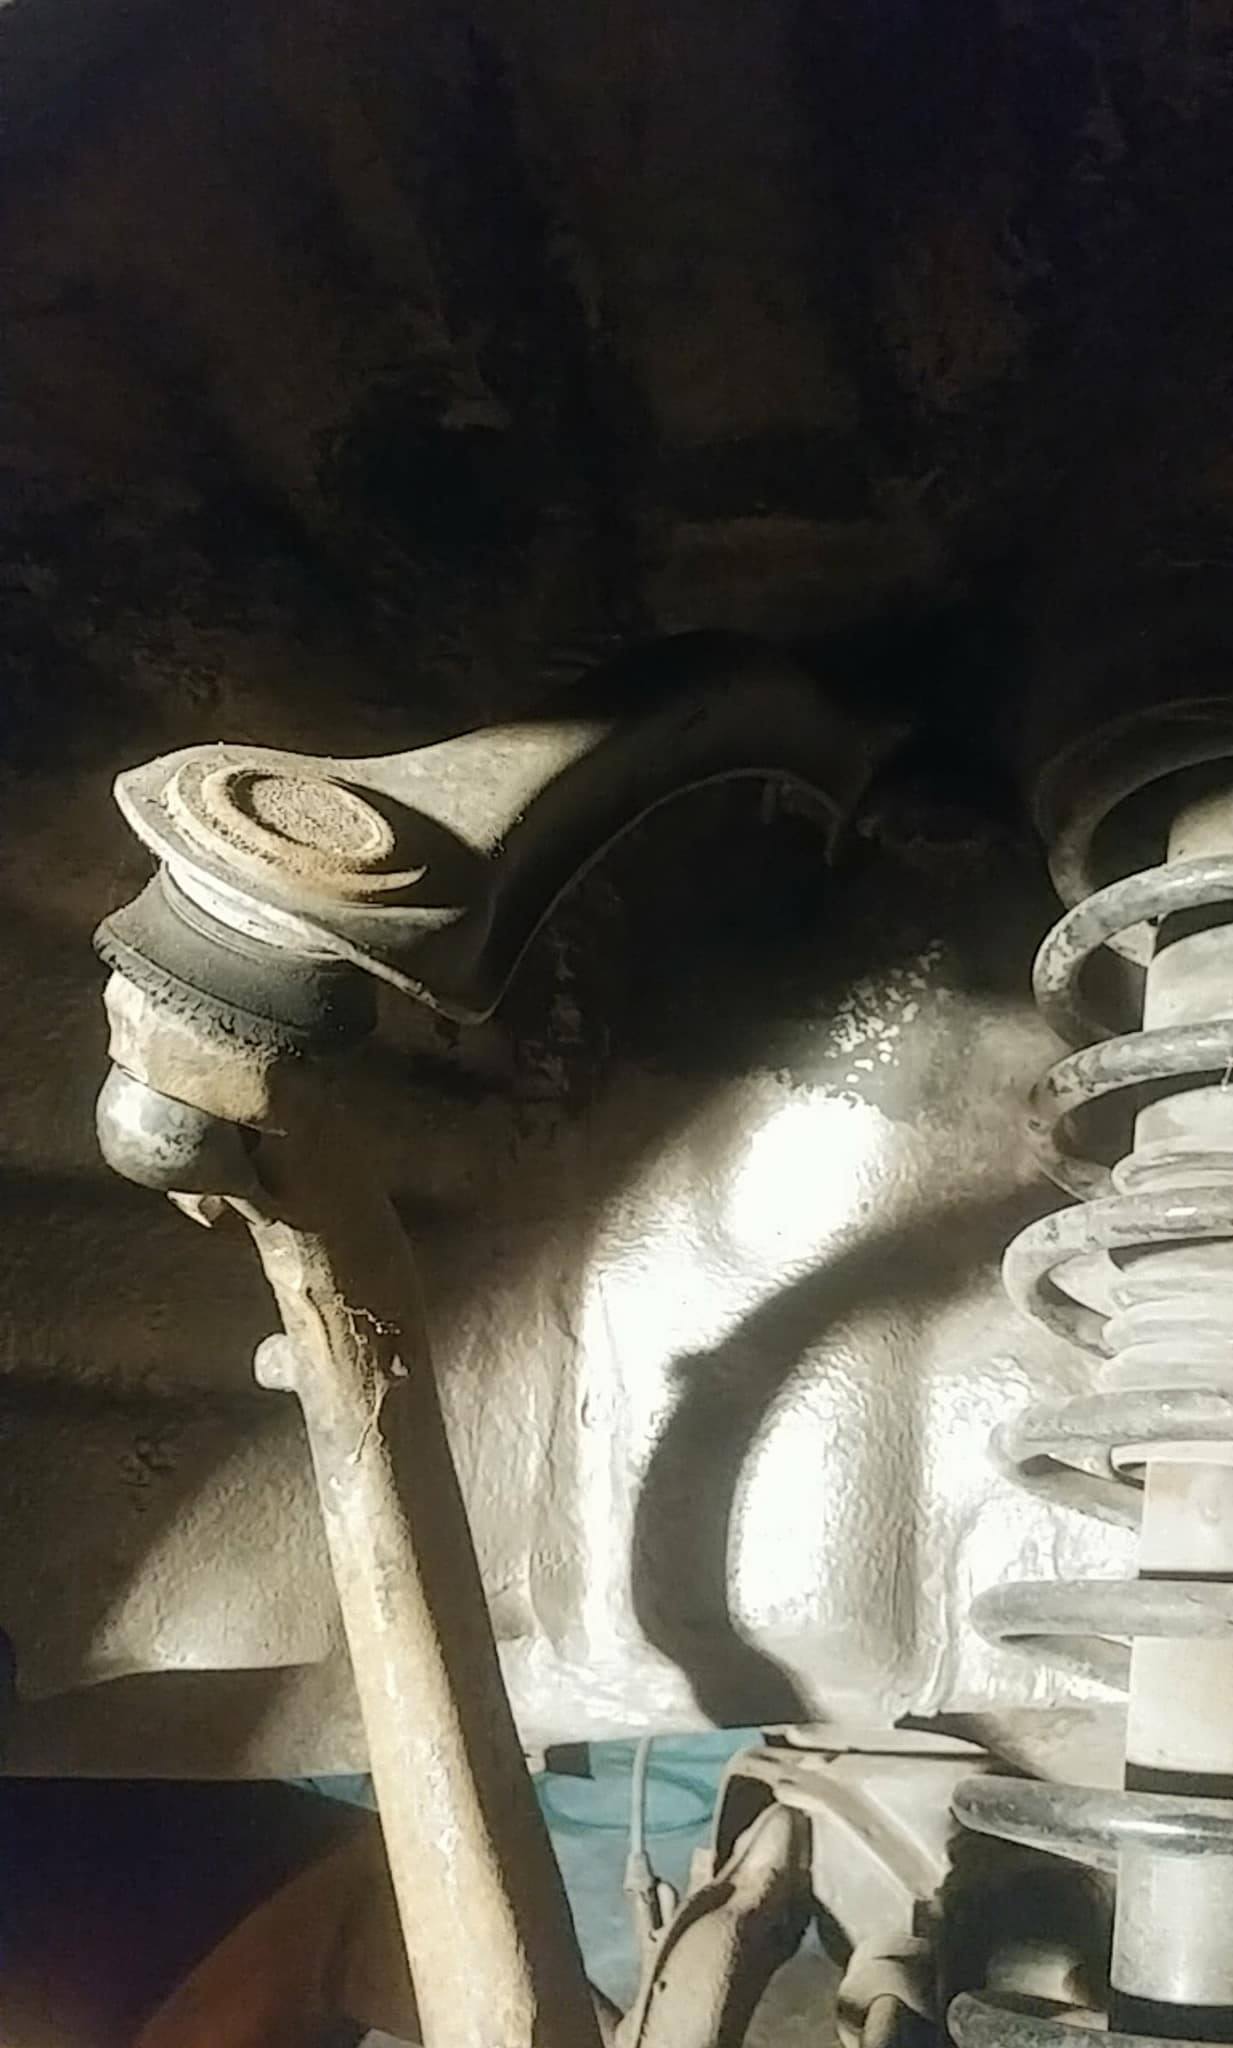
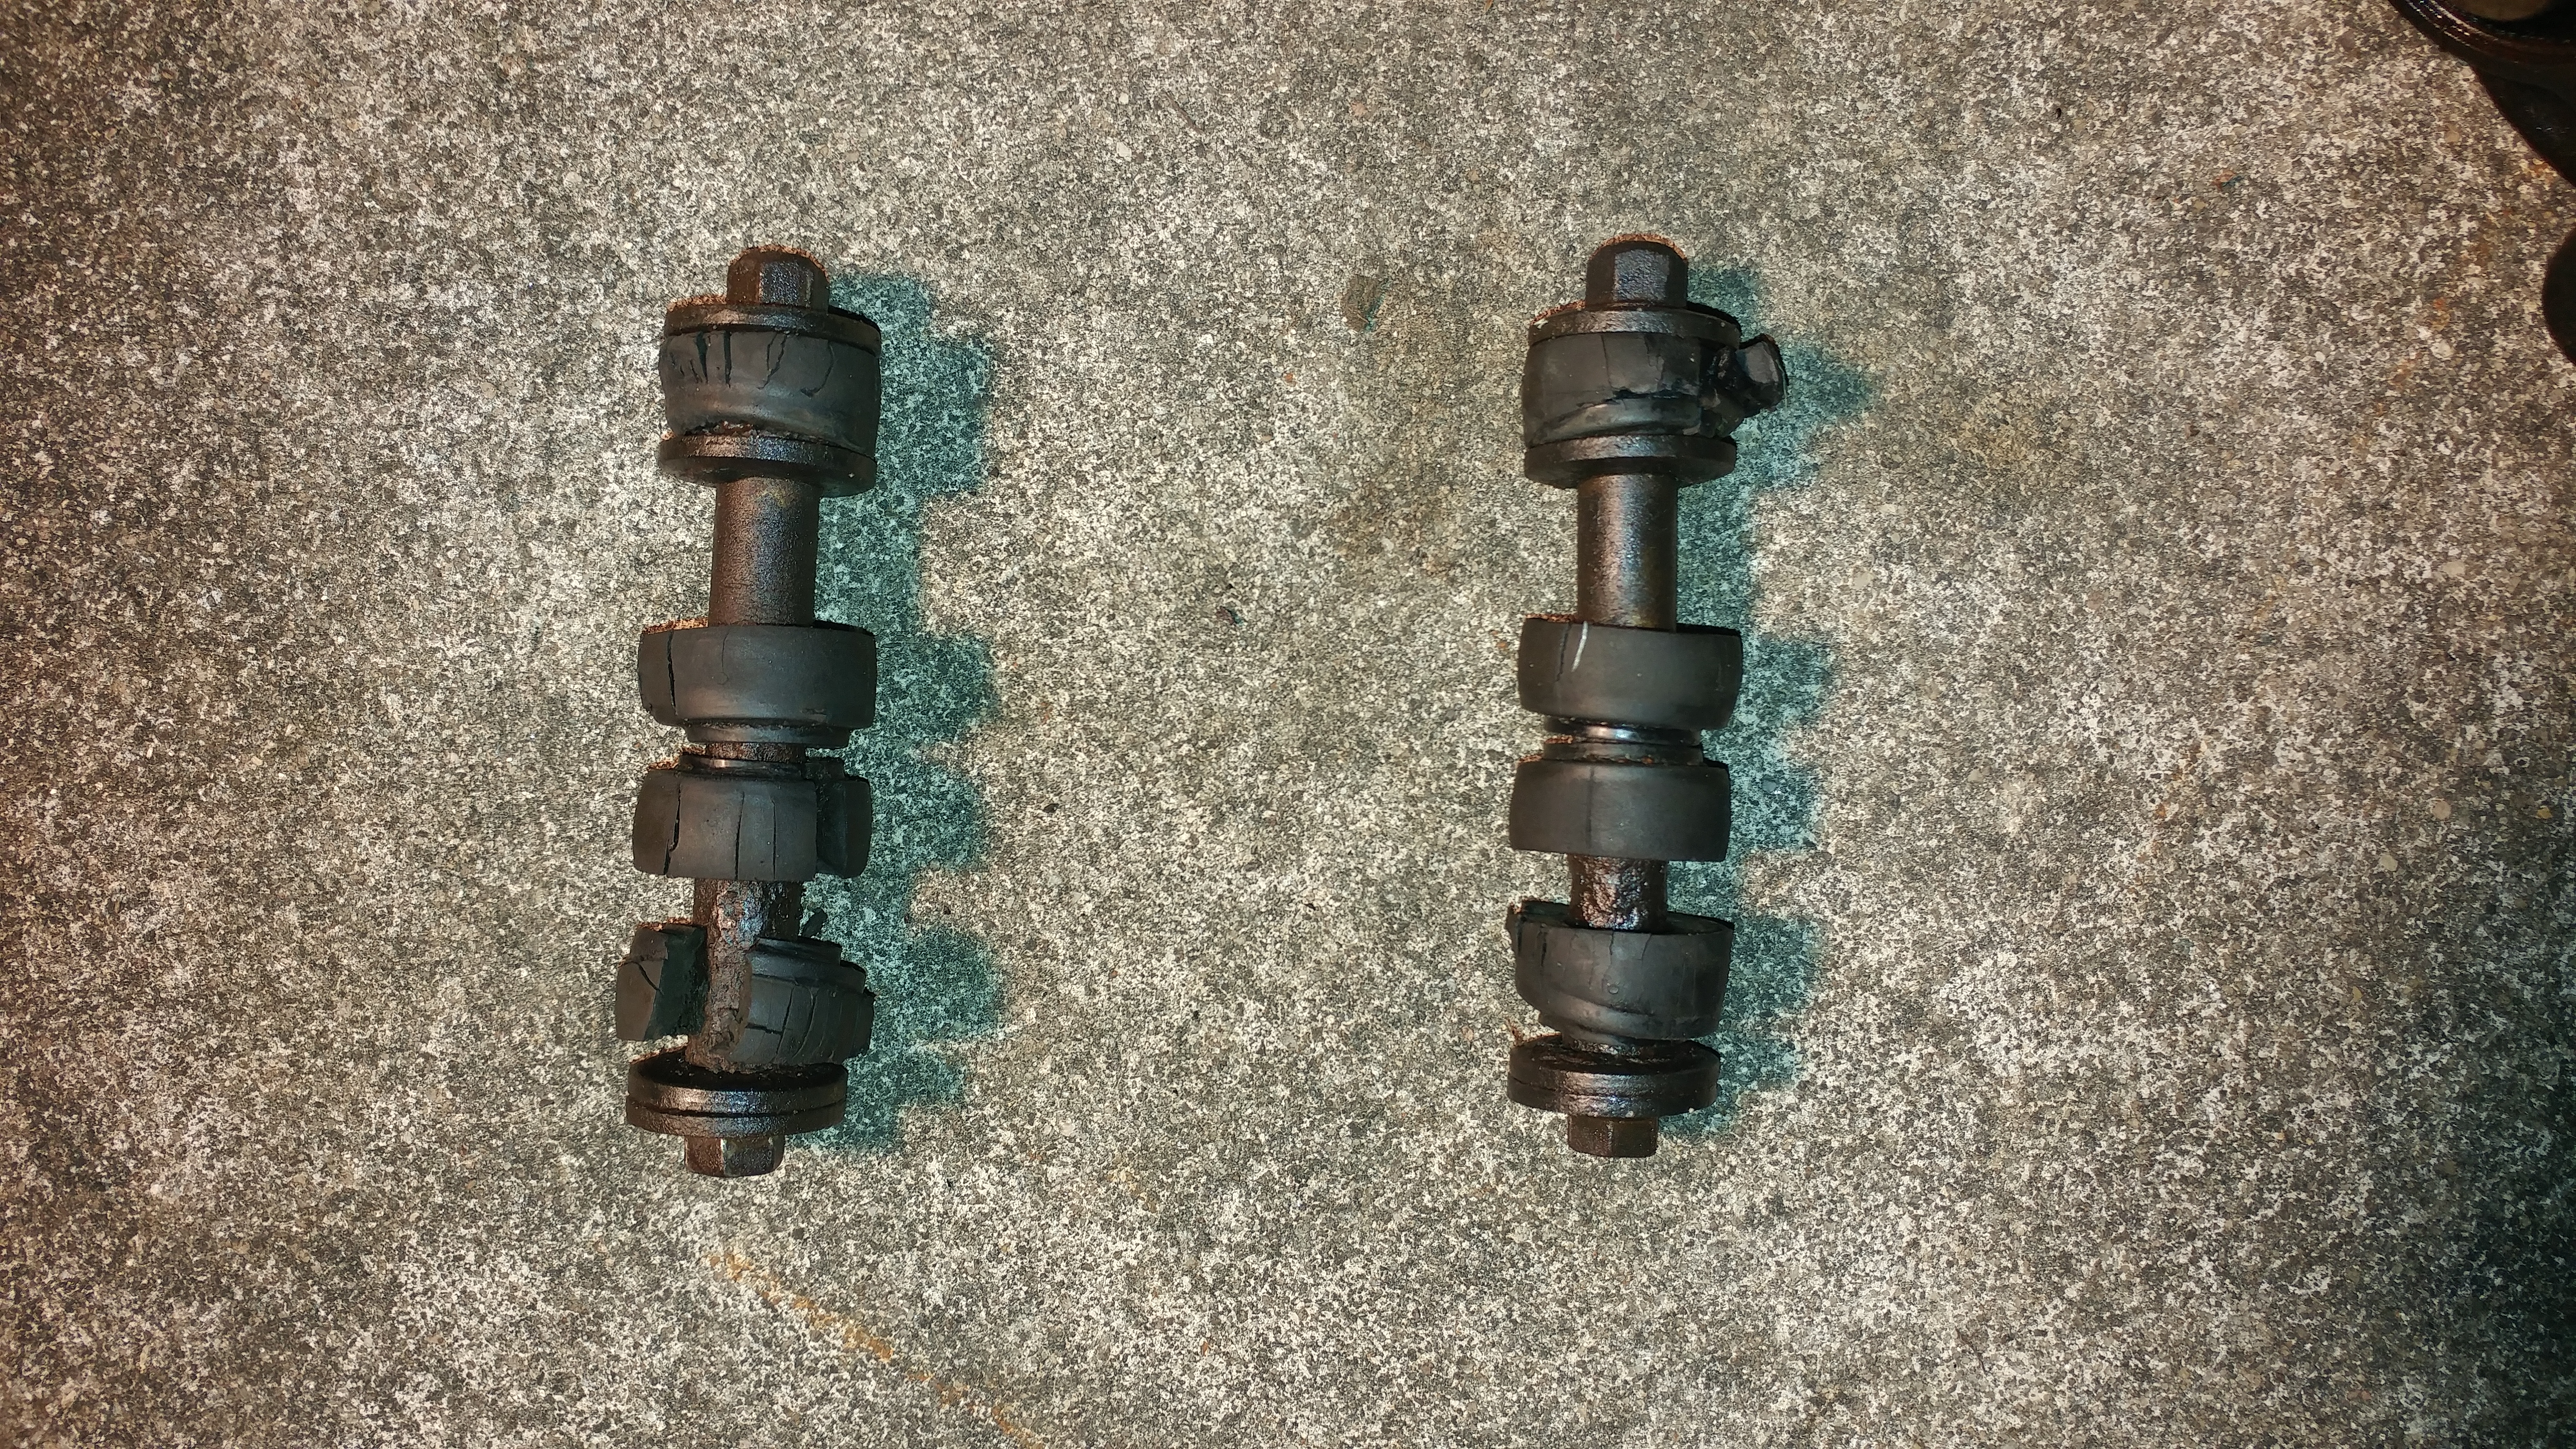
Got the rear upper arms and ball joints done. Really easy job. About 3 hours for both sides. Used a fork thing and a 5lb hammer and about 10-15 hard his to separate the ball joint from the knuckle.
Good thing I did this because those old ball joints flop around like a soft...male appendage...LOL.
Anyway. Didn't document much. But here ya go...
More like replacing an arm and ADDING a ball joint than replacing a arm and ball joint. lol

I'm gonna guess these are old 222,000 mile units. They had NO markings on them anywhere though.
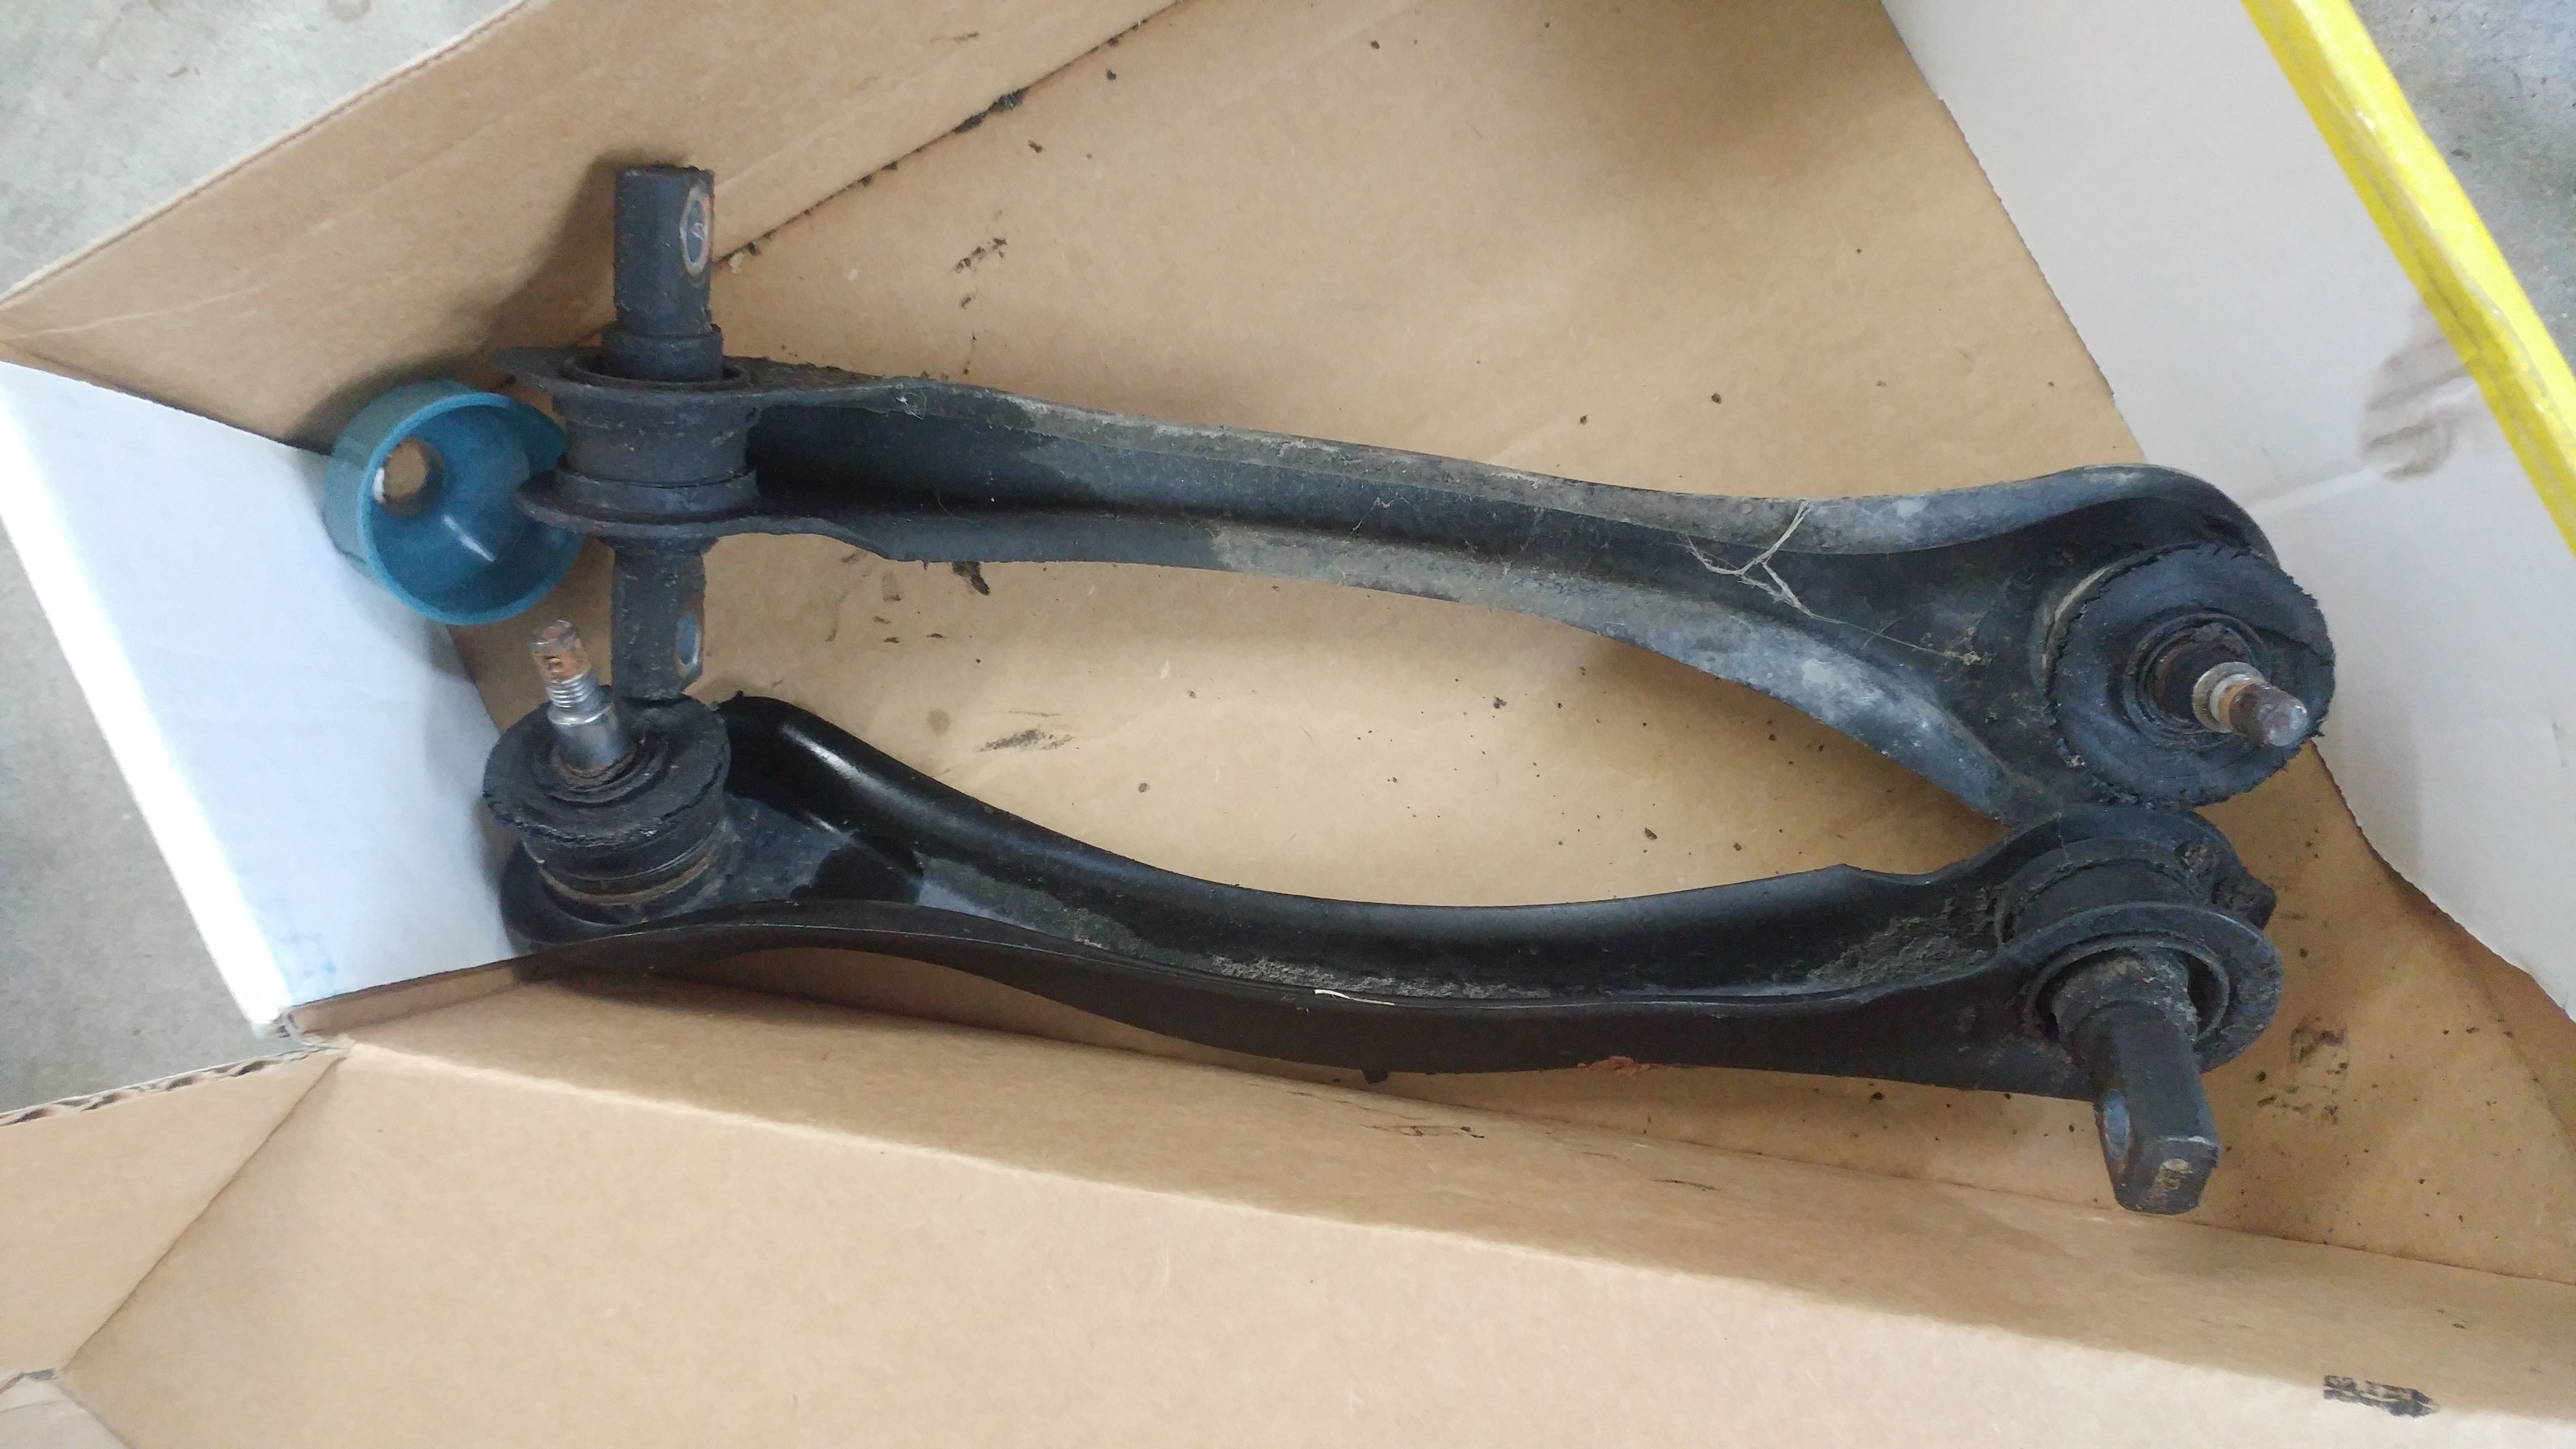
Good ole' double wishbone in all 4 corners! Like a Honda should be.

I've been in close contact with a wizard, lets call him, that my friend with the Integra track car and who has been lending his shop to me knows. He's built countless track Civics and a few TSXs and Accords. His personal TSX '06 6 speed has some really nicely set up suspension tweaks. It's nearly the Aspec set up but with some twists. He's going to assist me with doing the valve jobs and timing belt just because I'm trying to have the car done and ready by December 1st and I want those things done correctly without paying a shop labor.
When he heard I had a Vigor he was pretty ho-hum. Was willing and interested in doing the work and seeing the car. The man is in his 50's and said he remembers the Vigor well but just "forgot about them". I told him the story of the car and what I'm doing and he immediately asked for the part brands I'm using. Assured him with receipts it's all OEM Honda and highly reputable replacement parts and he was ecstatic!
I don't think he was expecting me to be so anal about the car. Profile the typical 21 year old kid with a "Honda" in my generation and you assume cut springs, light bars and the absolute cheapest ebay parts. He and I talked more about my car and my direction for it and it clicked to him that I was setting the car up for some mild autocross and street driving. He asked what suspension the Vigor used and requested pictures of the front and rear.
His reply to the pictures was simple: "there is a lot we can do with that car". This didn't surprise me but hearing it from him made it that much better. He asked about my racing experience and how I drive and handle speed and cornering. I told him I'm just an amateur, a beginner, but an aspiring HPDE/ NASA driver. He was concerned about what suspension and drop I was looking at doing and I told him Koni Yellow+Eibach Pro Springs and about 1"-1.8" drop. He was very pleased to hear that.
Pretty much to sum that story up is over our 30 minute phone call he went from "sure I can hep you with that" to "Hey, lets get this car set up right!". He's almost dying to meet the car and myself it feels like. It's wonderful knowing someone else is almost as crazy about the car as I am.
Next time, front end conversion!


Goal:
Got the rear upper arms and ball joints done. Really easy job. About 3 hours for both sides. Used a fork thing and a 5lb hammer and about 10-15 hard his to separate the ball joint from the knuckle.
Good thing I did this because those old ball joints flop around like a soft...male appendage...LOL.
Anyway. Didn't document much. But here ya go...
More like replacing an arm and ADDING a ball joint than replacing a arm and ball joint. lol
I'm gonna guess these are old 222,000 mile units. They had NO markings on them anywhere though.
Good ole' double wishbone in all 4 corners! Like a Honda should be.
I've been in close contact with a wizard, lets call him, that my friend with the Integra track car and who has been lending his shop to me knows. He's built countless track Civics and a few TSXs and Accords. His personal TSX '06 6 speed has some really nicely set up suspension tweaks. It's nearly the Aspec set up but with some twists. He's going to assist me with doing the valve jobs and timing belt just because I'm trying to have the car done and ready by December 1st and I want those things done correctly without paying a shop labor.
When he heard I had a Vigor he was pretty ho-hum. Was willing and interested in doing the work and seeing the car. The man is in his 50's and said he remembers the Vigor well but just "forgot about them". I told him the story of the car and what I'm doing and he immediately asked for the part brands I'm using. Assured him with receipts it's all OEM Honda and highly reputable replacement parts and he was ecstatic!
I don't think he was expecting me to be so anal about the car. Profile the typical 21 year old kid with a "Honda" in my generation and you assume cut springs, light bars and the absolute cheapest ebay parts. He and I talked more about my car and my direction for it and it clicked to him that I was setting the car up for some mild autocross and street driving. He asked what suspension the Vigor used and requested pictures of the front and rear.
His reply to the pictures was simple: "there is a lot we can do with that car". This didn't surprise me but hearing it from him made it that much better. He asked about my racing experience and how I drive and handle speed and cornering. I told him I'm just an amateur, a beginner, but an aspiring HPDE/ NASA driver. He was concerned about what suspension and drop I was looking at doing and I told him Koni Yellow+Eibach Pro Springs and about 1"-1.8" drop. He was very pleased to hear that.
Pretty much to sum that story up is over our 30 minute phone call he went from "sure I can hep you with that" to "Hey, lets get this car set up right!". He's almost dying to meet the car and myself it feels like. It's wonderful knowing someone else is almost as crazy about the car as I am.
Next time, front end conversion!
Goal:
Last edited by Timmy18; 09-23-2017 at 01:54 AM.
09-23-2017, 01:52 AM
#47
Burning Brakes
Thread Starter
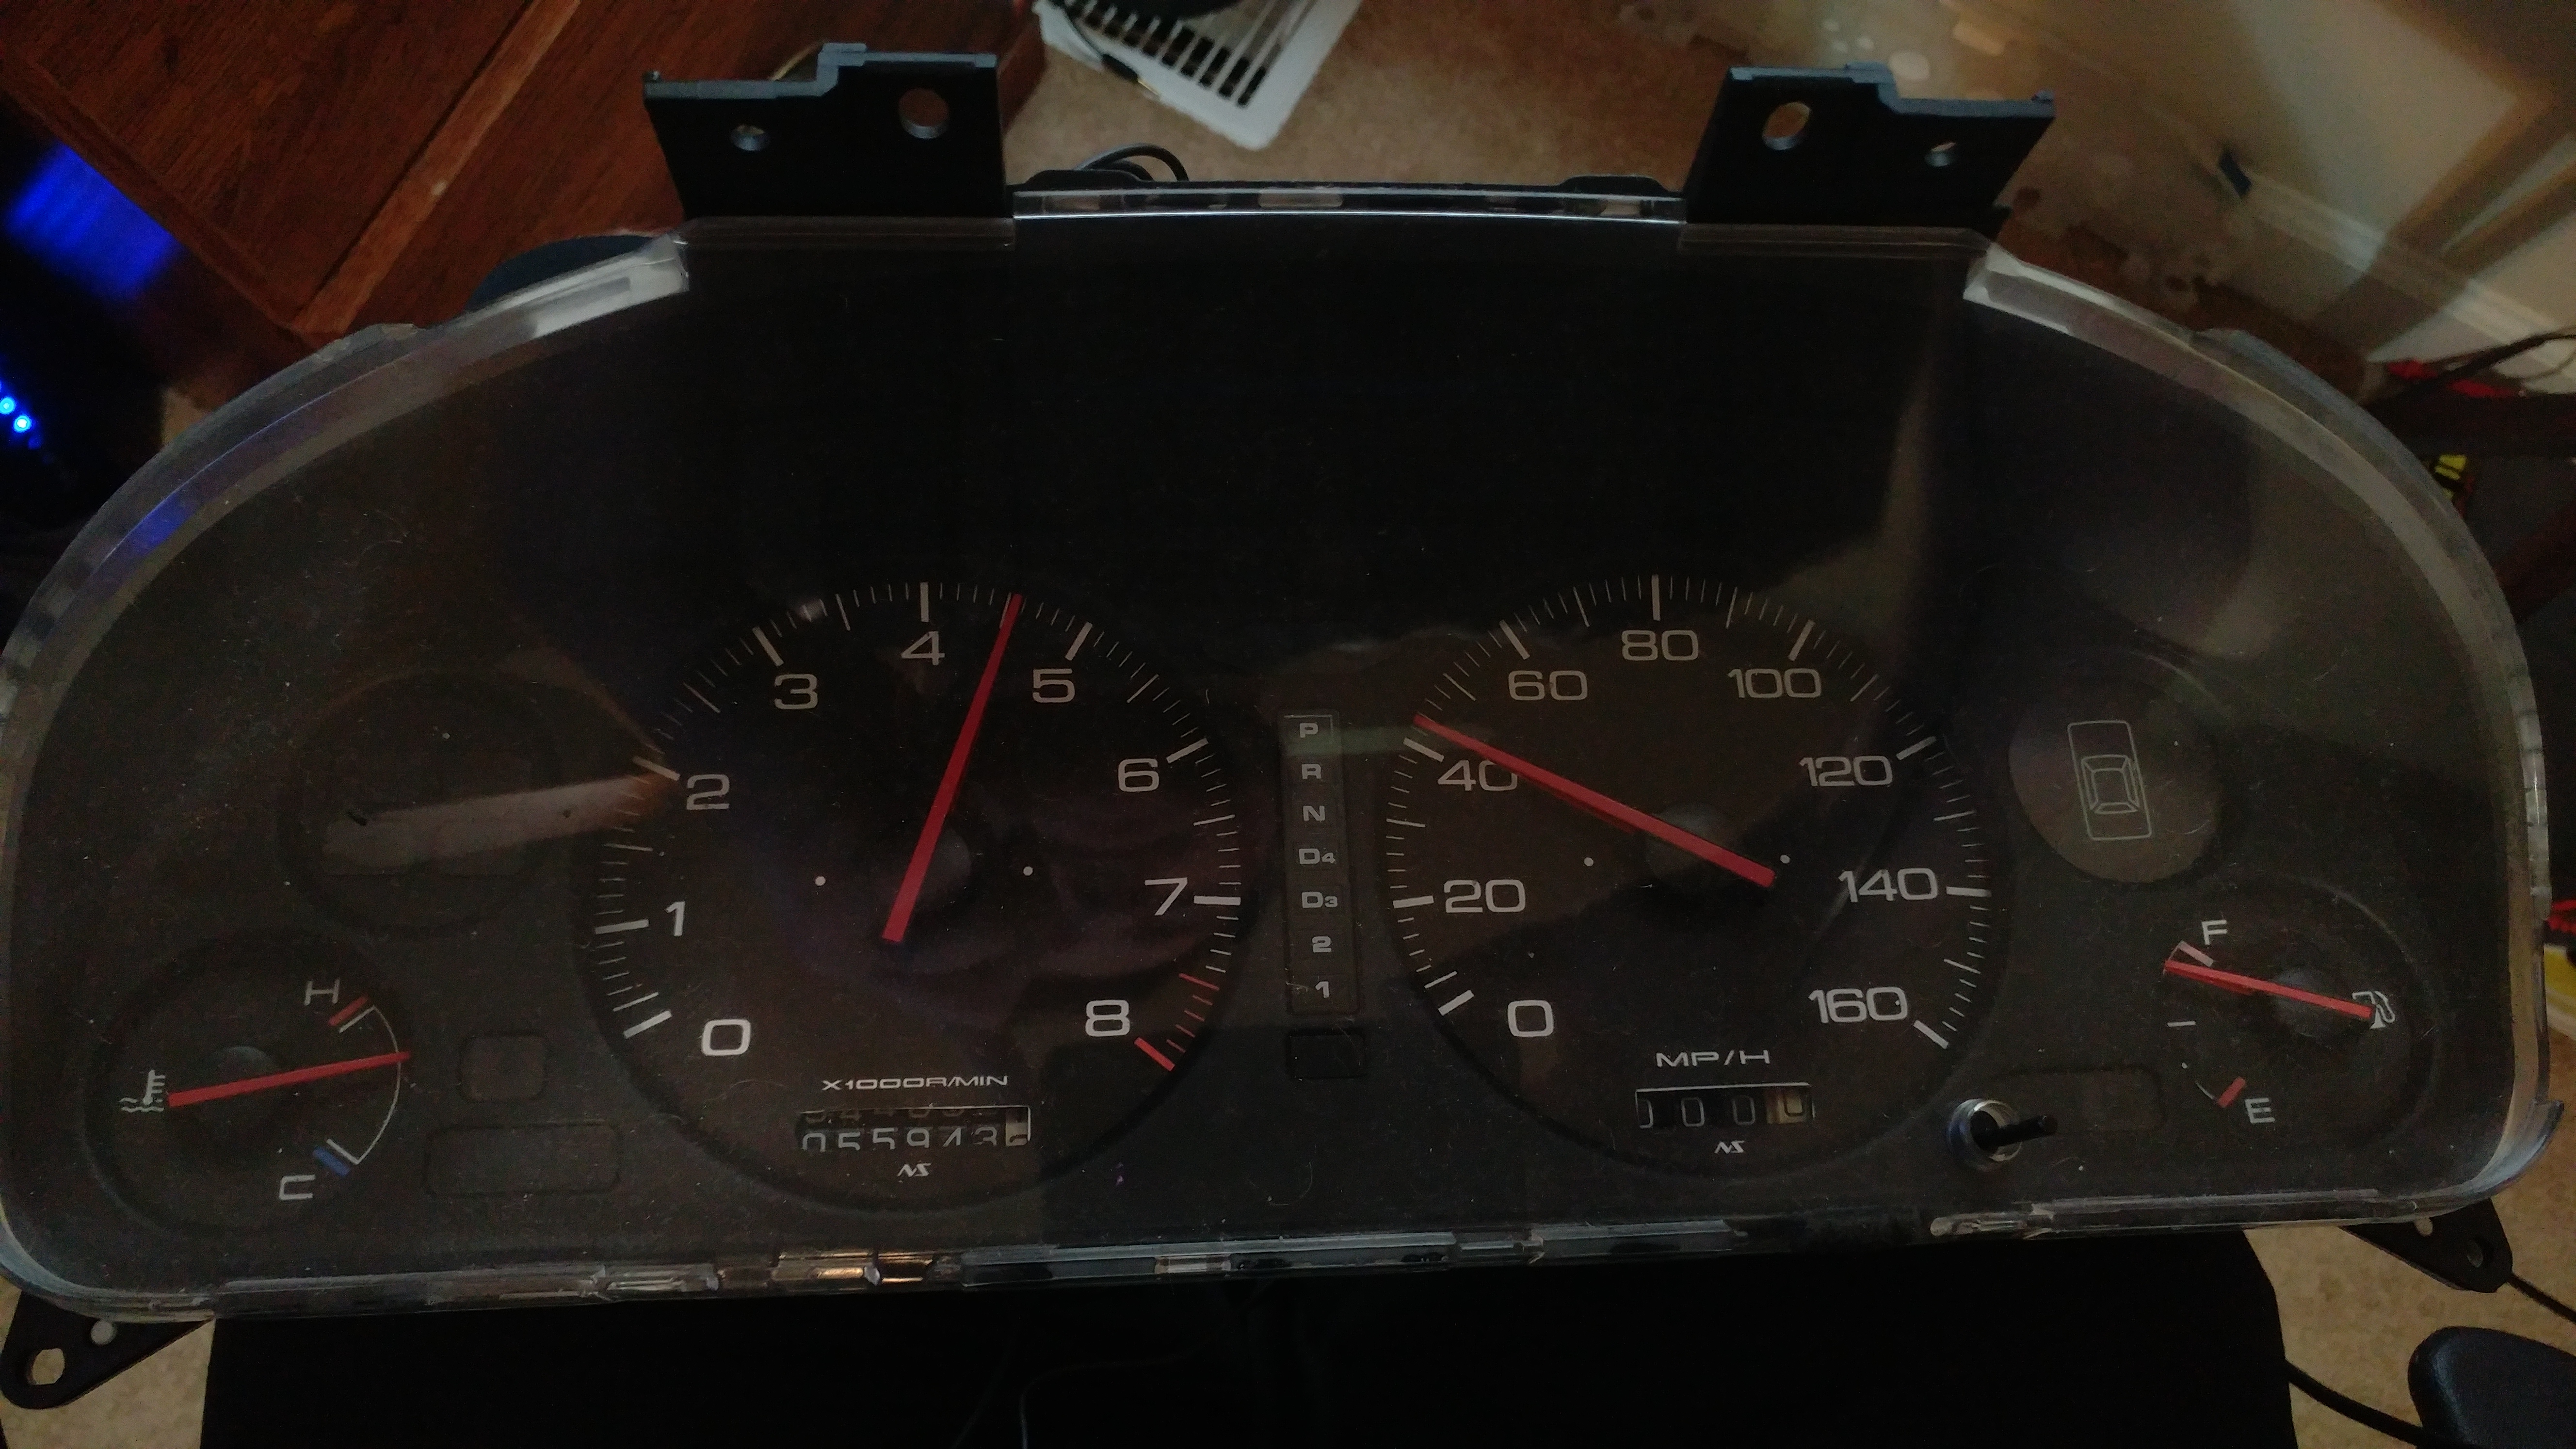
Also the gauges will only light up yellow. It's because the gauge faces aren't like other faces where you can sand away or use rubbing alcohol to remove the colorized film. Instead Honda decided to inject amber colored plastic into the clear plastic behind the white face areas. Also those gauge needles are extremely hard to remove and the stepper motors are very delicate. Luckily this is a pare JDM cluster I experimented on. Was still $150 shipped from overseas.
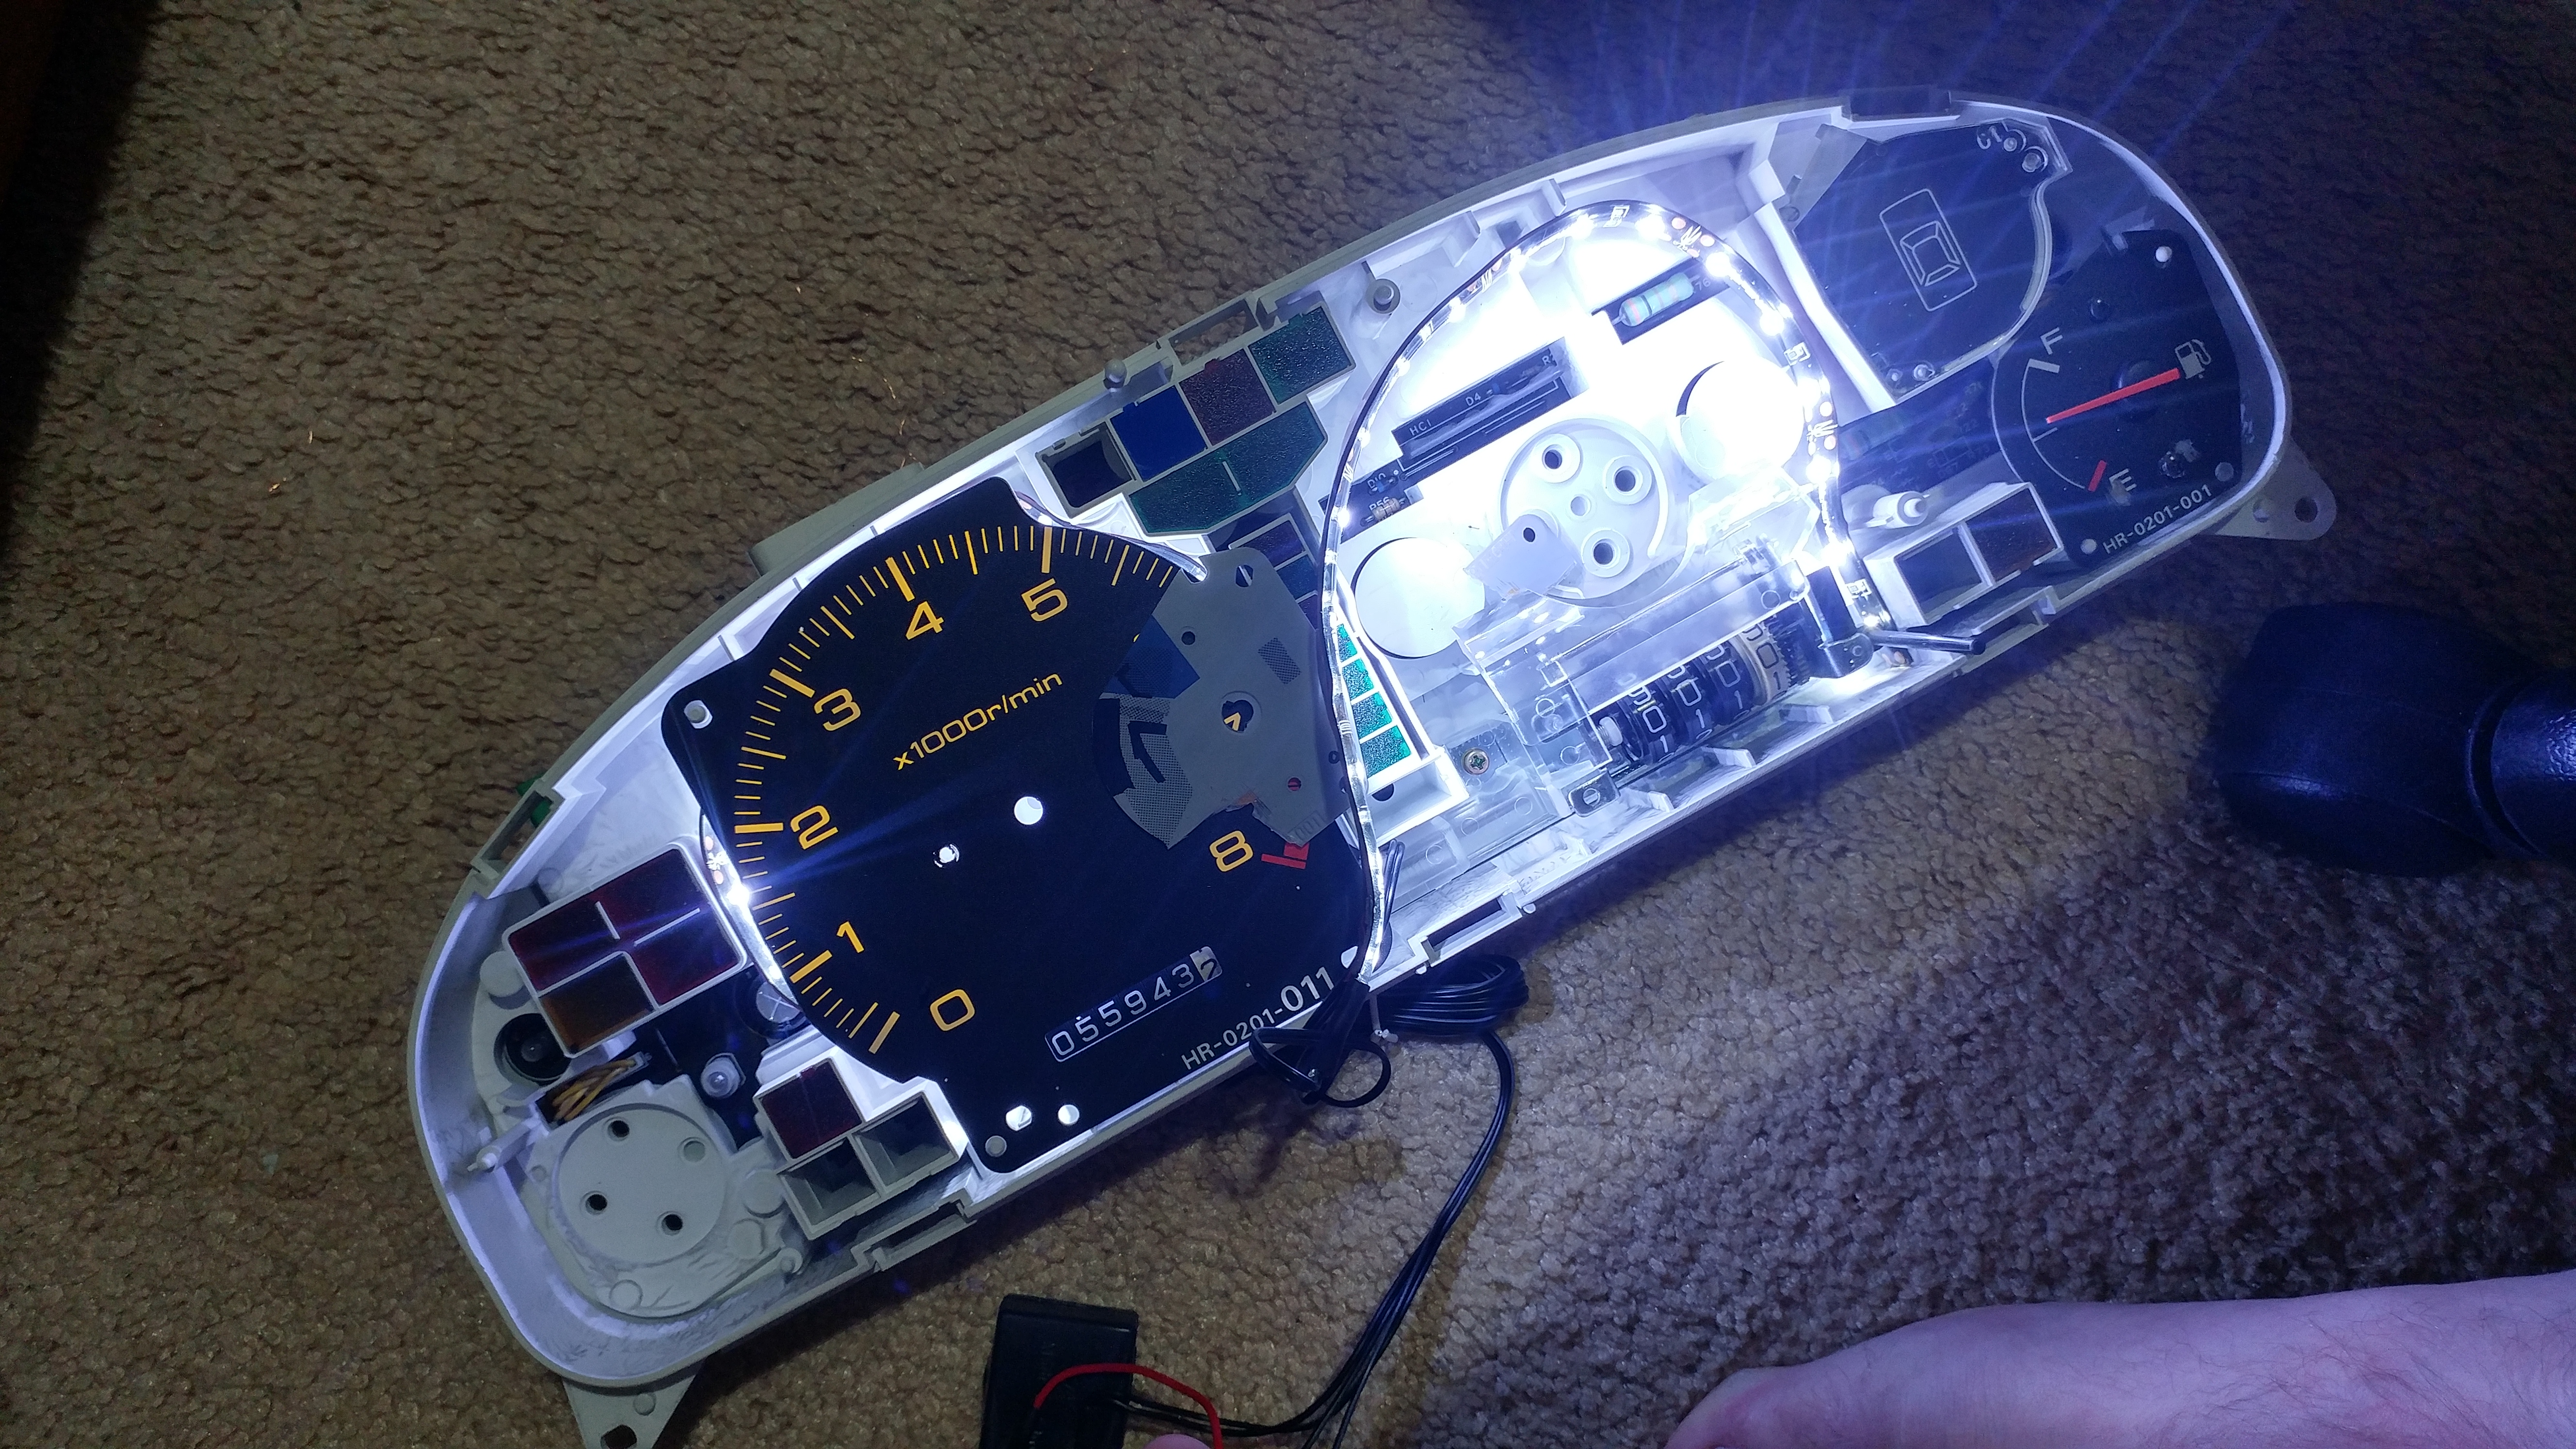

Doesn't look so bad but it's not my goal.

So I'll be scanning the gauge faces, doing some photo editing and printing new faces out on clear printer sheets in layers, divided by color and shadowing to give depth and sharpness. Going to laminate the layers together and glue them to a clear plastic slab that will replace the entire OEM gauge faces.
Doesn't look so bad but it's not my goal.
So I'll be scanning the gauge faces, doing some photo editing and printing new faces out on clear printer sheets in layers, divided by color and shadowing to give depth and sharpness. Going to laminate the layers together and glue them to a clear plastic slab that will replace the entire OEM gauge faces.
The following users liked this post:
Ken1997TL (01-25-2018)
09-23-2017, 09:36 PM
#48
Burning Brakes
Thread Starter
9/23/17
I'm not wasting no time!
Scanned 2 of the 4 gauge faces into photoshop (gimp2.8 as always!) and cleaned them up. Made some adjustments to the font and redline.
What I did was a colorless base layer on regular white paper to diffuse the light followed by 4 layers of the same print but with color on the clear sheets. The 4 layers insures sharpness when they all are aligned perfectly while giving the numbers and ticks some added depth! The results are sharp, OEM looking faces with a twist.
They do have that printer ink tint to them, meaning when the light hits it just right on the glossy black surfaces they have a deep purple-ish tint. Not a big deal seeing as how the cluster is buried into the dash and normally shadowed.

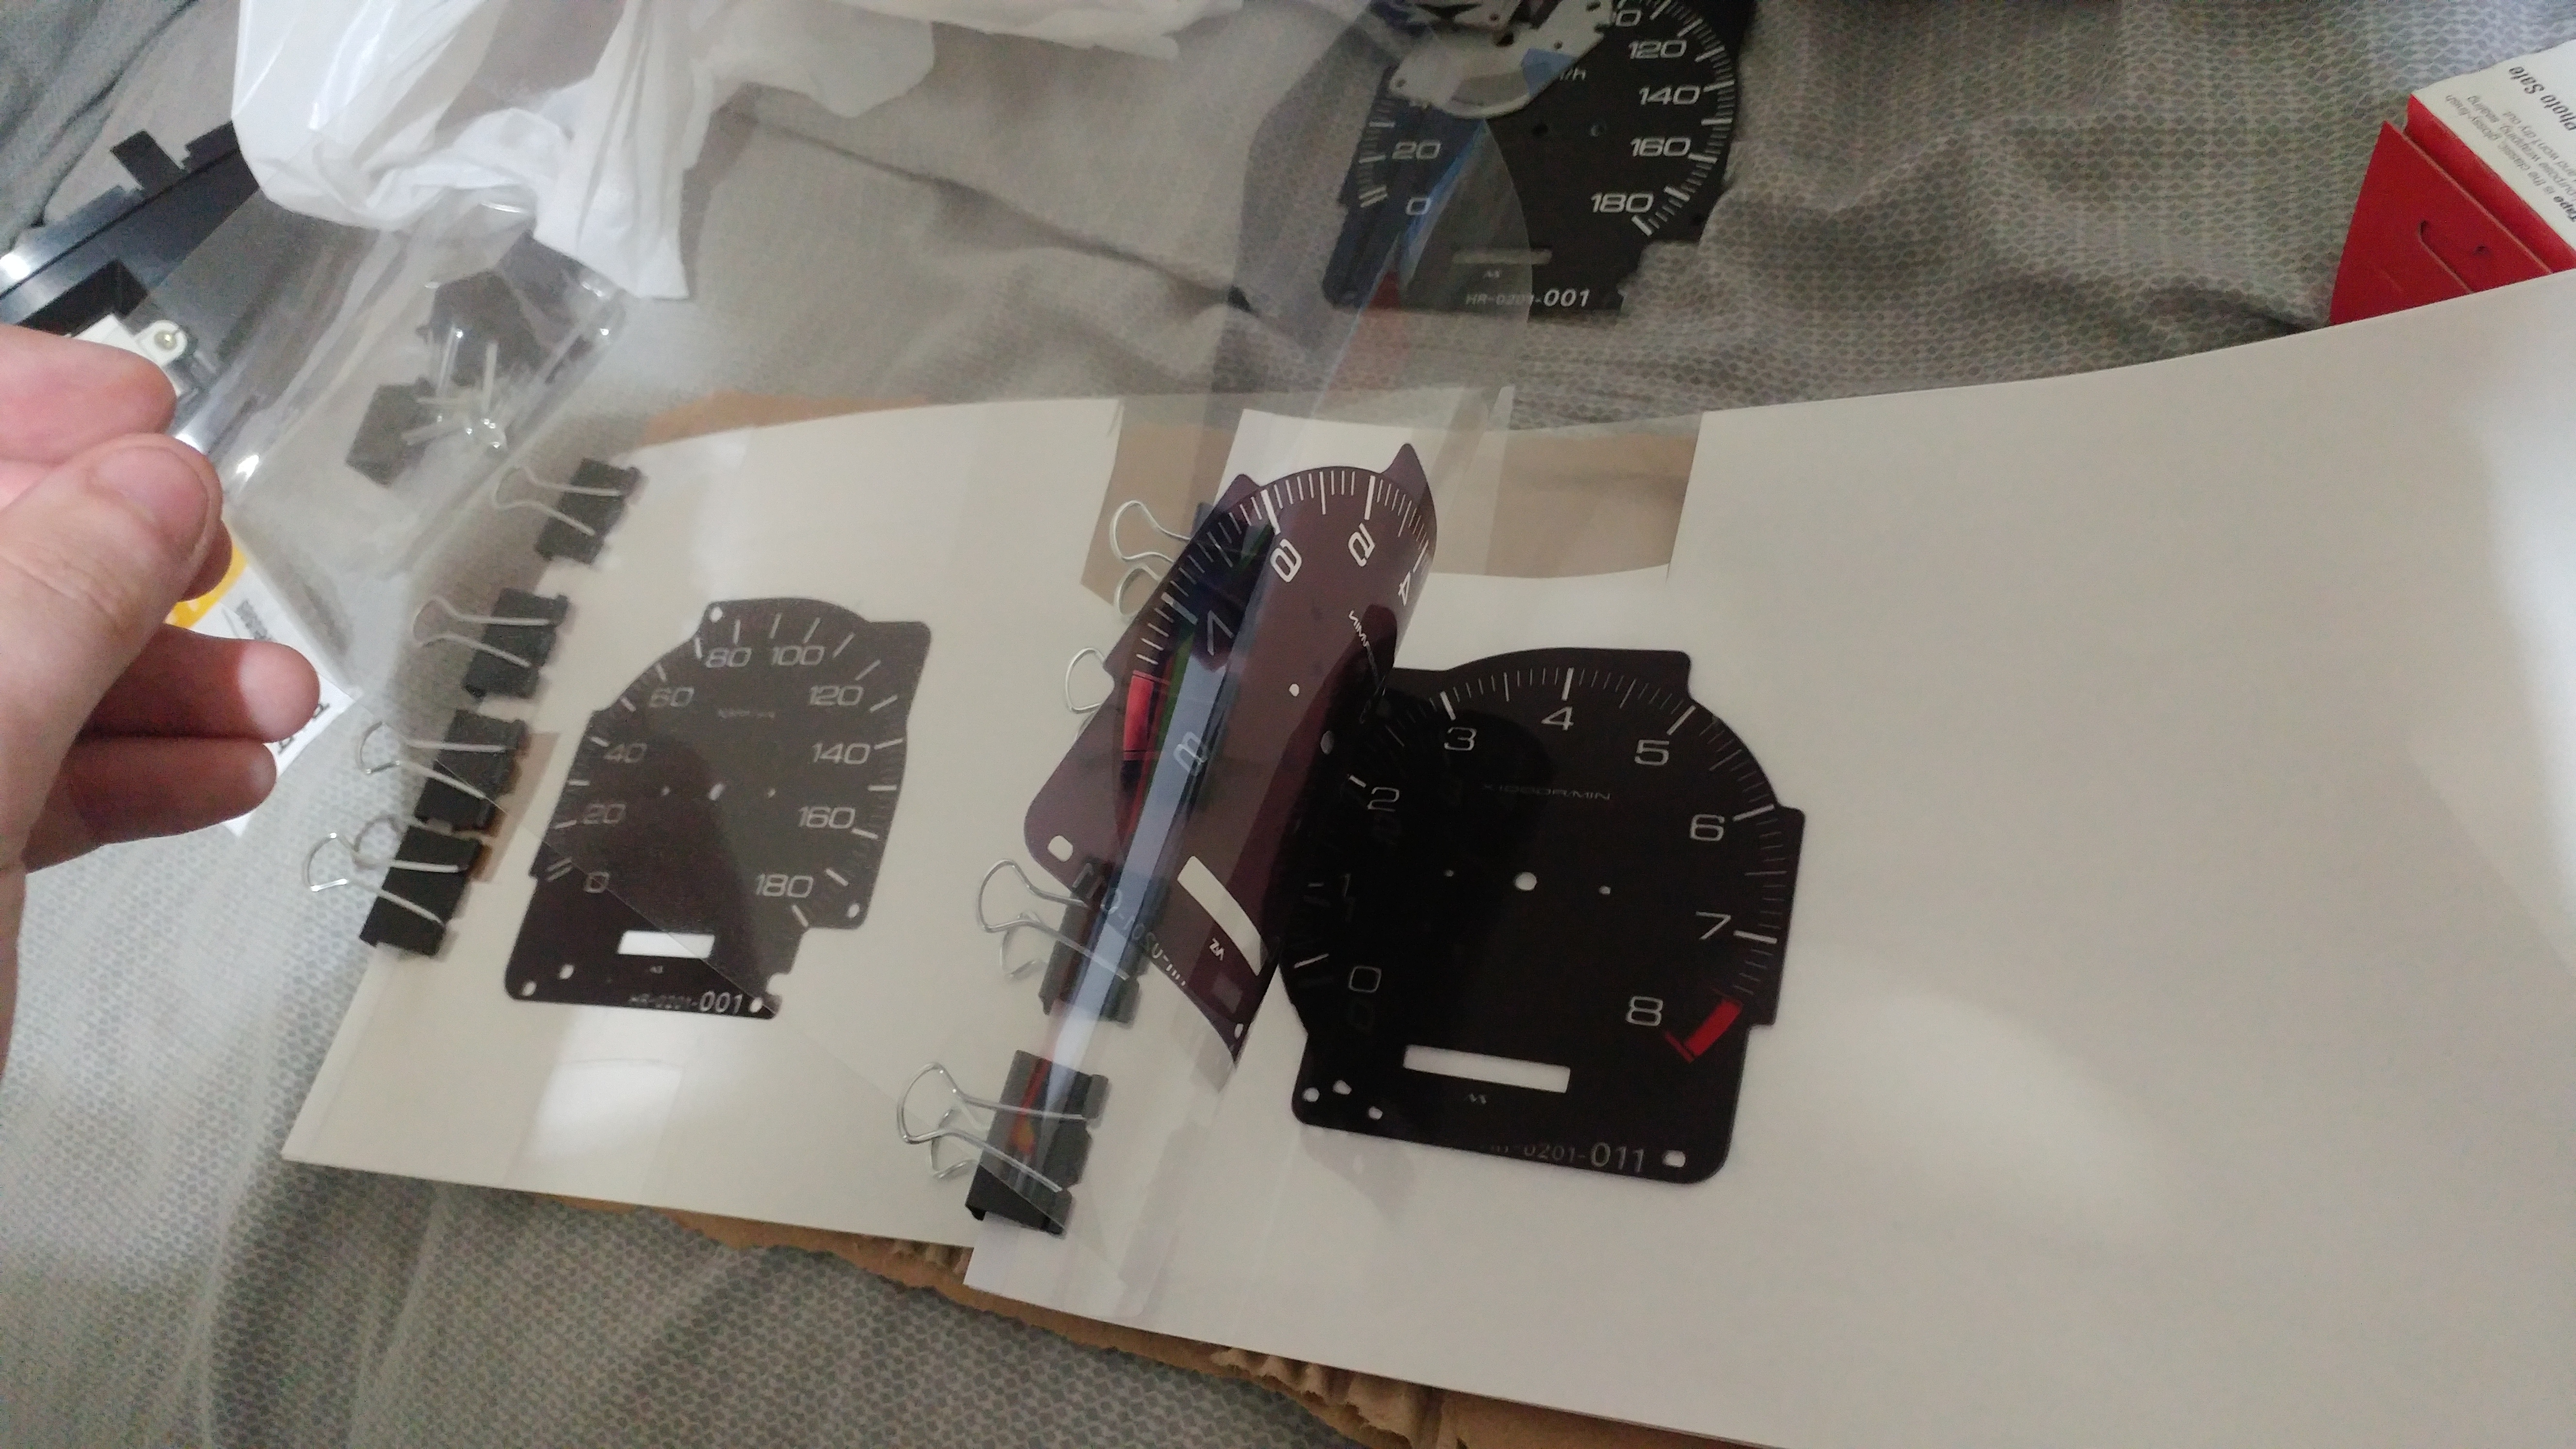
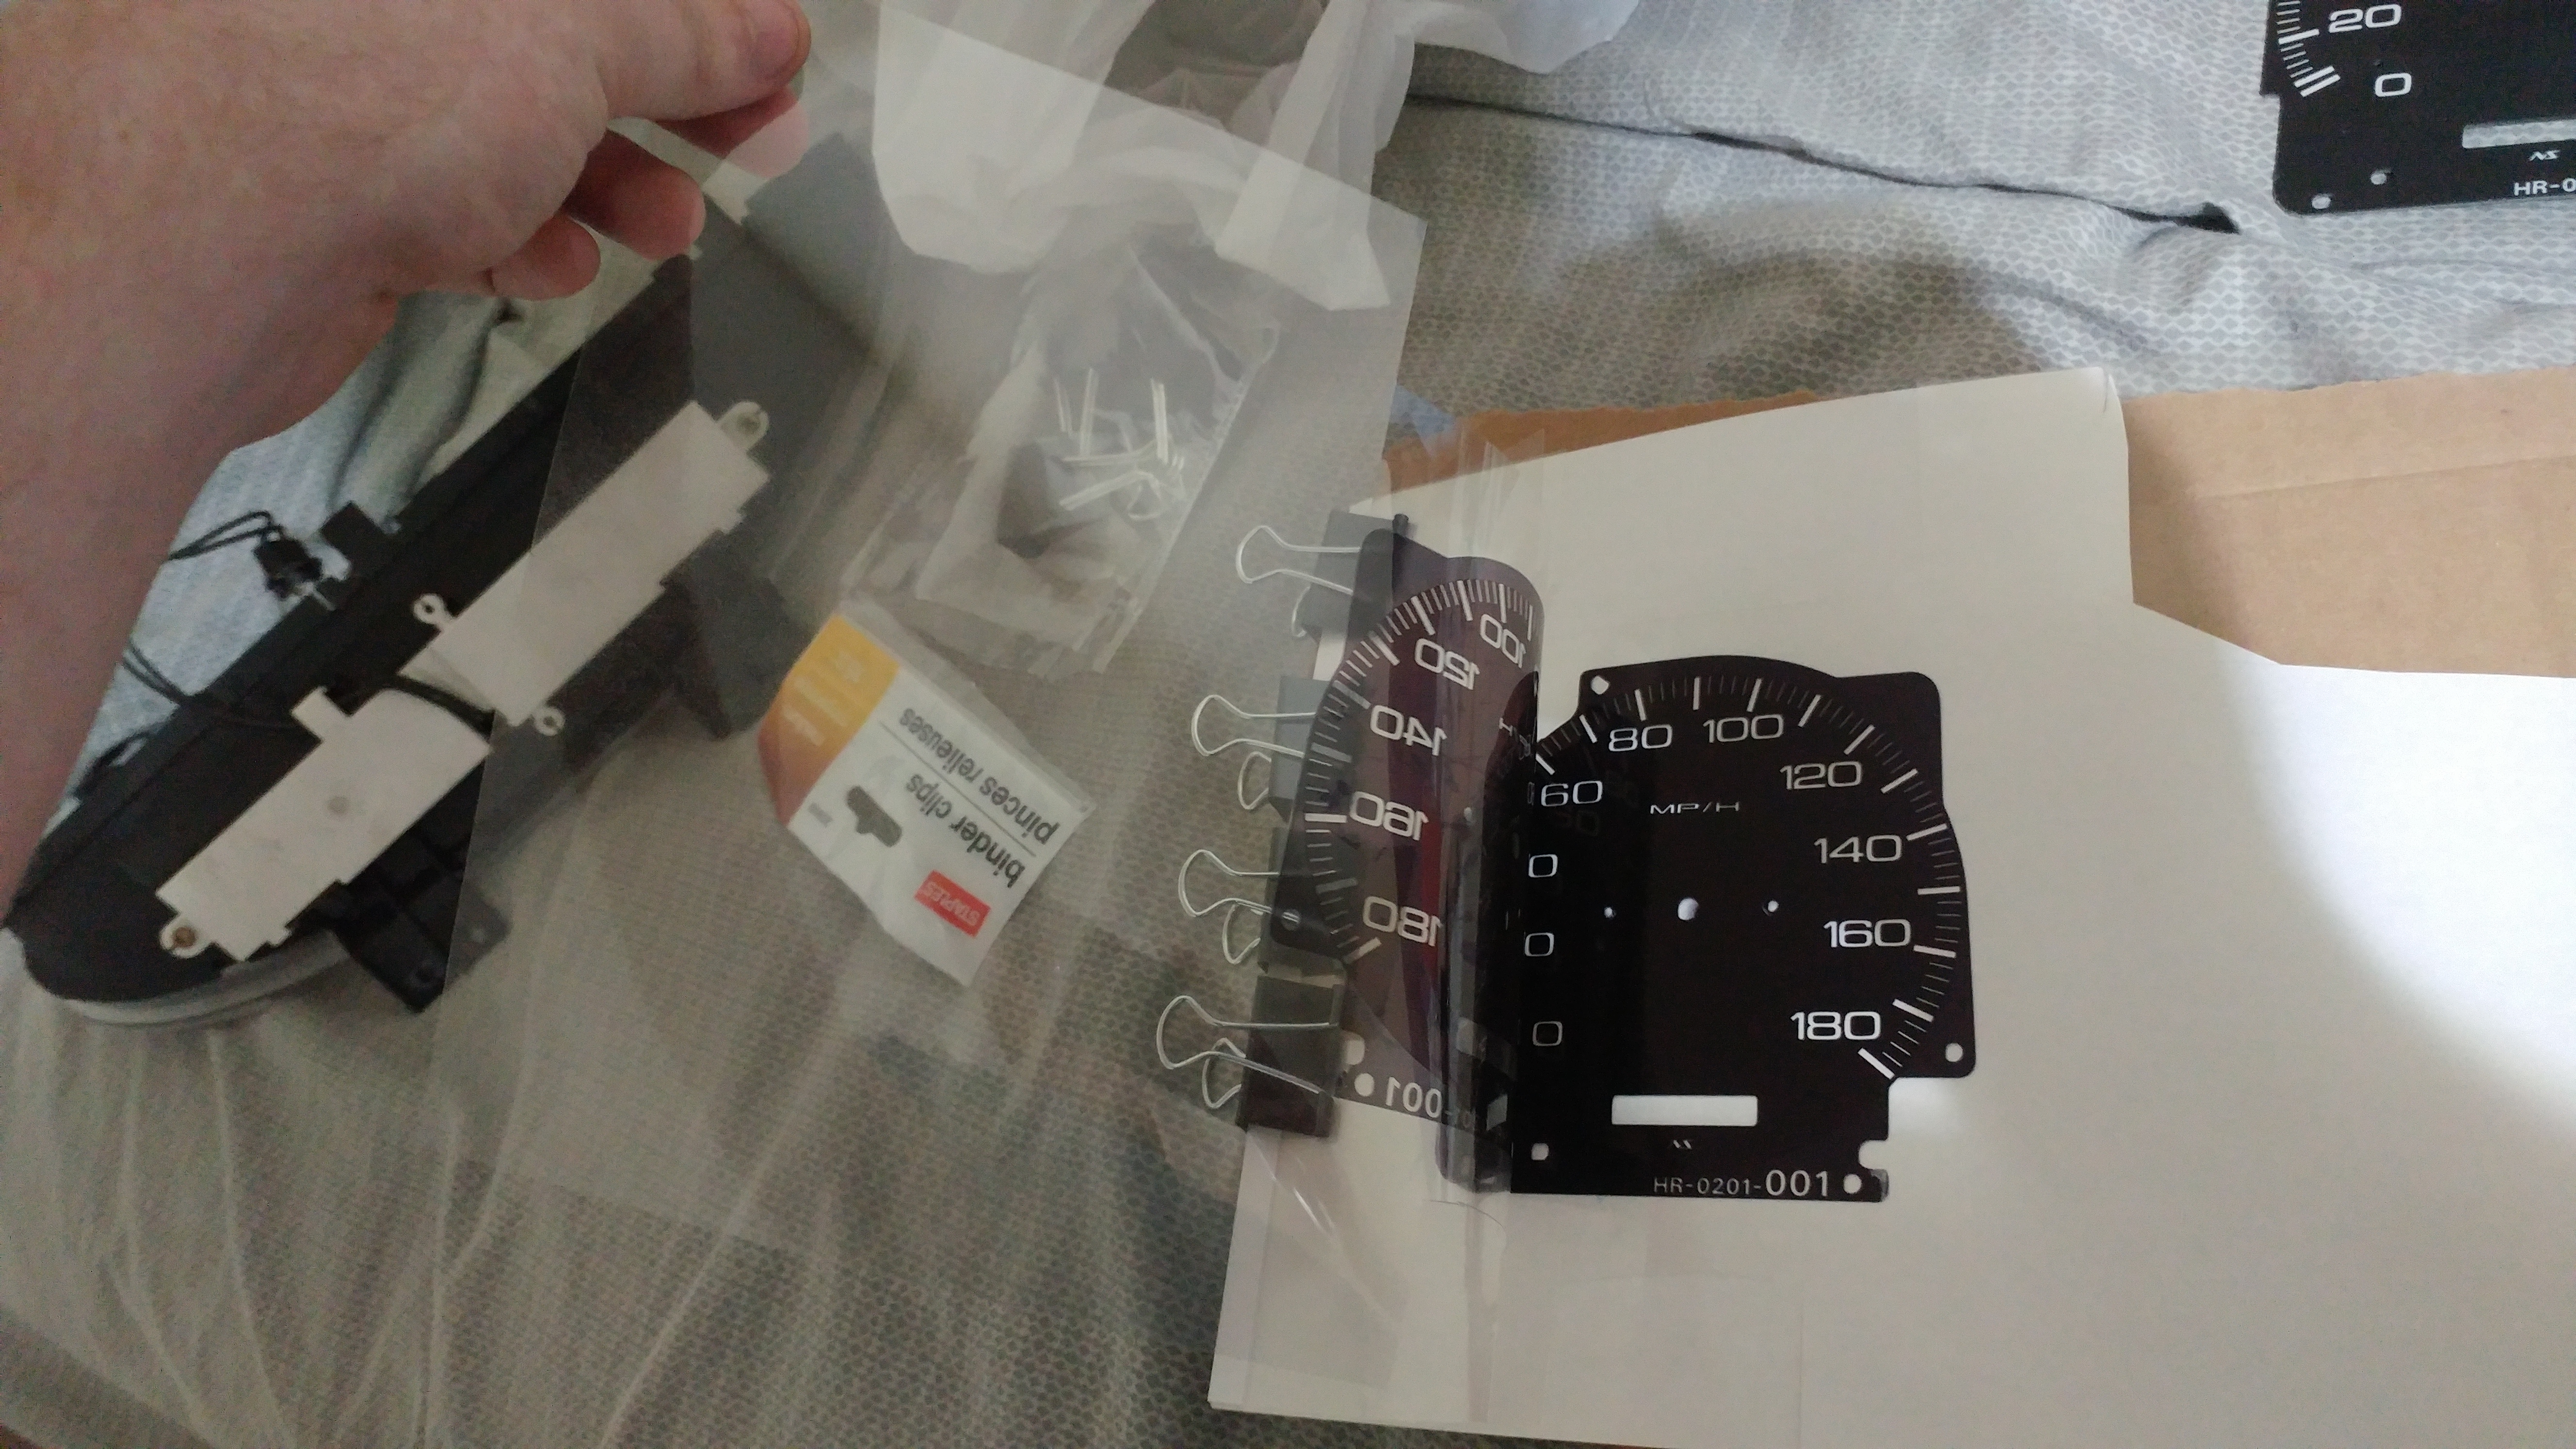
I still have to scan and edit the 2 other gauges and glue all the layers together with a spray adhesive. Then I will glue them to a crystal clear plate of plastic for rigidity so they don't warp in the head or move inside the gauges. I also have some colored filter paper I might use instead of adding blue and red LEDs for the red and blues. I'll experiment on that more later.
Don't bother me about the higher redline! It looks sportier and with the future plan of a:
custom cam,
slightly higher compression ratio pistons,
custom exhaust manifold,
tune on a standalone ECU with the coil on plug ignition,
..it will get there!
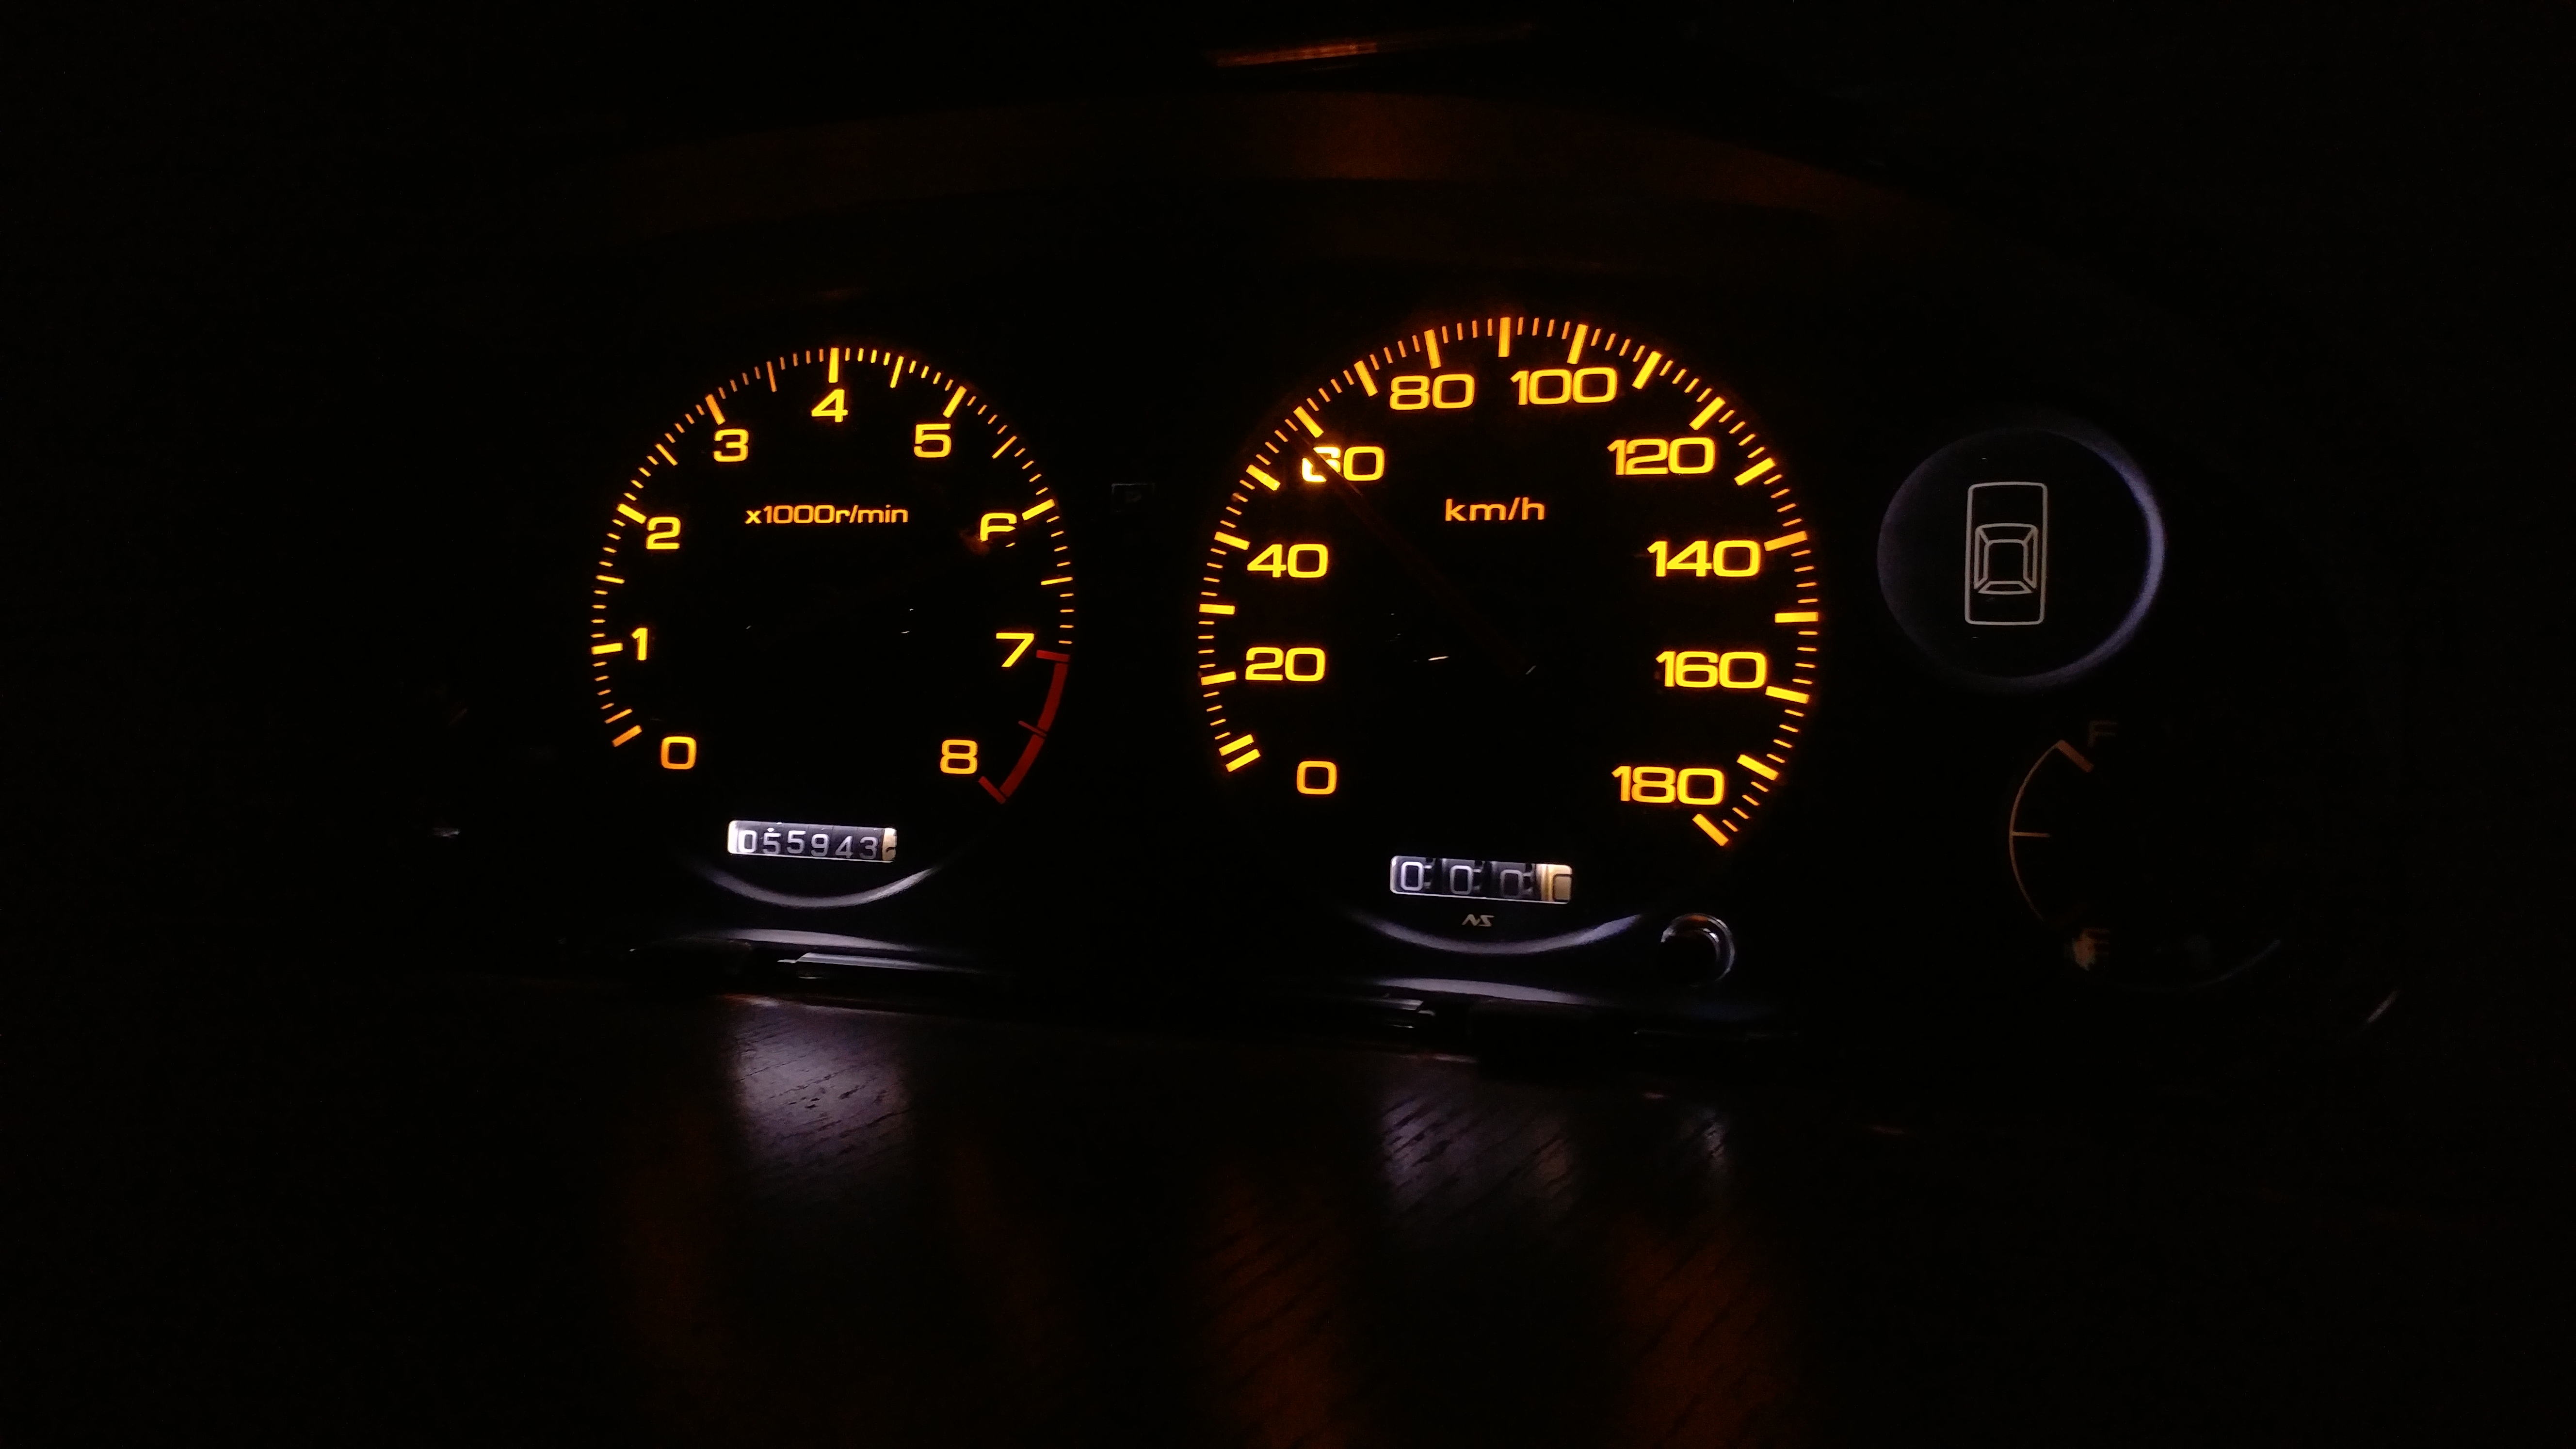
And for those of you wondering why 180mph.... well, just because! <b> </b> In use will be a converter to correct the speed. If plopped into the car right now, 60mph will read 100 on the face. A simple pulse adjuster can be built or bought to modify and correct the signal so that 60mph reads 60 on the face.
I'm not wasting no time!
Scanned 2 of the 4 gauge faces into photoshop (gimp2.8 as always!) and cleaned them up. Made some adjustments to the font and redline.
What I did was a colorless base layer on regular white paper to diffuse the light followed by 4 layers of the same print but with color on the clear sheets. The 4 layers insures sharpness when they all are aligned perfectly while giving the numbers and ticks some added depth! The results are sharp, OEM looking faces with a twist.
They do have that printer ink tint to them, meaning when the light hits it just right on the glossy black surfaces they have a deep purple-ish tint. Not a big deal seeing as how the cluster is buried into the dash and normally shadowed.
I still have to scan and edit the 2 other gauges and glue all the layers together with a spray adhesive. Then I will glue them to a crystal clear plate of plastic for rigidity so they don't warp in the head or move inside the gauges. I also have some colored filter paper I might use instead of adding blue and red LEDs for the red and blues. I'll experiment on that more later.
Don't bother me about the higher redline! It looks sportier and with the future plan of a:
custom cam,
slightly higher compression ratio pistons,
custom exhaust manifold,
tune on a standalone ECU with the coil on plug ignition,
..it will get there!
And for those of you wondering why 180mph.... well, just because! <b>
</b> In use will be a converter to correct the speed. If plopped into the car right now, 60mph will read 100 on the face. A simple pulse adjuster can be built or bought to modify and correct the signal so that 60mph reads 60 on the face.
The following users liked this post:
Ken1997TL (01-25-2018)
09-25-2017, 11:46 PM
#49
Burning Brakes
Thread Starter
9/26/17
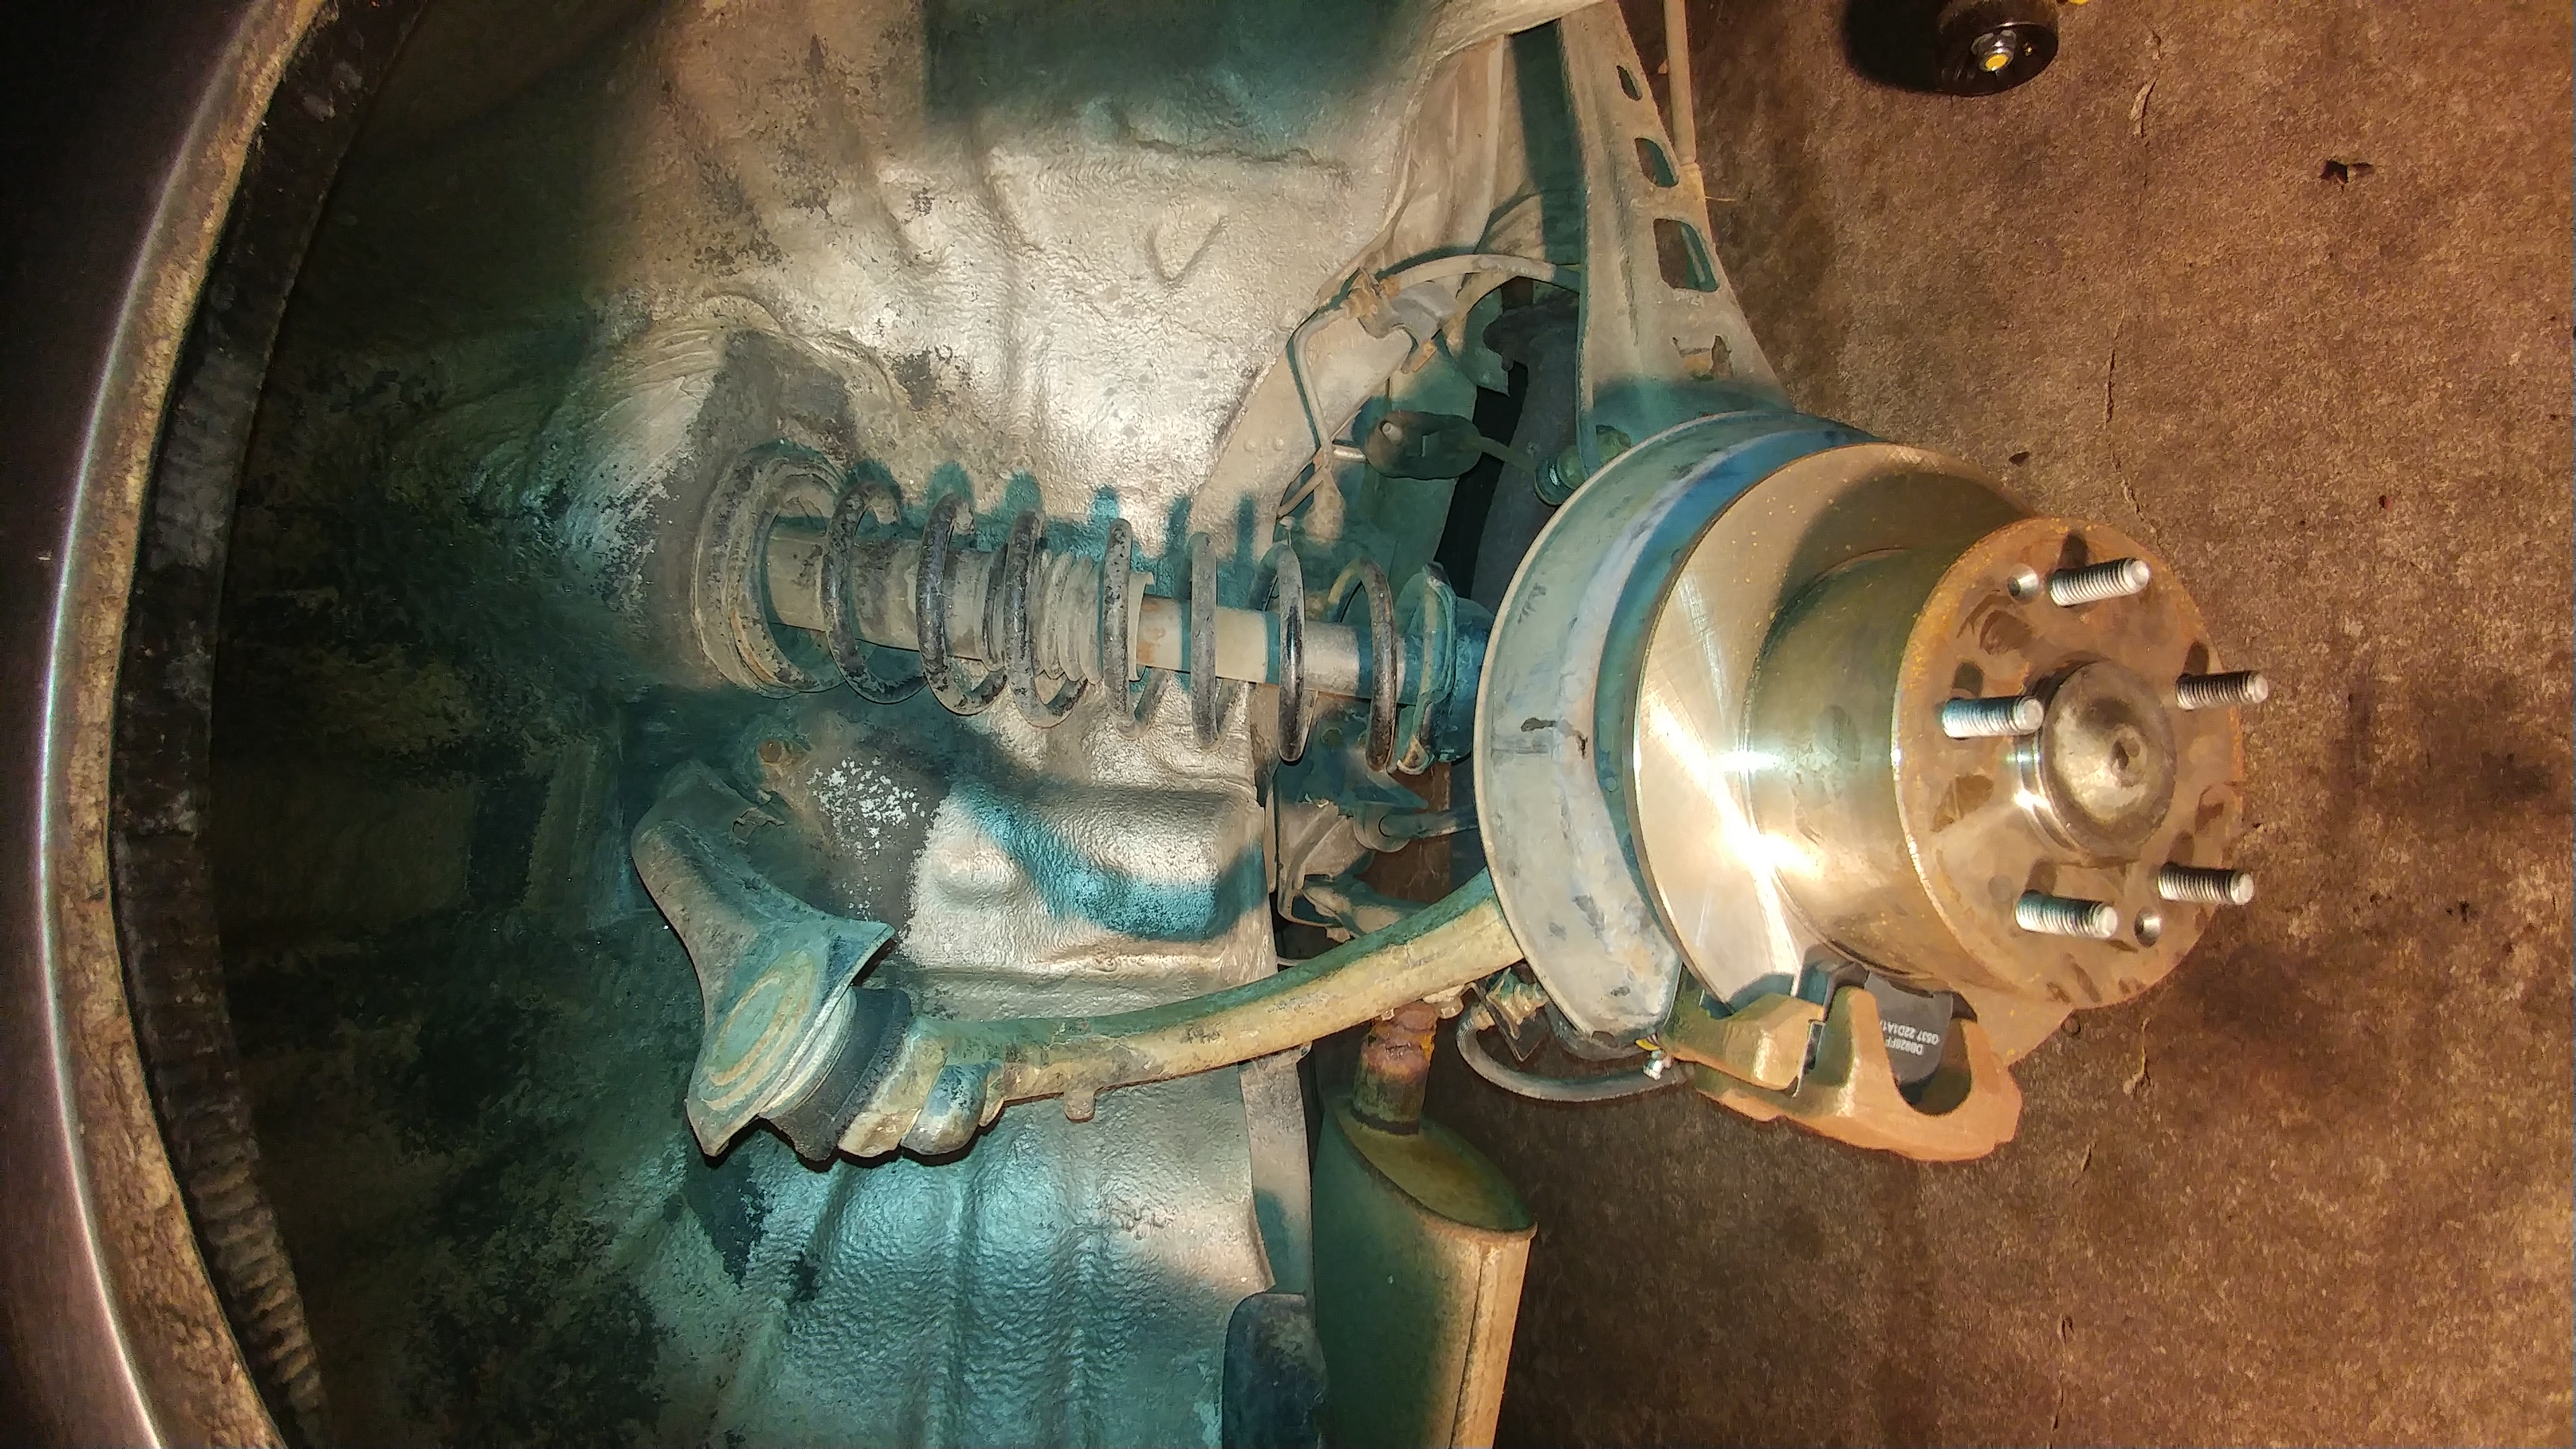
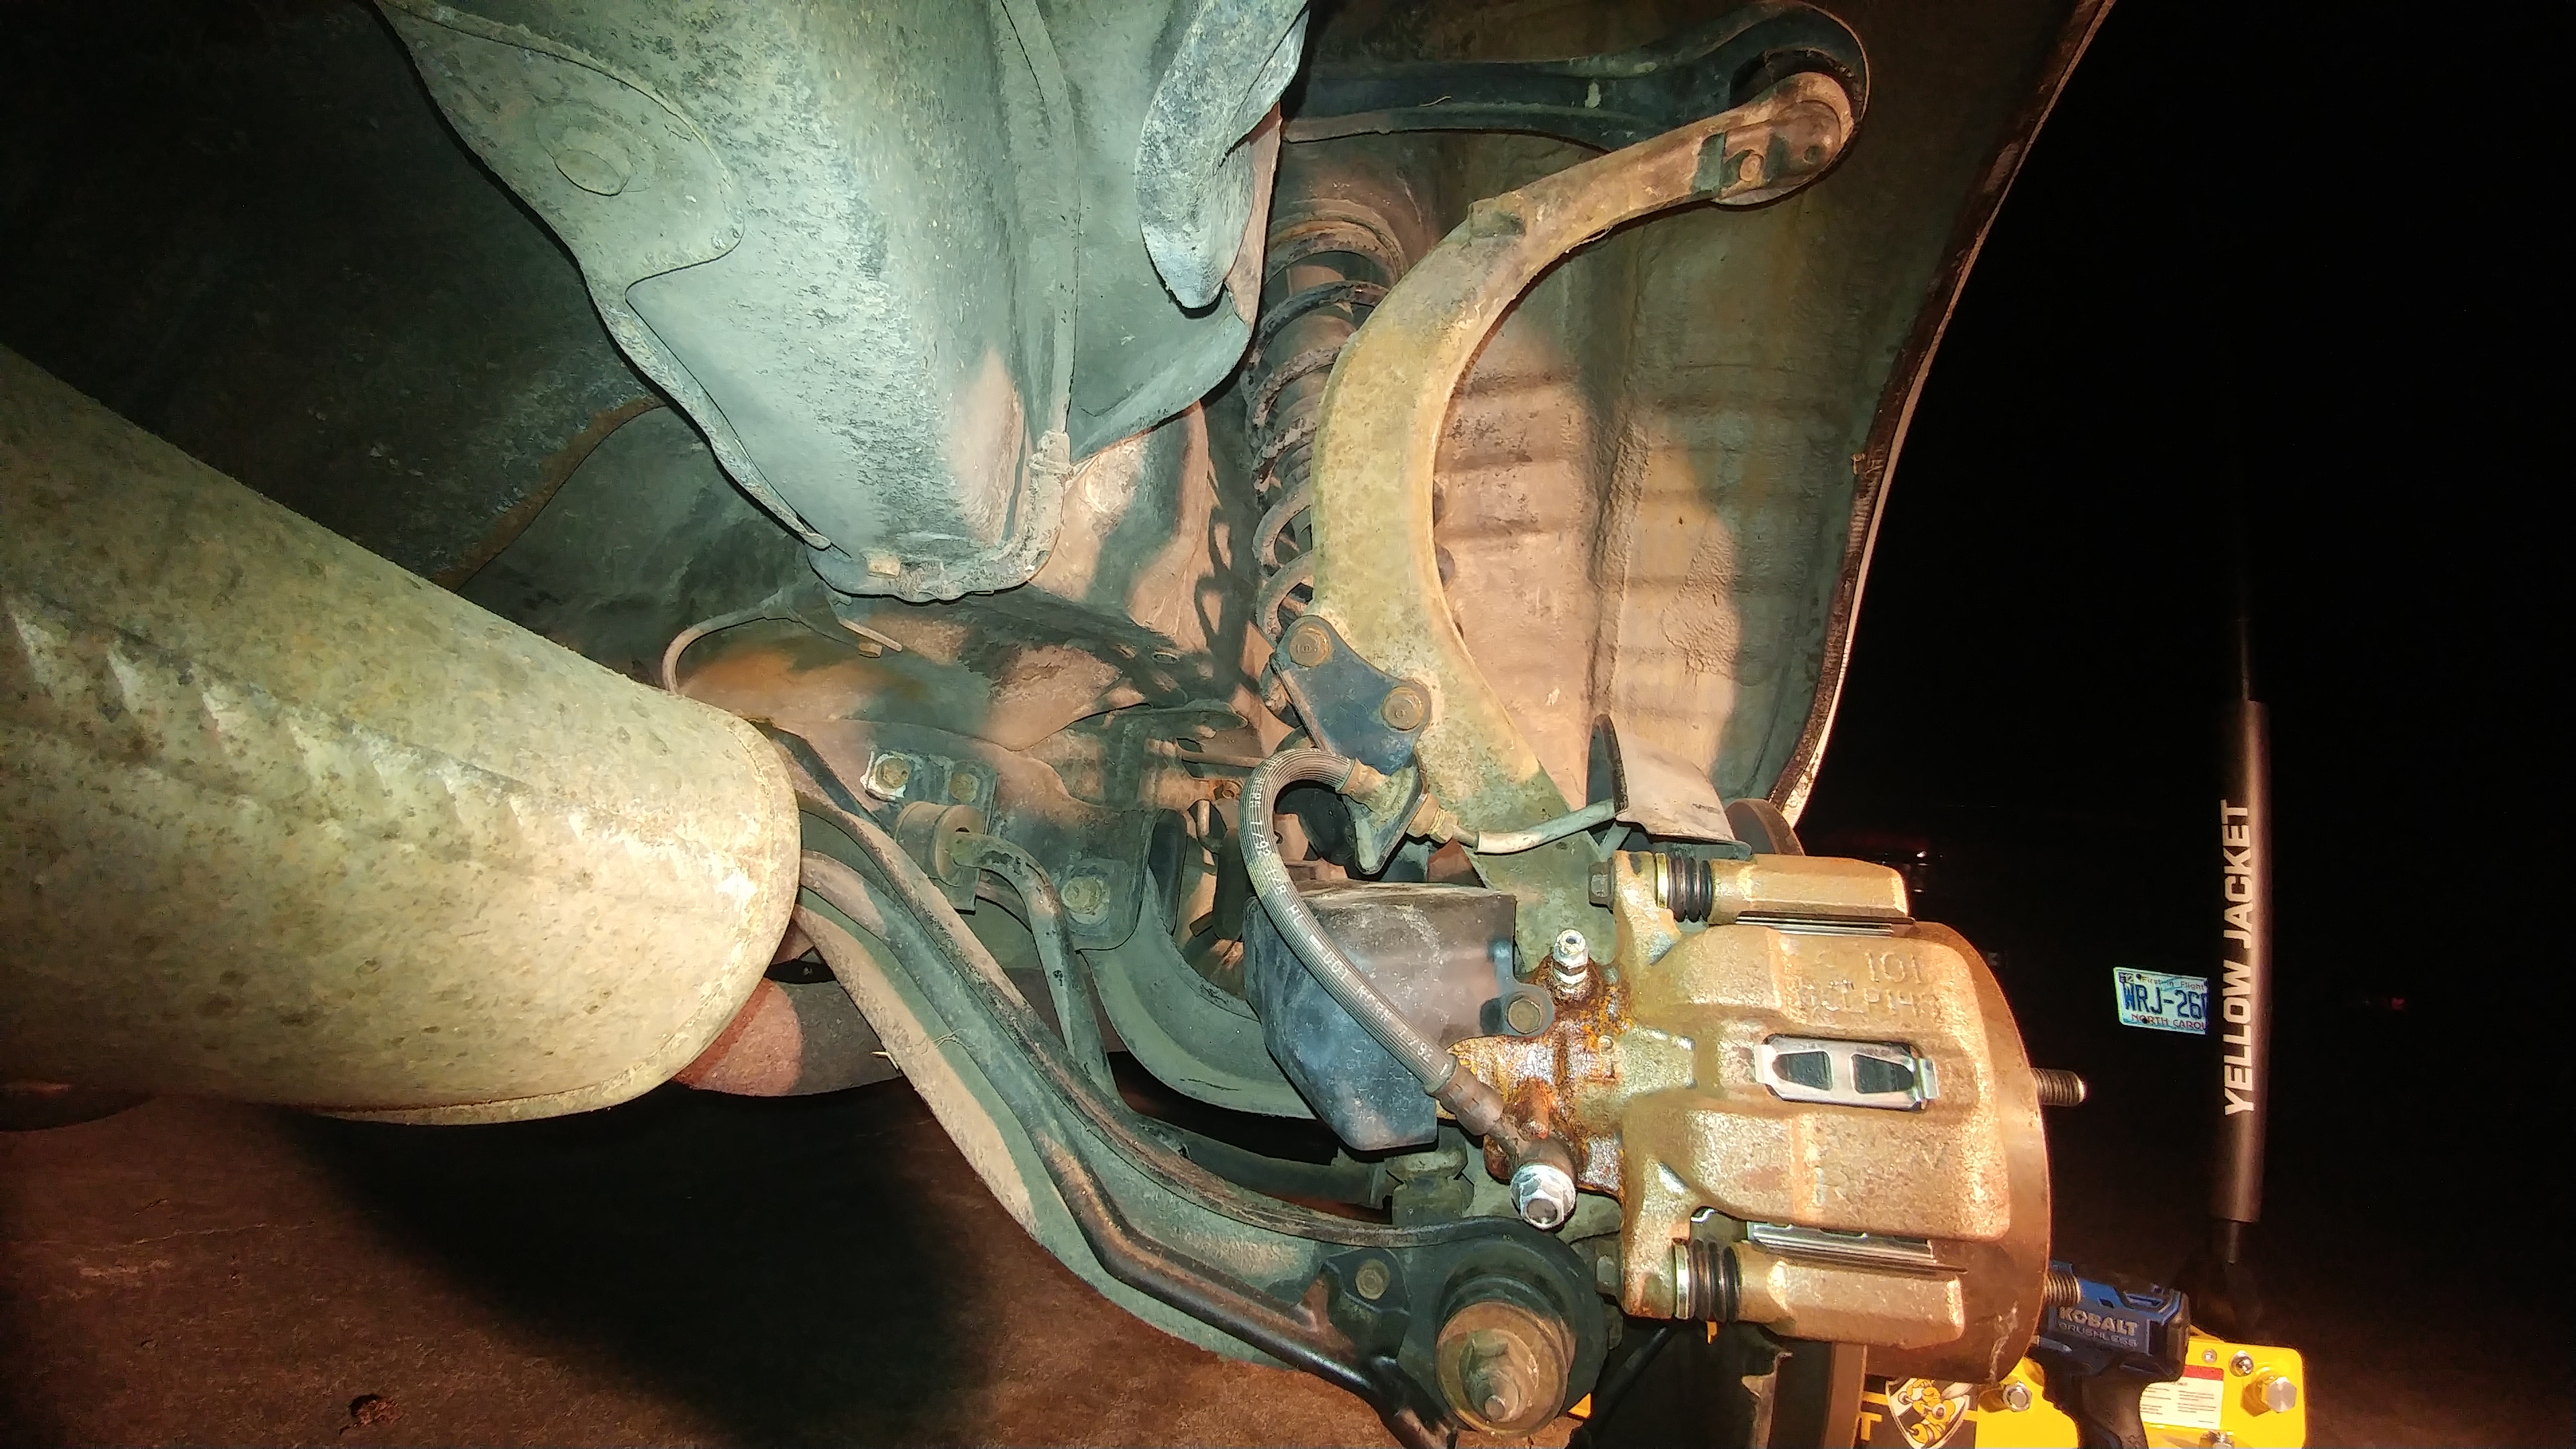
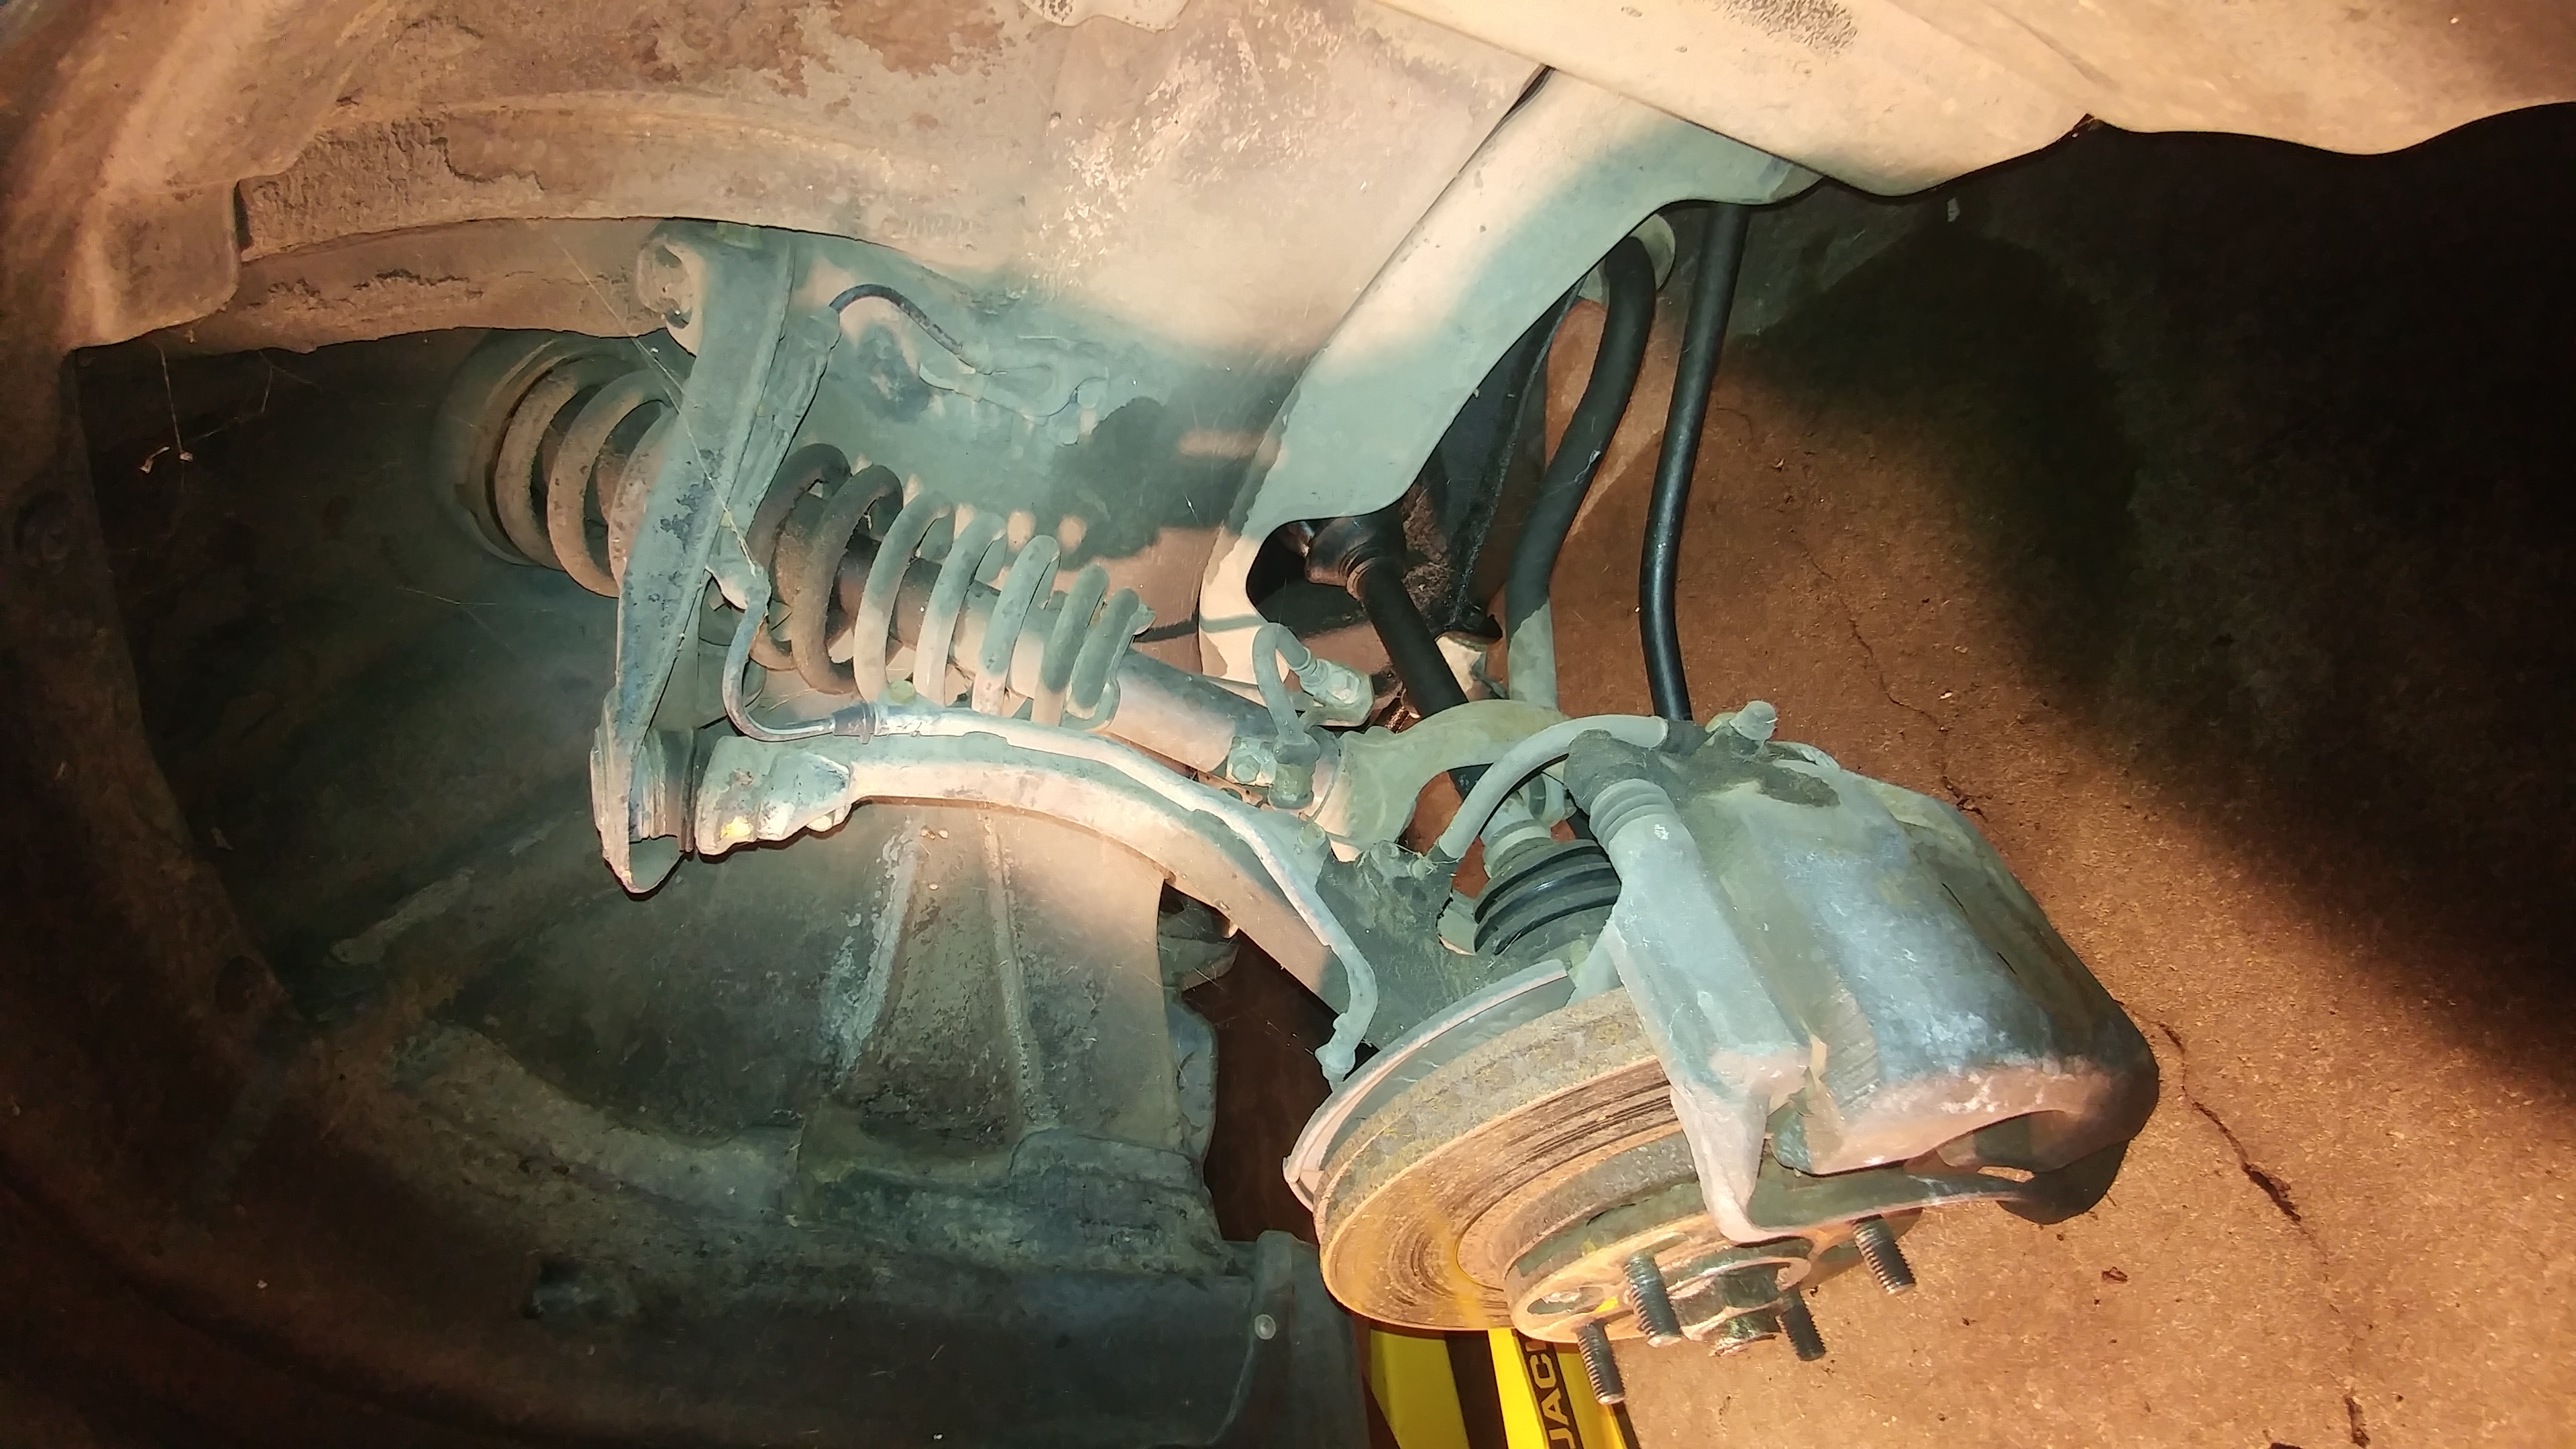
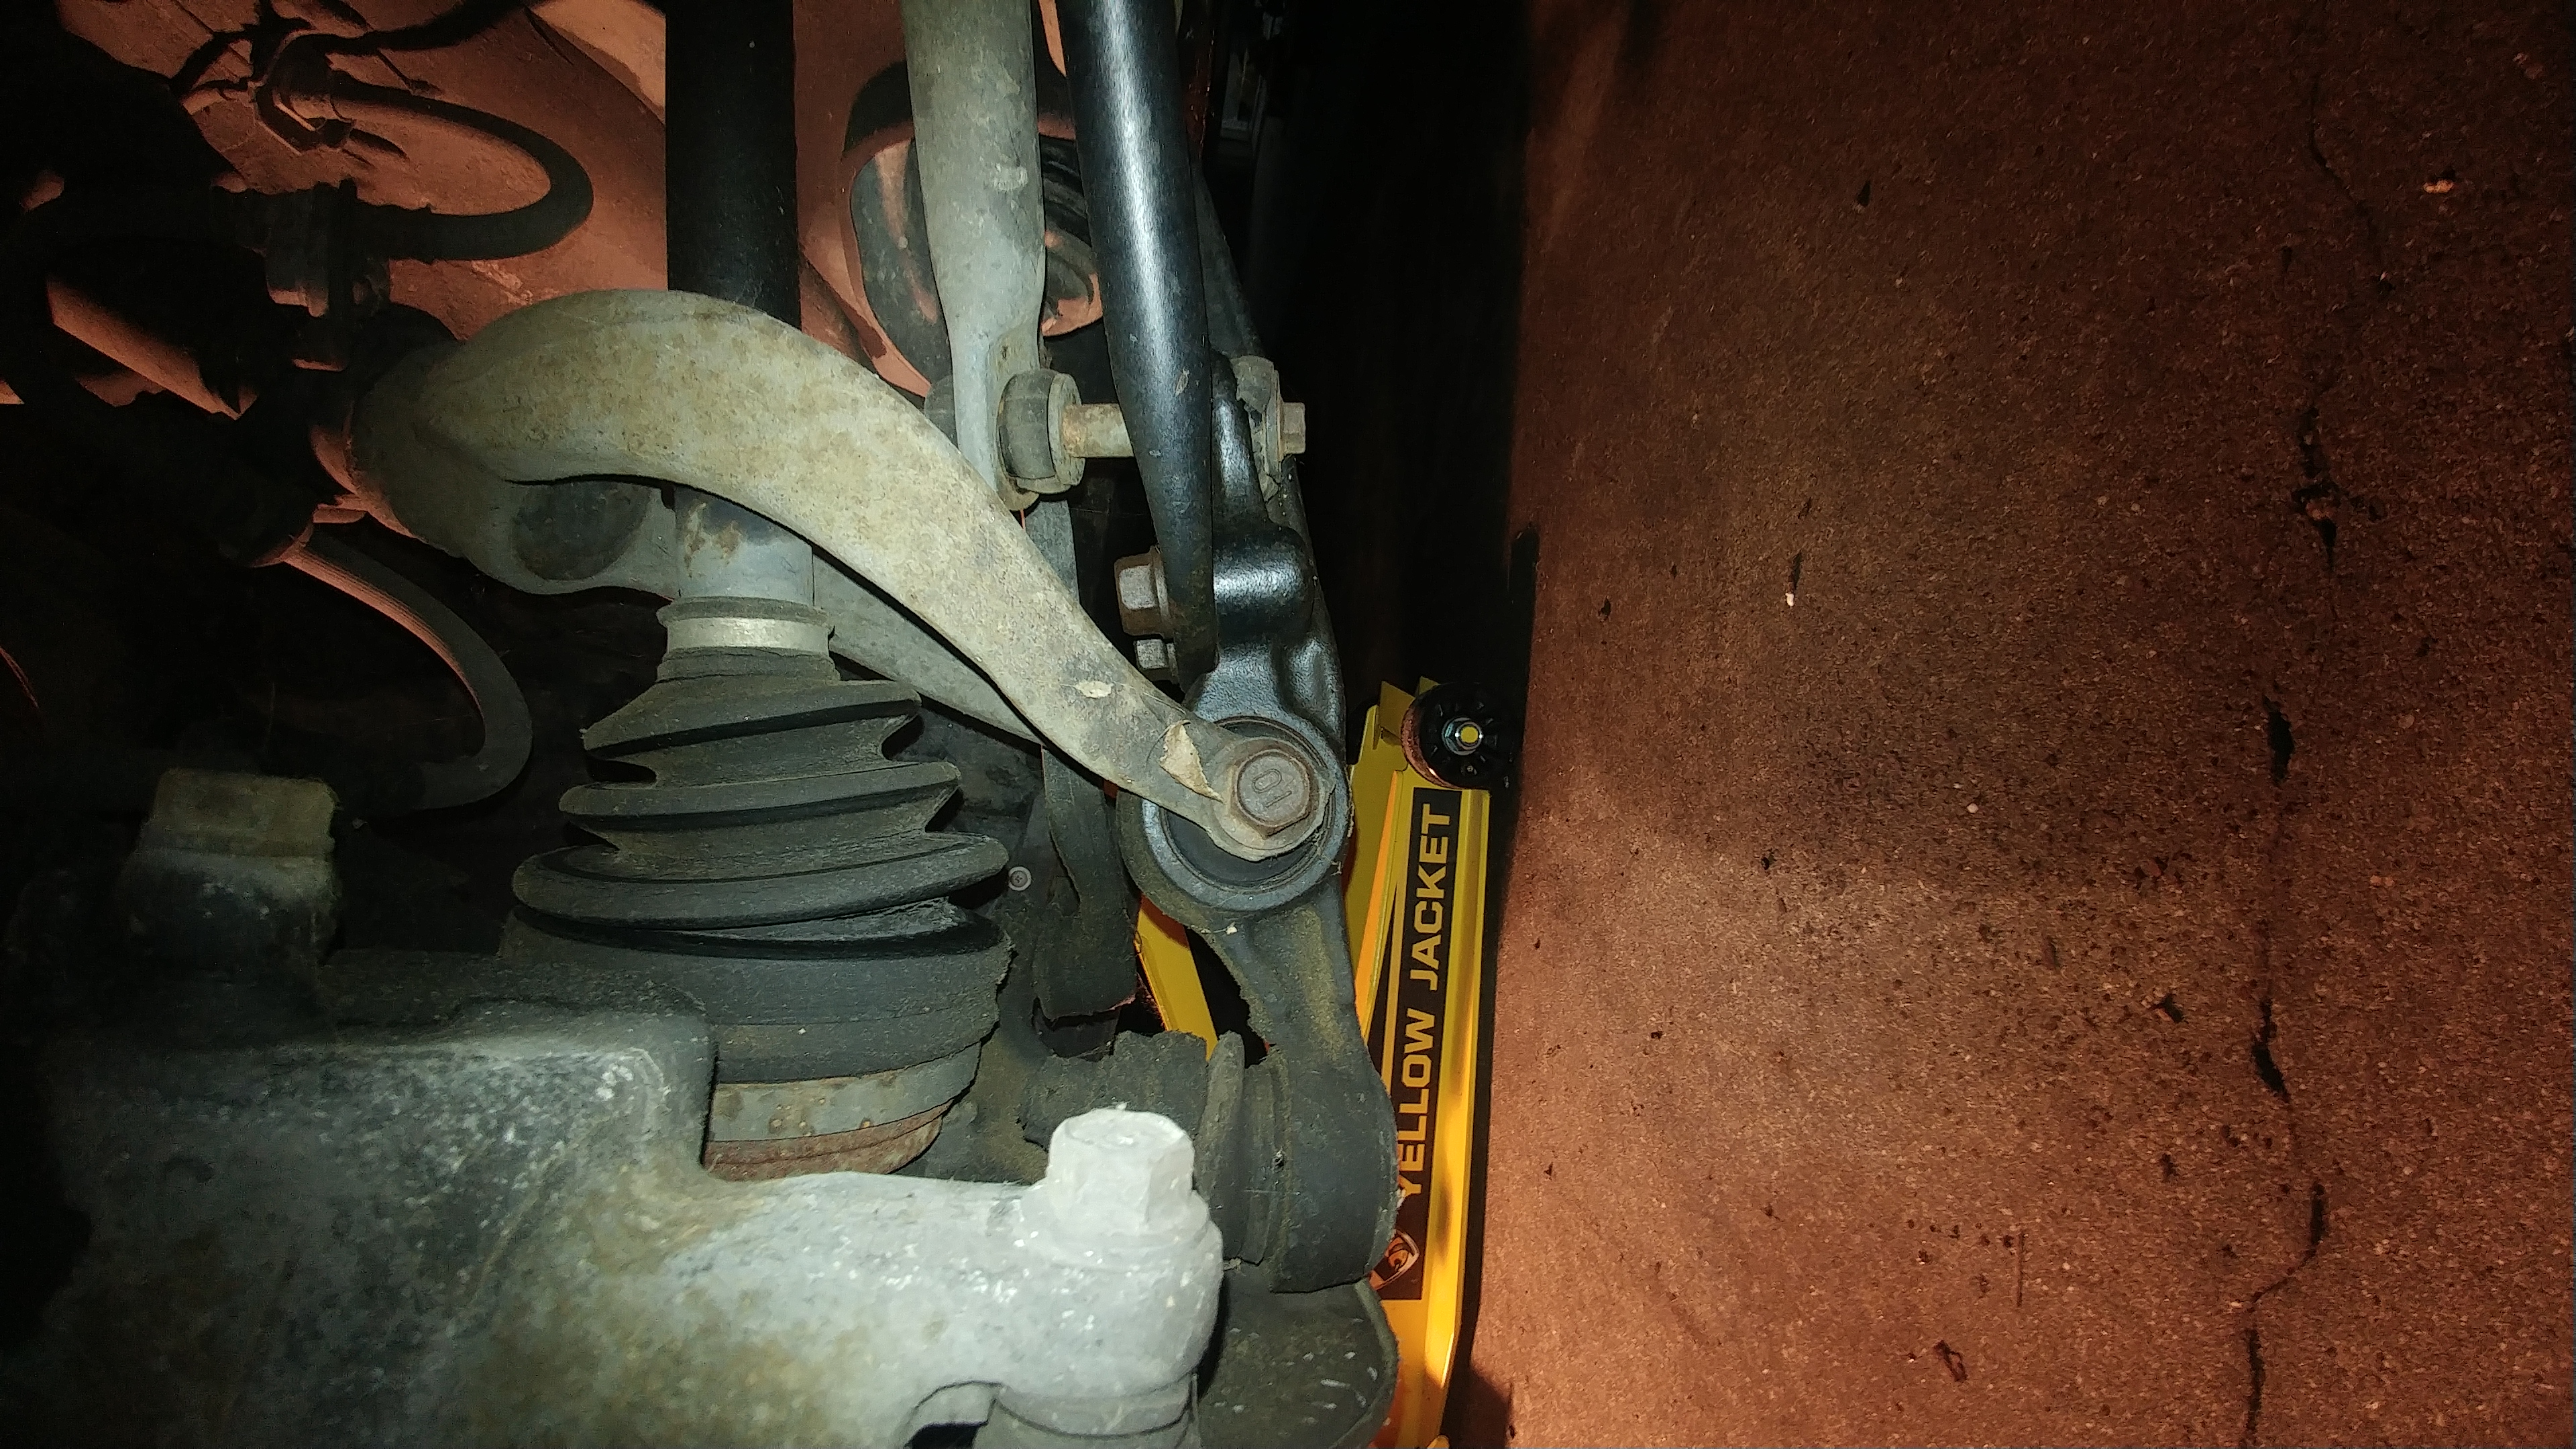
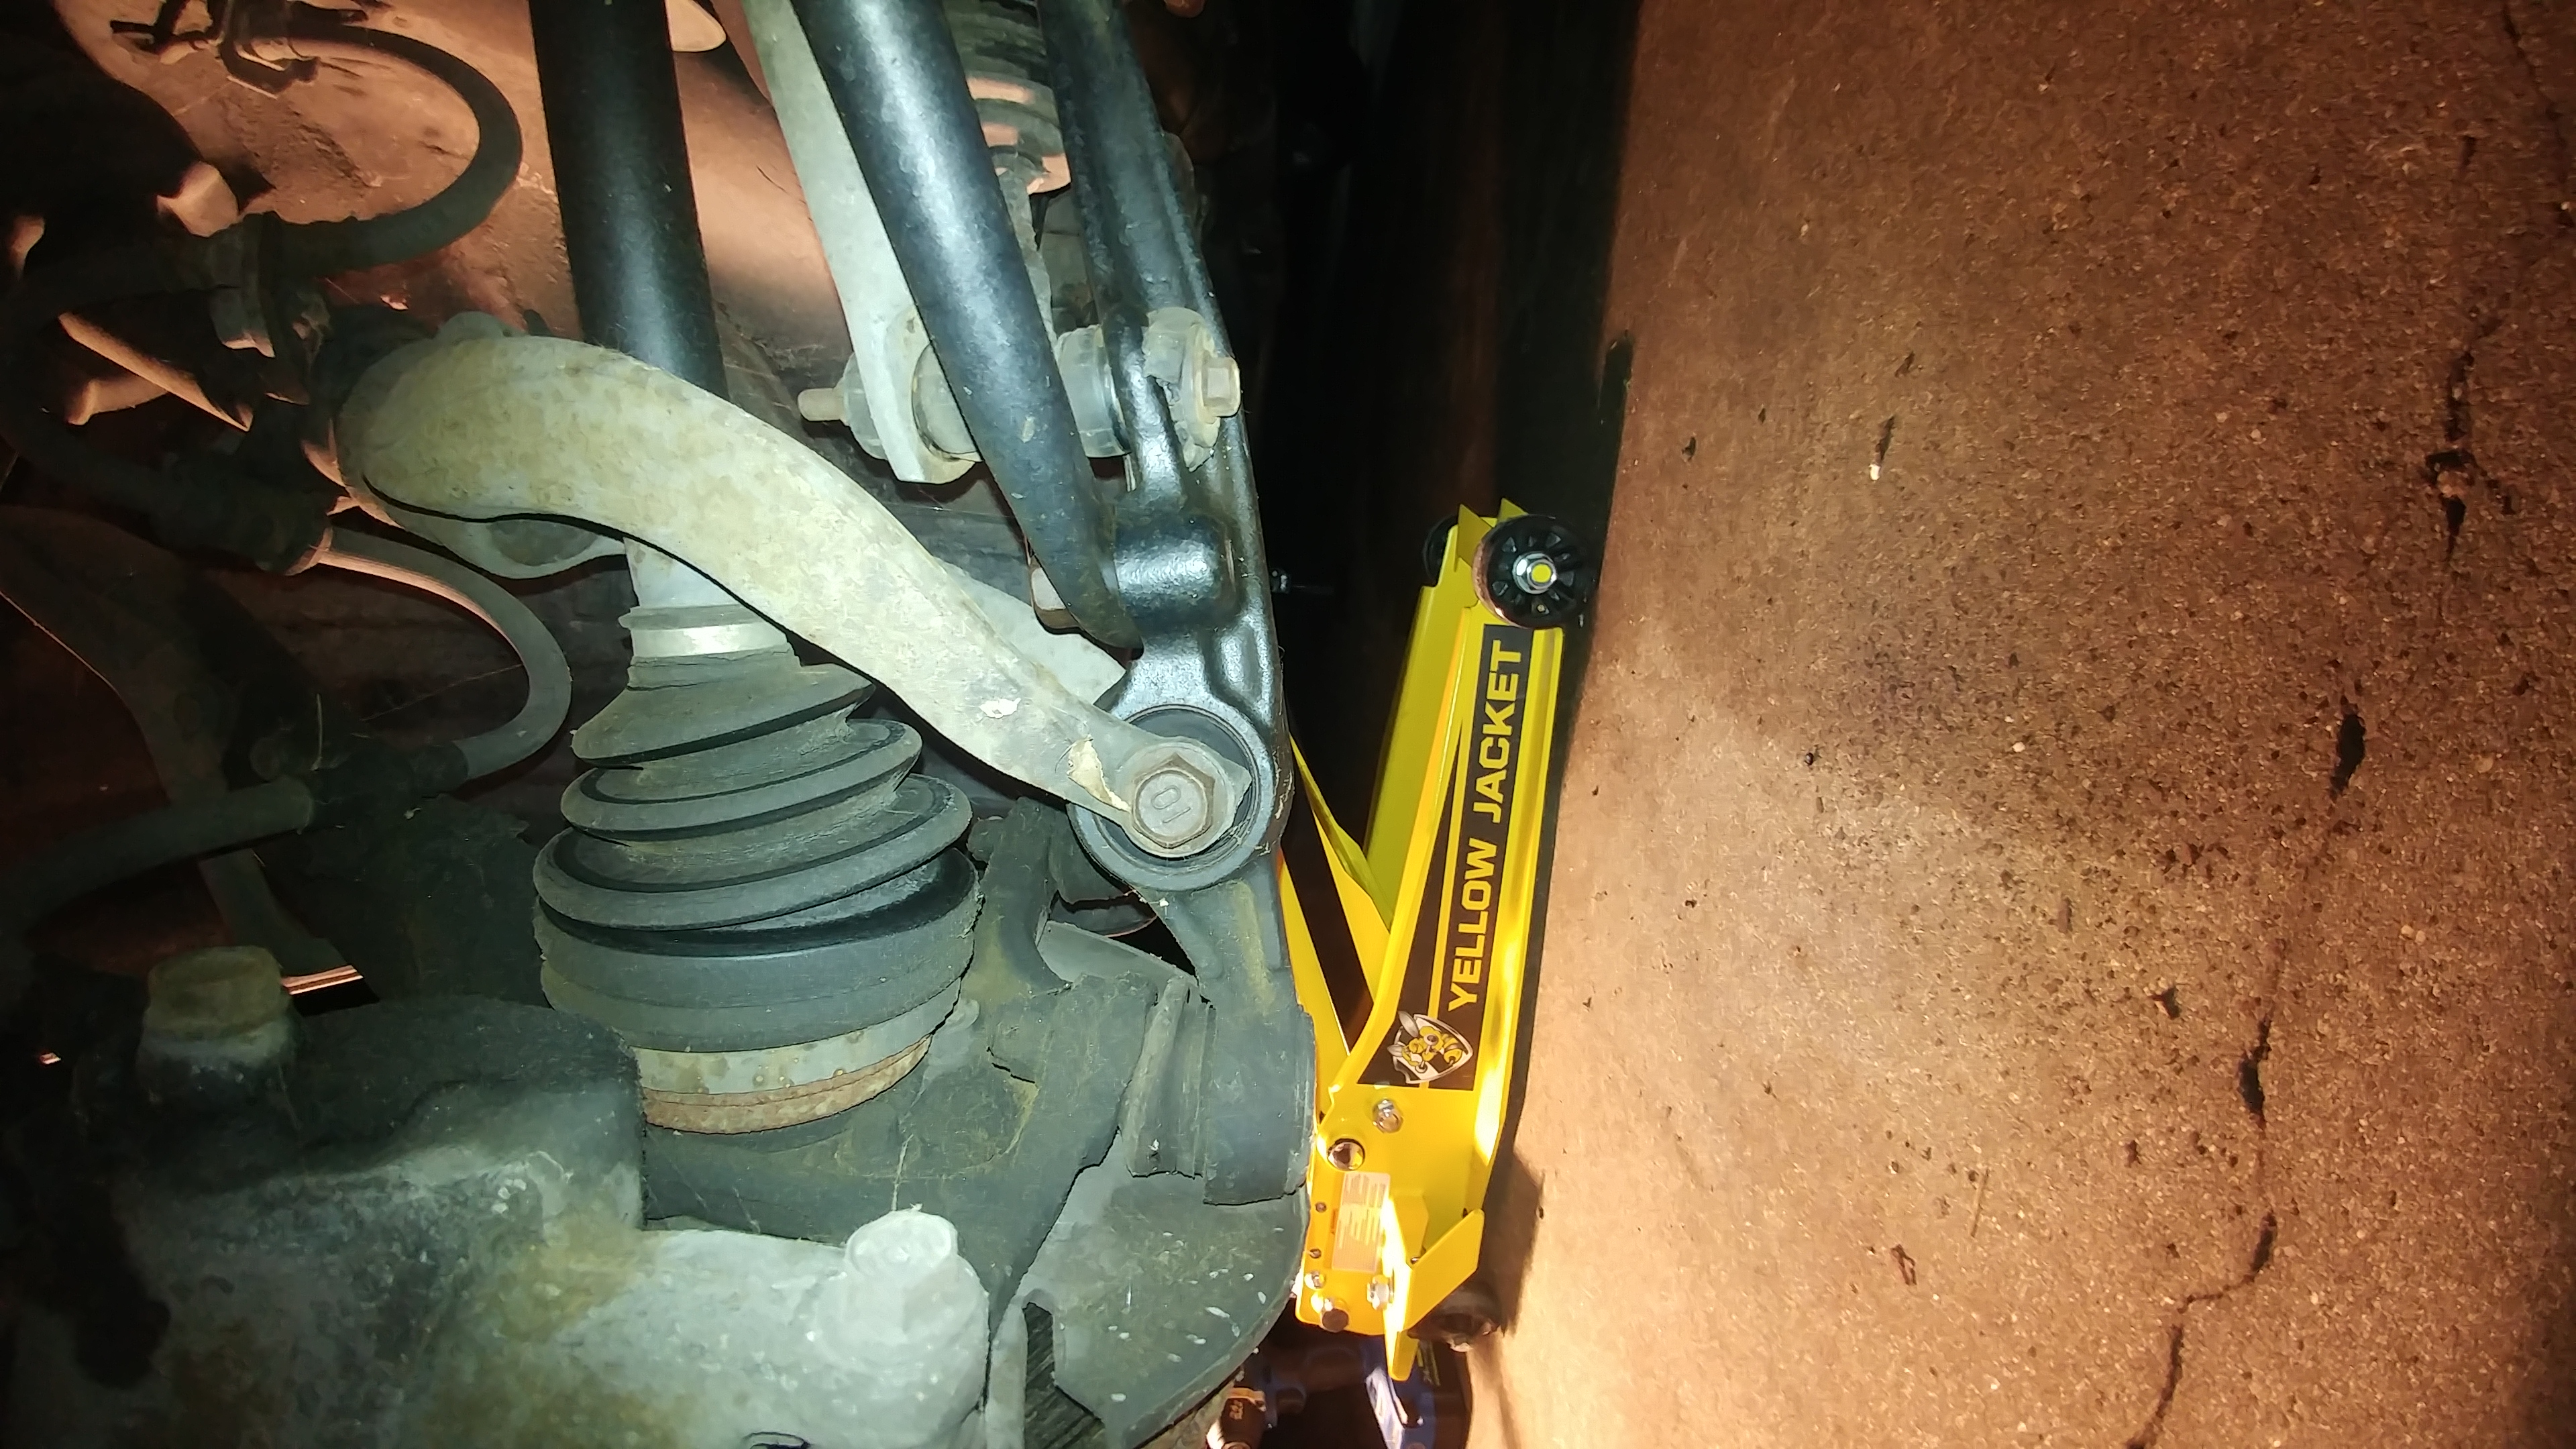
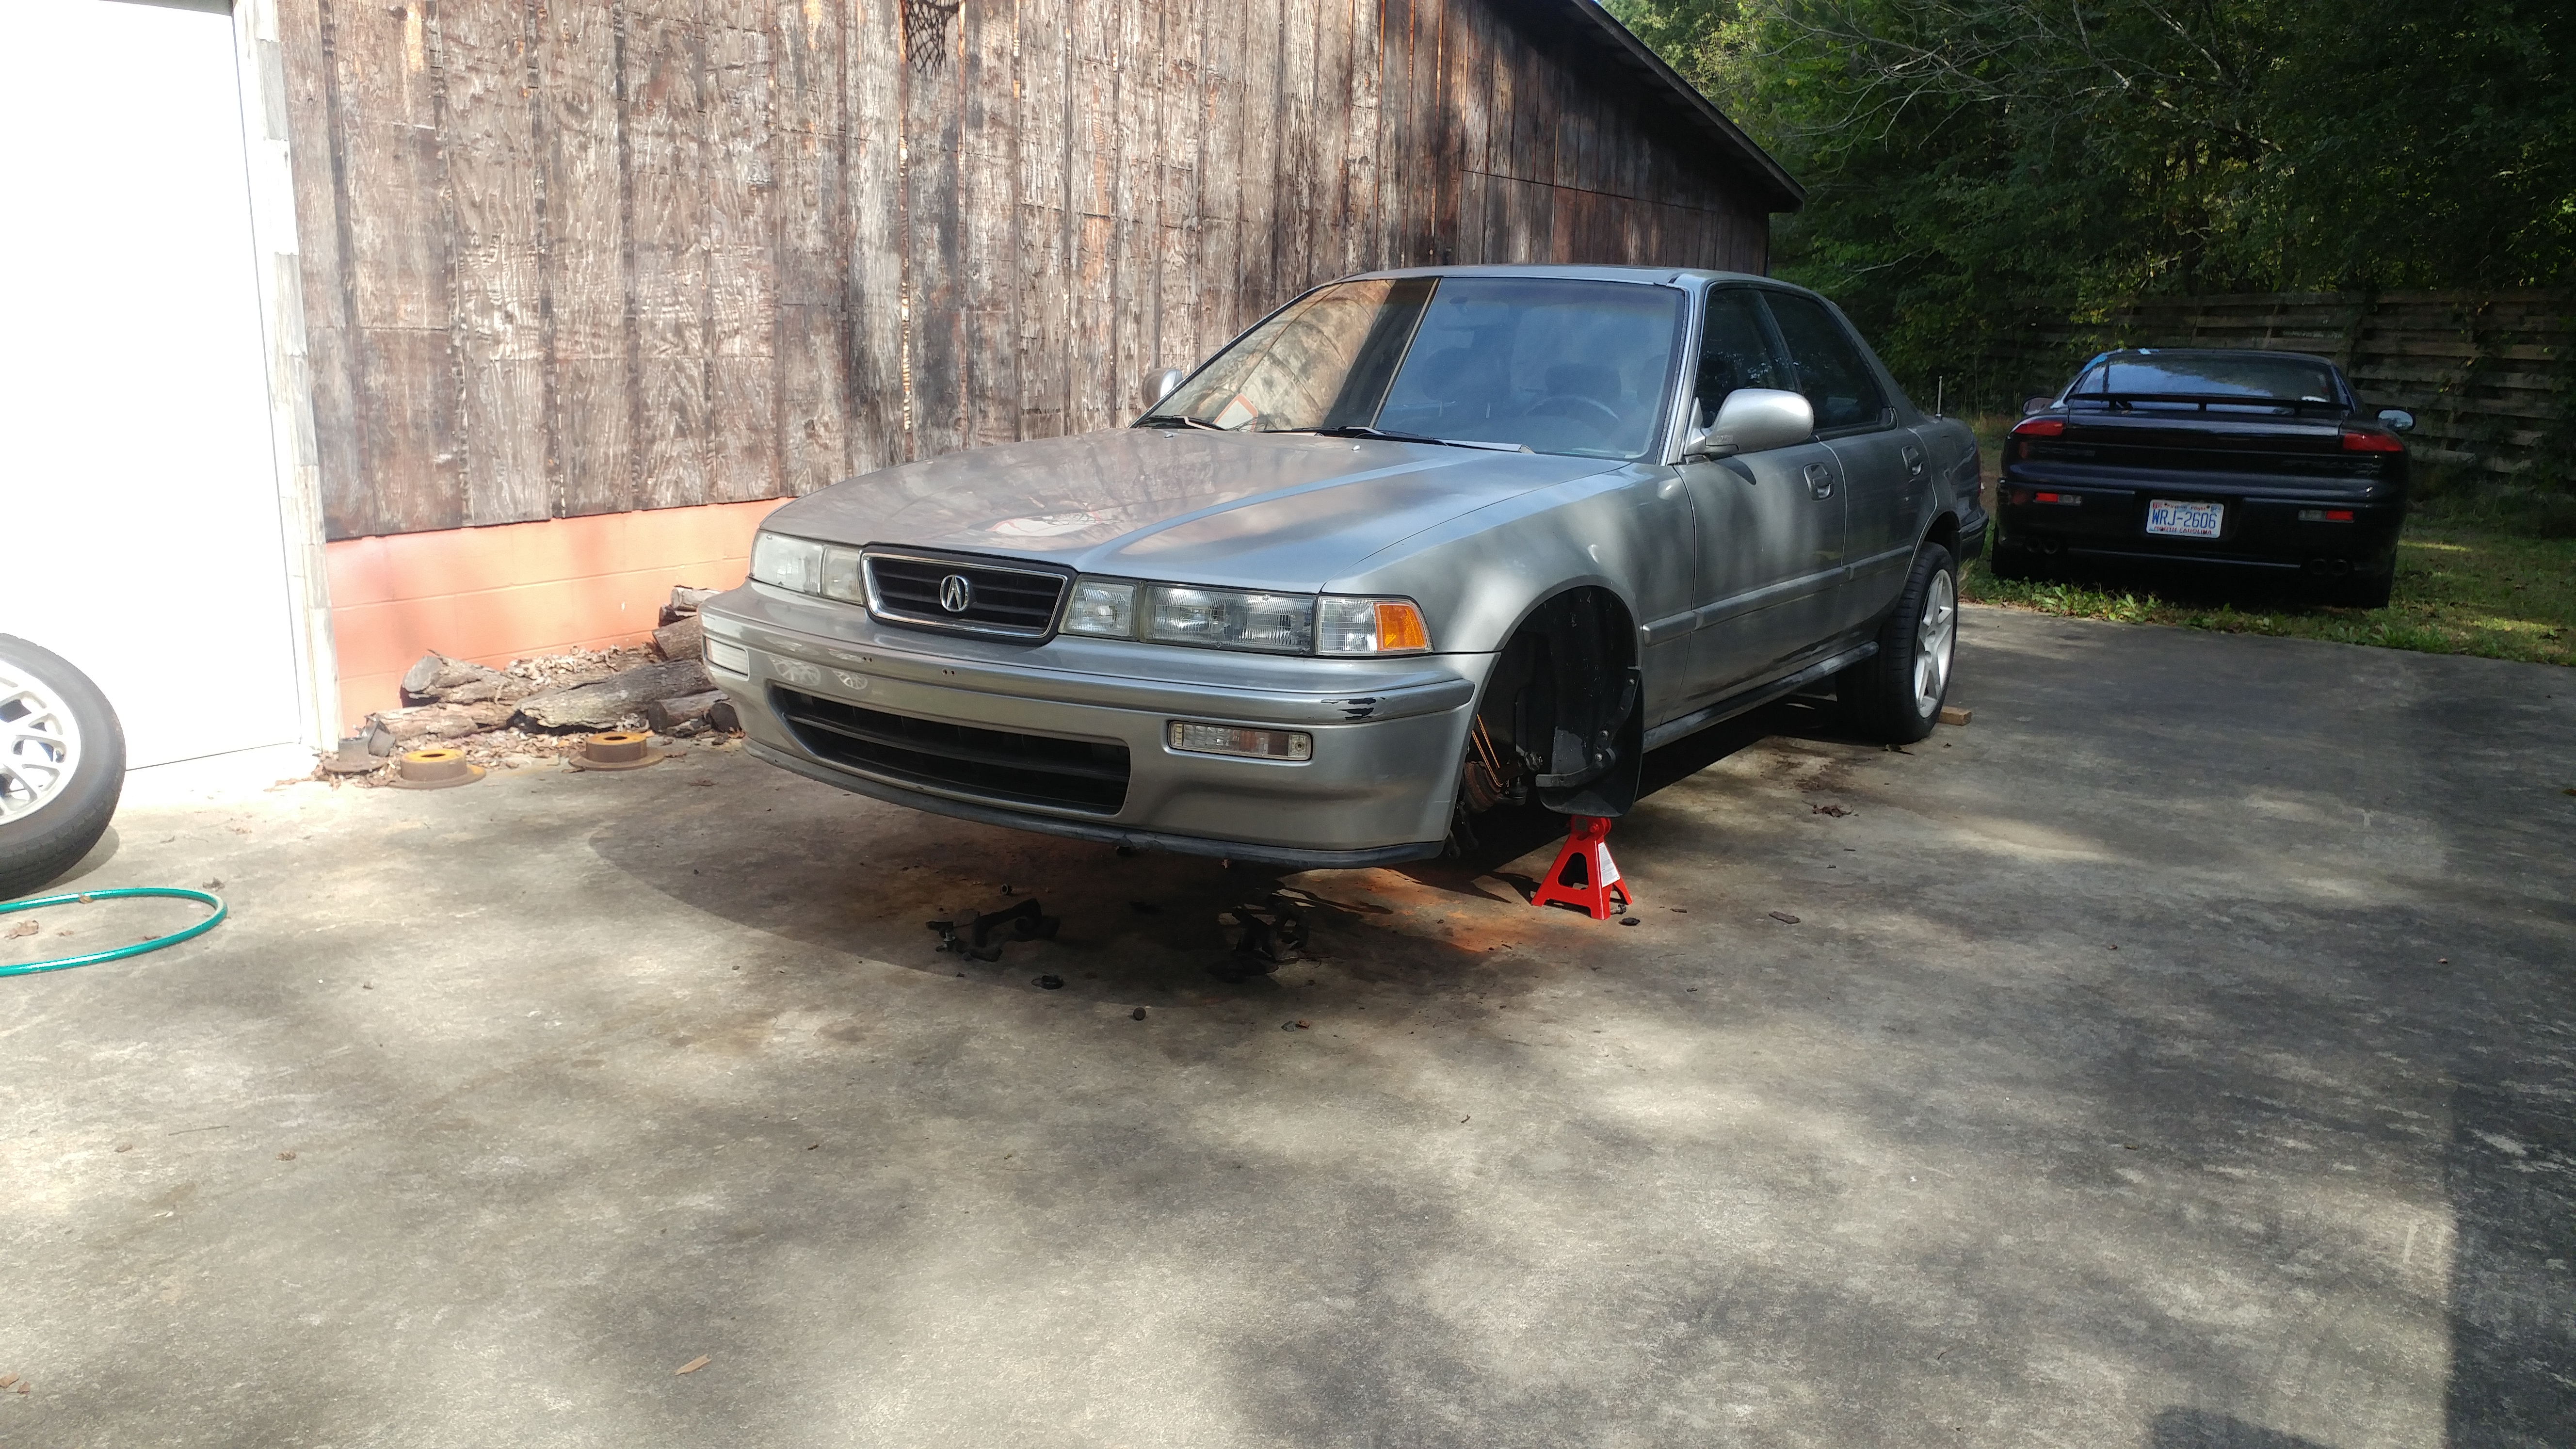
Lifted the front, removed the brakes, removed tie rods on both sides, took off upper arm castle nut on both sides then hit a brick wall. Not only did I forget to break the axle nut loose while the car was on the ground... but I don't have a socket big enough for that size. Welp this is going to be interesting.
Off to get larger impact sockets and some other supplies and a different style ball joint press. The goal tonight was to have both knuckles off the car and ready to have the old bearing and hub beat out and the new bearings and hubs pressed in while installing the new upper A arms and ball joints.
But progress is still progress.
The lower ball joints actually look new. Oh well, still getting replaced! Not taking any chances.
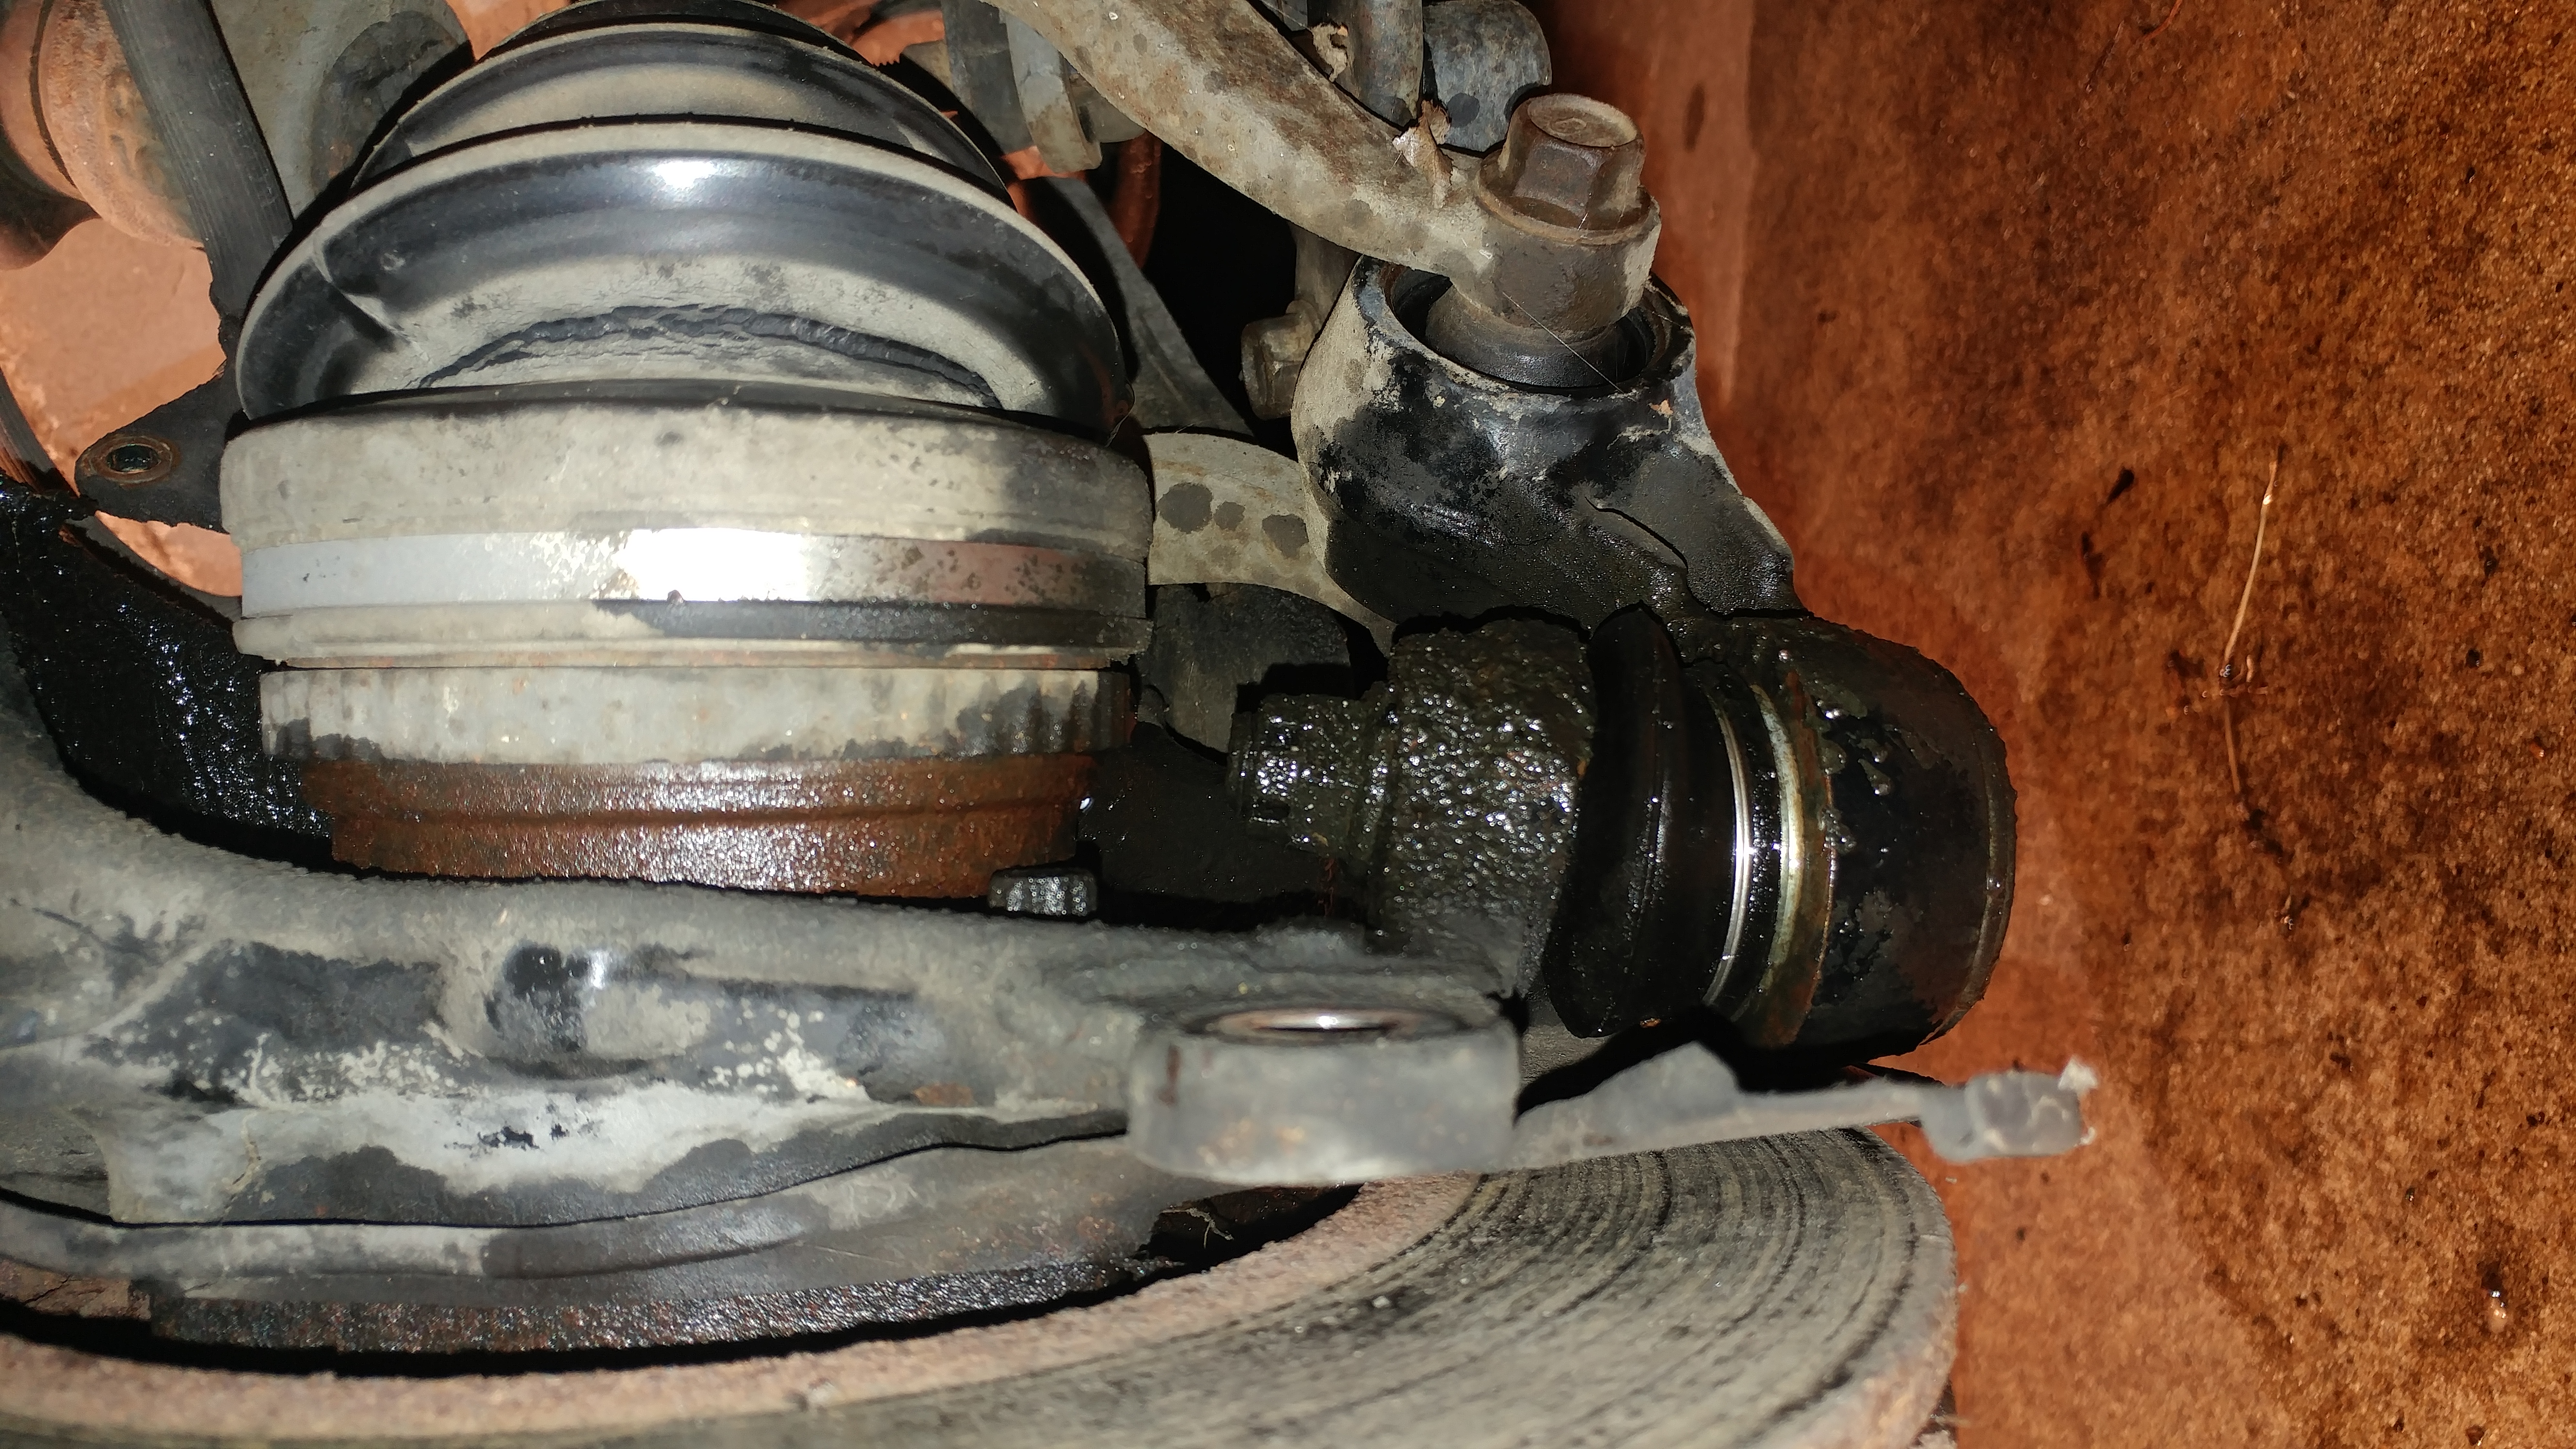
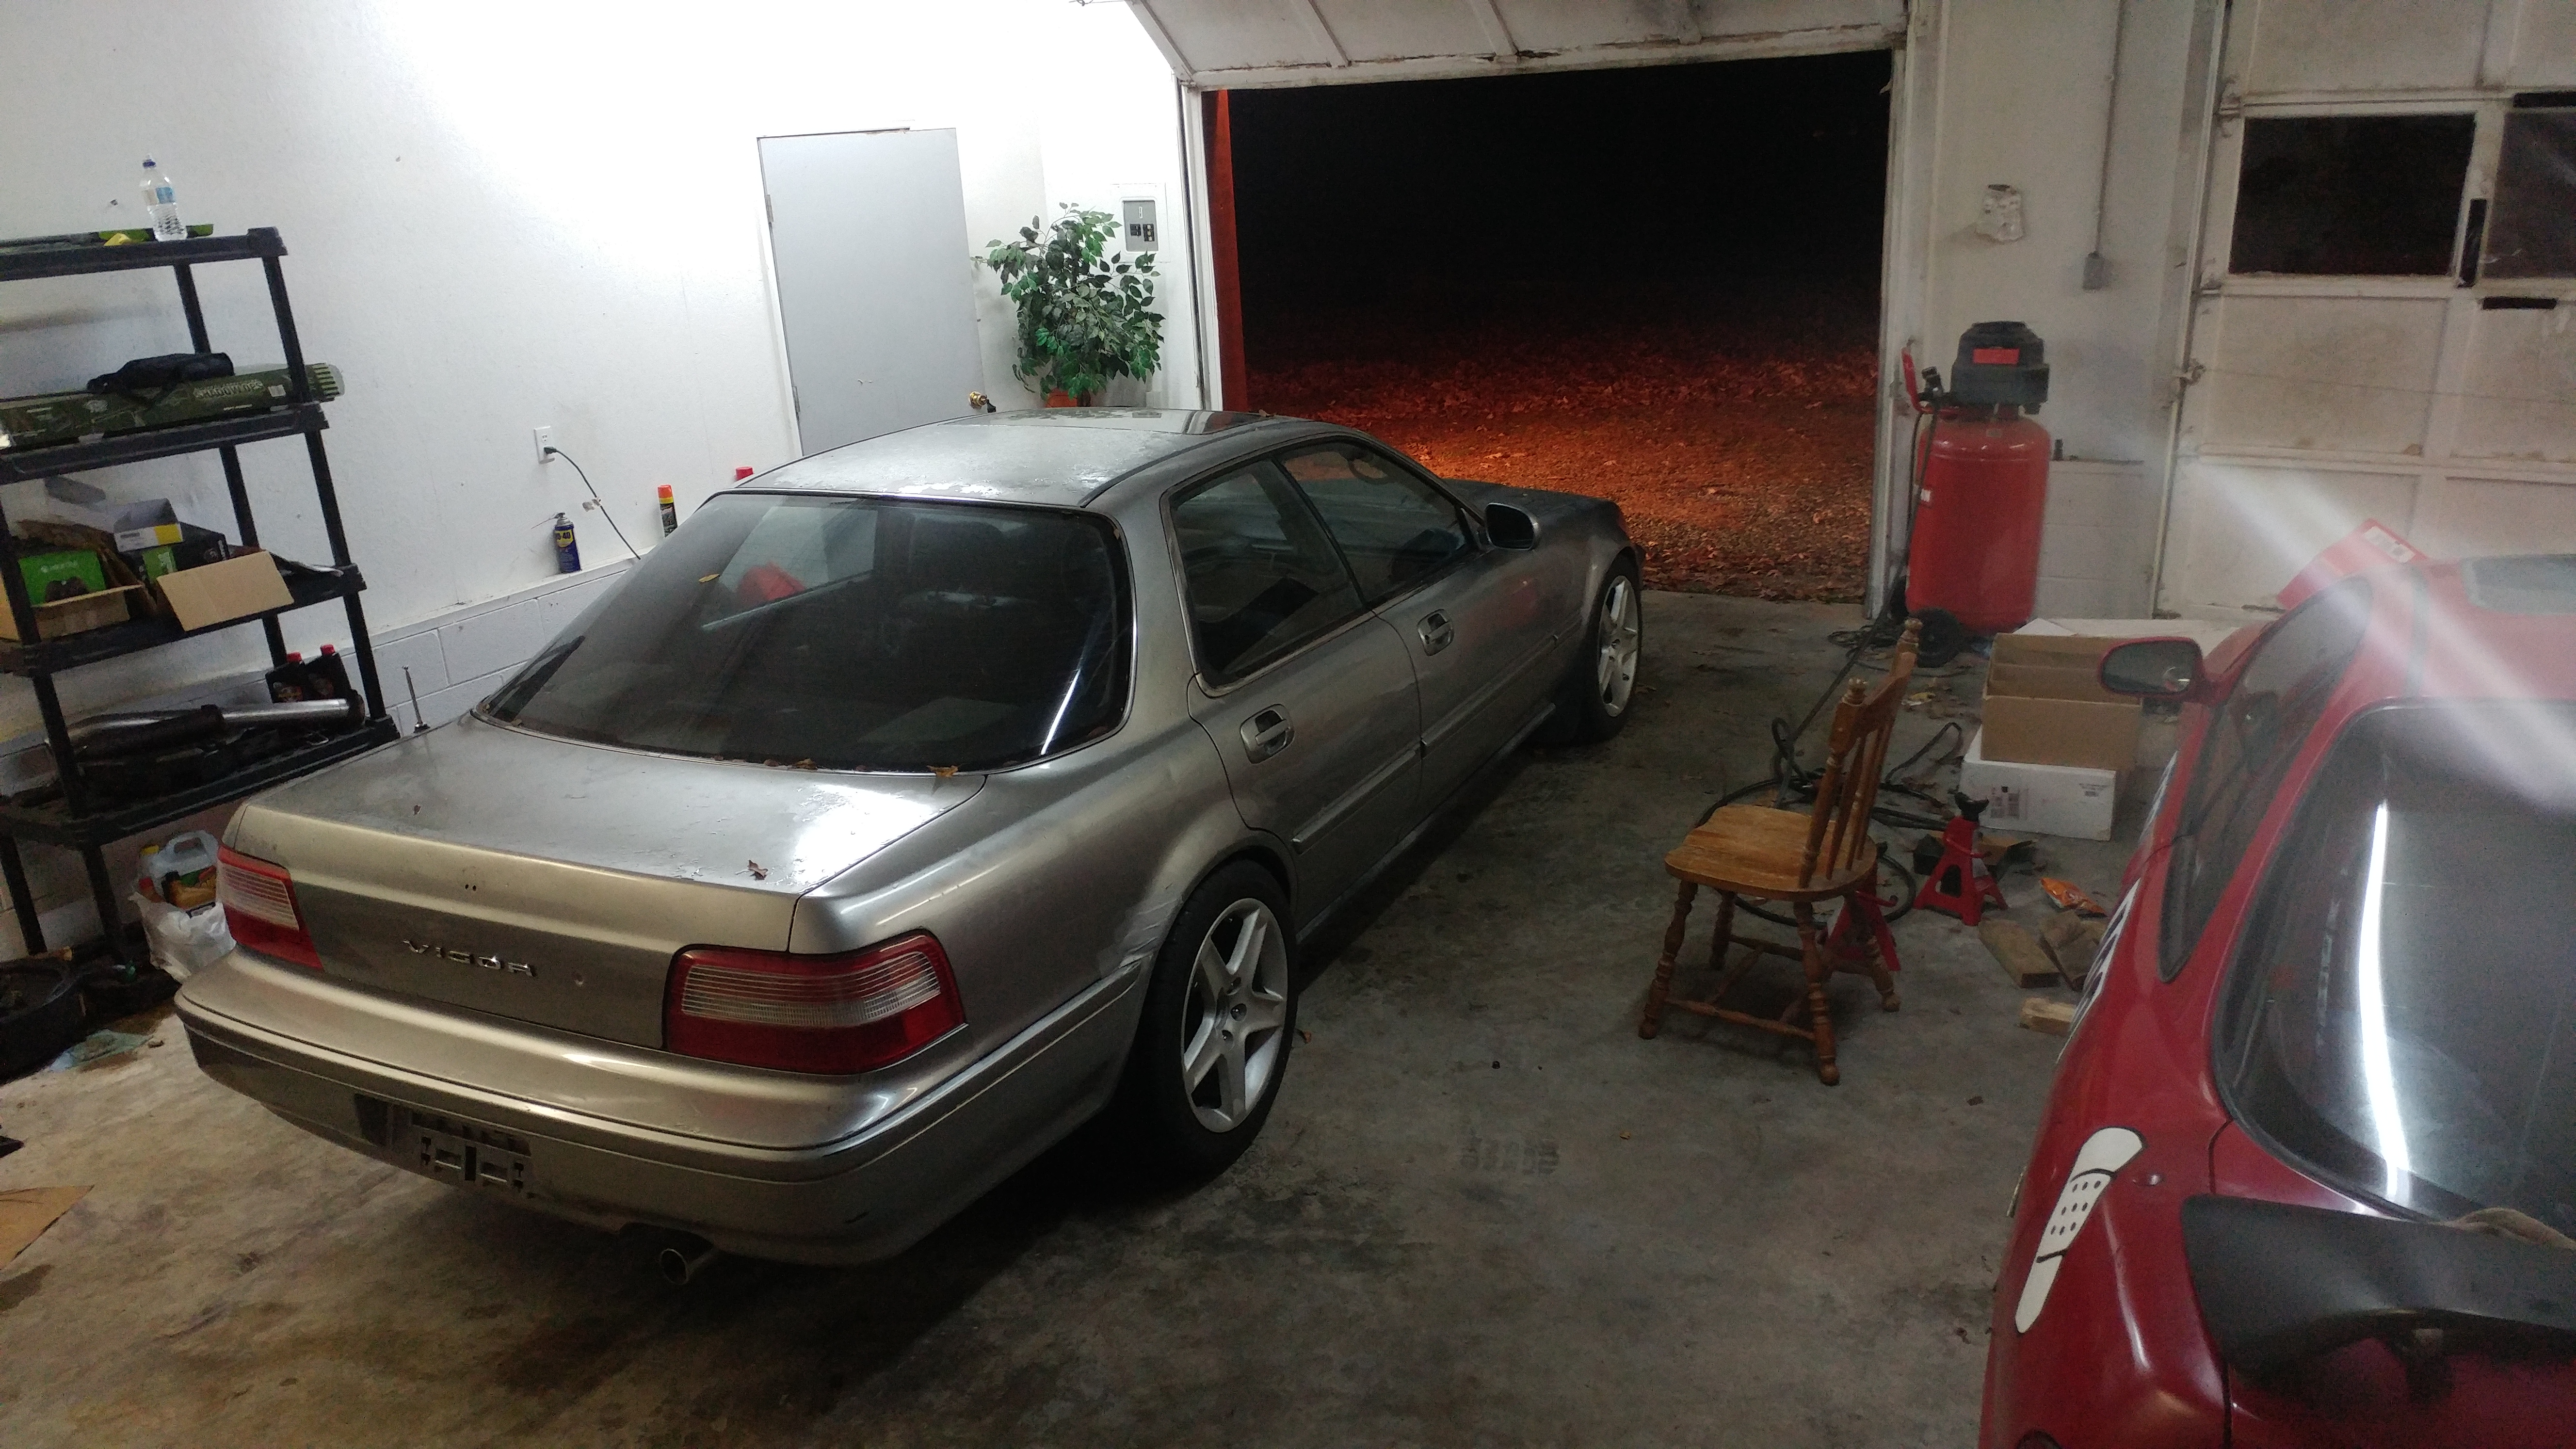
And for some reason the car in this lighting just reminded my of the movie "Christine". Almost as if the Vigor is trying to pull itself away from a crushing death.

Lifted the front, removed the brakes, removed tie rods on both sides, took off upper arm castle nut on both sides then hit a brick wall. Not only did I forget to break the axle nut loose while the car was on the ground... but I don't have a socket big enough for that size. Welp this is going to be interesting.
Off to get larger impact sockets and some other supplies and a different style ball joint press. The goal tonight was to have both knuckles off the car and ready to have the old bearing and hub beat out and the new bearings and hubs pressed in while installing the new upper A arms and ball joints.
But progress is still progress.
The lower ball joints actually look new. Oh well, still getting replaced! Not taking any chances.
And for some reason the car in this lighting just reminded my of the movie "Christine". Almost as if the Vigor is trying to pull itself away from a crushing death.
09-29-2017, 08:40 PM
#50
Burning Brakes
Thread Starter
9/29/17
Hit a snag!
Got both front knuckles off the car in less than a hour. Then found out the new bearings from the 1st generation Odyssey and 2.5TL are 3mm larger in diameter than the Vigors, meaning they won't fit into the knuckle. And the Odyssey hub won't fit into the older Vigor bearings either.
I never thought much about that issue. Vigor and TL bearings only had 3 letters different from each other and I assumed that designated the model the part was dedicated to. I was more worried about the hubs not matching the spline on the axles but that thankfully worked perfectly.
So to get around this bearing vs knuckle issue I either can swap the Vigor hardware with 2.5TL stuff, Knuckle and Lower Control Arm... OR have the Vigor knuckles bored out to fit the new bearings... I'm thinking about having it bored the 3mm required depending on price. Then again I could source 2.5TL knuckles probably pretty easily.
This guy right here is amazing.
10-19-2017, 12:15 AM
#51
Burning Brakes
Thread Starter
10/19/17
Late update:
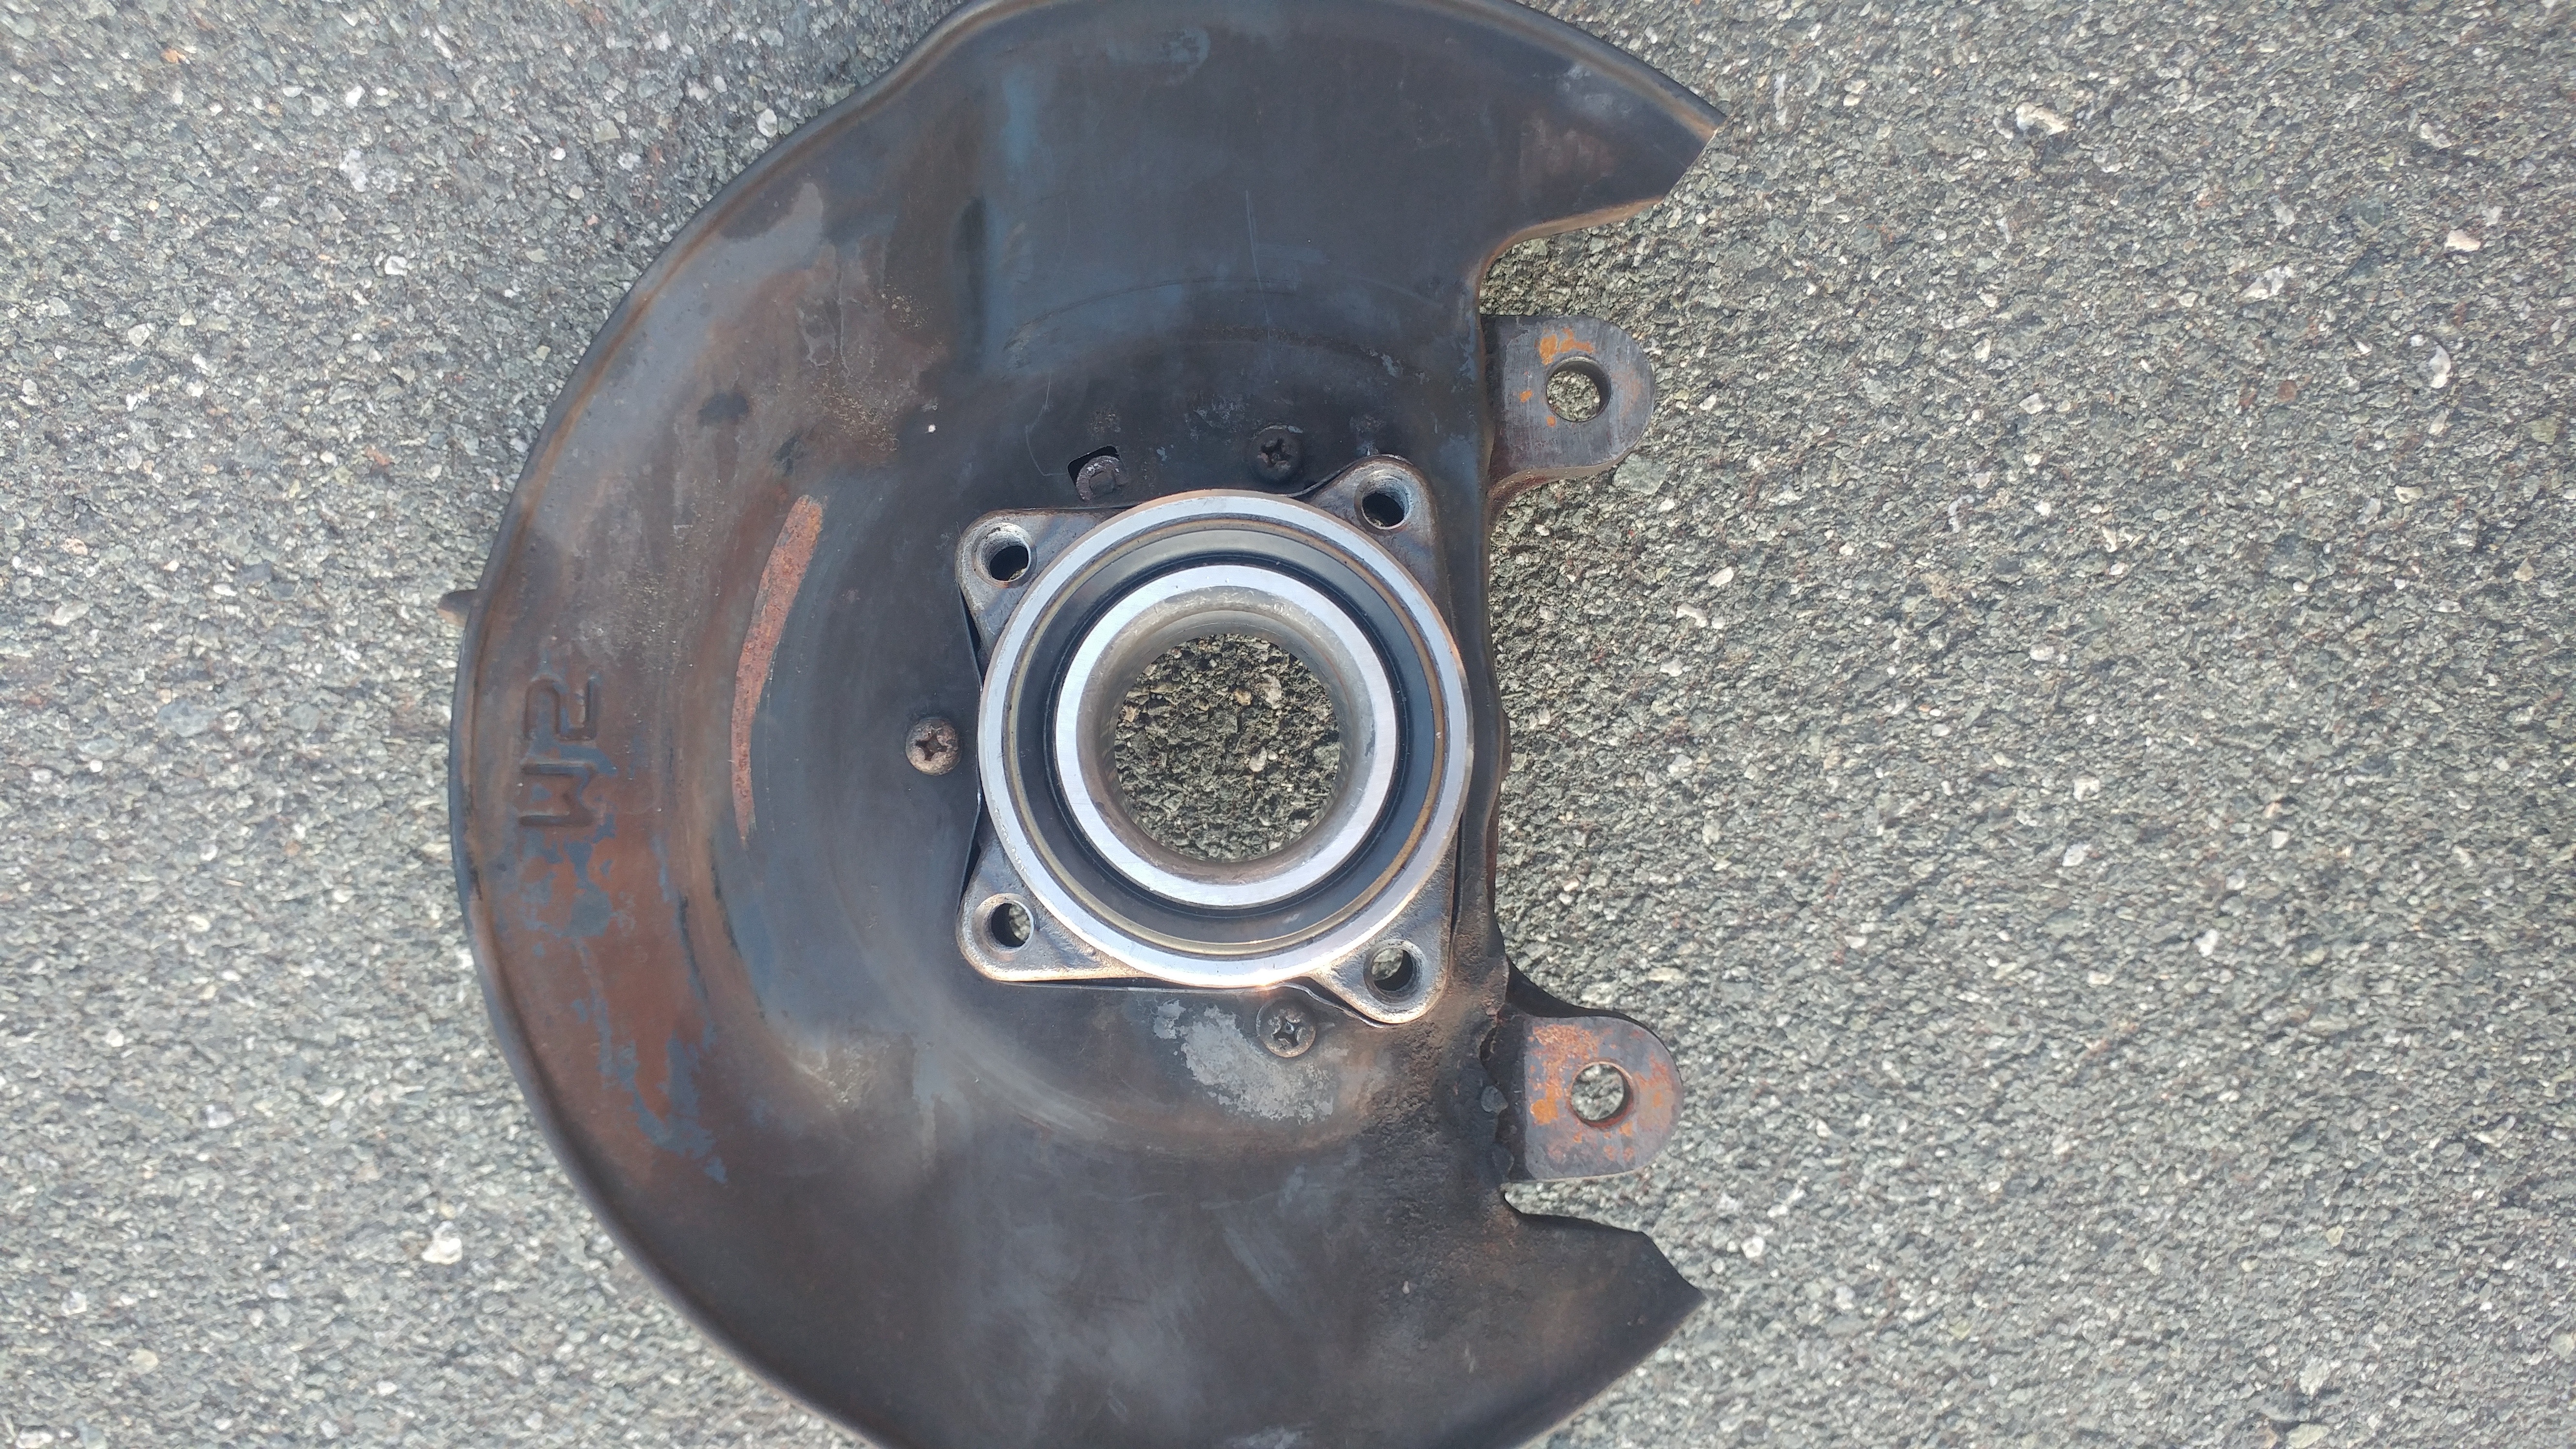
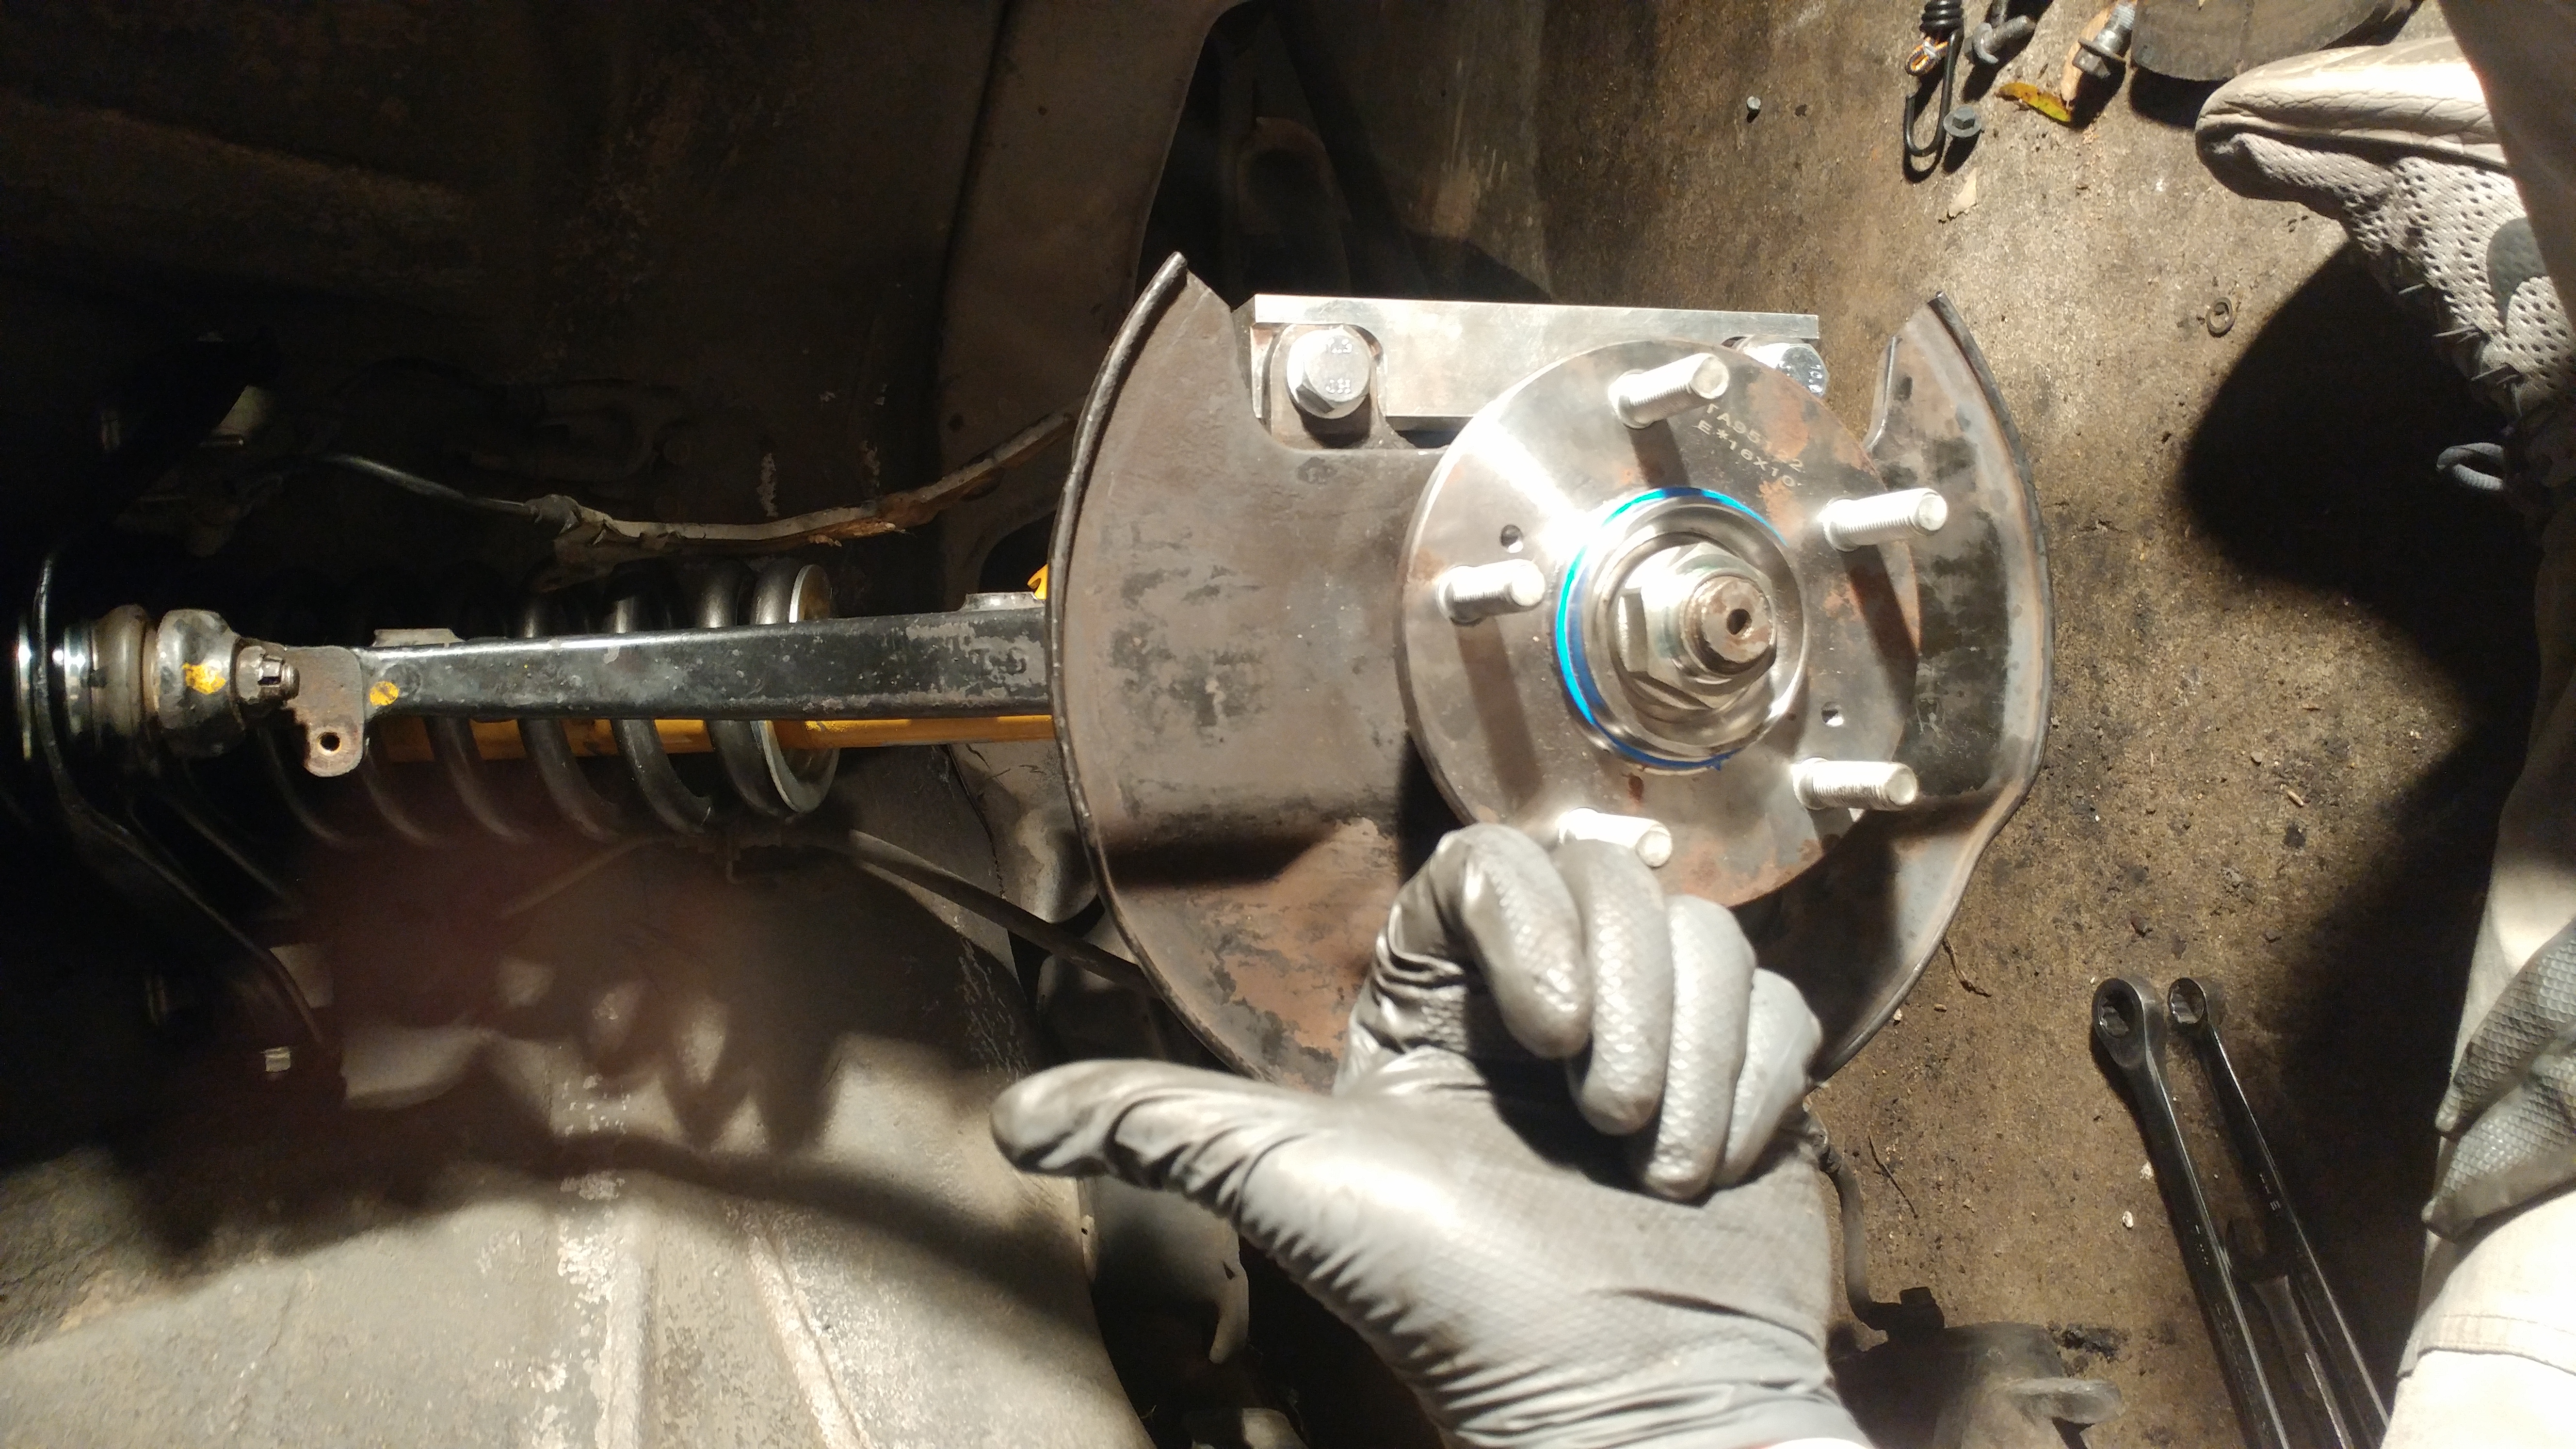
Got the knuckle bored to fit the bearing.
Got the bearing bolted in and hub pressed in.
Got the lower control arm off and pressed in new ball joints.
Got the new upper arms installed.
Waiting for new lower control arm bushings to arrive from Acura.
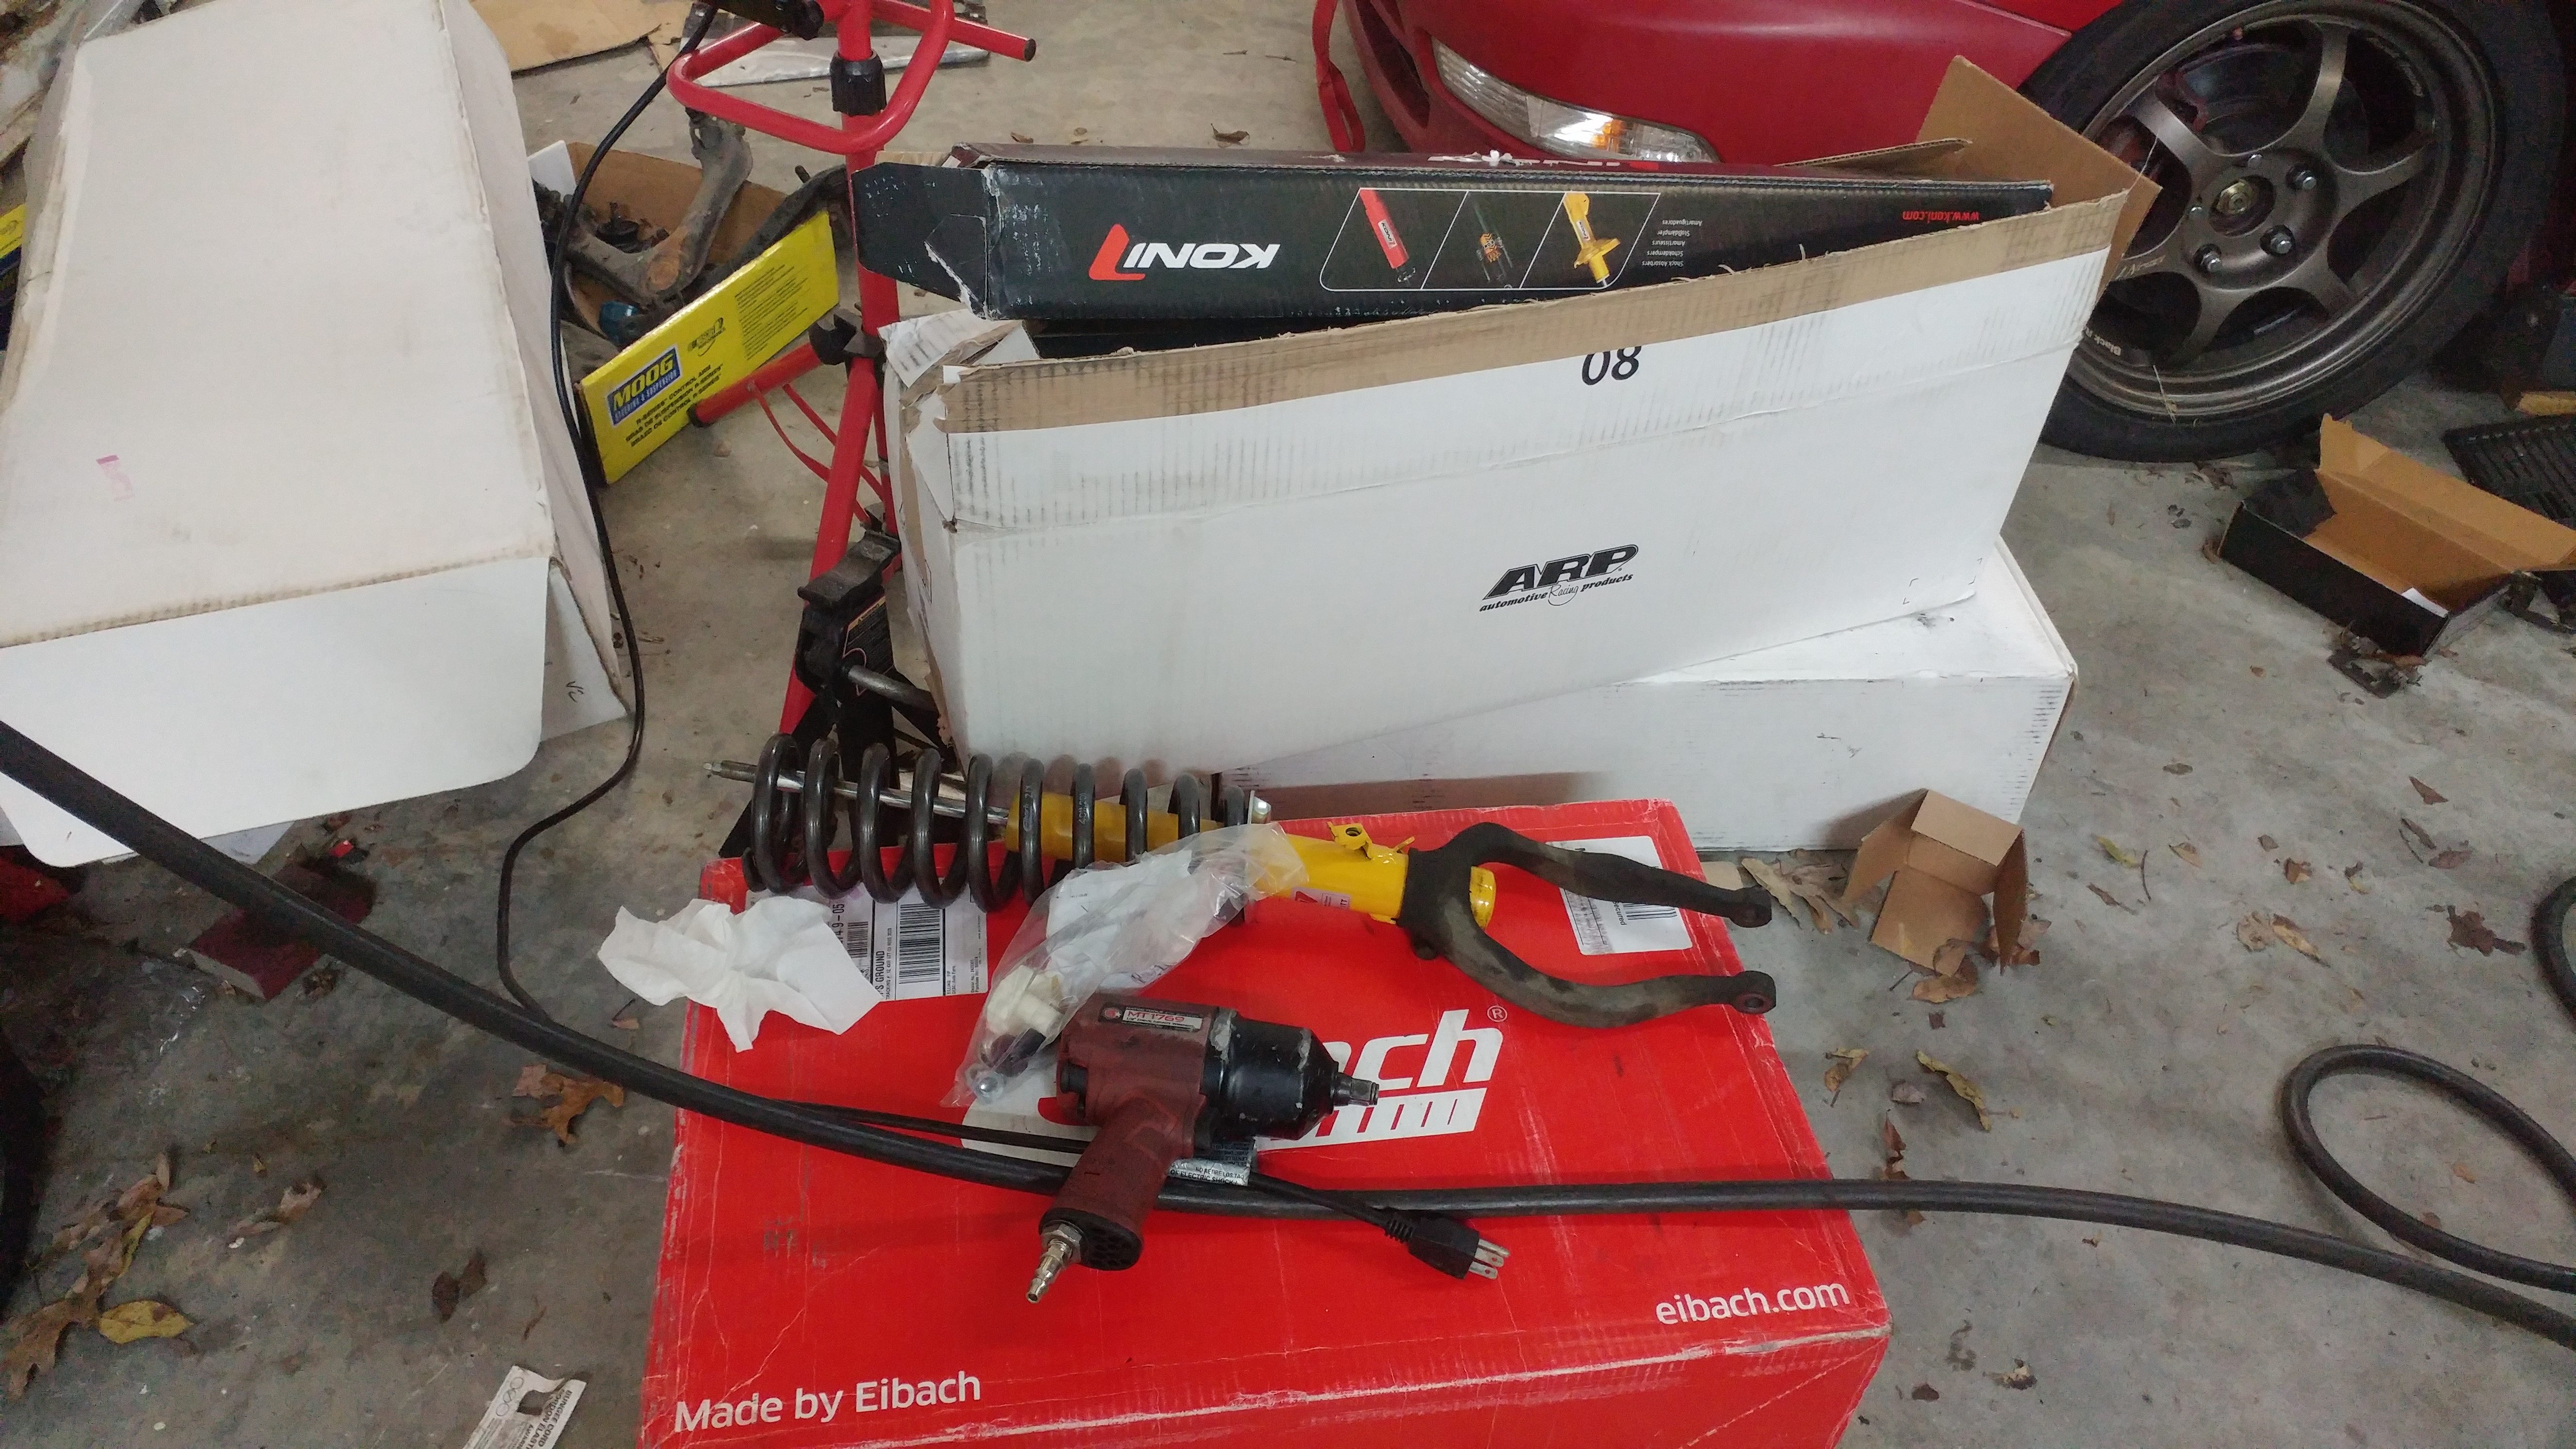
Waiting for Koni Yellow Sport shocks to arrive.
Waiting for new axle nuts to arrive from Acura.
Waiting for new sway bar end-links.
Got a brand new set of Eibach Pro-Kit lowering springs from Eibach that fits the 2.5 TL.
Getting closer!
The pics are random, didn't take many while having the stuff pressed.


Late update:
Got the knuckle bored to fit the bearing.
Got the bearing bolted in and hub pressed in.
Got the lower control arm off and pressed in new ball joints.
Got the new upper arms installed.
Waiting for new lower control arm bushings to arrive from Acura.
Waiting for Koni Yellow Sport shocks to arrive.
Waiting for new axle nuts to arrive from Acura.
Waiting for new sway bar end-links.
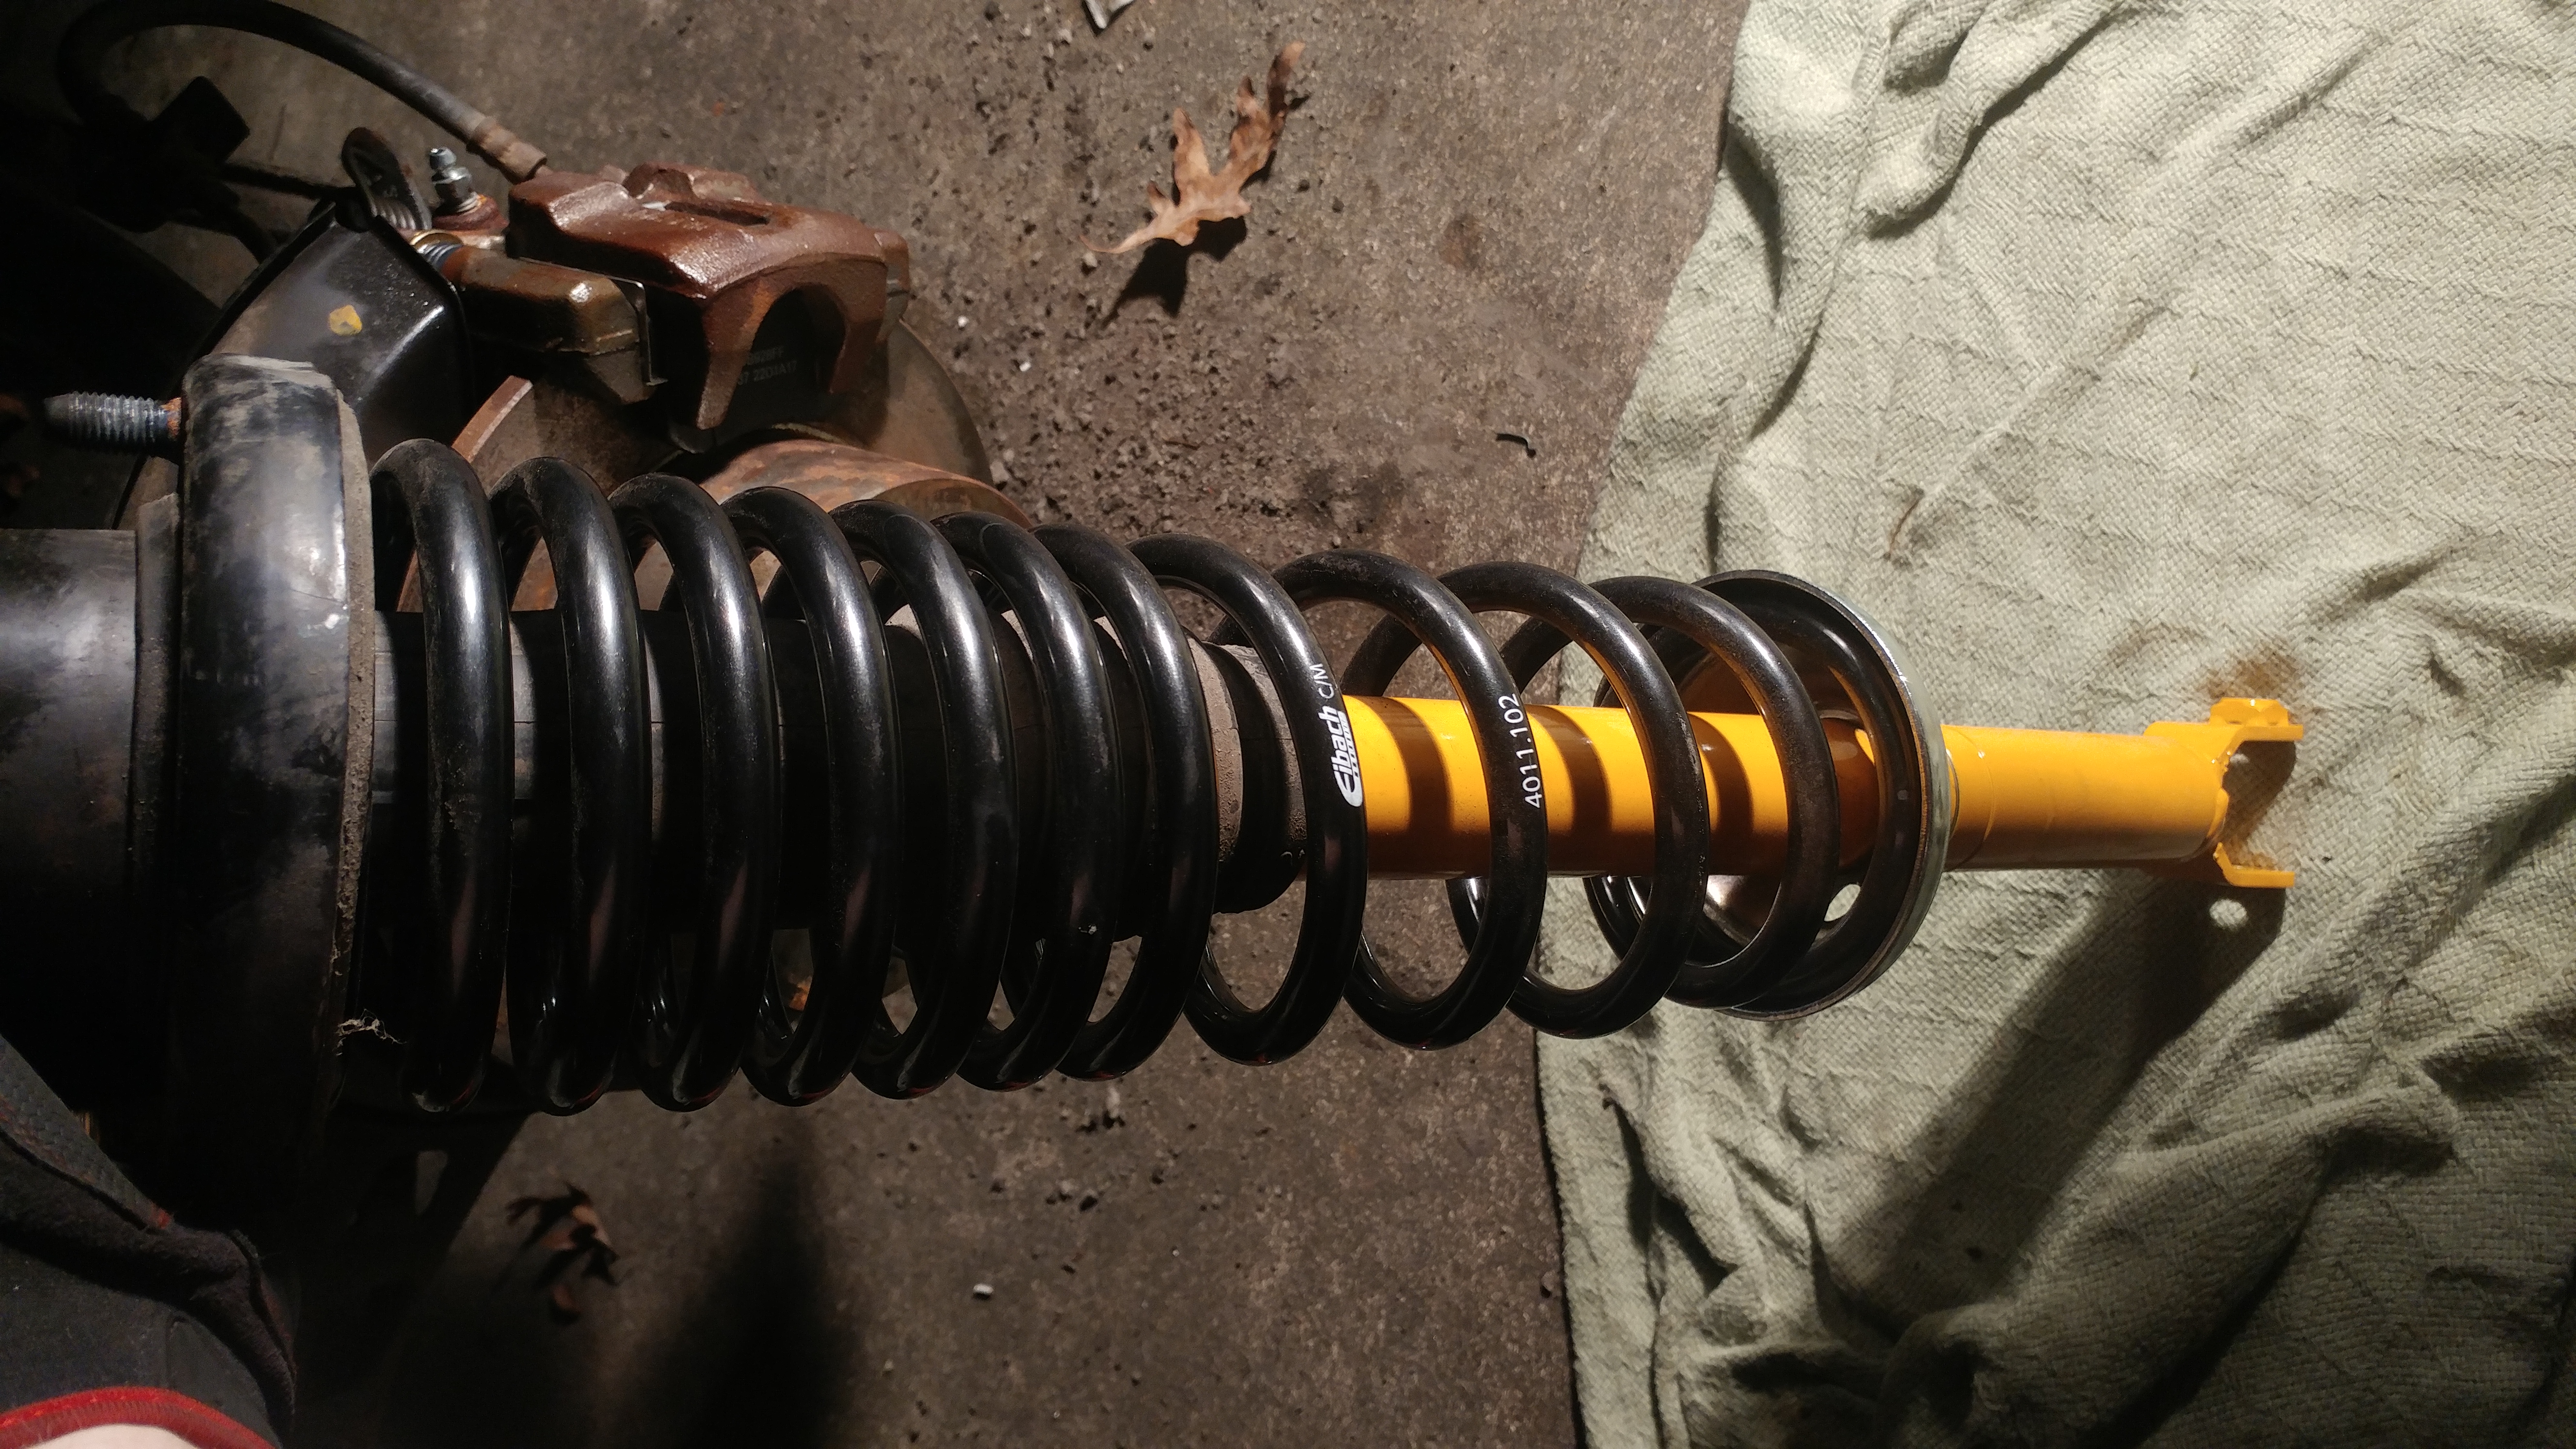
Got a brand new set of Eibach Pro-Kit lowering springs from Eibach that fits the 2.5 TL.
Getting closer!
The pics are random, didn't take many while having the stuff pressed.
The following users liked this post:
Ken1997TL (01-25-2018)
10-21-2017, 10:05 PM
#52
Burning Brakes
Thread Starter
10/21/17
Still waiting on Acura to send Lower Control Arm bushings and my TSXs door lock actuator... :/
But I did grab some dirty but in good shape<b>*</b> CL-S rear seats and arm rest. Yes I know I have the butt cushions on the wrong sides
<b>*</b>(ok, they're not really in that good of condition but all the seats from these Acuras are always ripped. I can deal with the light scratches and once I get them dusted off and moisturized they will looks great again)
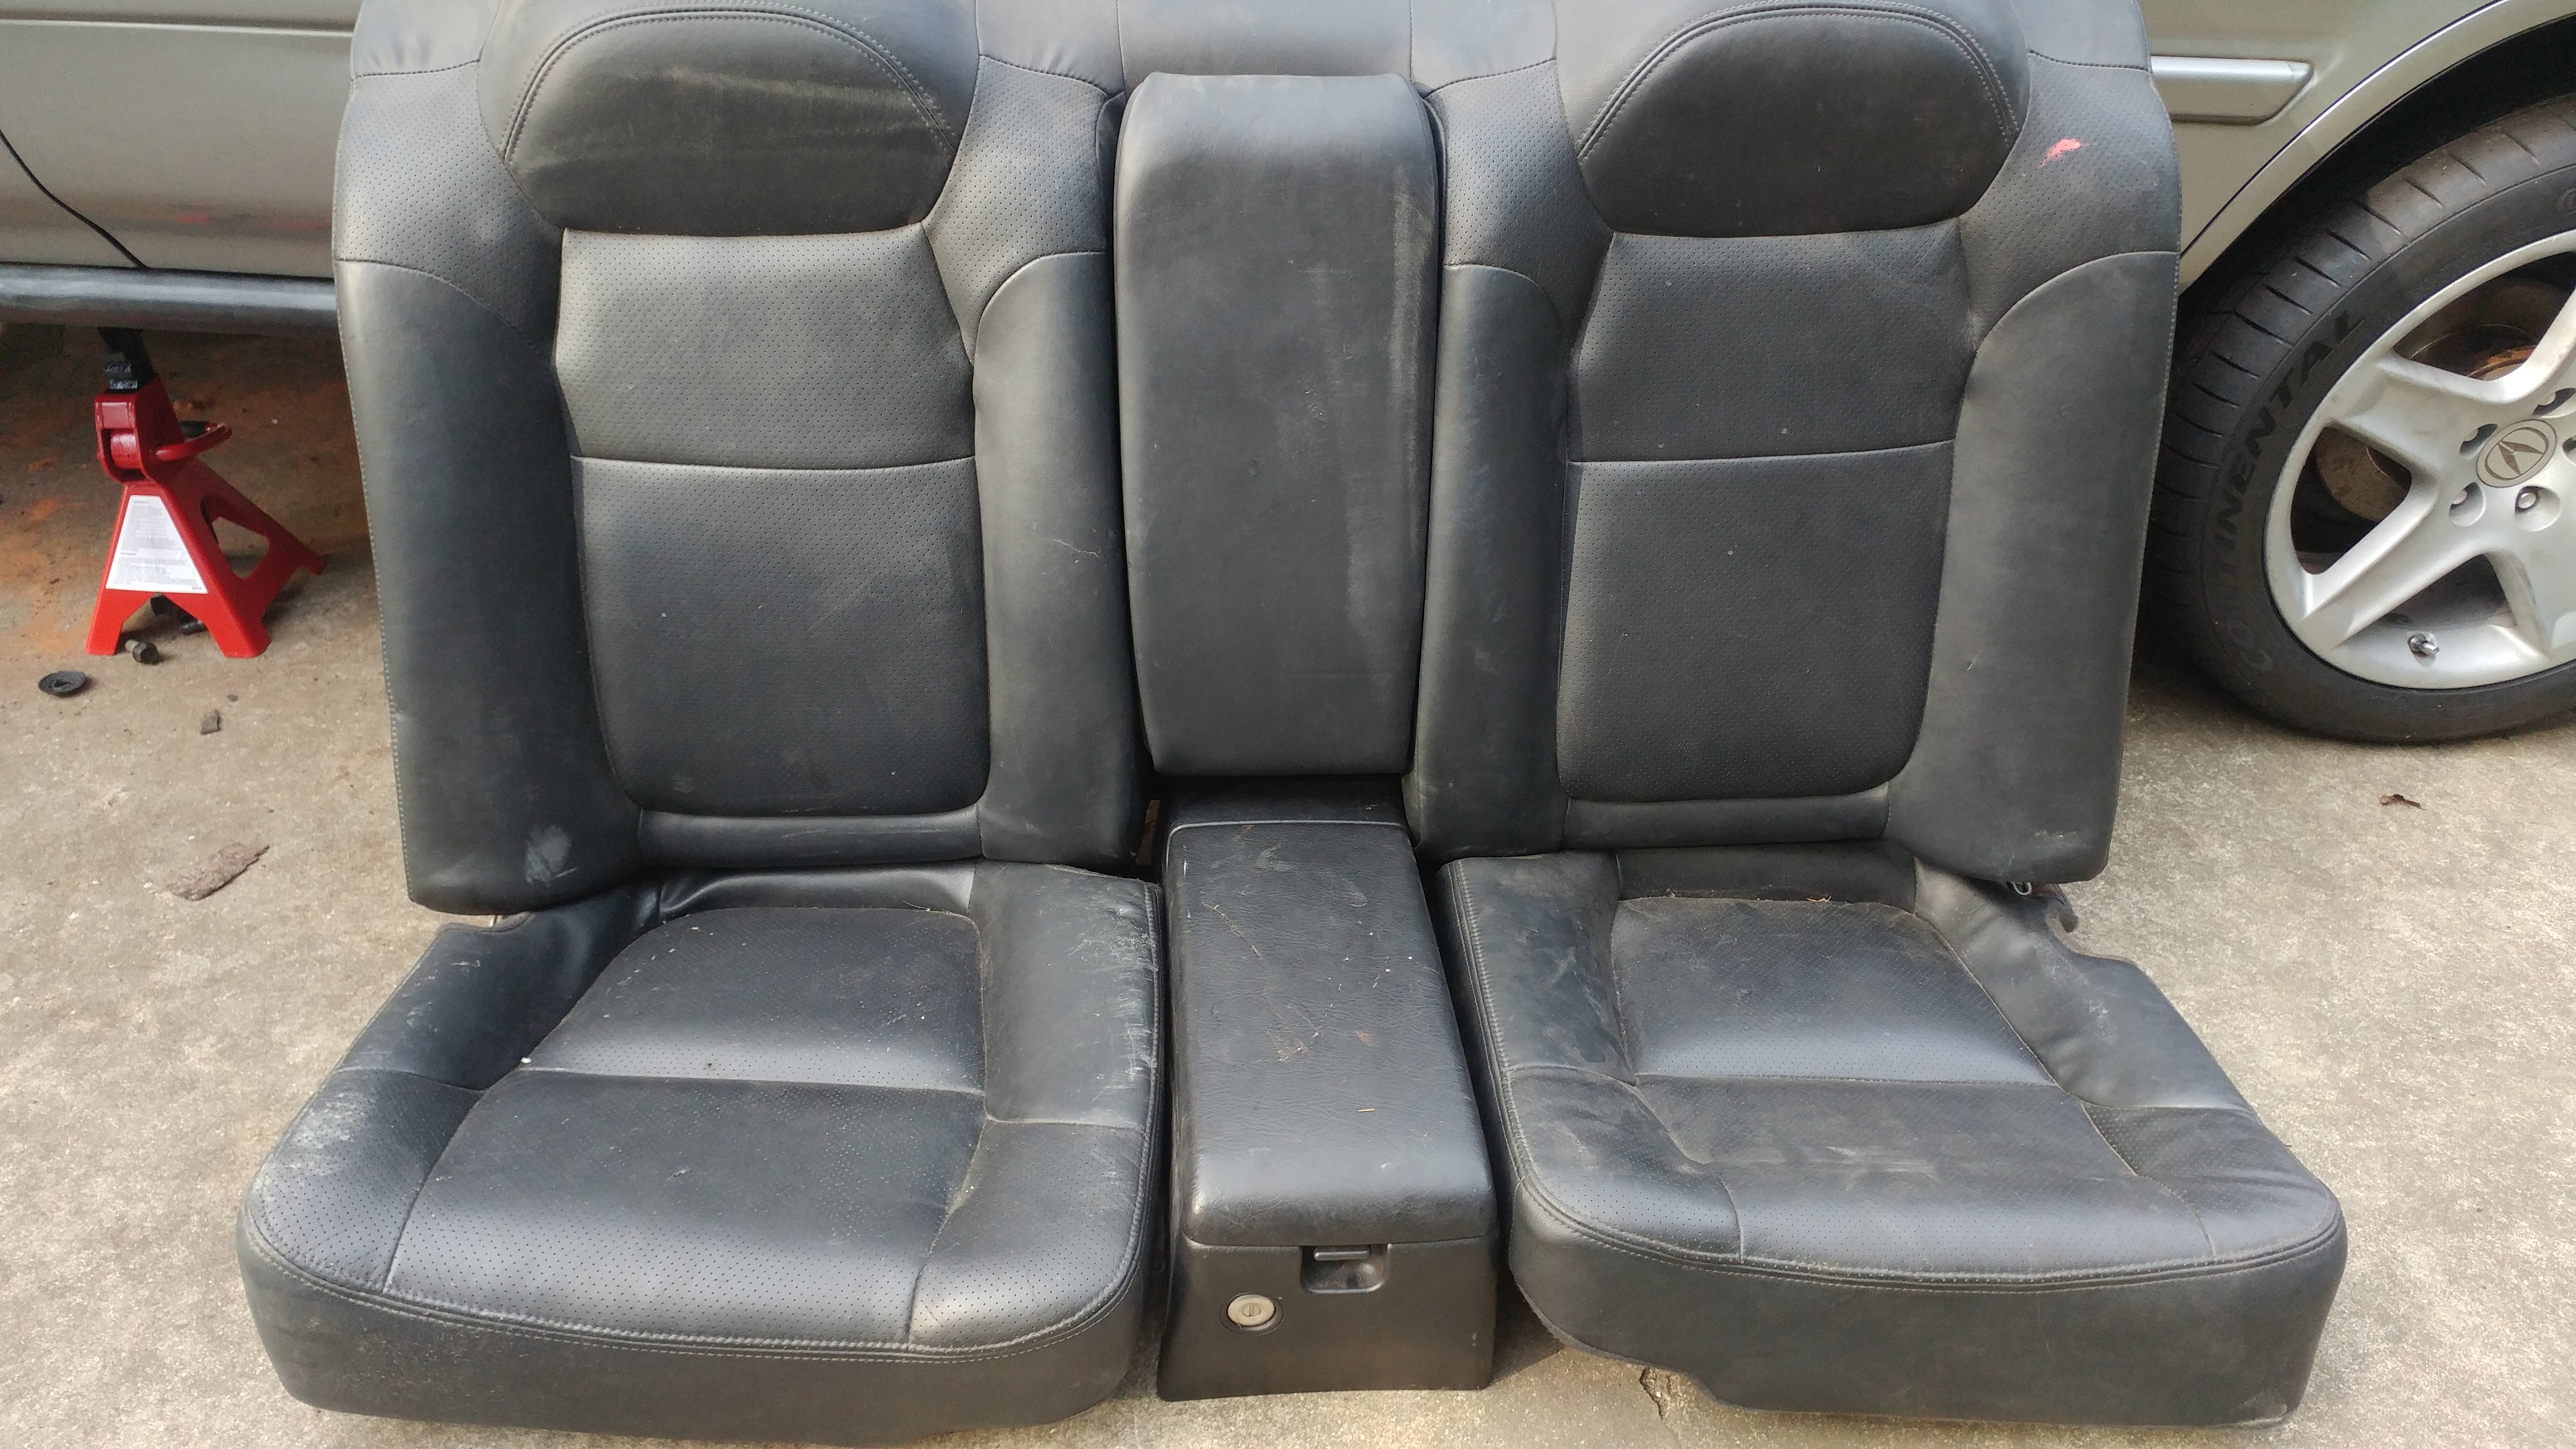
Literally just the new LCA bushings keeping it like this.

<b>P.S
</b> That Stealth RT is for sale.
Still waiting on Acura to send Lower Control Arm bushings and my TSXs door lock actuator... :/
But I did grab some dirty but in good shape<b>*</b> CL-S rear seats and arm rest. Yes I know I have the butt cushions on the wrong sides
<b>*</b>(ok, they're not really in that good of condition but all the seats from these Acuras are always ripped. I can deal with the light scratches and once I get them dusted off and moisturized they will looks great again)
Literally just the new LCA bushings keeping it like this.
<b>P.S
</b> That Stealth RT is for sale.
The following users liked this post:
Ken1997TL (01-25-2018)
01-18-2018, 12:11 PM
#53
Chapter Leader (Southern Region)
What a great thread.. should move this to Car Talk where it should get the attention it deserves.
01-18-2018, 12:15 PM
#54
Chapter Leader (Southern Region)

The following users liked this post:
Timmy18 (01-19-2018)
The following users liked this post:
Timmy18 (01-19-2018)
 01-19-2018, 01:05 AM
#58
Burning Brakes
Thread Starter
11/19/17
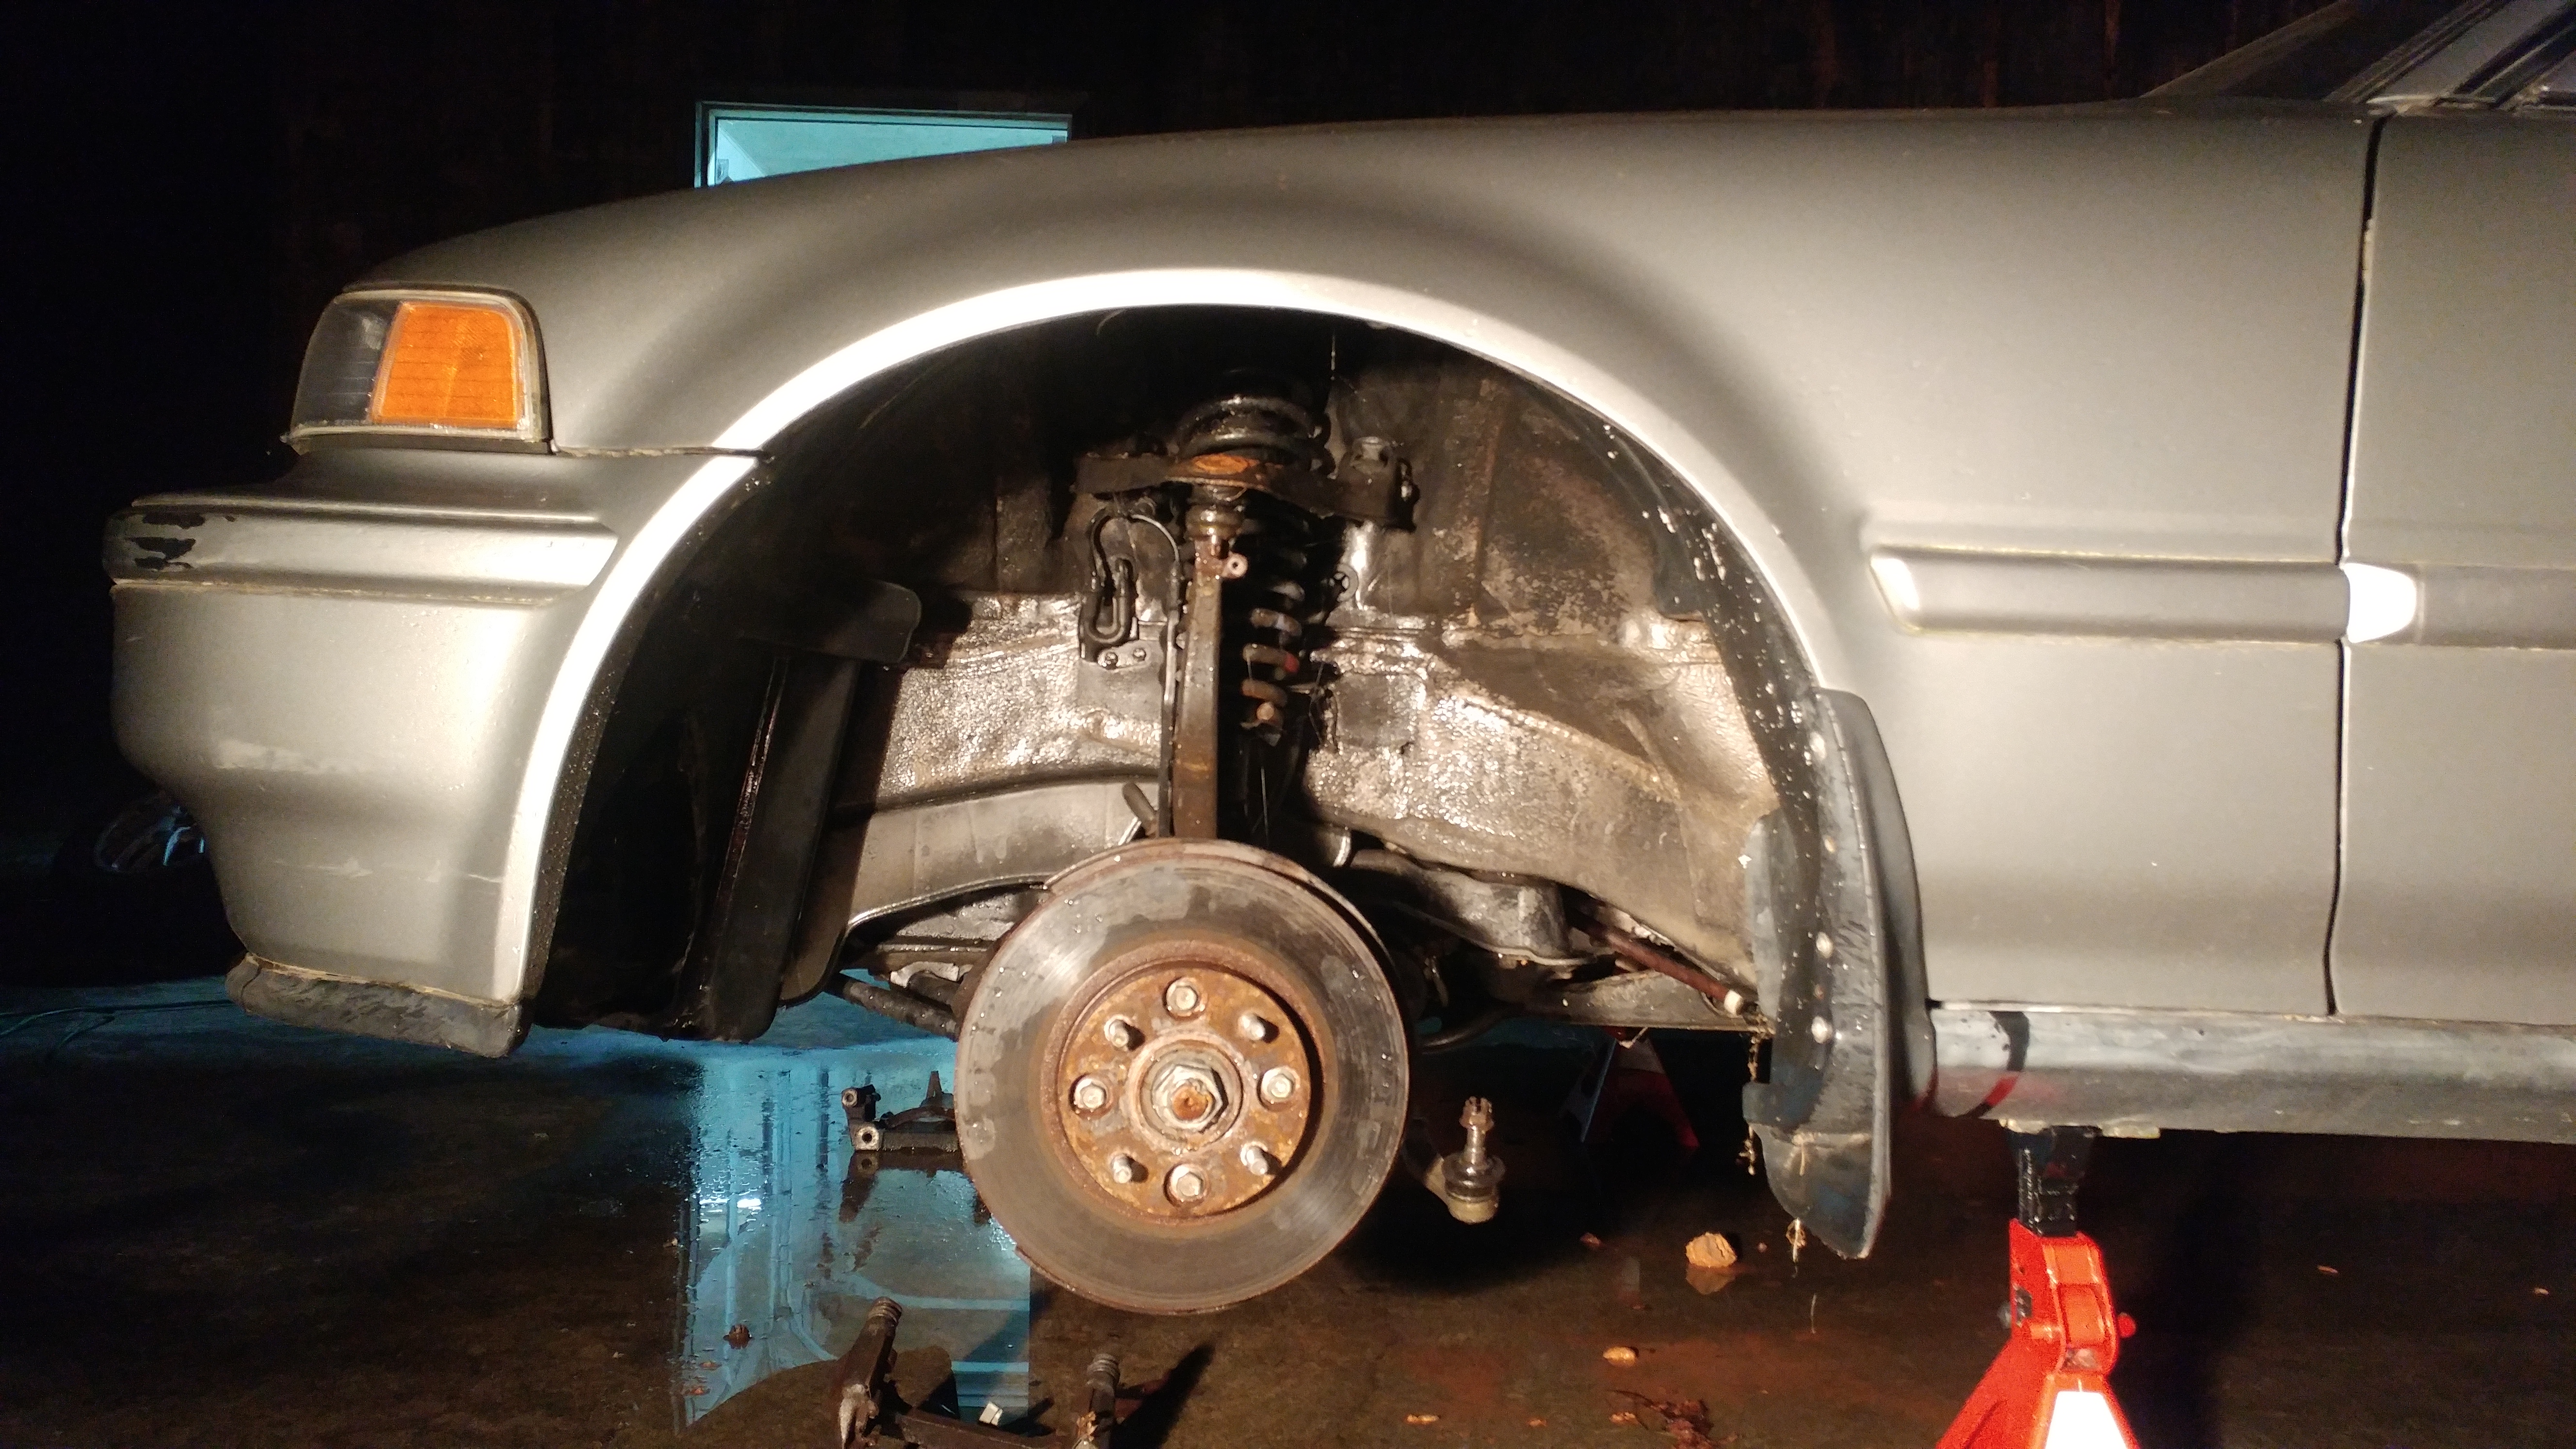
So the front end is complete! Got it all back together without any hang ups, bled the brakes and tightened the bushings <i>just enough</i>. Lowered the car, drove it back and forth some to get things to settle. drove the car up onto ramps and tightened the bushings down to spec and re-installed the front sway bar as well with it's new bushings.
The car sits beautifully up front and there is no rubbing (yet) and that's with the struts on their factory/ softest settings.
A lot of toe was gained and some natural camber as well.
Some Youtube videos of the car:
<b>Lowering the car:</b>


So the front end is complete! Got it all back together without any hang ups, bled the brakes and tightened the bushings <i>just enough</i>. Lowered the car, drove it back and forth some to get things to settle. drove the car up onto ramps and tightened the bushings down to spec and re-installed the front sway bar as well with it's new bushings.
The car sits beautifully up front and there is no rubbing (yet) and that's with the struts on their factory/ softest settings.
A lot of toe was gained and some natural camber as well.
Some Youtube videos of the car:
The following 2 users liked this post by Timmy18:
1killercls (01-26-2018),
Ken1997TL (01-25-2018)
01-19-2018, 01:08 AM
#59
Burning Brakes
Thread Starter
11/22/17
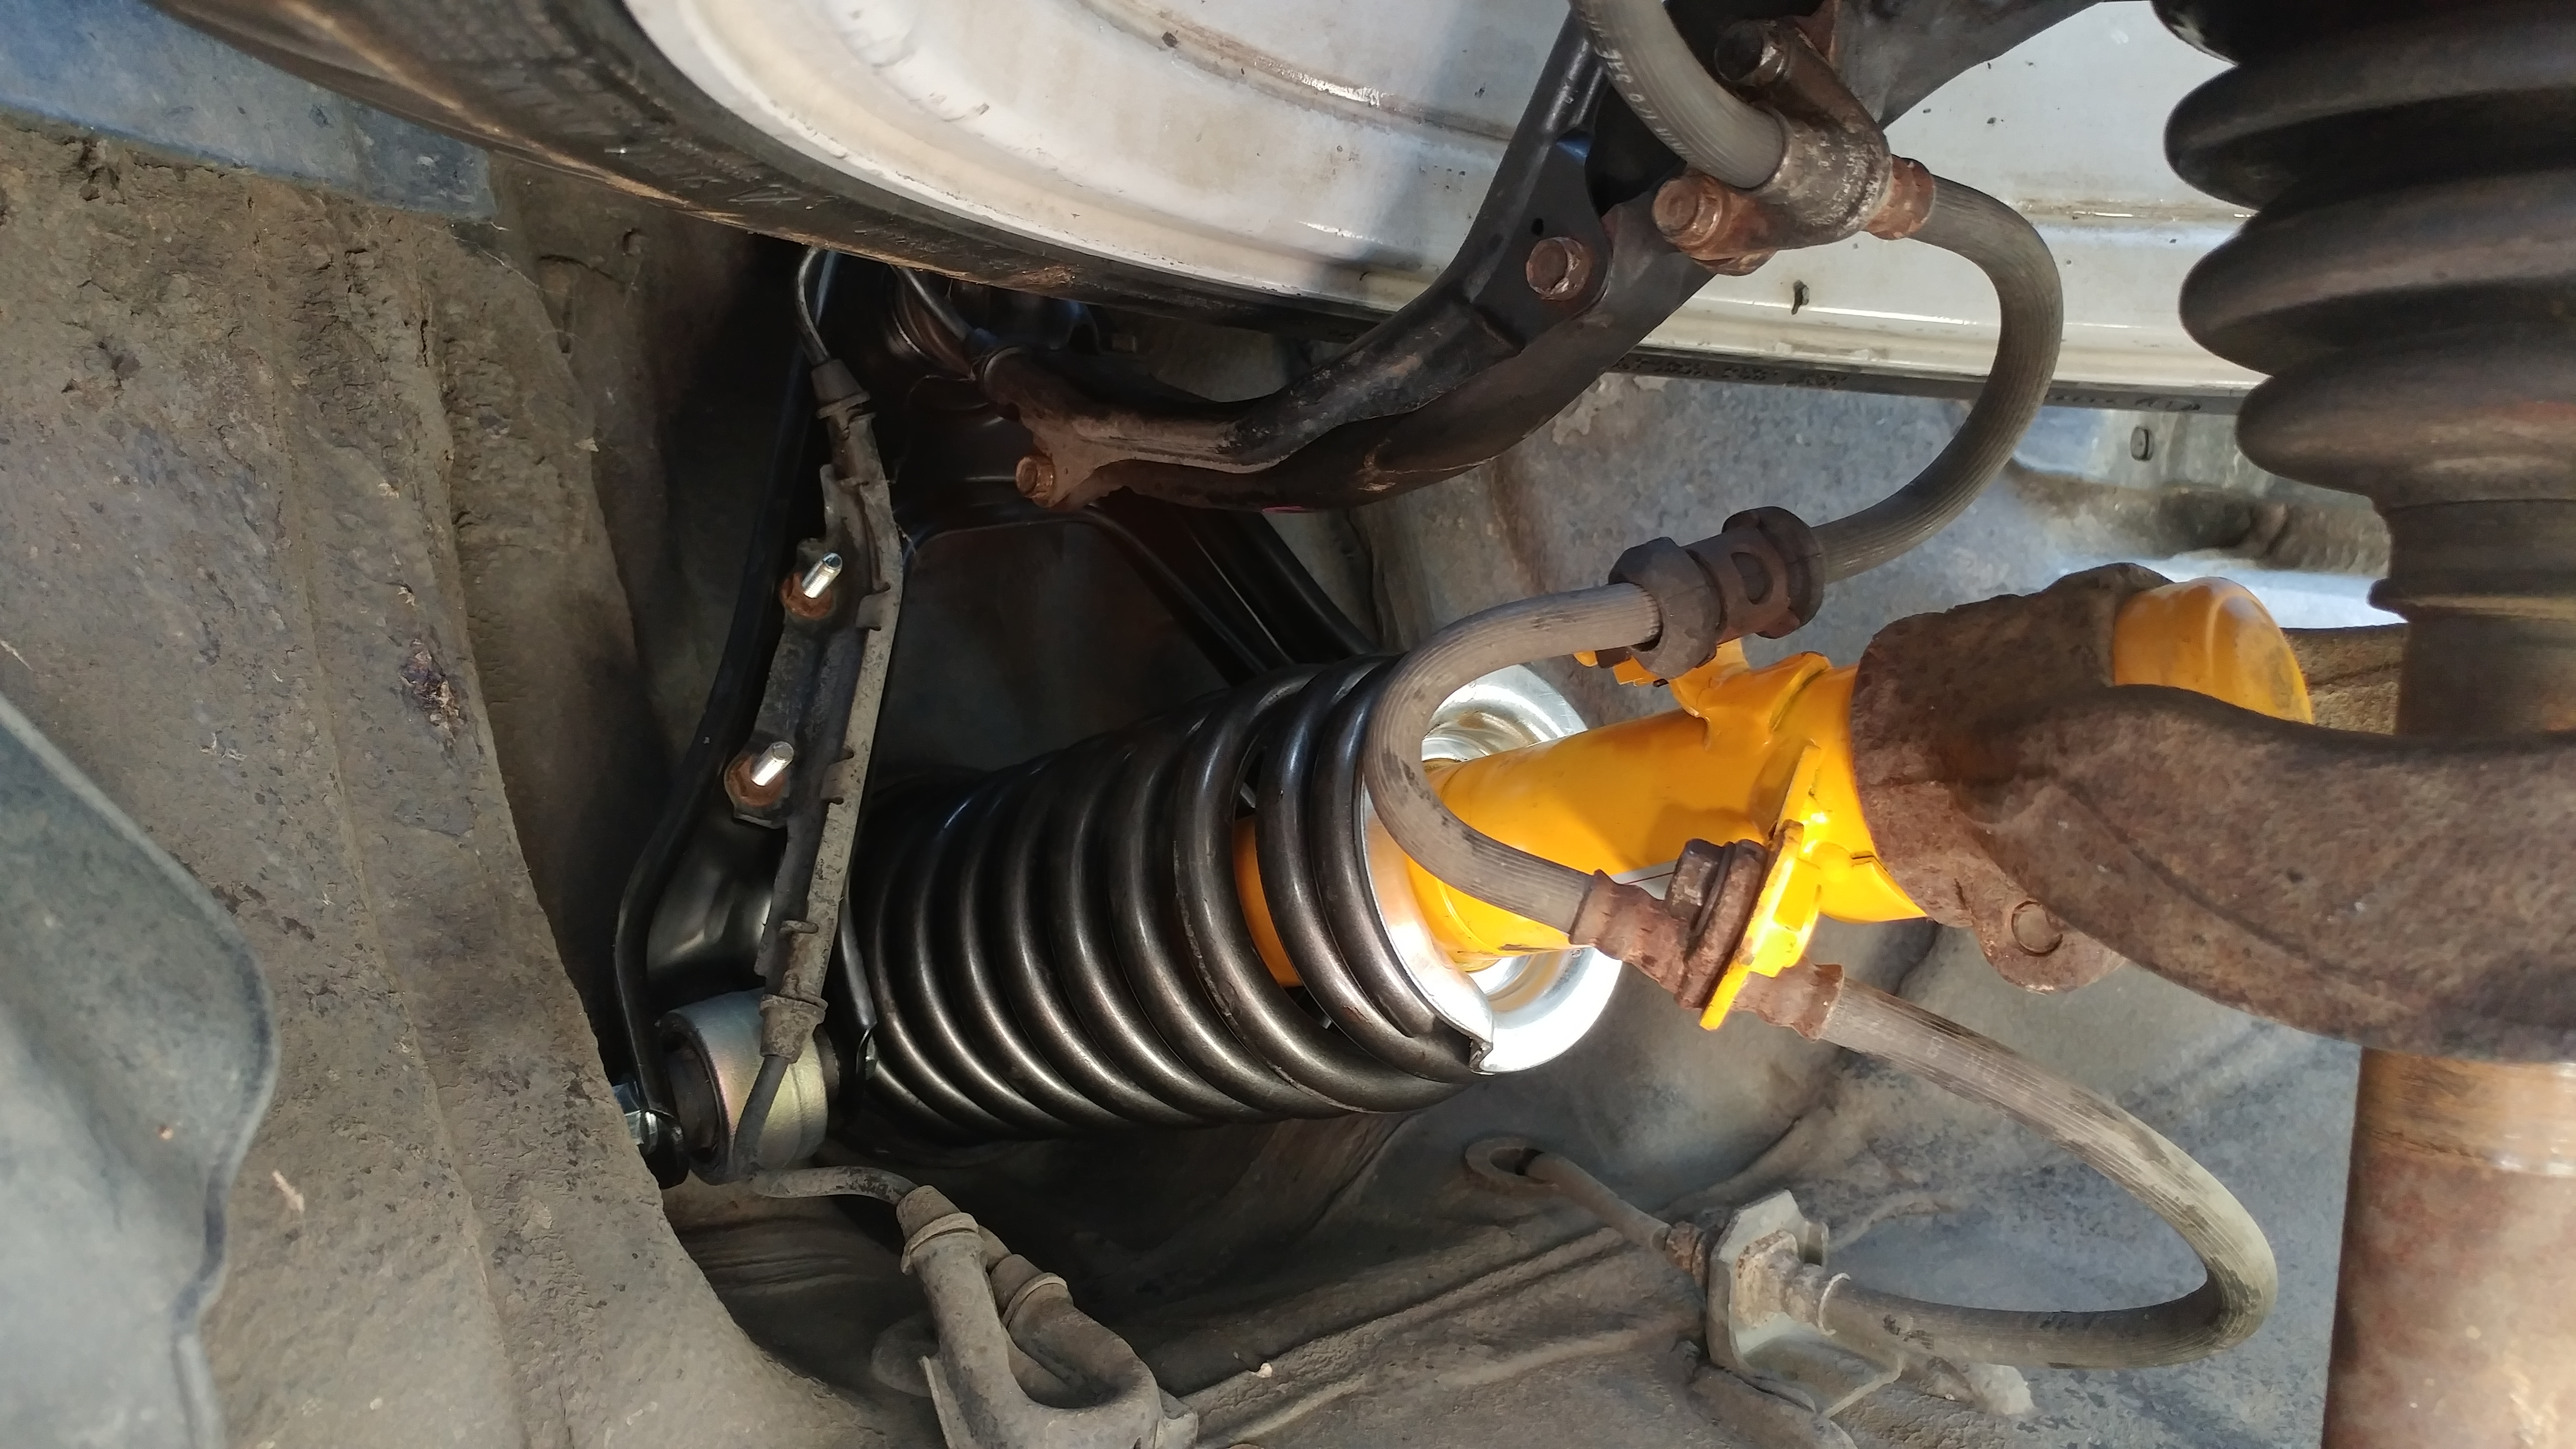
Installed the rears!
<b>Just a disclaimer!!</b> The front shocks are on their factory, out of the box setting. That is, softest dampening and "middle" perch/ height. I will be going back and raising the front perches up a notch which equals about +.25" of height over what you see in the front now. I will also set the dampening setting to "medium" to combat some body roll and bottoming out the strut in severe cases.
Online I had read about the rears sitting too-low on the *lighter* Accords with the middle/ out of box perch setting so I moved the perch up to the highest setting which is something around +5/8ths of an inch. The result was pretty desirable, though the springs STILL need to settle and break themselves in. I will also set these rear dampeners to the medium setting.
Also for the rear, I will be looking for a camber kit to gain me around -.08 / -1.0 or so degrees to match the front *which is just natural camber) and to help aid in handling as well as keep the tire and rear fenders from touching as much as possible. Also on the list is a stiffer rear sway bar to keep some body roll out.
Overall I am VERY happy with this outcome. First time ever "building" a car and I did all 100% on my own other than the fat my friend let me barrow his garage and tools. The hardest part was souring parts and figuring which worked together. Every time I ran into an issue I somehow over came that issue the same night and was able to keep moving forward. Nothing stopped me from doing this and the car is the proof. Not the cold, not the heat, not the rain and not myself. Dedication helped get me here for sure. Every night after work (9pm and after) I would drive 20 minutes to the shop and get to work until around 1 or 2am most nights. Doing little by little and keeping it all organized. For me to accomplish something like this, something i had always read and watched others do but never had the opportunity to do it myself has done so much for me. I can go on and on about how this project is helping me but I'll save it for later.

Sorry about the bad photos. Camera lens on my hone is cracked and causes bad focus and glare. The car needs to be detailed and cosmetically worked on anyway.
Installed the rears!
<b>Just a disclaimer!!</b> The front shocks are on their factory, out of the box setting. That is, softest dampening and "middle" perch/ height. I will be going back and raising the front perches up a notch which equals about +.25" of height over what you see in the front now. I will also set the dampening setting to "medium" to combat some body roll and bottoming out the strut in severe cases.
Online I had read about the rears sitting too-low on the *lighter* Accords with the middle/ out of box perch setting so I moved the perch up to the highest setting which is something around +5/8ths of an inch. The result was pretty desirable, though the springs STILL need to settle and break themselves in. I will also set these rear dampeners to the medium setting.
Also for the rear, I will be looking for a camber kit to gain me around -.08 / -1.0 or so degrees to match the front *which is just natural camber) and to help aid in handling as well as keep the tire and rear fenders from touching as much as possible. Also on the list is a stiffer rear sway bar to keep some body roll out.
Overall I am VERY happy with this outcome. First time ever "building" a car and I did all 100% on my own other than the fat my friend let me barrow his garage and tools. The hardest part was souring parts and figuring which worked together. Every time I ran into an issue I somehow over came that issue the same night and was able to keep moving forward. Nothing stopped me from doing this and the car is the proof. Not the cold, not the heat, not the rain and not myself. Dedication helped get me here for sure. Every night after work (9pm and after) I would drive 20 minutes to the shop and get to work until around 1 or 2am most nights. Doing little by little and keeping it all organized. For me to accomplish something like this, something i had always read and watched others do but never had the opportunity to do it myself has done so much for me. I can go on and on about how this project is helping me but I'll save it for later.
Sorry about the bad photos. Camera lens on my hone is cracked and causes bad focus and glare. The car needs to be detailed and cosmetically worked on anyway.
01-19-2018, 01:10 AM
#61
Burning Brakes
Thread Starter
11/24/17
Some updates


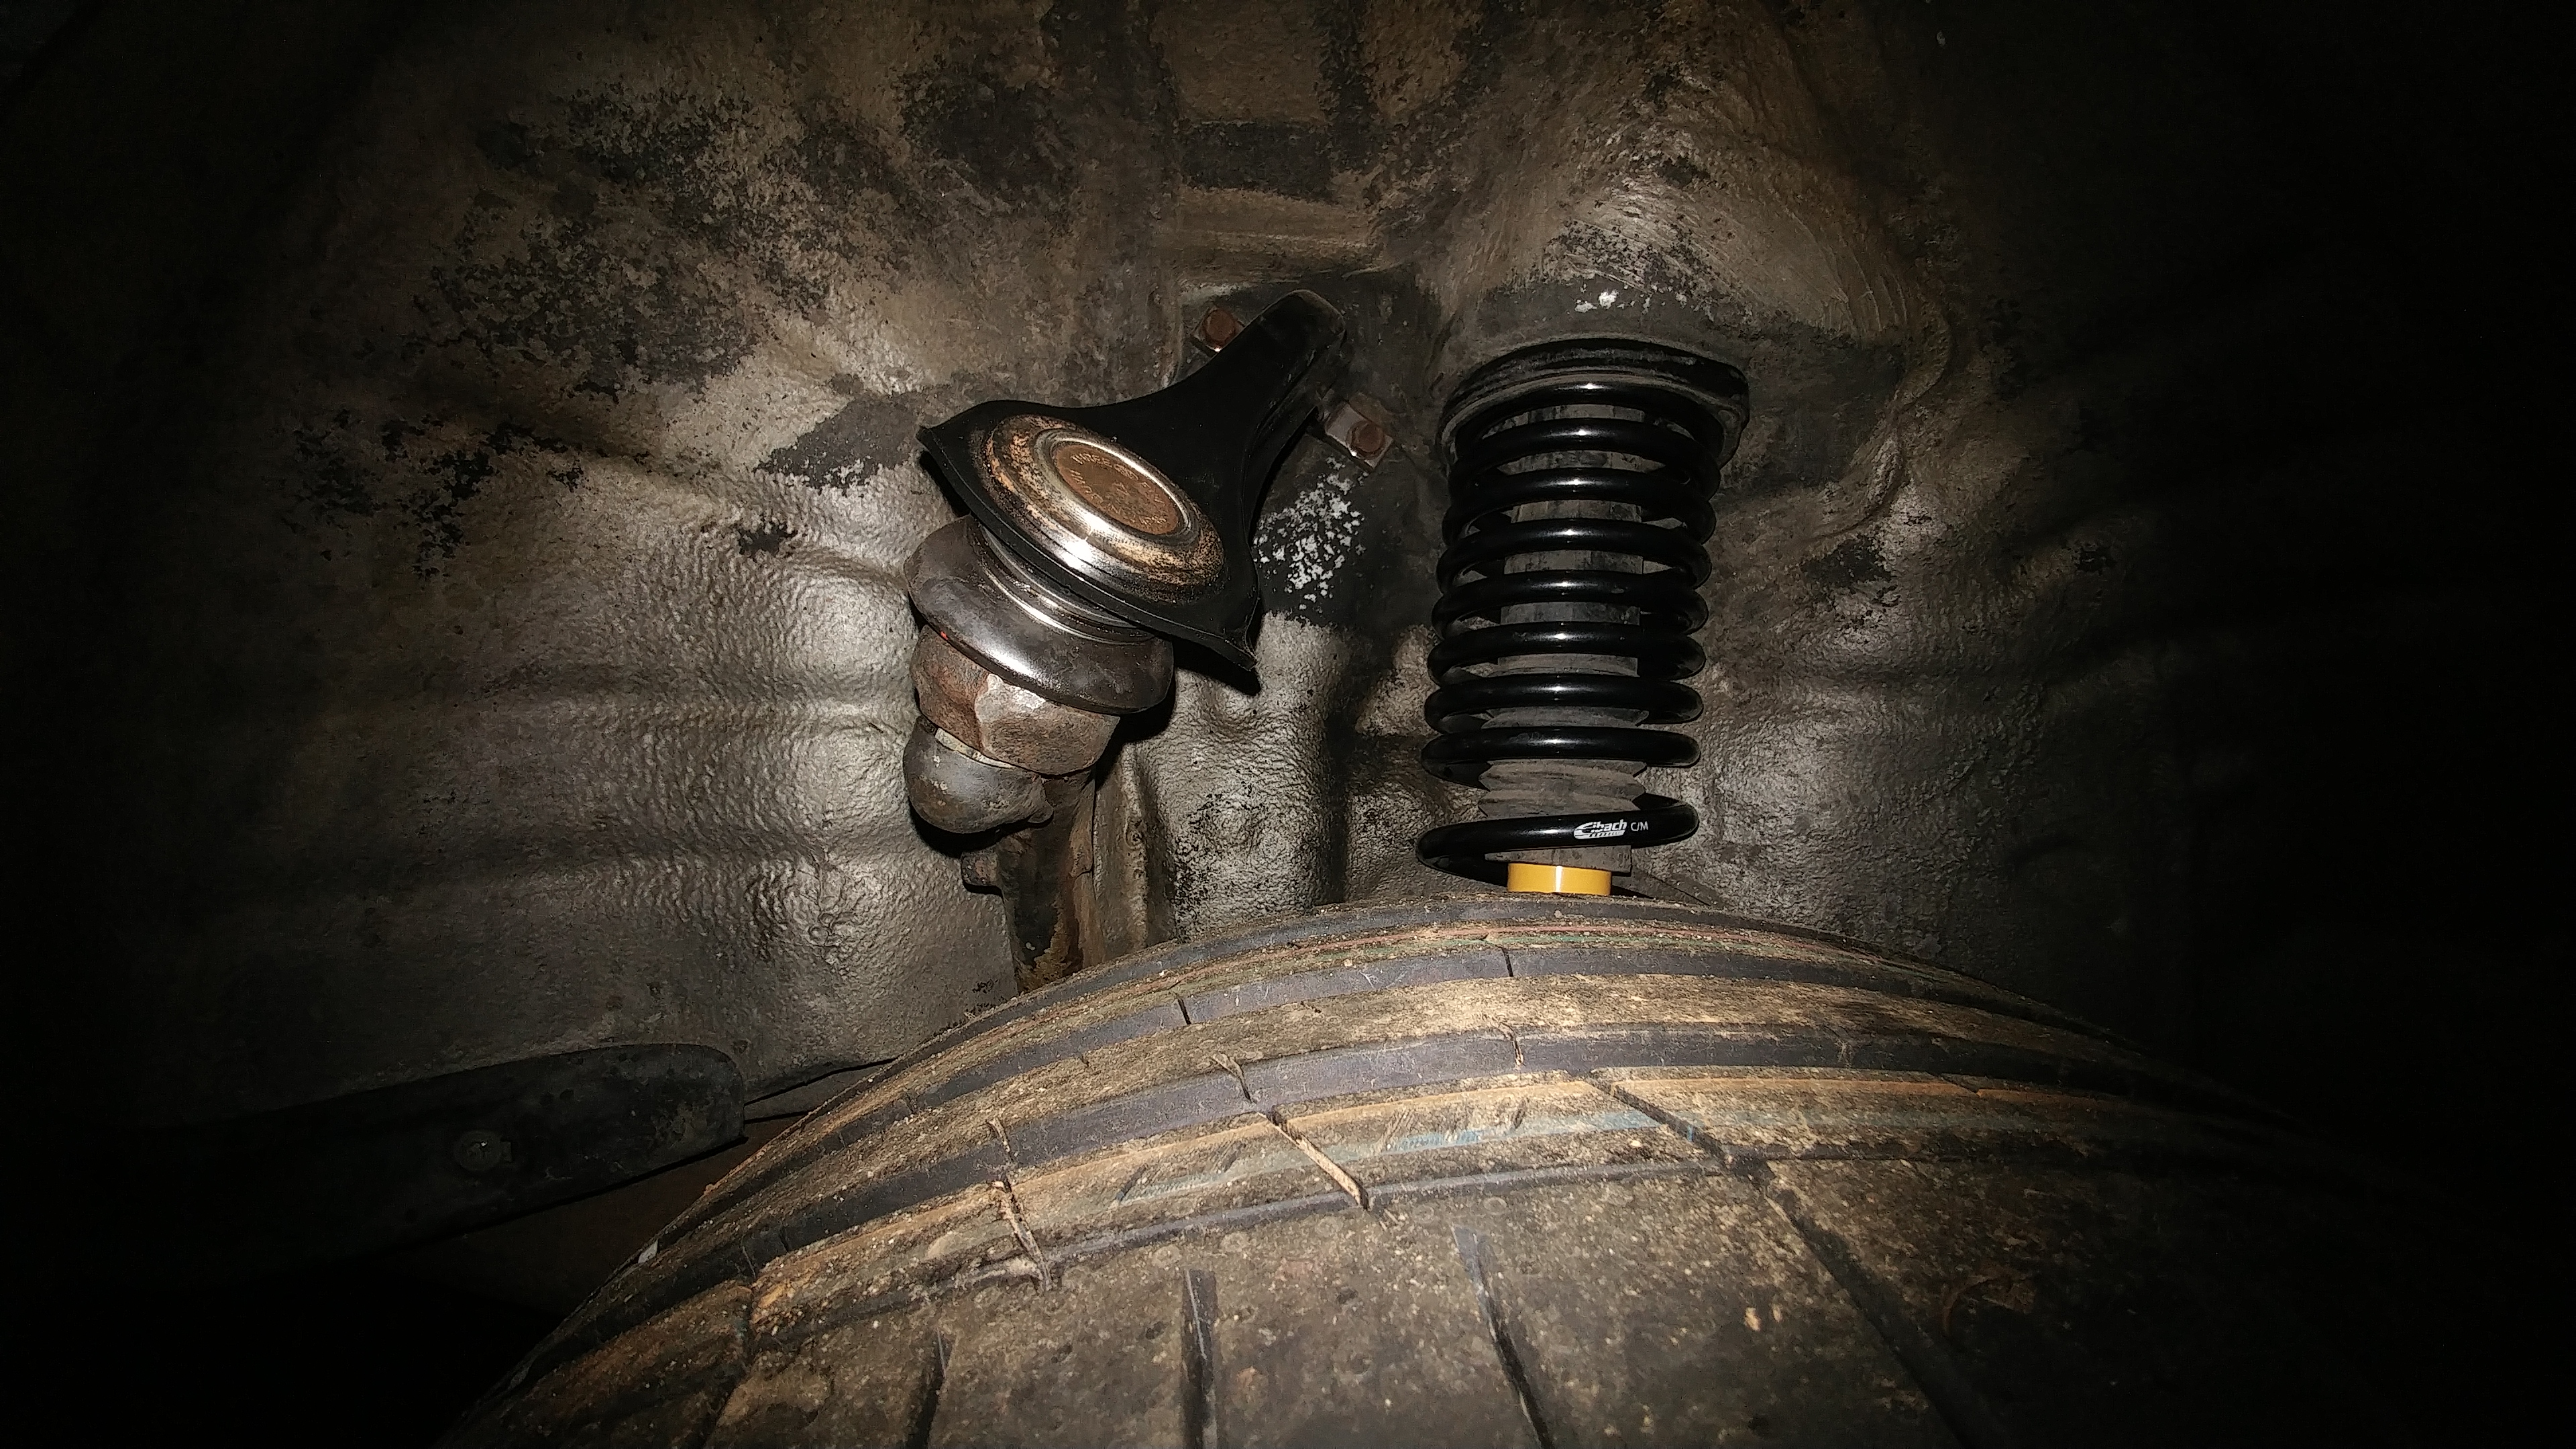
So these were taken after I removed the front suspension to raise the perch on the struts to gain some wheel to fender clearance. Well, There is only two settings and I'm already on the highest.
So I have to look into taller and stiffer springs or have spacers made to go between the top hat and car, but the top hat studs would have to be extended.
And for the rears, they rub! Even with the clearance they have away from the fender vertically, the struts even on their stiffest setting still allows enough travel to make the tires rub because they are flush. I do need to add camber to the rear, that may help some but I'm sure I'll have to go get a smaller tire size, probably 225/40/17 vs current 235/45/17. From what I am told 235/40/17 won't be different enough than 235/45/17.....
ughhhhh.
I'm not even going to talk about the distributor leaking oil onto the exhaust causing a huge smoke problem I have to address or some other things.
And forget the Krell Audio.
Some updates
So these were taken after I removed the front suspension to raise the perch on the struts to gain some wheel to fender clearance. Well, There is only two settings and I'm already on the highest.
So I have to look into taller and stiffer springs or have spacers made to go between the top hat and car, but the top hat studs would have to be extended.
And for the rears, they rub! Even with the clearance they have away from the fender vertically, the struts even on their stiffest setting still allows enough travel to make the tires rub because they are flush. I do need to add camber to the rear, that may help some but I'm sure I'll have to go get a smaller tire size, probably 225/40/17 vs current 235/45/17. From what I am told 235/40/17 won't be different enough than 235/45/17.....
ughhhhh.
I'm not even going to talk about the distributor leaking oil onto the exhaust causing a huge smoke problem I have to address or some other things.
And forget the Krell Audio.
The following users liked this post:
Ken1997TL (01-25-2018)
 01-19-2018, 01:11 AM
#63
Burning Brakes
Thread Starter
12/11/17
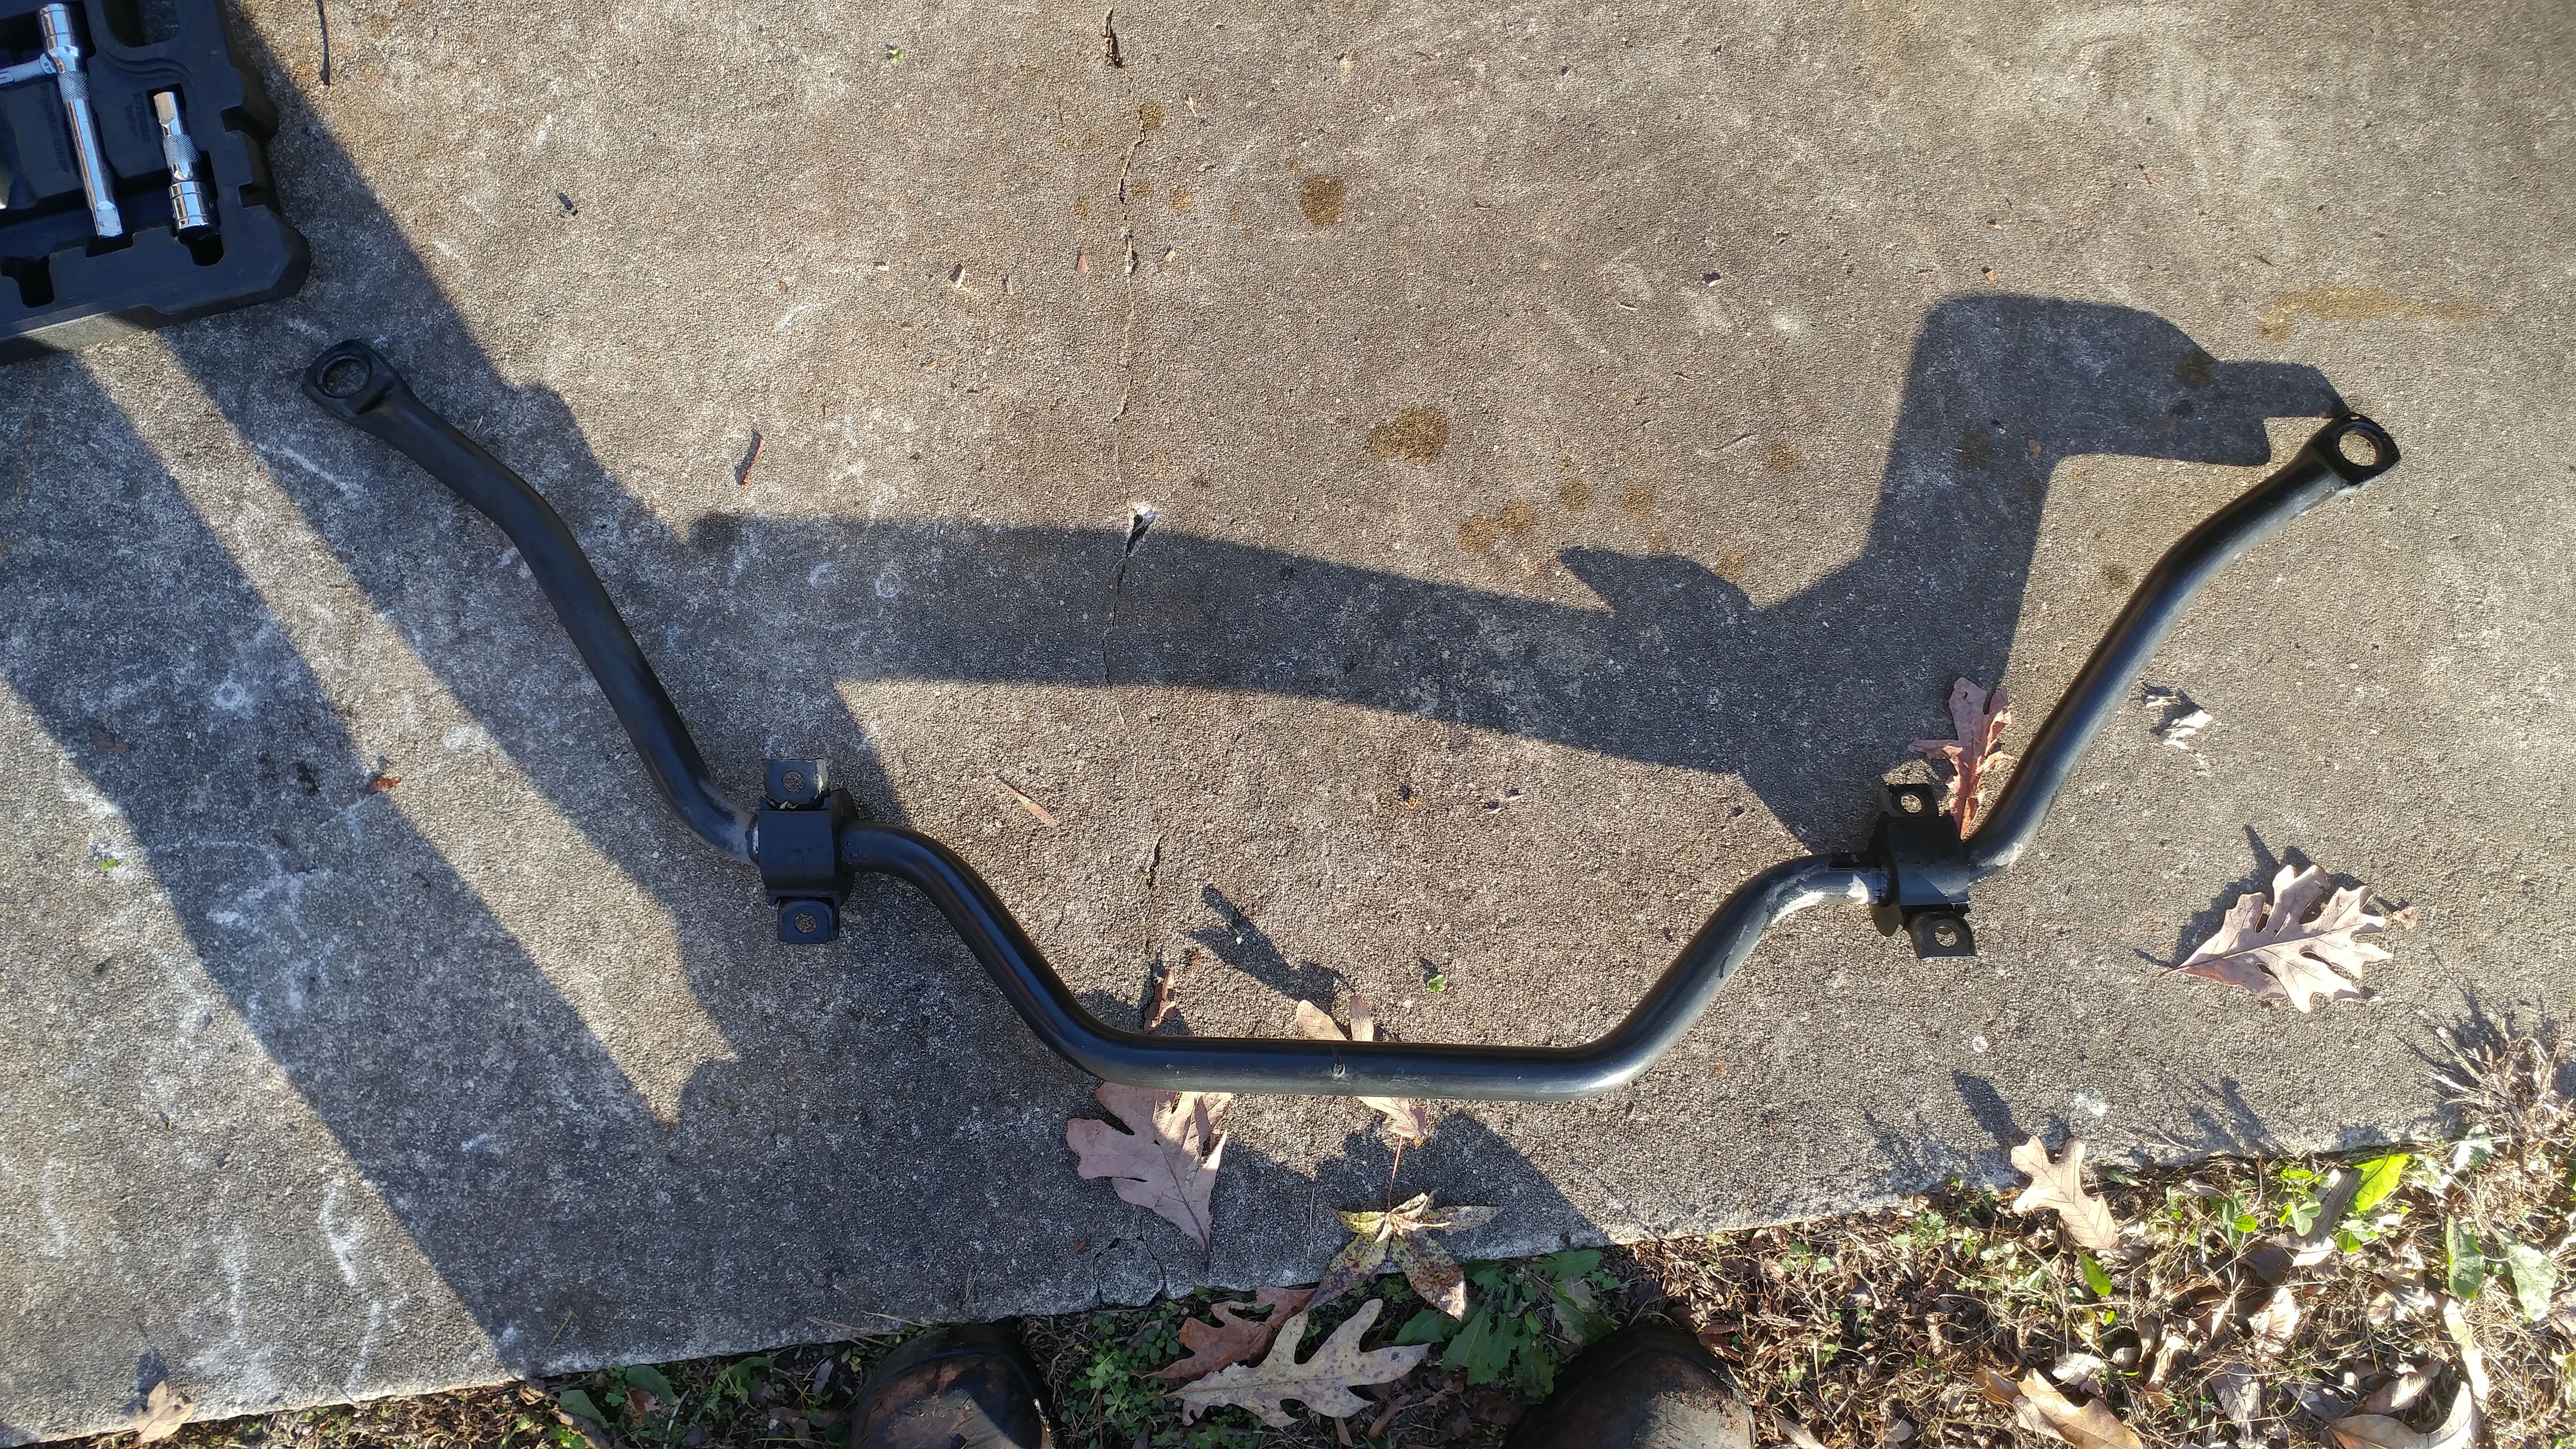
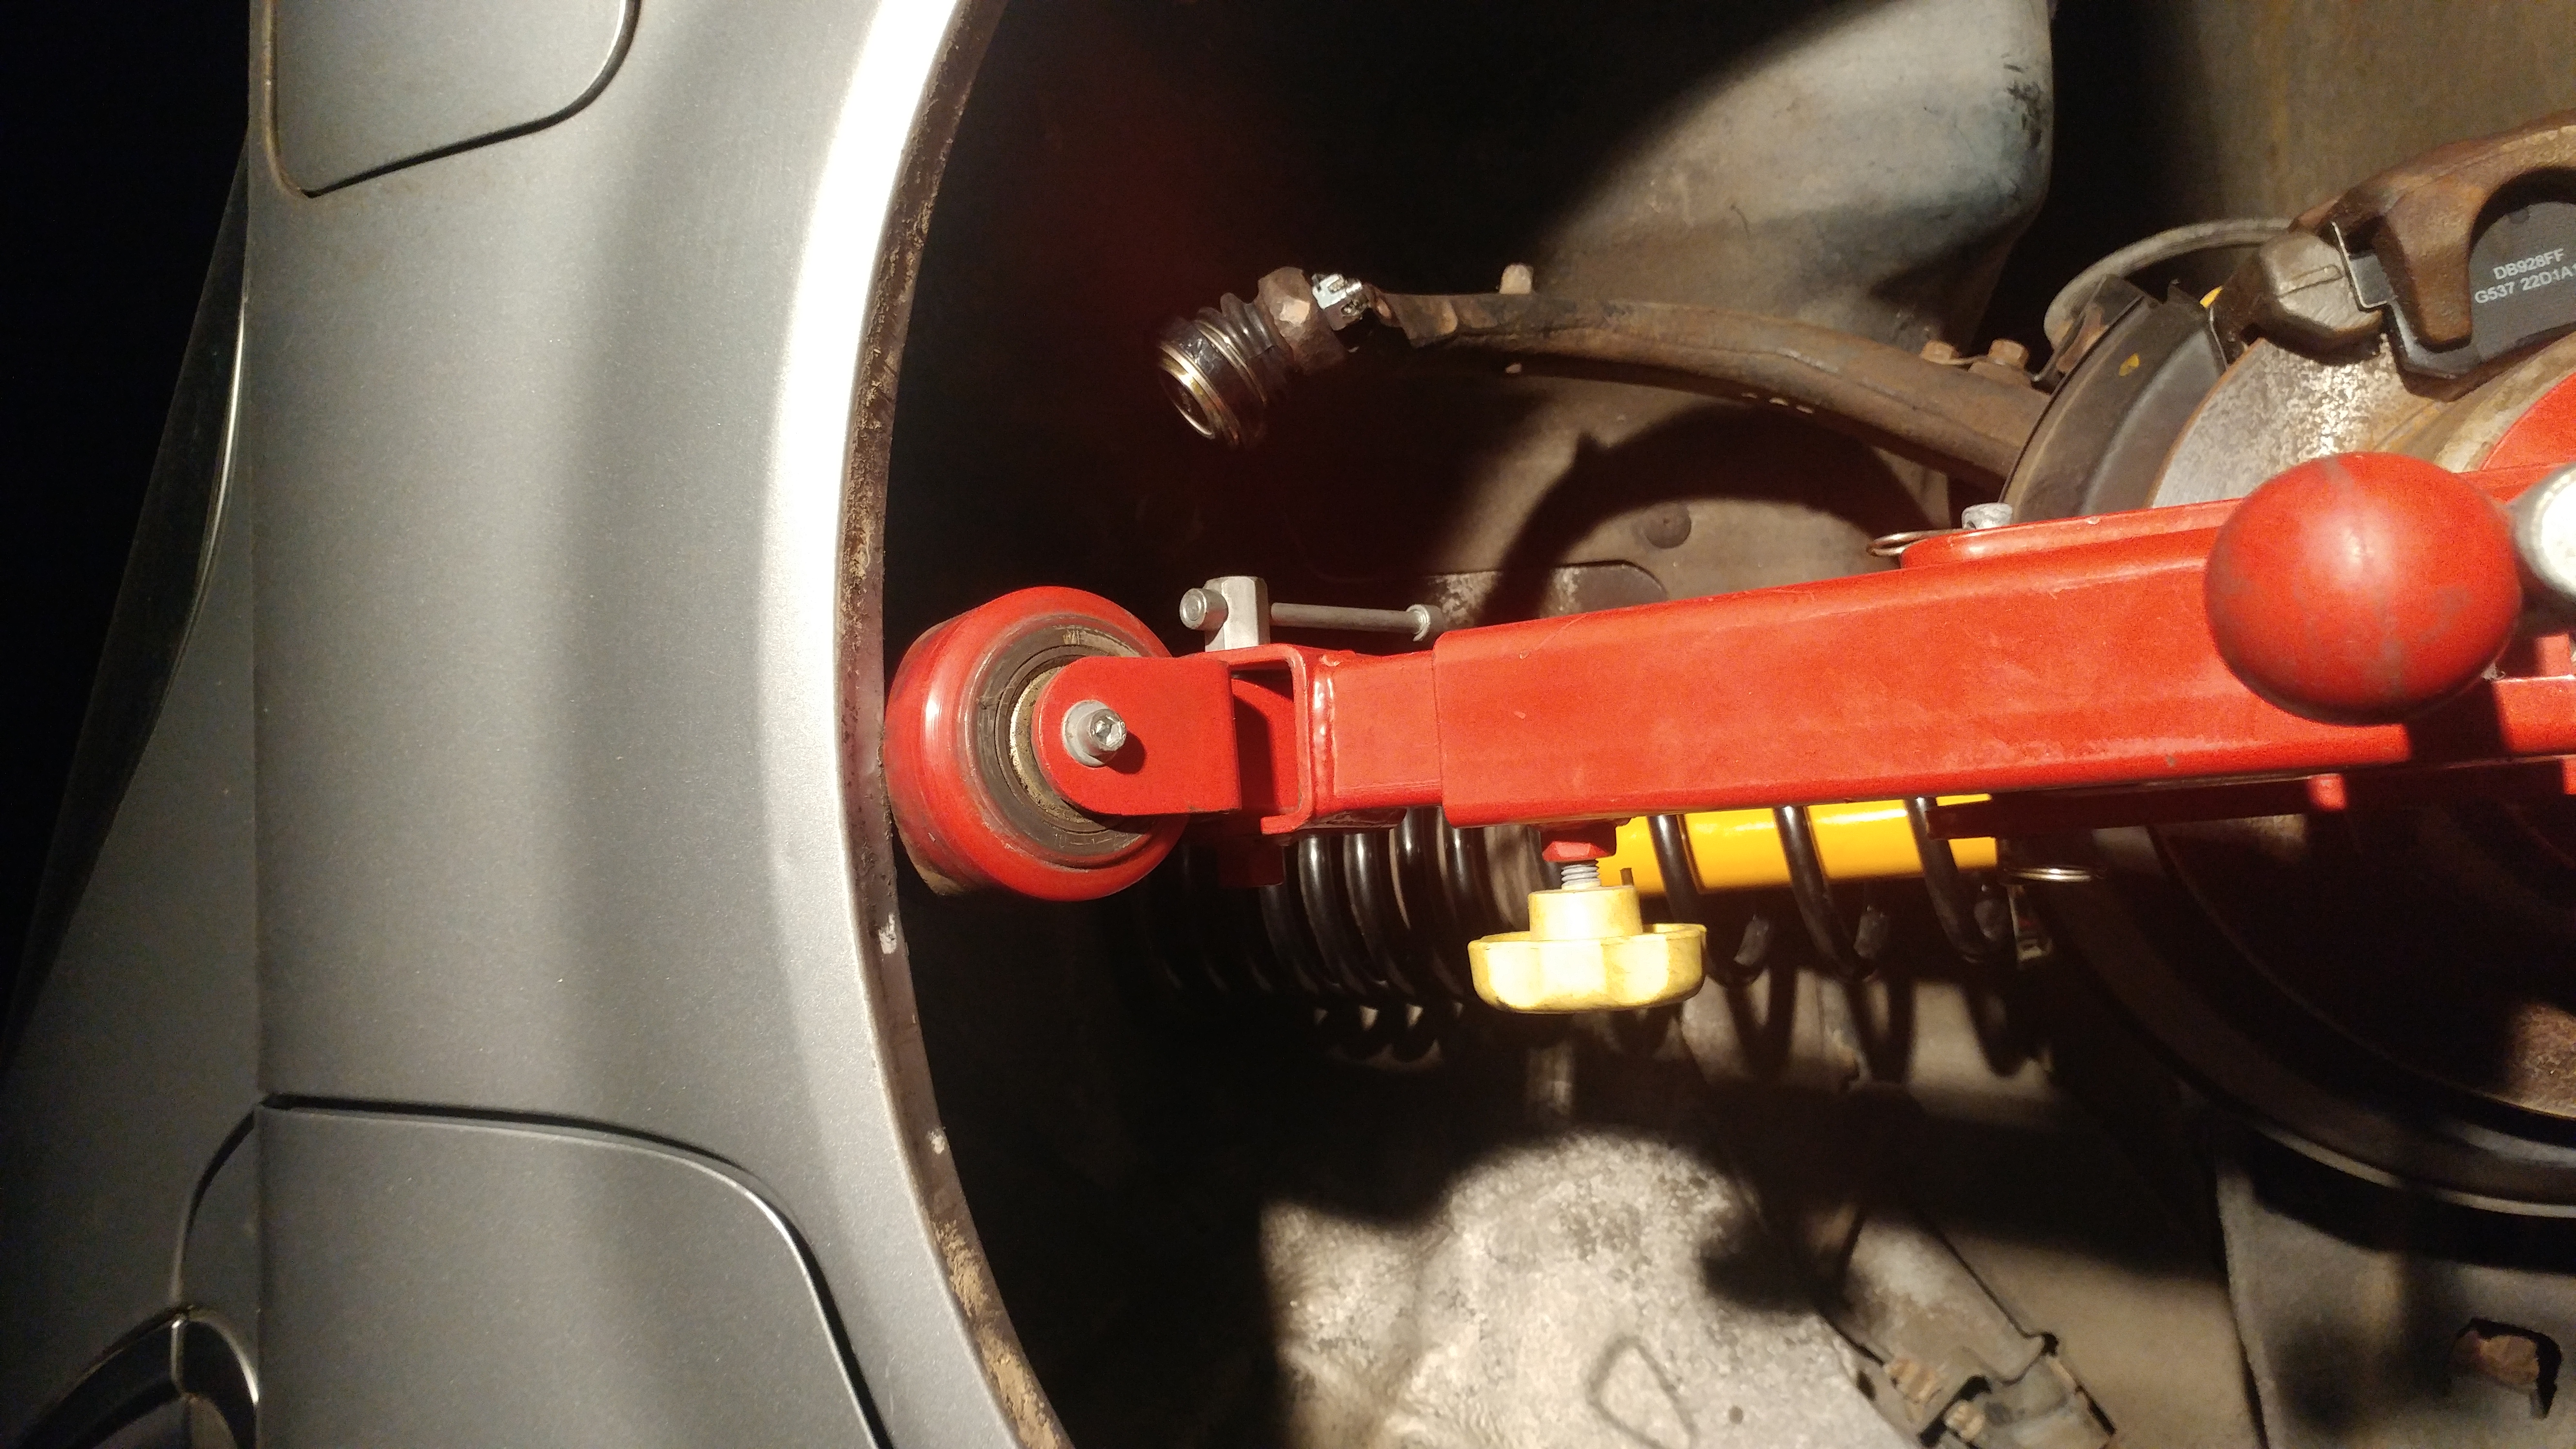
Time to add some negative rear camber! This kit only allows up to -2 degrees max for cars lowered 1 1/2 inches. I'm border line that in the rear alone. Should be fine.
This is mainly to help negate the rears from rubbing until I have the inside fender lips professionally rolled. degree camber with the +45 offset wheels and the 235/45 tires are a little more than flush with the fenders so this will help.
I would love to get a 235/35/17 tire but none exist for all season and regular summer tires. I think I saw DOT race tires though which isn't what I need.
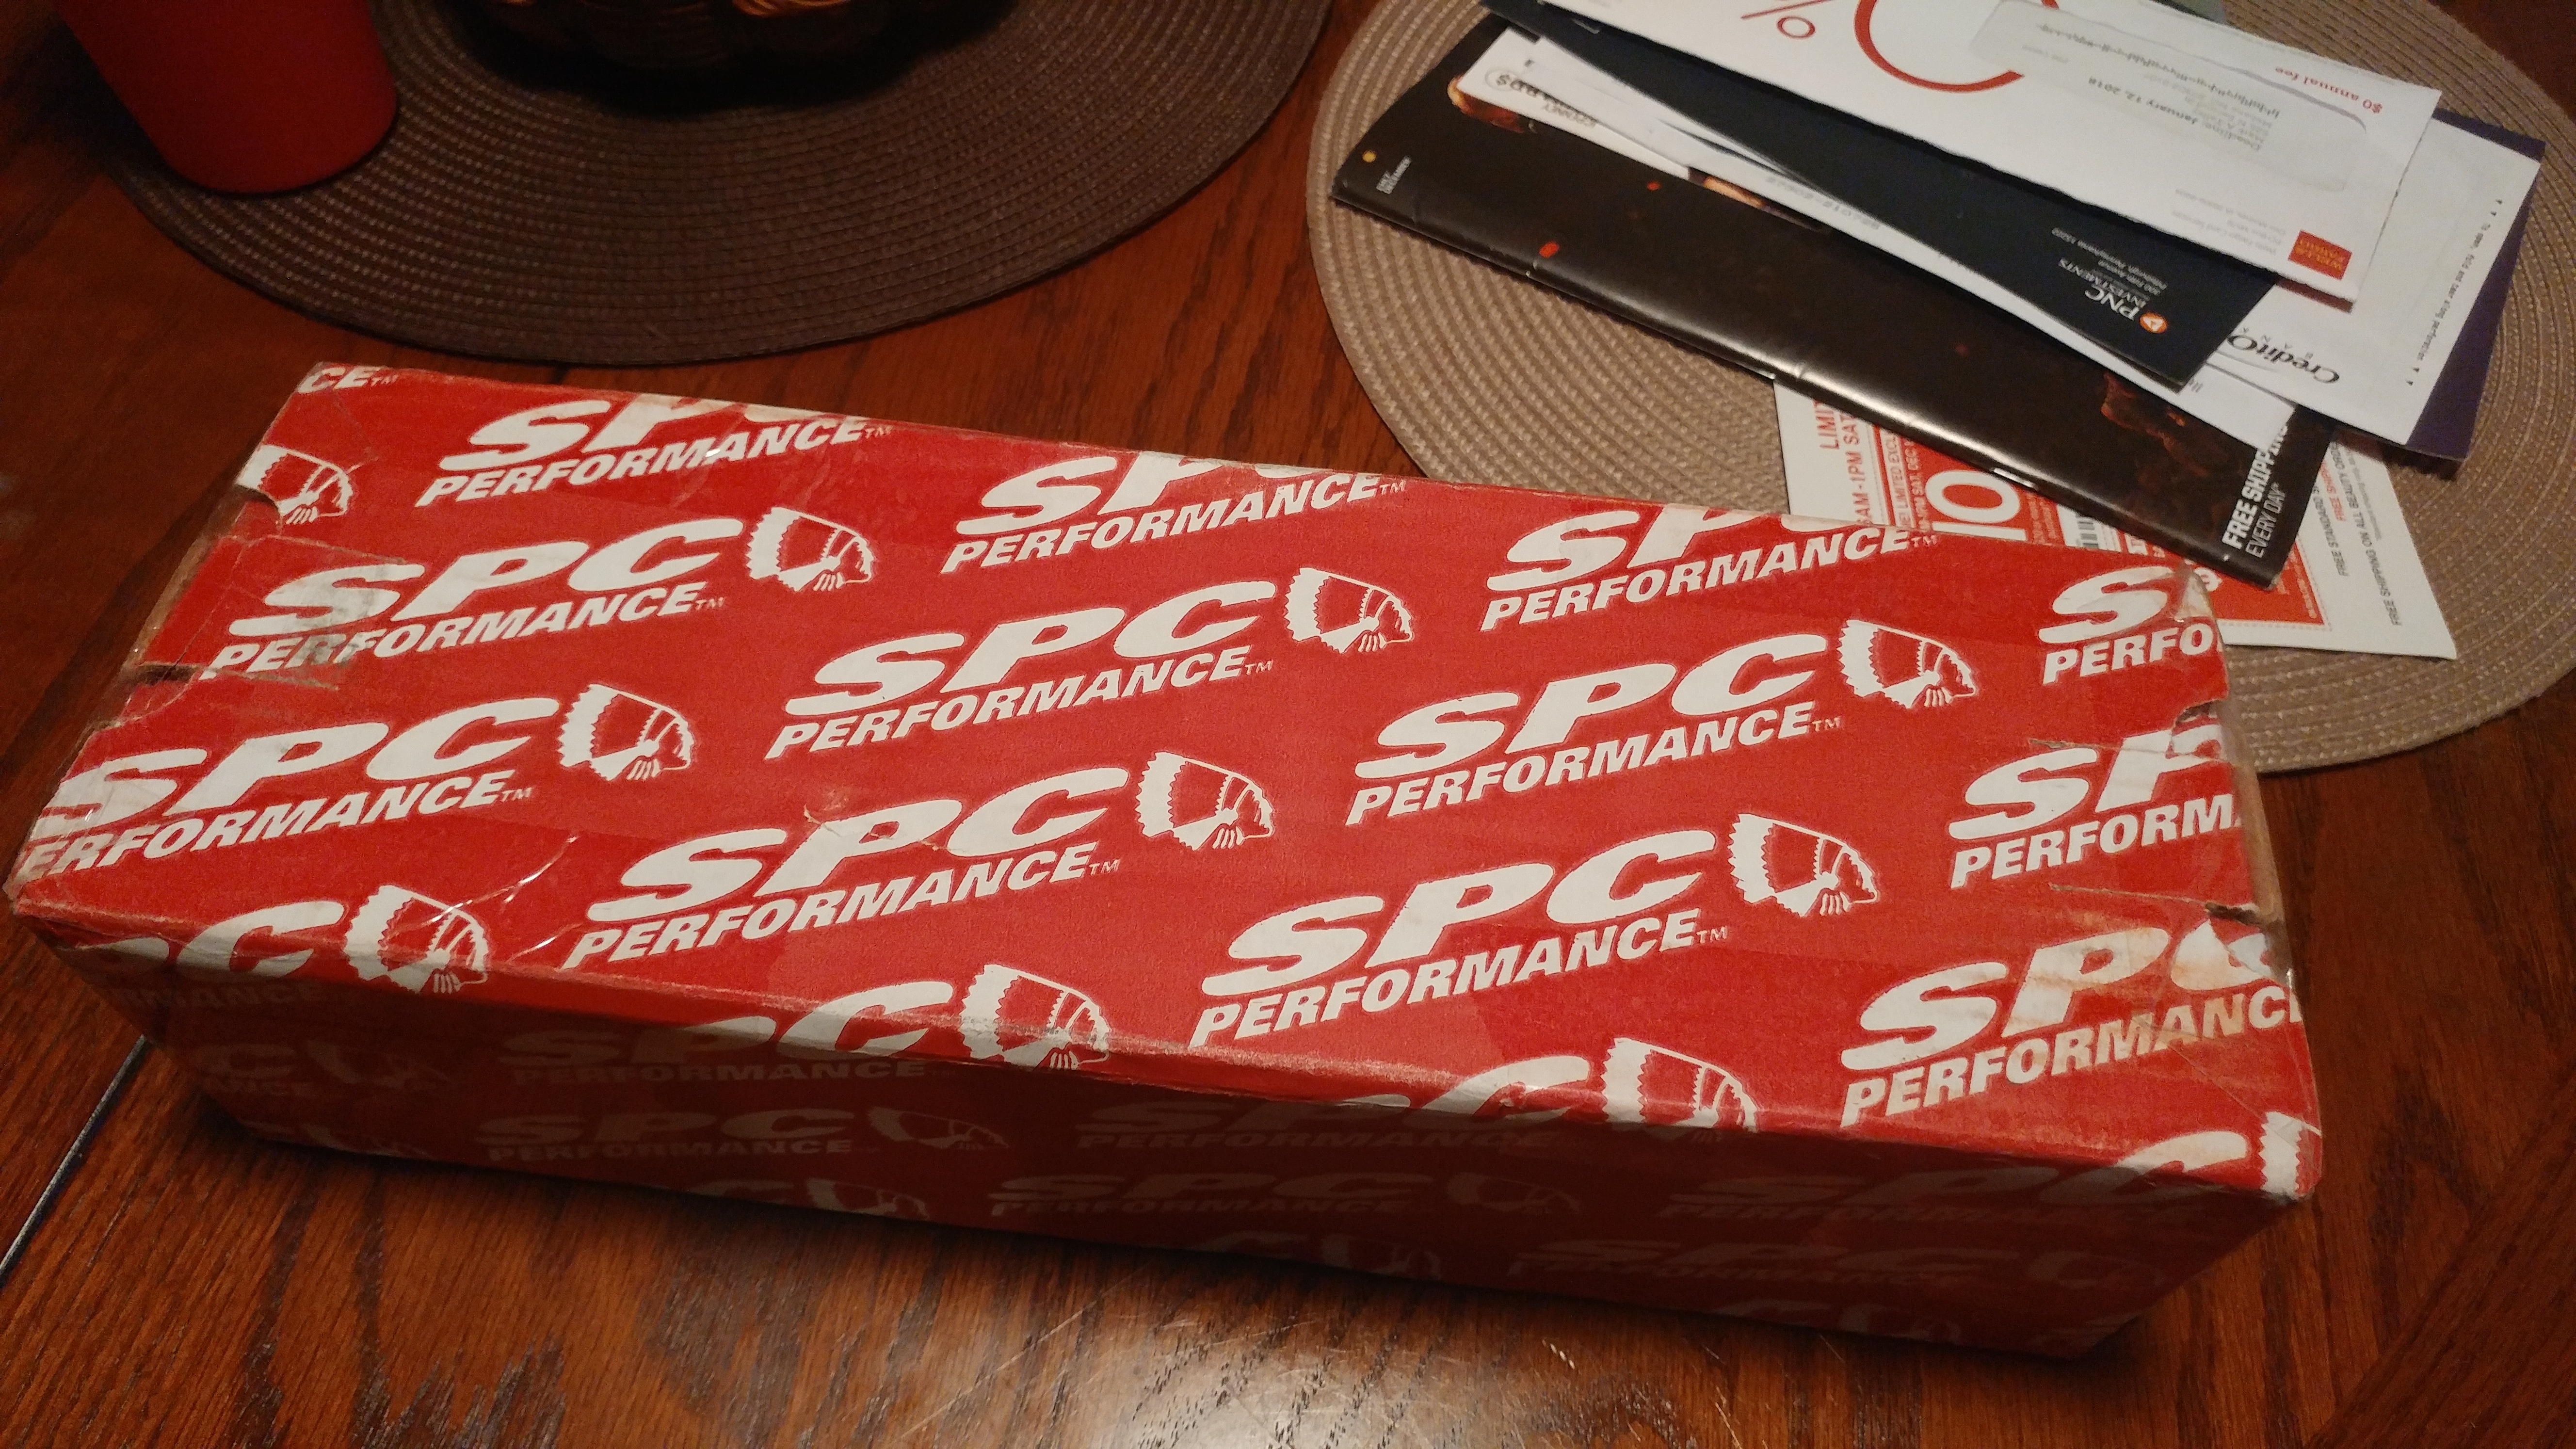
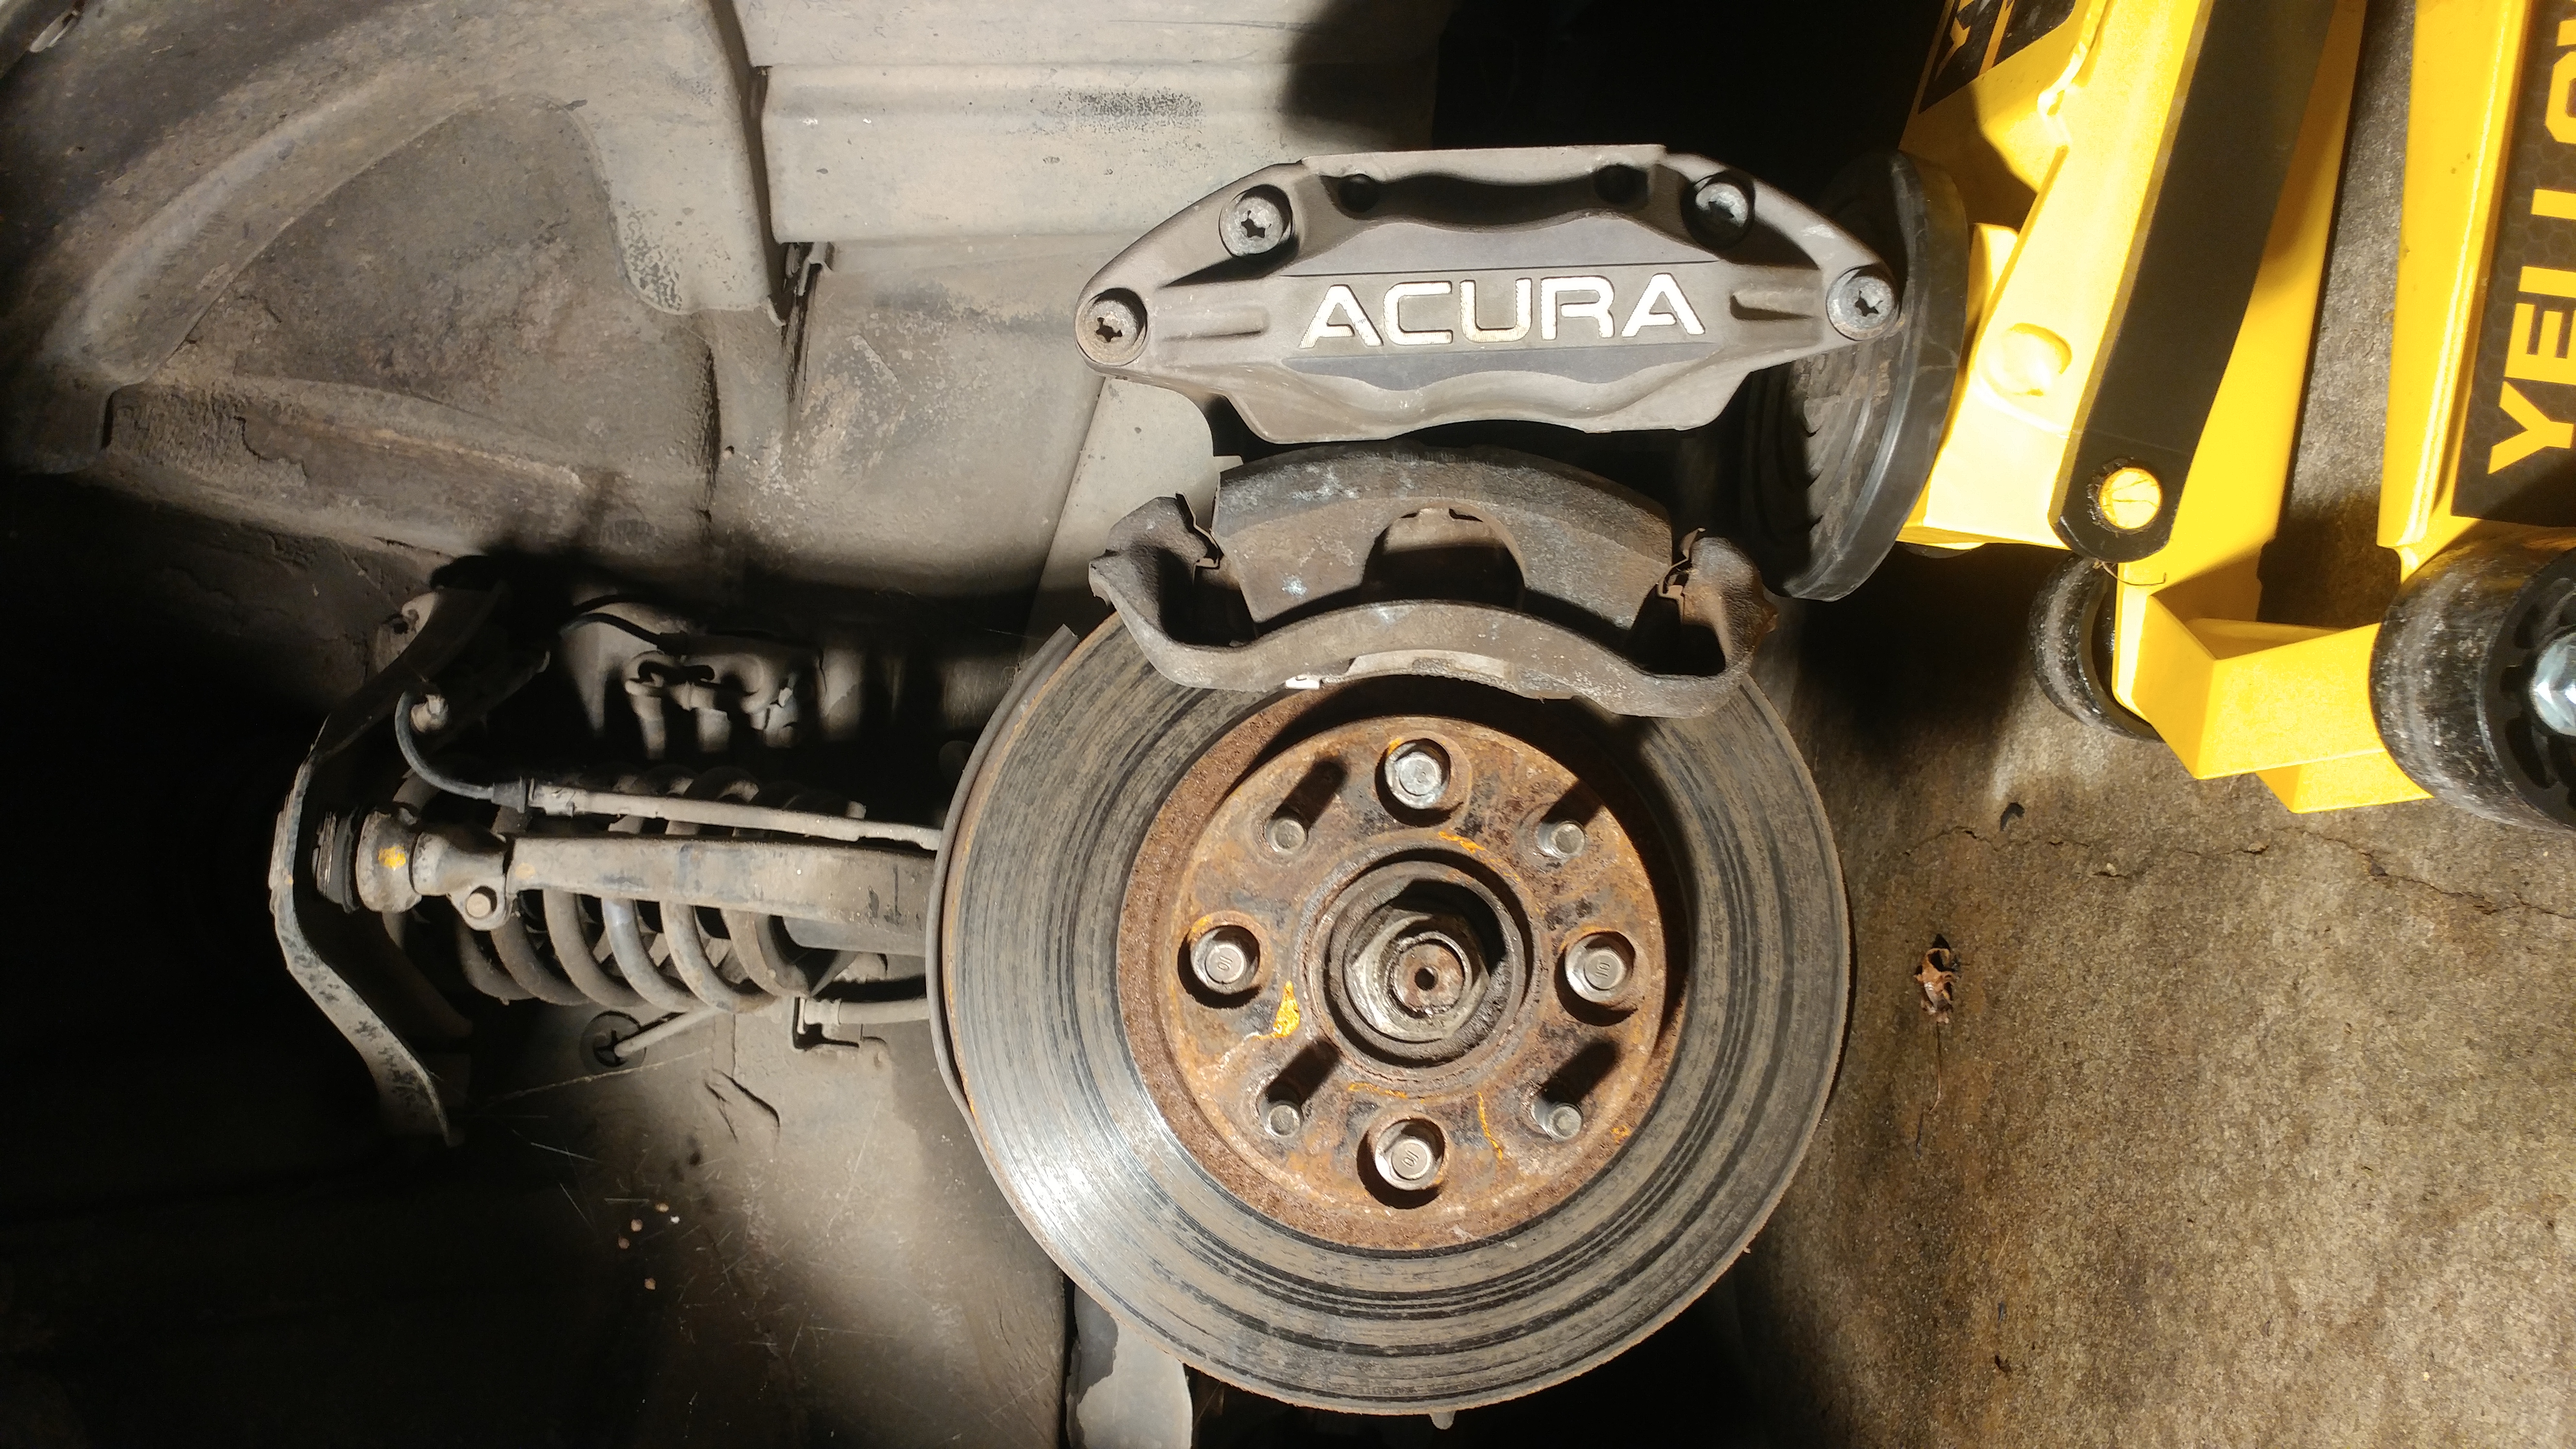
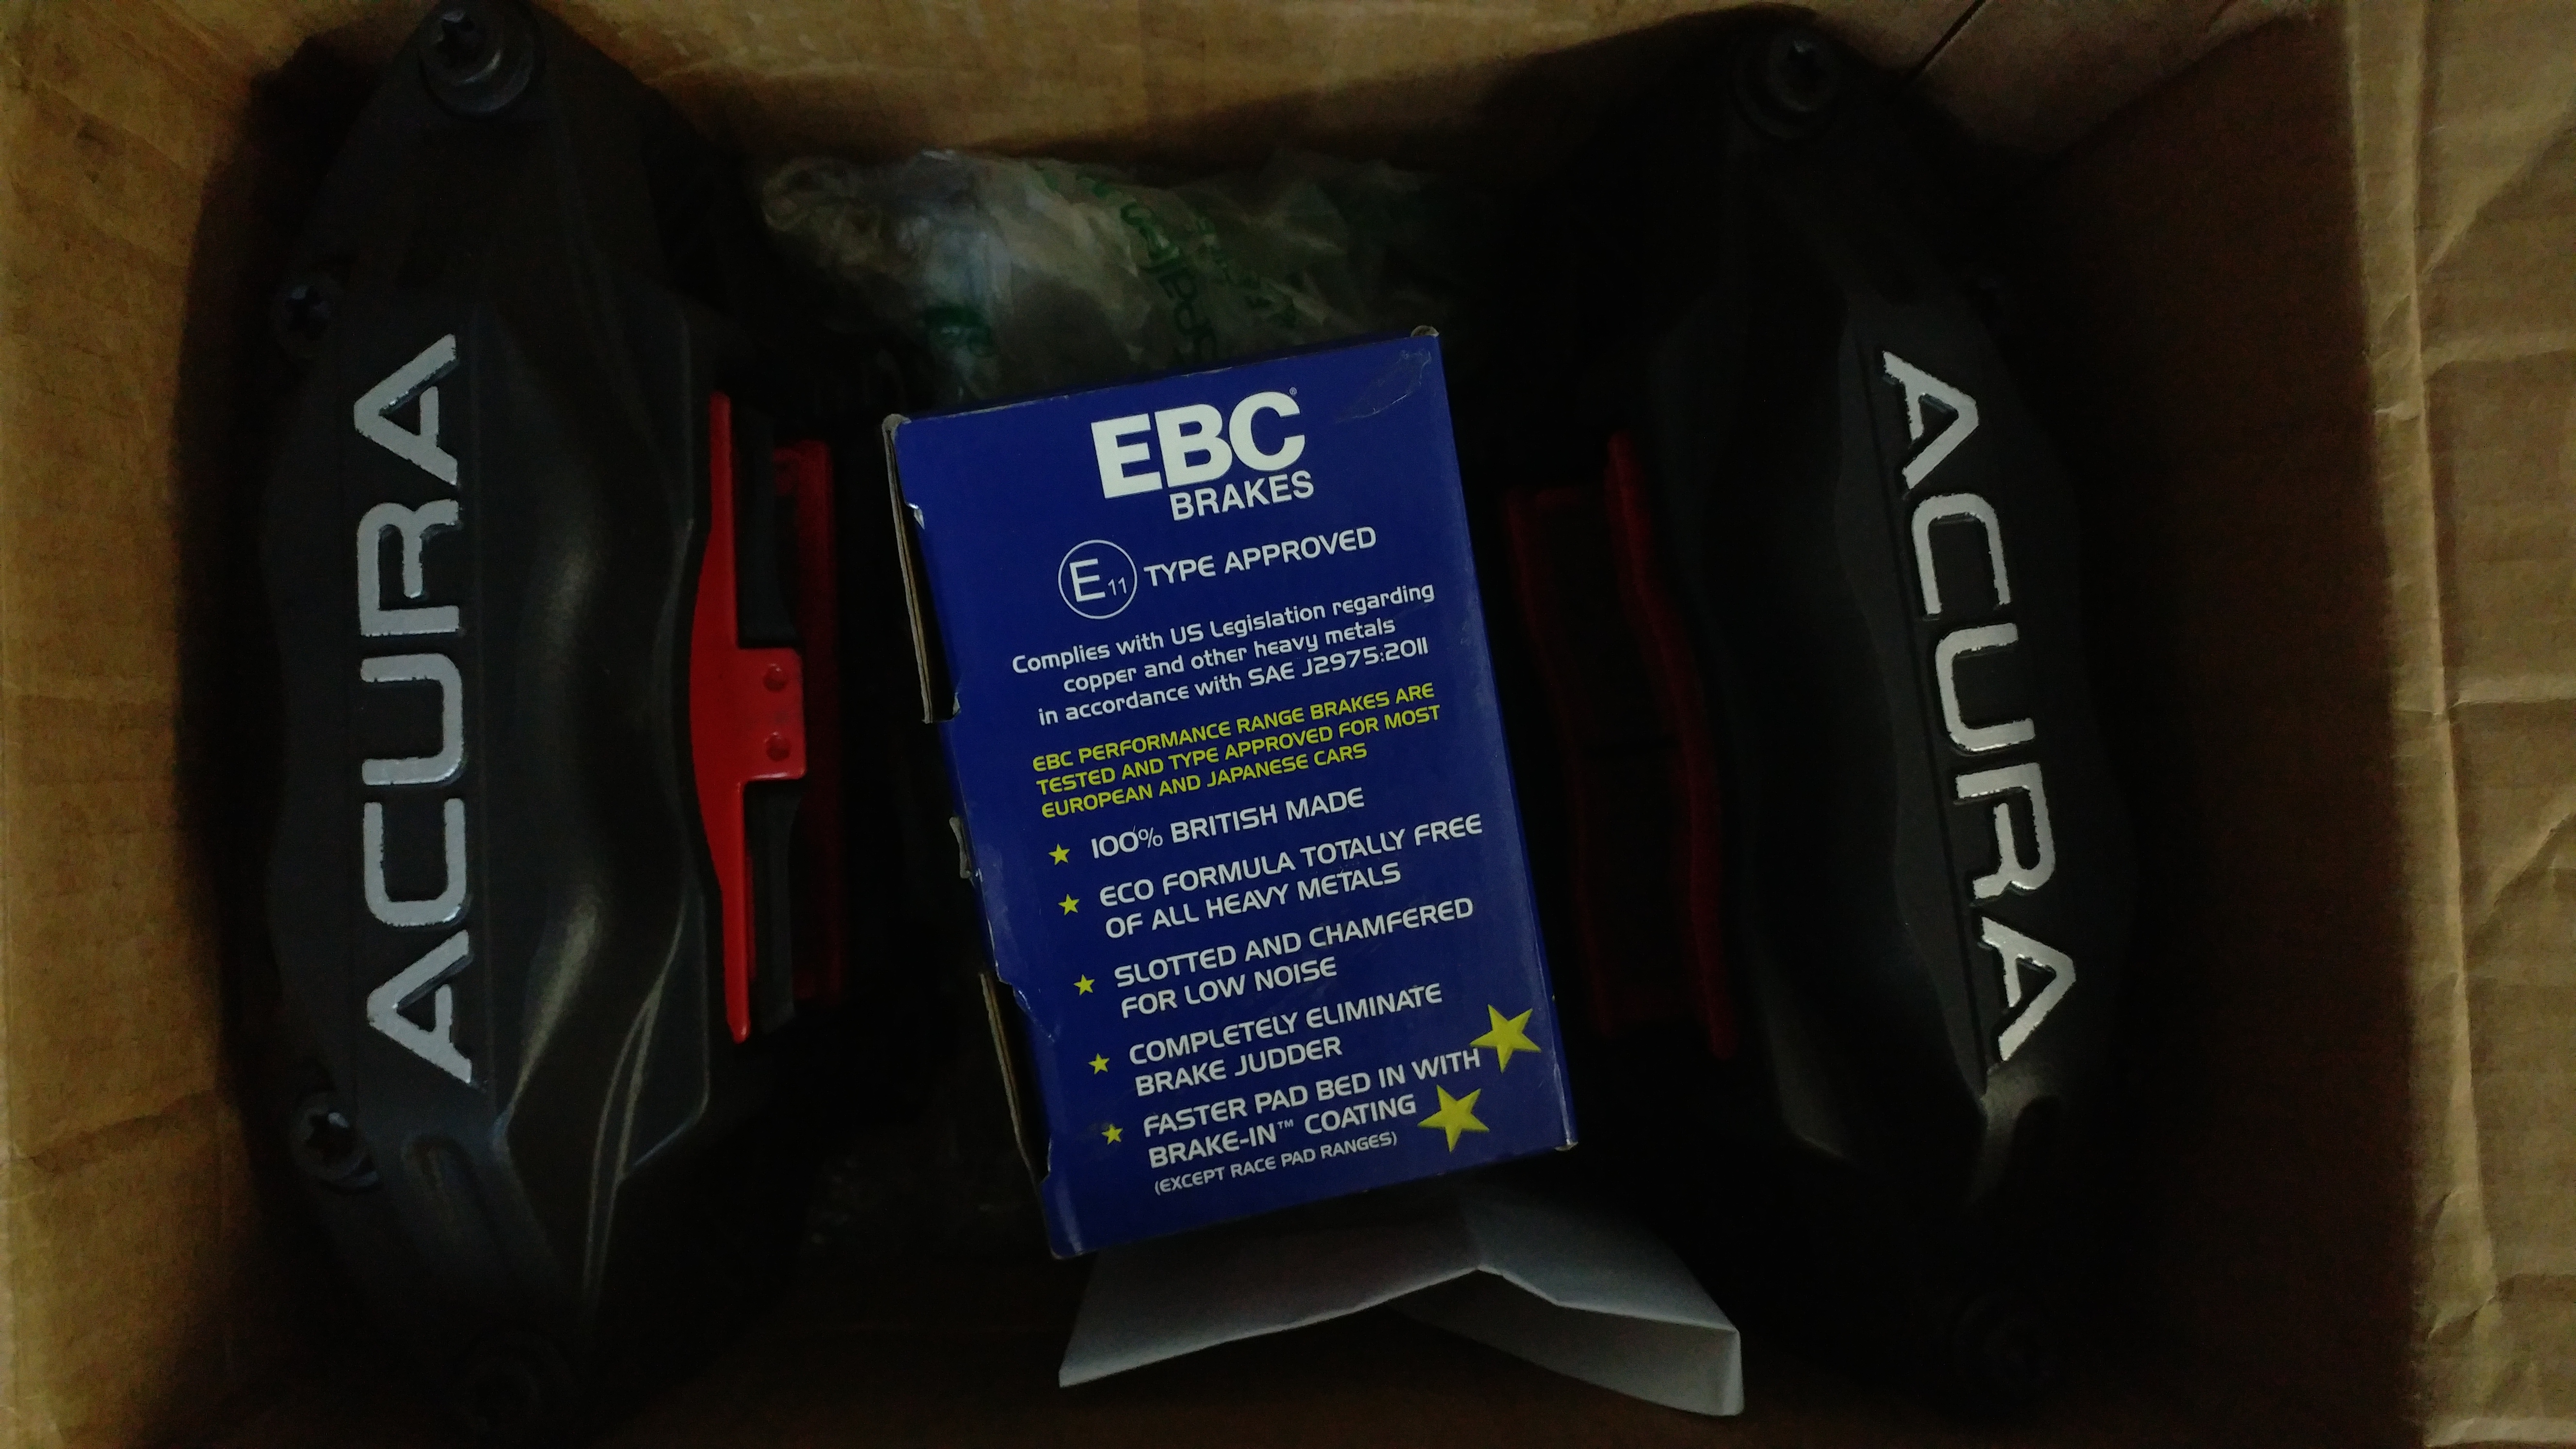
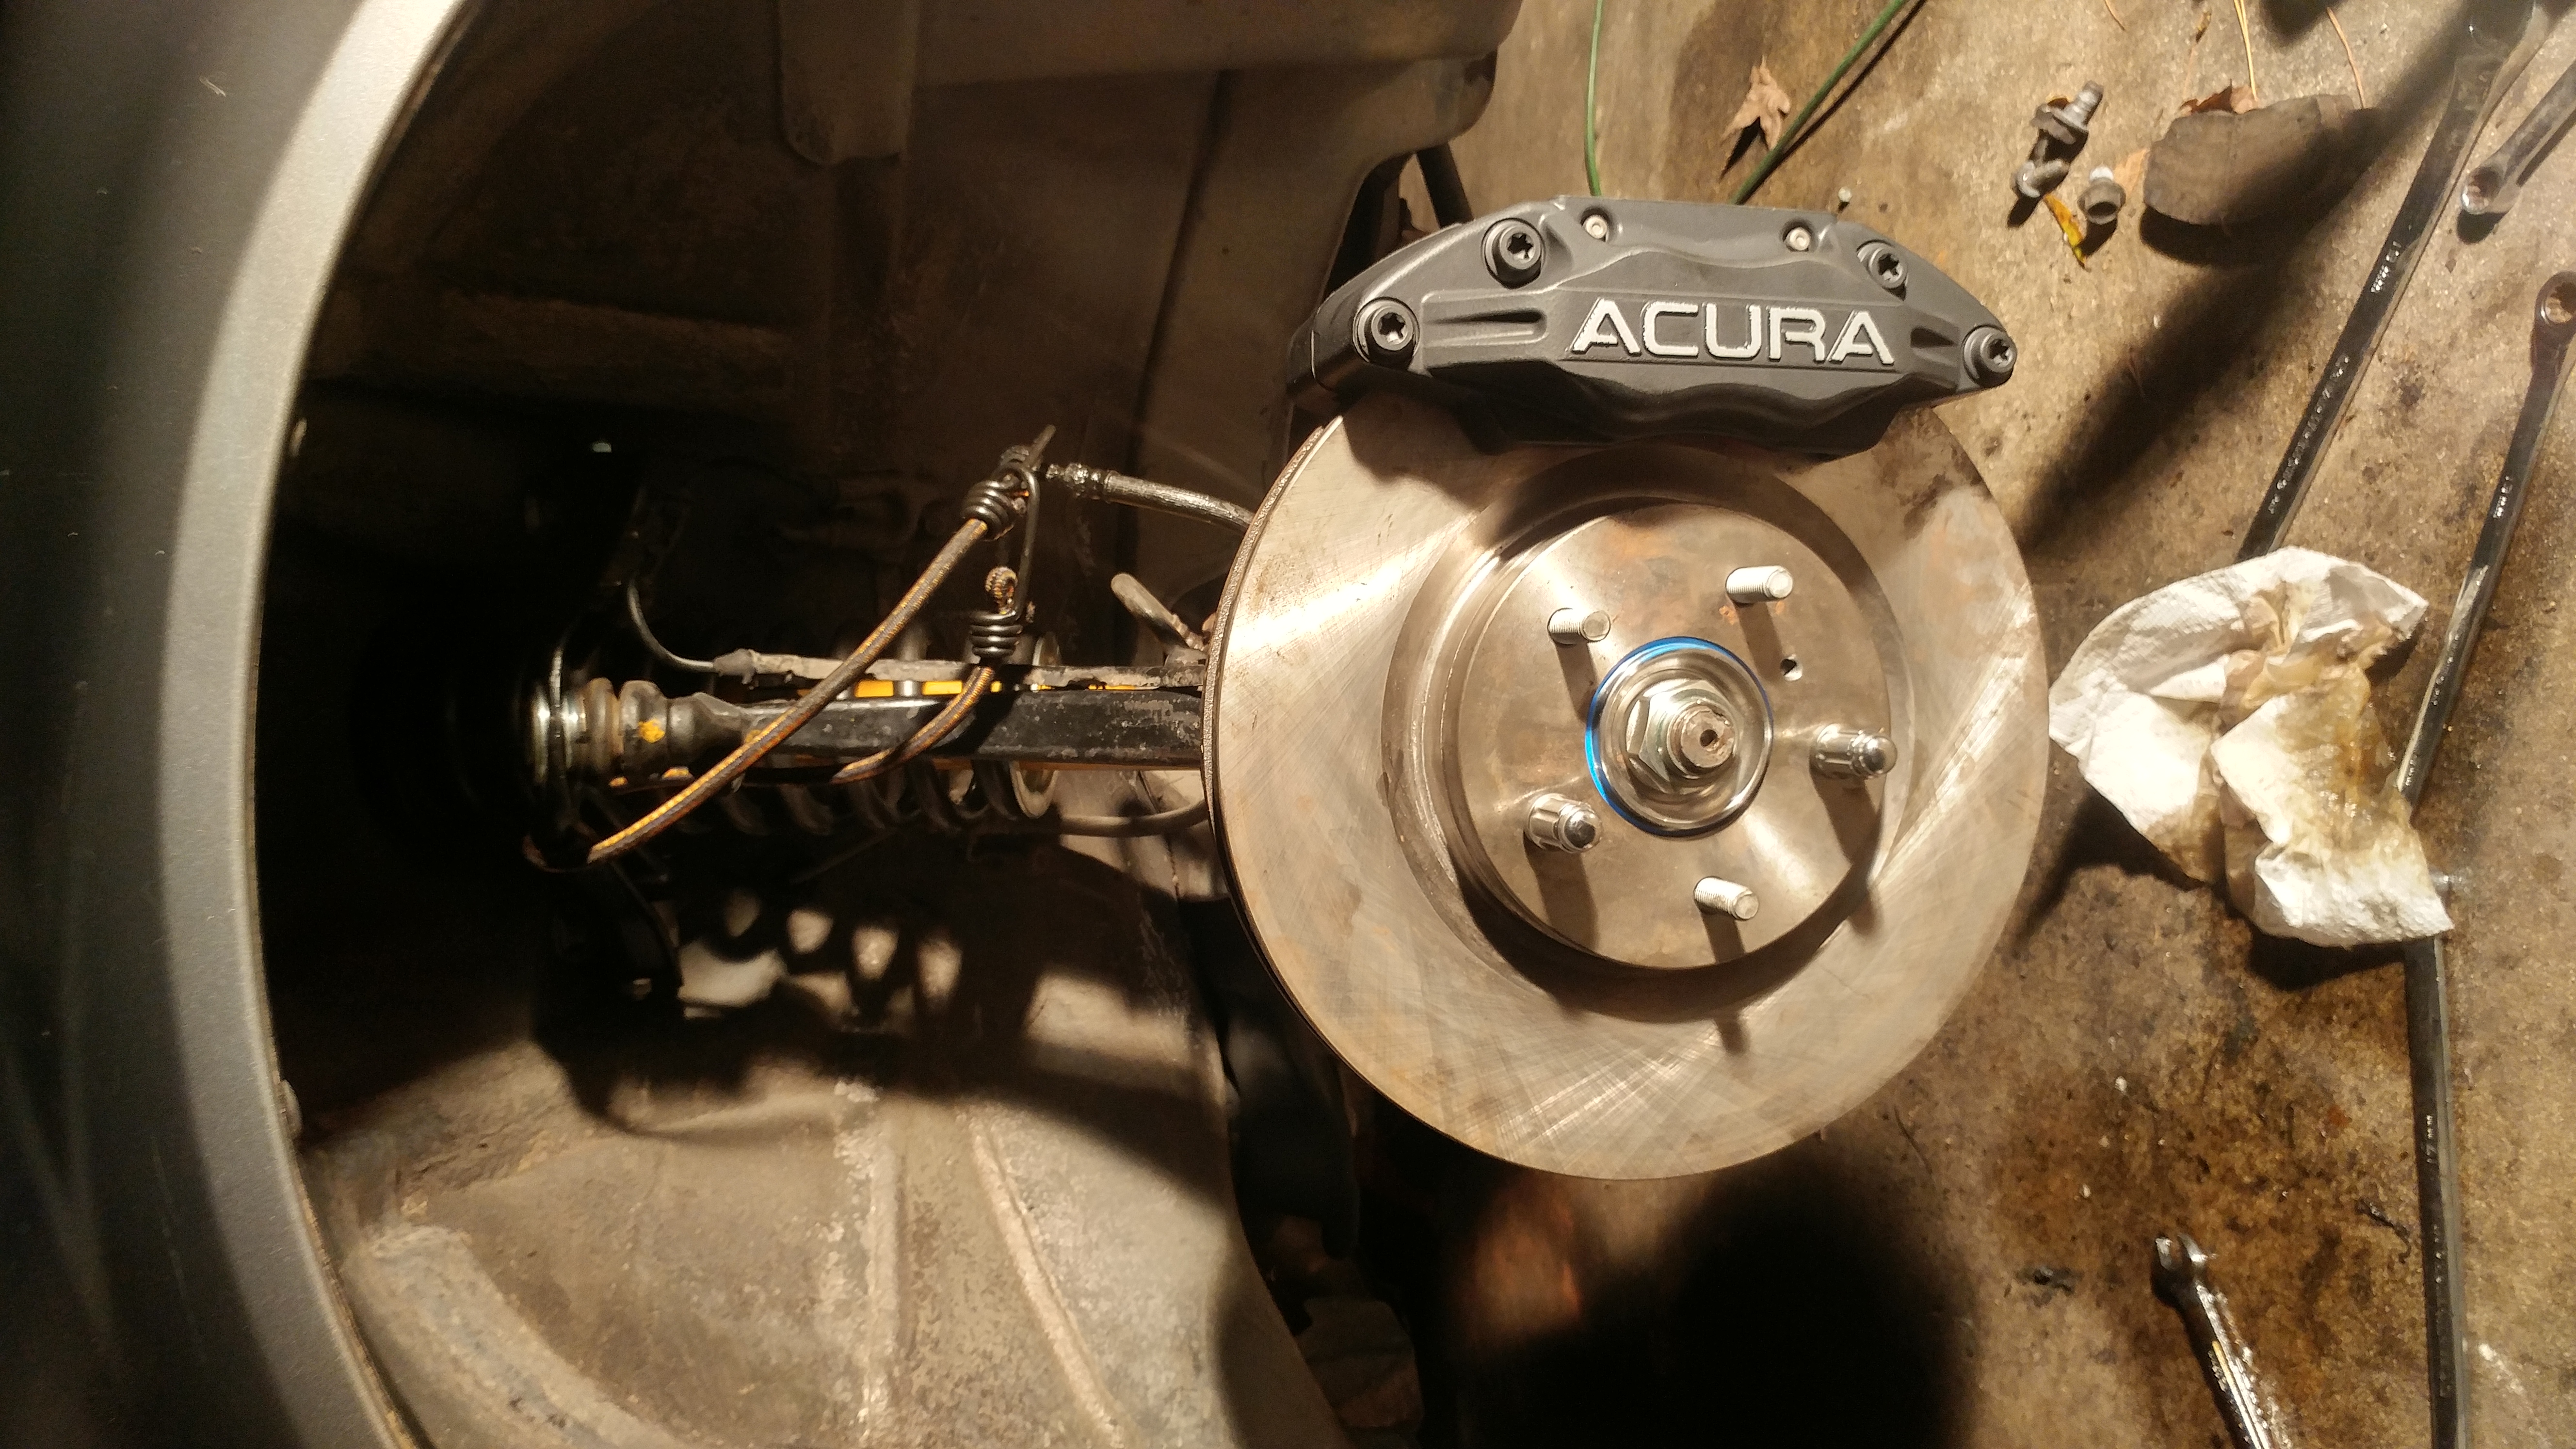
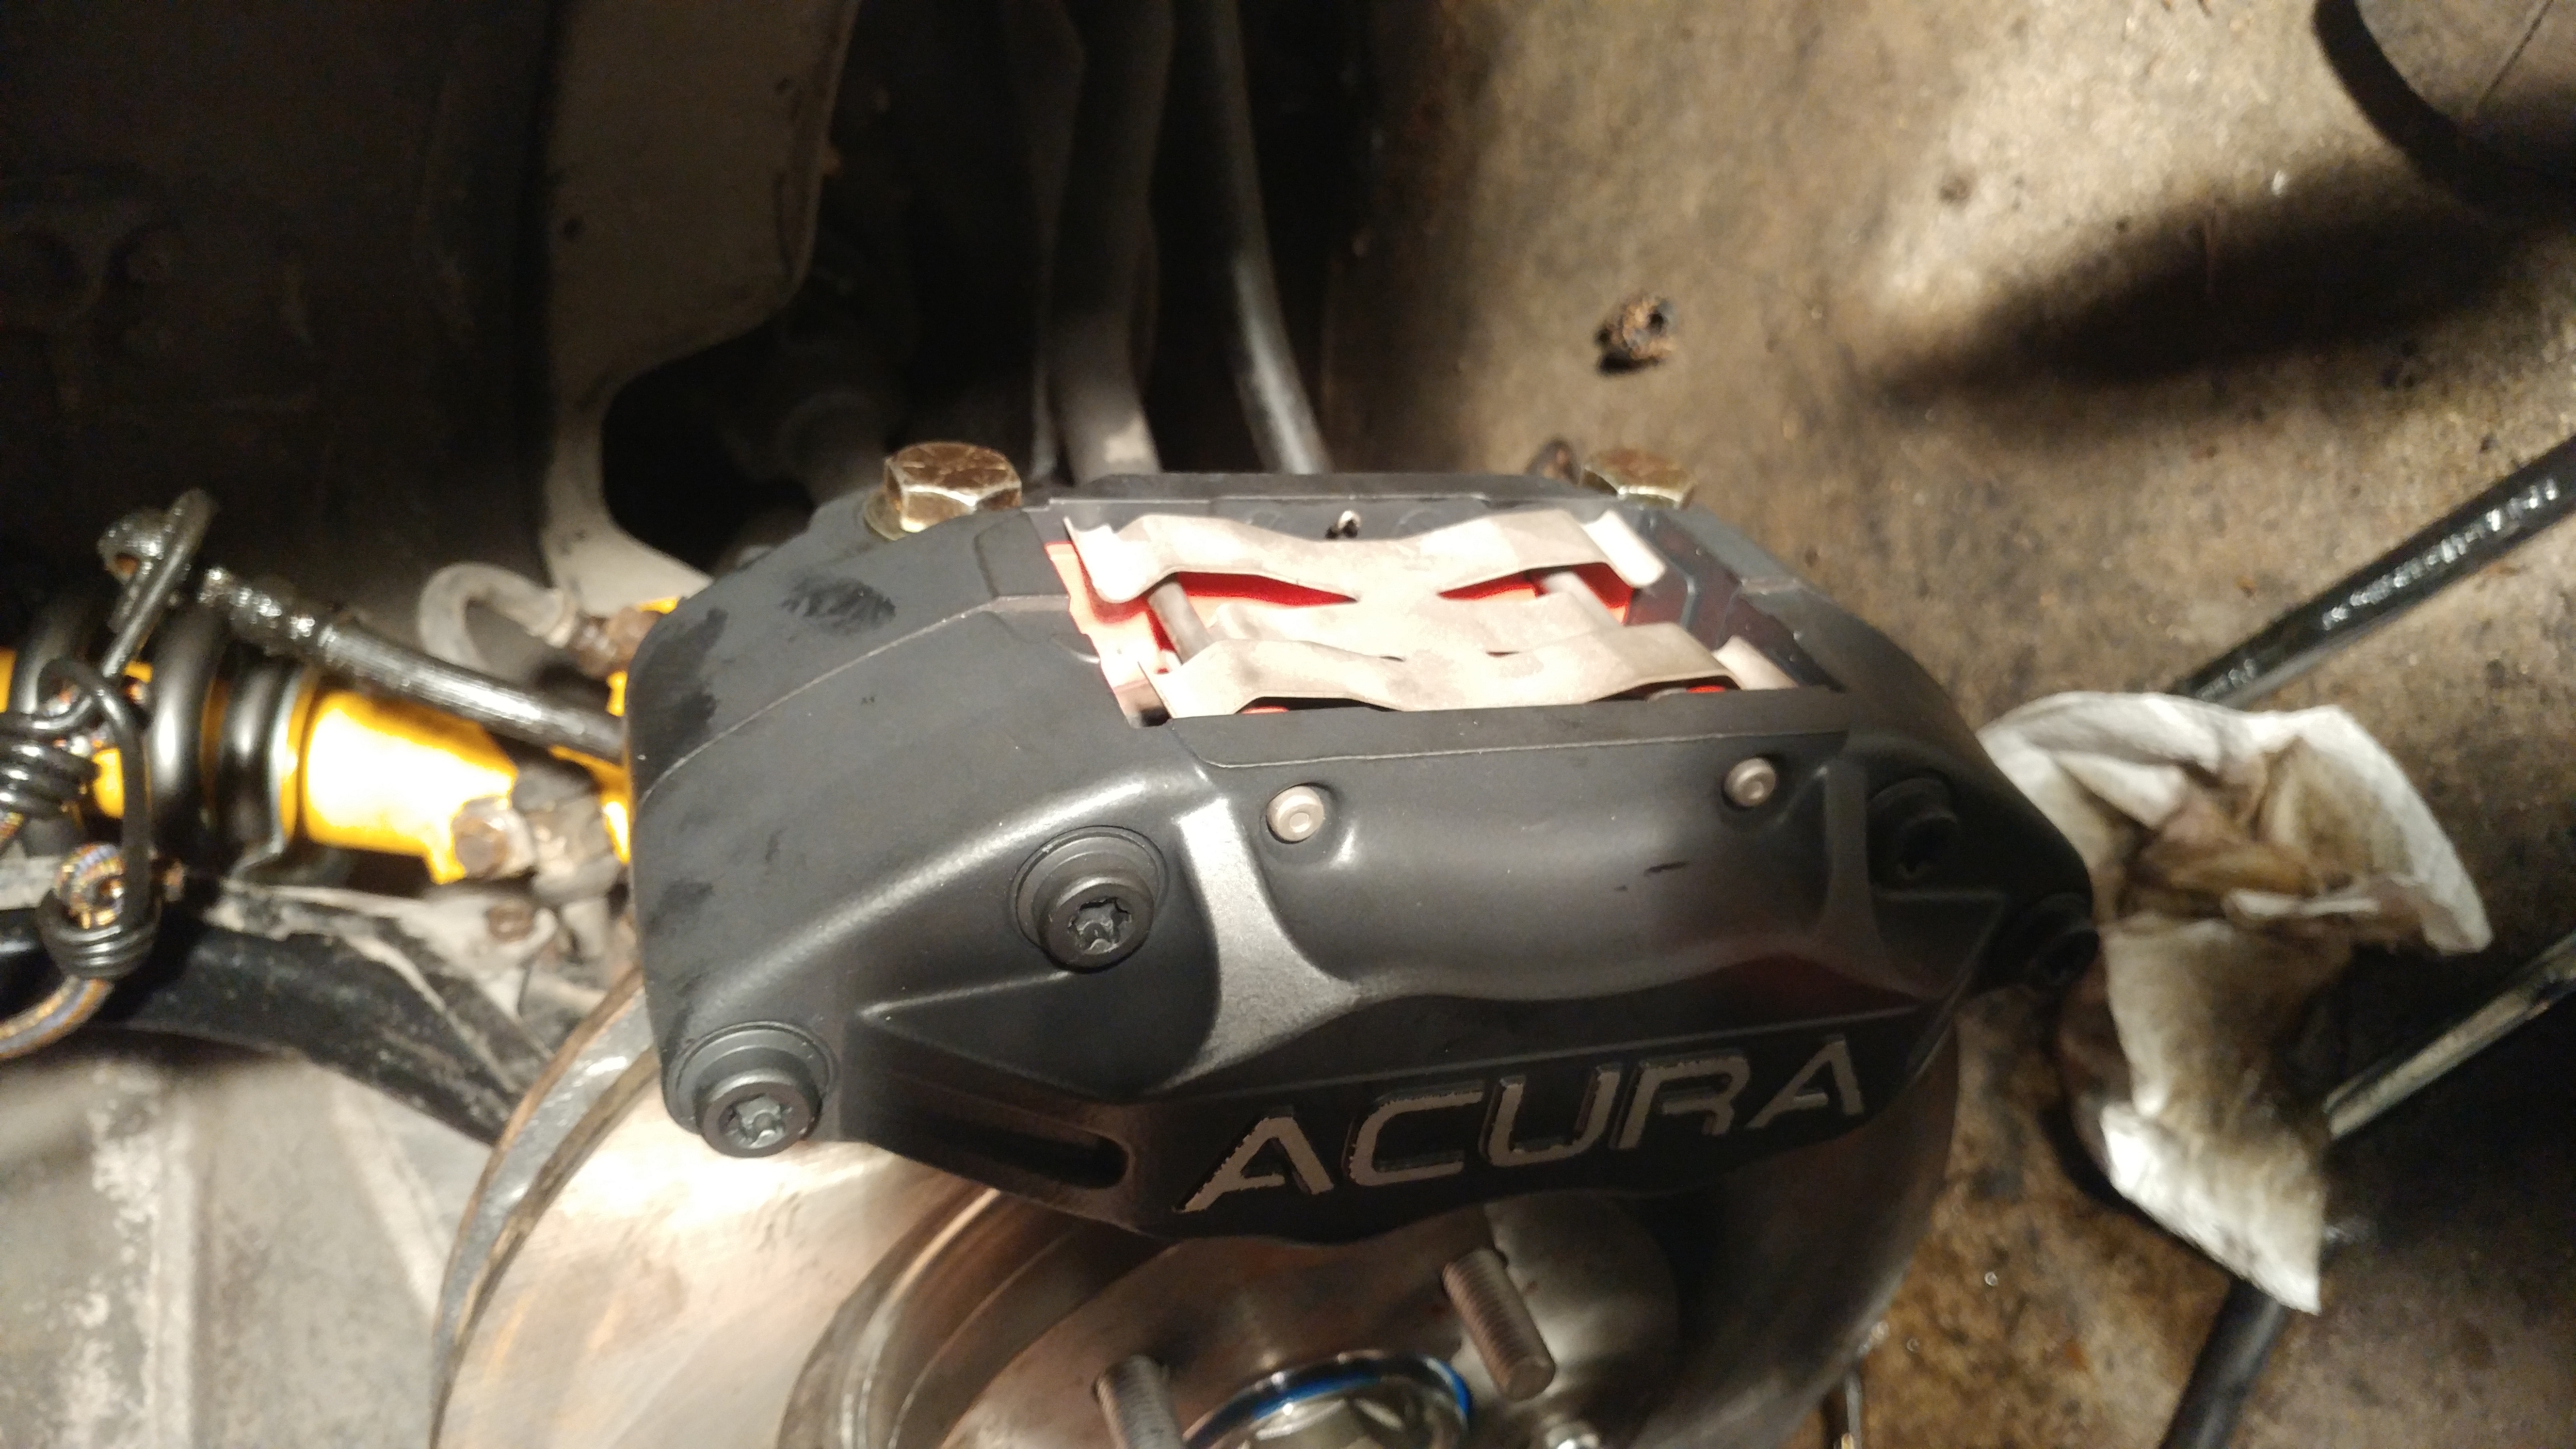
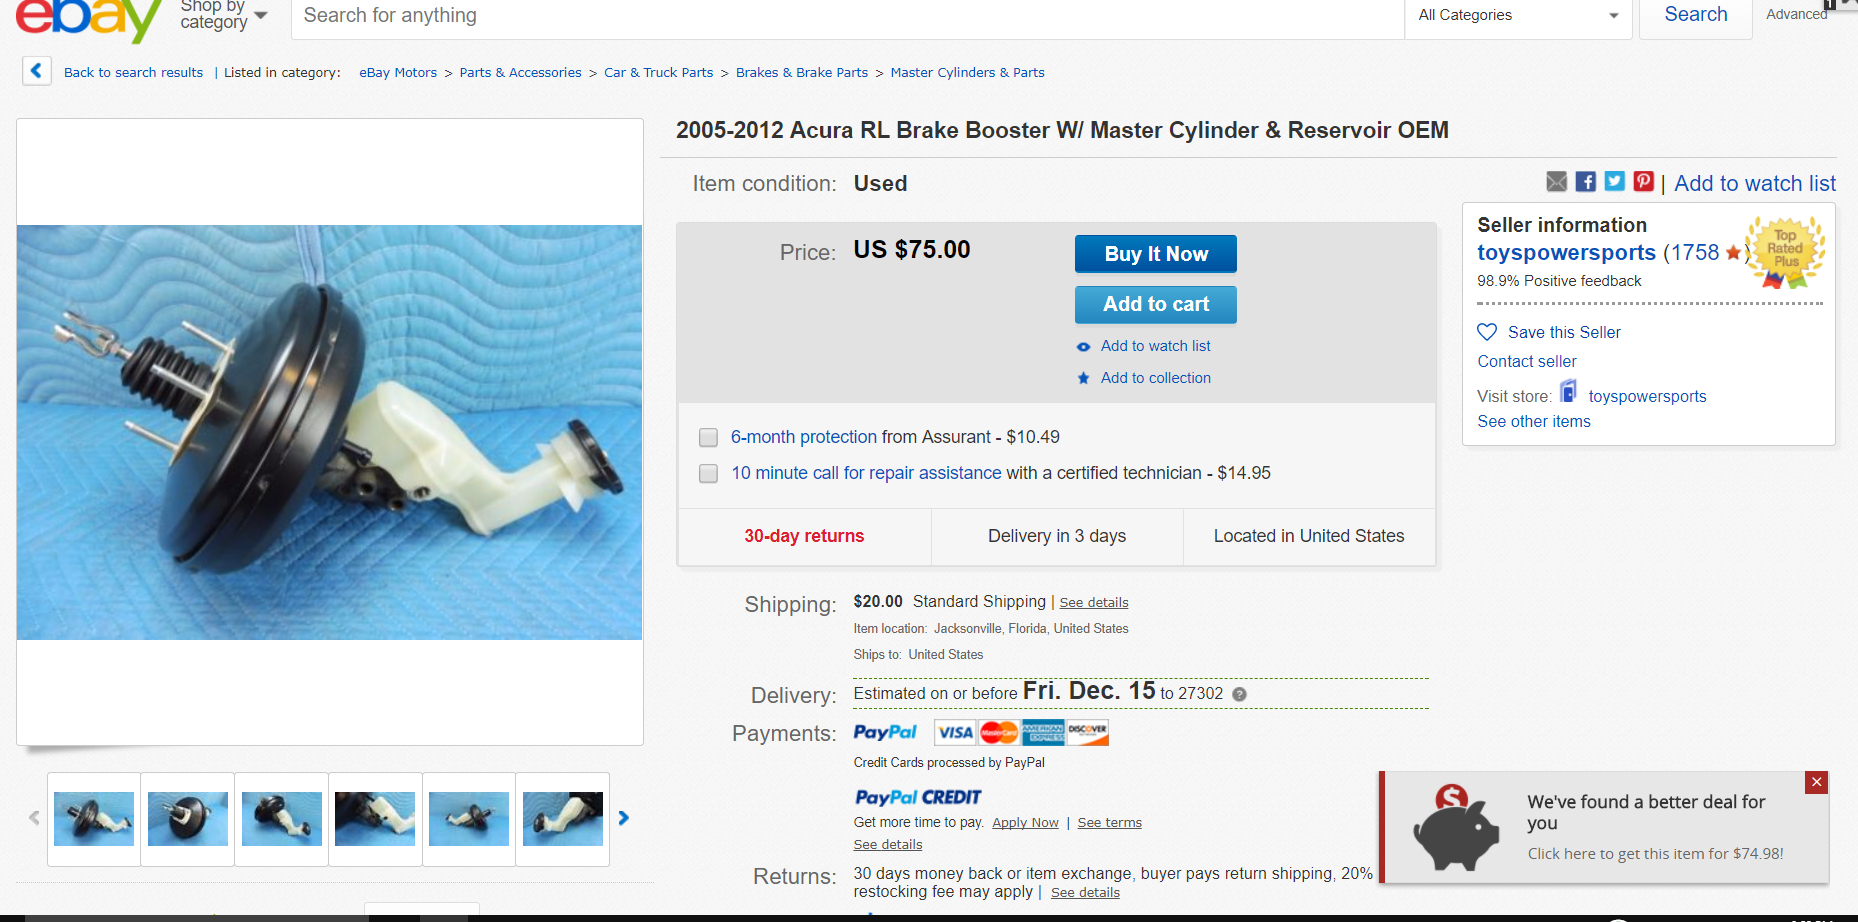
Also this 2005-2012 RL brake booster and Master Cylinder will now feed the appropriate sized RL calipers (TL 3.2 in the rear). Looks like it will swap in. Was going to go with the TLS BB and MC with the brembo brakes but the RL calipers are still larger byt 20% or so.
Rear MAY lock before the fronts if I don't fix the ABS in this car. I do plan on upgrading the rear caliper and rotor size in the future but I haven't bee able to find a OE caliper that swaps over. I'm sure some do but they have different ebrak cable set ups.
I do suspect with the RL stopy bits that the hard lines going to the MC will need to be tweaked and reflared. I will hand this over to a shot to do more than likely.
As of now after bleeding the brakes repeatedly the peddal still sinks to the floor and doesn't build up much pressure. I'm certain the Vigor MC is worn out but also important to note is the Vigor MC is believed to be a 1" bore with a 8" brake booster. The RL is at least a 1" or bigger MC with a 10" brake booster.
Either way it was designed for a near 5,000lb car so putting it in a 3,200lb ca will be interesting. I may have to go back and swap out the ABS and proportioning valves. Hopefully not. We will see which wheel locks first!
Time to add some negative rear camber! This kit only allows up to -2 degrees max for cars lowered 1 1/2 inches. I'm border line that in the rear alone. Should be fine.
This is mainly to help negate the rears from rubbing until I have the inside fender lips professionally rolled. degree camber with the +45 offset wheels and the 235/45 tires are a little more than flush with the fenders so this will help.
I would love to get a 235/35/17 tire but none exist for all season and regular summer tires. I think I saw DOT race tires though which isn't what I need.
Also this 2005-2012 RL brake booster and Master Cylinder will now feed the appropriate sized RL calipers (TL 3.2 in the rear). Looks like it will swap in. Was going to go with the TLS BB and MC with the brembo brakes but the RL calipers are still larger byt 20% or so.
Rear MAY lock before the fronts if I don't fix the ABS in this car. I do plan on upgrading the rear caliper and rotor size in the future but I haven't bee able to find a OE caliper that swaps over. I'm sure some do but they have different ebrak cable set ups.
I do suspect with the RL stopy bits that the hard lines going to the MC will need to be tweaked and reflared. I will hand this over to a shot to do more than likely.
As of now after bleeding the brakes repeatedly the peddal still sinks to the floor and doesn't build up much pressure. I'm certain the Vigor MC is worn out but also important to note is the Vigor MC is believed to be a 1" bore with a 8" brake booster. The RL is at least a 1" or bigger MC with a 10" brake booster.
Either way it was designed for a near 5,000lb car so putting it in a 3,200lb ca will be interesting. I may have to go back and swap out the ABS and proportioning valves. Hopefully not. We will see which wheel locks first!
01-19-2018, 01:12 AM
#64
Burning Brakes
Thread Starter
12/18/17
This was probably the hardest thing to do to my car. With no luck finding a smaller tire combination and not willing to find new wheels with a lower offset (<i>not much will clear those RL calipers anyway</i>) I settled with rolling the fenders and installing an Accord camber kit from SPC.
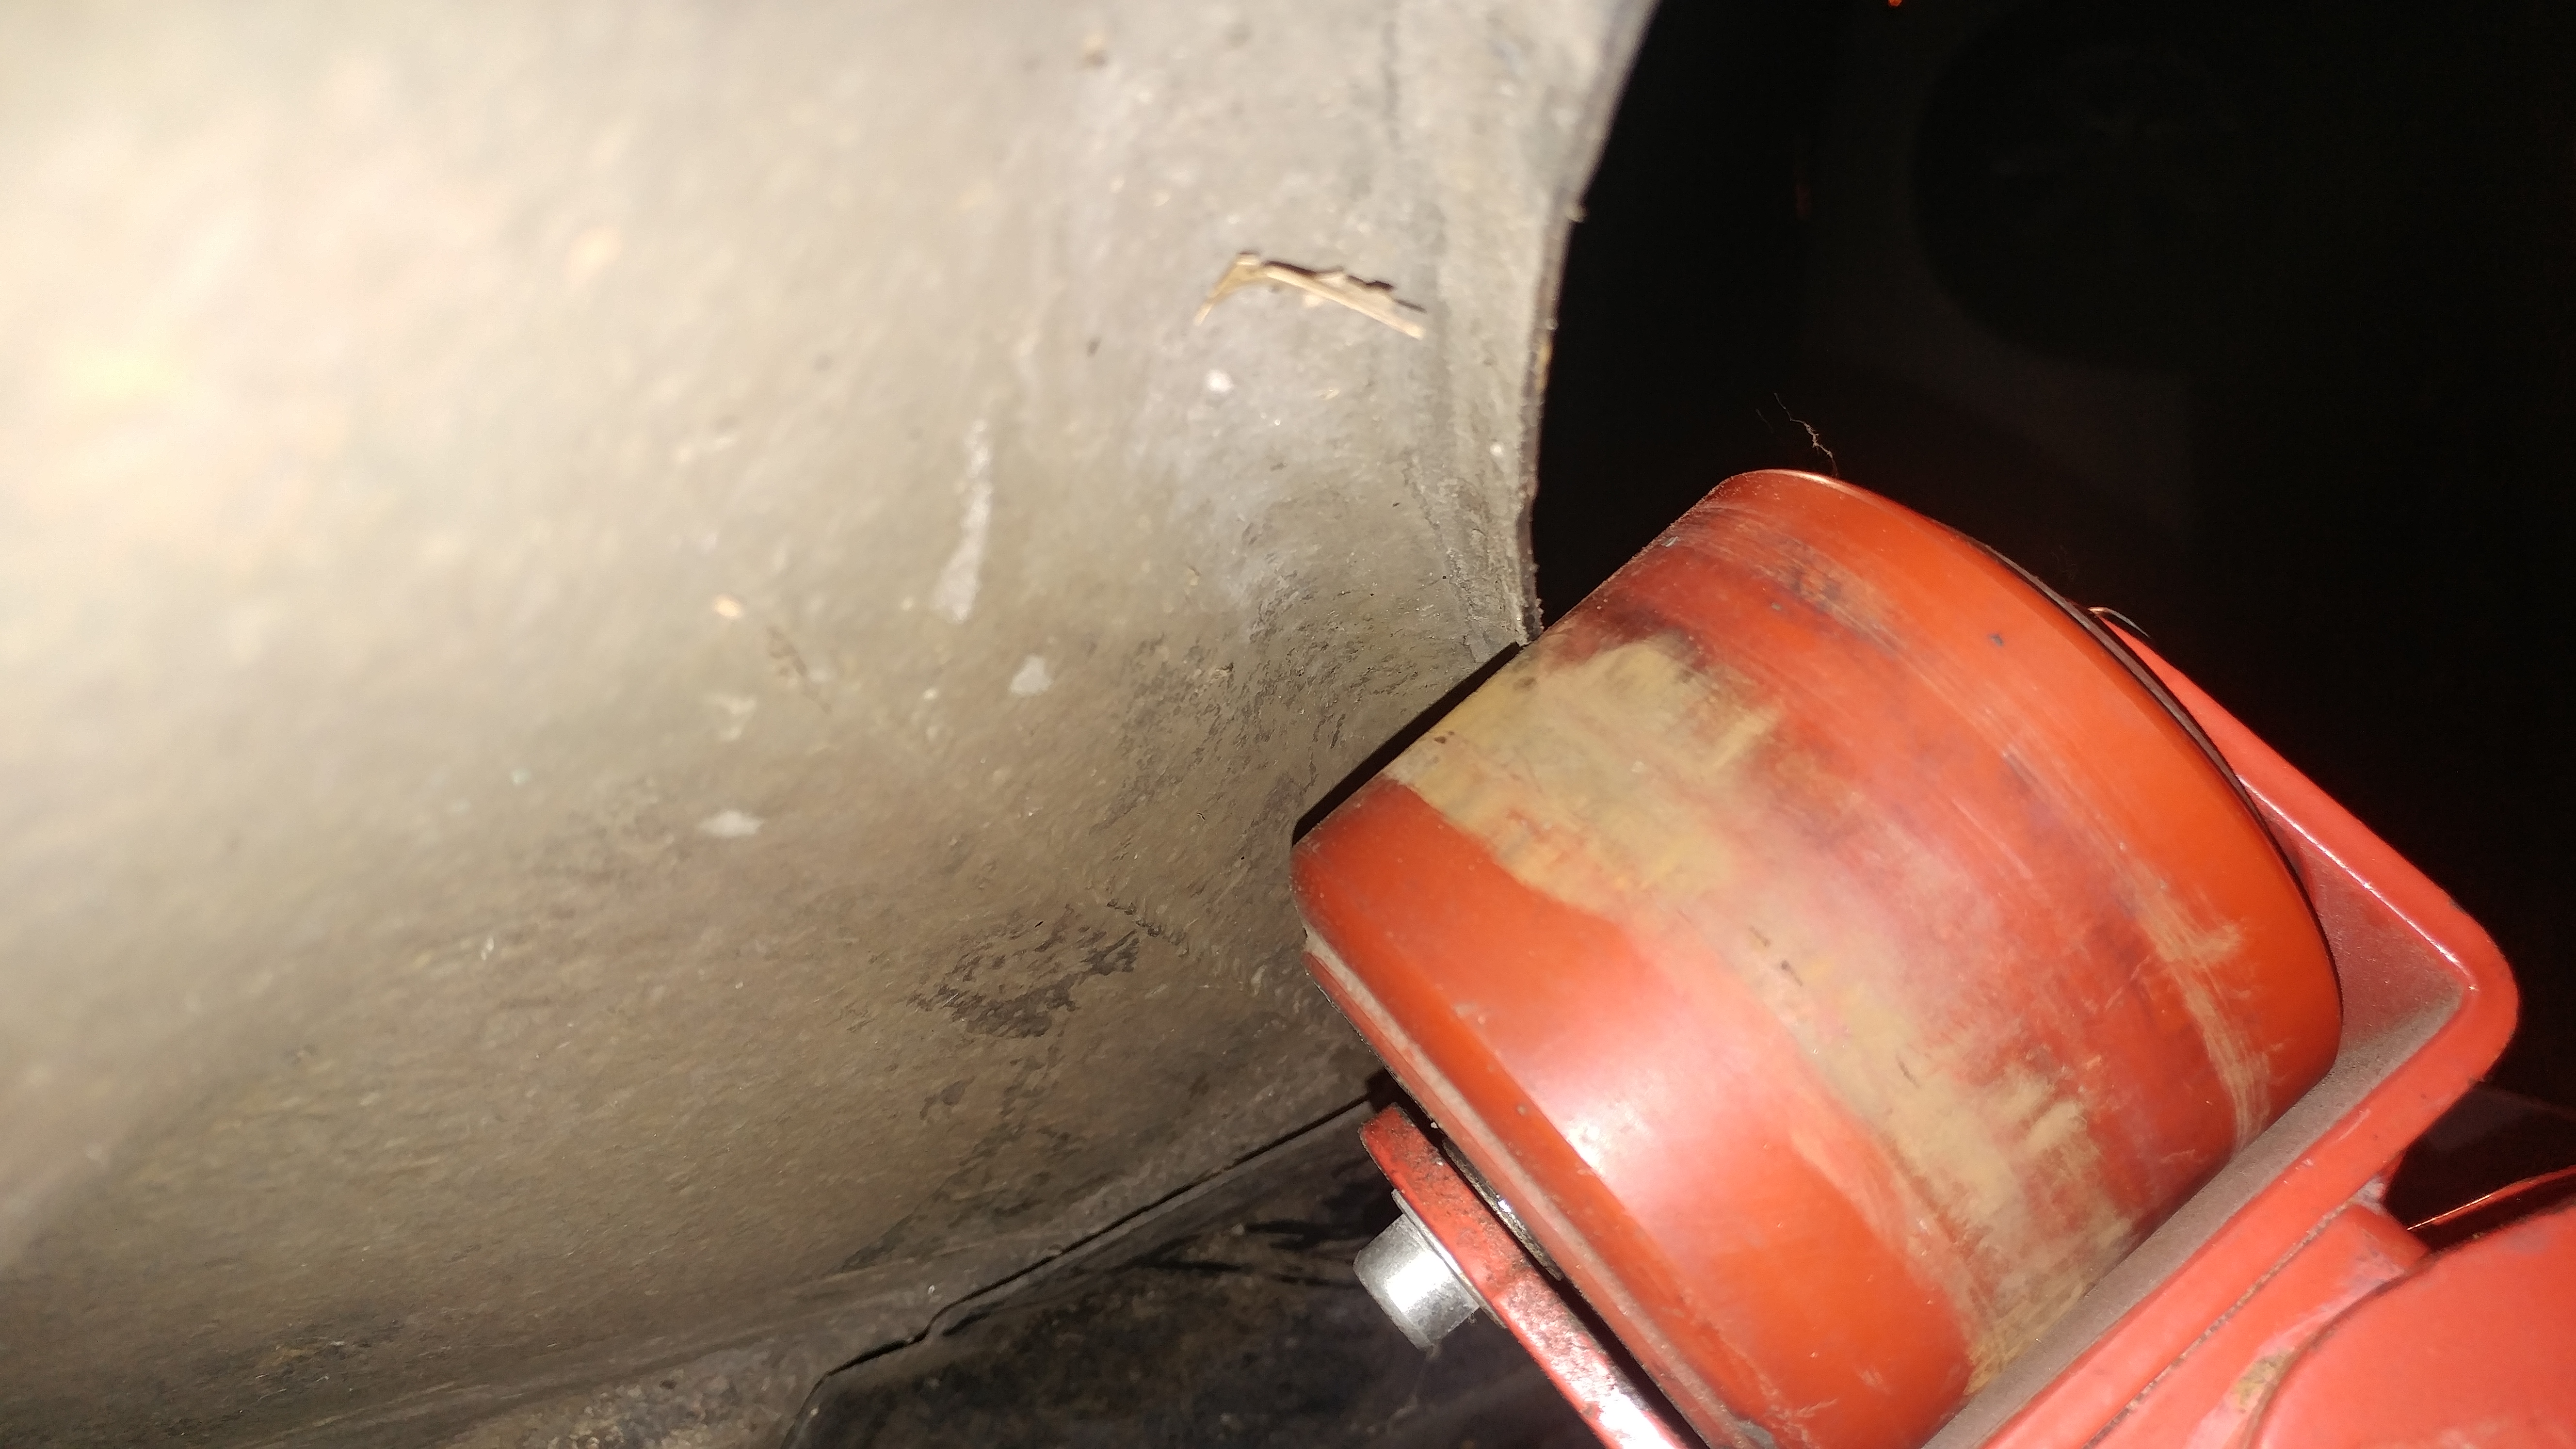
The result is actually very clean. This was my first time touching a roller, let alone rolling fenders, and by myself as well. I made sure to start on my "bad side" with the rust that was already forming just so if I did mess up it wasn't going to be on a pristine panel.
I paid extra close attention to only fold the inside lip and not to distort or flare the actual outside fender detail and shape AND only to fold what I had to, which was just the 40% of the top half portion where the wheel would travel. I will go ahead and admit that I did not heat the paint while rolling in the sub 40's. So the paint is indeed cracked. But it's not bothering me since the whole car needs and will be getting paint.
The final result turned out great. With the SPC kit is maxed out at -2 (as a even starting point) and with both sides rolled there is so much more room for wheel travel now without rubbing. Plus there is no more ungodly wheel poke!! I did notice that my rear passenger side sits a tad lower and seems to have more camber than the drivers side.
This is likely due to collapsed rear lower control arm bushings I've been told. I have not replaced those arm bushing so wouldn't be surprised if they were the culprit. Will be fixed when the car is sent away for a full alignment and the top end rebuilt<b>*</b>.


I still need to purchase a lift kit for the front end, something along the lines of a 30mm strut spacer to to go between the body and top hat as the front is at it's highest setting.
Had no luck with the RL MC and BB. Not upset though, I didn't expect a 2005 RL part to fit a '93 Vigor. But $75 was worth the answer.
The Vigor BB is a 8+9" which seems to be a two stage booster with the first portion being 9" and the second being 8"? It physically looks like two sizes and the 8/9/10" designation seems to be its diameter size.
In the Vigor it nearly sits against the under hood fuel pump and clutch slave cylinder. There is maybe 3mm or so between the two items and the booster it's self. After looking at the two side by side and seeing the size differences decided to wait and see if my stock MC is just worn out since the pedal doesn't hold pressure and the lines are fully bled.
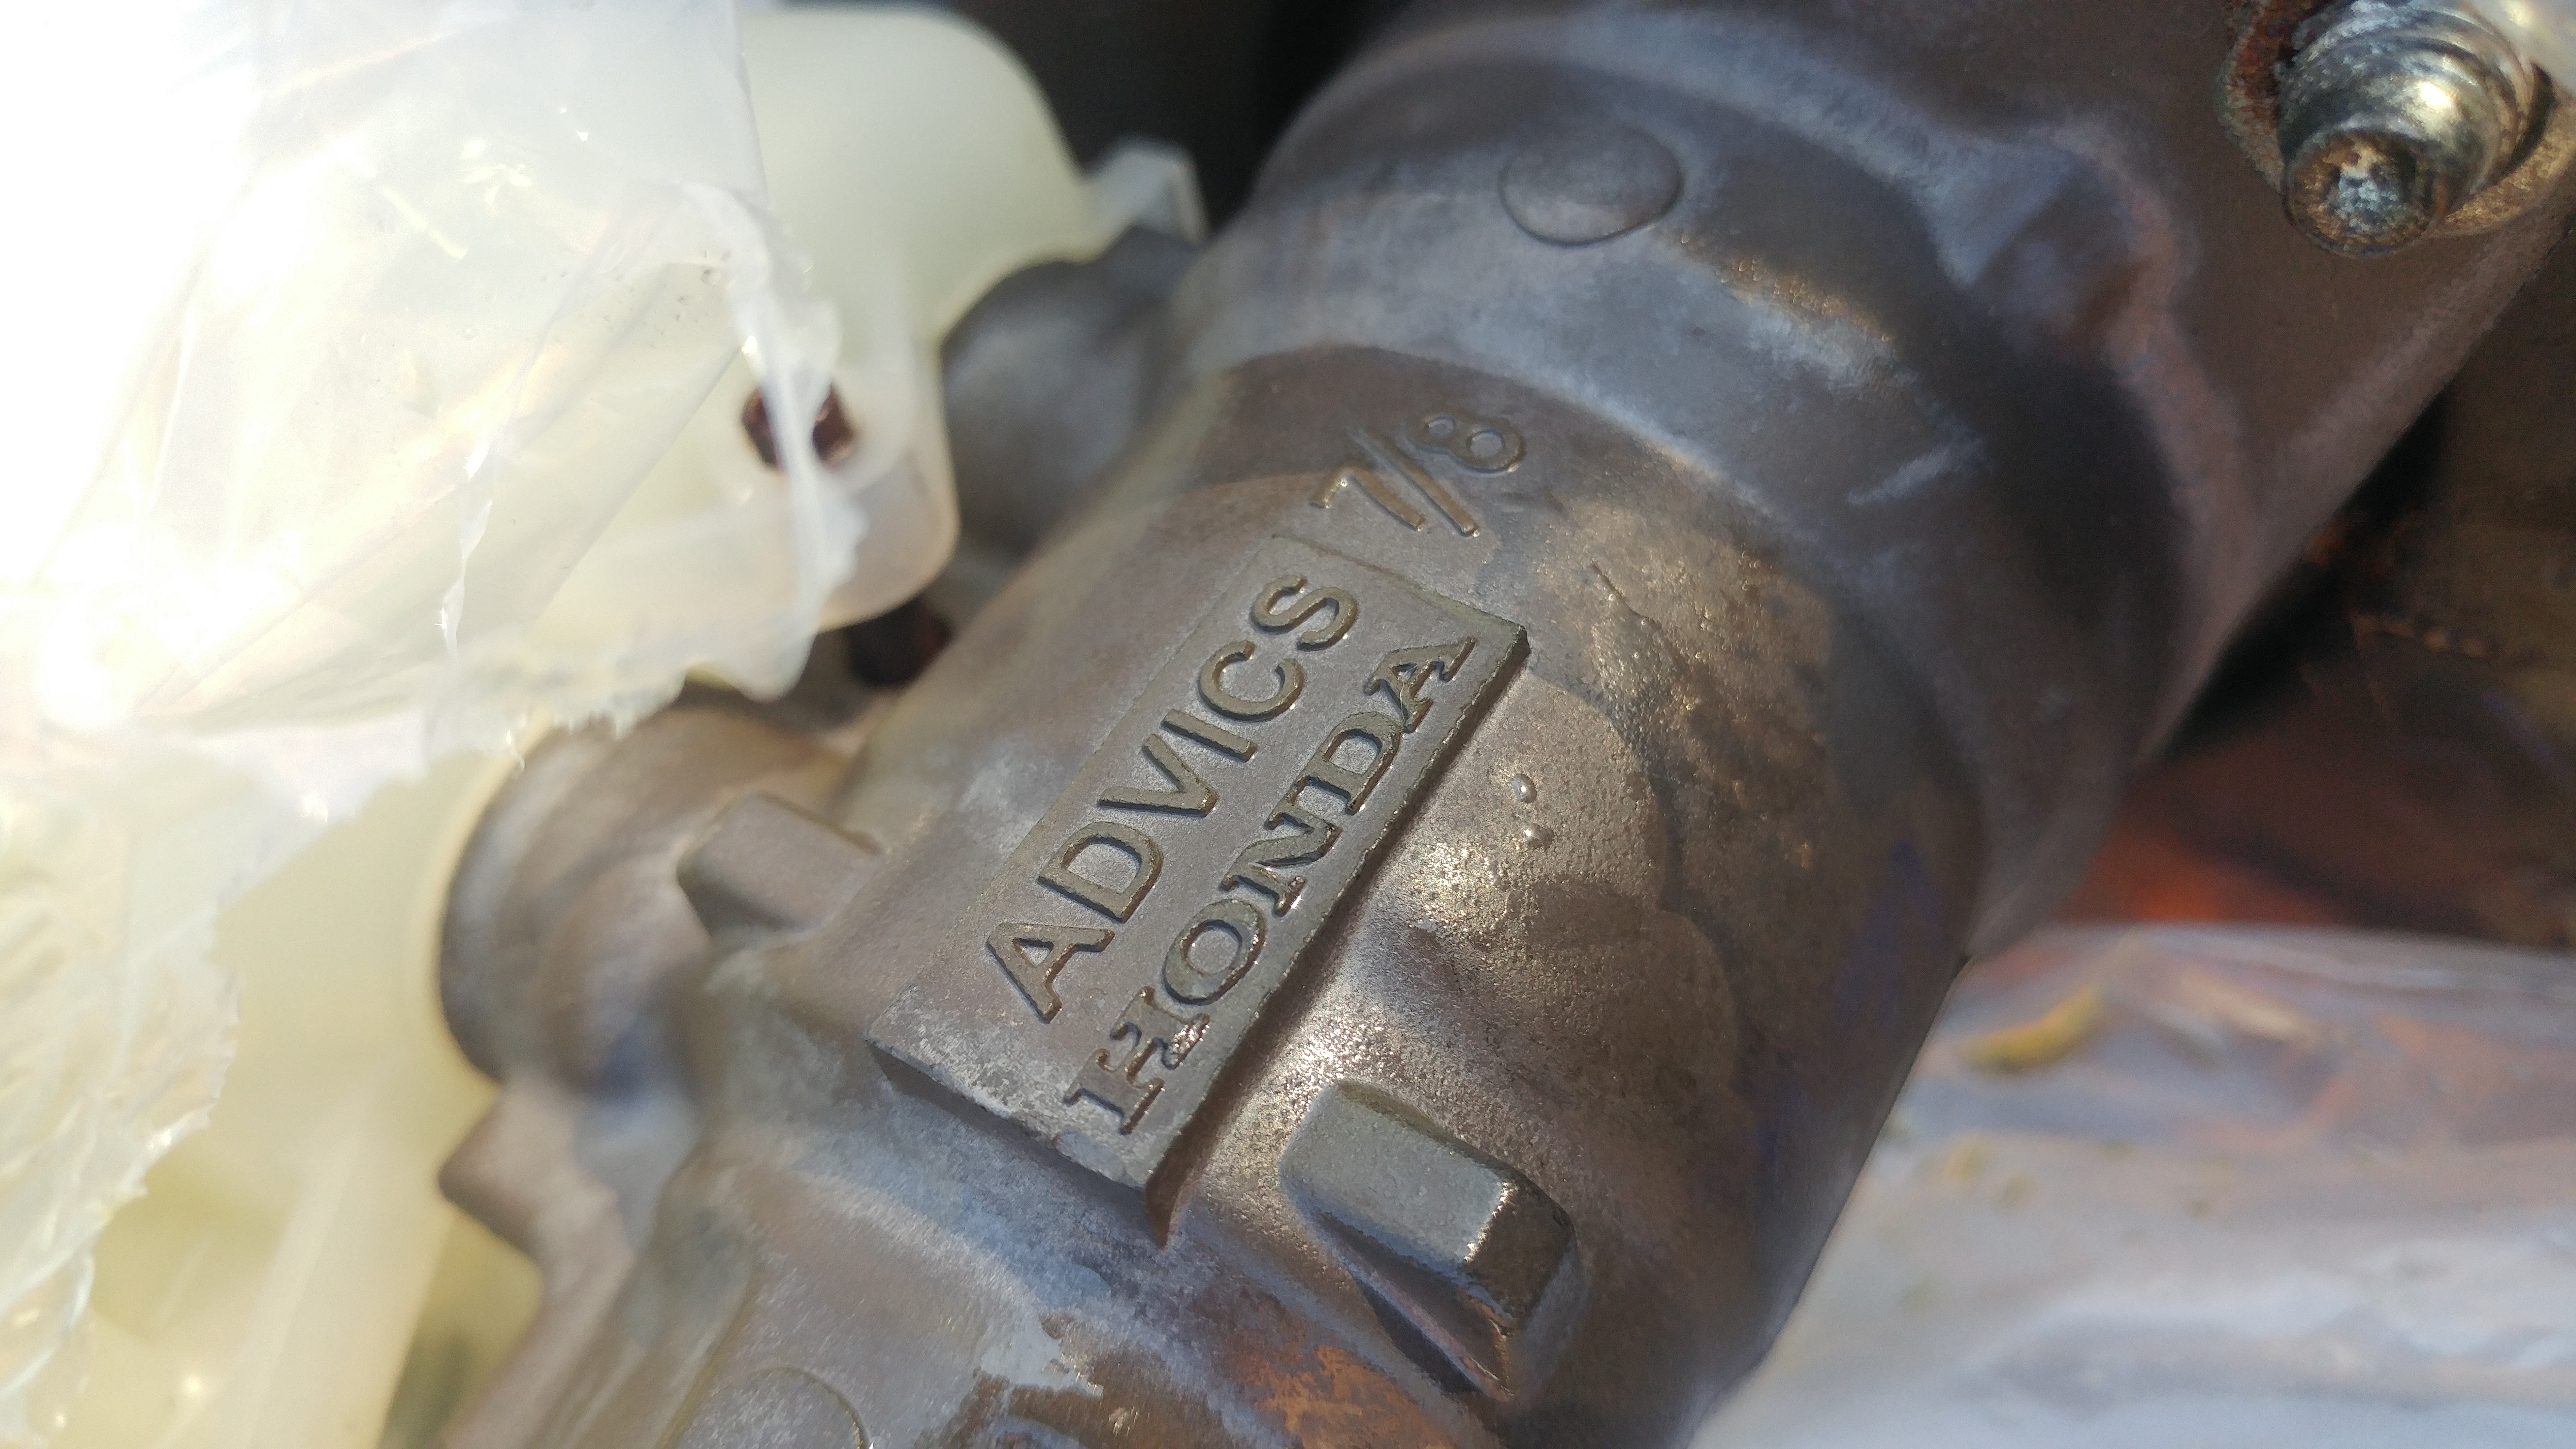
Another little note about the RL vs Vigor MCs. The RL has the "Honda+Advics 7/8ths" stamp which designates it to be a 7/8th size bore where as my rough research shows the Vigor to have a 1" bore.
I feel like I could be wrong because if the RL has larger brakes front and rear and is a heavier sedan, shouldn't it need <i>at least</i> a 1" or larger MC to supply plenty of brake pressure to the big calipers?? The BB only adjusts how the pedal fees and the overall travel if I'm not mistaken.
Either way that turned me off the RL MC until I find some more information and maybe even try it out somehow.

<b>*</b>T-belt, water pump, valve seals, under-cam spark plug O-ring seals, head gasket, valve adjustment.
This was probably the hardest thing to do to my car. With no luck finding a smaller tire combination and not willing to find new wheels with a lower offset (<i>not much will clear those RL calipers anyway</i>) I settled with rolling the fenders and installing an Accord camber kit from SPC.
The result is actually very clean. This was my first time touching a roller, let alone rolling fenders, and by myself as well. I made sure to start on my "bad side" with the rust that was already forming just so if I did mess up it wasn't going to be on a pristine panel.
I paid extra close attention to only fold the inside lip and not to distort or flare the actual outside fender detail and shape AND only to fold what I had to, which was just the 40% of the top half portion where the wheel would travel. I will go ahead and admit that I did not heat the paint while rolling in the sub 40's. So the paint is indeed cracked. But it's not bothering me since the whole car needs and will be getting paint.
The final result turned out great. With the SPC kit is maxed out at -2 (as a even starting point) and with both sides rolled there is so much more room for wheel travel now without rubbing. Plus there is no more ungodly wheel poke!! I did notice that my rear passenger side sits a tad lower and seems to have more camber than the drivers side.
This is likely due to collapsed rear lower control arm bushings I've been told. I have not replaced those arm bushing so wouldn't be surprised if they were the culprit. Will be fixed when the car is sent away for a full alignment and the top end rebuilt<b>*</b>.
I still need to purchase a lift kit for the front end, something along the lines of a 30mm strut spacer to to go between the body and top hat as the front is at it's highest setting.
Had no luck with the RL MC and BB. Not upset though, I didn't expect a 2005 RL part to fit a '93 Vigor. But $75 was worth the answer.
The Vigor BB is a 8+9" which seems to be a two stage booster with the first portion being 9" and the second being 8"? It physically looks like two sizes and the 8/9/10" designation seems to be its diameter size.
In the Vigor it nearly sits against the under hood fuel pump and clutch slave cylinder. There is maybe 3mm or so between the two items and the booster it's self. After looking at the two side by side and seeing the size differences decided to wait and see if my stock MC is just worn out since the pedal doesn't hold pressure and the lines are fully bled.
Another little note about the RL vs Vigor MCs. The RL has the "Honda+Advics 7/8ths" stamp which designates it to be a 7/8th size bore where as my rough research shows the Vigor to have a 1" bore.
I feel like I could be wrong because if the RL has larger brakes front and rear and is a heavier sedan, shouldn't it need <i>at least</i> a 1" or larger MC to supply plenty of brake pressure to the big calipers?? The BB only adjusts how the pedal fees and the overall travel if I'm not mistaken.
Either way that turned me off the RL MC until I find some more information and maybe even try it out somehow.
<b>*</b>T-belt, water pump, valve seals, under-cam spark plug O-ring seals, head gasket, valve adjustment.
01-19-2018, 01:13 AM
#65
Burning Brakes
Thread Starter
12/19/17
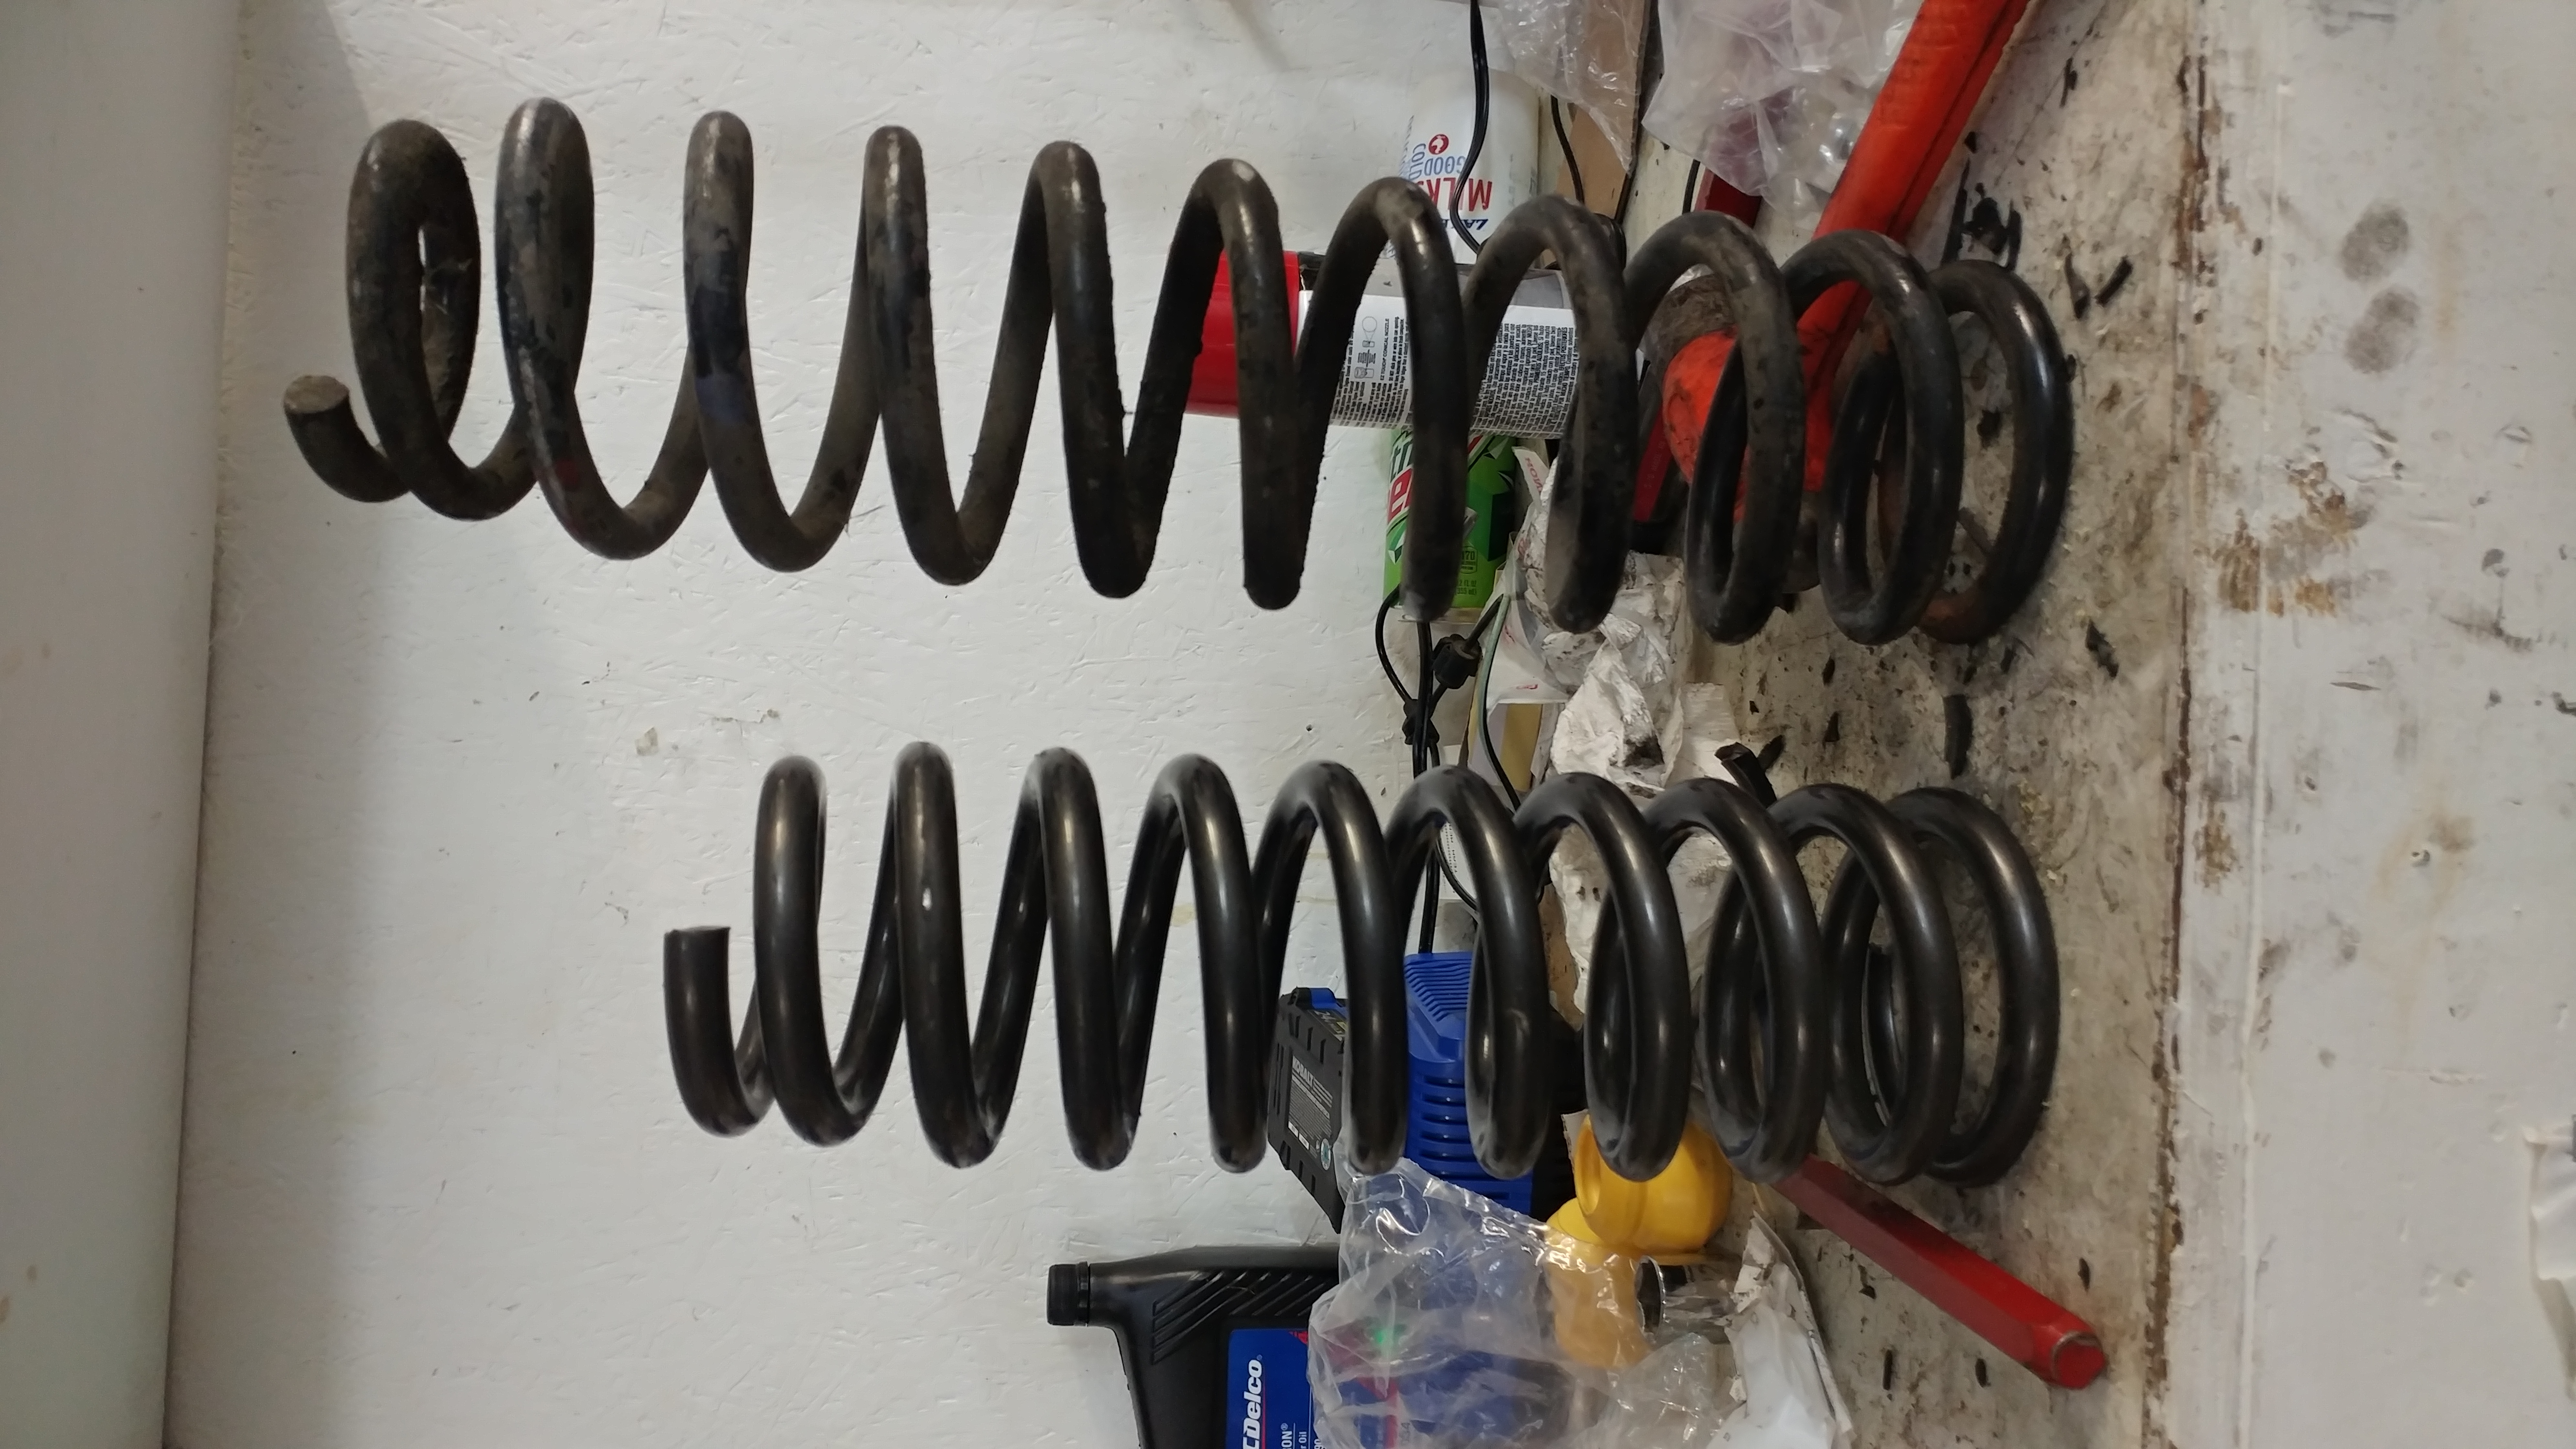
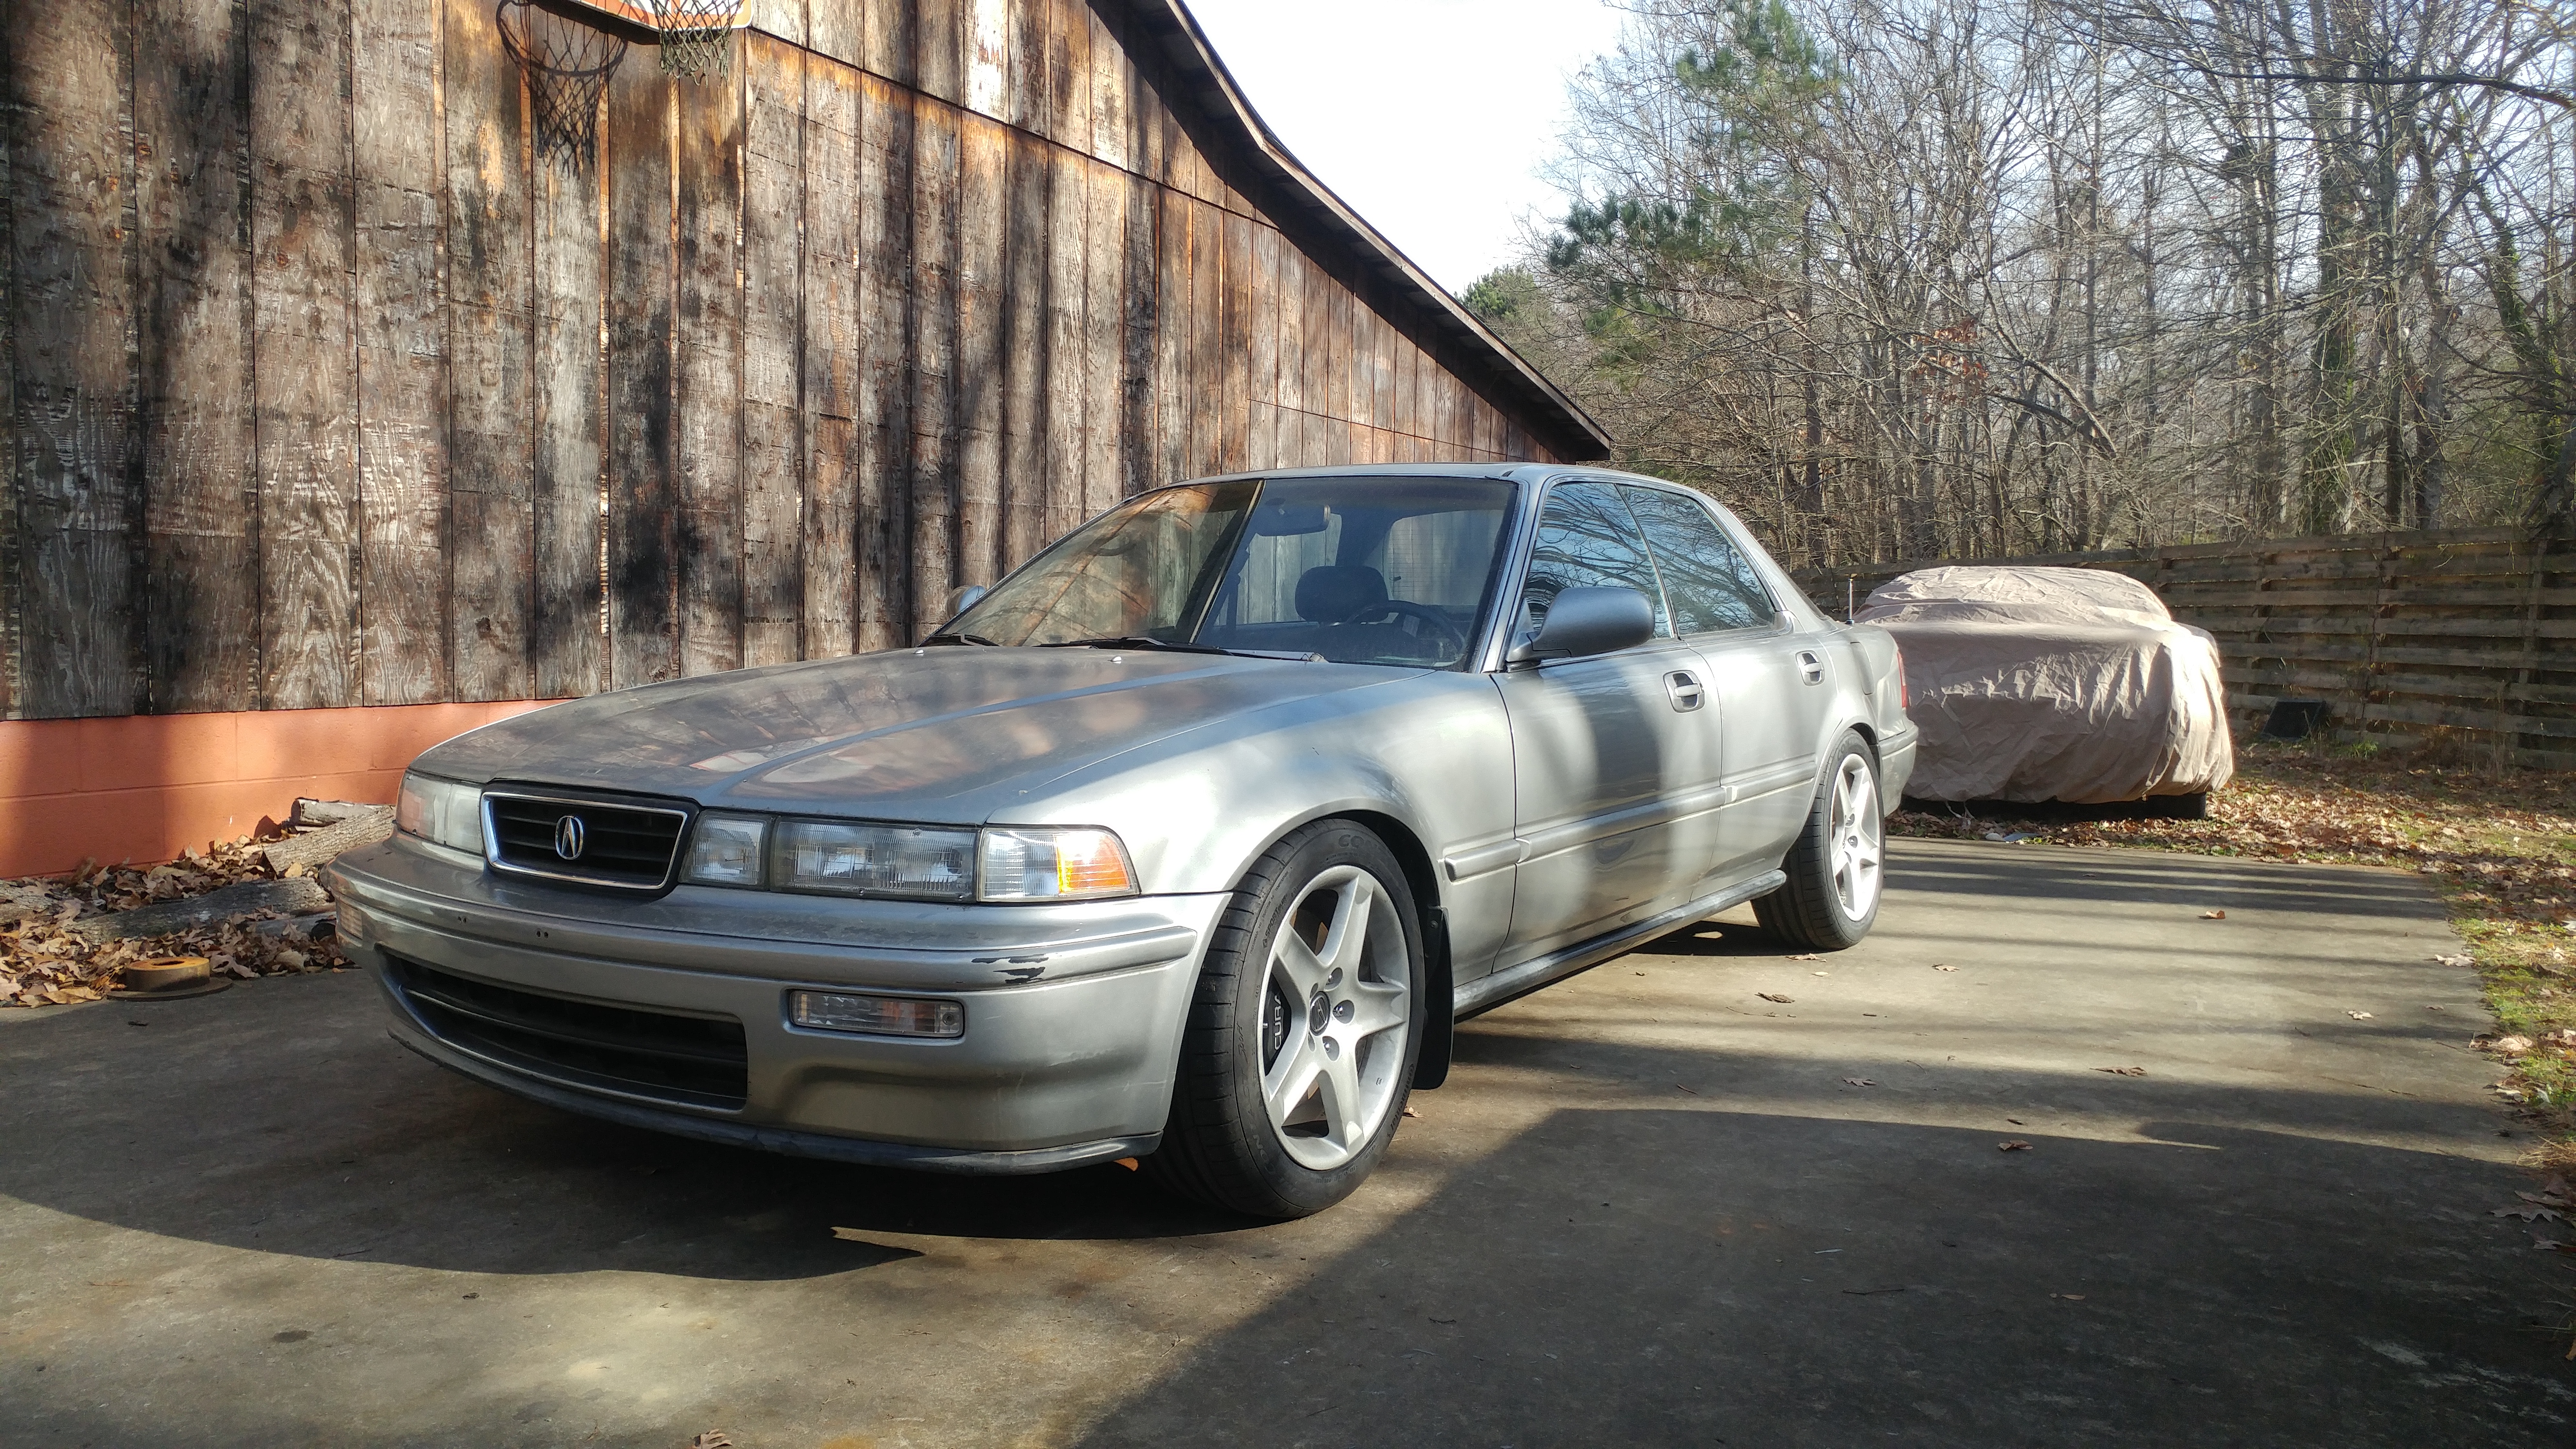
Picked up a new 1" MC this morning and took some day time pics and did a drive way brake test.
Most likely more than -2 degrees. Collapsed lower arm bushings will allow that.

I hate the rear of these cars BUT... this looks kinda cute actually. I've actually came to adore the rear wrap around glass treatment.
The car still locks them up at 15mph... not sure if this was the front or rear, looks like rear since that's not 8" of tire and the rear has about -3 degree camber. Also with the weight transfer, surely the rear will lock first.
I'll hold judgment and do actual testing once I install the new MC.
Picked up a new 1" MC this morning and took some day time pics and did a drive way brake test.
Most likely more than -2 degrees. Collapsed lower arm bushings will allow that.
I hate the rear of these cars BUT... this looks kinda cute actually. I've actually came to adore the rear wrap around glass treatment.
The car still locks them up at 15mph... not sure if this was the front or rear, looks like rear since that's not 8" of tire and the rear has about -3 degree camber. Also with the weight transfer, surely the rear will lock first.
I'll hold judgment and do actual testing once I install the new MC.
01-19-2018, 01:14 AM
#66
Burning Brakes
Thread Starter
12/23/17
2003 TL needles (Clear/red illuminating)
Custom gauge faces
Final adjustment
Needs the needles trimmed
Needs light diffused
Needs clear bracing for rigidity and multiple layers to add depth to he lettering on the faces.
This red needle cluster looks so much better than the stock gimpy 140mph, white needle cluster.
The following users liked this post:
Legend2TL (01-19-2018)
01-19-2018, 01:15 AM
#67
Burning Brakes
Thread Starter
1/08/18
The Vigor required a new main relay over the weekend. Picked one up at Advance. Also went ahead and ordered a Denso fuel pump for good measure.
Cold start:
About 5 minutes later the relay failed:
With a new relay:
Maiden Voyage:
Not it's typical habitat, also not my best photo quality ever.
Of course this is going to be glazed over because his happy I am but my Initial impressions:
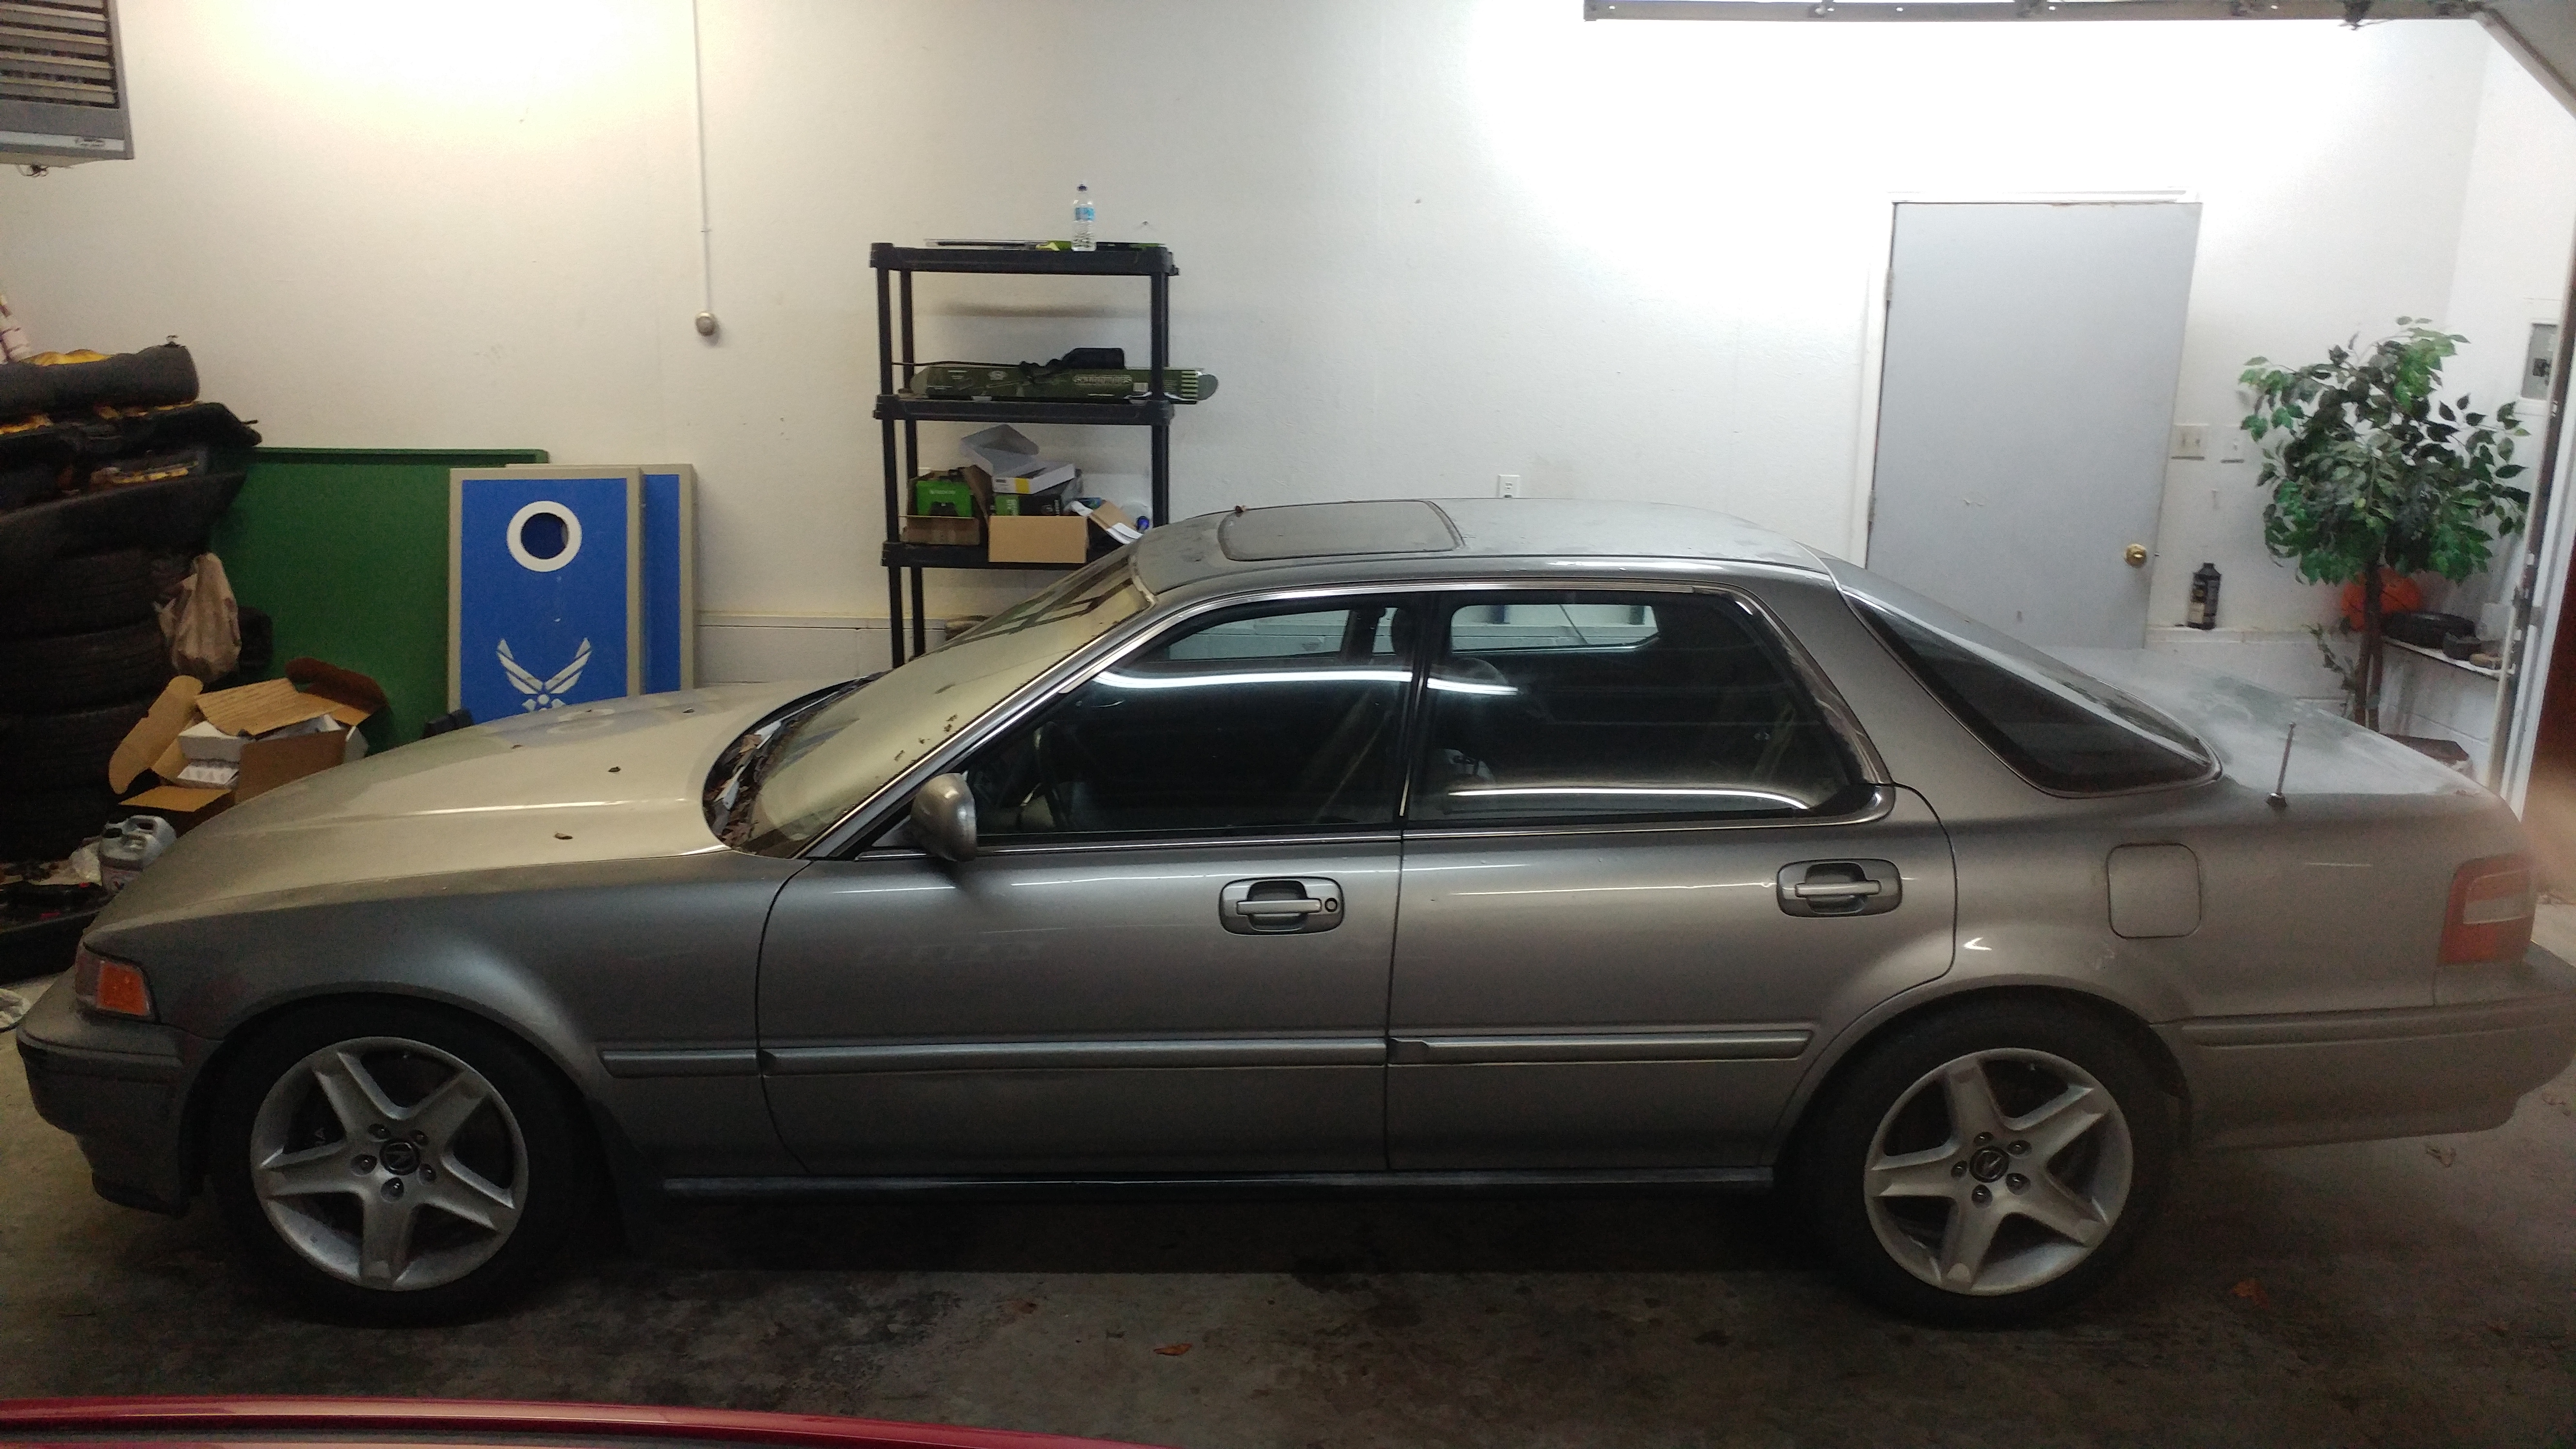
The car rides EXTREMELY smooth. I have Koni Yellows and Eibach Pro Springs on the car with the 17x8 235/45R17s tires. I jave the shocks on their softest setting and the car rides amazing. It's similar to my TSX but has zero body roll. Not bouncy at all either.
The front tires didn't rub in any mid corner bumps. I thought it was going to because when lock to lock it will rub the too middle of the fender in the driveway. I'm shocked it didn't. It actually rubbed only twice on my short drive and that was entry/ exit of the driveway.
The car dives straight. I don't know how. I have nkt done an alignment on the car. The front is toed out, rear is toed in. Negative 3 degrees out back, close to negative 2.5 up front. Drove straight as an arrow.
Despite that alignment mentioned above the car isn't twitchy. The road was empty tonight (which is why I waited to do it) and I "slalomed" from white line to white line at 40mph and never felt the car act out of place. Not saying it won't in higher speed cornering with bumps because I know it will.
The brakes work. The ABS does not. Locked up the front for sure, Idk about the rear. I have ABS code 3 I believe by counting the ABS light flashes.
Going back to the body lean/ roll/ the was no majit nose dive when stomping the brakes.
The steering. My God I love it. Its Like extremely over boosted in parkinglot speeds but quickly tightens up amd gets really heavy as you get over 30mph. It's so direct. The car feels light and nimble. Point and shoot is a great way to put it. The TSX is the same way But never gets as heavy or right. I believe the Vigor and most older Hondas go to almost zero power assist once at speed. I like that.
Wind noise and NVH. I didn't have much wind noise at mph. There is a lot of road noise like little pebbles and salt but I have half of an interior so... The wind noise still, thought these old frame-less Windows would whistle.
Power. I didn't thrash it much. I managed easy wheel spin but I'm blaming summer tires in sub 40 degrees and wet roads. I didn't push the car past 60. Had no reason to. It's of course slow. But felt eager and competent. I'll half to open it up in more favorable conditions.
I think I've registering the car this week sooner than expected.
The Vigor required a new main relay over the weekend. Picked one up at Advance. Also went ahead and ordered a Denso fuel pump for good measure.
Cold start:
About 5 minutes later the relay failed:
With a new relay:
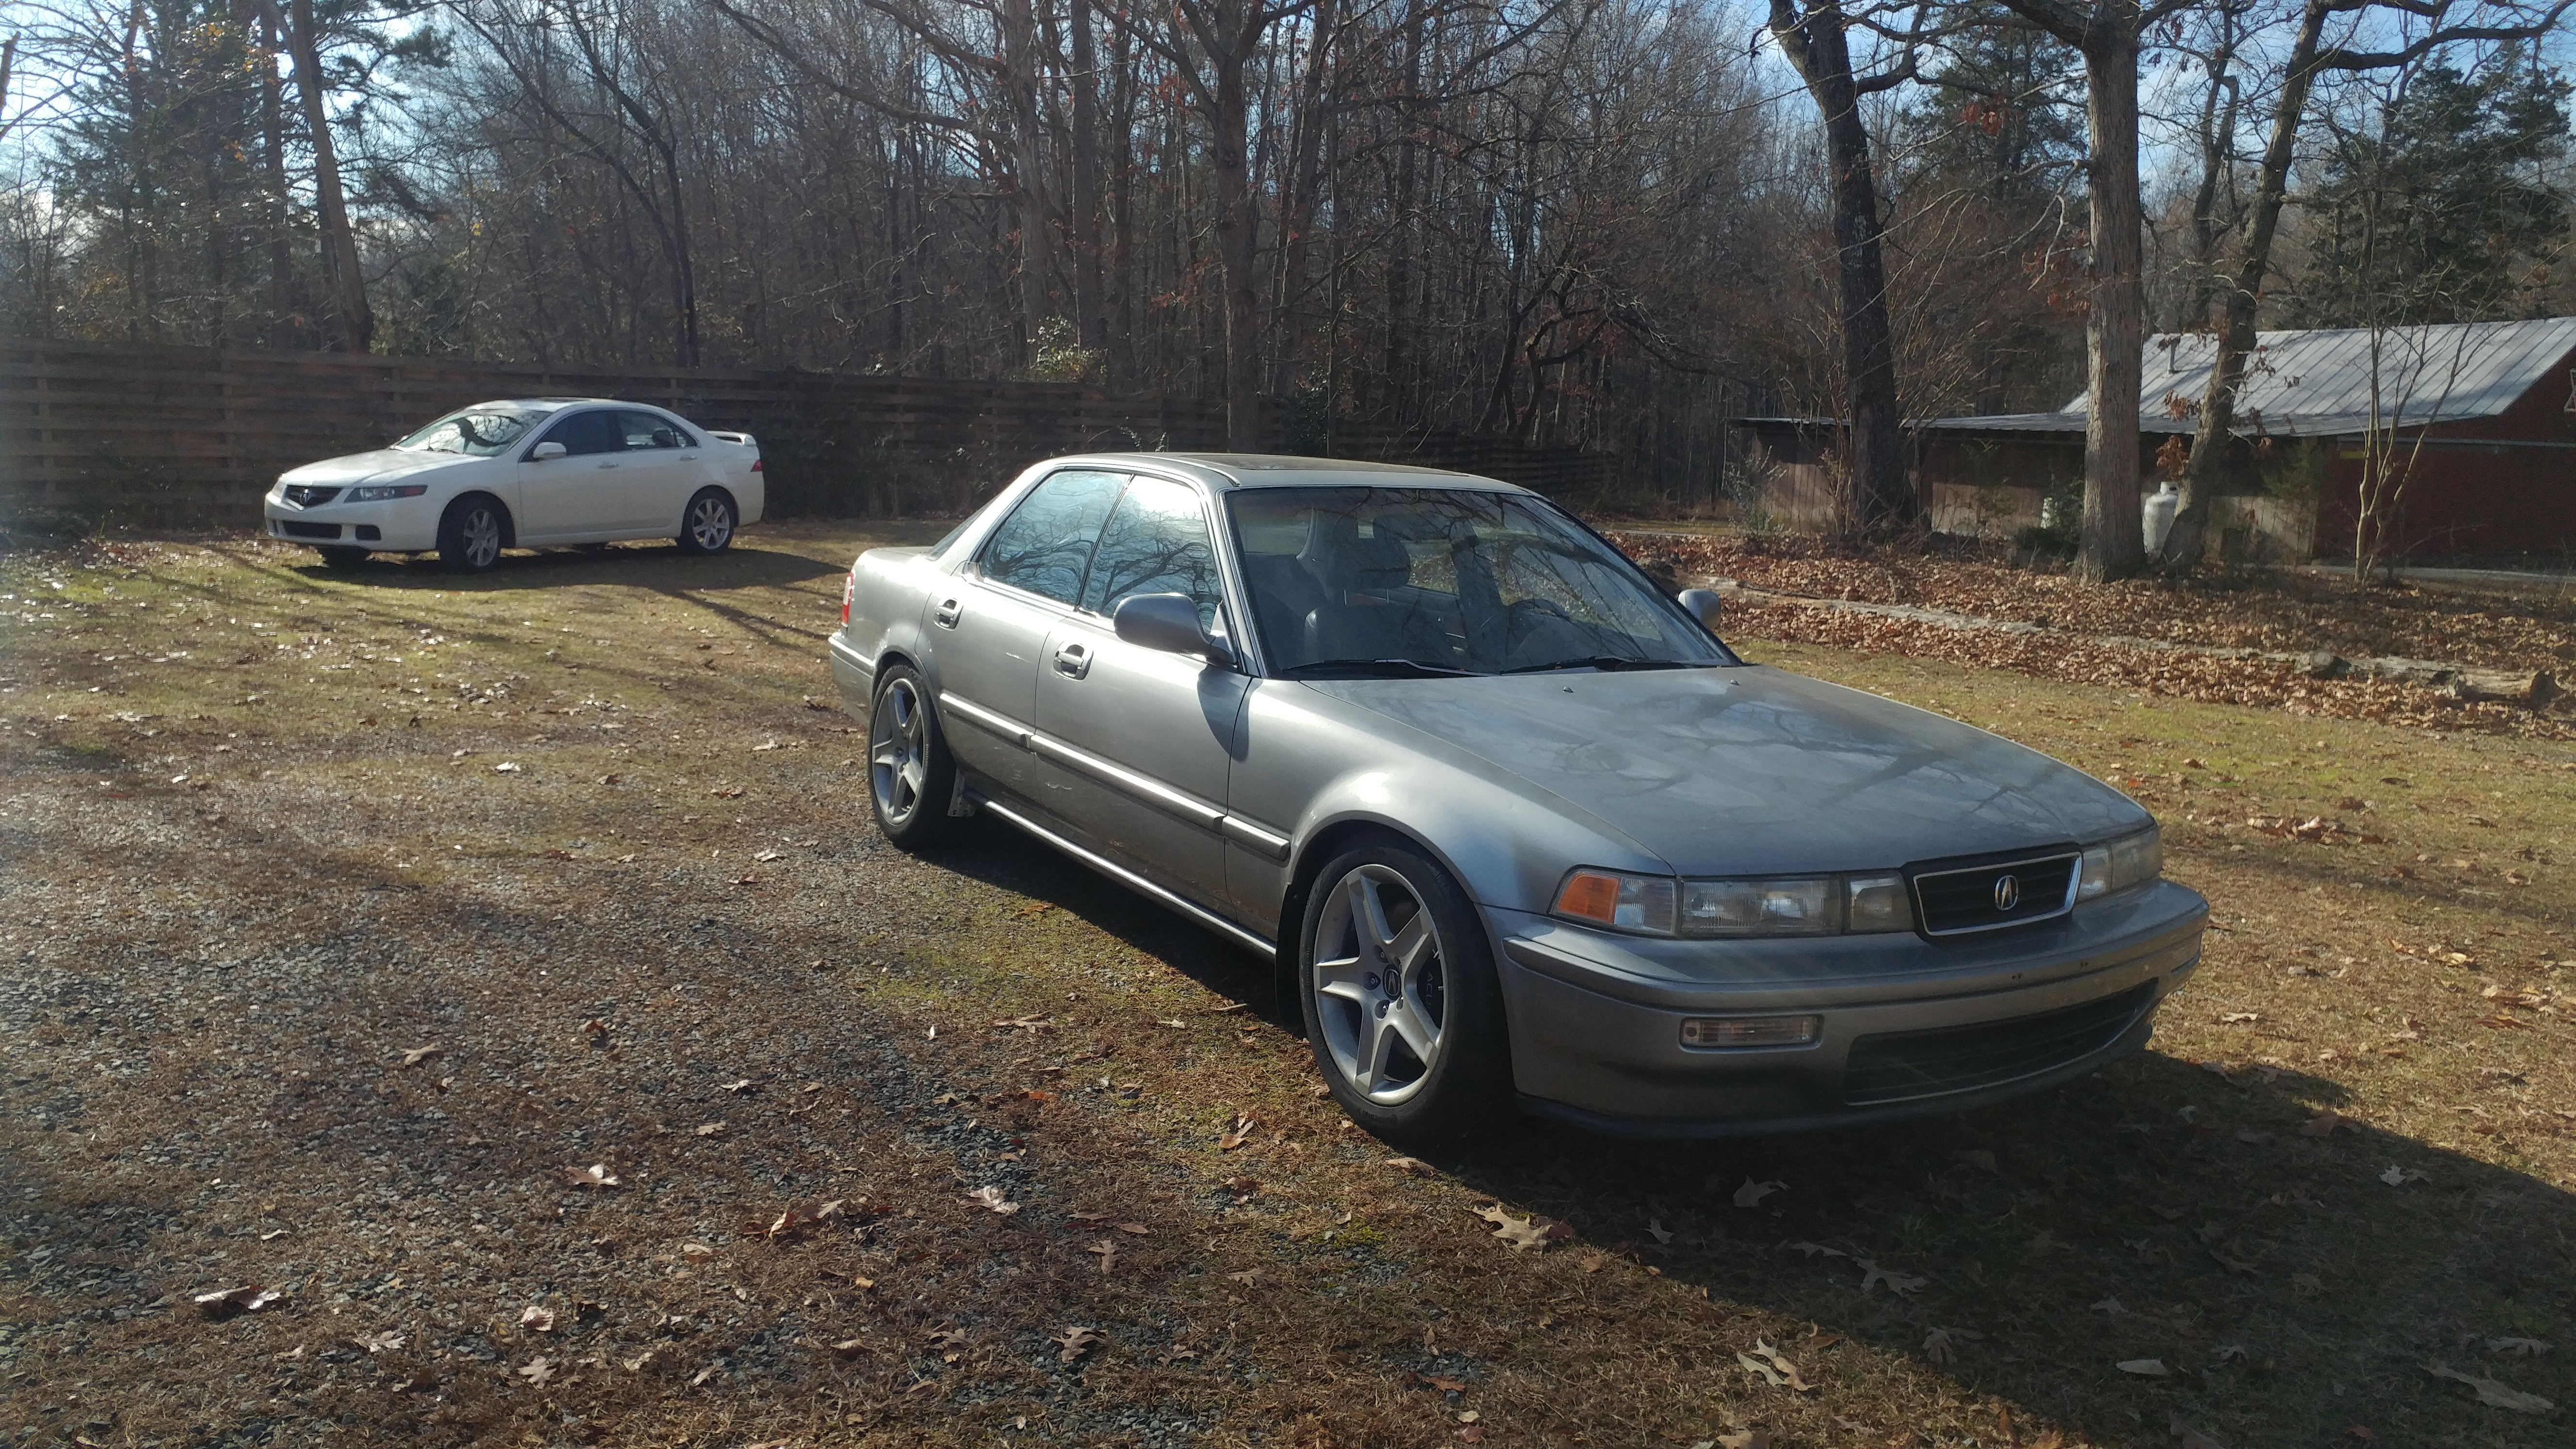
Maiden Voyage:
Not it's typical habitat, also not my best photo quality ever.
Of course this is going to be glazed over because his happy I am but my Initial impressions:
The car rides EXTREMELY smooth. I have Koni Yellows and Eibach Pro Springs on the car with the 17x8 235/45R17s tires. I jave the shocks on their softest setting and the car rides amazing. It's similar to my TSX but has zero body roll. Not bouncy at all either.
The front tires didn't rub in any mid corner bumps. I thought it was going to because when lock to lock it will rub the too middle of the fender in the driveway. I'm shocked it didn't. It actually rubbed only twice on my short drive and that was entry/ exit of the driveway.
The car dives straight. I don't know how. I have nkt done an alignment on the car. The front is toed out, rear is toed in. Negative 3 degrees out back, close to negative 2.5 up front. Drove straight as an arrow.
Despite that alignment mentioned above the car isn't twitchy. The road was empty tonight (which is why I waited to do it) and I "slalomed" from white line to white line at 40mph and never felt the car act out of place. Not saying it won't in higher speed cornering with bumps because I know it will.
The brakes work. The ABS does not. Locked up the front for sure, Idk about the rear. I have ABS code 3 I believe by counting the ABS light flashes.
Going back to the body lean/ roll/ the was no majit nose dive when stomping the brakes.
The steering. My God I love it. Its Like extremely over boosted in parkinglot speeds but quickly tightens up amd gets really heavy as you get over 30mph. It's so direct. The car feels light and nimble. Point and shoot is a great way to put it. The TSX is the same way But never gets as heavy or right. I believe the Vigor and most older Hondas go to almost zero power assist once at speed. I like that.
Wind noise and NVH. I didn't have much wind noise at mph. There is a lot of road noise like little pebbles and salt but I have half of an interior so... The wind noise still, thought these old frame-less Windows would whistle.
Power. I didn't thrash it much. I managed easy wheel spin but I'm blaming summer tires in sub 40 degrees and wet roads. I didn't push the car past 60. Had no reason to. It's of course slow. But felt eager and competent. I'll half to open it up in more favorable conditions.
I think I've registering the car this week sooner than expected.
The following users liked this post:
Legend2TL (01-19-2018)
01-19-2018, 11:54 AM
#69
Moderator
Nice work, just read the whole thing. Always been a bit of a Vigor fan. Girl in my HS had one in black/black, clean little car.
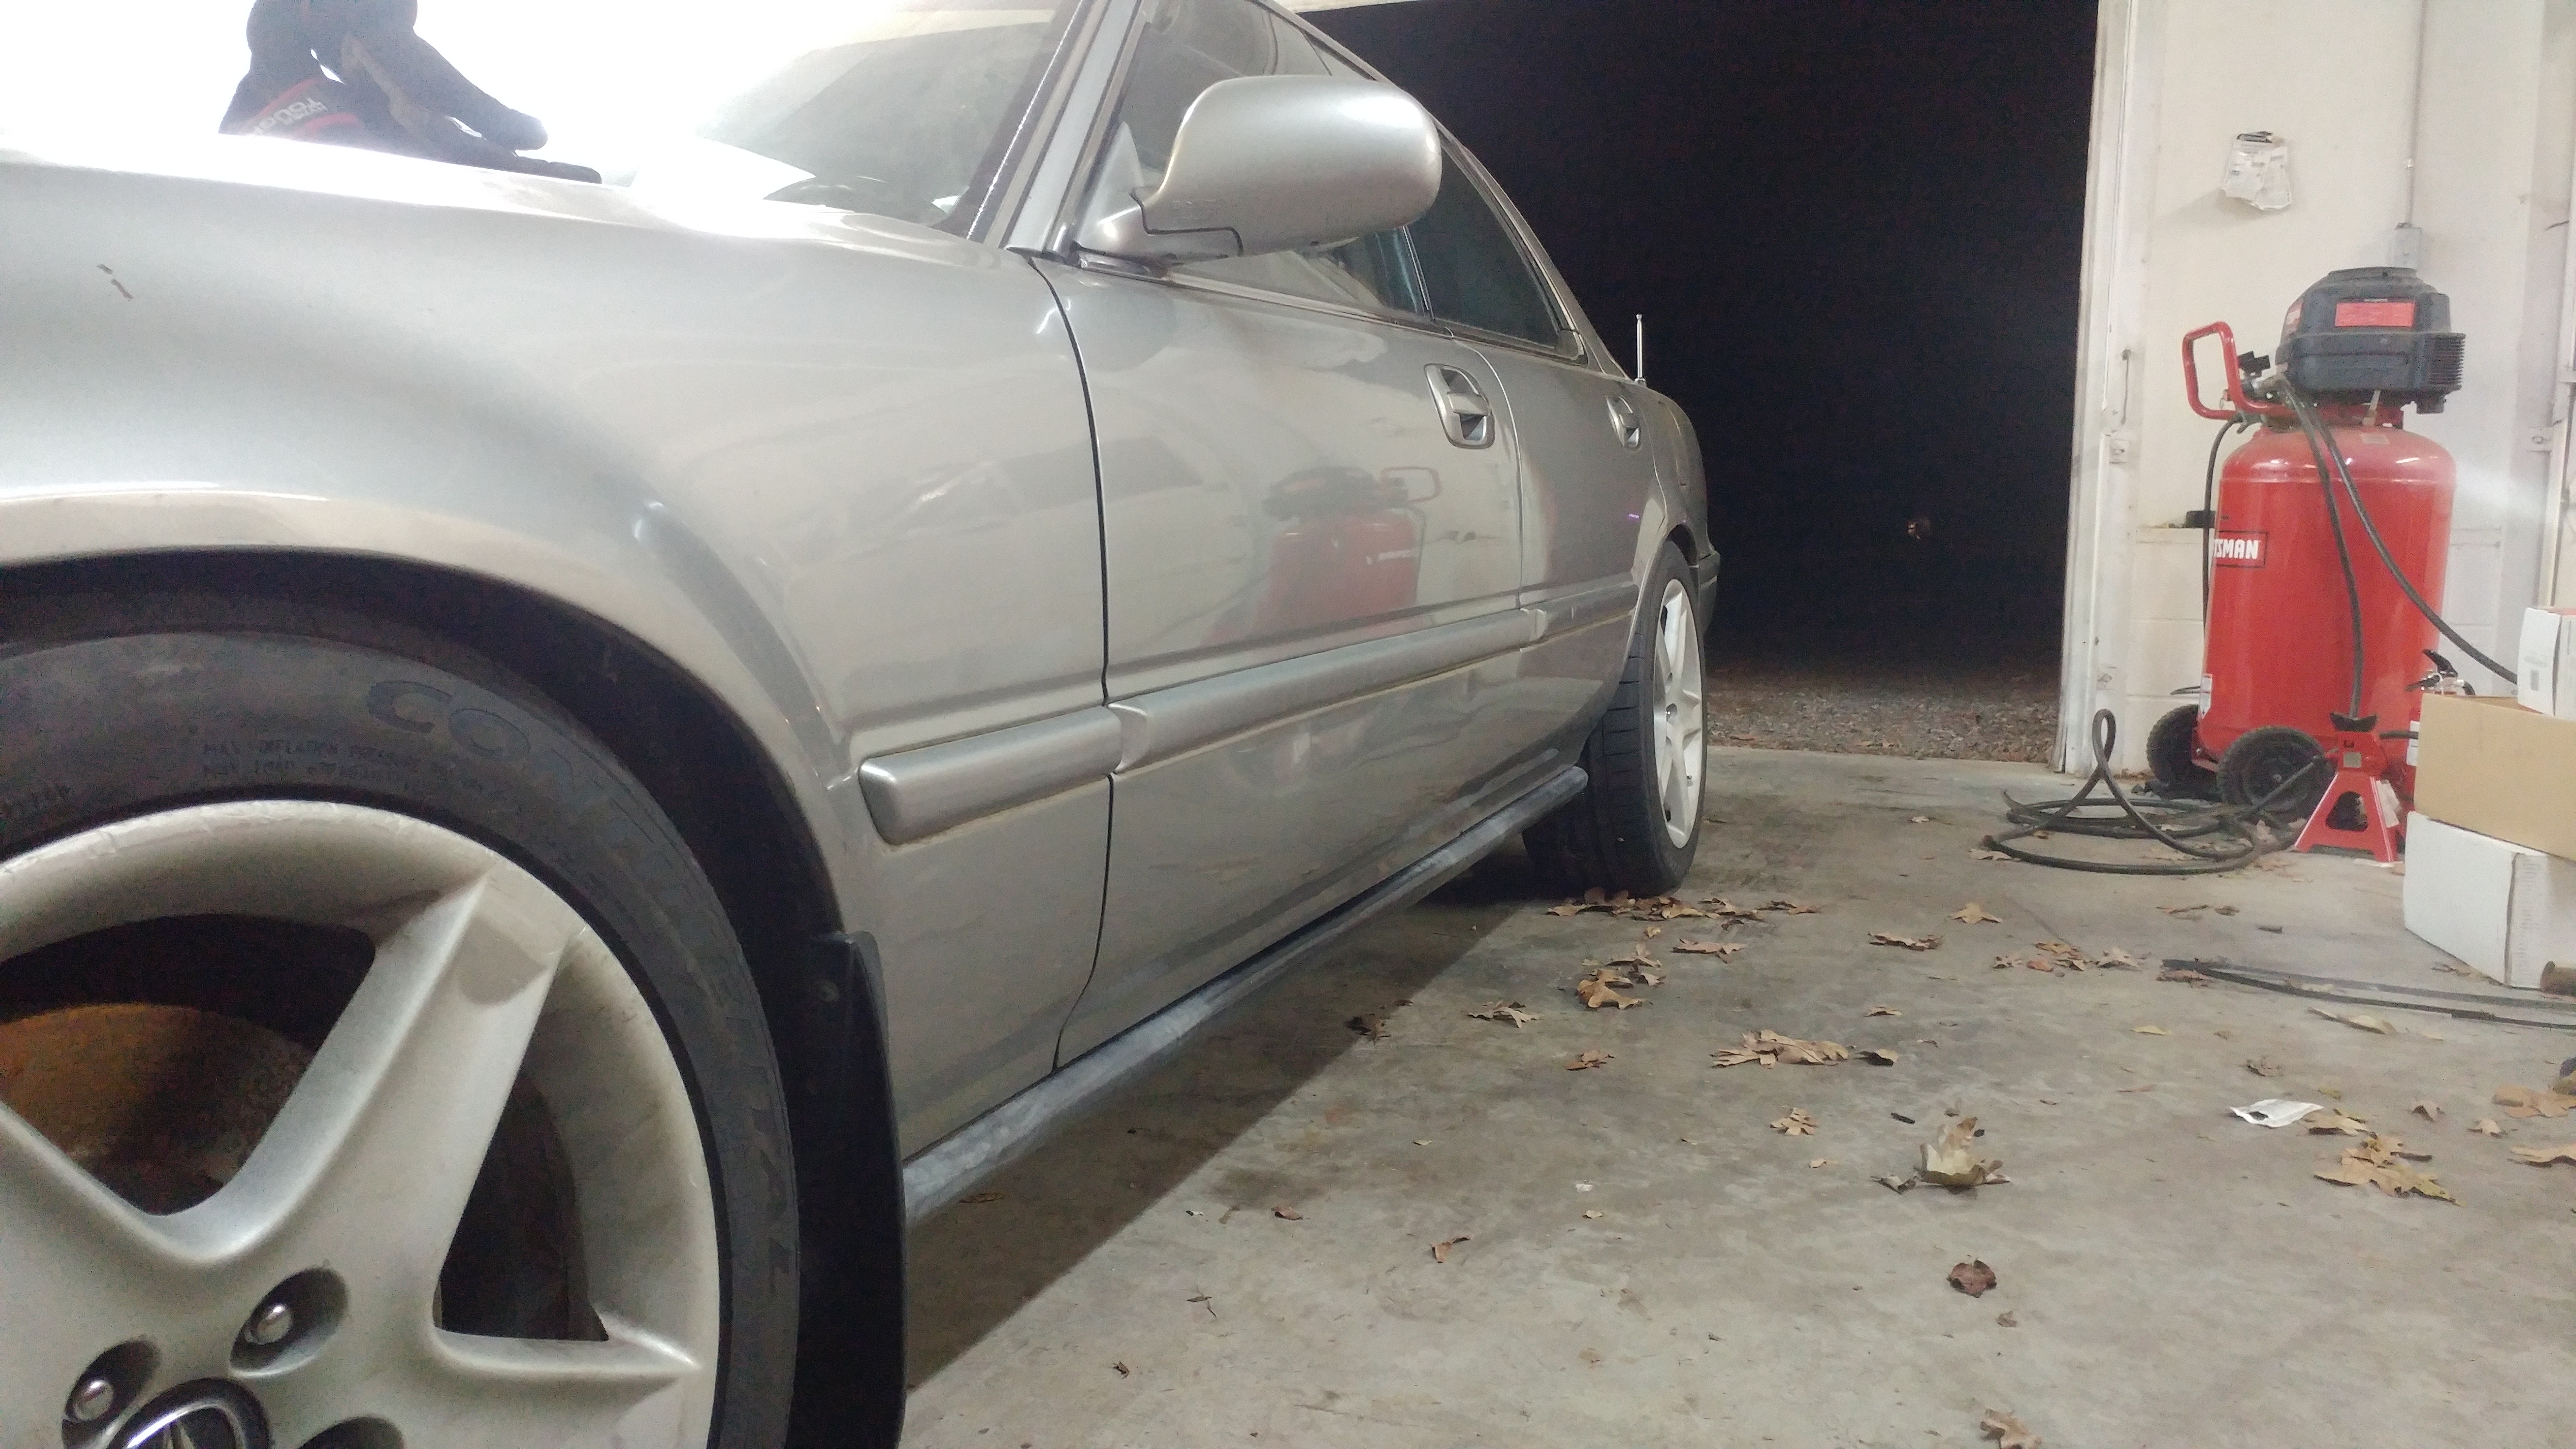
Thought the wheels would be oversized from the first few shots, but they work well on there.
Looking forward to further progress. Your p'shopped images look great.
Thought the wheels would be oversized from the first few shots, but they work well on there.
Looking forward to further progress. Your p'shopped images look great.
The following users liked this post:
Timmy18 (01-19-2018)
01-19-2018, 12:14 PM
#70
AZ Community Team
Nice project, keep posting updates and good luck with all the work
The following users liked this post:
Timmy18 (01-19-2018)

The following users liked this post:
Timmy18 (01-19-2018)

 01-20-2018, 06:34 PM
#75
Someday, an RS6 Avant+
Very nice work. But I have to ask: If the steering wheel is stock, does it have an airbag? If so, is that a concern being as old as it is. Just curious.
And go Eagles....... Fly Eagles Fly
And go Eagles....... Fly Eagles Fly
01-20-2018, 10:11 PM
#76
Burning Brakes
Thread Starter
I plan to put a steering wheel in the car from a 2003 TL/CL-S/ MDX. May have to leave the airbag unplugged unless I change over the SRS system because I read there are different airbag types over the years.
01-21-2018, 08:55 PM
#77
Stage 1 Audi S5
Awesome thread man and great job on rolling the fenders, makes the wheels look perfect where they looked out of place before. The car really seems to still have a presence but I agree, the back isn't my favorite but it's growing on me in reading this thread.
You going to paint or wrap?
You going to paint or wrap?
The following users liked this post:
Timmy18 (01-21-2018)
01-21-2018, 10:12 PM
#78
Burning Brakes
Thread Starter
Awesome thread man and great job on rolling the fenders, makes the wheels look perfect where they looked out of place before. The car really seems to still have a presence but I agree, the back isn't my favorite but it's growing on me in reading this thread.
You going to paint or wrap?
You going to paint or wrap?
You also have to consider the dinky single exit muffler someone put on the car. The twin exit looks much better.
As for wrap or paint, I'm 100% going with paint. Not sure what color yet. Silver is so boring. Thinking maybe Canterbury Green Metallic, Phantom Grey Metallic, Buckingham Blue Pearl, Carbon Bronze Pearl, Deep Green Pearl. Those aren't anything crazy either but they're subtle and slightly more unique. The Vigor is one of the fewer cars that pull off red really well too, but I personally don't want this one to be red.

 01-23-2018, 04:34 AM
#80
I love me some Curry...!
Join Date: Feb 2008
Location: Murrieta CA.. but Brooklyn is in the soul..
Age: 42
Posts: 795
Received 14 Likes
on
9 Posts
I had an Acura Vigor when I was in Japan in 2005 I loved that car, I'm back in Japan again now I have a 02 TSX/ aka Honda Accord. Its a project of love for you I see and that's whats its all about!
The following users liked this post:
Timmy18 (01-25-2018)

