Eddie's build thread

 12-27-2013, 09:54 PM
#42
Complacently Comfortable in Conforming!
I like everything to kinda be the same. I'll only do different colors if they are separate modules or instruments. Cluster all one color. Head Unit all one color, etc!
What bulbs did you use for that? Links? What do you prefer green or blue?
I like everything to kinda be the same. I'll only do different colors if they are separate modules or instruments. Cluster all one color. Head Unit all one color, etc!
What bulbs did you use for that? Links? What do you prefer green or blue?
12-27-2013, 10:04 PM
#43
Racer
Thread Starter
I used the Neo-3x that El-Baz recommended. Personally I think blue looks really good, but green would look just as good if its the right shade.
https://www.superbrightleds.com/more...l-led/220/985/
I ordered better license plate led lights, and ordered the 3mm leds I need for my custom needles. So sometime next week I'll start those mods.
https://www.superbrightleds.com/more...l-led/220/985/
I ordered better license plate led lights, and ordered the 3mm leds I need for my custom needles. So sometime next week I'll start those mods.
12-27-2013, 10:28 PM
#45
Racer
Thread Starter
I've already put leds in but their cheap ones and the left one is dimmer than the right. I also broke the lens that cover the first time so I hope I don't break them again.
 12-30-2013, 01:31 AM
#48

 12-30-2013, 04:04 PM
#49
Racer
Thread Starter
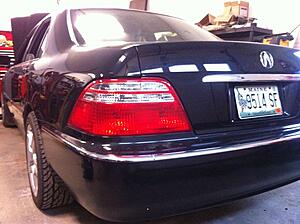
The photo I posted is actually after 3m Adhesive Remover followed by a strong cutting compound. The mark is literally etched into my paint. I think my only option to reduce it's visibility is a light wetsanding and potentially touch up paint.
On the plus side my headlights are aligned!
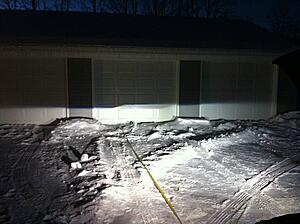
Before the alignment the passenger side one literally wouldn't even shine onto the garage door. Yet it looked good at a 4ft distance shining onto a board. Last step is to finalize the mounting so they don't wiggle during driving.
On the plus side my headlights are aligned!

Before the alignment the passenger side one literally wouldn't even shine onto the garage door. Yet it looked good at a 4ft distance shining onto a board. Last step is to finalize the mounting so they don't wiggle during driving.
12-31-2013, 10:11 AM
#52
Racer
Thread Starter
Thanks Earl! It's actually a tape measure that was precisely 25 ft long. I really under estimated the car it had no trouble on the ice.
I followed through with your advice of putting the diffusers back in too. I really like the new look. All that needs to be done is to fix the other one now.
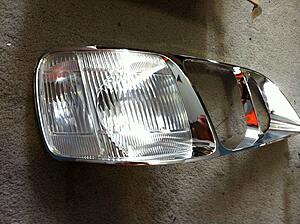
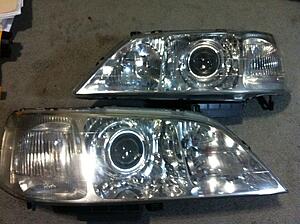
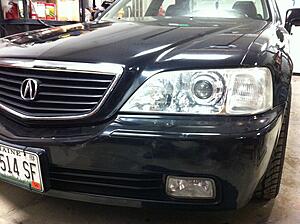
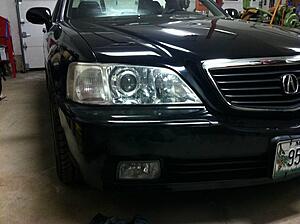
Old clear corner vs new clear corner
I followed through with your advice of putting the diffusers back in too. I really like the new look. All that needs to be done is to fix the other one now.

Old clear corner vs new clear corner
 12-31-2013, 02:33 PM
#53
01-01-2014, 05:27 PM
#54
Racer
Thread Starter
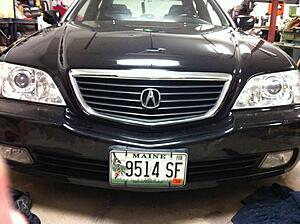
That's a shame, the trunk looks better without the emblem but if it has to be repainted I'll just re mount the emblem.
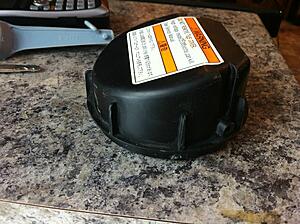
Headlight haven't made any progress. The rear caps that cover the back to remove the bulbs are causing clearance issues and are gonna need some modding to get to work.
Currently:
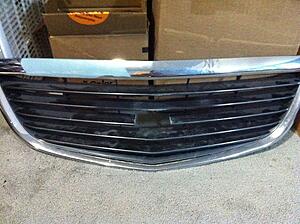
After the headlights are done I'm going to move onto the grill. I plan on creating a debadged grill. What could I use to build new bars with?
01-01-2014, 06:05 PM
#56
Racer
Thread Starter
It wouldn't be debadged completely. My desired look would be to have a debadged grill, and no "ACURA" word emblem on the rear. I still have plenty of other spots that say Acura all over like the door sills =p
01-01-2014, 07:12 PM
#58
Racer
Thread Starter
You've come to the right place haha! There is 3 bulbs in the window switches / window lock. One for the top 2 switches, one for the bottom, and one for the window lock. The NEO-3x leds from superbrightleds are good fits. They are a bit tight so if you get the polarity wrong you have a bit of a hard time changing them but they fit perfect other than that.
(I highly recommend blue)
(I highly recommend blue)
01-01-2014, 08:01 PM
#59
Oh, I was going to stick with incandescants. I kinda like the green, and I really like the idea of not having to take my door panels off and deal with the sticky sh*t. I effing hate that stuff. What number does it say on the bulb?
01-03-2014, 12:13 PM
#63
Racer
Thread Starter
So for this being the easy method of projectors it really hasn't proven to be easy...
I almost feel like I should have gone with the harder to install OEM ones now.
New HID bulbs will be in tomorrow. I went with phillips 85122 D2S bulbs. Switchbacks and led side bulbs will be in next week. It will be all worth it when they are finally in though.


I almost feel like I should have gone with the harder to install OEM ones now.
New HID bulbs will be in tomorrow. I went with phillips 85122 D2S bulbs. Switchbacks and led side bulbs will be in next week. It will be all worth it when they are finally in though.
01-05-2014, 08:57 AM
#66
3 Bulbs at $6/bulb. Hey, if you are into all sorts of LED stuff, you oughta do my ambient lighting, I've been enjoying it so much at nighttime. It's probably one of my favorite subtle mods you could ever do.
01-05-2014, 10:31 AM
#67
Racer
Thread Starter
I probably will, I just have a lot of mods going on right now that I should finish some before I start more. I'm hoping to get the head lights done first, then either move on to the cluster or putting the leds in the ac unit.
01-05-2014, 06:34 PM
#68
You may want to hold off on doing the AC unit until you know you can replace all the controls. I think it will look weird if only the AC had LEDs but the other controls didn't.
01-05-2014, 07:34 PM
#69
Racer
Thread Starter
Yeah thats true I don't want it to look out of place. Once the headlights are done its off to the cluster then. Hopefully I don't break my cluster again..
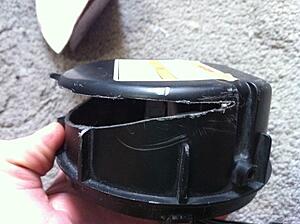
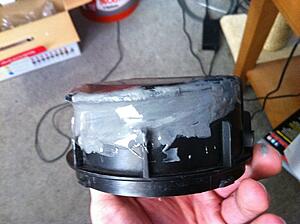
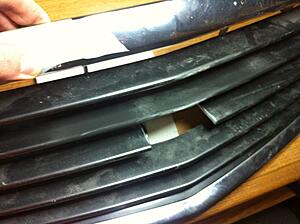
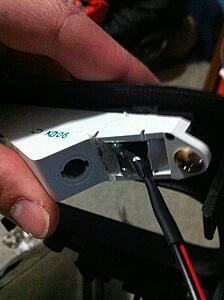
On the other hand when life gives you lemons you make lemon aid!
Not perfect by any means but hey it's the back of the headlight. Who's gonna look back there?
On the other hand when life gives you lemons you make lemon aid!

Not perfect by any means but hey it's the back of the headlight. Who's gonna look back there?
01-05-2014, 07:46 PM
#70
Advanced
Join Date: Nov 2013
Location: Bailey, Colorado
Age: 64
Posts: 86
Likes: 0
Received 9 Likes
on
9 Posts
http://www.allelectronics.com/make-a...SE-LAMP/1.html
01-08-2014, 08:09 PM
#71
Racer
Thread Starter
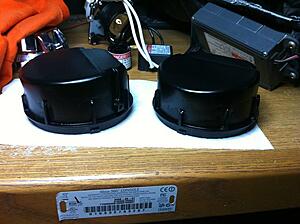
Alright good update. Headlights will be sealed tomorrow The only thing I'm missing at this point is my new led side bulbs. I probably won't install the headlights until those arrive.
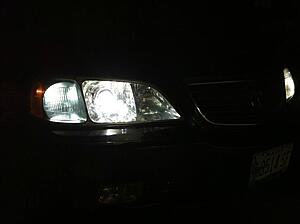
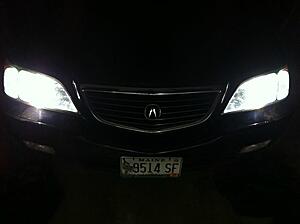
Final look:
There isn't too much gap either its hardly noticable from normal views.
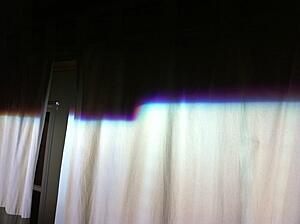
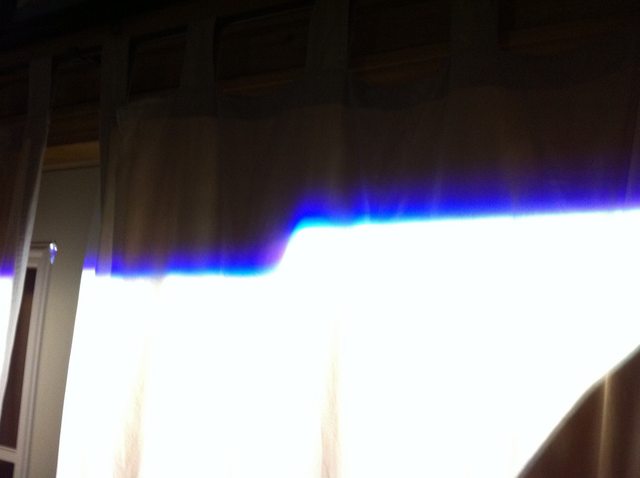
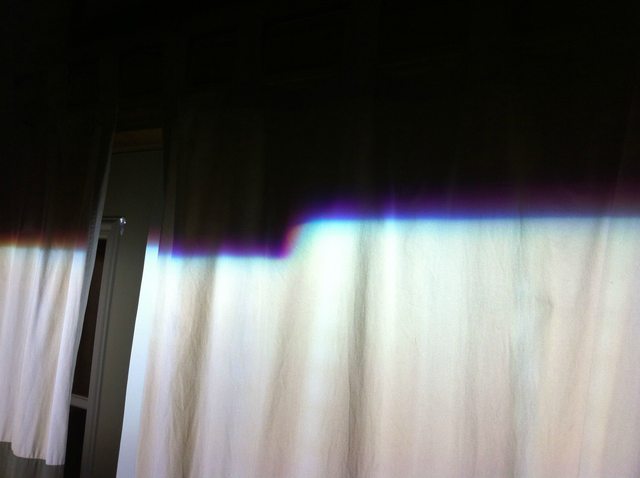
My new D2S bulbs are much brighter than the D2R's. Vertical height is different because I didn't bother to align that since it was sooo cold out. I focused on making the cutoff flat. All glare in the second photo is due to the ice, and lack of shrouds around projectors.

My side project is making good progress as well.
Once the headlights are done I will be moving onto the cluster followed by an idea I have for the tail lights.
Final look:

There isn't too much gap either its hardly noticable from normal views.

My new D2S bulbs are much brighter than the D2R's. Vertical height is different because I didn't bother to align that since it was sooo cold out. I focused on making the cutoff flat. All glare in the second photo is due to the ice, and lack of shrouds around projectors.
My side project is making good progress as well.


Once the headlights are done I will be moving onto the cluster followed by an idea I have for the tail lights.
Last edited by Not_So_Fast_Eddie; 01-08-2014 at 08:10 PM. Reason: I accidentally forgot a photo
01-09-2014, 06:40 PM
#73
Racer
Thread Starter
Thanks RL-Nation, I hope I don't dissapoint as it isn't a crazy mod.
I also have good news to share. My final bulbs came in and the headlights are back in the car!
This is the mod list I did
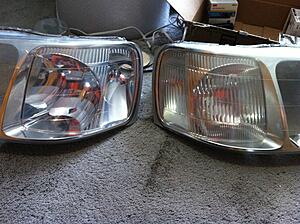
-"JDM" Clear corners
-Projectors / Phillips D2S bulbs
-Diode Dynamic Switchback blinkers
-LED side markers
The lit up photos were really hard to take with an Iphone. The side markers are dim but not as bad as the photo portrays. The switchbacks are actually really bright they could probably light up about 6-8 feet in front of the car. They look like a 5000k and the D2S bulbs are 4300k.
The switchback look like a real nice touch to headlights as they really cut back on the orange. When you look straight on at these headlights you can barely see any orange. Thanks for the motivation to do the mod Earl!
I also have good news to share. My final bulbs came in and the headlights are back in the car!
This is the mod list I did
-"JDM" Clear corners
-Projectors / Phillips D2S bulbs
-Diode Dynamic Switchback blinkers
-LED side markers


The lit up photos were really hard to take with an Iphone. The side markers are dim but not as bad as the photo portrays. The switchbacks are actually really bright they could probably light up about 6-8 feet in front of the car. They look like a 5000k and the D2S bulbs are 4300k.


The switchback look like a real nice touch to headlights as they really cut back on the orange. When you look straight on at these headlights you can barely see any orange. Thanks for the motivation to do the mod Earl!
01-10-2014, 04:48 PM
#75
Racer
Thread Starter
The blue needles are in progress now. I don't like the choice I made on white 3mm leds as they turn the needles to a ice blue so I have to order some blue 3mms now. I'm not too sure if the gas / temp needle change will work due to how they are removed. Only time will tell I guess.
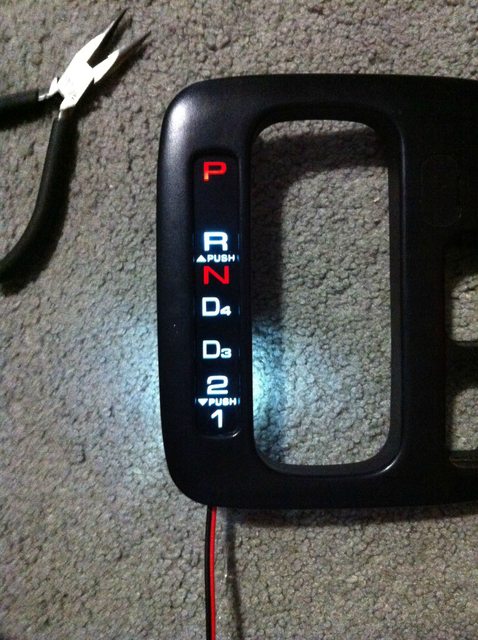
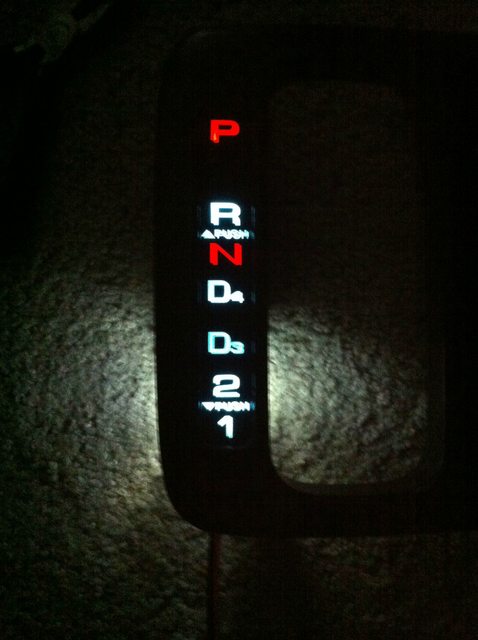
On the other hand I've gotten my shift light by the shifter using leds now. ( My friend Brian beat me to it in his car so I had to catch up). I used a 6 inch led strip and cut about 1.5 inches off of it. Using some sheet metal I created a flat panel in the case so I could lay the strip on it to produce an even level of light. I used a dremel to make a square for the wires to come out of.
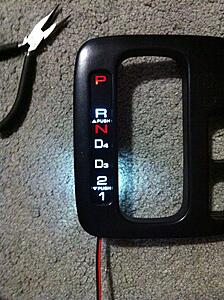
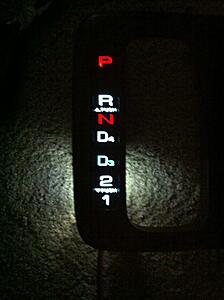
The R is slightly brighter than the rest, and the is the dimmest one. Overall the differences aren't too noticable so it looks pretty good. College is about to restart so progress will slow down.
On the other hand I've gotten my shift light by the shifter using leds now. ( My friend Brian beat me to it in his car so I had to catch up). I used a 6 inch led strip and cut about 1.5 inches off of it. Using some sheet metal I created a flat panel in the case so I could lay the strip on it to produce an even level of light. I used a dremel to make a square for the wires to come out of.

The R is slightly brighter than the rest, and the is the dimmest one. Overall the differences aren't too noticable so it looks pretty good. College is about to restart so progress will slow down.
01-11-2014, 12:06 PM
#76
Racer
Thread Starter
So what's the point of having clear corner headlights if your car has ambers in the tail light? Here's the next thing:
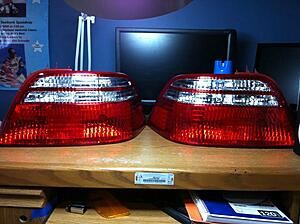
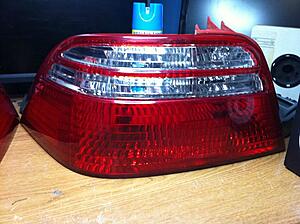
Did I go out and buy 03-04 tail lights? Nope! Was it easy? Hell no.
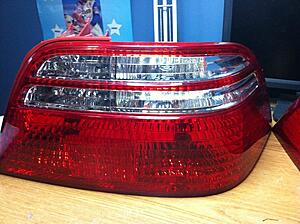
I used a dremel, pliers, and a flat head screw driver for prying. It took roughly 3 hours of cutting, prying, pushing, and swearing. In the end I think it was worth it as they look great on the car. It's gonna take some rebuilding, and I estimate I'll have them done in a few weeks (or more) as I'm not just removing the amber.
This is how much cutting I did:
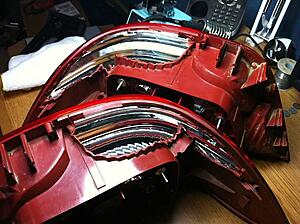
I wanted to do a DIY on it but it was really two steps. If anyone's interested I can go more in depth.


Did I go out and buy 03-04 tail lights? Nope! Was it easy? Hell no.
I used a dremel, pliers, and a flat head screw driver for prying. It took roughly 3 hours of cutting, prying, pushing, and swearing. In the end I think it was worth it as they look great on the car. It's gonna take some rebuilding, and I estimate I'll have them done in a few weeks (or more) as I'm not just removing the amber.
This is how much cutting I did:
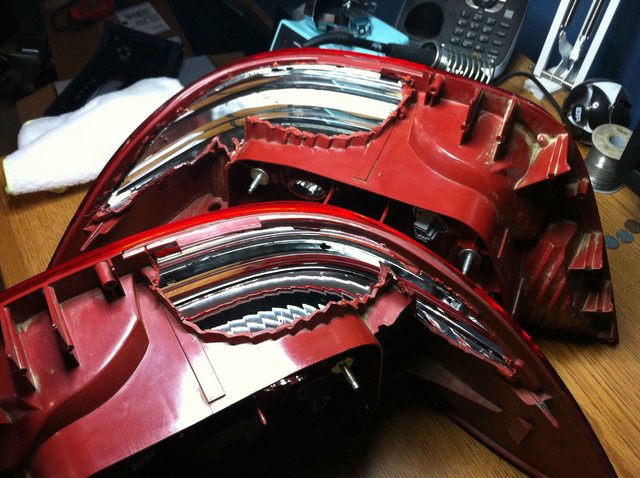
I wanted to do a DIY on it but it was really two steps. If anyone's interested I can go more in depth.
01-19-2014, 12:59 PM
#77
Racer
Thread Starter
Here's probably one of the best updates I'll ever show today. I'm really happy with how it played out and I think it looks better than an 04 cluster but that's just my opinion.
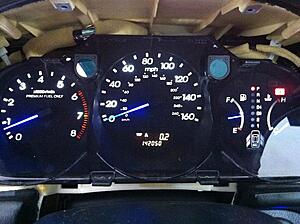
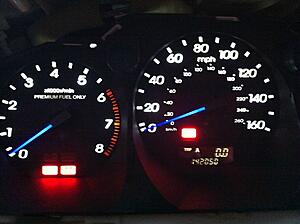
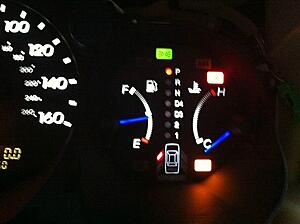
Pro-tip: DO NOT pull the needles of the gas / temp guages. Mine are broken now but I have a spare set. I'm thinking this is gonna need a DIY for people.
Sorry it was hard to get a clear photo. I'll try again when its dark. The needles are best shown in the last photo as they aren't as bright as they look in the first two.
01-27-2014, 08:21 PM
#78
Racer
Thread Starter
Sorry Earl but I think the cheap way to go on the projector retrofit was a bad choice. These projectors may have a nice flat cut off but they really lack brightness. I'd honestly say these are dimmer than the stock HIDs and there is a crappy gap between my highs and lows now. I've done too much modding to my headlights to go back to stock HIDs so I bought some real quality projectors!
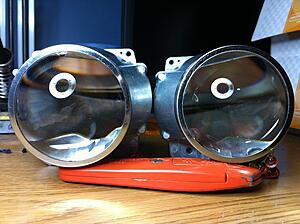
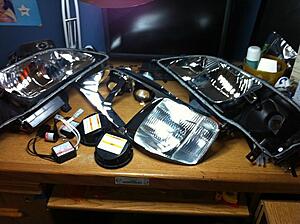
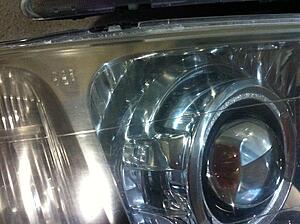
These are the 3" version of the FX-R 3.0 by The Retrofit Source. I should also add they are huge compared to the set I have installed right now. (They are chipped because I bought the value option and those chips are the only defects I've found so far). I really hope they will fit or else I'm really screwed. I should have roughly 1/4 in of clearance from projector lens to headlight lens at minimum. Ones gonna need a slight tuning to produce more color and a sharper cut off but overall they look epic.
Here's the good one:

The one that needs a bit of work:
Their much brighter than the ebay projectors and are going to be brighter than the stock lights.

These are the 3" version of the FX-R 3.0 by The Retrofit Source. I should also add they are huge compared to the set I have installed right now. (They are chipped because I bought the value option and those chips are the only defects I've found so far). I really hope they will fit or else I'm really screwed. I should have roughly 1/4 in of clearance from projector lens to headlight lens at minimum. Ones gonna need a slight tuning to produce more color and a sharper cut off but overall they look epic.
Here's the good one:
The one that needs a bit of work:
Their much brighter than the ebay projectors and are going to be brighter than the stock lights.
01-28-2014, 06:27 PM
#80
Racer
Thread Starter
Actually these really aren't that more of a price issue than the first set I put in.
First set was 40 for projectors, 20 for centric rings, 20 for shrouds
This set is 70 for projectors, and 15 for shrouds ( No centric rings since its a 3" lens)
Totals: Ebay (80) FXRs b stock (85). This doesn't include extras like bolts, and jb weld so the actual prices will be higher.
The only major difference is the amount of work its going to take to put these ones in. (I'll probably make a DIY on the mounting process)