DIY: 1996-98 HID/Projector Install
 12-01-2013, 12:38 AM
#1
Racer
Thread Starter
DIY: 1996-98 HID/Projector Install
Hi all,
So, I've been meaning to post this for a while, and finally got around to doing it.
This is an installation guide for how to install HID headlights and projectors for a first generation RL. If you have a 1999-2004 model, you have most of the work done already. You basically just don't have to sand your stock lenses, and I believe your car is wired for HID already.
Lastly, before we get started. I want you all to make sure with your state and local laws before proceeding. Modifying your headlights in anyway can sometimes be illegal. So make sure when you do this project that you try your best to make it look like your car came from the factory that way. That way it will minimize any law enforcement inquiry into why your lights are so dog-on bright. Also, this is a labor intensive project, make sure you are up for it before beginning.
Now, lets get started. First, in case you are totally new to this style of lights I will define a couple of terms for you. If you know this already, then well, good for you! HID is an acronym that stands for High Intensity Discharge (HID). HID bulbs are different than your regular halogen bulbs or Silverstar Ultra-whatever. HID bulbs are filled with Xenon, one of the nobel gas elements on the periodic table. Then, you have to types of these bulbs, Xenon and Bi-Xenon. Xenon bulbs have a halogen element built in so that your regular headlights are HID, but your high beams will be halogen, and who wants that right? Bi-Xenon is when the bulb has only the one filament and never gets brighter when you activate your high beams. But, this is actually preferable as there is a solenoid that controls a little flap of metal inside the projector. So when the high beams are activated, the solenoid switches and your projectors just allow more light out. The flap lets light shoot out using the whole projector and allows it to leave so you gain height in your visibility. So when you are buying your products, make sure, if you go the same route I did, that you buy bi-xenon bulbs and projectors with the solenoid in it. For lights, there is a temperature scale, rated in degrees Kelvin, or the K rating. Stock lights are typically 4300K, but can range from 4000K to 5000K. Now the bulbs never get this hot, it would melt the entire front of your car if it did, it's just how the bulbs look. The lower the number the warmer the light (oranges and yellows) and the higher the number, the colder the light (blues and purples).
Things you will need:
150 Grit Sandpaper
300 Grit Sandpaper
3M Headlight Restoration Kit
1000 Grit Sandpaper
2000 Grit Sandpaper
HID Bulbs
Ballasts
Projectors
Shrouds
Relay Kit
Rubbing Compound
Turtle Wax
Waxing Pads
Regular Mechanics Tool (e.g., screwdriver, drill, stuff like that)
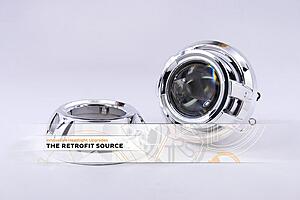
So now for the equipment. If you have a bit, well actually a lot of money to spend on this project, I would recommend that you buy your stuff from The Retrofit Source. Or you can go like I did and hit the eBay store. You will need to buy HID ballasts (they typically come with bulbs, and make sure to tell the seller what K rating you want!). I choose a K rating of 5000k as it is pure white. Anything above that will just look blue and tacky. The ballasts are basically transformers (no not like the movie) and convert your cars 12 Volt system into thousands so the bulbs can operate as designed, HID bulbs will not work without ballasts. Then you will need to buy a relay kit, this protects your cars wiring harness so it doesn't burn up if anything goes wrong with the wiring. It's not absolutely necessary, but STRONGLY recommended. Then projectors, for 1996-98 models, you will need 2.5" lenses, you could probably get away with 3" for 1999-2004 models, but I have not confirmed this. Lastly, projector shrouds, this is the stylish part. There are tons to choose from. I would take a look at The Retrofit Source's website and see all the cool projector shrouds you can choose from. You can even get LED rings in white or amber like BMWs have. But who wants to copy BMWs right?
So here are the listing that I bought my stuff from:
Projectors/Shrouds: http://www.ebay.com/itm/290716474285...84.m1497.l2649
Ballasts/Bulbs: http://www.ebay.com/itm/321170658042...84.m1497.l2649
Relay Kit: http://www.ebay.com/itm/261189591525...84.m1497.l2649
Now lets get started.
First, lets take a look out how the lights look originally.

If you are tech savvy and want to test your bulbs and projectors first without doing the headlight lens, feel free to go ahead. I did, but just be careful the bulbs get hot, like very hot!

Now it's time to start taking stuff apart. You will first need to remove the front bumper molding and the bumper itself.

Then, it's time to take off the headlights.

Now your baby looks like frankencar.

So now that that's done, we have to remove the headlight lens from the housing. To do this, I used a hair dryer and a large flathead screwdriver. Make sure not to melt the plastic, but it should be pretty soft. And carefully work the screwdriver in between all around the housing until you get the lens off. If you pull on the lens too soon before one side is done being separated, you run the risk of totally snapping your lens, and that's not good.
So now you should have something like this.

Before you remove the two screw for the chrome molding, take a sharpie and trace a circle around the part for the main headlights. Take off the two screws holding the chrome molding in. And it leaves you with this. Again, be careful not to break the molding.

Then you tape off what you sharpied that will help protect the area outside of what you are going to sand.

Now, this is truly the point of no return, once you begin this step, there is no going back. So make sure you really want to do this. Take your roughest grain sandpaper and start at it. This part is very labor intensive and your arm will hurt like crazy afterwards. So you should be seeing something like this. And make sure none of the prisms remain.

Keep working at it and move onto finer grains and you will get something like this. You will then need to use the 3M kit.

But, you're still not done, with some of the rubbing compound, turtle wax, drill head (from 3M kit), and waxing pads, keep working at it until you get this.

Yay, now for the bad news, you are only half way done with the sanding. You still have a whole other lens to sand. But, hang in there!
So now you want to actually put in your projector/shroud. Make sure you don't touch the lens, or if you do to wipe it with rubbing alcohol, its not good for oils to get on stuff like that, same goes especially for the bulbs. I also took out the retaining clips in the back of the housing to make room for the projector. Installing the projector is pretty straight forward. If you have an air compressor I would blow out the housing and projector just to make sure no dust gets in there.
Now go back together with your headlight lens and housing. You should be getting pretty excited by now. Make sure you make a good seal or else water will get in and you'll have a bad day. Having two hair dryers helps when going back together.

Let's compare new to old!

So repeat the above for the other headlight.
Now for the wiring. Your kits should come with instructions so I won't go too far into detail here. Depending on what kind of kits you get some connectors may not fit the others, but thats nothing a soldering iron and a couple heat shrinks can't fix. After all, we are retrofitting here.
So, put all your wiring in. Just look around for places to ground your lights, mount your hardware, etc. It's not all that difficult. I have full confidence in you! But if you guys need help on this later, I'll post a picture of how I did it.

I would also add that make sure you tighten the retaining rings for your bulbs, like a lot. I didn't have them all that tight and you get a sort of flickering because the bulb shakes around when you driver, even just a little bit. The tighter the better.
Now back together with it all and admire your work! Don't forget to aim your headlights too! It's easier to aim with the front bumper molding off.


Lastly, please note that although the pictures for my lights appear somewhat blue, that's just the camera not capturing the color that well, they are very white, actually.
Grab yourself a beer, or root beer, or whatever the hell you want and relax for a couple days! Stay away from push-ups, pull-ups, you get the idea!
So, I've been meaning to post this for a while, and finally got around to doing it.
This is an installation guide for how to install HID headlights and projectors for a first generation RL. If you have a 1999-2004 model, you have most of the work done already. You basically just don't have to sand your stock lenses, and I believe your car is wired for HID already.
Lastly, before we get started. I want you all to make sure with your state and local laws before proceeding. Modifying your headlights in anyway can sometimes be illegal. So make sure when you do this project that you try your best to make it look like your car came from the factory that way. That way it will minimize any law enforcement inquiry into why your lights are so dog-on bright. Also, this is a labor intensive project, make sure you are up for it before beginning.
Now, lets get started. First, in case you are totally new to this style of lights I will define a couple of terms for you. If you know this already, then well, good for you!
HID is an acronym that stands for High Intensity Discharge (HID). HID bulbs are different than your regular halogen bulbs or Silverstar Ultra-whatever. HID bulbs are filled with Xenon, one of the nobel gas elements on the periodic table. Then, you have to types of these bulbs, Xenon and Bi-Xenon. Xenon bulbs have a halogen element built in so that your regular headlights are HID, but your high beams will be halogen, and who wants that right? Bi-Xenon is when the bulb has only the one filament and never gets brighter when you activate your high beams. But, this is actually preferable as there is a solenoid that controls a little flap of metal inside the projector. So when the high beams are activated, the solenoid switches and your projectors just allow more light out. The flap lets light shoot out using the whole projector and allows it to leave so you gain height in your visibility. So when you are buying your products, make sure, if you go the same route I did, that you buy bi-xenon bulbs and projectors with the solenoid in it. For lights, there is a temperature scale, rated in degrees Kelvin, or the K rating. Stock lights are typically 4300K, but can range from 4000K to 5000K. Now the bulbs never get this hot, it would melt the entire front of your car if it did, it's just how the bulbs look. The lower the number the warmer the light (oranges and yellows) and the higher the number, the colder the light (blues and purples).Things you will need:
150 Grit Sandpaper
300 Grit Sandpaper
3M Headlight Restoration Kit
1000 Grit Sandpaper
2000 Grit Sandpaper
HID Bulbs
Ballasts
Projectors
Shrouds
Relay Kit
Rubbing Compound
Turtle Wax
Waxing Pads
Regular Mechanics Tool (e.g., screwdriver, drill, stuff like that)
So now for the equipment. If you have a bit, well actually a lot of money to spend on this project, I would recommend that you buy your stuff from The Retrofit Source. Or you can go like I did and hit the eBay store. You will need to buy HID ballasts (they typically come with bulbs, and make sure to tell the seller what K rating you want!). I choose a K rating of 5000k as it is pure white. Anything above that will just look blue and tacky. The ballasts are basically transformers (no not like the movie) and convert your cars 12 Volt system into thousands so the bulbs can operate as designed, HID bulbs will not work without ballasts. Then you will need to buy a relay kit, this protects your cars wiring harness so it doesn't burn up if anything goes wrong with the wiring. It's not absolutely necessary, but STRONGLY recommended. Then projectors, for 1996-98 models, you will need 2.5" lenses, you could probably get away with 3" for 1999-2004 models, but I have not confirmed this. Lastly, projector shrouds, this is the stylish part. There are tons to choose from. I would take a look at The Retrofit Source's website and see all the cool projector shrouds you can choose from. You can even get LED rings in white or amber like BMWs have. But who wants to copy BMWs right?
So here are the listing that I bought my stuff from:
Projectors/Shrouds: http://www.ebay.com/itm/290716474285...84.m1497.l2649
Ballasts/Bulbs: http://www.ebay.com/itm/321170658042...84.m1497.l2649
Relay Kit: http://www.ebay.com/itm/261189591525...84.m1497.l2649
Now lets get started.
First, lets take a look out how the lights look originally.
If you are tech savvy and want to test your bulbs and projectors first without doing the headlight lens, feel free to go ahead. I did, but just be careful the bulbs get hot, like very hot!
Now it's time to start taking stuff apart. You will first need to remove the front bumper molding and the bumper itself.
Then, it's time to take off the headlights.
Now your baby looks like frankencar.
So now that that's done, we have to remove the headlight lens from the housing. To do this, I used a hair dryer and a large flathead screwdriver. Make sure not to melt the plastic, but it should be pretty soft. And carefully work the screwdriver in between all around the housing until you get the lens off. If you pull on the lens too soon before one side is done being separated, you run the risk of totally snapping your lens, and that's not good.
So now you should have something like this.
Before you remove the two screw for the chrome molding, take a sharpie and trace a circle around the part for the main headlights. Take off the two screws holding the chrome molding in. And it leaves you with this. Again, be careful not to break the molding.
Then you tape off what you sharpied that will help protect the area outside of what you are going to sand.
Now, this is truly the point of no return, once you begin this step, there is no going back. So make sure you really want to do this. Take your roughest grain sandpaper and start at it. This part is very labor intensive and your arm will hurt like crazy afterwards. So you should be seeing something like this. And make sure none of the prisms remain.
Keep working at it and move onto finer grains and you will get something like this. You will then need to use the 3M kit.
But, you're still not done, with some of the rubbing compound, turtle wax, drill head (from 3M kit), and waxing pads, keep working at it until you get this.
Yay, now for the bad news, you are only half way done with the sanding. You still have a whole other lens to sand. But, hang in there!
So now you want to actually put in your projector/shroud. Make sure you don't touch the lens, or if you do to wipe it with rubbing alcohol, its not good for oils to get on stuff like that, same goes especially for the bulbs. I also took out the retaining clips in the back of the housing to make room for the projector. Installing the projector is pretty straight forward. If you have an air compressor I would blow out the housing and projector just to make sure no dust gets in there.
Now go back together with your headlight lens and housing. You should be getting pretty excited by now. Make sure you make a good seal or else water will get in and you'll have a bad day. Having two hair dryers helps when going back together.
Let's compare new to old!
So repeat the above for the other headlight.
Now for the wiring. Your kits should come with instructions so I won't go too far into detail here. Depending on what kind of kits you get some connectors may not fit the others, but thats nothing a soldering iron and a couple heat shrinks can't fix. After all, we are retrofitting here.
So, put all your wiring in. Just look around for places to ground your lights, mount your hardware, etc. It's not all that difficult. I have full confidence in you! But if you guys need help on this later, I'll post a picture of how I did it.
I would also add that make sure you tighten the retaining rings for your bulbs, like a lot. I didn't have them all that tight and you get a sort of flickering because the bulb shakes around when you driver, even just a little bit. The tighter the better.
Now back together with it all and admire your work! Don't forget to aim your headlights too! It's easier to aim with the front bumper molding off.
Lastly, please note that although the pictures for my lights appear somewhat blue, that's just the camera not capturing the color that well, they are very white, actually.
Grab yourself a beer, or root beer, or whatever the hell you want and relax for a couple days! Stay away from push-ups, pull-ups, you get the idea!

The following users liked this post:
Not_So_Fast_Eddie (12-01-2013)
12-01-2013, 08:23 AM
#2
Damn that came out good!
Do you have a front view shot of it all reassembled? Also how straightforward is the projector install? Any drilling or cutting needed?
I'm tempted to do this to my 99 as it's currently parked for the winter.
Do you have a front view shot of it all reassembled? Also how straightforward is the projector install? Any drilling or cutting needed?
I'm tempted to do this to my 99 as it's currently parked for the winter.
12-01-2013, 03:17 PM
#3
Racer
Thread Starter
The only thing I had to do, as far as removing material goes, was use a utility knife to trim the weather guard a bit because the back of the projector was wider than the weather seal would fit. But it may fit on your car. It really all depends on the kit. Also, depending on what projectors you use. You have to be sure they will even fit in your housing. Some of them, you can check The Retrorfit Source, are super long, or wide, etc. So you may have to experiment a little by buying and returning different projector kits. Also, you may need to drill on some projectors, but not others. But like I said before, if you have some extra cash, definitely go for the more expensive projectors, it really makes a difference. For instance, mine are WAY better than stock, but my dads 2008 TL beats mine. I'll be sure to take a front picture today or tomorrow.
If you get some projectors you know will fit, but may need to modify the housing a bit. I'll try my best to help you. Hell, you could even send it to me and Ill see what I can do. I'll try my best to help if you get a projector set that doesn't seem quite right. But remember this is retrofit, so just be sure of what you are doing.
If you get some projectors you know will fit, but may need to modify the housing a bit. I'll try my best to help you. Hell, you could even send it to me and Ill see what I can do. I'll try my best to help if you get a projector set that doesn't seem quite right. But remember this is retrofit, so just be sure of what you are doing.
12-01-2013, 04:31 PM
#4
Thanks for the advice. I actually really like the looks of the set you picked. I'm probably gonna get a set of my own. And best of all the price won't kill my wallet 
In the 99-04 they have D2R bulbs stock, and those projectors take D2S so I'll probably have to get a new set. In the description I noticed those lens have a plate that opens up for highs. I want to wire that to my highs so it will make the lows brighter when the highs go on as well.
What are your thoughts on angel eyes?
12-01-2013, 04:54 PM
#5
Racer
Thread Starter
I love the look of Angle Eyes. I just feel that they are totally copying BMW. I do have to hand it to BMW and Audi for their amazingly beautiful headlights, I just feel that no one should ever copy them. It's one thing if you have a way newer car than we do and it would look okay. But every project I do, I try to make things look stock. So I wouldn't want someone to see my headlights and say "Oh, I see you tried to make your car a BMW." haha. Considering too, the LED/plasma rings are way to far in the future to ever make it look stock with our cars.
But, after all, it's YOUR retrofit! if you want purple bulbs and green Angel Eyes on one side and orange on the other, go for it!
If you would like a look that gives your car a little bit of flare, instead of the angel eyes, perhaps look out some of the other shrouds out there available. The Retrofit Source has all sorts of great examples, too!
To answer your comment about the low and high beams, remember the bulb never gets brighter, just the plate controlled by the solenoid moves.
12-01-2013, 05:28 PM
#6
I have been looking through other shrouds. I spent a good amount of time searching on ebay and amazon. I found a few angel eyes kits I liked but they were all 140+. One shroud I did like was the Apollo one on the retrofit source but I don't think those would take an angel eye easily.
I'm thinking a nice pure white angel eye would look awesome. I'd wire them to the DRLs so I wouldn't need an extra switch or have to drill through my firewall. Also I know the lows won't increase in brightness but the little extra range will help.
I'll document my process as I go to help out those with 99-04 headlights
12-01-2013, 10:08 PM
#7

Very details DIY. You bet your hand hurt like hell after the sanding lol. BTW, do you remember how to adjust the headlight. Can you tell me which way goes up/down, left/right.
Trending Topics
12-01-2013, 10:15 PM
#8
Racer
Thread Starter
EXTRA NOTE FOR ANYONE READING: Depending on what shrouds you get, you may have to trim off the bottom or top of it to make it fit into your housing. If you have a 1999+, you shouldn't have a problem. But 1996-1998, you will probably have to use a belt sander or mounted circular sander to trim it down a little bit. I hope that is evident in the pictures.
Hey Eddie,
I took some more pictures for you and even threw in a couple more. I hope these are what you are looking for.
Oh, and there's no need to drill through the firewall. There is this massive bundle of cables that goes under the driver's fender well and into the engine bay. You can tape your wire to the end of a straightened out coat hanger and very carefully push it all the way through. That's what I did for my PA system when I had to mount my PA speaker to the bumper.


Low Beams

High Beams

Hey Eddie,
I took some more pictures for you and even threw in a couple more. I hope these are what you are looking for.
Oh, and there's no need to drill through the firewall. There is this massive bundle of cables that goes under the driver's fender well and into the engine bay. You can tape your wire to the end of a straightened out coat hanger and very carefully push it all the way through. That's what I did for my PA system when I had to mount my PA speaker to the bumper.
Low Beams
High Beams
12-01-2013, 10:24 PM
#9
Racer
Thread Starter
This can be confirmed in the owner's manual though.
12-02-2013, 05:42 AM
#10
Those are exactly what I was hoping to see. You did a really good job making them look OEM! Do you know what bulbs these will fit? I know on the 96-98 your low/high are one bulb so the newer gens will need a different style one since its only for the low.
Also I spoke with the seller and he says the diameter for a angel eye is inner 73mm and outer 87mm. The closest size I can find is 70mm inner and 85 outer. Think that will be an issue?
Also I spoke with the seller and he says the diameter for a angel eye is inner 73mm and outer 87mm. The closest size I can find is 70mm inner and 85 outer. Think that will be an issue?
The following users liked this post:
MyNameIsEarl (12-02-2013)
12-02-2013, 06:22 AM
#11
Racer
Thread Starter
Those are exactly what I was hoping to see. You did a really good job making them look OEM! Do you know what bulbs these will fit? I know on the 96-98 your low/high are one bulb so the newer gens will need a different style one since its only for the low.
Also I spoke with the seller and he says the diameter for a angel eye is inner 73mm and outer 87mm. The closest size I can find is 70mm inner and 85 outer. Think that will be an issue?
Also I spoke with the seller and he says the diameter for a angel eye is inner 73mm and outer 87mm. The closest size I can find is 70mm inner and 85 outer. Think that will be an issue?
Thanks for the compliment!.
The bulb type depends on what projector you are going to put in, or the other way around, whatever you want to buy first. The traditional HID bulbs is D2S, so if you get that bulb style, make sure the projectors are fitted for that. And for the High/Low operation, that's what the ballast/relay kit takes care of. It knows when I switch to high beams because it is attached to the original H4 (I think that's what the car's stock is) plug. So when it gets the voltage, it flips the solenoid.
As far as your Angel Eyes go, I can't speak too much on it. But you just have to really draw yourself a picture and see if it would look okay. 70mm is about 2.7 inches, and if you get 2.5" projectors, it will probably look a little bit odd. I'd be able to help out a lot easier if you show me the links of projectors/shrouds/Angel Eyes that you want.
12-02-2013, 06:47 AM
#12
The projectors and shrouds are the same as yours. The little ring outside them is what those diameter are. The seller says all I need to do is find a CCFL ring to put behind it and they will work. I'm gonna keep looking for a closer fit ring, but was wondering how close it has to be.
12-02-2013, 07:04 AM
#13
Racer
Thread Starter
The way these particular projectors and shrouds work, there is no way to fit it behind that somewhat clear plastic ring. It actually separates and has tabs the would prevent you from mounting behind it. You'd have to get another kit for that.
12-02-2013, 08:43 AM
#14
This is the listing I'm looking at:
http://www.ebay.com/itm/111169612990...84.m1438.l2649
This is what the seller told me:
I'm gonna keep researching but its not a deal breaker if I cant do the angel eyes. Also what method did you use to cut the shroud?
http://www.ebay.com/itm/111169612990...84.m1438.l2649
This is what the seller told me:
Hello,
Thanks for your interest.
The angel light ring:outside diameter is 87mm,inside diameter is 73cm.
But this item does not come with angel light tube,and if you have got one,you just need to assemble it in the ring of shrouds,but you don't need to swap it.
Thanks for your interest.
The angel light ring:outside diameter is 87mm,inside diameter is 73cm.
But this item does not come with angel light tube,and if you have got one,you just need to assemble it in the ring of shrouds,but you don't need to swap it.
12-02-2013, 03:53 PM
#15
Racer
Thread Starter
Well, if he told you it fits, and you like it, go for it! I would just advise you to make sure it fits within the 14 days or whatever, so you can return it if it doesn't work out. Definitely let us (me?) know how the progress is coming along. Also note that when you buy from China, it's like watching paint dry, very slow.
Haha, I hope enough people do this so it can get stickied to theforum!
Haha, I hope enough people do this so it can get stickied to theforum!
12-02-2013, 04:16 PM
#16
I'll provide updates when they come in. I just hope it will only be a little bit of cutting, as I'm a bit nervous if I screw up I'll lose a lot of $$$. I gotta say though if you didn't show that there was other ways (cheaper and easier) to retrofit I probably wouldn't be trying this right now.
I know how China and shipping is haha. My current grill came from there and I buy all of my leds from China as its dirt cheap.
I know how China and shipping is haha. My current grill came from there and I buy all of my leds from China as its dirt cheap.
 12-12-2013, 07:00 PM
#18
Haha your jumping the gun! The projectors aren't here yet I'm already checking the tracking a few times a day. I probably wont go with Halo eyes after all I thought for awhile on it. The Apollo shrouds are what I'm gonna switch to I think. They have a bit of detail but not too much to make them stick out.
I think I might start a build thread soon as I have a lot of little things I want to post pictures of. (I just finished wrapping my center console in carbon fiber for one)

I think I might start a build thread soon as I have a lot of little things I want to post pictures of. (I just finished wrapping my center console in carbon fiber for one)
12-12-2013, 08:06 PM
#19
Racer
Thread Starter
I think that the Apollo shrouds will look very nice! It will definitely look very stock. I like the Porsche Panamera shrouds too. But anything too flashy will look out of place.
See you are lucky, you have no sanding involved.
I just looked at the 99+ models front, and I just noticed something that did quite fit right in my brain. 99+ have the fog lights down in the bumper, 96-98 have them next to the grille in the headlight housing. So what goes next to your headlights if the fog lights are on the bottom??
12-12-2013, 08:24 PM
#20
Are you talking about the inner bulbs by the grill? Those are the high beams in 99+. They are standard halogens.
I checked the tracking the projectors finally reached New York. I should have them by Wednesday latest. I'm gonna order some knock off Apollos on Ebay tomorrow.
I checked the tracking the projectors finally reached New York. I should have them by Wednesday latest. I'm gonna order some knock off Apollos on Ebay tomorrow.
Last edited by Not_So_Fast_Eddie; 12-12-2013 at 08:24 PM. Reason: Typo
12-12-2013, 09:56 PM
#21
Racer
Thread Starter
Eddie, you are getting bi-xenon right? Also have you considered doing quad retrofit so you have 2 lights when driving normally (xenon) and when hi beams are on, you have 4 lights and the two lights in the main assembly will shine higher because of the solenoid flap?
Just wondering what your setup will look like.
Just wondering what your setup will look like.
12-13-2013, 05:09 AM
#22
Yup I'm getting bi-xenons. I don't think a quad retrofit would work as the high beam spacing is very small. The shroud for them would have to be cut up quite a bit. The way I'm planning my set up is to install the projectors where the lows are and wire the solenoid to the high beams. That way when the highs go on the lows will shine higher and help slightly improve the high beams range.
12-13-2013, 09:01 PM
#24
How do you installed in the Hi beam wires? I never figure it out on my Infiniti projector. I had the Angle eyes on my projectors too but after 2 years it keeping blow the fuse so I disconnect them.
12-14-2013, 02:13 AM
#25
Racer
Thread Starter
Or are you asking about 99+?
12-25-2013, 12:12 AM
#26
Advanced
Isn't there a projector on the 96-98 acura tl's on the high beam part of the headlight, couldnt we use that one on our low beams or no?, iam clueless when it comes to these things
http://www.ebay.com/itm/ACURA-TL-HEADLIGHT-HEADLAMP-USED-OEM-LH-96-97-98-So-Cal-Parts-Locator-/291021034565?pt=Motors_Car_Truck_Parts_Accessories&fits=Make%3AAcura%7CModel%3ATL%7CYear%3A1996&hash=item43c2349445&vxp=mtr#ht_378wt_1219
http://www.ebay.com/itm/ACURA-TL-HEADLIGHT-HEADLAMP-USED-OEM-LH-96-97-98-So-Cal-Parts-Locator-/291021034565?pt=Motors_Car_Truck_Parts_Accessories&fits=Make%3AAcura%7CModel%3ATL%7CYear%3A1996&hash=item43c2349445&vxp=mtr#ht_378wt_1219
12-25-2013, 01:16 AM
#28
Racer
Thread Starter
I took a look at that eBay listing, and from first impressions, I would say that those are not projectors, if you look at it closely, you can see lines in the plastic that go perfectly straight up and down. Also, there is a bit of a yellow tint in it, so that makes me think they are fog lights. If they were projectors, I'd say the lens would be much more reflective and give back a distorted reflection of an image, not just look like a warped, clear piece of plastic.
I also did some research on seeing if they were projectors, I couldn't turn anything up. Even then, I know in 1999, the started introducing the HID lights, projectors didn't get introduced until about 2004. So it wouldn't make sense to go from projectors to none and back to projectors again.
And if they were projectors even, it totally would not be worth it to buy those because the ones you can get on eBay today are way cheaper, way newer, built better (hopefully!), and don't require modification for extraction from one housing to insertion into another.
Thanks for the compliment though! Are you thinking about doing this project? You will love driving at night if you do! It's so nice to be behind the lights for a change, instead of looking at them in oncoming traffic, or in your rear view mirror (the worst!).
12-25-2013, 01:45 AM
#29
Racer
Thread Starter
And 99Horsepower, I am drooling over your rear sunshade. PLEASE tell me where you got it! Or where you like to park so I can take it from you. Was it expensive? I love the second gen RL sunshades with the electronic up and down!
The following users liked this post:
99HORSEPOWER (12-25-2013)
12-25-2013, 12:44 PM
#30
Advanced
I took a look at that eBay listing, and from first impressions, I would say that those are not projectors, if you look at it closely, you can see lines in the plastic that go perfectly straight up and down. Also, there is a bit of a yellow tint in it, so that makes me think they are fog lights. If they were projectors, I'd say the lens would be much more reflective and give back a distorted reflection of an image, not just look like a warped, clear piece of plastic.
I also did some research on seeing if they were projectors, I couldn't turn anything up. Even then, I know in 1999, the started introducing the HID lights, projectors didn't get introduced until about 2004. So it wouldn't make sense to go from projectors to none and back to projectors again.
And if they were projectors even, it totally would not be worth it to buy those because the ones you can get on eBay today are way cheaper, way newer, built better (hopefully!), and don't require modification for extraction from one housing to insertion into another.
Thanks for the compliment though! Are you thinking about doing this project? You will love driving at night if you do! It's so nice to be behind the lights for a change, instead of looking at them in oncoming traffic, or in your rear view mirror (the worst!).
I also did some research on seeing if they were projectors, I couldn't turn anything up. Even then, I know in 1999, the started introducing the HID lights, projectors didn't get introduced until about 2004. So it wouldn't make sense to go from projectors to none and back to projectors again.
And if they were projectors even, it totally would not be worth it to buy those because the ones you can get on eBay today are way cheaper, way newer, built better (hopefully!), and don't require modification for extraction from one housing to insertion into another.
Thanks for the compliment though! Are you thinking about doing this project? You will love driving at night if you do! It's so nice to be behind the lights for a change, instead of looking at them in oncoming traffic, or in your rear view mirror (the worst!).
12-25-2013, 12:49 PM
#31
Advanced
Lol i got it off of ebay i saw it- its from New Zealend its a bolt in sunshade a super rare OEM accessory, ithink it was like $130???, I cant remember
12-25-2013, 02:15 PM
#32
Racer
Thread Starter
Thanks on the detailed info, oh i would have never thought of that- i see your point on taking them out of one headlight and reinstalling them into another haha- one more uneccessary step, and thats one reason i want to copy you and do projectors too because of the light output of the stock ones and then watching newer cars pass by with crazy light output....makes you want to crawl under arock and hide :/
 It was actually a really fun project, I love doing stuff like this. Too bad my next car, which I have already decided that it will be a second gen RL, has tons of tech that kind of makes projects like this redundant, because it has all that stuff already! I got the cheapest projectors and stuff I could find, but if I had to do it again, I would probably get better equipment.
I think I'll have to start looking on eBay every day for that rear sunshade now! It isn't motorized though, right? In wonder if I could wire one up to work from a second gen RL. Although there is probably code in that that would have to communicate with my car, we'll see.
12-30-2013, 11:31 PM
#33
Hey Earl how tight did you get your projectors? Mini feel like they still have a bit of wiggle if you give them a twist. I'm just worried of them going out of alignment from bumps.
12-31-2013, 08:47 AM
#35
Hmm the method I used was tighten as tight as possible by hand then I added silicon around the mounts to ensure it had a strong seal. I picked silicon because I could remove them later on. It feels nice and tight but they have a very minimal wiggle room. I'm gonna check the alignment one last time soon.

Thread
Thread Starter
Forum
Replies
Last Post
cycdaniel
1G TSX Performance Parts & Modifications
8
12-17-2019 10:58 AM
pistacio
2G TL (1999-2003)
10
09-26-2015 09:45 AM

