QPDO's 1998 NA2 NSX-T "Build" Thread
 12-07-2012, 05:11 PM
#1
Cruisin'
Thread Starter

Join Date: Nov 2012
Posts: 20
Likes: 0
Received 0 Likes
on
0 Posts
QPDO's 1998 NA2 NSX-T "Build" Thread
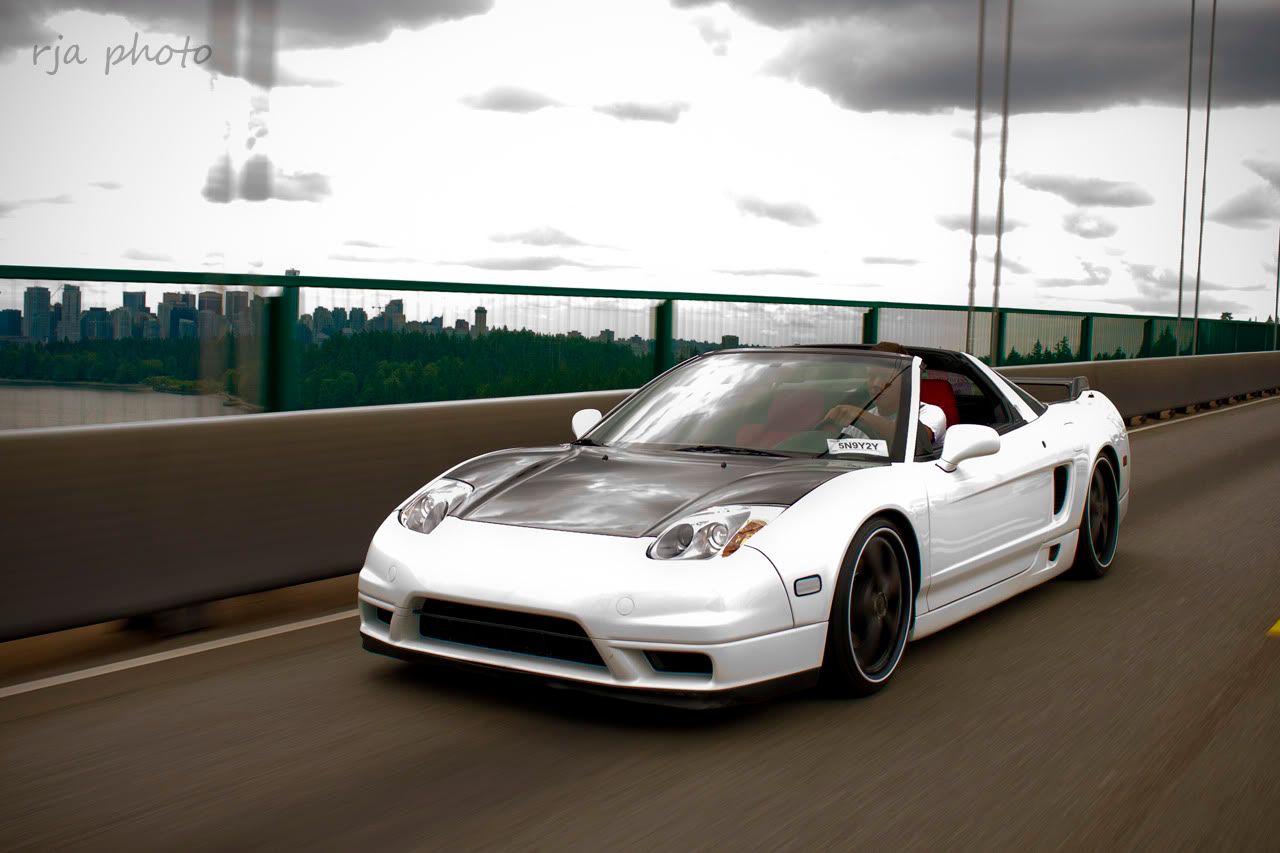
I wasn’t going to write up a build thread on 780 because, well, I haven’t done much “building”… only tweaking and bits and pieces of it are scattered across 780 already. But much has changed over the past 2 years and I figured the odd few might be interested in reading and following it’s progression from what is was, to what it’s become. In one thread.
2010:
When I picked her up July 2010, this is how she looked! By in large, I was happy with the previous owners' mods. But there were a few things that NEEDED to be changed.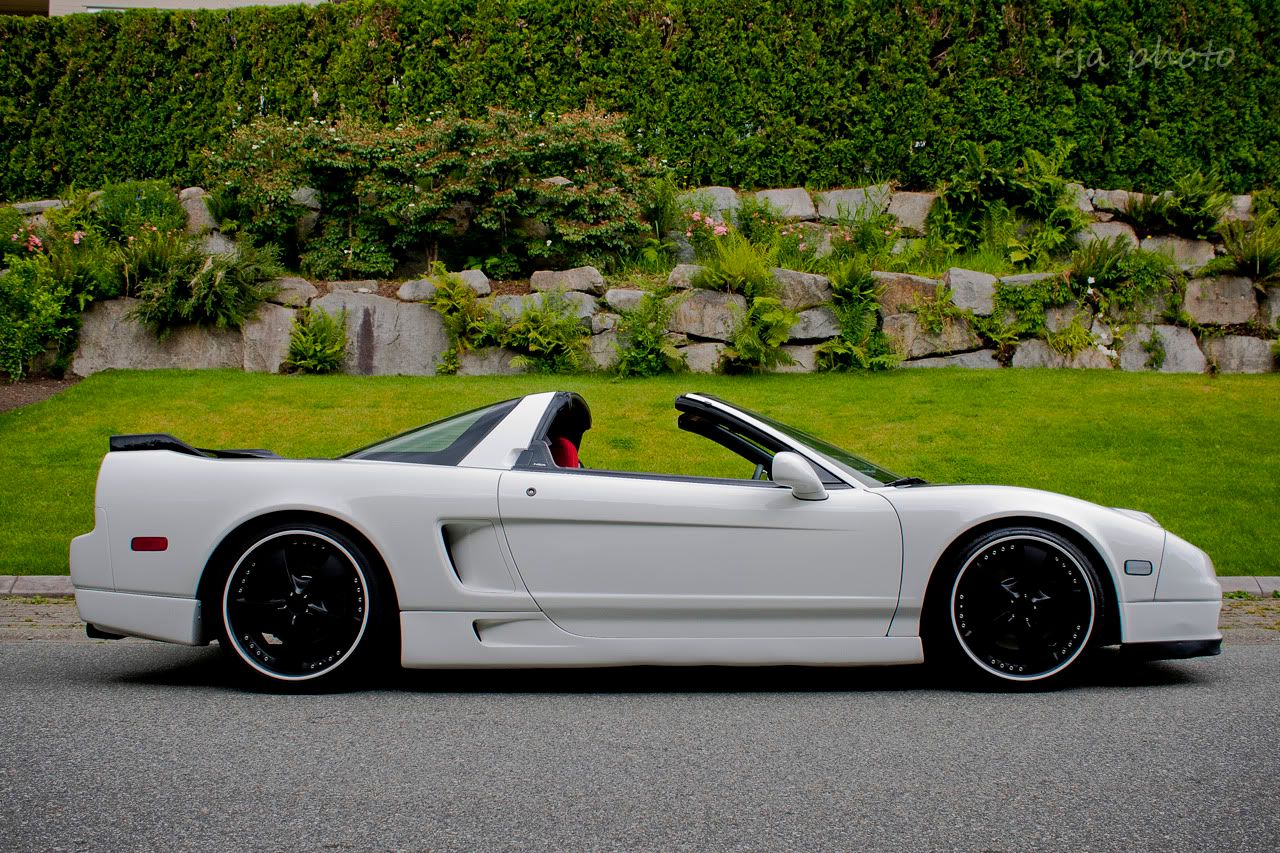


2010:
When I picked her up July 2010, this is how she looked! By in large, I was happy with the previous owners' mods. But there were a few things that NEEDED to be changed.
- Vis Racing OEM style carbon fiber hood and trunk
- NSX-R replica spoiler
- 2005 full front end conversion (OEM parts)
- 2005 taillights
- Wings west side skirts and spats
- Science of Speed engine cover
- K&N filter
- Comptech headers
- Comptech short shifter
- H&R lowering springs
- Double din DVD player
- Momo 'Jet' steering wheel with quick release hub
- Reupholstered alcantara interior
- 18"/19" Work LS105's painted matte black with white lip
 12-07-2012, 05:11 PM
#2
Cruisin'
Thread Starter
Join Date: Nov 2012
Posts: 20
Likes: 0
Received 0 Likes
on
0 Posts
2011:
When I first bought my NSX the first thing I knew I had to change was the exhaust. As nice as the car was… the exhaust was far too quiet and reminded me of my old Civic. I bought my car with Comptech headers so I'm sure its louder then stock... but just not enough!! With the NSX looking like a race car… it sure as hell better sound like one too! I installed a locally designed and fabricated exhaust & test pipes from another NSX’er in Vancouver and that did the trick. While under there, I had the seeping oil pan gasket replaced. This was a task I was not about to undertake myself… so Grego, OutofFocus and Godzilla started removing pieces of the aluminum subframe and the front bank header like it was going out of style. Thanks boys. Turning the car over for the first time this spring was jaw dropping. The engine sparked to life with a nice little grumble, just what I was looking for.


http://www.youtube.com/watch?v=p98igOElV8Y The summer's driving season was going great until I became acquainted with a paving stone which did a number to my driver’s side front wheel. While Egberts and Impact were taking care of my wheels, OutofFocus and I took care of my brakes. With my rear rotors nearing the end of their lives I upgraded to RB 2pc rotors and Hawk HPS pads and gave my calipers a much needed makeover.


When I first bought my NSX the first thing I knew I had to change was the exhaust. As nice as the car was… the exhaust was far too quiet and reminded me of my old Civic. I bought my car with Comptech headers so I'm sure its louder then stock... but just not enough!! With the NSX looking like a race car… it sure as hell better sound like one too! I installed a locally designed and fabricated exhaust & test pipes from another NSX’er in Vancouver and that did the trick. While under there, I had the seeping oil pan gasket replaced. This was a task I was not about to undertake myself… so Grego, OutofFocus and Godzilla started removing pieces of the aluminum subframe and the front bank header like it was going out of style. Thanks boys. Turning the car over for the first time this spring was jaw dropping. The engine sparked to life with a nice little grumble, just what I was looking for.
http://www.youtube.com/watch?v=p98igOElV8Y The summer's driving season was going great until I became acquainted with a paving stone which did a number to my driver’s side front wheel. While Egberts and Impact were taking care of my wheels, OutofFocus and I took care of my brakes. With my rear rotors nearing the end of their lives I upgraded to RB 2pc rotors and Hawk HPS pads and gave my calipers a much needed makeover.
12-07-2012, 05:12 PM
#3
Cruisin'
Thread Starter
Join Date: Nov 2012
Posts: 20
Likes: 0
Received 0 Likes
on
0 Posts
2012:
As the list of parts started to build up, I was becoming more and more excited for the 2012 season:
18/19 Work VS-XX and Tein Flex Coilovers:

Set of Project Kics R40's

RSX Steering Wheel with single stage airbag conversion

Titanium Gunmetal Billet Aluminum Door Handles

Civic Type-R Shift Knob

Zanardi Floor Mats

JP Vizage front lip + FULL hood/fenders/bumper/mirrors/spat 3M

OEM 2002+ rear valance

Got her tinted (35%) and installed my NSXClear corners

As the list of parts started to build up, I was becoming more and more excited for the 2012 season:
18/19 Work VS-XX and Tein Flex Coilovers:
Set of Project Kics R40's
RSX Steering Wheel with single stage airbag conversion
Titanium Gunmetal Billet Aluminum Door Handles
Civic Type-R Shift Knob
Zanardi Floor Mats
JP Vizage front lip + FULL hood/fenders/bumper/mirrors/spat 3M
OEM 2002+ rear valance
Got her tinted (35%) and installed my NSXClear corners
12-07-2012, 05:12 PM
#4
Cruisin'
Thread Starter
Join Date: Nov 2012
Posts: 20
Likes: 0
Received 0 Likes
on
0 Posts
This update isn't really "build" material... but an update none the less: 

Old tires after 3500kms (shitty alignment)

New tires after 7500kms (good alignment)


- New timing belt
- New alternator belt
- New A/C belt
- New water pump
- New spark plugs
- New v-tec selonoid gasket
- New cam plugs
- New CV boots
- Valve Adjustment
- New 275/30R19's in the back
- Raised the car up another 1/2"
- Dialed back the toe-in to half of factory specs (tire life)
- Connected the DC5 steering wheel cruise control buttons
Old tires after 3500kms (shitty alignment)
New tires after 7500kms (good alignment)
12-07-2012, 05:12 PM
#5
Cruisin'
Thread Starter
Join Date: Nov 2012
Posts: 20
Likes: 0
Received 0 Likes
on
0 Posts
2013:
Plans:


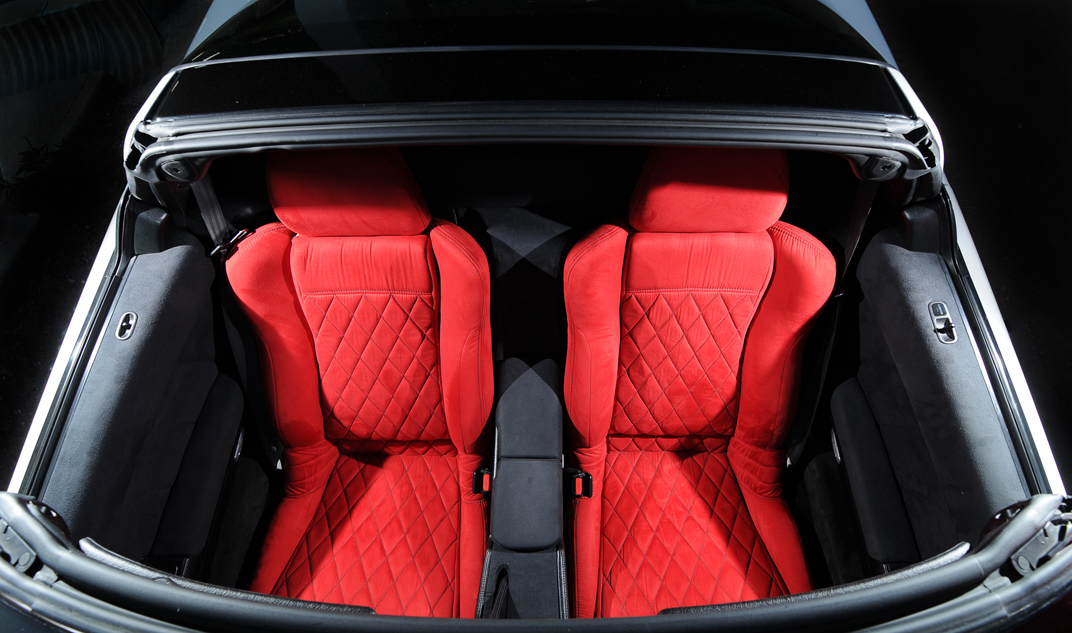
This past weekend I got started on the interior remodel. First things first... remove the passenger seat, which was set almost all the way back... with a f*$^ed up power seat switch. I zipped on over to SaDisTicEM1’s father's company who does reupholstery and he tidy'd up the separating seam within 45min. Then out comes the driver’s side seat to give me more working room. Out comes the centre armrest with broken hinge (to be replaced with new OEM leather), and centre console. I tore off the gaudy and now dirty alcantara upholstery to see what I had to work with under there. The USB connection on my stereo had been skipping so there had to be some electrical issues behind there... low and behold, a rats nest. I HATE hack jobs.
Seat’s before and after pic


F*&^ youuuuuu!!

Looking better already!!


No stereo bracket? No problem... styrofoam. Bloody hack jobs.

Time to rid the car of this ridiculousness... gonna get a new harness to clean up this rats nest.


Plans:
- Replace OEM shift boot with NSX-R shift boot
- Replace broken center console armrest with OEM leather armrest
- Replace upholstered (useless) hvac vent with OEM vent
- Tear suede off and refinish console with custom double din cutout
- Bring passenger side seat in to get small separation in seam repaired
- Complete electrical connections for DC5 steering wheel conversion
- Prospeed RDX injector conversion
- LED tail light conversion
- New Double DIN unit
This past weekend I got started on the interior remodel. First things first... remove the passenger seat, which was set almost all the way back... with a f*$^ed up power seat switch. I zipped on over to SaDisTicEM1’s father's company who does reupholstery and he tidy'd up the separating seam within 45min. Then out comes the driver’s side seat to give me more working room. Out comes the centre armrest with broken hinge (to be replaced with new OEM leather), and centre console. I tore off the gaudy and now dirty alcantara upholstery to see what I had to work with under there. The USB connection on my stereo had been skipping so there had to be some electrical issues behind there... low and behold, a rats nest. I HATE hack jobs.
Seat’s before and after pic
F*&^ youuuuuu!!
Looking better already!!
No stereo bracket? No problem... styrofoam. Bloody hack jobs.
Time to rid the car of this ridiculousness... gonna get a new harness to clean up this rats nest.
12-07-2012, 05:13 PM
#6
Cruisin'
Thread Starter
Join Date: Nov 2012
Posts: 20
Likes: 0
Received 0 Likes
on
0 Posts
Change that had piled up under the seats... Tim Hortons money!

It blows me away that someone would even think that this is acceptable... especially in an NSX. I'm going to see if I can clean this up, but theres a good chance I'll bite the bullet and buy a new one.

Started to pull apart the door cards as I'll be refinishing the door switch surrounds the same colour/fashion as the center console. When removing the vents from the switch surround, be sure to take any and all precautions as those 15yr old plastic snaps are brittle. Took me ~1hr to get them out, but I also saved breaking any of them!

Pieces that will match the center console:

It blows me away that someone would even think that this is acceptable... especially in an NSX. I'm going to see if I can clean this up, but theres a good chance I'll bite the bullet and buy a new one.
Started to pull apart the door cards as I'll be refinishing the door switch surrounds the same colour/fashion as the center console. When removing the vents from the switch surround, be sure to take any and all precautions as those 15yr old plastic snaps are brittle. Took me ~1hr to get them out, but I also saved breaking any of them!
Pieces that will match the center console:
12-09-2012, 05:59 PM
#7
Burning Brakes
Keep up the good work...I'm following!
Trending Topics
 12-17-2012, 08:39 PM
#10
Cruisin'
Thread Starter
Join Date: Nov 2012
Posts: 20
Likes: 0
Received 0 Likes
on
0 Posts
Spent another afternoon tinkering. The drivers side door checker 'clicked' when opening and closing it. The 'click' was there from the day I bought it but I never got around to investigating further. I thought it was an issue within the door itself so I never bothered removing the door card and getting it fixed. Turns out the plastic bushing on the checker itself had worn away and as the door opened and closed to the next position the pin bounced from side to side making the clicking noise. For $5.37 this issue could have been fixed 2 years ago! Just as I determined what was the culprit, I stared down at the checker, which was trolling me all along, "LOL". Son of a b&@^$!!!!

Moving onto the bastardization, which is my center console... I started to chip away at the bondo. The 'custom' hack job is only getting uglier the more I uncover. I'm not sure whether I should keep on keeping on, or just scrap the project and buy a new one all together, but we'll see how the next few afternoons go. The hack glued the ash tray door closed, bondo'd over top, and called it good. There was no saving the ash tray or cig lighter so out it all came. The change dish was covered in a thin sheet of metal and the depression also smothered in bondo. I got the majority of it cleaned up in preparation for sanding and fiberglass...
Upwards of 1/4" of bondo here

Chiseling away...

What is that crack forming?!

Oh... that's what USED to be my ash tray door...

Time for you to go...

All the bits and bobs that were bondo'd over

As she sits, for the time being

Moving onto the bastardization, which is my center console... I started to chip away at the bondo. The 'custom' hack job is only getting uglier the more I uncover. I'm not sure whether I should keep on keeping on, or just scrap the project and buy a new one all together, but we'll see how the next few afternoons go. The hack glued the ash tray door closed, bondo'd over top, and called it good. There was no saving the ash tray or cig lighter so out it all came. The change dish was covered in a thin sheet of metal and the depression also smothered in bondo. I got the majority of it cleaned up in preparation for sanding and fiberglass...
Upwards of 1/4" of bondo here
Chiseling away...
What is that crack forming?!
Oh... that's what USED to be my ash tray door...
Time for you to go...
All the bits and bobs that were bondo'd over
As she sits, for the time being
Last edited by QPDO; 12-17-2012 at 08:42 PM.
12-19-2012, 08:39 AM
#11
Cruisin'
Thread Starter
Join Date: Nov 2012
Posts: 20
Likes: 0
Received 0 Likes
on
0 Posts
Didn't get to tooo much yesterday, just properly wired in my cruise control and horn. First time in my 2+ years of ownership that I'll have an operating horn! Then I removed some more interior panelling to gain access to my ECU which is tucked in behind the passenger side seat. I then removed the previous owners version of DRL wiring... this guy most definitely not an electrician. The blue wires he had jammed in with a pin on the lighting relay and power steering relay, while the black was obviously ground. He then used a myriad of zip-ties to hold the relay and wiring in place. Out it ALL comes!


 12-23-2012, 08:43 PM
#13
Safety Car
Very nice build.
12-24-2012, 12:16 AM
#14
sick
12-24-2012, 04:02 PM
#15
Team Owner
iTrader: (2)
Join Date: Jan 2008
Location: Kansas City, MO (Overland Park, KS)
Posts: 36,545
Received 6,470 Likes
on
5,162 Posts
Damn....can't wait to see if finished!
01-03-2013, 03:26 AM
#16
Cruisin'
Thread Starter
Join Date: Nov 2012
Posts: 20
Likes: 0
Received 0 Likes
on
0 Posts
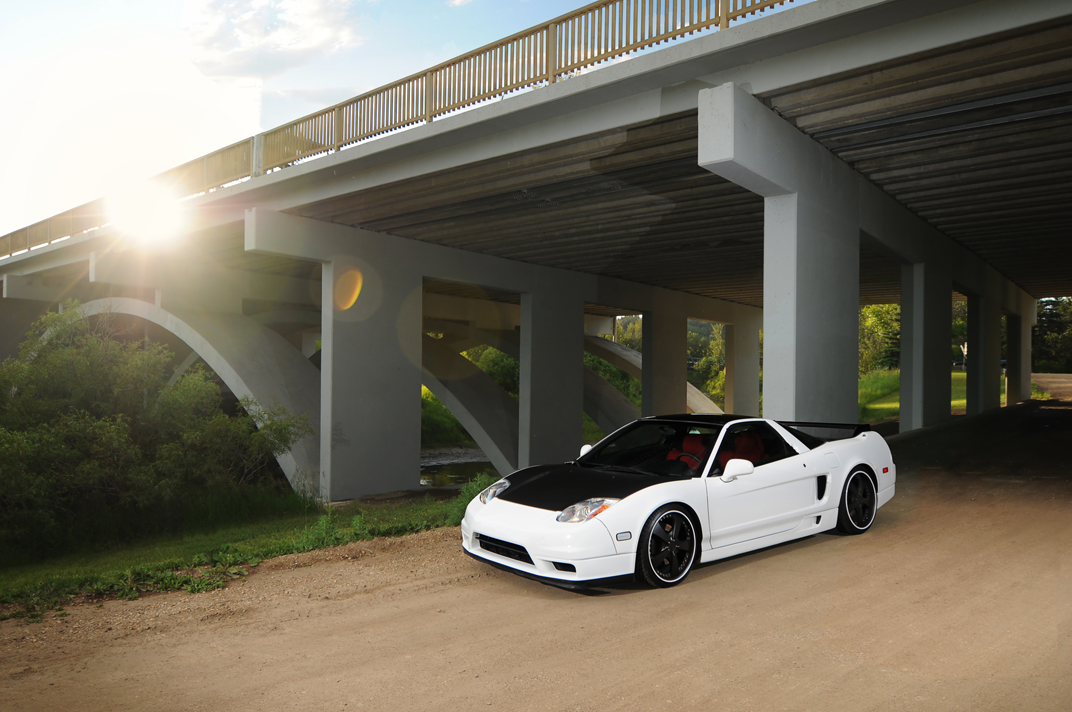
Well, I've spent more time drinking and enjoying the holidays than I have spent working on the car... but all my SOS bits have come in and I recently got back a few photos from a photoshoot late last season.


 01-31-2013, 09:19 AM
#19
Race Director
iTrader: (3)
Join Date: Feb 2012
Location: South Florida
Age: 30
Posts: 18,278
Received 3,824 Likes
on
2,847 Posts
Great work! Your car looks excellent! 
02-03-2013, 12:21 AM
#22
Cruisin'
Thread Starter
Join Date: Nov 2012
Posts: 20
Likes: 0
Received 0 Likes
on
0 Posts
Much appreciated! It's taken quite a bit of time and far too much $ to get it where it is... but I'm happy!
I bought it just over 2 years ago for $48k. I'll never see the money back that I'm dumping into it... but I'm also not planning on selling it for a long while!
Haha... I'd argue that synth19 has the nicest NSX, but I do quite enjoy mine as well. Thanks!
I bought it just over 2 years ago for $48k. I'll never see the money back that I'm dumping into it... but I'm also not planning on selling it for a long while!
Haha... I'd argue that synth19 has the nicest NSX, but I do quite enjoy mine as well. Thanks!
02-26-2013, 10:54 AM
#25
Cruisin'
Thread Starter
Join Date: Nov 2012
Posts: 20
Likes: 0
Received 0 Likes
on
0 Posts
Thanks man. One day is right... 6 years ago I bought my first car as I was putting myself through University (1995 Honda Civic Si). 4 years after and 6 cars in between I was stoked to add this to the stable!
Ya, lots of people go the S2K route, and rebadge it as a Honda. Not my style so the DC5 wheel was the route for me!
Ya, lots of people go the S2K route, and rebadge it as a Honda. Not my style so the DC5 wheel was the route for me!
03-11-2013, 11:09 PM
#26
Cruisin'
Thread Starter
Join Date: Nov 2012
Posts: 20
Likes: 0
Received 0 Likes
on
0 Posts
Been a while since I've had a chance to work on the car... and I didn't get much done other than some shopping:
Some OEM goodness and a nice Pioneer X940BT Nav Unit:

Unwrapping new car parts is like Christmas all over!

Now some before and after pics:


Before I can start reassembling my interior, I have to finish up with my center console. I HATED the idea of gluing on my OEM NSX-R shift boot & coin tray to the Science of Speed console (as they suggested), so a little 2-part epoxy resin is being used to recreate the mounting points of the OEM console that SOS omitted. Layer by layer, I'll get it to the right height in order to mount it with the OEM screws.

Some OEM goodness and a nice Pioneer X940BT Nav Unit:
Unwrapping new car parts is like Christmas all over!
Now some before and after pics:
Before I can start reassembling my interior, I have to finish up with my center console. I HATED the idea of gluing on my OEM NSX-R shift boot & coin tray to the Science of Speed console (as they suggested), so a little 2-part epoxy resin is being used to recreate the mounting points of the OEM console that SOS omitted. Layer by layer, I'll get it to the right height in order to mount it with the OEM screws.
03-31-2013, 10:00 AM
#28
Cruisin'
Thread Starter
Join Date: Nov 2012
Posts: 20
Likes: 0
Received 0 Likes
on
0 Posts
Got a little more done again this weekend. Finished the mounting tabs for the NSX-R shift boot and coin tray, cut the hole in my dash for the double din (most nerve racking mod to date), wired in my SOS 12V plug into my arm rest console, assembled the new armrest, installed the rear bulkhead lining, ran the wires for my bluetooth hands free and my navigation antenna, and replaced some incandescent interior lighting with LEDs.
Millimeter by millimeter I shaved out the hole for a perfect flush-mount fit of the Pioneer X940. Quite happy how it all turned out. The white edge on the last picture is a slightly beveled edge for a nice finish when it's painted.


And a couple shots of the custom epoxy mounting tabs for the NSX-R shift boot and coin tray:


Millimeter by millimeter I shaved out the hole for a perfect flush-mount fit of the Pioneer X940. Quite happy how it all turned out. The white edge on the last picture is a slightly beveled edge for a nice finish when it's painted.
And a couple shots of the custom epoxy mounting tabs for the NSX-R shift boot and coin tray:
04-16-2013, 10:24 PM
#29
Moderator
iTrader: (3)
Wow, gorgeous NSX and awesome work! I saw this on Facebook and had to come check it out!


 05-23-2013, 01:38 PM
#31
Cruisin'
Thread Starter
Join Date: Nov 2012
Posts: 20
Likes: 0
Received 0 Likes
on
0 Posts
Well... being that I've reassembled... I should probably tidy up this season's updates.
After finishing the epoxy tabs and getting the cutout for the double din cut out, it was time for prep and paint. Picking up some fine grit sand paper, paint adhesion promoter, sandable primer, and finish coat I was off to a good start. However, the wrinkled wrap on the switch panels proved to be a pain in the ass. I sanded, picked, scraped, chipped and widdled away at the foil wrapped brittle plastic for a few days. Got it to the point where I thought I'd be happy and proceeded with the prep/prime/paint. Which turned out looking absolutely horrendous and had a piss poor color match to my new center HVAC piece. So I gave up, gave in, and took it to Killer Color Designs (http://www.killercolordesigns.com/) in St. Albert who proceeded to paint everything (including my brand new OEM center HVAC vent that I was attempting to color match), Berlina Black. These guys are incredible... not only was their workmanship amazing, but their customer service and turnaround time was something I've never EVER experienced in the car industry. Mad props.
After a mad day of reassembly, I got the ol girl together save for the passenger side sun visor, as I have apparently misplaced the screws. Without further adieu... here's the remaining pictures:
My attempt:


Killer Color Design's accomplishment:

Final Product:


Full Car:

 05-23-2013, 01:40 PM
#32
Moderator
iTrader: (3)
Damn, nice work! The car looks great as always 


 sweet ride... waow so damn sexy. you can definitely tell all the hard work, time and effort spent on it was worth it.
11-03-2013, 10:44 AM
sweet ride... waow so damn sexy. you can definitely tell all the hard work, time and effort spent on it was worth it.
11-03-2013, 10:44 AM
#37
Instructor
Wow a lot of work, but looks like it was well worth it.
How hard was it getting the door panels off and back on? I have to get in there to install my Procar CF mirrors and fix the passenger side window.
How hard was it getting the door panels off and back on? I have to get in there to install my Procar CF mirrors and fix the passenger side window.