Current PROJECT you're working on
 02-16-2009, 11:07 PM
#281
Senior Moderator
Regional Coordinator
(Mid-Atlantic)
Regional Coordinator
(Mid-Atlantic)
Thread Starter
iTrader: (6)
Didn't get to work over the weekend, but worked on her tonight, took my measurements for the wire upgrade, but I did the steering wheel swap. Still needs some work, but came out good.
Before

After

Will post more of a write up in the steering wheel diy thread
Before
After
Will post more of a write up in the steering wheel diy thread

 02-17-2009, 08:37 AM
#284
Senior Moderator
Regional Coordinator
(Mid-Atlantic)
Regional Coordinator
(Mid-Atlantic)
Thread Starter
iTrader: (6)
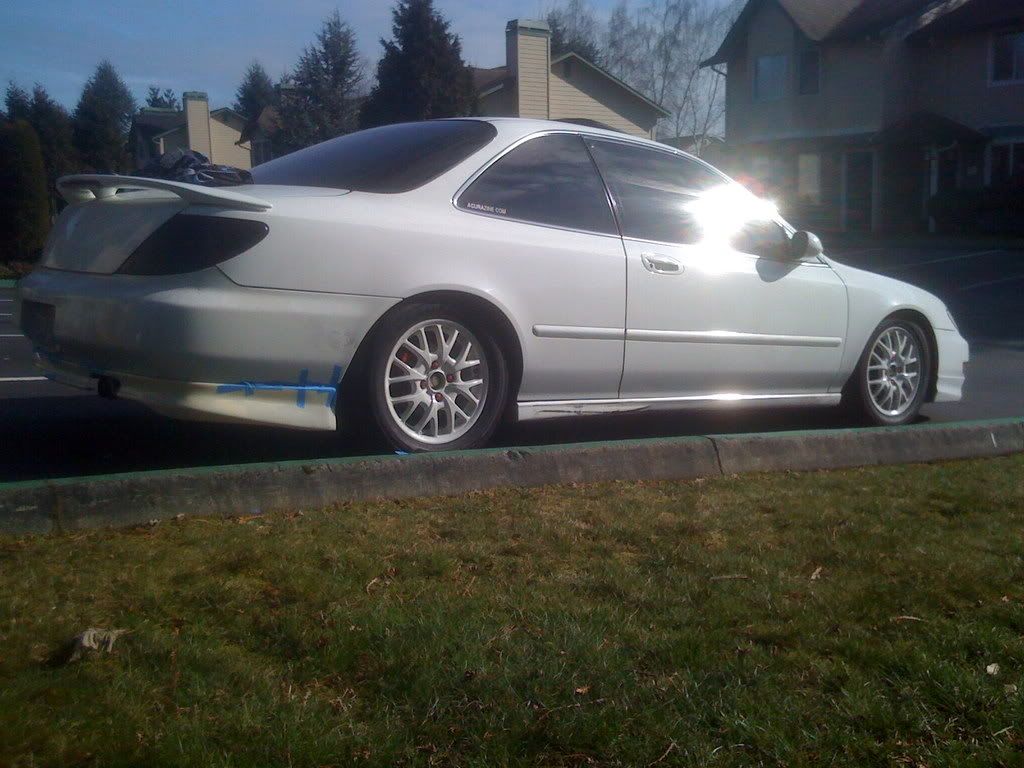
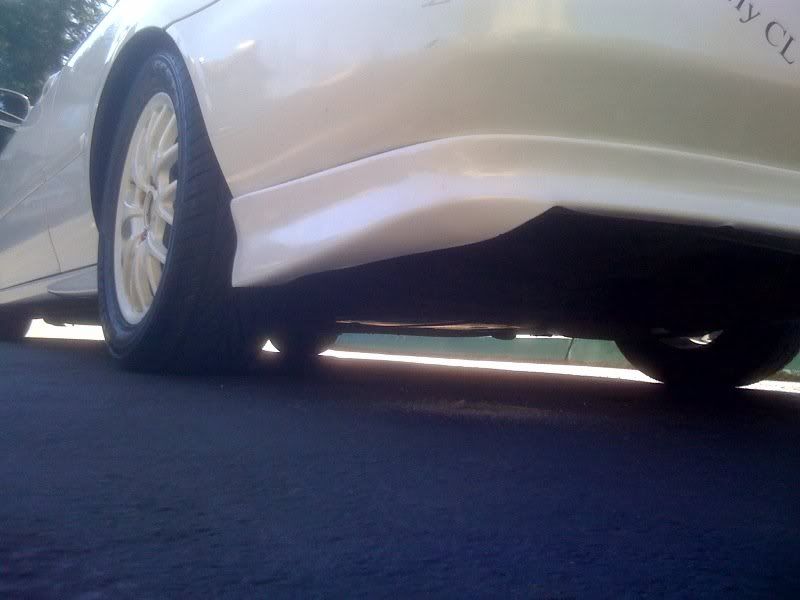
 It's been ripped out of the car since I did the climate control LED swap
I should have taken a pic without the steering wheel cover so you could really see the color difference, but anyone with a 97 knows how blue gray the interior and steering wheel is

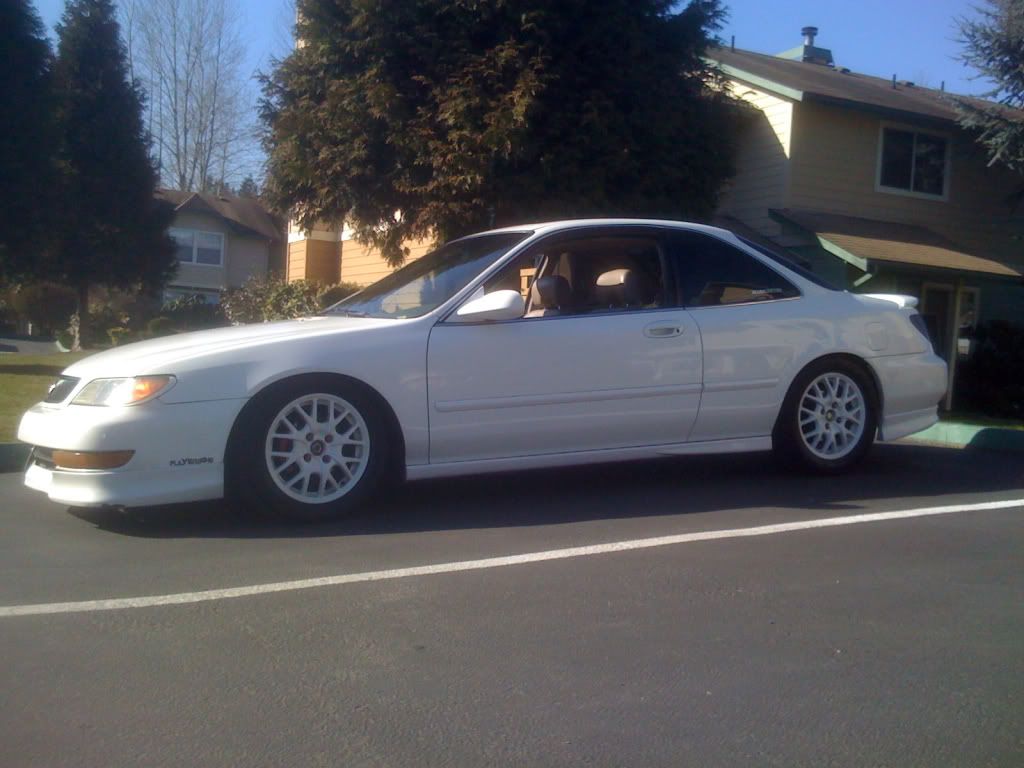
Matt, it's definitely less bulky than the 97 and lighter, I don't know about diameter, it may be a tad bit smaller, it's a 2nd gen type S wheel, with cocoa's 98 airbag (painted satin black) I like the black so much better than the gray. Also, with this conversion, the horn button is in the air bag, instead of the stupid horn buttons on the sides of the wheel that make it hard to hit. I scared the crap out of my pits last night testing the horn switch, 2 x hella horns @ 120 db's will do that, whoops
 02-17-2009, 01:11 PM
#288
Senior Moderator
Regional Coordinator
(Mid-Atlantic)
Regional Coordinator
(Mid-Atlantic)
Thread Starter
iTrader: (6)
https://acurazine.com/forums/showpos...6&postcount=60
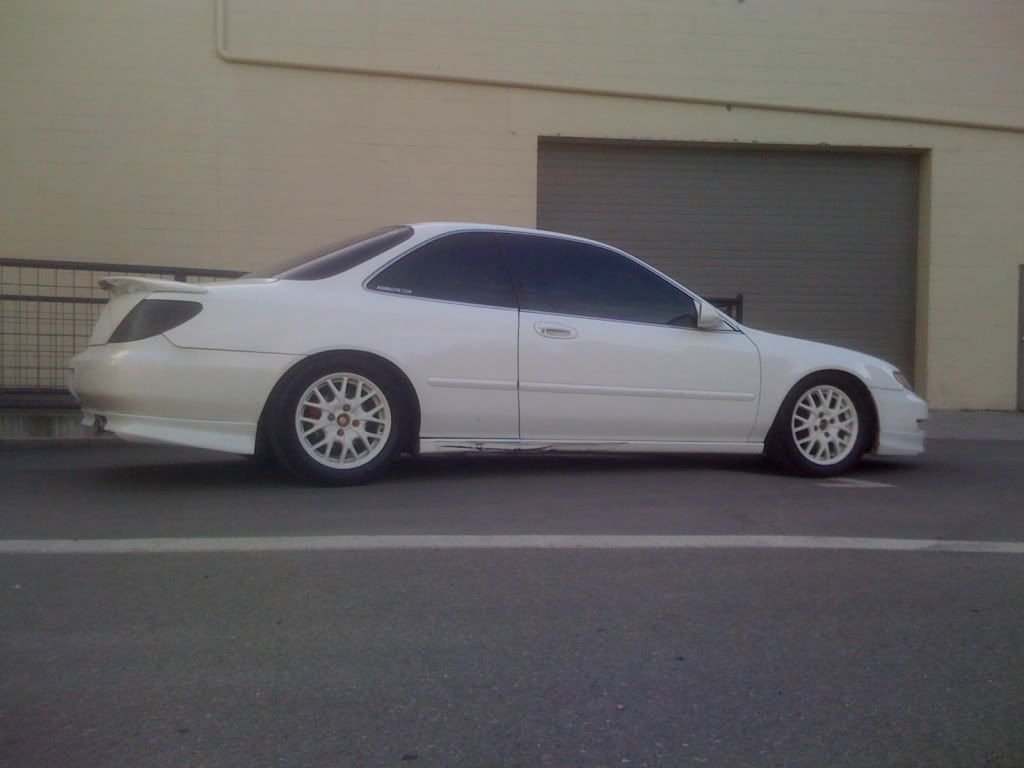
My airbag and horn are fully functional


 02-18-2009, 09:34 AM
#291
Senior Moderator
Regional Coordinator
(Mid-Atlantic)
Regional Coordinator
(Mid-Atlantic)
Thread Starter
iTrader: (6)
Looks nice matt, can't wait to see the glass box
02-18-2009, 05:14 PM
#292
i like acura
96-97 Rear Lip Install
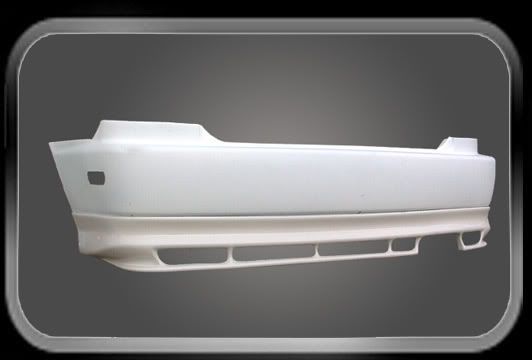
so i picked up a mugen style 96-97 rear lip from an old member (lunchbox) for a great price ( free )
so heres what the lip originally looked like.
well i started by cutting it in half, and remomving the excess lip to make it fit our bumper. So after i cut it, i put it on to test fit, and make sure everything lines up. And i decided i didnt like the honeycomb holes just like klepto. I know he cut it, but i wanted to try it and see if it was too ricey or what.
So i decided to cut off all the honeycomb, but not the same way kelpto did. so i got ahold of a good jigsaw, and started doing work.
So i made all the cuts, and went to test fit it today. looks good. but there are some fitment issues.
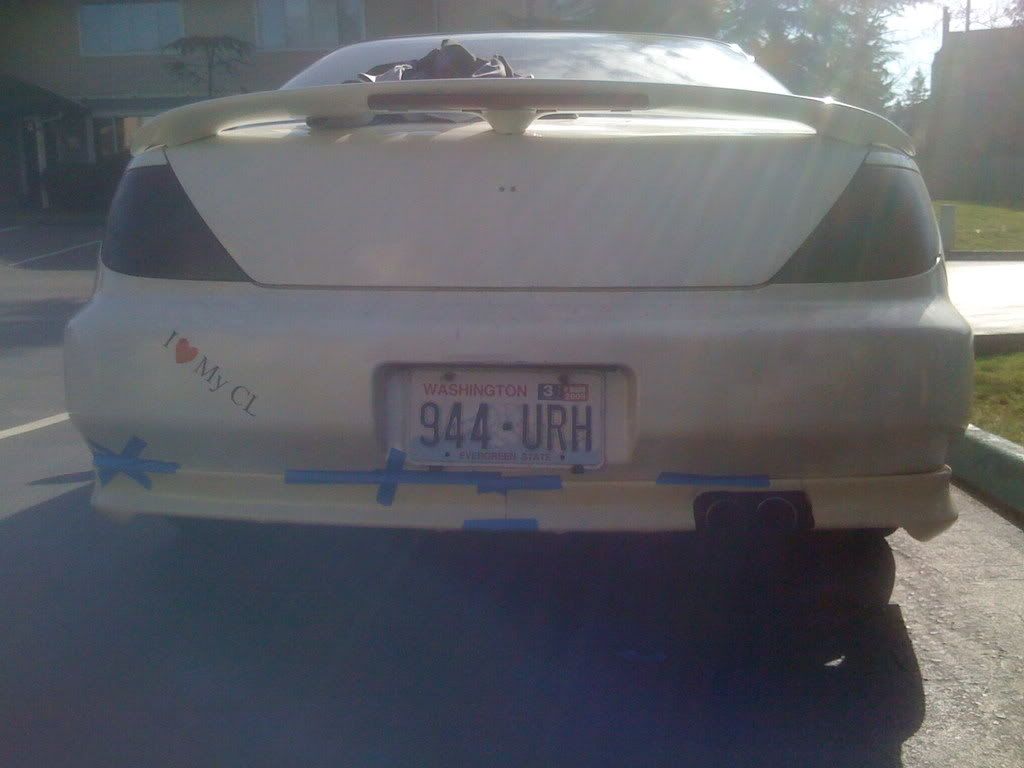
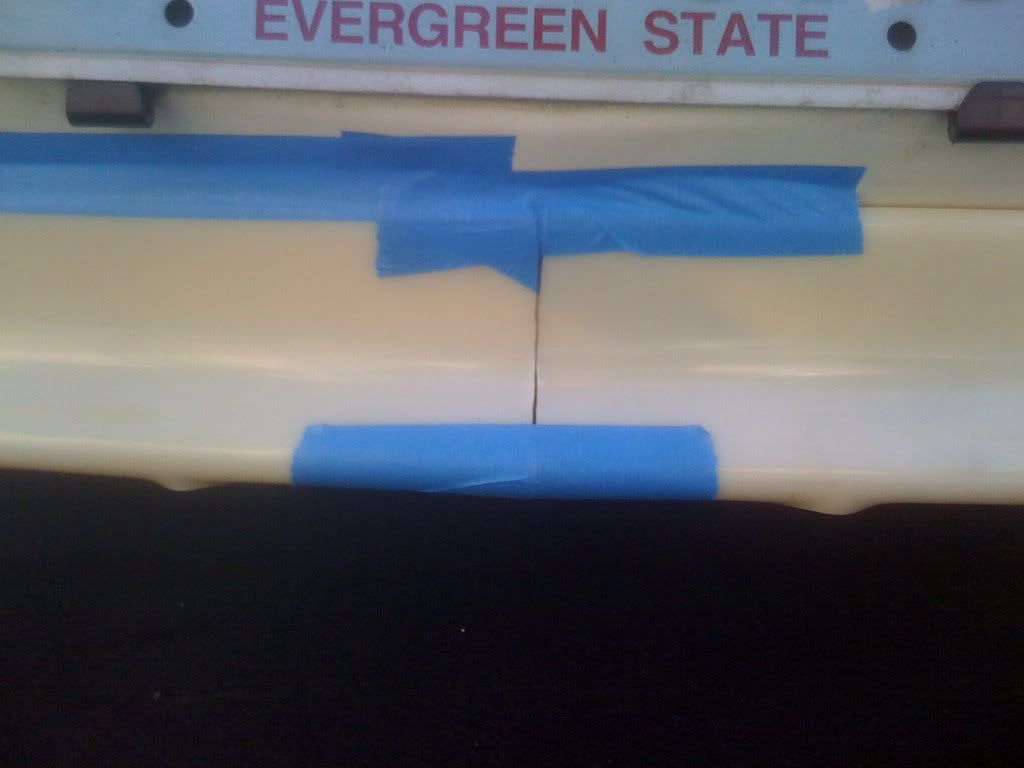
Here is a pic of it taped on from the rear.
side
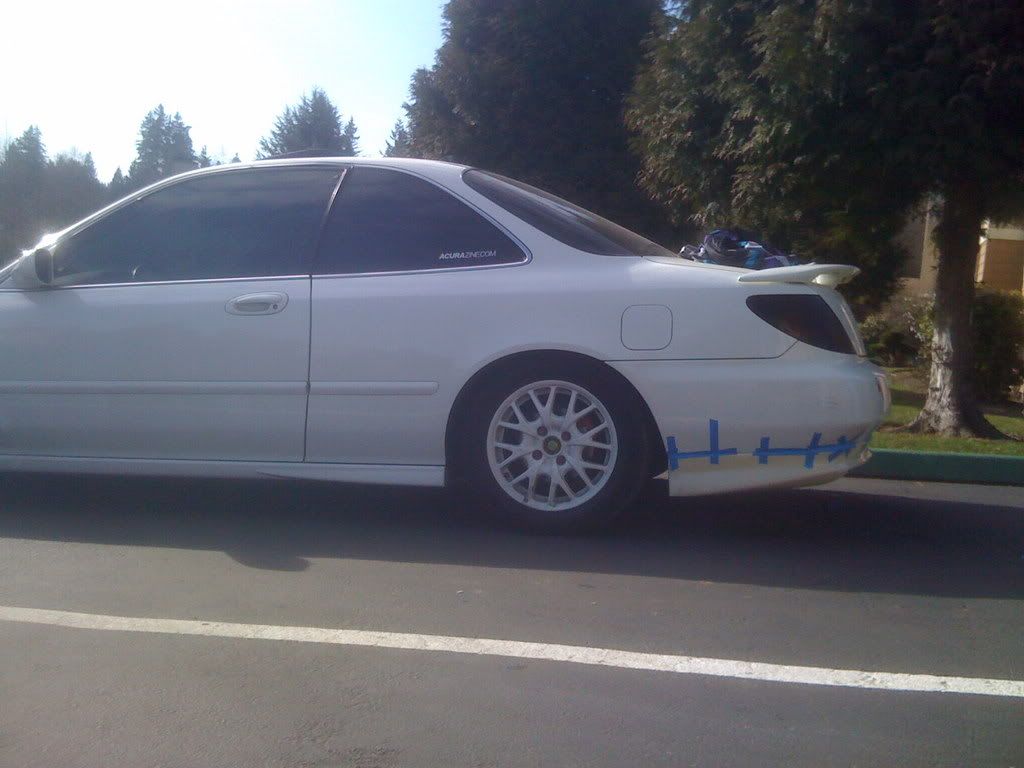
you can see the fitment issues in this one, it doesnt fit the corner snug.
here you can see that they match up. i need to trim down the right side a tiny bit to make it sit flush.
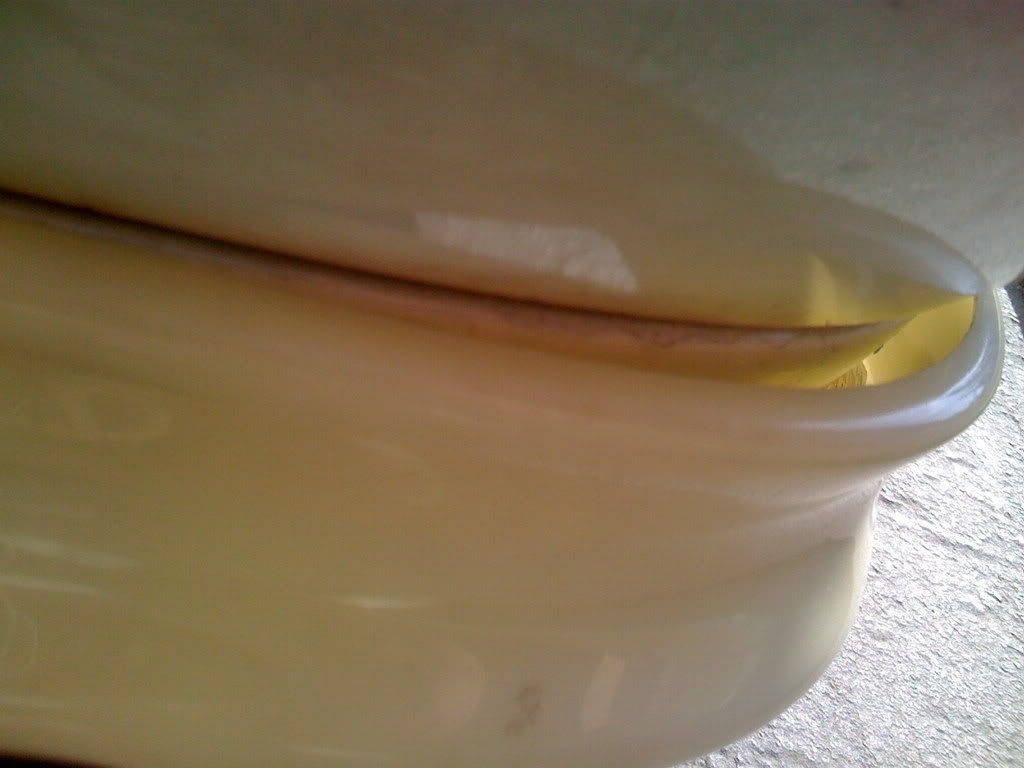
^^ you can see that i still need to file down the stems from the honecomb. and i know that a lot of you wont like the fact that im letting the crack be visible in the middle, but it was a free lip, and im not gonna pay 500 bucks to have a lip custom fit on when i might not end up keeping this lip anyways.
so tomorrow is final trimming, filing, sanding, painting, and hopefully install with a wash
so heres what the lip originally looked like.
well i started by cutting it in half, and remomving the excess lip to make it fit our bumper. So after i cut it, i put it on to test fit, and make sure everything lines up. And i decided i didnt like the honeycomb holes just like klepto. I know he cut it, but i wanted to try it and see if it was too ricey or what.
So i decided to cut off all the honeycomb, but not the same way kelpto did. so i got ahold of a good jigsaw, and started doing work.
So i made all the cuts, and went to test fit it today. looks good. but there are some fitment issues.
Here is a pic of it taped on from the rear.
side
you can see the fitment issues in this one, it doesnt fit the corner snug.
here you can see that they match up. i need to trim down the right side a tiny bit to make it sit flush.
^^ you can see that i still need to file down the stems from the honecomb. and i know that a lot of you wont like the fact that im letting the crack be visible in the middle, but it was a free lip, and im not gonna pay 500 bucks to have a lip custom fit on when i might not end up keeping this lip anyways.
so tomorrow is final trimming, filing, sanding, painting, and hopefully install with a wash
02-18-2009, 05:26 PM
#293
Senior Moderator
Regional Coordinator
(Mid-Atlantic)
Regional Coordinator
(Mid-Atlantic)
Thread Starter
iTrader: (6)
Looks great man, whatever happened to lunchbox? Does he still have his CL? For the center, I would at least do a strip of bondo across the 2 pieces and sand it smooth before painting, but that's me. Looks great though, very different look
02-18-2009, 08:01 PM
#295
i like acura
hes where i got my front lip too
02-18-2009, 10:25 PM
#296
Senior Moderator
Regional Coordinator
(Mid-Atlantic)
Regional Coordinator
(Mid-Atlantic)
Thread Starter
iTrader: (6)
I forgot about that, I remember now
02-18-2009, 10:41 PM
#297
W WHIP.
Join Date: Jun 2006
Location: 412, PA & always ballin in FLO RIDA.
Age: 34
Posts: 3,859
Likes: 0
Received 1 Like
on
1 Post
alright, that looks a lot better then what i was imagining. since your painting it, you might as well get some flexible filler and just use it to fill the crack.
02-18-2009, 10:58 PM
#298
i like acura
correct me if im wrong

and if u look at the pic above, the crack looks really bad, thats only becasue i havent filed the edges down yet. it will sit completely flush when its done
02-20-2009, 06:28 PM
#300
i like acura
so i planned on being done by today, but again im not.
i filed my a** off yesterday. when i initially made all the cuts, the edges were very jaged and ugly. so yesterday i spent about 4 hours making every edge round, and smooth.
i painted this morning. went to class, and was going to install it after class, but before work. i got home, cleaned up the lip and bumper, and stuck the lip on. but when i went to go screw it in, my drill was dead and i had to be at work. so i scrapped this attempt and wasted 10 bucks worth of 3m tape in the process. ill try again tomorrow. snapped a couple pics with one side on, cant give u guys the pic of the whole thing installed.
02-20-2009, 08:38 PM
#301
Senior Moderator
Regional Coordinator
(Mid-Atlantic)
Regional Coordinator
(Mid-Atlantic)
Thread Starter
iTrader: (6)
lookin real good man, can't wait to see it finished
 Looks like a fun project.
02-21-2009, 07:51 PM
Looks like a fun project.
02-21-2009, 07:51 PM
#303
i like acura
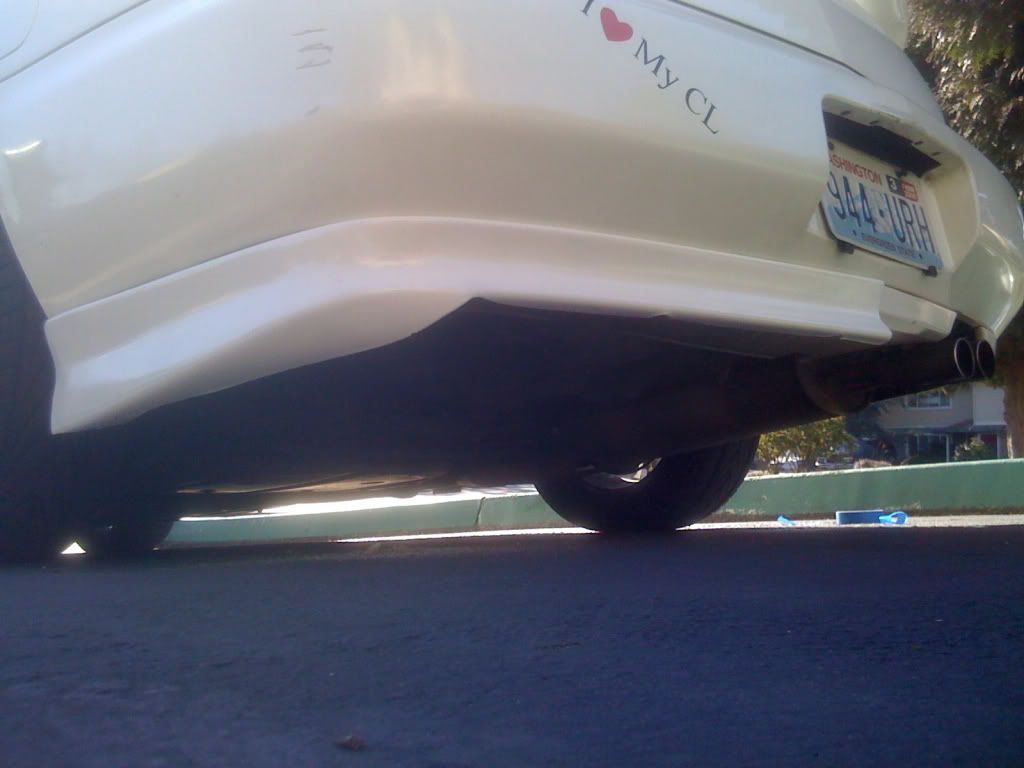
side is all u get. ive got nothin to do tonight so im heading downtown, gonna explore scenery and have a little photoshoot.

went a little too far, and i have no idea how this happened. i measured, checked and measured again everytime. so basically ive got a 1/2 inch gap between the two peices! looks like ill be doing what you guys suggested more sooner than later.
ive got a GHETTO fix until then!
what would you guys suggest using?
02-22-2009, 12:47 AM
#305
Drifting
So today, this:
became this:
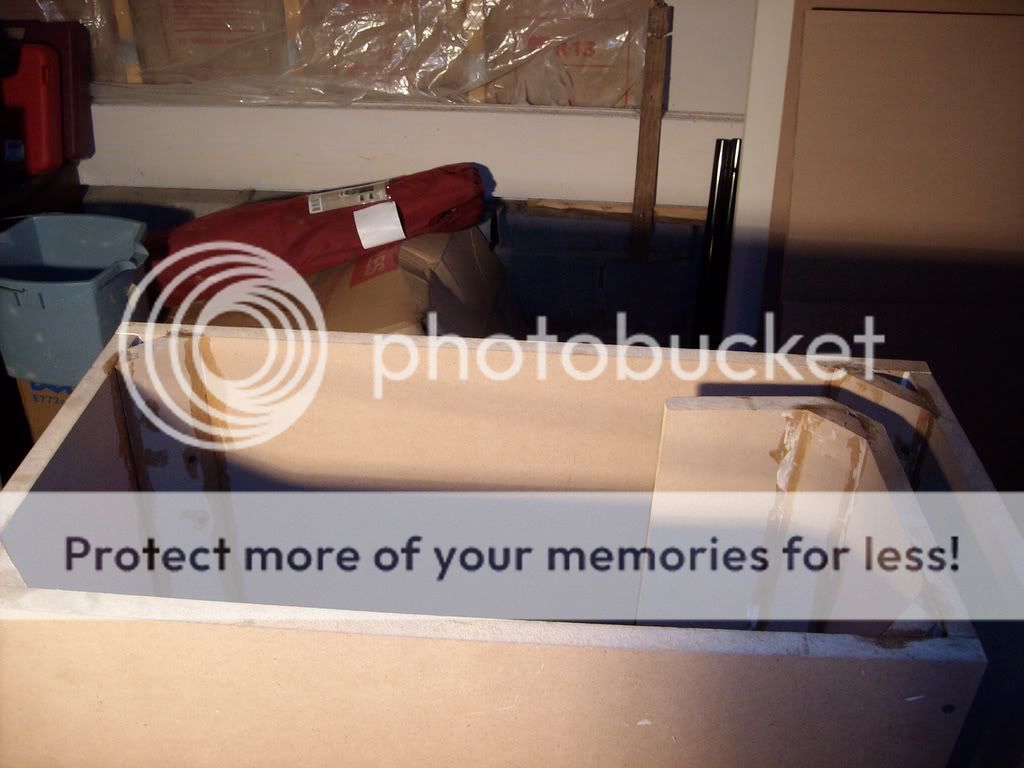
Here's a question for you guys... Round sub, so why the square hole?
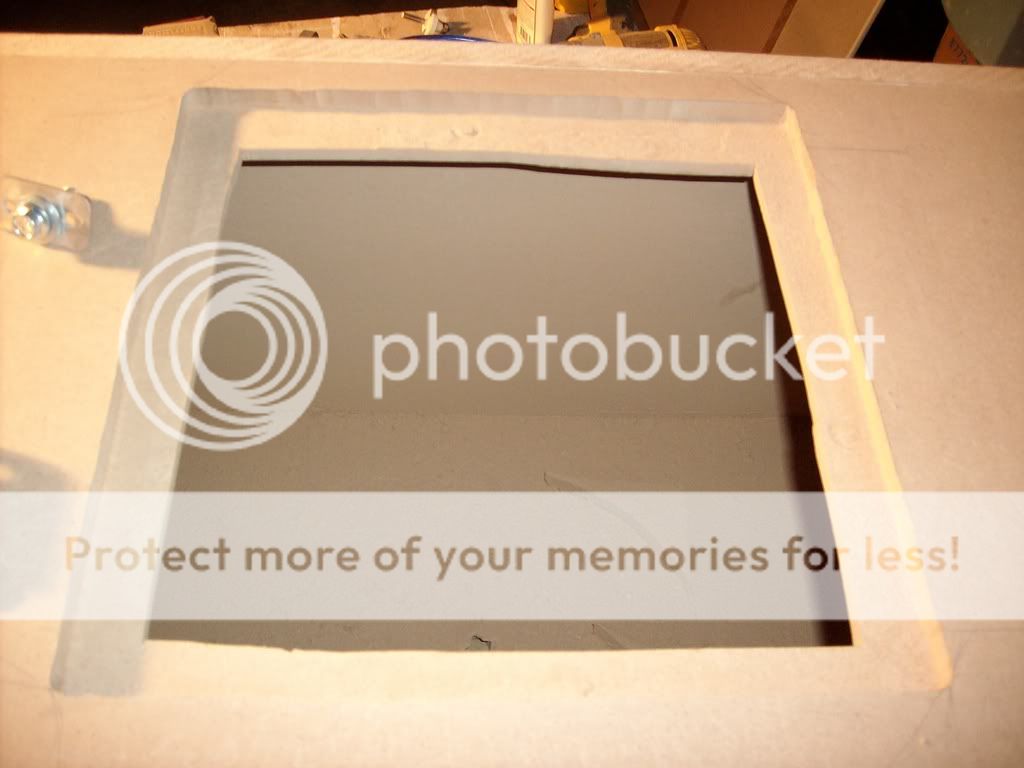
If I've told you, please don't ruin it for everyone else... Hopefully, I'll be able to finish it tomorrow, but I've still got a ton of work to do...
became this:
Here's a question for you guys... Round sub, so why the square hole?
If I've told you, please don't ruin it for everyone else... Hopefully, I'll be able to finish it tomorrow, but I've still got a ton of work to do...
 02-22-2009, 12:54 AM
#307
Drifting
 02-22-2009, 01:03 AM
#309
Operation: TSA
Just finished colormodding the projos by sanding down the cut-off sheild a little and bending the housing a little with the washer trick. Just some teasers:
Took the entire projector apart (for the exeption of the clear lens)

Took out the clear lens just for poops and giggles. :gheylaugh: (finnished projo in the back)

It's basicly just like a freaking $80 magnifying glass... I'm working with the vinyal backing that I got today as we speak. Thought you guys would like to see all the parts of a projector. More later.
Took the entire projector apart (for the exeption of the clear lens)
Took out the clear lens just for poops and giggles. :gheylaugh: (finnished projo in the back)
It's basicly just like a freaking $80 magnifying glass... I'm working with the vinyal backing that I got today as we speak. Thought you guys would like to see all the parts of a projector. More later.
Last edited by GhettoNinja06; 02-22-2009 at 01:07 AM.
02-22-2009, 01:04 AM
#310
Drifting
Edit: More pics Fred... I love seeing the projos retrofitted... They look sick...
02-22-2009, 01:13 AM
#311
^Yo Matt, you should totaly post your sub enclosure project in the audio section of AZine. I'm sure some audiophiles would love to see the birth of a new sub box. Looks sweet. I gotta get some subs one of these days. Probably next thing after my drop and wheels. I just don't listen to Hip-Hop much (unless it's MIA  ) so it probably wouldn't be worth the trouble and money for me. I am starting to get into Techno though.
As for the pics, that's all you guys get for now.
) so it probably wouldn't be worth the trouble and money for me. I am starting to get into Techno though. As for the pics, that's all you guys get for now.
02-22-2009, 09:18 AM
#312
Drifting
^Yo Matt, you should totaly post your sub enclosure project in the audio section of AZine. I'm sure some audiophiles would love to see the birth of a new sub box. Looks sweet. I gotta get some subs one of these days. Probably next thing after my drop and wheels. I just don't listen to Hip-Hop much (unless it's MIA ) so it probably wouldn't be worth the trouble and money for me. I am starting to get into Techno though.
As for the pics, that's all you guys get for now.
) so it probably wouldn't be worth the trouble and money for me. I am starting to get into Techno though. As for the pics, that's all you guys get for now.
Subs are important no matter what kind of music you listen to... All music has low end frequencies, not just rap/hip hop. If you don't listen to much music with a ton of bass, I'd suggest a good 10" sub sealed. This will give you a very nice response curve, and with a good sub, you'll still be able to get loud if/when you want it... PM me for suggestions when you want to get a build going...
And boo your teasers... Although I guess I'm doing the same thing...
02-22-2009, 04:03 PM
#313
Drifting
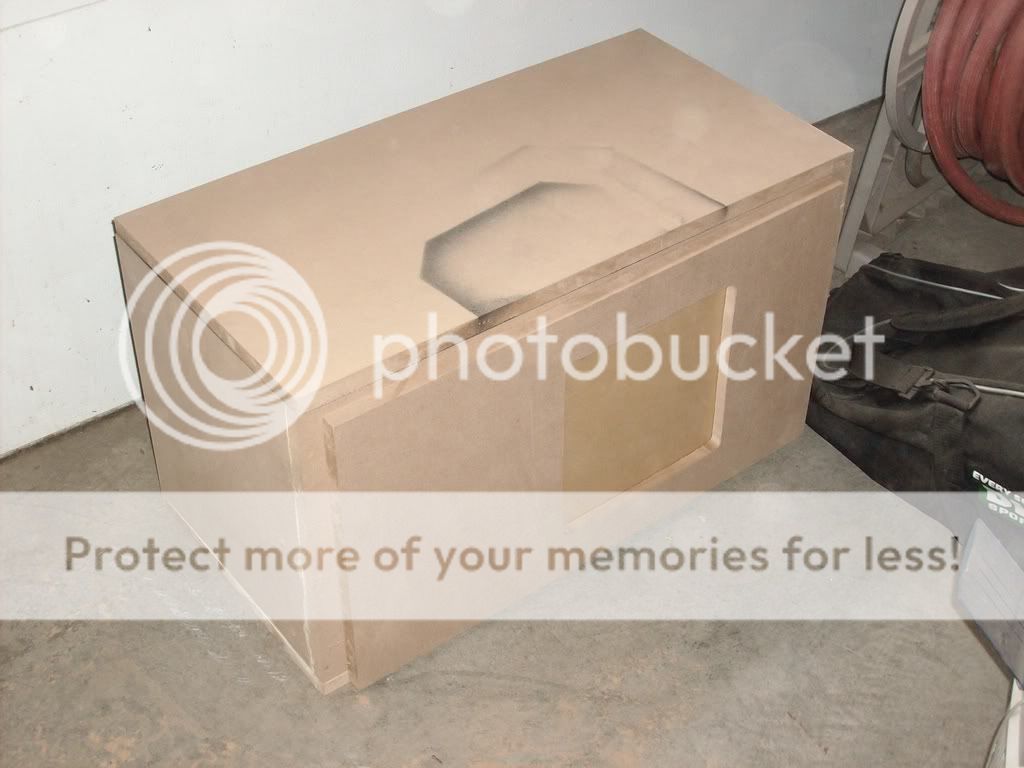
So I've been working on the box since like noon, and I figured I'd take a little break while the glue holding the top of the box dries a little... So here's a small update:
Ski Pass View:

That's all for now... It's time for me to go back out and get this damn thing done...
Ski Pass View:
That's all for now... It's time for me to go back out and get this damn thing done...
 Anyway, here are some finished pics:
 02-22-2009, 10:14 PM
#316
Drifting
The rectangular opening on the side of the box with the sub mounted is a port that lets air out. it is tuned to a certain frequency (in this case ~33Hz) and this is (generally) where the most output (sound/volume) is... The square in the second pic is actually just a cut through on the box. There's a sheet of plexi mounted in there so that you can see the motor (that big shiny part) of the sub through the ski pass in the backseat... There's also a little surprise for when it gets dark...
02-23-2009, 11:50 AM
#317
Senior Moderator
Regional Coordinator
(Mid-Atlantic)
Regional Coordinator
(Mid-Atlantic)
Thread Starter
iTrader: (6)
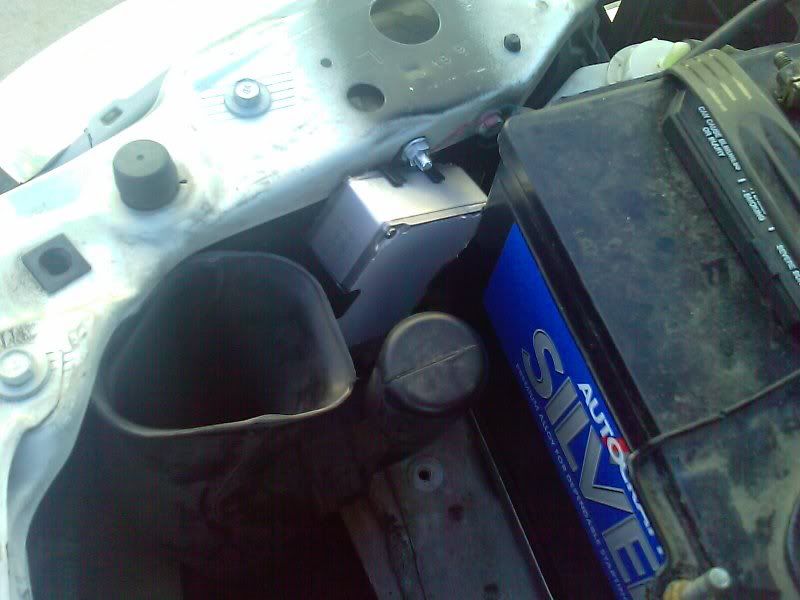
So I have to take my steering wheel back off to mount the cruise control and useless volume control buttons, kind of sucks, wanted to just screw them on and be done with it, oh well nothing custom is ever easy, will have finished pics tonight hopefully. Then it's on to the engine wiring
02-23-2009, 03:42 PM
#319
Three Wheelin'
Join Date: Feb 2009
Location: Mooresville NC
Age: 39
Posts: 1,942
Likes: 0
Received 11 Likes
on
10 Posts
Well myself I just installed a circuit breaker for my amp power wire. Also I just installed my new 10k hid set(sold my last one). I just finished up powder coating my intake mineral black 70% gloss(it was all scratched and rashed up). The intake is actually the cold air portion from a 97 2.2 accord. It came loose(on the old car) one day and fell out into the road got scared up. But the powder coat brought her back looking good. Also prob going tomorrow to get rims put on her, trading the stocks straight up cant beat it. Will post pics once they load to email