The Rebirth - CCColtsicehockey TSX Thread
 11-07-2012, 12:23 AM
#1
Moderator
Regional Coordinator (Southeast)
Regional Coordinator (Southeast)
Thread Starter
Join Date: Dec 2003
Location: Mooresville, NC
Age: 37
Posts: 43,461
Received 3,655 Likes
on
2,490 Posts
The Rebirth - CCColtsicehockey TSX Thread
This has been a long time coming and many have been asking recently and I have finally gotten this all finished and documented.
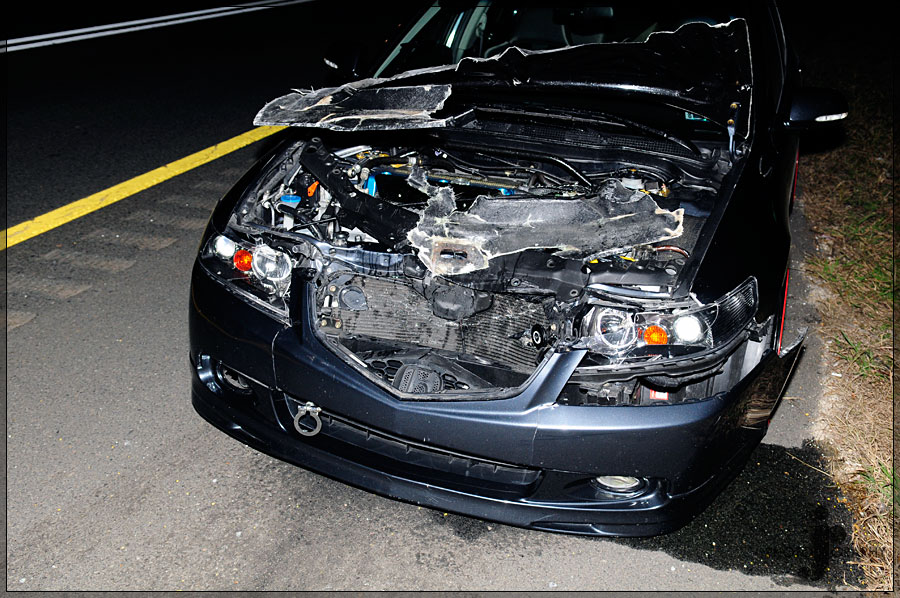
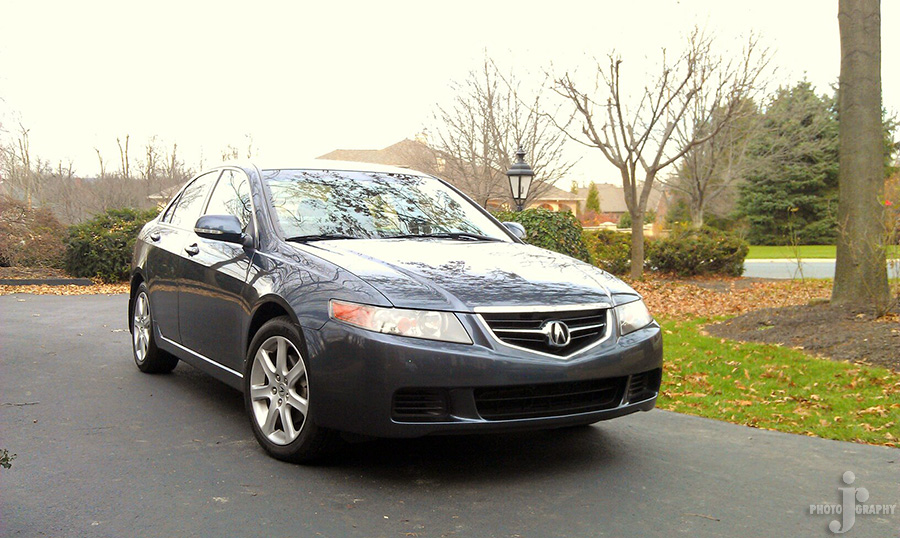
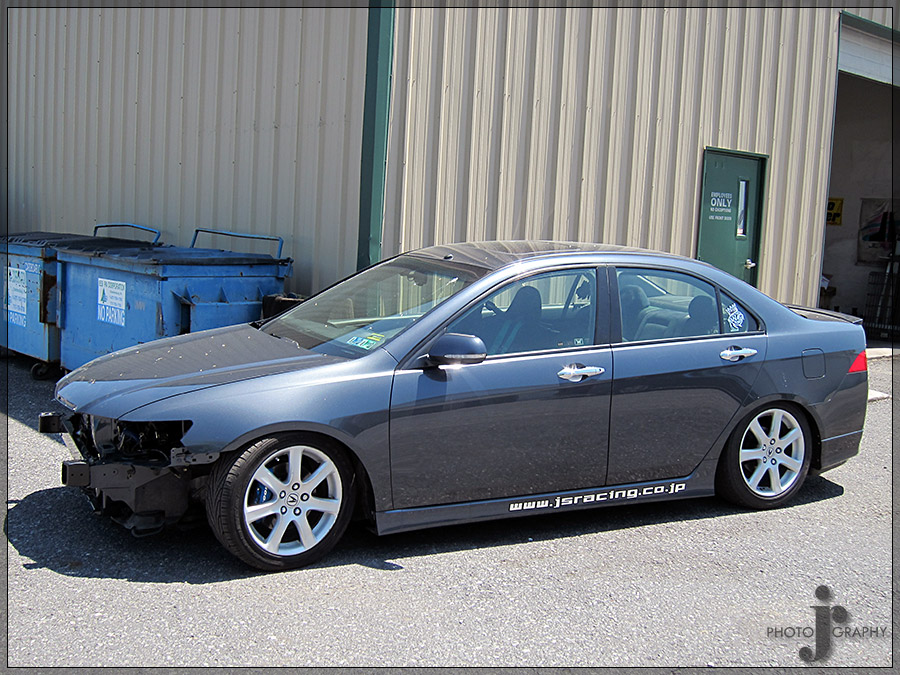
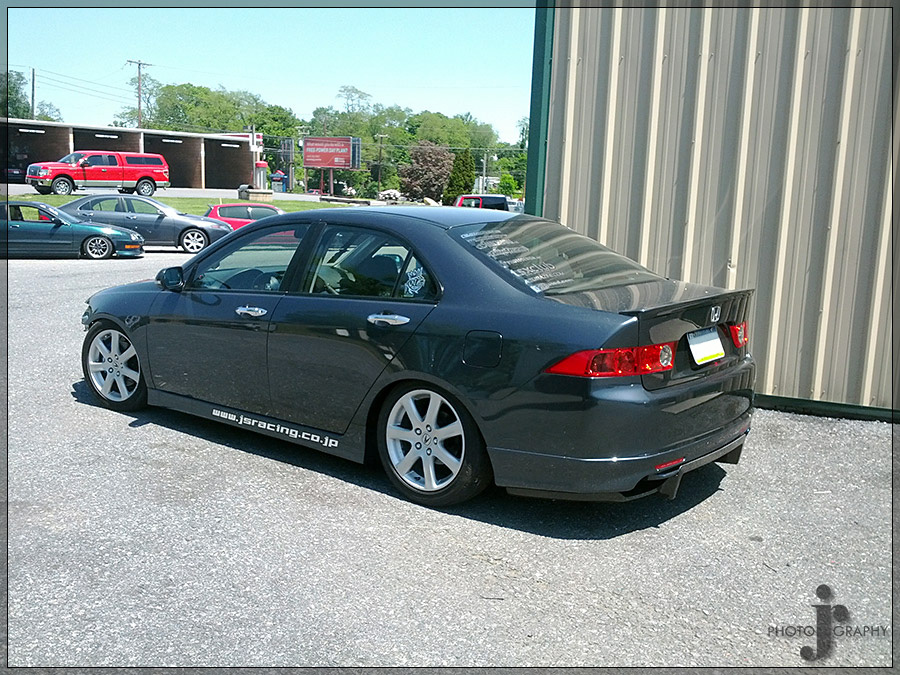
So as some of you might have seen in November 2010 my long standing continuous project, my Acura TSX met a terrible fate, I hit a dear at 70mph on the interstate. You can see the carnage from it below.
If you haven�t seen it or read about it you can read more and see pictures of what happened in this link.
https://acurazine.com/forums/car-talk-5/amazing-sunday-afternoon-pictures-798504/
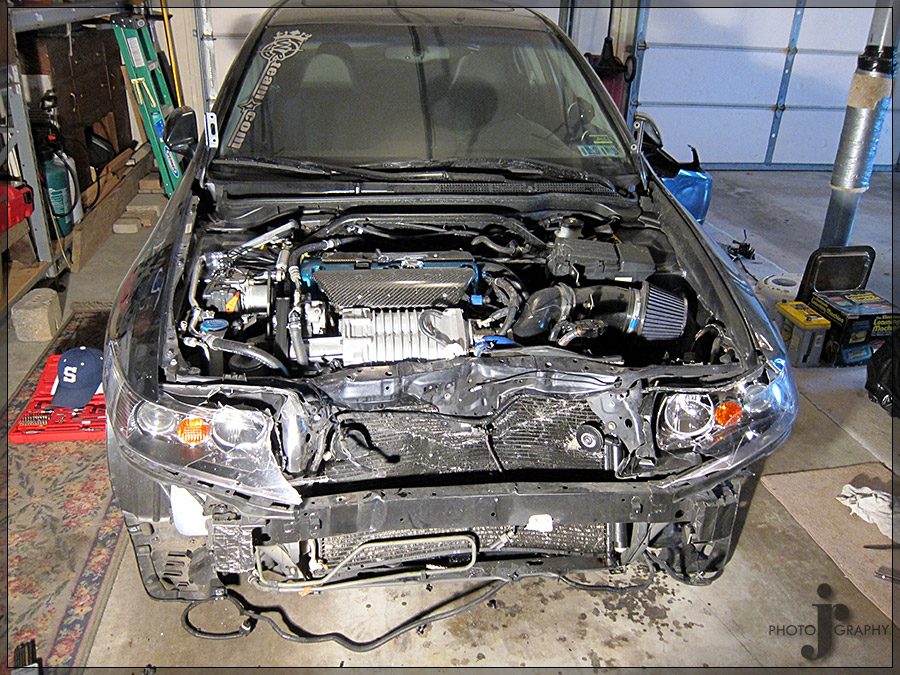
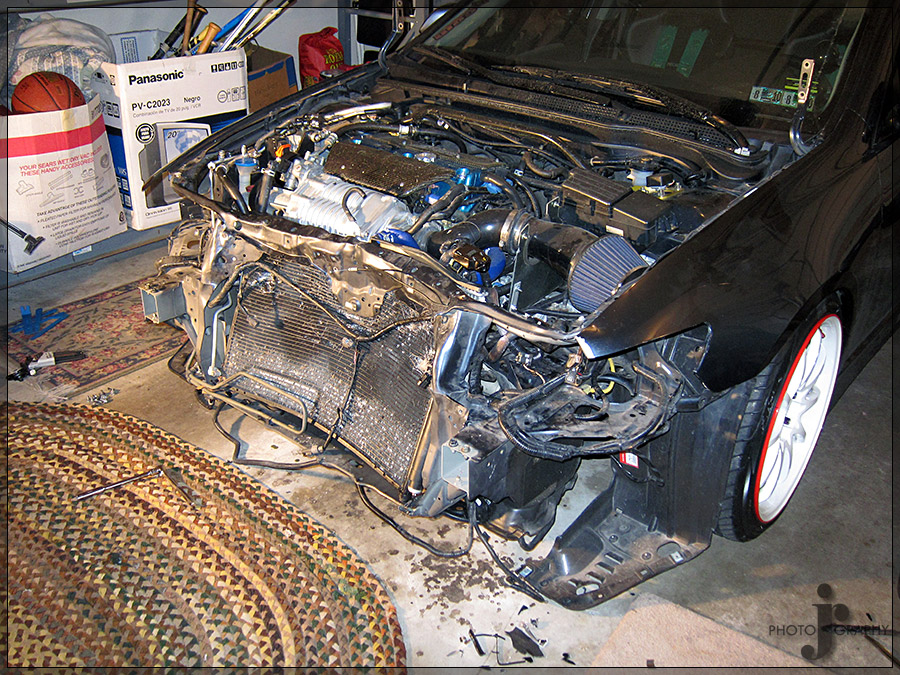
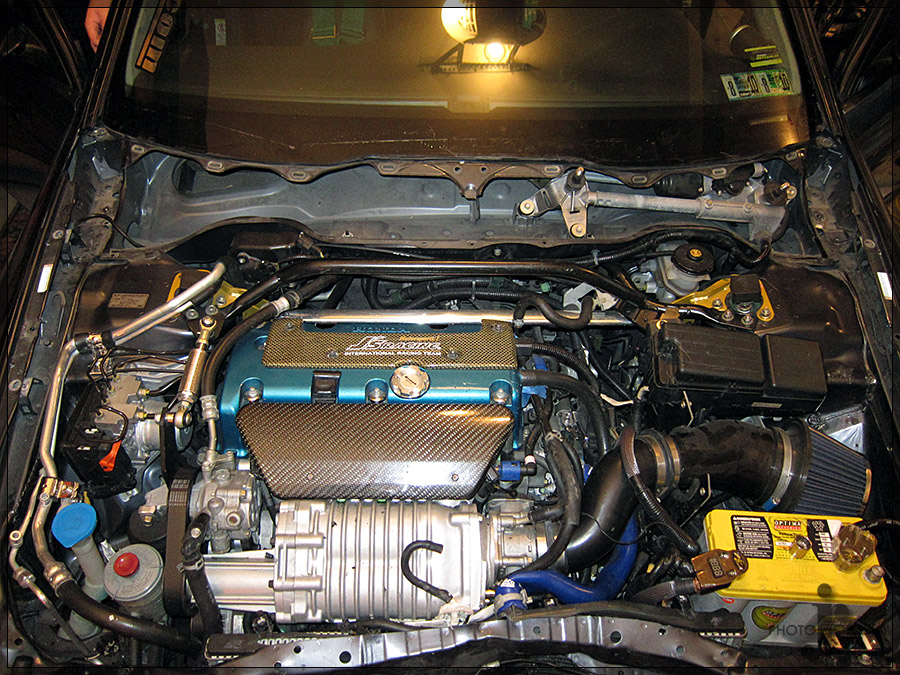
After the accident it was about a month and a half till I had time to move the car from NC to PA so I could begin tearing it down to see the extent of the damage and what parts would be needed for the repair. It also took a while to get things coordinated with the insurance company since I was working in NC and they wanted me in PA when they had the adjuster look at the car so I could explain things about all the parts and what not to them. Below are some pictures from the tear down process.
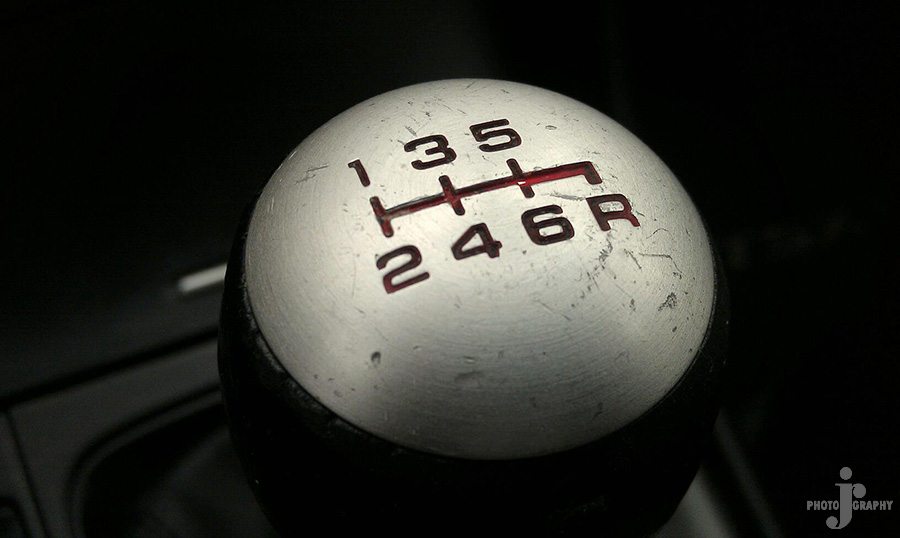
I am always planning to do new things to the car and one thing I had wanted to do for a while was either RHD conversion or a 6MT swap along with increased boost with the supercharger setup. In this case I thought the 6MT swap was the more cost effective route. Since I wanted to do an 6MT swap I began looking for a wrecked 6MT specifically with NAV from 2004 or 2005 as I didn�t like the changes to the gauges in 2006+. Now if any of you know a lot of details about the TSX there were not a lot of 6MT sold to begin with and were even fewer sold with NAV and 6MT. So with all that being said I was not up for an easy task of finding a semi local (or even continental US) wrecked car with little to no front end damage.
After a few months with no success finding a donor car I decided to at least order the replacement parts that would be needed in March 2011 as they would take a while to arrive. It had taken a while for me to get around to ordering the parts after still being bummed about the whole incident in the first place so I was already getting a late start on things.
I continued searching for donor cars while also finalizing the plan for other upgrades I was planning to do during the rebuild. I didn�t really just want to buy parts to do the 6MT swap as I am a bit OCD and wanted everything about the swap to look factory perfect so a donor car was the only way to not have to buy any little missing piece constantly from the dealer.
After having looking for a car for about 9 months I was really beginning to get irritated. I had found a few but lost the insurance auctions for the cars cause of either loosing internet connection at work at the last second or just feeling that the cars were bid higher than they were actually worth. About this time my dad also mentioned he was looking for a good commuter car that got good mileage, comfortable to drive, and pretty cheap to maintain. I told him that the TSX would fit all those need and I had torn mine apart so many times I could do most of the service on it for him. He wasn�t opposed to the idea so I started searching for a good condition 6MT with NAV that I could have torn apart. After finding a few higher priced ones we found a few good candidates and went to test drive them. We ended up purchasing one in October so I finally had the donor car for the swap. The other car would be converted to an AT using the parts from my car. Below are pictures of the donor car.
Just after this I began receiving my various shipments of parts from Japan in November I was finally able to start to get everything together for the rebuild to start. At this point I began coordinating with the shops I had chosen for a rough timeline of how things would go from one shop to the next.
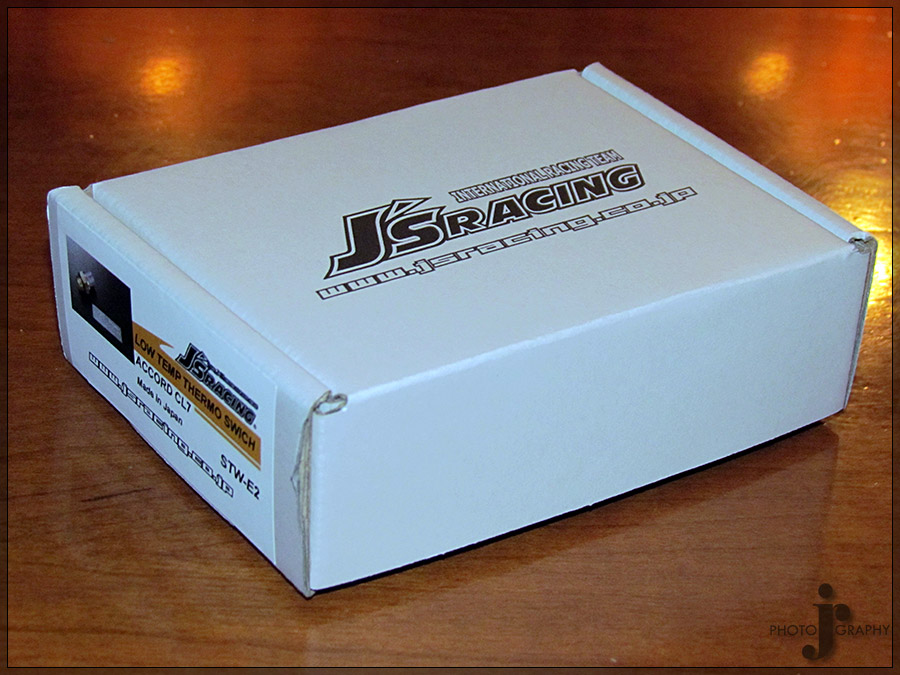
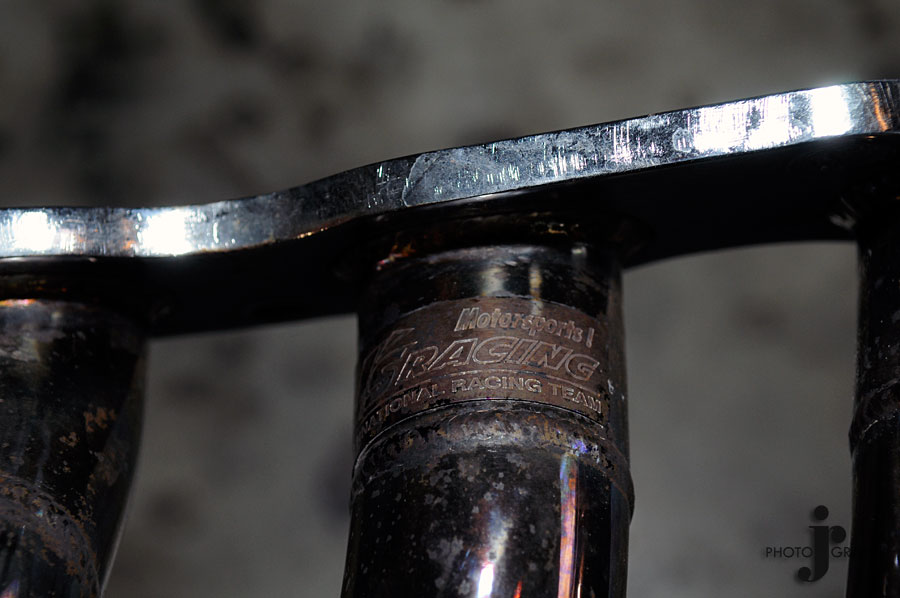
At this time I unfortunately got busy with things on a personal level with the holidays and also with work so unfortunately things didn�t get underway then until March 2012. Below are some pictures of the new parts that came in. I made sure to replace parts that were damaged or destroyed even if I was not going to replace them right away. I also picked up some parts I was not sure I was going to use right away as they flowed with the theme of the car of mostly J�s Racing parts.
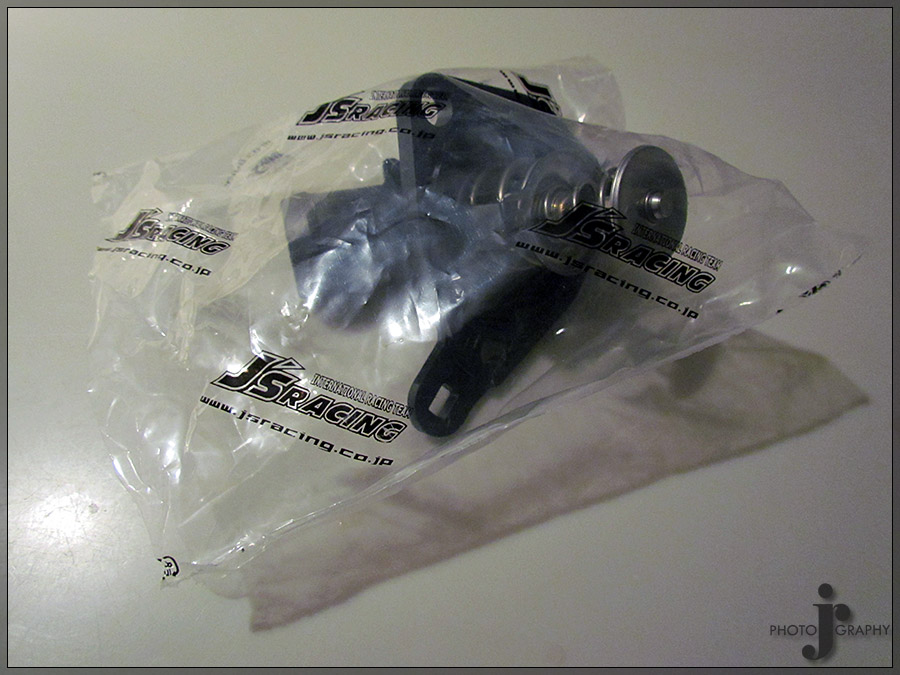
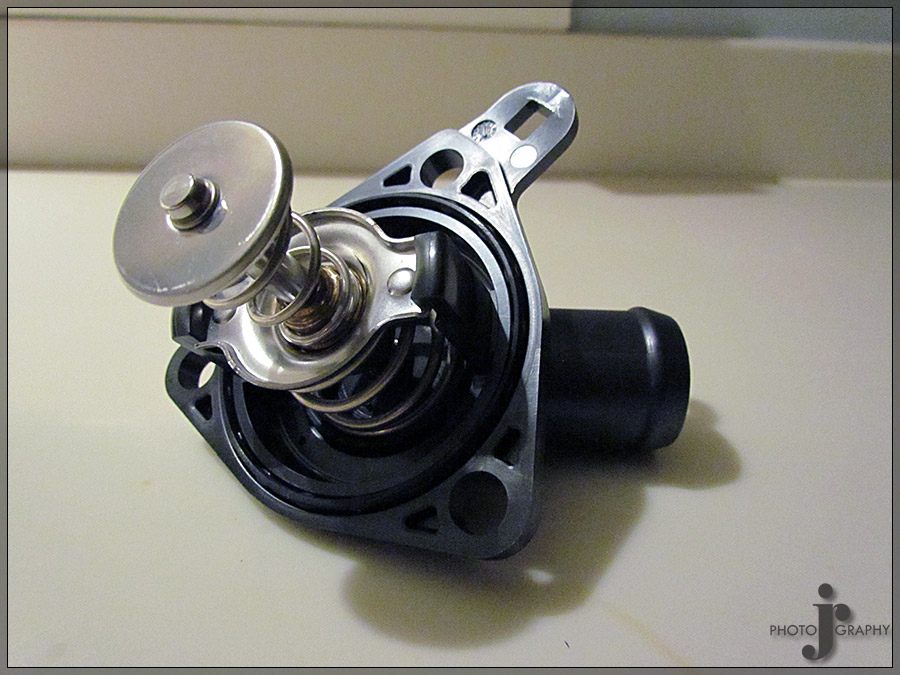
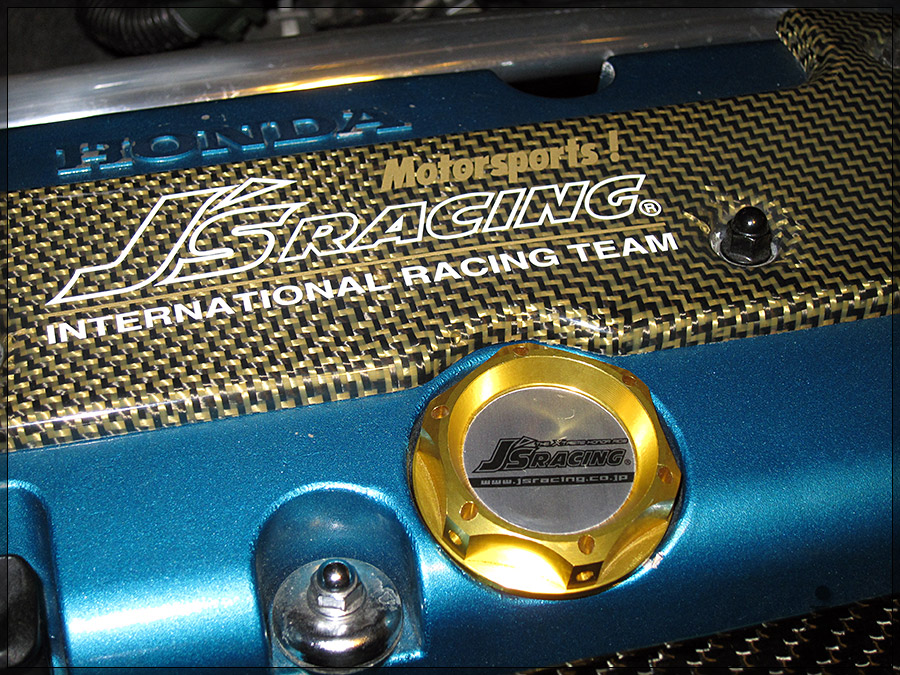
J's Racing Temperature Switch
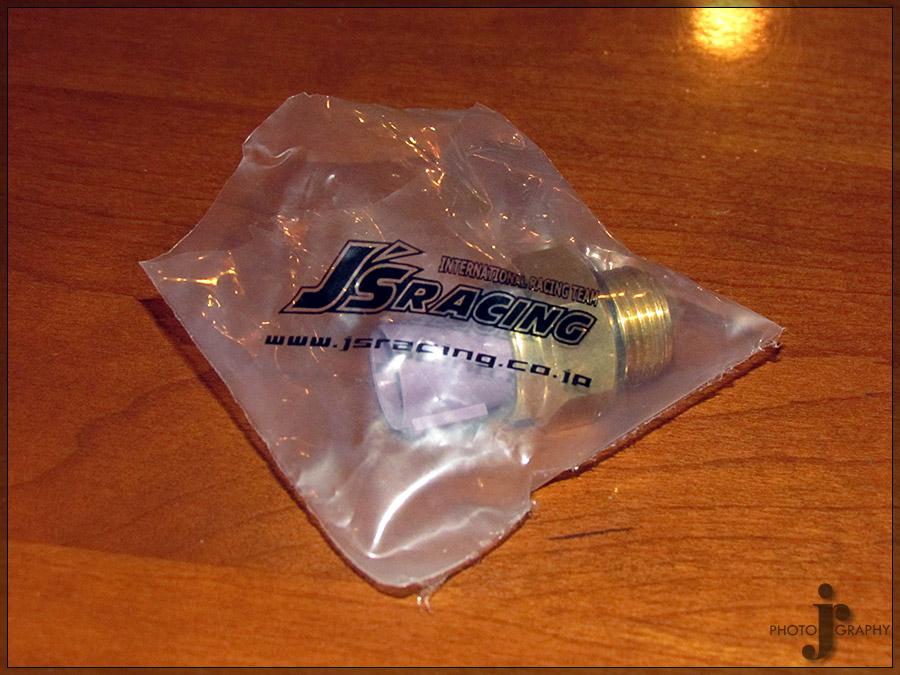

J's Racing Fan Switch
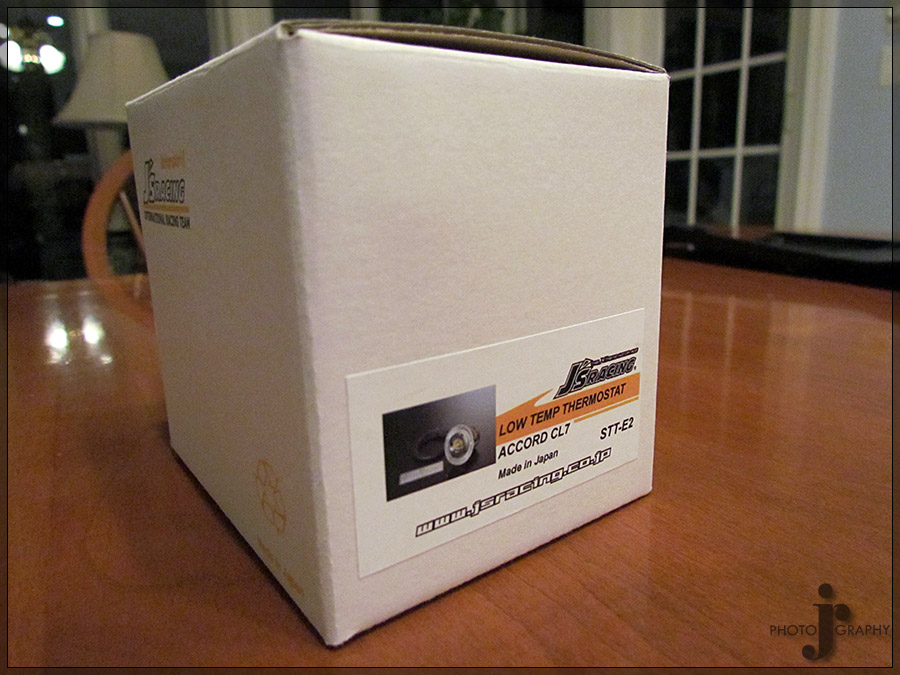
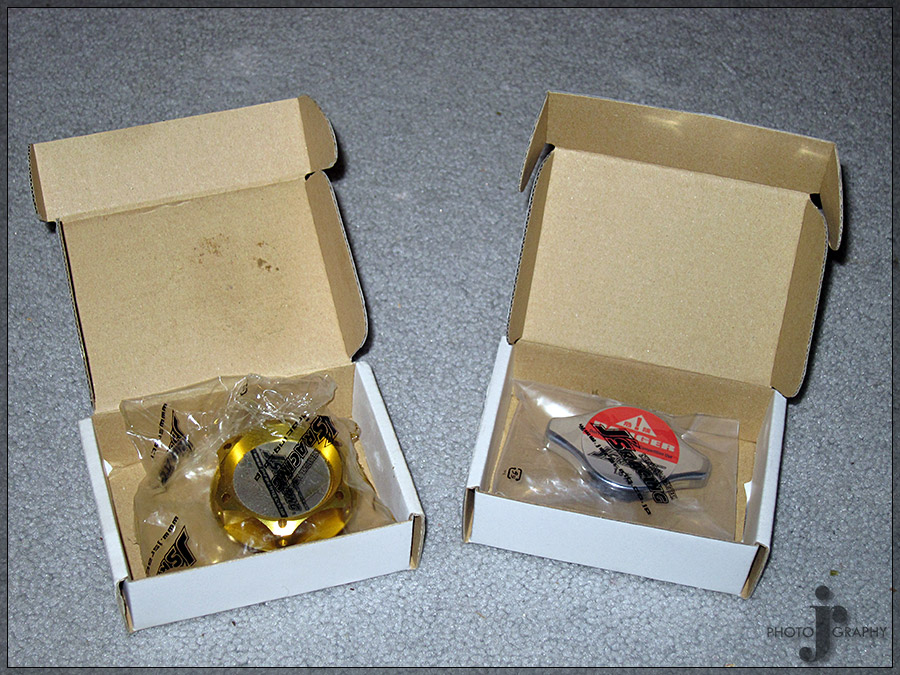
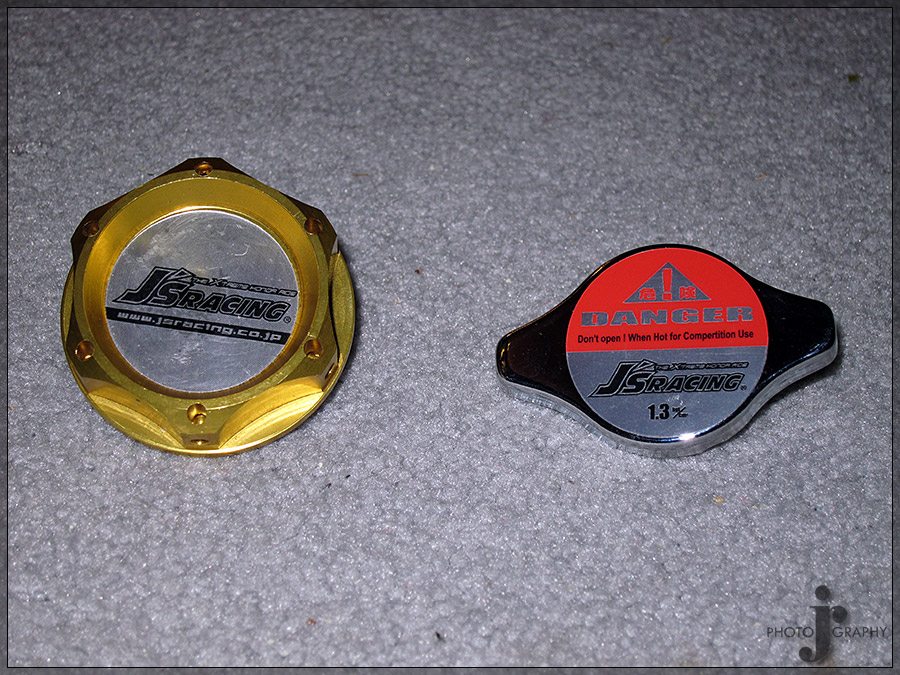
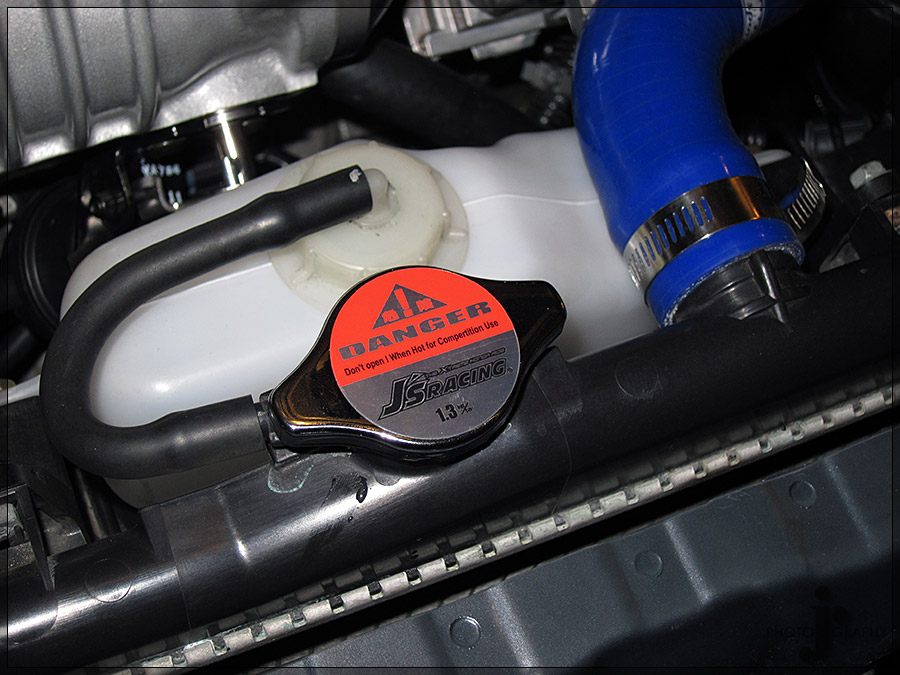
J's Racing Radiator Cap & Oil Cap

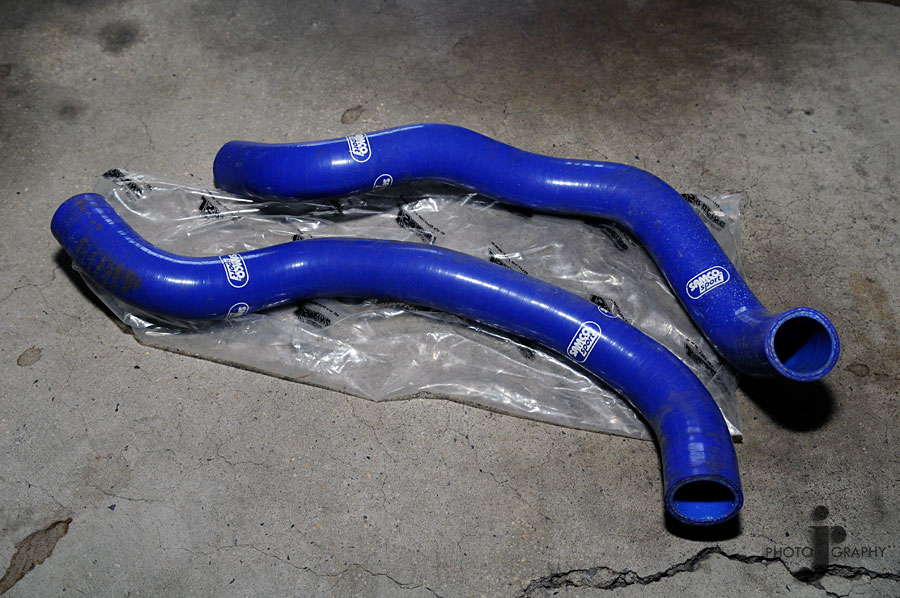
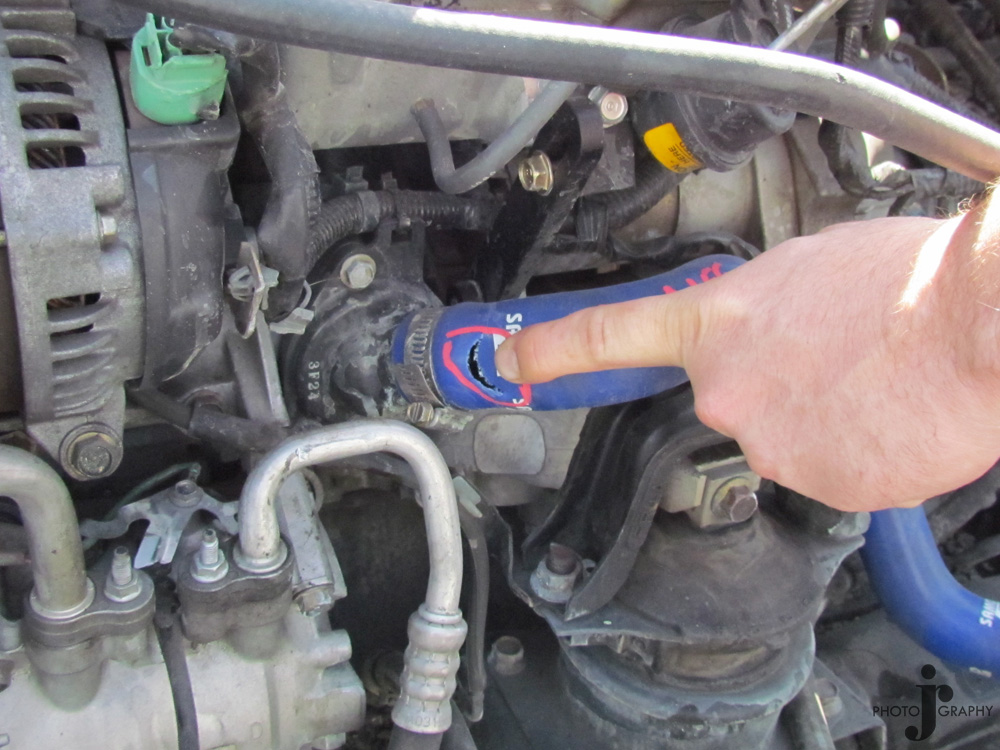
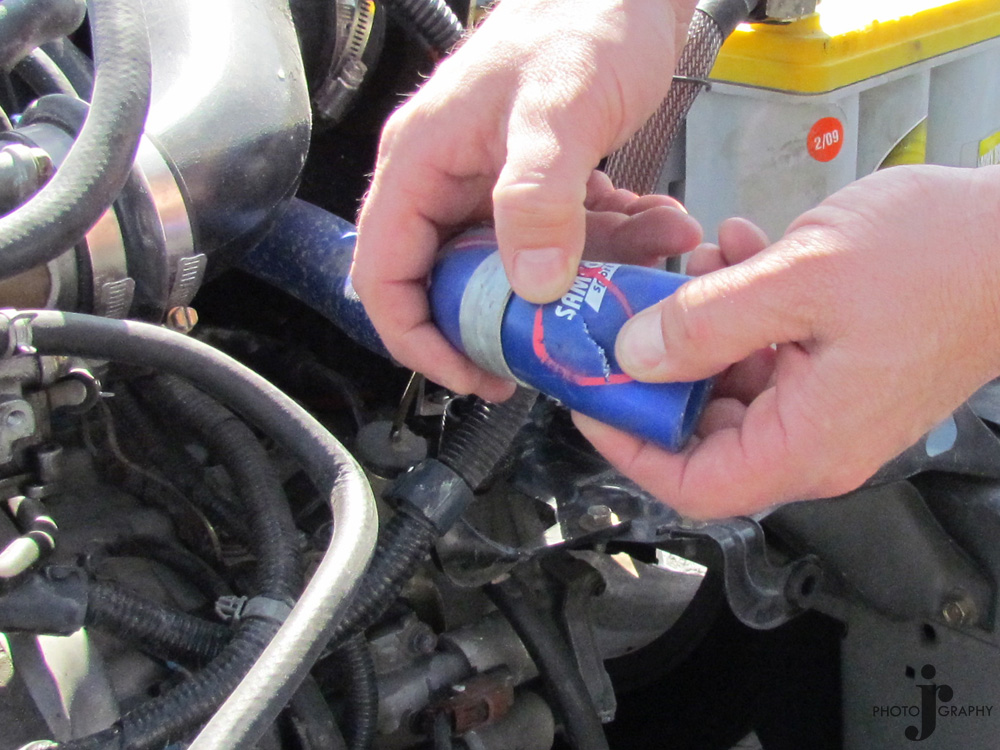
J's Racing Samco Blue Radiator Hoses (Discontinued)
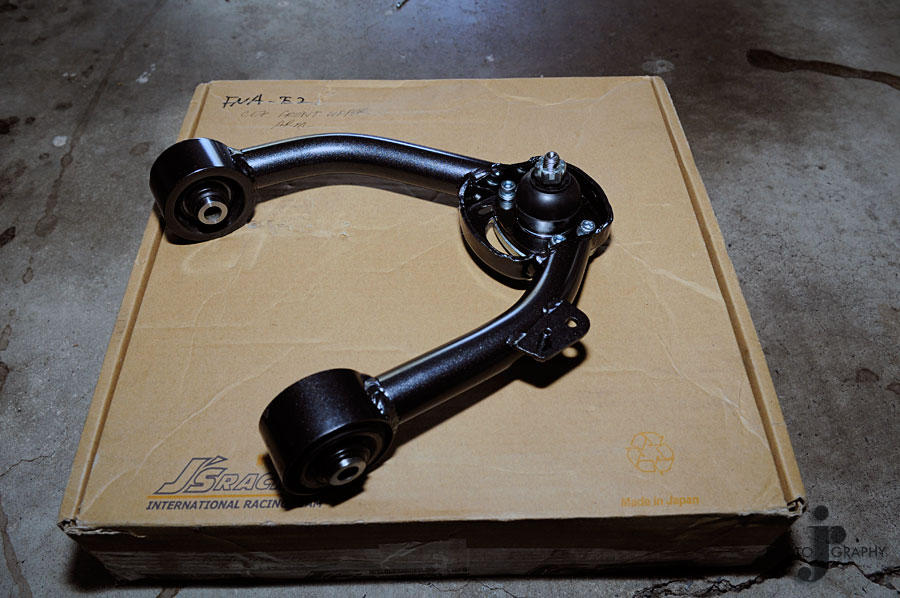
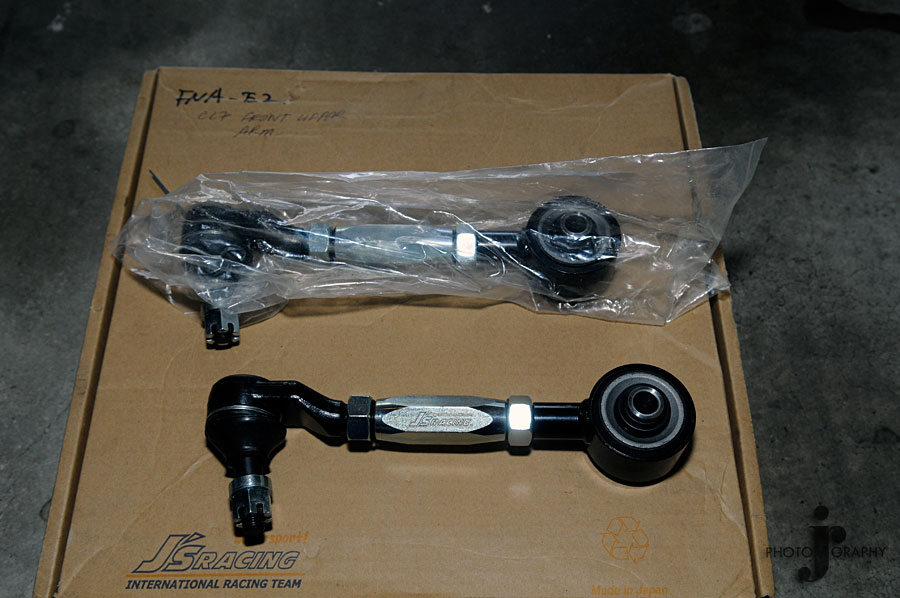
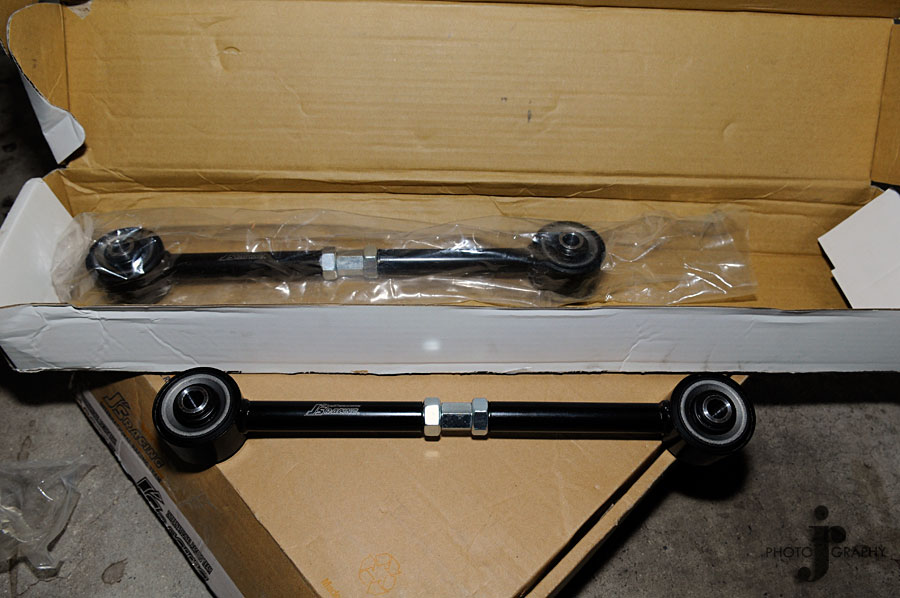
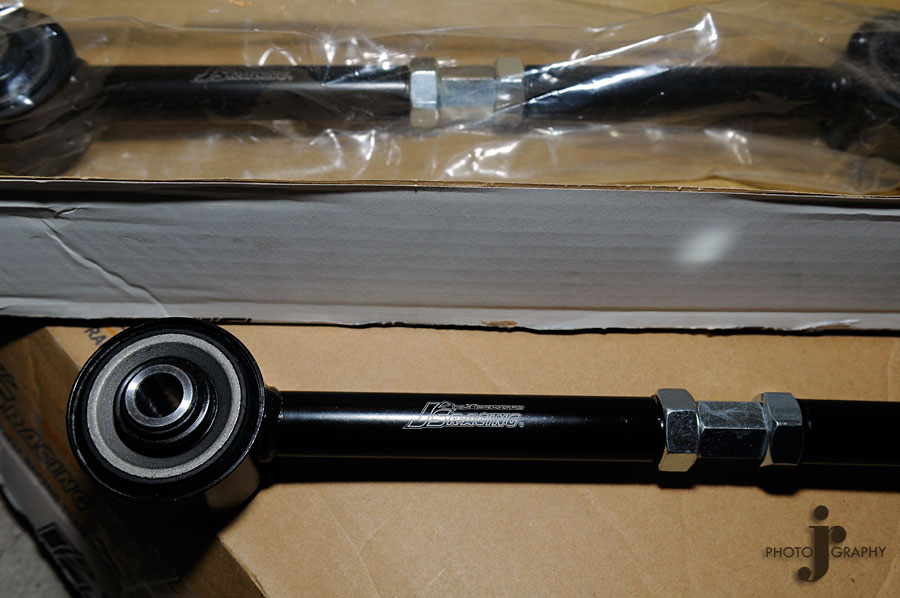
J's Racing Upper Control Arms

J's Racing Rear Upper Camber Arms
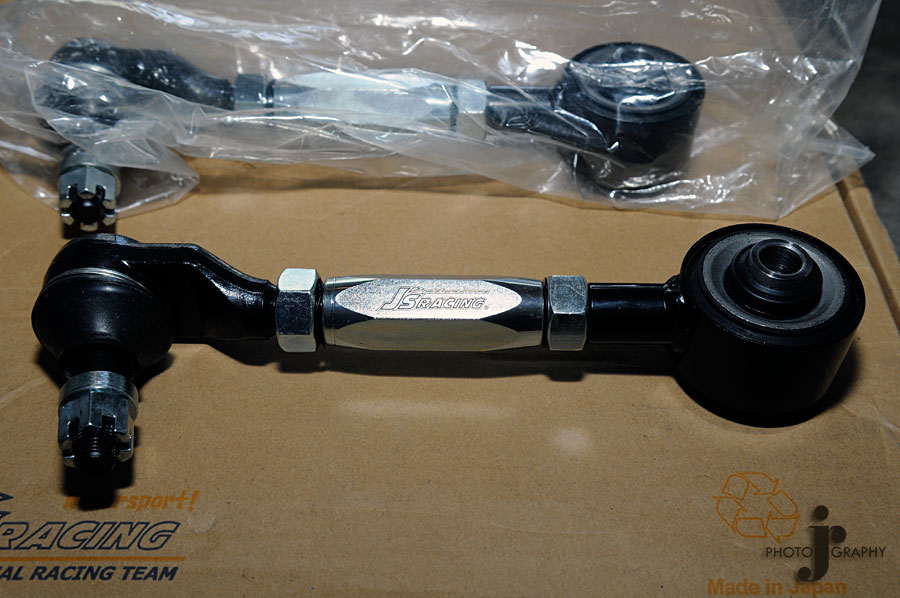
J's Racing Rear Lower Camber Arms
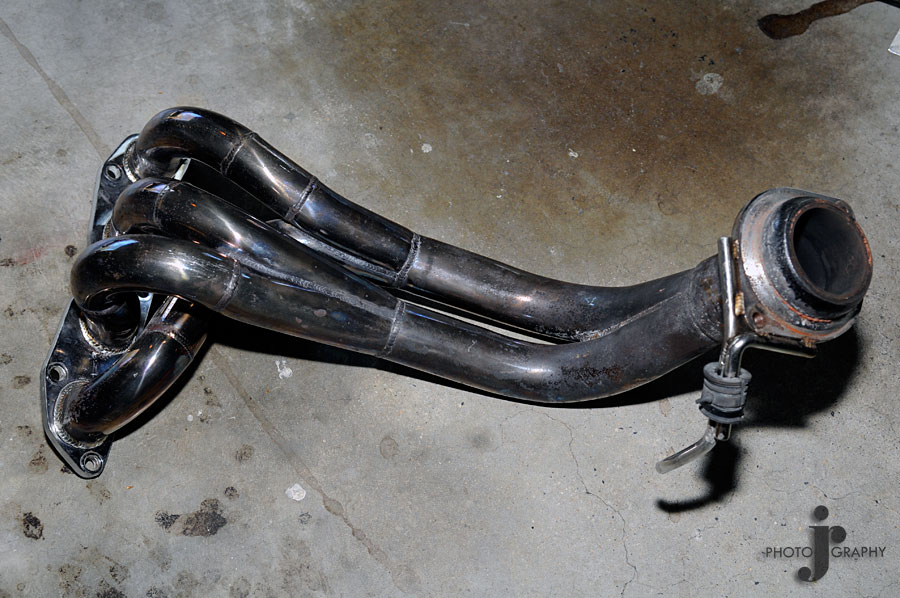
J's Racing Header
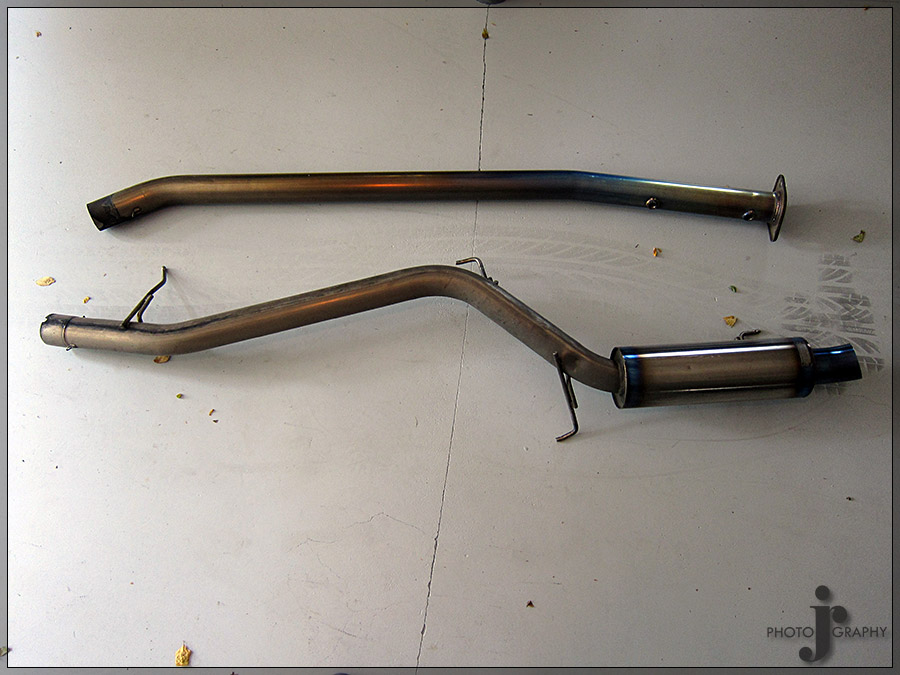
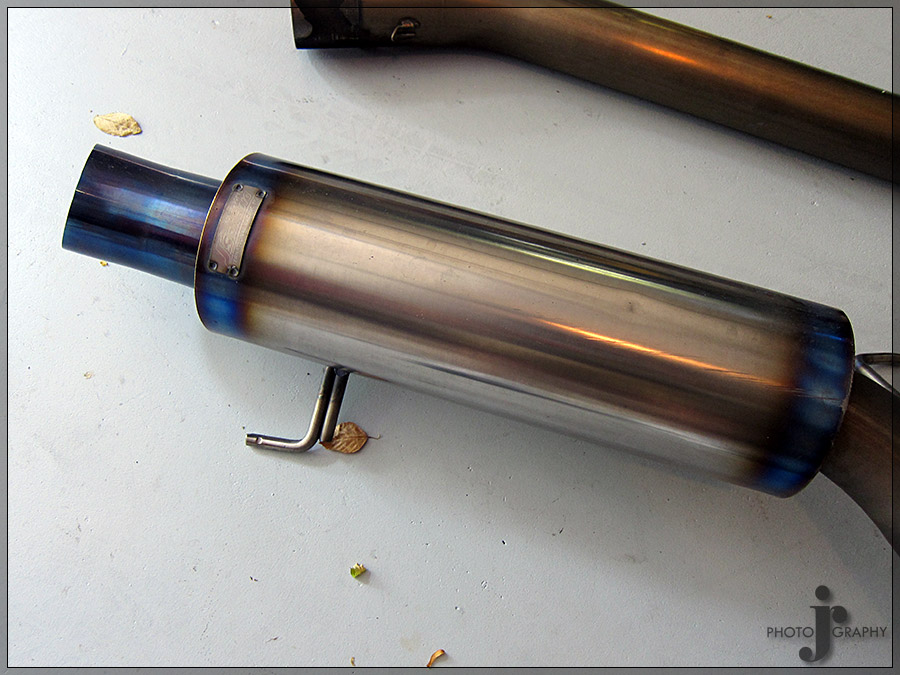
J's Racing 70RR Exhaust

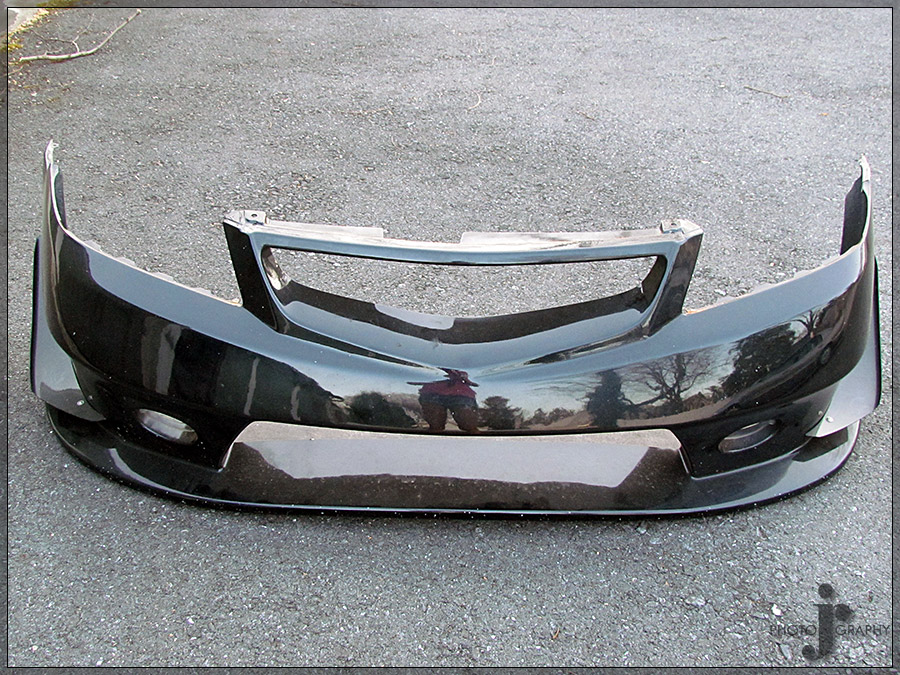
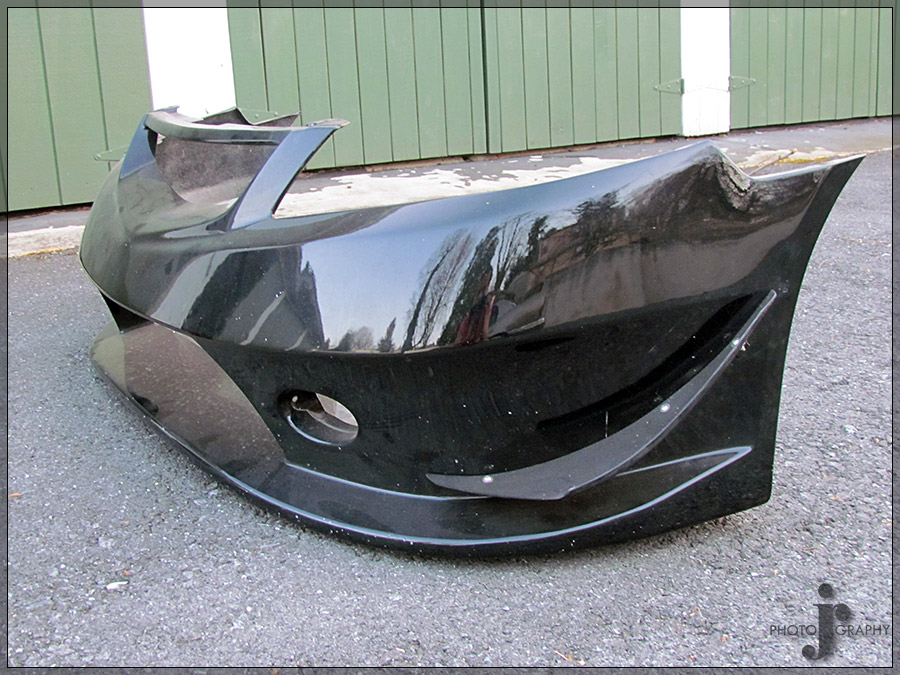
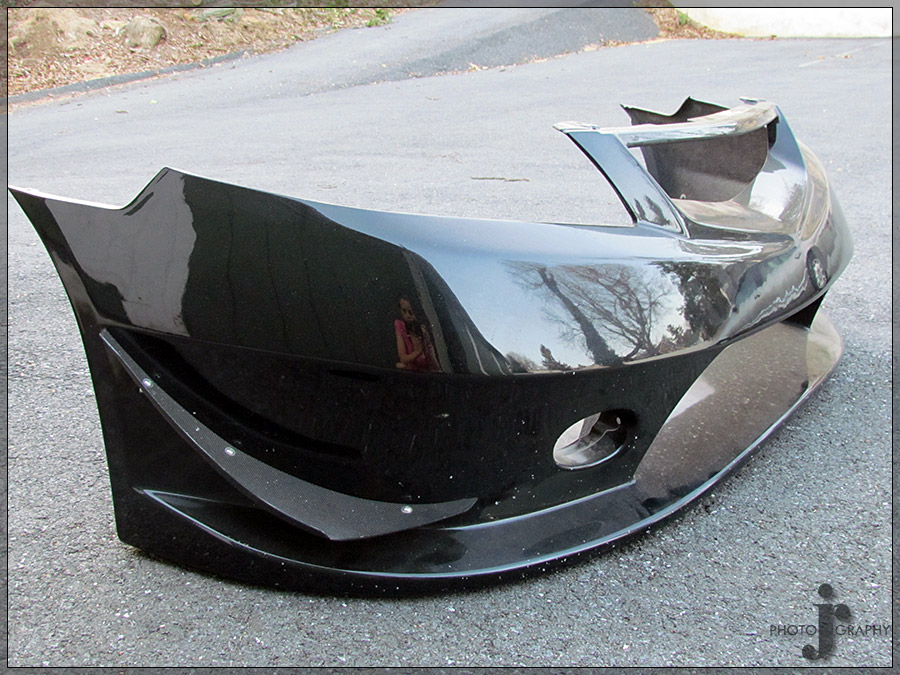
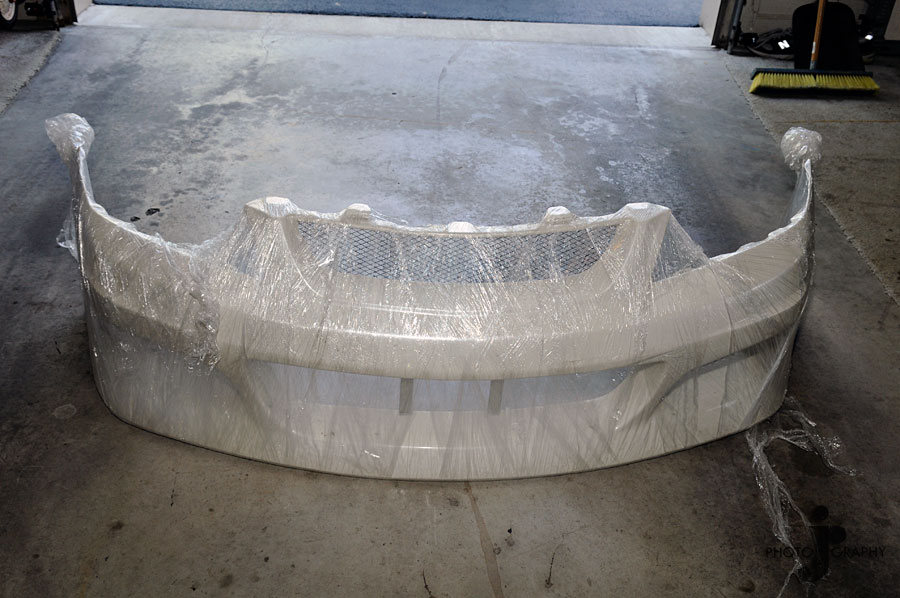
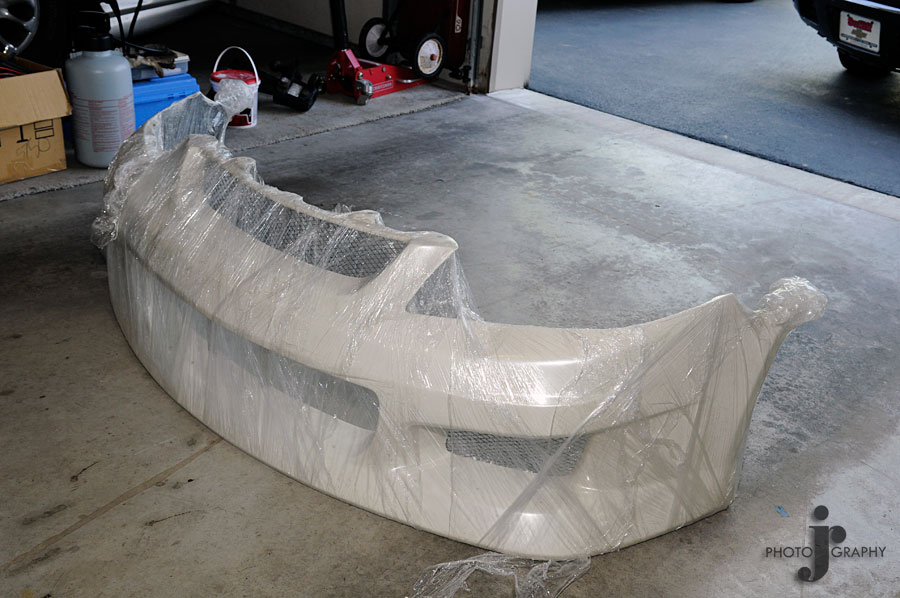
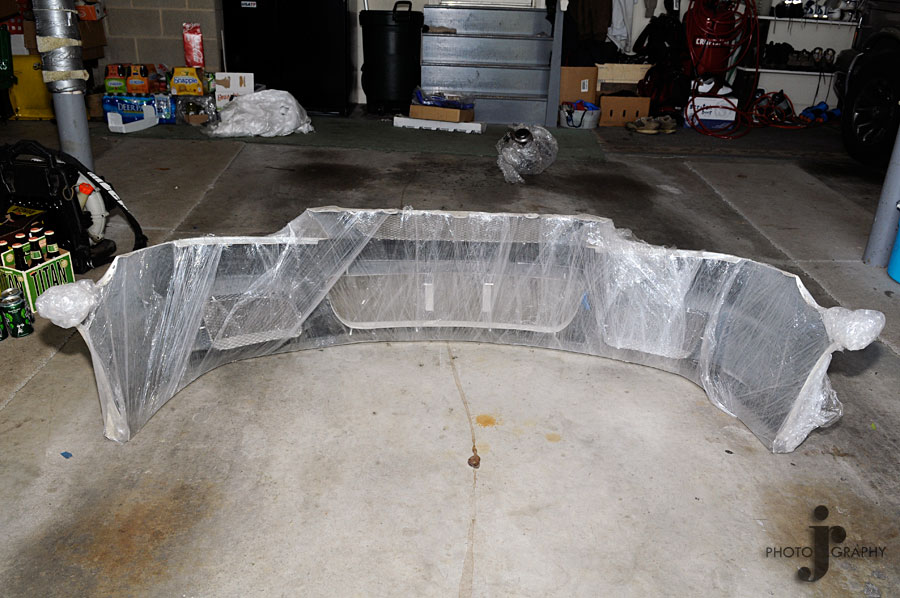
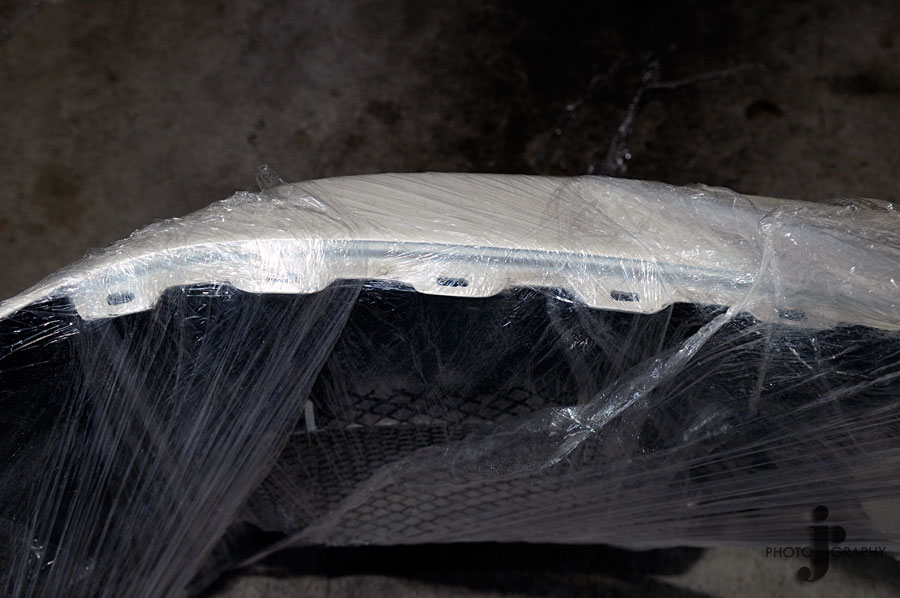
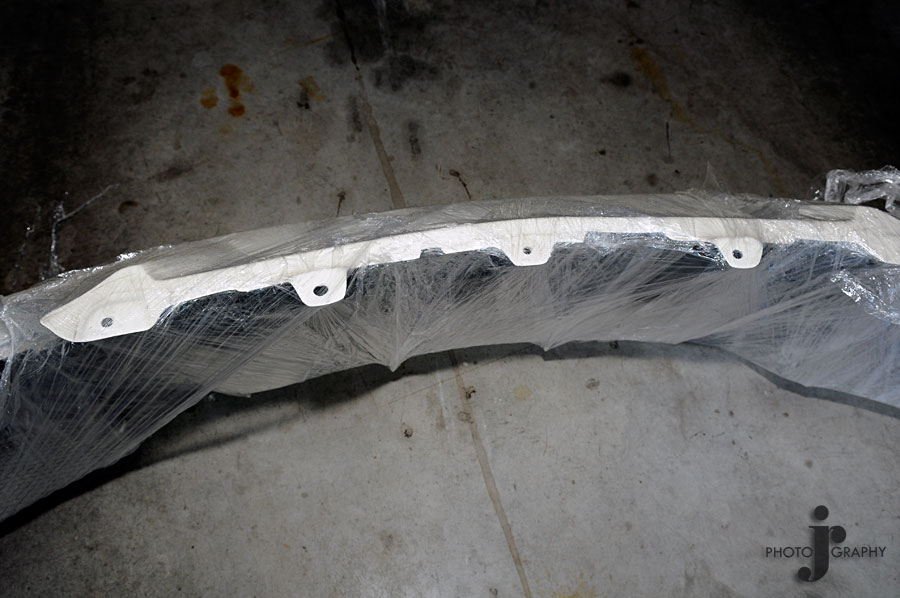
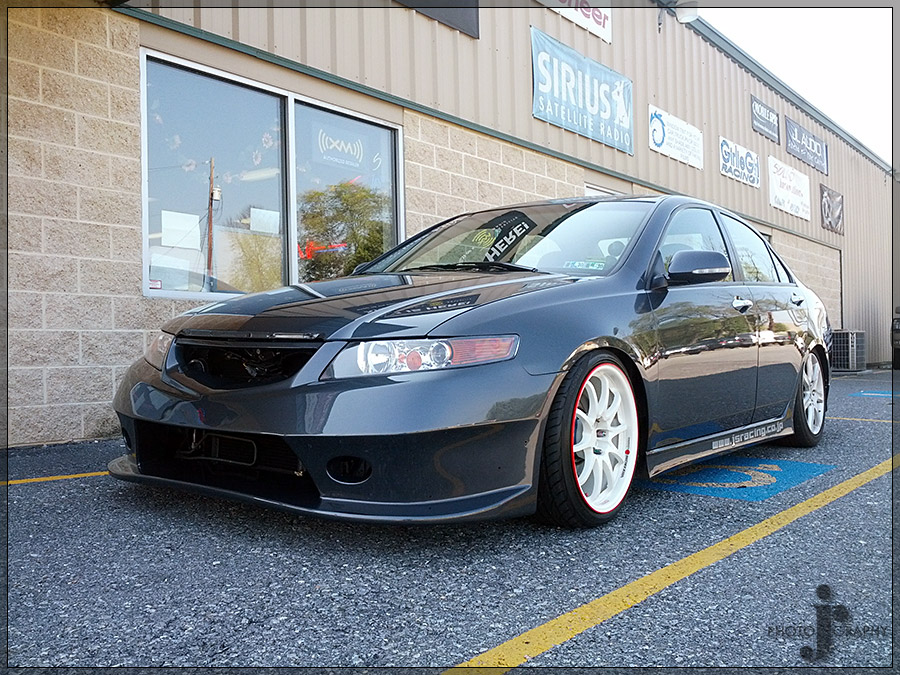
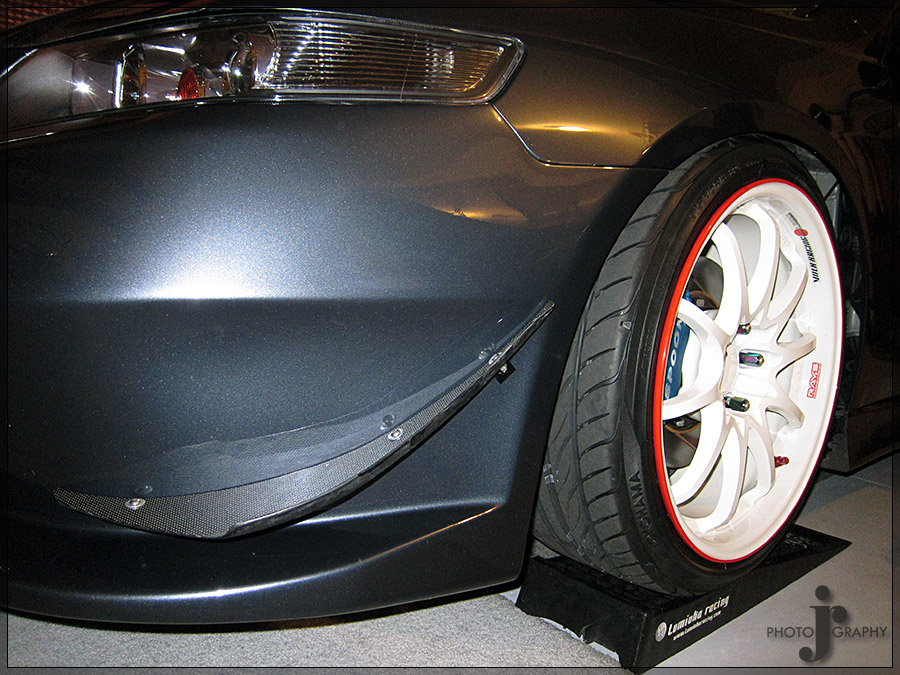
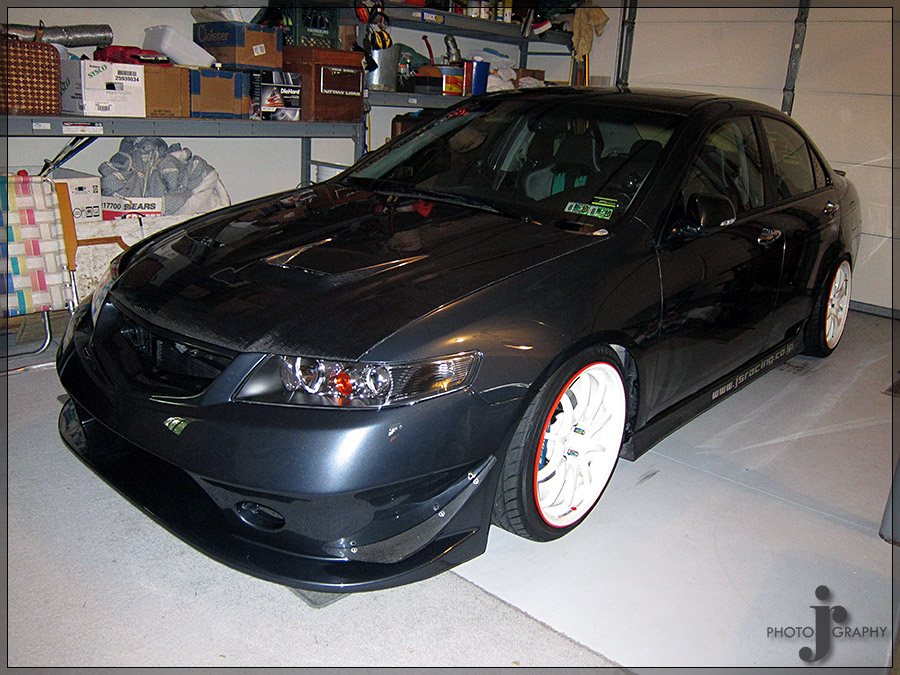
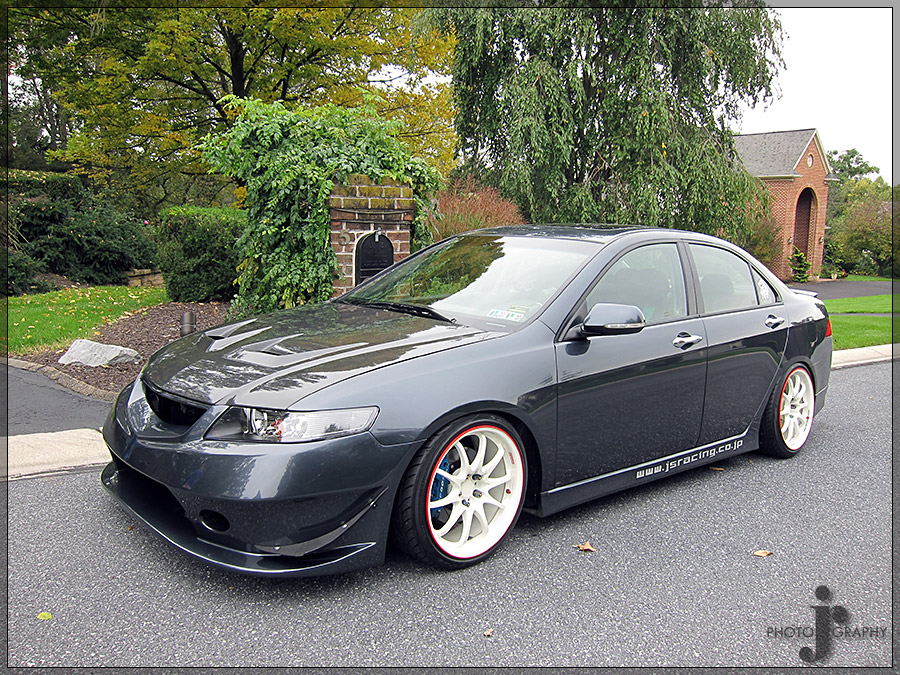
J's Racing Bumper
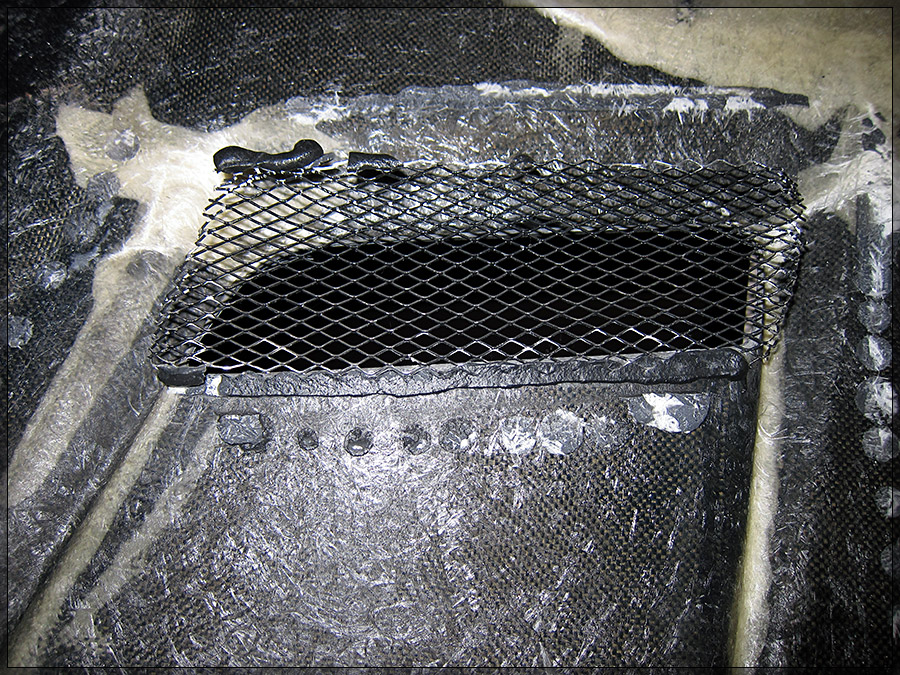
J's Racing Double Sided Carbon Fiber Hood (Only one that has been made)

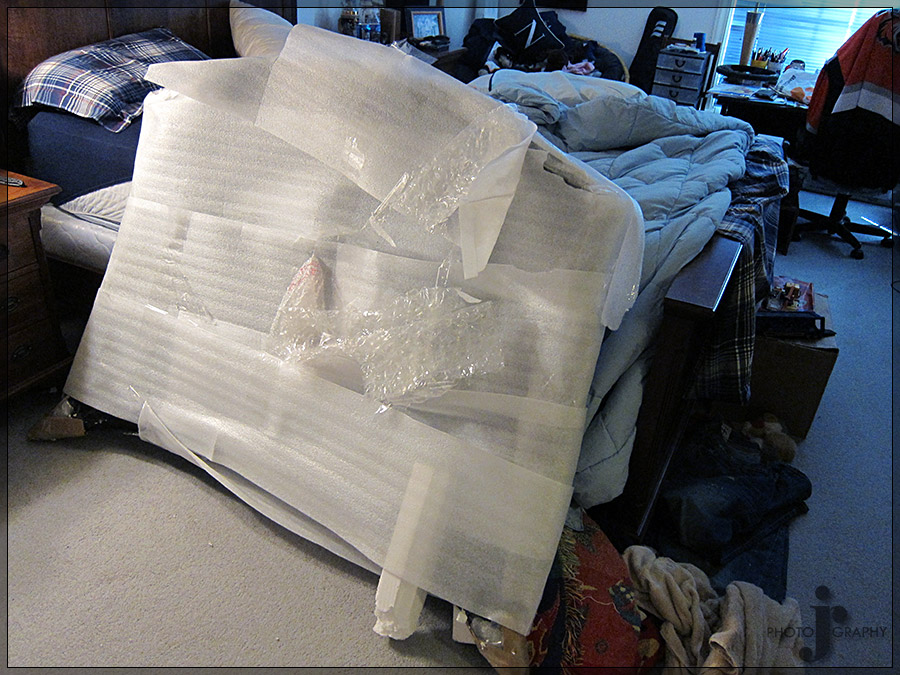
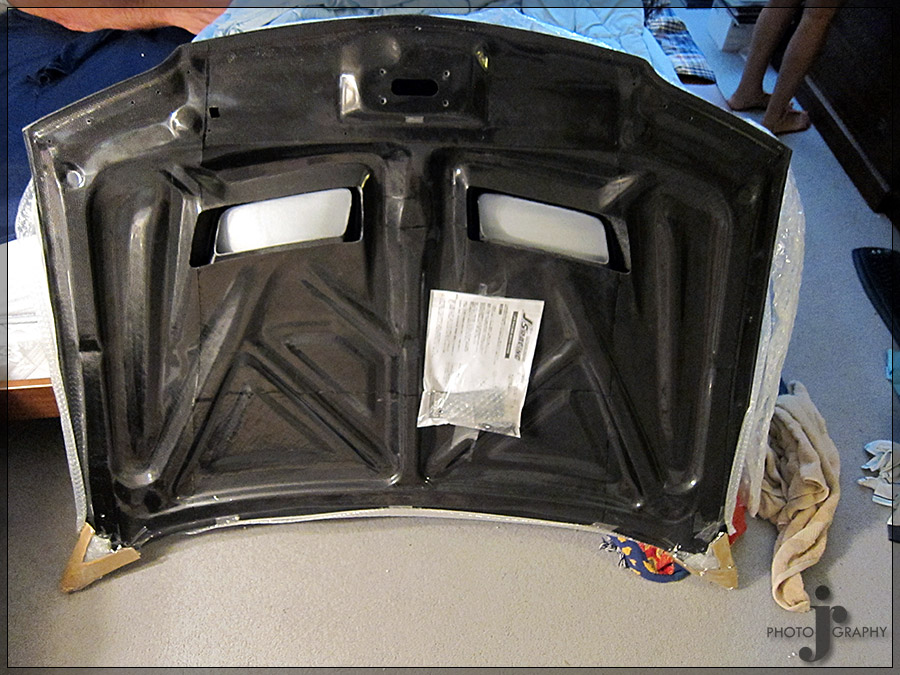
The top is absolutely perfect
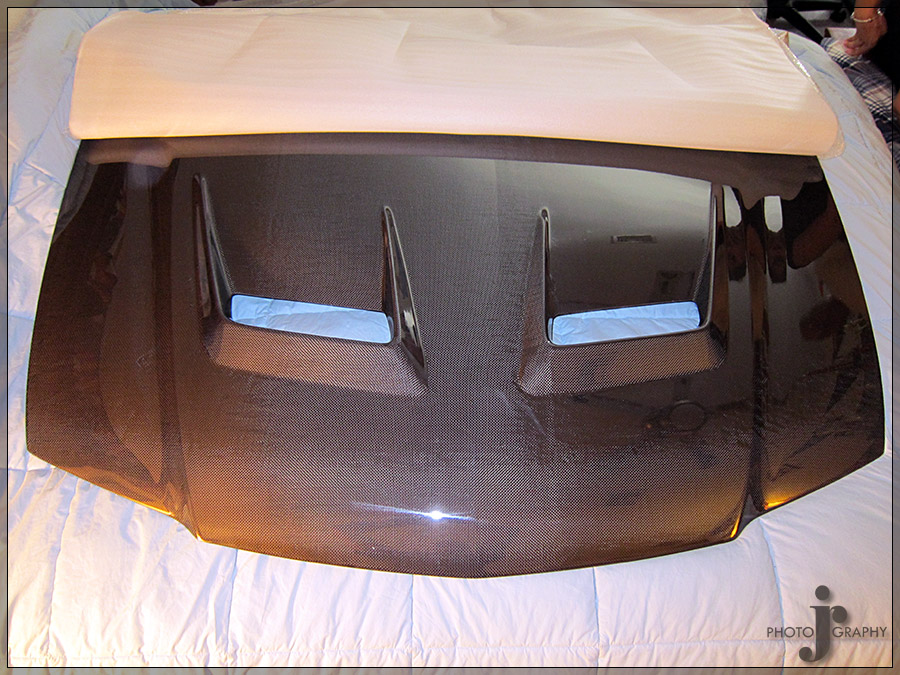
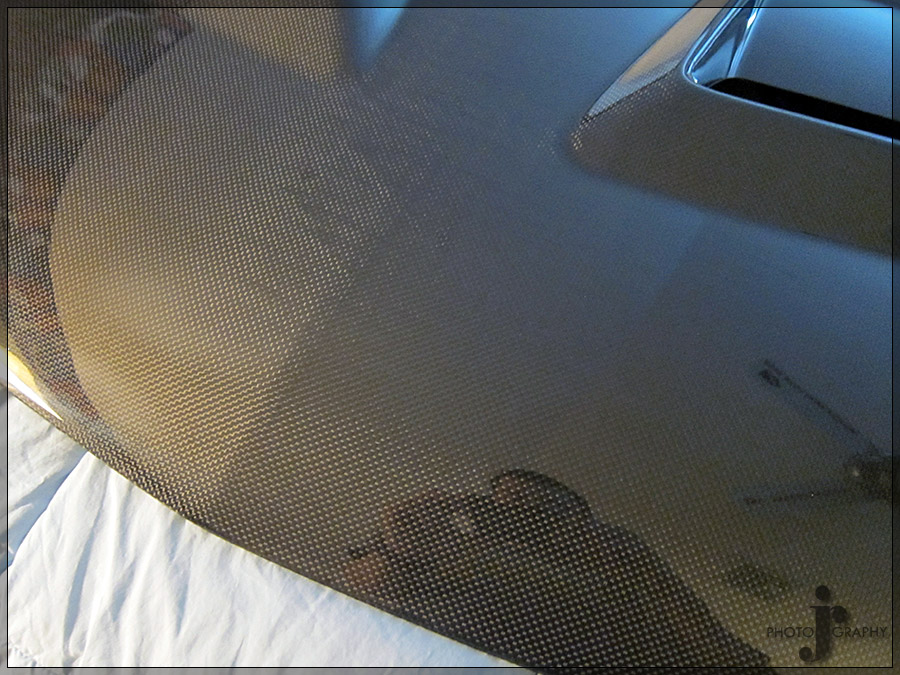
The underside isn't perfect but it is a race hood

Spoon Bumper
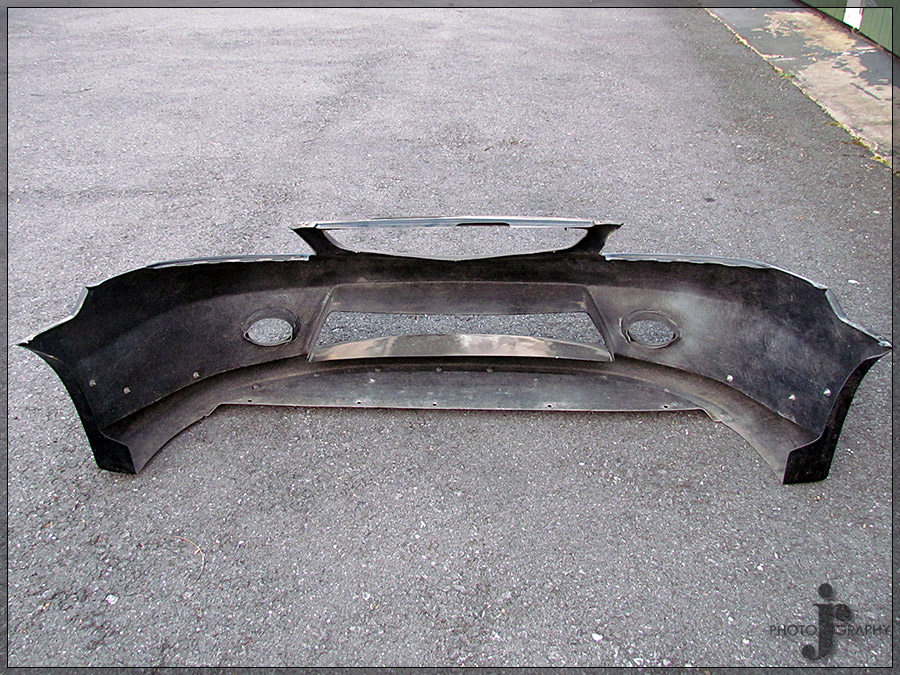
JDM OEM Bumper Support

Also have a replacement J's Racing Strut bar to replaced a cosmetically damaged one an a new J's Racing Intake as well but still are not unboxed yet. Unfortunately it turned out that I would not be able to use the J's Racing intake.
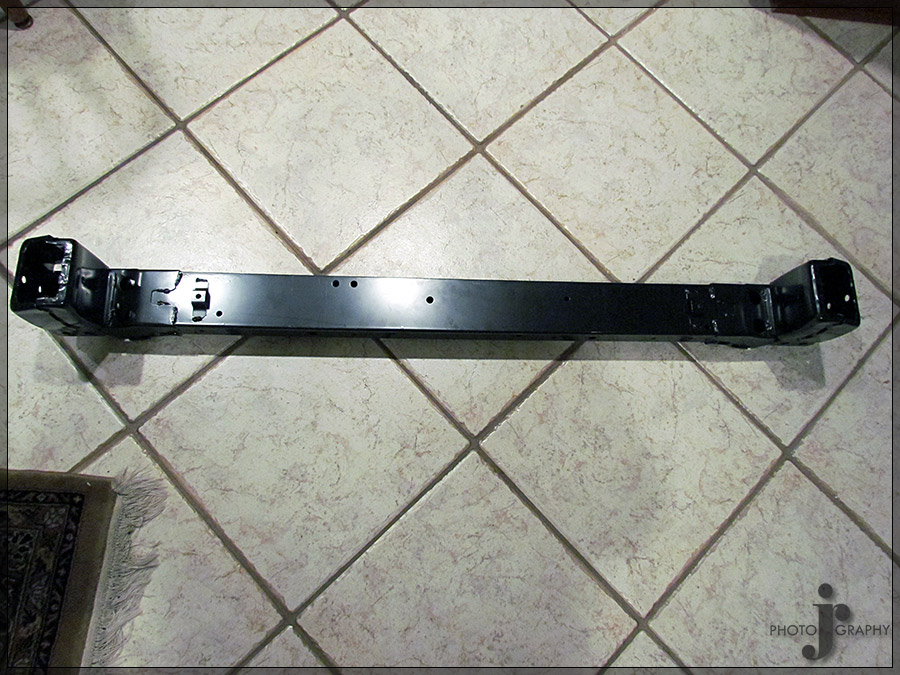
The car started at the body shop first getting a new a whole new rad support , two new fenders, and new front wiring harness. Also at the same time more damage was found on the car regarding the supercharger setup as well.


I didn�t want to give the body shop the new carbon hood so I gave them the original factory hood to put back on the car for the time being so they could align the fenders properly. There is no bumper on the car yet because I had only just received the new bumpers and had not yet decided on which one of the two I was going to get painted to put on the car.
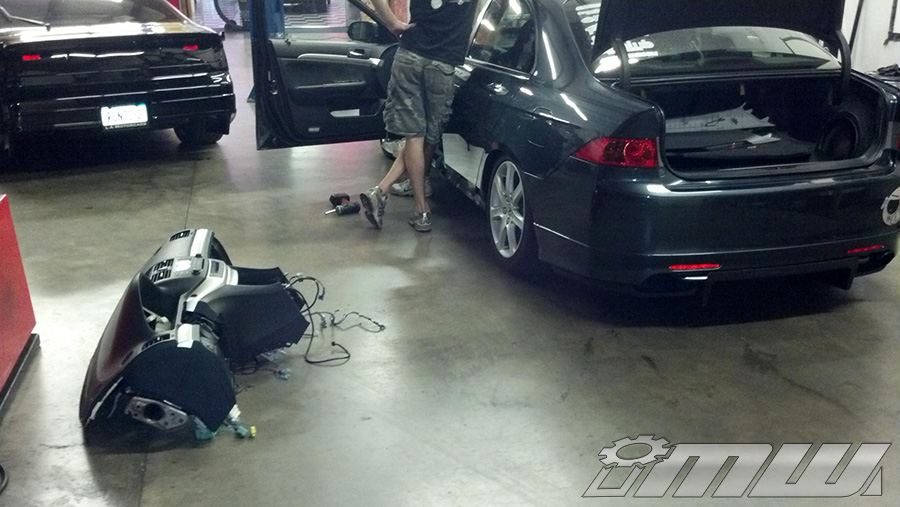
After the body shop the car was transported to Innovative Motorworks to have the transmission swap and supercharger upgrade done. These guys were real troopers as the process would end up taking much longer than anticipated as I was having two cars swapped together. It would end up with this not being the best option to go with money wise but I am rather anal for attention to detail and wanted everything to appear stock as far as wiring and bolts and what not in the engine bay and interior.
Being that I did not do the work on the car I do not have many pictures of these stages of work and those that I do are from a camera phones and were sent via MMS message to me. I am trying to get the originals emailed to me at least so they may be a little bit better quality down the road.
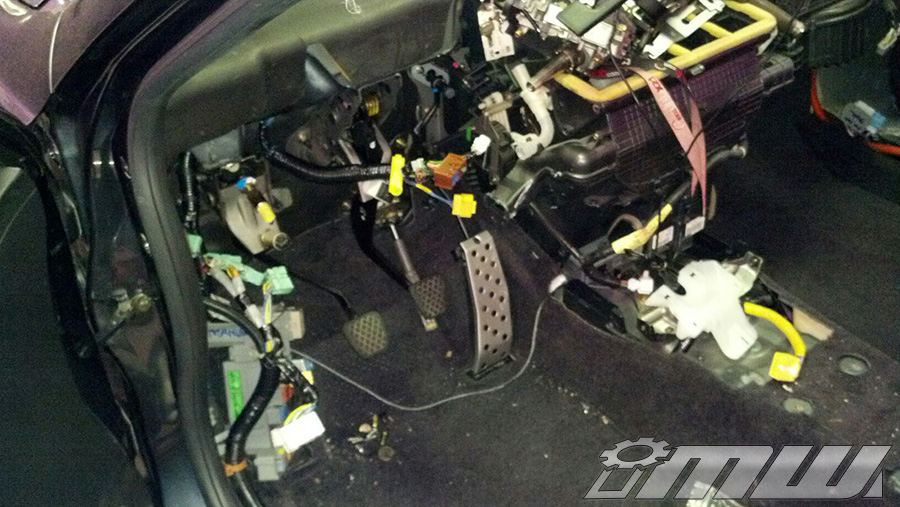
The swap was not easy to begin with and only got harder down the road as it was figured out since I was doing a swap from an AT non-navi car to a MT navi car that every wiring harness in the car except the trunk lighting harness would need to be swapped out. I wanted this done without breaking clips so it added quite a bit of labor to the project that was not expected unfortunately. However, at this point I was too far in and I was not about to turn back on the project. I had planned on doing the navi swap myself, not only to save labor but also because I like to work on the car myself as it is one of the most enjoyable parts of owning a modified car in my opinion. Unfortunately, it all needed to be done at once for the car to be able to run correctly.
The beginning of the swap
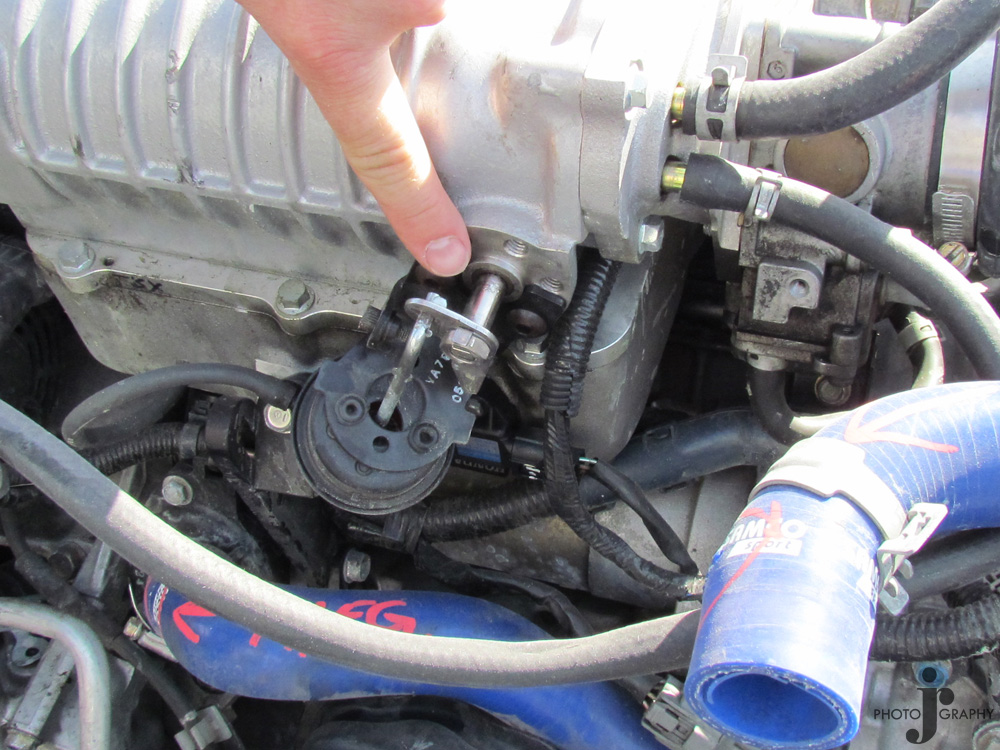
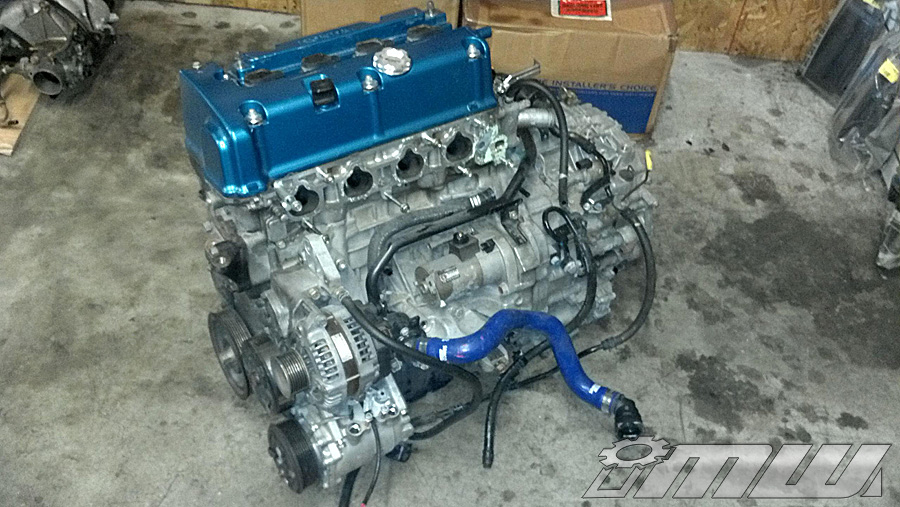
The motor was pulled from both cars and the sub frames were dropped and swapped to the opposite car as it made the MT/ AT swap much easier. While the motor was out the 06 camshaft, larger crankshaft pulley, 50 degree VTC gear with 45 degree limit, 1,000cc injectors, Competition 1620 clutch and flywheel, and MFactory Helical LSD were all installed on the engine.
It had already been known that the blower would need to be sent out for repairs but once the blower was removed and the manifold was removed it was found the manifold was cracked as well. Luckily the manifold was able to be welded and a new one was not needed. The blower repair though was one of the large setbacks of the project. It needed to have the actuator for the pressure release valve replaced as it was bent. The blower was sent out to Magnuson for repair. Nothing was heard back from them for basically a month.
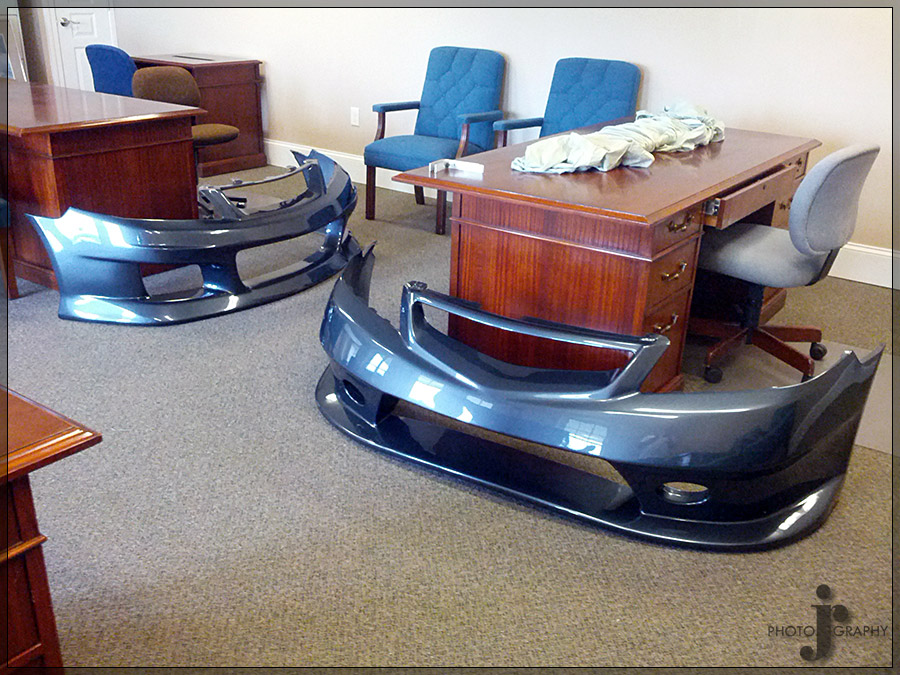
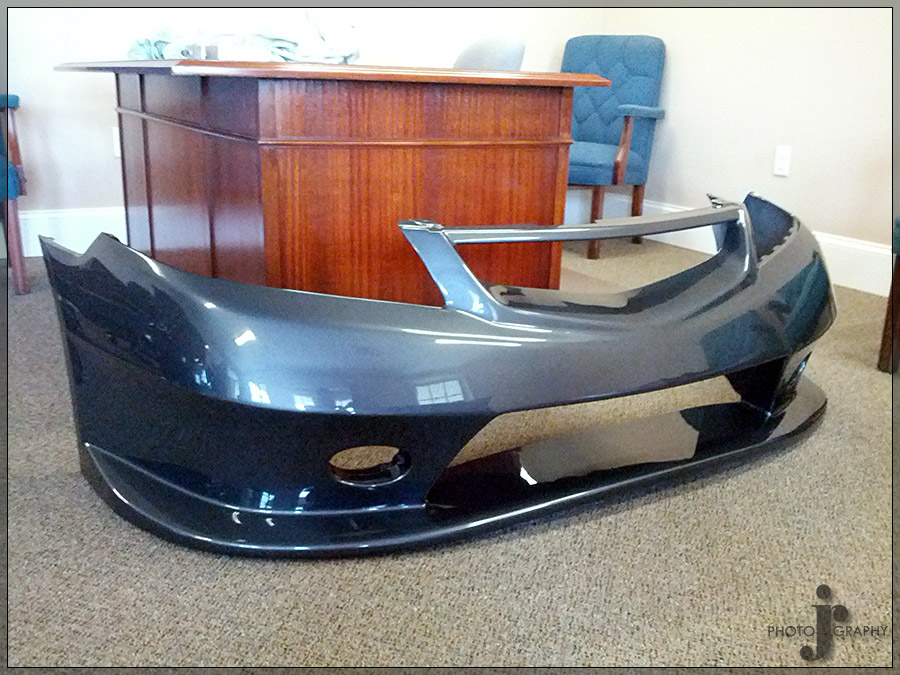
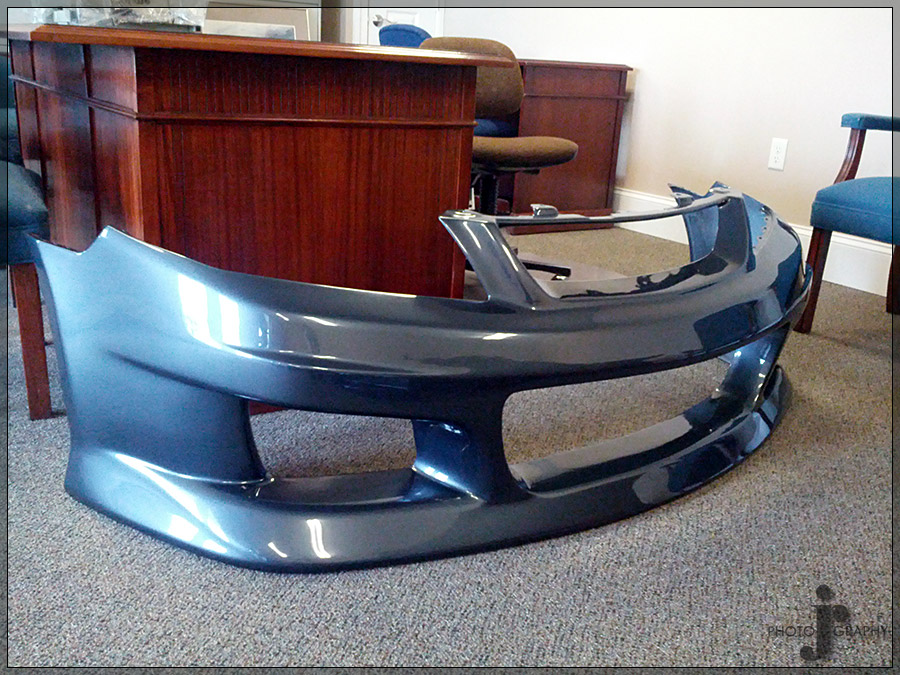
About this time I received the two bumpers I had painted back from the body shop. I was unable to decide which bumper to go with when selecting parts for the rebuild so I ended up getting both and figured I would decide when I was putting the car together.
Bumpers finally painted
During the wait for the supercharger the engines and dashes had been put back in the cars and the donor car that was now an AT was done for the most part and put on the back burner until the other one would be finished. The new J�s Racing header and J�s Racing 70RR exhaust were installed on the car. The exhaust note should be loud but sound amazing as I have never heard a car with a 70RR exhaust not sound good.


After constant attempts to contact Magnuson they got back to the shop with a response to let them know that the blower was not repaired but rather just what all needed to be replaced. They also needed full payment before they would start the repair. So after payment was taken care of it still took them another two weeks to repair and another week for it to arrive back in PA from CA. This made it evident to me that my first hopeful completion date of the end of July would be missed with all that still needed to be done. I wasn�t worried though as there were still two events at the end of August I wouldn�t mind debuting the car at either.
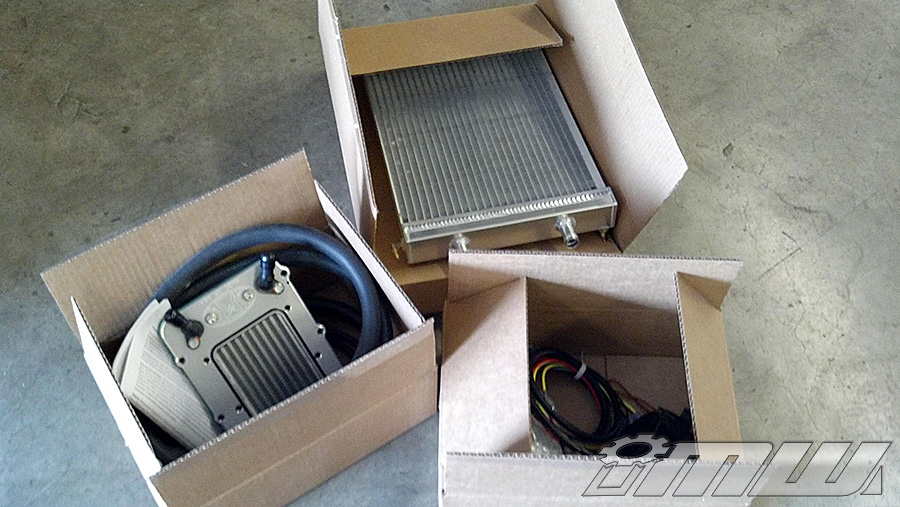
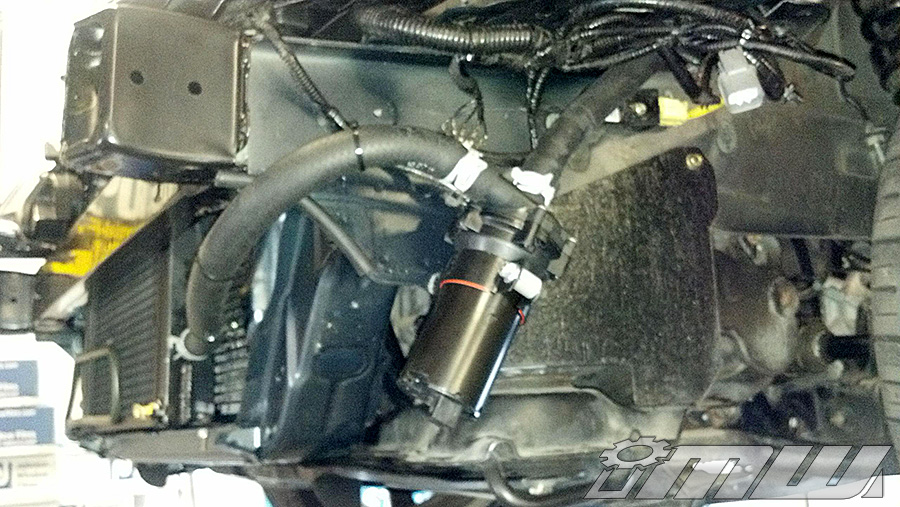
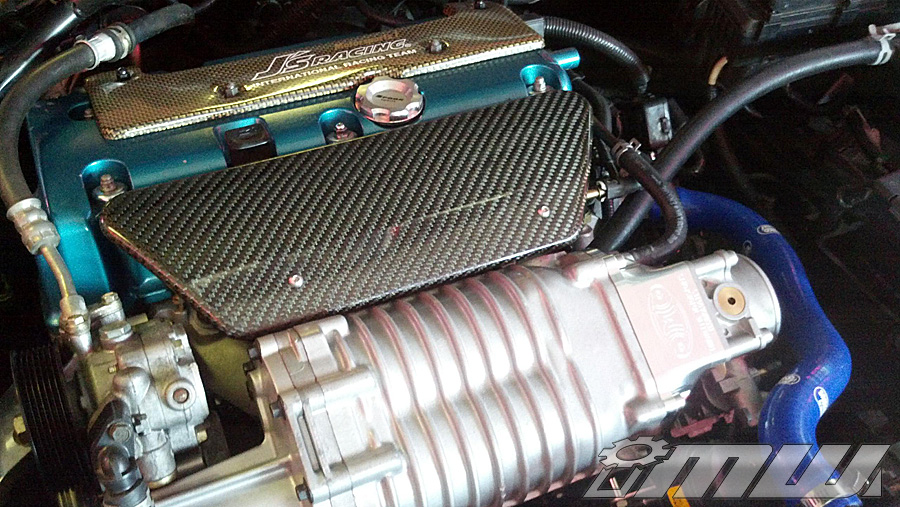
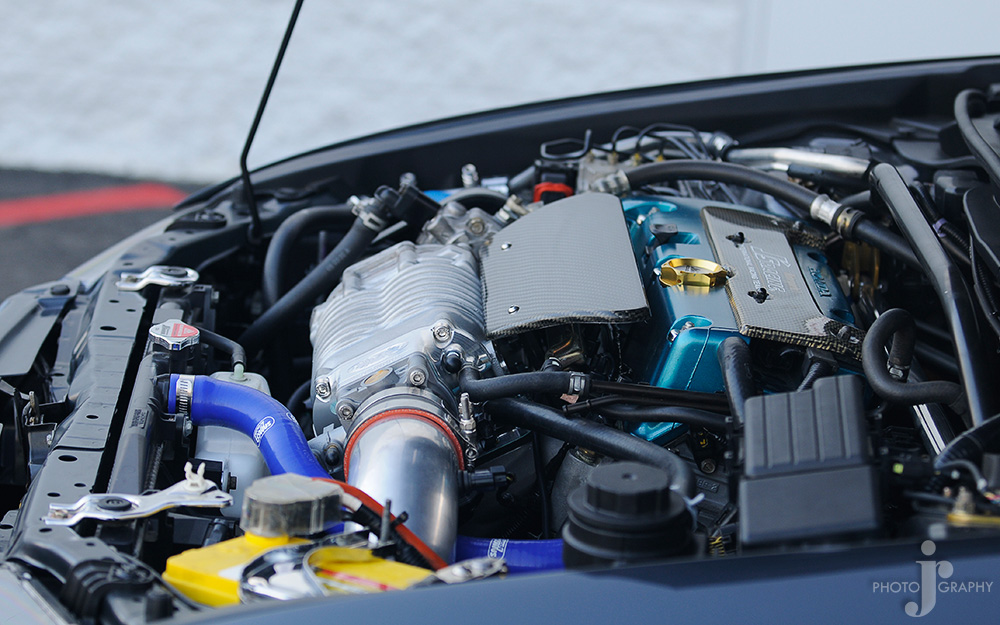
Meanwhile the Innovative Motorsports Technologies Stage II aftercooler kit arrived at the beginning of August and was installed on the car. This quality of work these guys put into making these kits is amazing. Once the kit was installed the car sat for a while as they were still waiting on the supercharger. The kit would provide the necessary cooling needed for running the 3in pulley I would be running on the supercharger. Even if the blower had gotten in at this point a second problem had come up. I would be running a TL-SH AWD throttle body as it is 74mm instead of 60mm as the stock TSX throttle body is. The issue is I needed a special inlet for the supercharger so it would connect. I was getting one from IMT but they had become popular and were on a 5 week backorder at the time.
Innovative Motorsport Technologies Stage II Aftercooler Kit
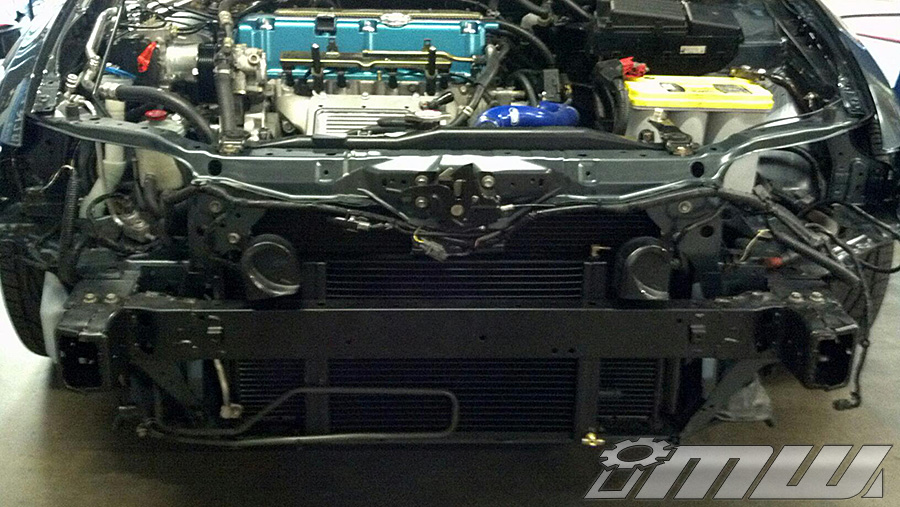
Bumper installed after aftercooler put on to test clearance
Both cars in the shop showroom while partially back together

Well the blower finally arrived at the very end of August and so I missed the next chance of debut for the car. At this point I no longer was really concerned much with when it was finished as I did not have anything in particular I was looking to get the car to anymore. We also still were waiting on the new supercharger inlet.
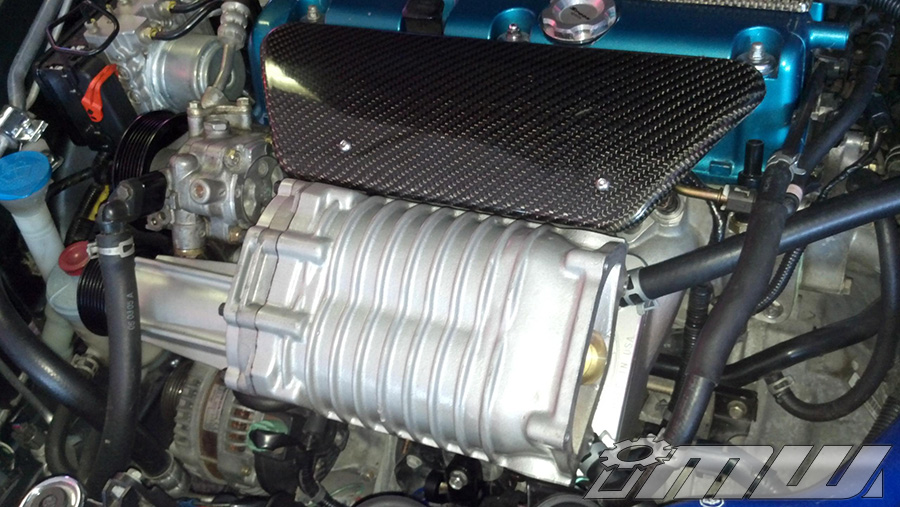
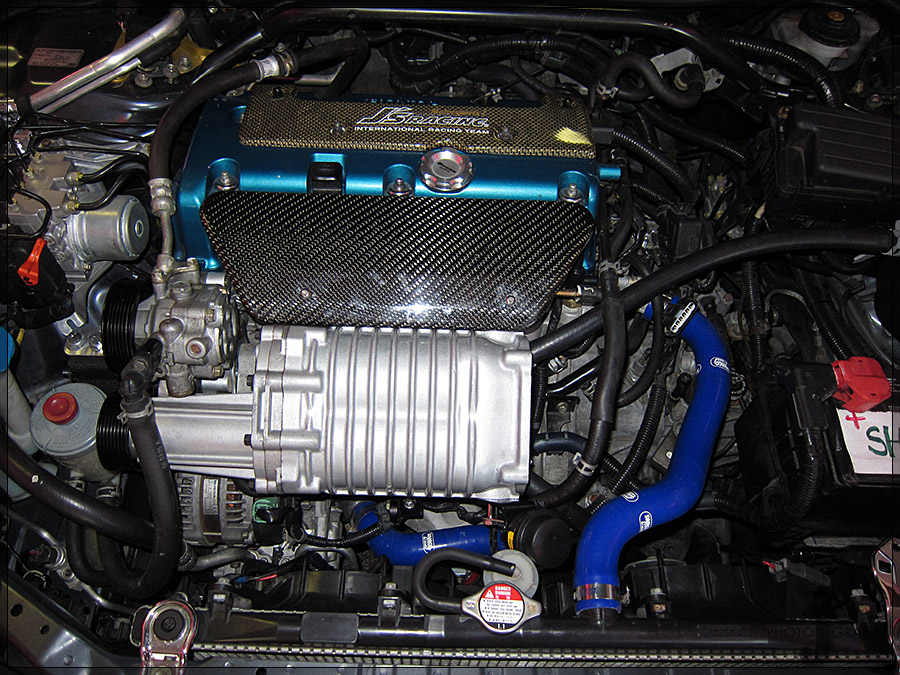
The inlet finally arrived about two weeks into September. Now everything was on hand finally to complete the car once and for all. Unfortunately now though I had other things planned for the next two weekends and would not be able to get home to pick up the car anyways so I planned for October 4th as the day to be completed. The car still needed a custom intake as my J�s Racing intake would no longer be able to fit due to the new position of the throttle body so a custom 3.5in intake was built instead. Also the car would need to be tuned as well.

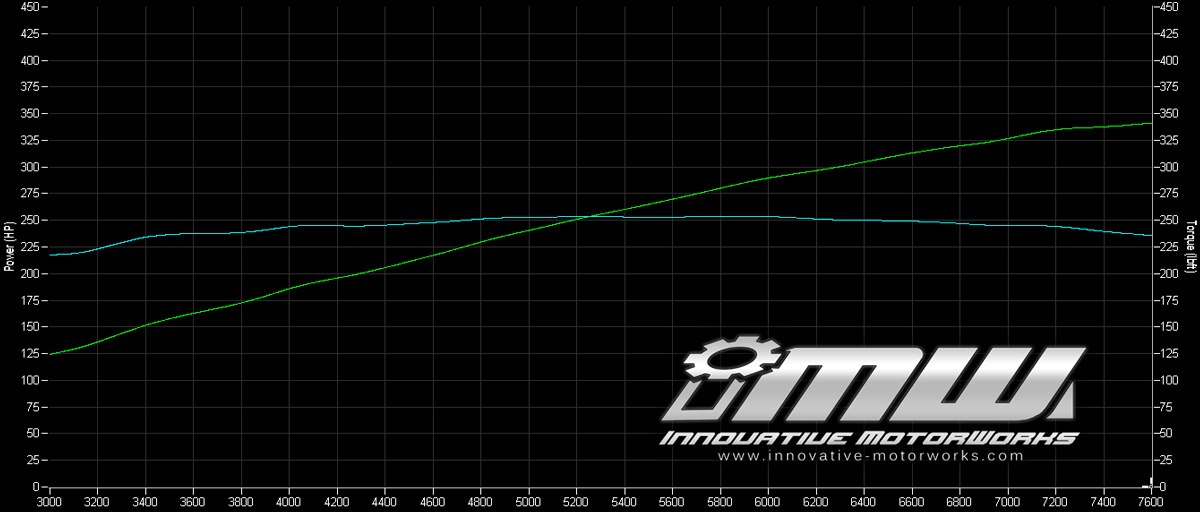
After the car was tuned the final numbers it made were 348whp and 254ftlbs at 10.2psi. Unfortunately those graphs didn�t get saved but the graphs from the tuning day show 343whp and 254ftlbs so they are pretty much the same. My favorite part is the lack of torque curve really as it is pretty much just constant consistent torque across the board.
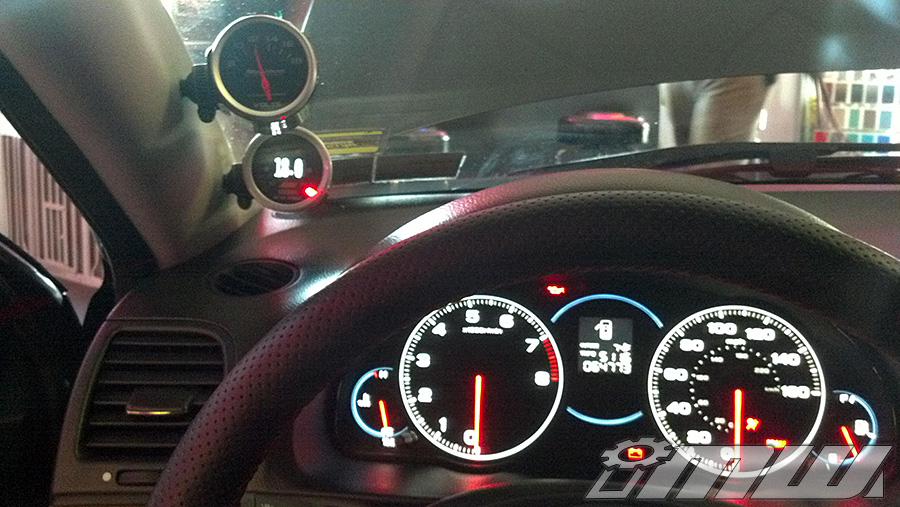
To monitor the new setup I went with an AEM Failsafe Gauge which will prevent anything terrible happening to the engine should something malfunction.
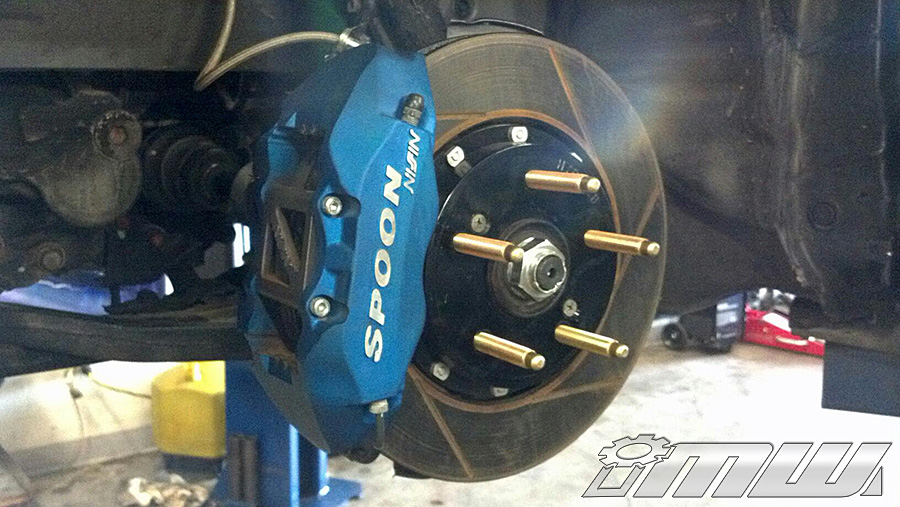
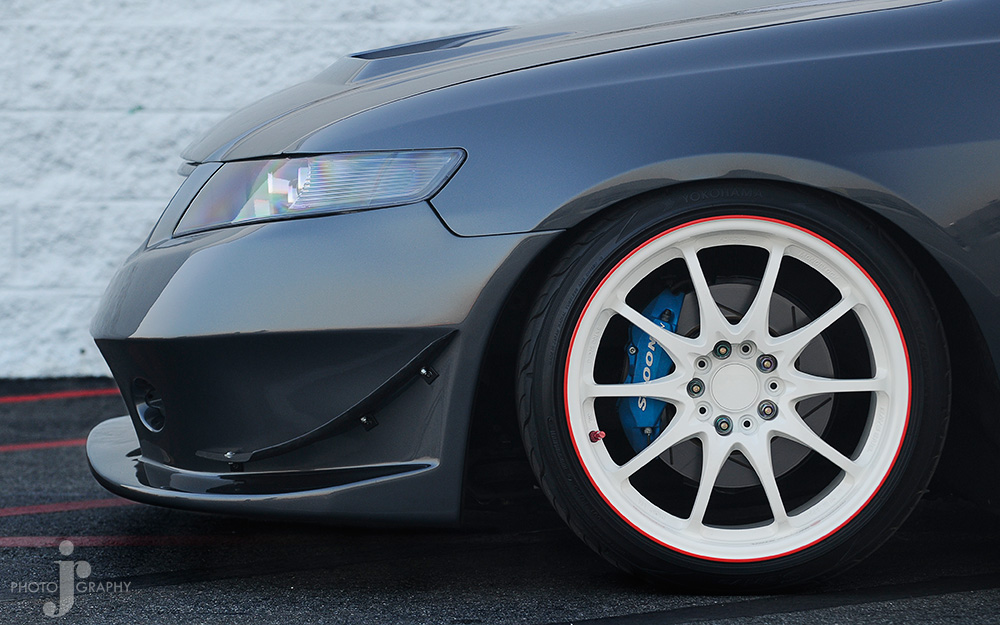
I had previously cut my wheel studs to run bolt on spacers before. However, with the new power I did not feel this was safe. I decided to then have the studs changed out for ARP extended studs and will now run slip on spacers instead when I need them but I have a set of track wheels I hope to be able to fit without spacers as they have 265 wide tires on them.
There are still other areas of the car that are not completed yet to my final desire that I plan to work on through the winter. I plan to do a small wire tuck in the engine bay to at least hide the power wires a little bit and the amp wiring completely. The battery will still stay in the bay for the time being. I plan to try and relocate the overflow tank for the IMT Aftercooler up between the fuse box and valve cover. The bolts in the engine bay will all be replaced with chromed stainless steel hardware everywhere that is possible while keeping the proper grade bolts in place. Also, the supercharger, inlet, throttle body, and power steering pump I plan to have mirror polished this winter to help dress up the engine bay as well. Lastly, the stereo amp rack needs to be rebuild as the force of the impact caused the bolts holding it to the false floor to fully rip out and no longer be usable.
I was finally able to pick up the car on October 5th.
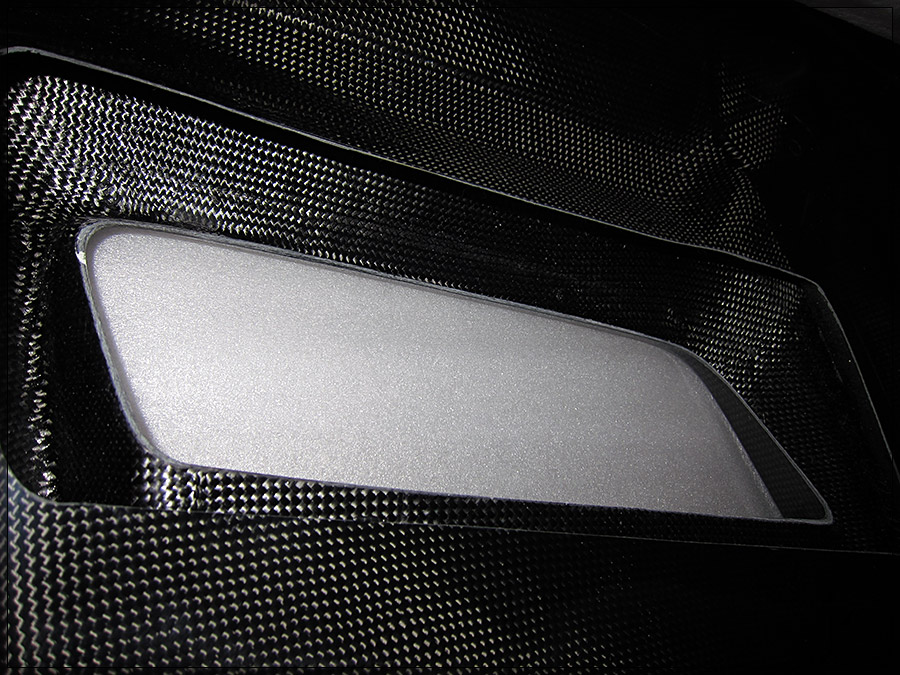
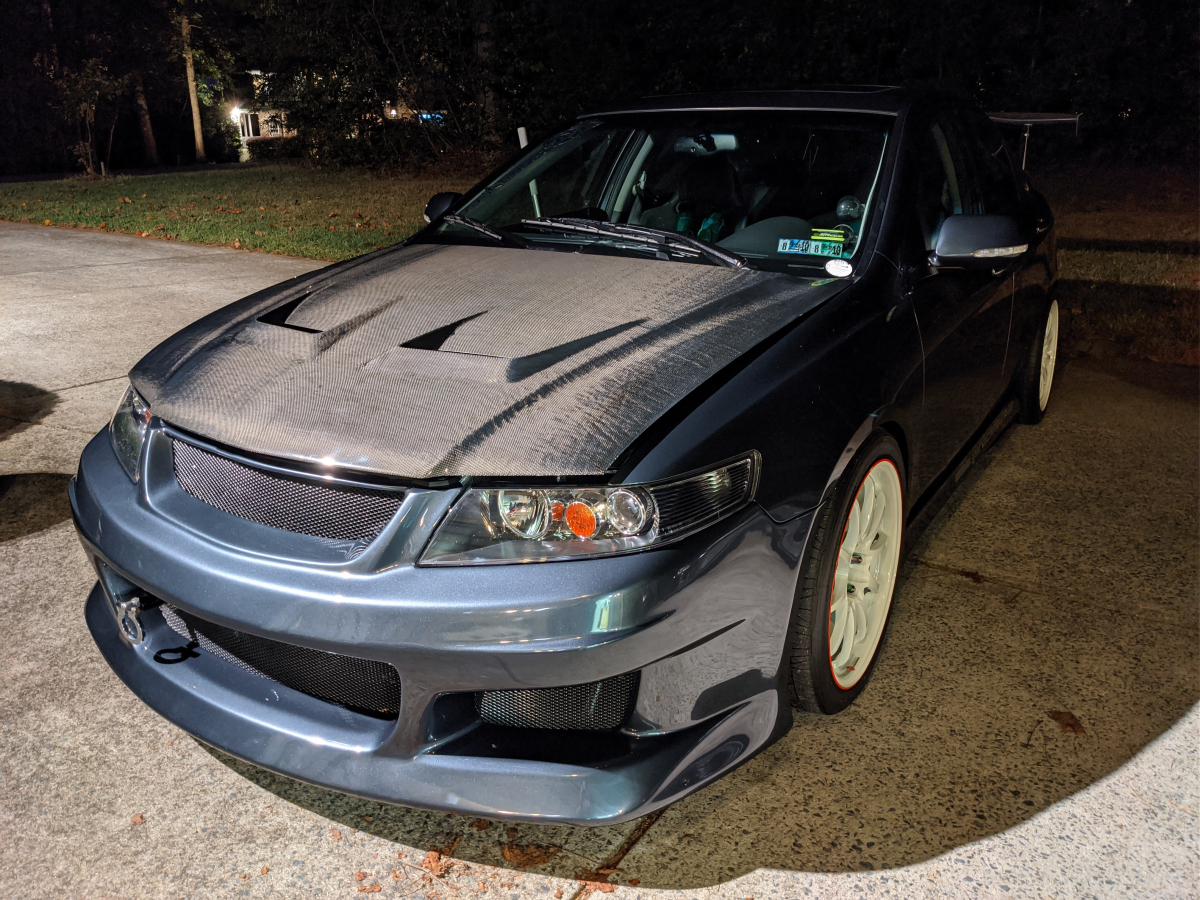
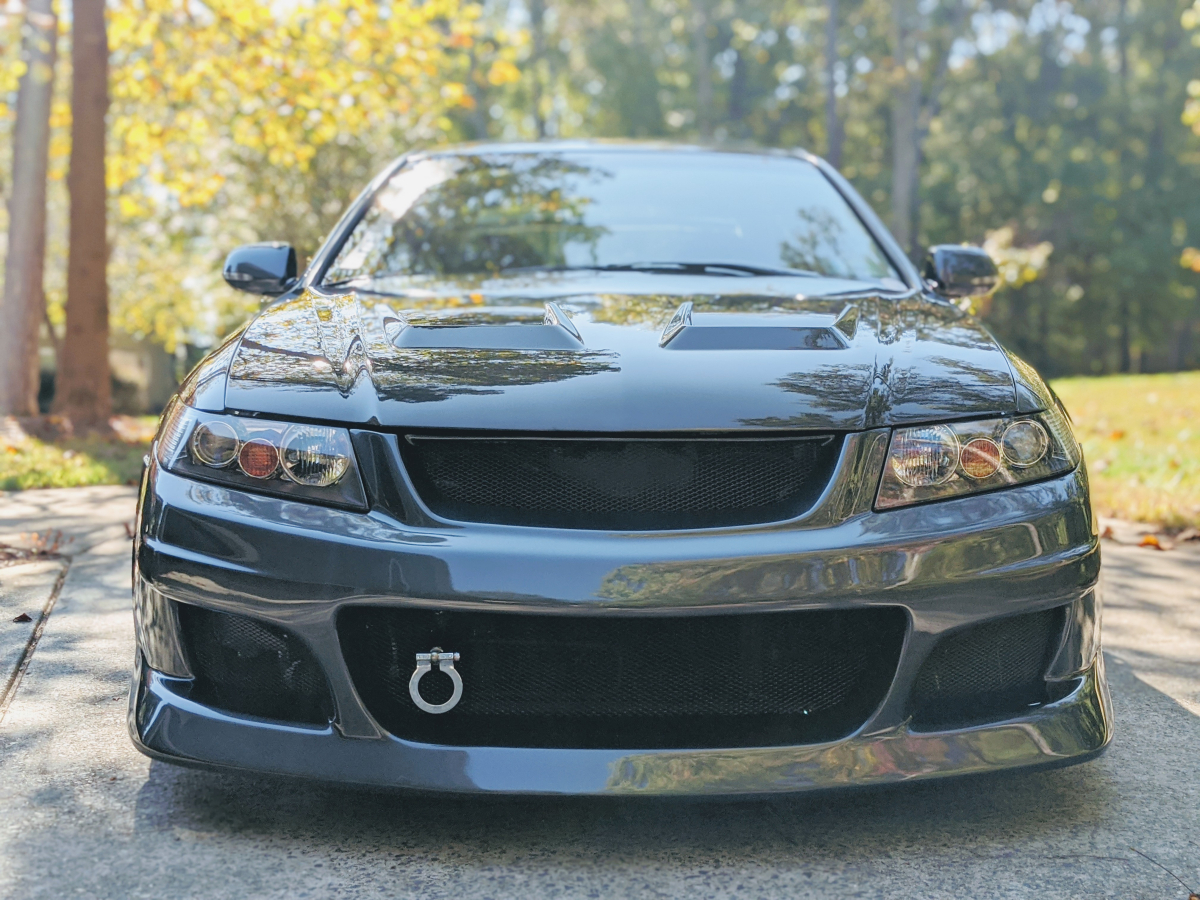
This allowed me one weekend to work on the car as much as I could before I would take it back to NC. I got the one off double sided carbon hood and the new 04/05 JDM headlights installed. They were one of the last sets obtained before Honda stopped making the headlights. Also included are a few pics of the ender panel mounting of the J�s Racing bumper as well as the hood vent grills I would need to recreate from the original hood.
New J's Racing radiator cap and oil cap installed
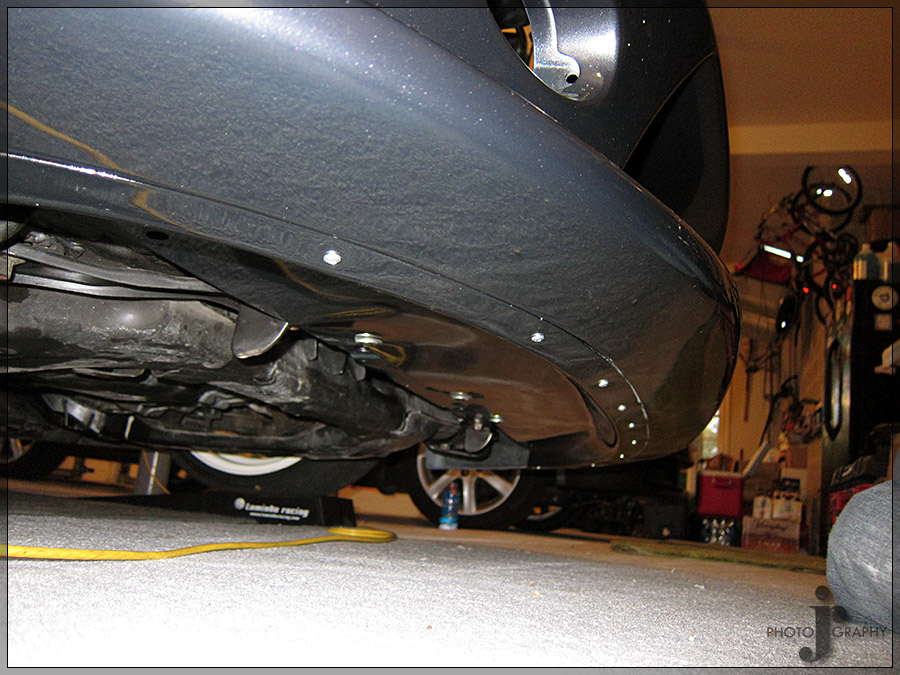
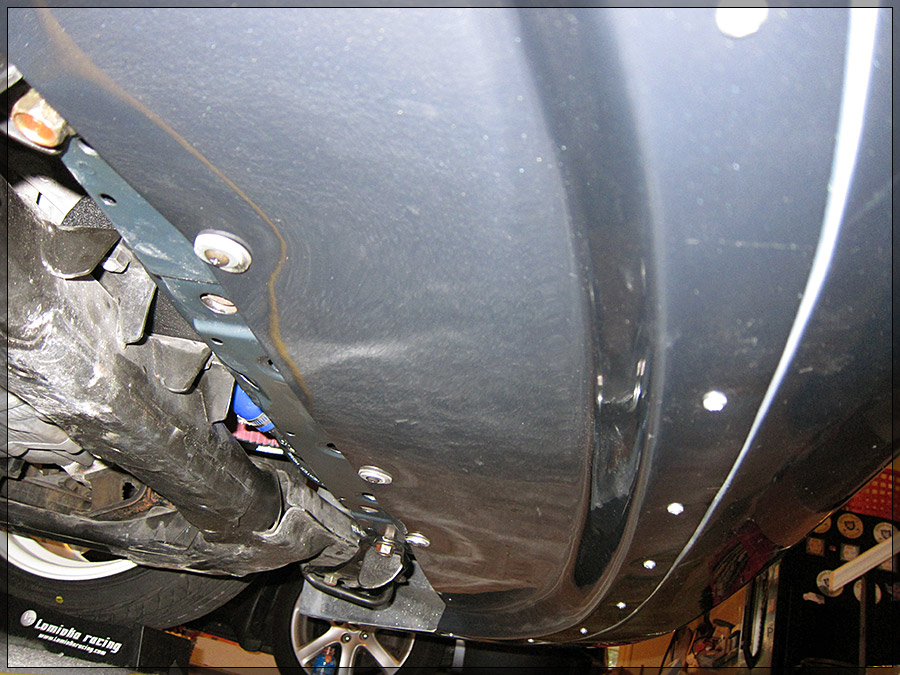
Some pics of the underside panel and mounting of the J's Racing bumper
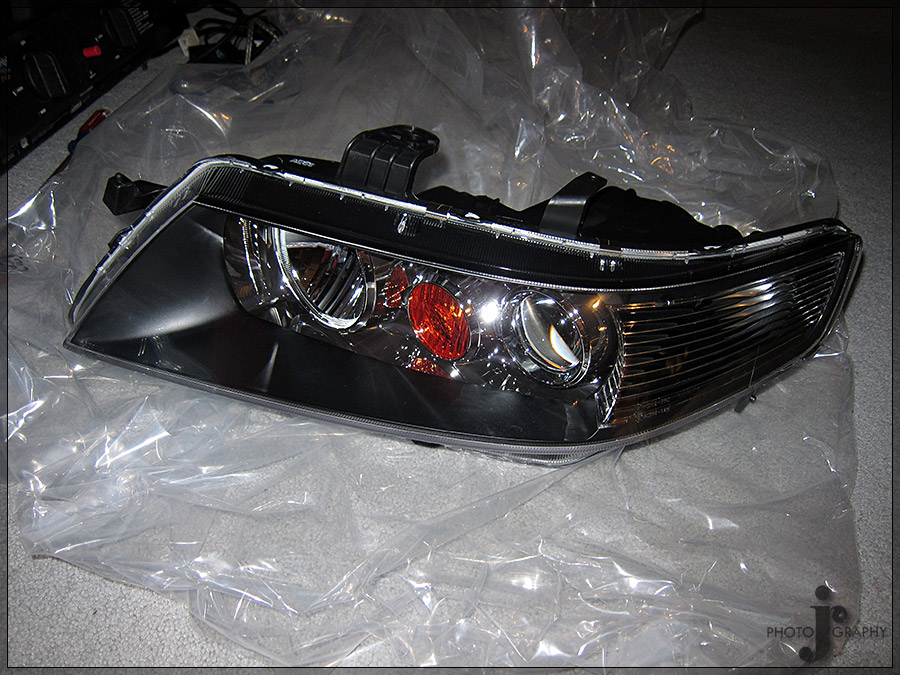
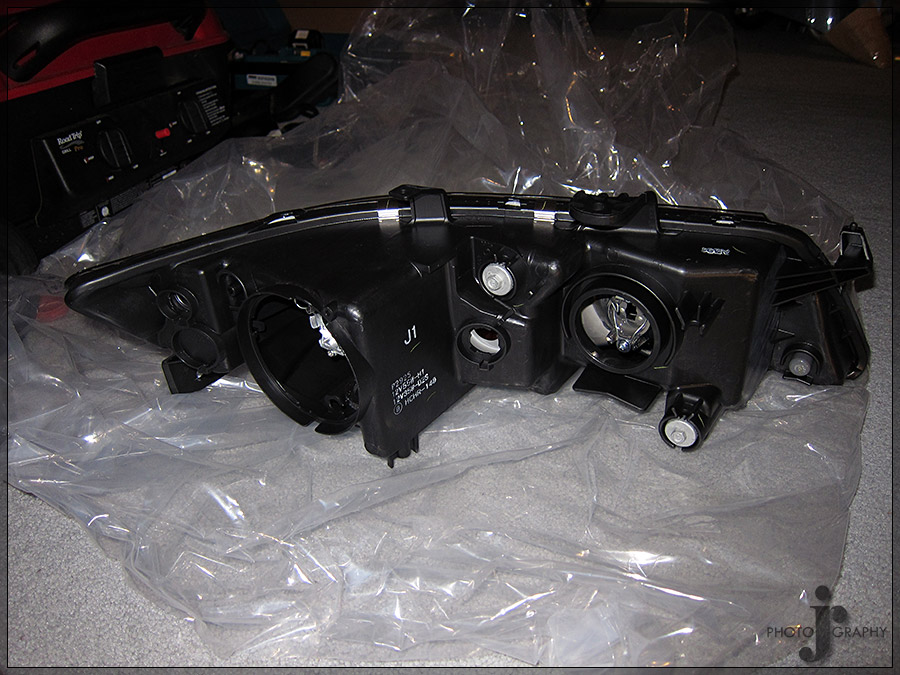
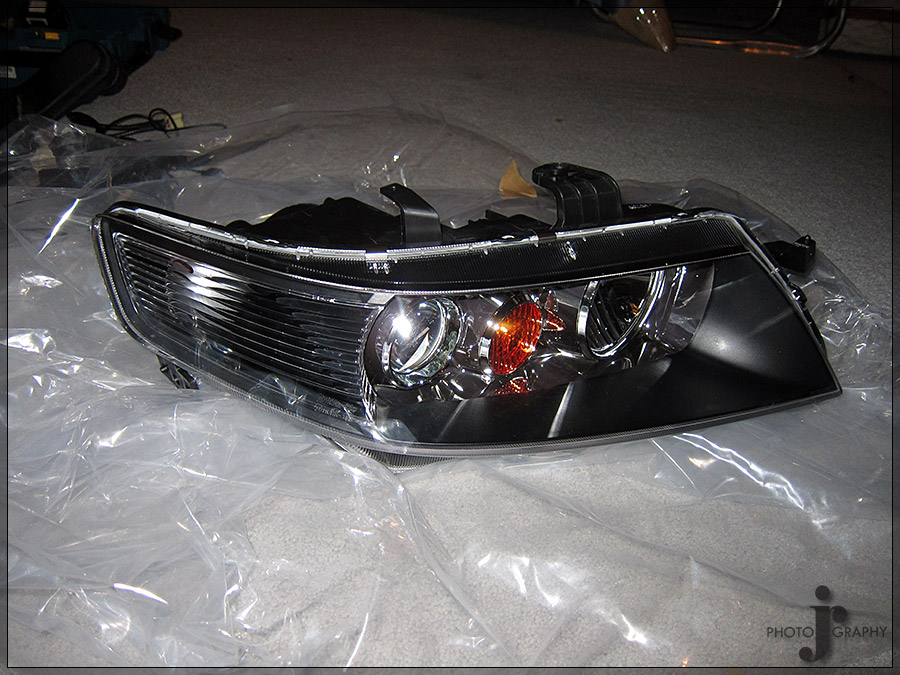
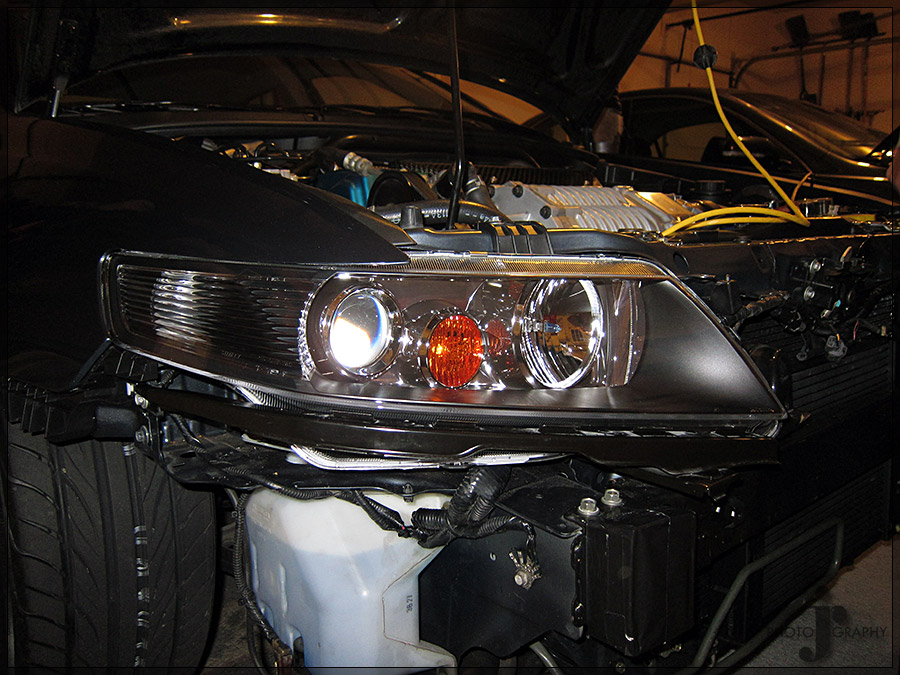
New JDM OEM Headlights unboxed and installed
Canards finally installed
Underside of the hood after install

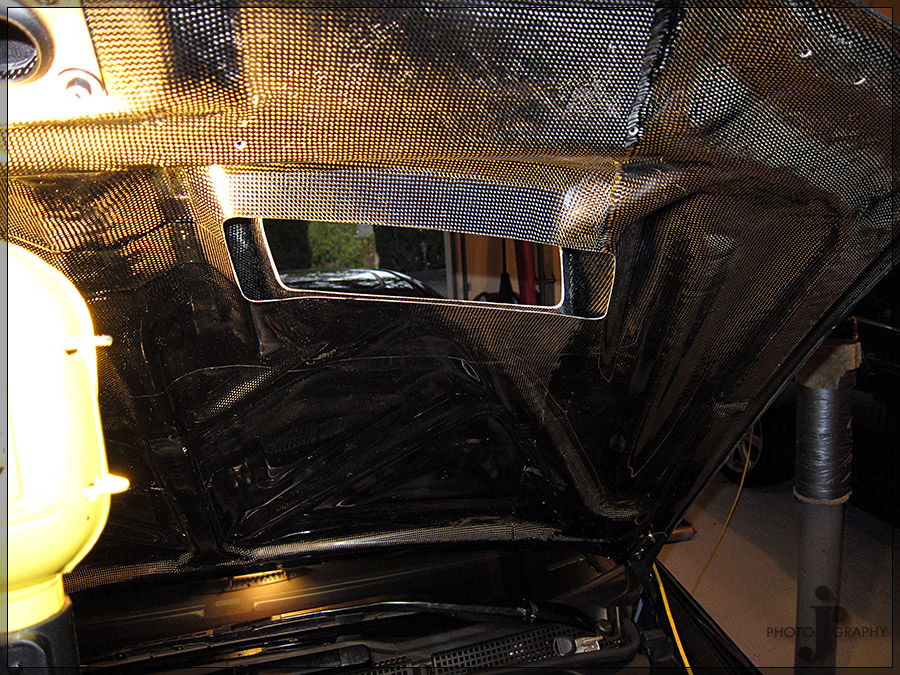
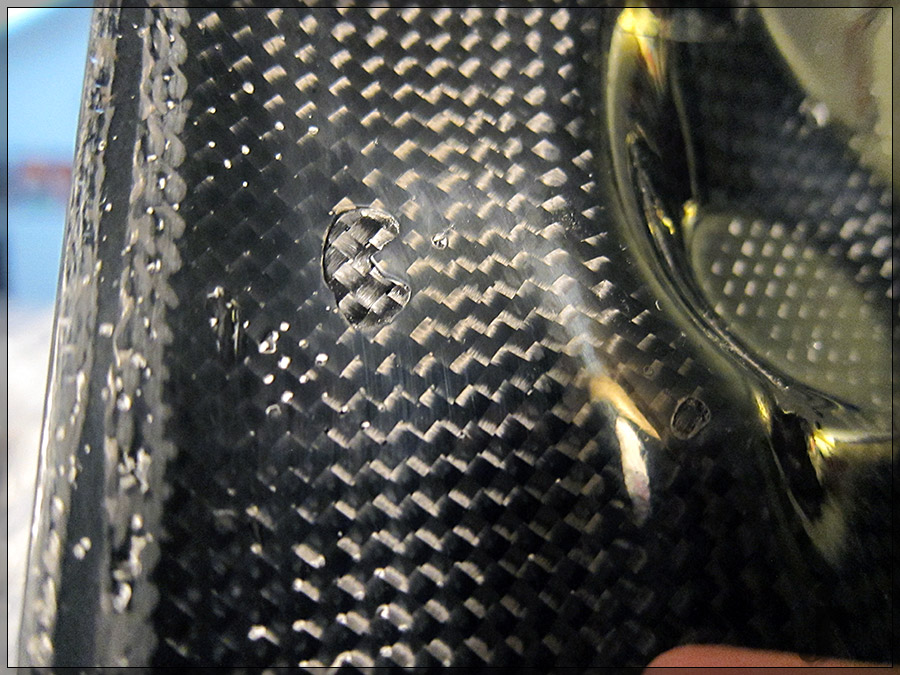
The new hood did not come with mesh over the vents. Apparently this costs extra. Luckily I still have the old damaged hood as I eventually plan to hang it in my garage when I get a house so I was able to pull the mesh grills off of it. They were held on with some rather strong adhesive. I am not sure what route I will go to attach them to the new hood since it is double sided carbon.
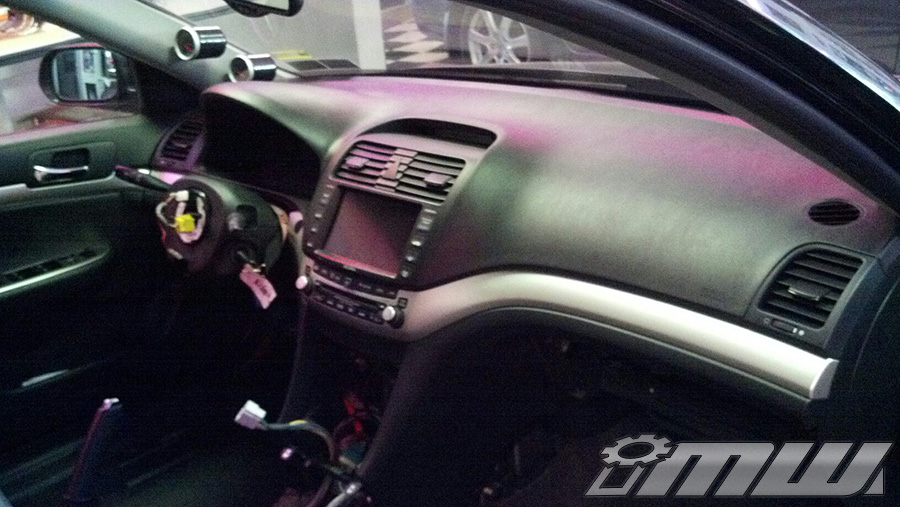
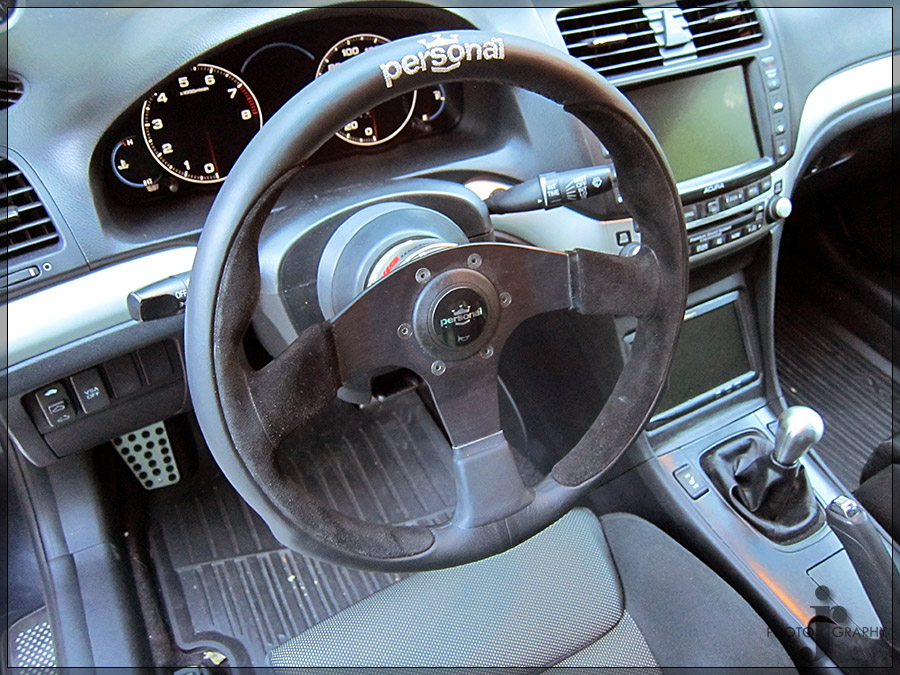
At this point I also installed my old center console video screen that is used to display my Brockway Engineering video gauge display which I use to monitor accurate engine temp, oil pressure, and intake air temp.
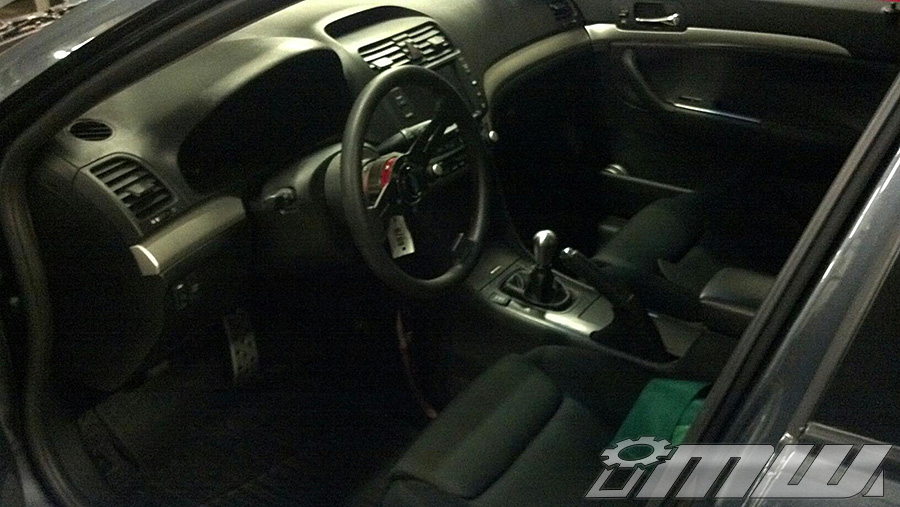
Everything all buttoned up ready to leave the next day.

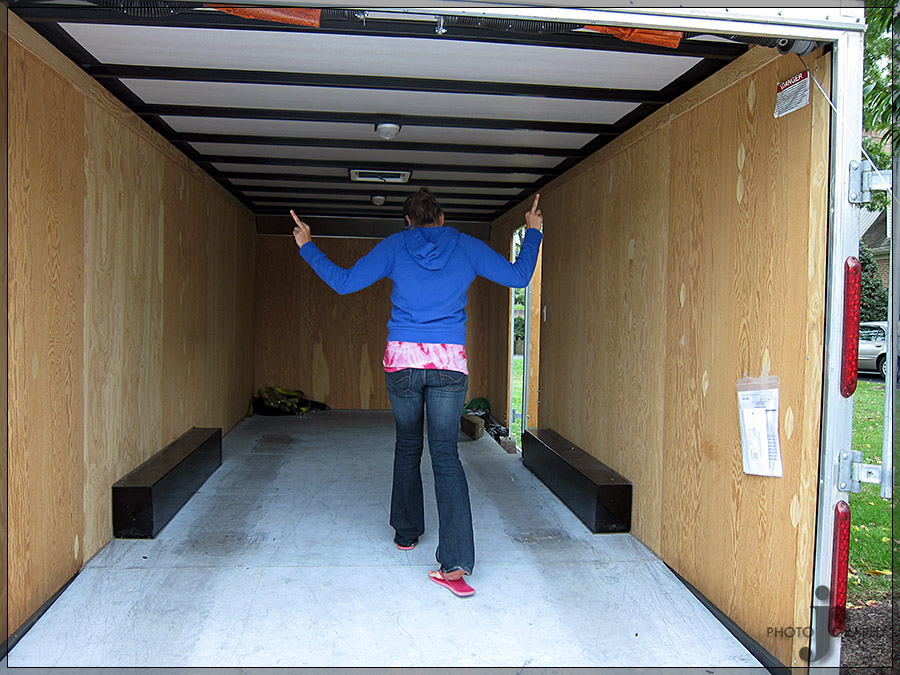
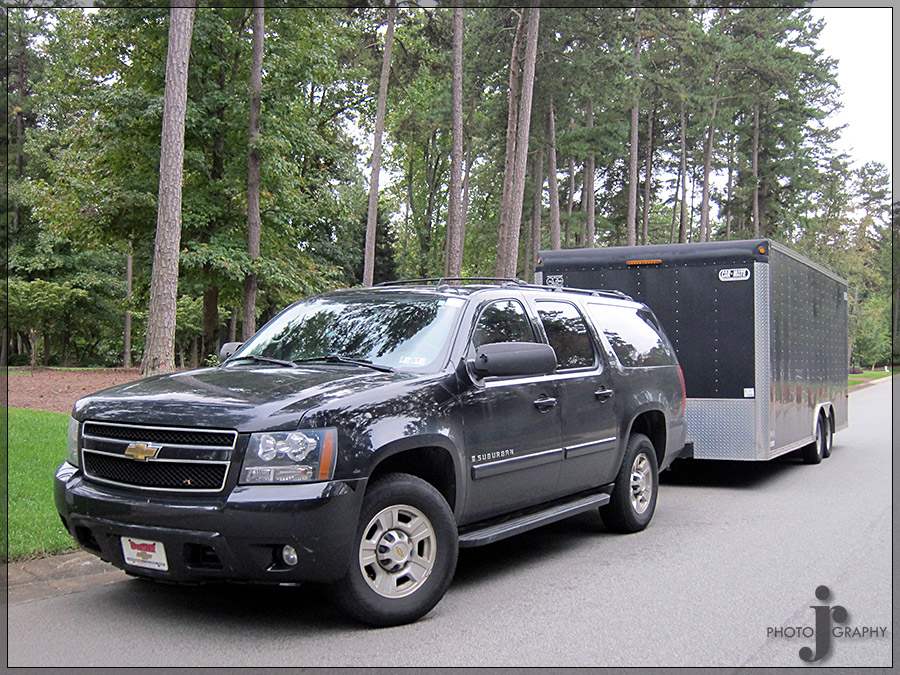
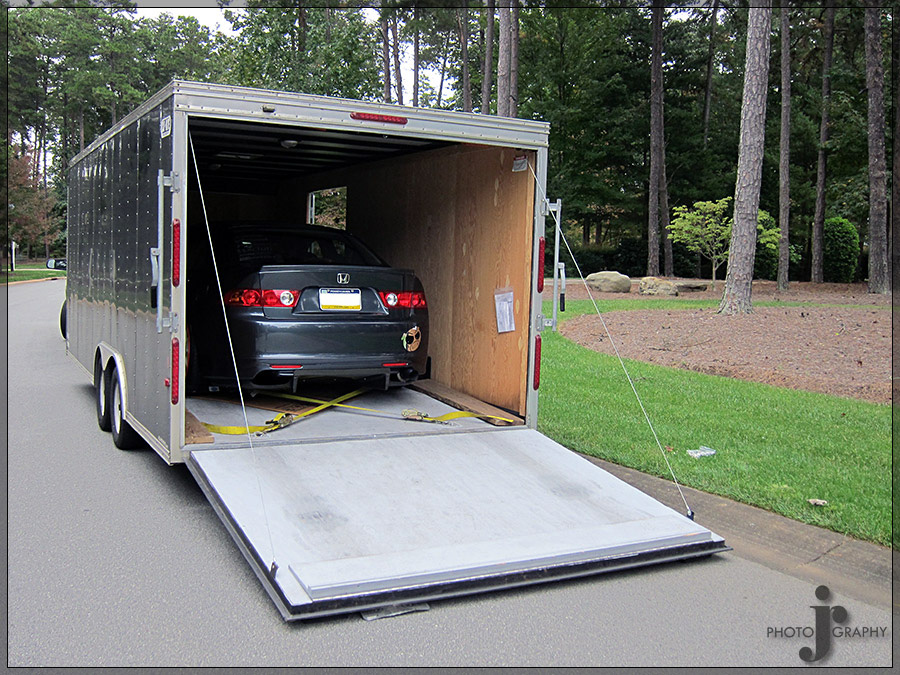
After this it was finally time to load the car up for transport with help of my gf who thankfully almost always helps me load the car on the trailer which makes the process go smoother.
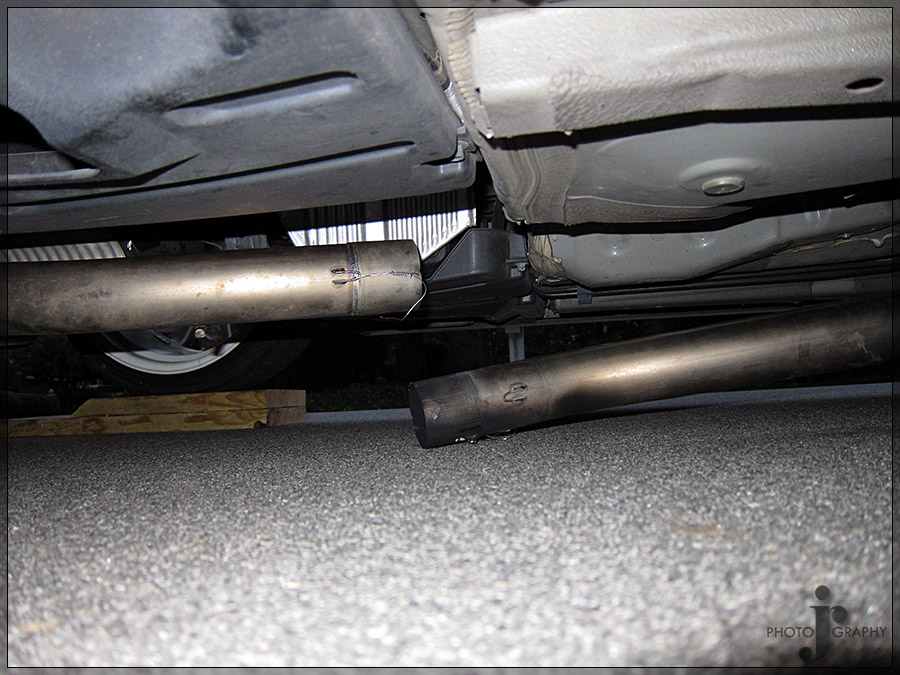
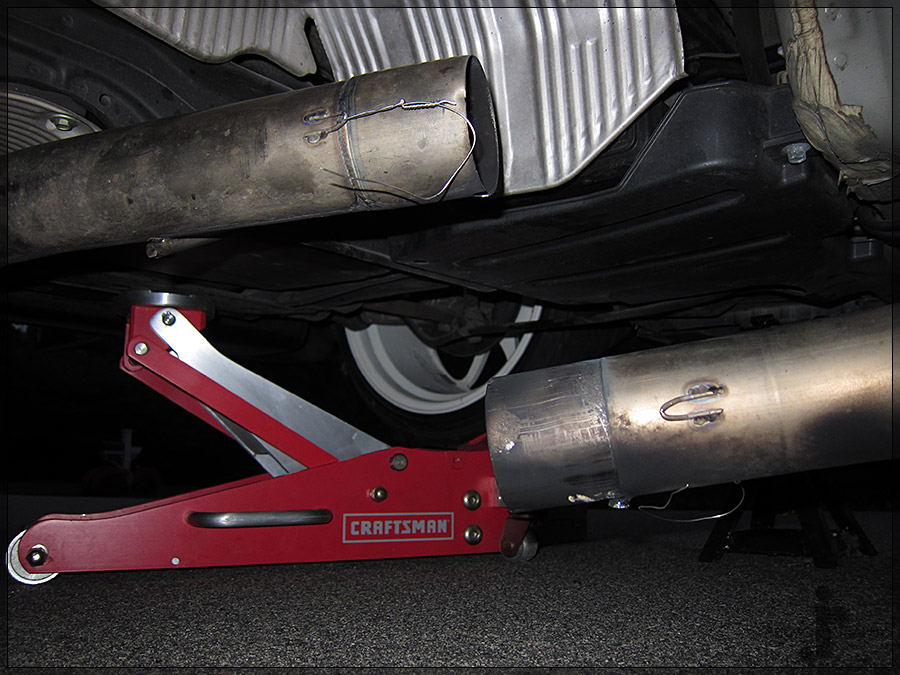
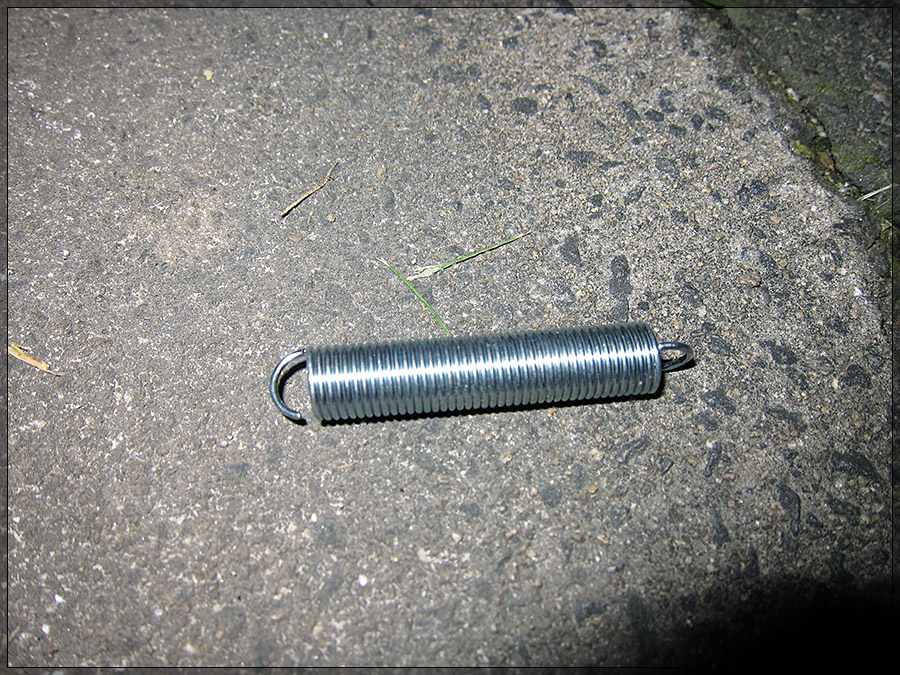
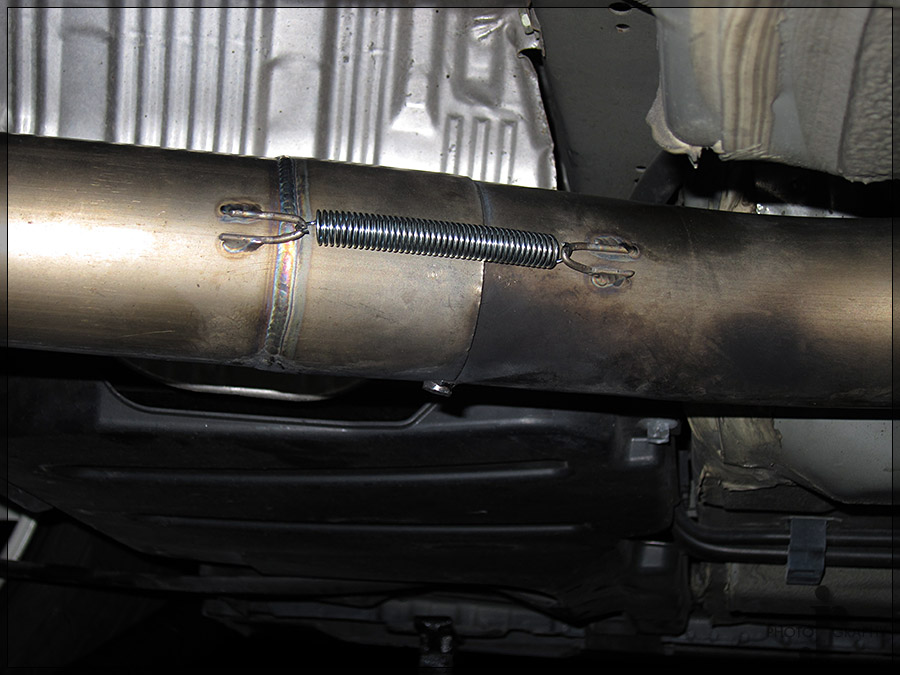
After finally making the trip to NC it was time to unload the car. I had a little incident getting the car on the trailer in PA so that needed to be repaired in NC as well once the car was unloaded. The new straight pipe titanium exhaust to race muffler was a slip fit exhaust held together by wire. I replaced the wire with springs as many other slip fit exhausts are held together.

The last two difficulties I have had with the car on getting it completely back to normal is the stereo install was destroyed by the impact as the bolts ripped out of the false floor and using larger bolts did not fix the problem so it will need to be redesigned. Also the shifter cable guide broke. I have temporarily fixed it and I am awaiting a upgraded solution hopefully from Hytech or KTuned so as to have almost a direct fixed shift linkage system in place.
My crazy shifter cable repair for now

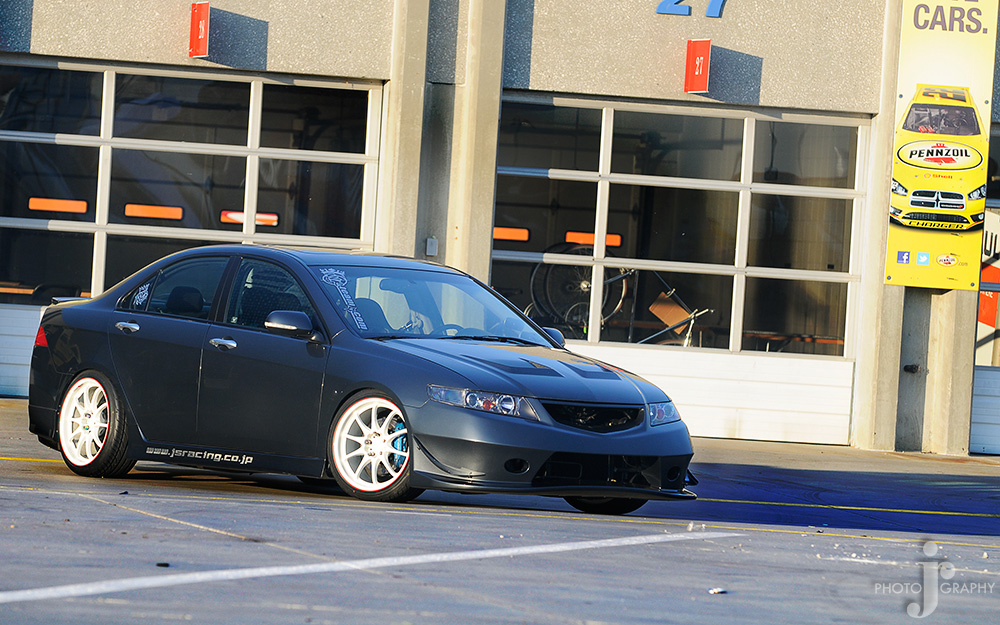
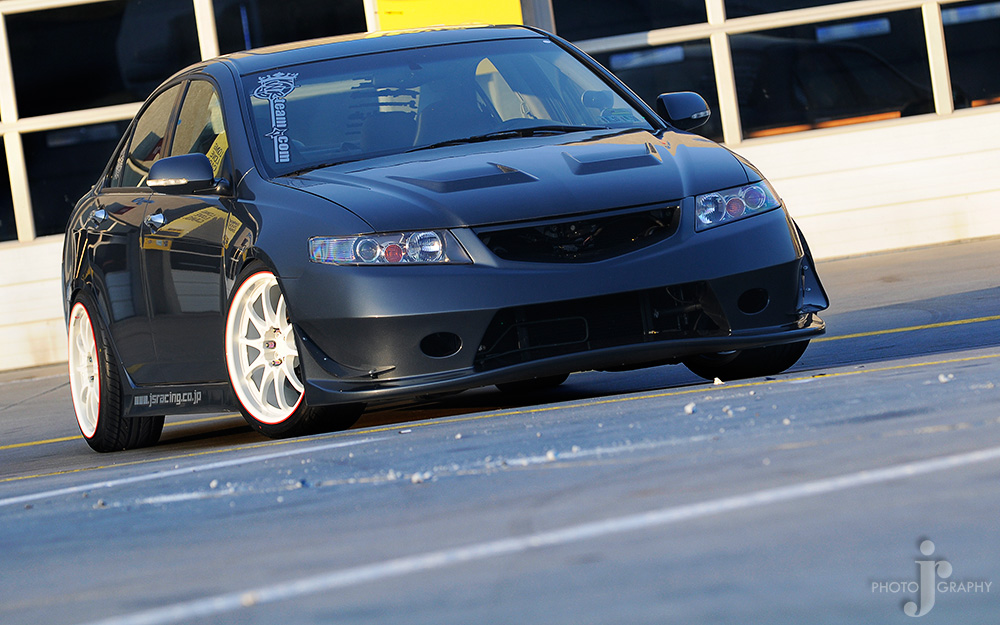
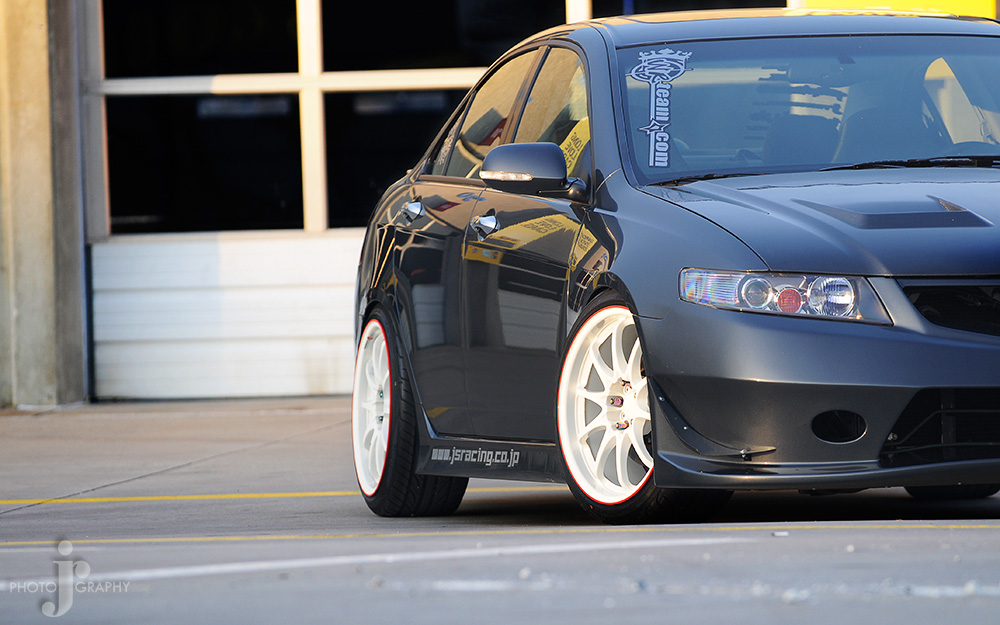
Ok so enough typing now on for the completed pictures.


Updated list of modifications: (New parts in italics)
COMING SOON!!!
So as some of you might have seen in November 2010 my long standing continuous project, my Acura TSX met a terrible fate, I hit a dear at 70mph on the interstate. You can see the carnage from it below.
If you haven�t seen it or read about it you can read more and see pictures of what happened in this link.
https://acurazine.com/forums/car-talk-5/amazing-sunday-afternoon-pictures-798504/
After the accident it was about a month and a half till I had time to move the car from NC to PA so I could begin tearing it down to see the extent of the damage and what parts would be needed for the repair. It also took a while to get things coordinated with the insurance company since I was working in NC and they wanted me in PA when they had the adjuster look at the car so I could explain things about all the parts and what not to them. Below are some pictures from the tear down process.
I am always planning to do new things to the car and one thing I had wanted to do for a while was either RHD conversion or a 6MT swap along with increased boost with the supercharger setup. In this case I thought the 6MT swap was the more cost effective route. Since I wanted to do an 6MT swap I began looking for a wrecked 6MT specifically with NAV from 2004 or 2005 as I didn�t like the changes to the gauges in 2006+. Now if any of you know a lot of details about the TSX there were not a lot of 6MT sold to begin with and were even fewer sold with NAV and 6MT. So with all that being said I was not up for an easy task of finding a semi local (or even continental US) wrecked car with little to no front end damage.
After a few months with no success finding a donor car I decided to at least order the replacement parts that would be needed in March 2011 as they would take a while to arrive. It had taken a while for me to get around to ordering the parts after still being bummed about the whole incident in the first place so I was already getting a late start on things.
I continued searching for donor cars while also finalizing the plan for other upgrades I was planning to do during the rebuild. I didn�t really just want to buy parts to do the 6MT swap as I am a bit OCD and wanted everything about the swap to look factory perfect so a donor car was the only way to not have to buy any little missing piece constantly from the dealer.
After having looking for a car for about 9 months I was really beginning to get irritated. I had found a few but lost the insurance auctions for the cars cause of either loosing internet connection at work at the last second or just feeling that the cars were bid higher than they were actually worth. About this time my dad also mentioned he was looking for a good commuter car that got good mileage, comfortable to drive, and pretty cheap to maintain. I told him that the TSX would fit all those need and I had torn mine apart so many times I could do most of the service on it for him. He wasn�t opposed to the idea so I started searching for a good condition 6MT with NAV that I could have torn apart. After finding a few higher priced ones we found a few good candidates and went to test drive them. We ended up purchasing one in October so I finally had the donor car for the swap. The other car would be converted to an AT using the parts from my car. Below are pictures of the donor car.
Just after this I began receiving my various shipments of parts from Japan in November I was finally able to start to get everything together for the rebuild to start. At this point I began coordinating with the shops I had chosen for a rough timeline of how things would go from one shop to the next.
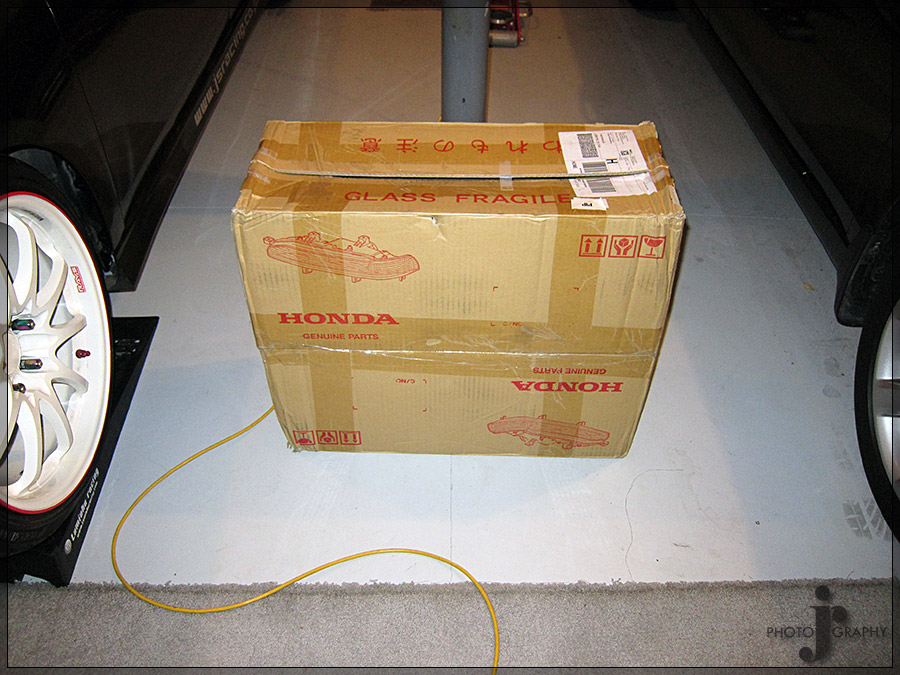
At this time I unfortunately got busy with things on a personal level with the holidays and also with work so unfortunately things didn�t get underway then until March 2012. Below are some pictures of the new parts that came in. I made sure to replace parts that were damaged or destroyed even if I was not going to replace them right away. I also picked up some parts I was not sure I was going to use right away as they flowed with the theme of the car of mostly J�s Racing parts.
J's Racing Temperature Switch
J's Racing Fan Switch
J's Racing Radiator Cap & Oil Cap
J's Racing Samco Blue Radiator Hoses (Discontinued)
J's Racing Upper Control Arms
J's Racing Rear Upper Camber Arms
J's Racing Rear Lower Camber Arms
J's Racing Header
J's Racing 70RR Exhaust
J's Racing Bumper
J's Racing Double Sided Carbon Fiber Hood (Only one that has been made)
The top is absolutely perfect
The underside isn't perfect but it is a race hood
Spoon Bumper
JDM OEM Bumper Support
Also have a replacement J's Racing Strut bar to replaced a cosmetically damaged one an a new J's Racing Intake as well but still are not unboxed yet. Unfortunately it turned out that I would not be able to use the J's Racing intake.
The car started at the body shop first getting a new a whole new rad support , two new fenders, and new front wiring harness. Also at the same time more damage was found on the car regarding the supercharger setup as well.
I didn�t want to give the body shop the new carbon hood so I gave them the original factory hood to put back on the car for the time being so they could align the fenders properly. There is no bumper on the car yet because I had only just received the new bumpers and had not yet decided on which one of the two I was going to get painted to put on the car.
After the body shop the car was transported to Innovative Motorworks to have the transmission swap and supercharger upgrade done. These guys were real troopers as the process would end up taking much longer than anticipated as I was having two cars swapped together. It would end up with this not being the best option to go with money wise but I am rather anal for attention to detail and wanted everything to appear stock as far as wiring and bolts and what not in the engine bay and interior.
Being that I did not do the work on the car I do not have many pictures of these stages of work and those that I do are from a camera phones and were sent via MMS message to me. I am trying to get the originals emailed to me at least so they may be a little bit better quality down the road.
The swap was not easy to begin with and only got harder down the road as it was figured out since I was doing a swap from an AT non-navi car to a MT navi car that every wiring harness in the car except the trunk lighting harness would need to be swapped out. I wanted this done without breaking clips so it added quite a bit of labor to the project that was not expected unfortunately. However, at this point I was too far in and I was not about to turn back on the project. I had planned on doing the navi swap myself, not only to save labor but also because I like to work on the car myself as it is one of the most enjoyable parts of owning a modified car in my opinion. Unfortunately, it all needed to be done at once for the car to be able to run correctly.
The beginning of the swap
The motor was pulled from both cars and the sub frames were dropped and swapped to the opposite car as it made the MT/ AT swap much easier. While the motor was out the 06 camshaft, larger crankshaft pulley, 50 degree VTC gear with 45 degree limit, 1,000cc injectors, Competition 1620 clutch and flywheel, and MFactory Helical LSD were all installed on the engine.
It had already been known that the blower would need to be sent out for repairs but once the blower was removed and the manifold was removed it was found the manifold was cracked as well. Luckily the manifold was able to be welded and a new one was not needed. The blower repair though was one of the large setbacks of the project. It needed to have the actuator for the pressure release valve replaced as it was bent. The blower was sent out to Magnuson for repair. Nothing was heard back from them for basically a month.
About this time I received the two bumpers I had painted back from the body shop. I was unable to decide which bumper to go with when selecting parts for the rebuild so I ended up getting both and figured I would decide when I was putting the car together.
Bumpers finally painted
During the wait for the supercharger the engines and dashes had been put back in the cars and the donor car that was now an AT was done for the most part and put on the back burner until the other one would be finished. The new J�s Racing header and J�s Racing 70RR exhaust were installed on the car. The exhaust note should be loud but sound amazing as I have never heard a car with a 70RR exhaust not sound good.
After constant attempts to contact Magnuson they got back to the shop with a response to let them know that the blower was not repaired but rather just what all needed to be replaced. They also needed full payment before they would start the repair. So after payment was taken care of it still took them another two weeks to repair and another week for it to arrive back in PA from CA. This made it evident to me that my first hopeful completion date of the end of July would be missed with all that still needed to be done. I wasn�t worried though as there were still two events at the end of August I wouldn�t mind debuting the car at either.
Meanwhile the Innovative Motorsports Technologies Stage II aftercooler kit arrived at the beginning of August and was installed on the car. This quality of work these guys put into making these kits is amazing. Once the kit was installed the car sat for a while as they were still waiting on the supercharger. The kit would provide the necessary cooling needed for running the 3in pulley I would be running on the supercharger. Even if the blower had gotten in at this point a second problem had come up. I would be running a TL-SH AWD throttle body as it is 74mm instead of 60mm as the stock TSX throttle body is. The issue is I needed a special inlet for the supercharger so it would connect. I was getting one from IMT but they had become popular and were on a 5 week backorder at the time.
Innovative Motorsport Technologies Stage II Aftercooler Kit
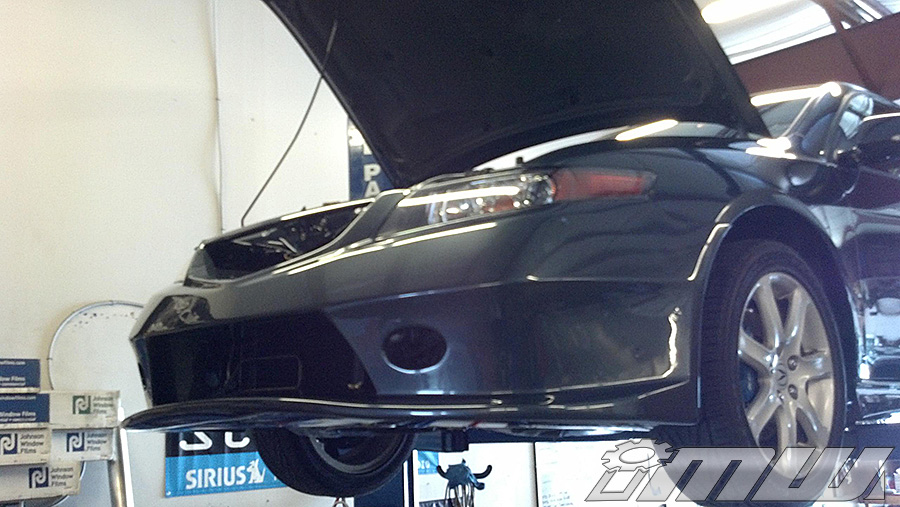
Bumper installed after aftercooler put on to test clearance
Both cars in the shop showroom while partially back together
Well the blower finally arrived at the very end of August and so I missed the next chance of debut for the car. At this point I no longer was really concerned much with when it was finished as I did not have anything in particular I was looking to get the car to anymore. We also still were waiting on the new supercharger inlet.
The inlet finally arrived about two weeks into September. Now everything was on hand finally to complete the car once and for all. Unfortunately now though I had other things planned for the next two weekends and would not be able to get home to pick up the car anyways so I planned for October 4th as the day to be completed. The car still needed a custom intake as my J�s Racing intake would no longer be able to fit due to the new position of the throttle body so a custom 3.5in intake was built instead. Also the car would need to be tuned as well.
After the car was tuned the final numbers it made were 348whp and 254ftlbs at 10.2psi. Unfortunately those graphs didn�t get saved but the graphs from the tuning day show 343whp and 254ftlbs so they are pretty much the same. My favorite part is the lack of torque curve really as it is pretty much just constant consistent torque across the board.
To monitor the new setup I went with an AEM Failsafe Gauge which will prevent anything terrible happening to the engine should something malfunction.
I had previously cut my wheel studs to run bolt on spacers before. However, with the new power I did not feel this was safe. I decided to then have the studs changed out for ARP extended studs and will now run slip on spacers instead when I need them but I have a set of track wheels I hope to be able to fit without spacers as they have 265 wide tires on them.
There are still other areas of the car that are not completed yet to my final desire that I plan to work on through the winter. I plan to do a small wire tuck in the engine bay to at least hide the power wires a little bit and the amp wiring completely. The battery will still stay in the bay for the time being. I plan to try and relocate the overflow tank for the IMT Aftercooler up between the fuse box and valve cover. The bolts in the engine bay will all be replaced with chromed stainless steel hardware everywhere that is possible while keeping the proper grade bolts in place. Also, the supercharger, inlet, throttle body, and power steering pump I plan to have mirror polished this winter to help dress up the engine bay as well. Lastly, the stereo amp rack needs to be rebuild as the force of the impact caused the bolts holding it to the false floor to fully rip out and no longer be usable.
I was finally able to pick up the car on October 5th.
This allowed me one weekend to work on the car as much as I could before I would take it back to NC. I got the one off double sided carbon hood and the new 04/05 JDM headlights installed. They were one of the last sets obtained before Honda stopped making the headlights. Also included are a few pics of the ender panel mounting of the J�s Racing bumper as well as the hood vent grills I would need to recreate from the original hood.
New J's Racing radiator cap and oil cap installed
Some pics of the underside panel and mounting of the J's Racing bumper
New JDM OEM Headlights unboxed and installed
Canards finally installed
Underside of the hood after install
The new hood did not come with mesh over the vents. Apparently this costs extra. Luckily I still have the old damaged hood as I eventually plan to hang it in my garage when I get a house so I was able to pull the mesh grills off of it. They were held on with some rather strong adhesive. I am not sure what route I will go to attach them to the new hood since it is double sided carbon.
At this point I also installed my old center console video screen that is used to display my Brockway Engineering video gauge display which I use to monitor accurate engine temp, oil pressure, and intake air temp.
Everything all buttoned up ready to leave the next day.
After this it was finally time to load the car up for transport with help of my gf who thankfully almost always helps me load the car on the trailer which makes the process go smoother.
After finally making the trip to NC it was time to unload the car. I had a little incident getting the car on the trailer in PA so that needed to be repaired in NC as well once the car was unloaded. The new straight pipe titanium exhaust to race muffler was a slip fit exhaust held together by wire. I replaced the wire with springs as many other slip fit exhausts are held together.
The last two difficulties I have had with the car on getting it completely back to normal is the stereo install was destroyed by the impact as the bolts ripped out of the false floor and using larger bolts did not fix the problem so it will need to be redesigned. Also the shifter cable guide broke. I have temporarily fixed it and I am awaiting a upgraded solution hopefully from Hytech or KTuned so as to have almost a direct fixed shift linkage system in place.
My crazy shifter cable repair for now
Ok so enough typing now on for the completed pictures.
Updated list of modifications: (New parts in italics)
COMING SOON!!!

The following 7 users liked this post by CCColtsicehockey:
Acura_Dude (11-07-2012),
CLtotheTL32 (11-07-2012),
Costco (11-07-2012),
EvilVirus (08-06-2018),
komet (11-10-2012),
and 2 others liked this post.

Popular Reply
11-07-2019, 04:04 PM
Moderator
Regional Coordinator (Southeast)
Regional Coordinator (Southeast)
Thread Starter
Join Date: Dec 2003
Location: Mooresville, NC
Age: 37
Posts: 43,461
Received 3,655 Likes
on
2,490 Posts
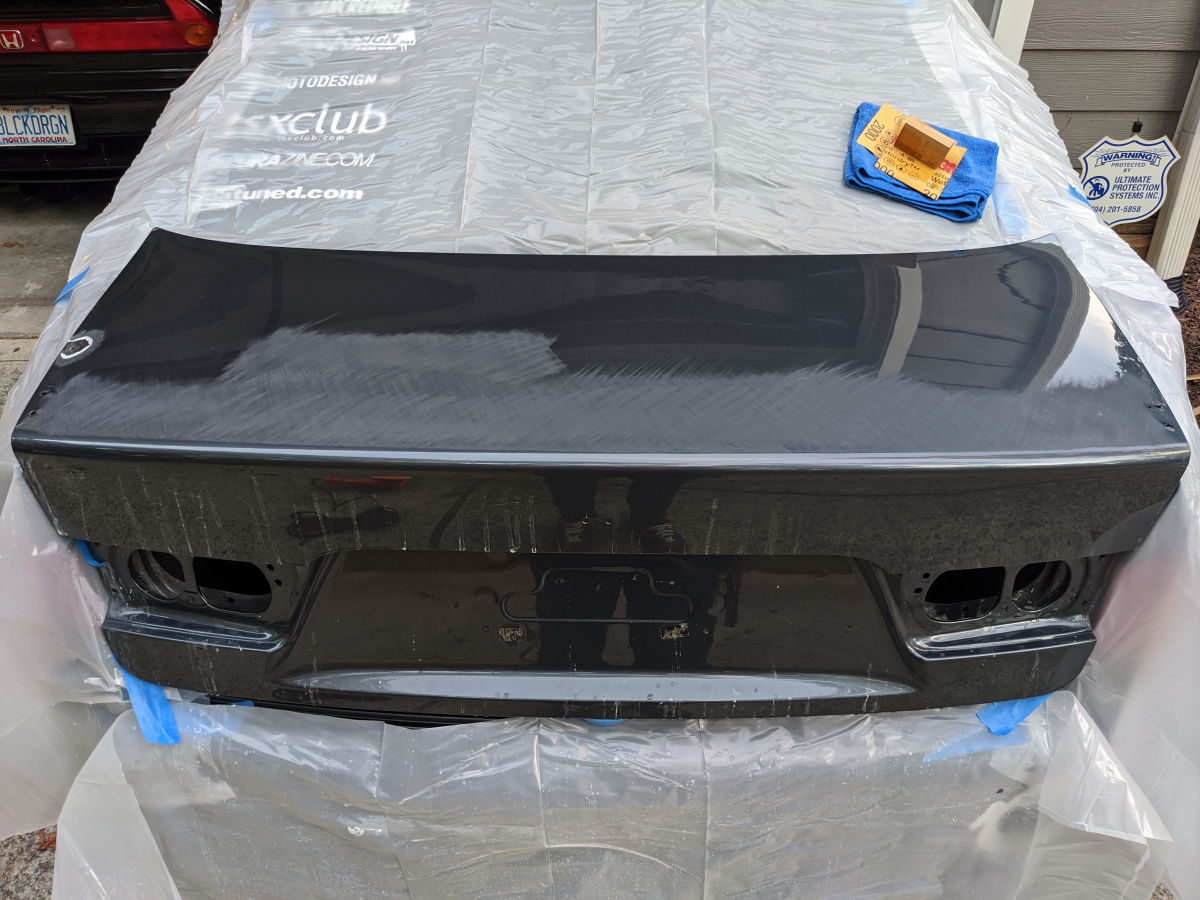
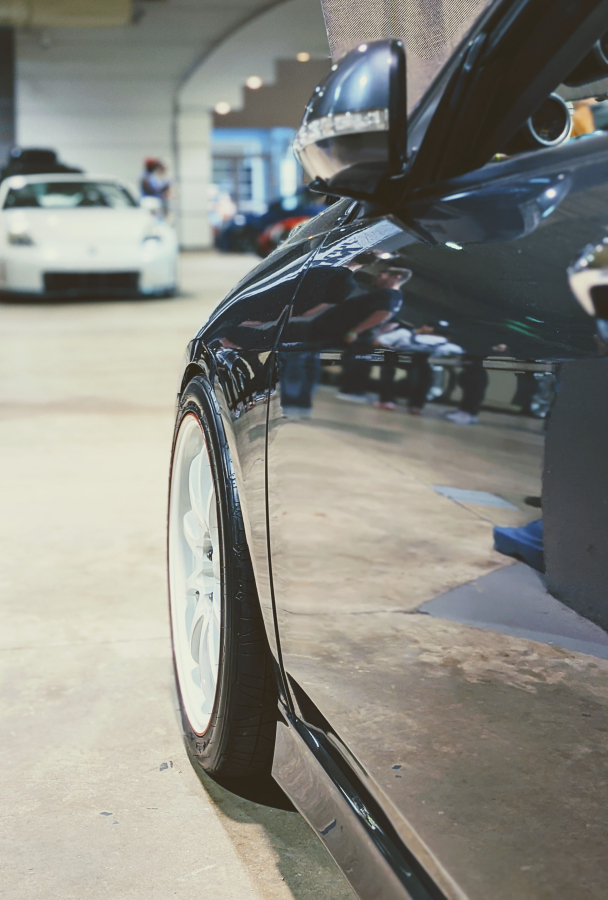
So I had wrapped the trunk in red camo because it had all sorts of scratches on it I didn't want to deal with. Being my first time doing vinyl wrapping it didn't come out perfect. I also ended up not digging it as much as I thought. It was a test to see if I would carry it to other parts of the car. Long term it is still in the plans as I want to carry the red/white of the wheels into an accent theme on the rest of the car.
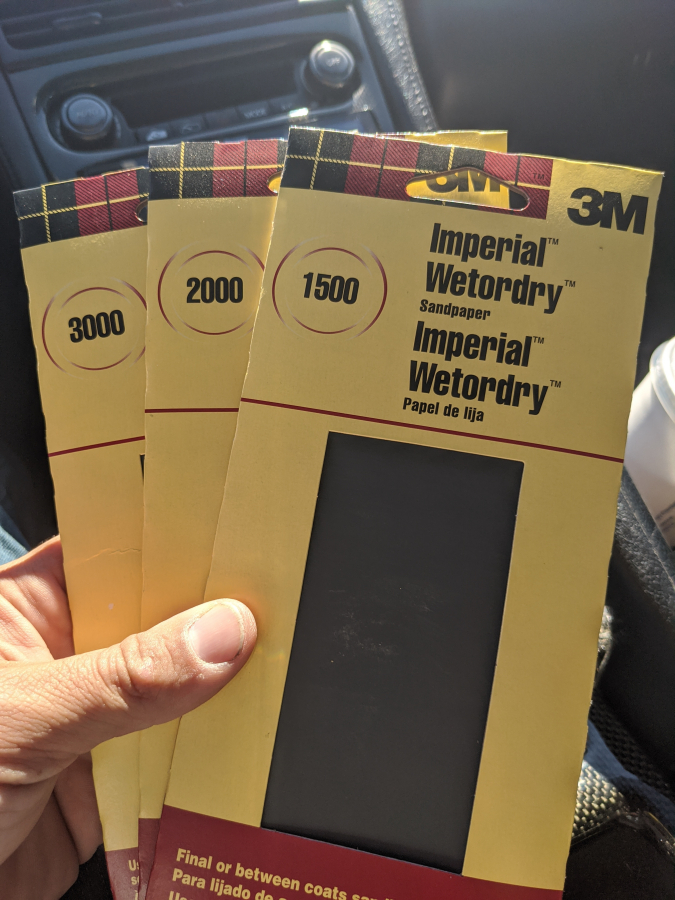
So to get the car ready for a friend's show it meant it was time to try and get as many of the scratches I could out of the trunk. First time I was wet sanding. Thank to @rockstar143 and @KaMLuNg for assuring me I couldn't really fuck this up.
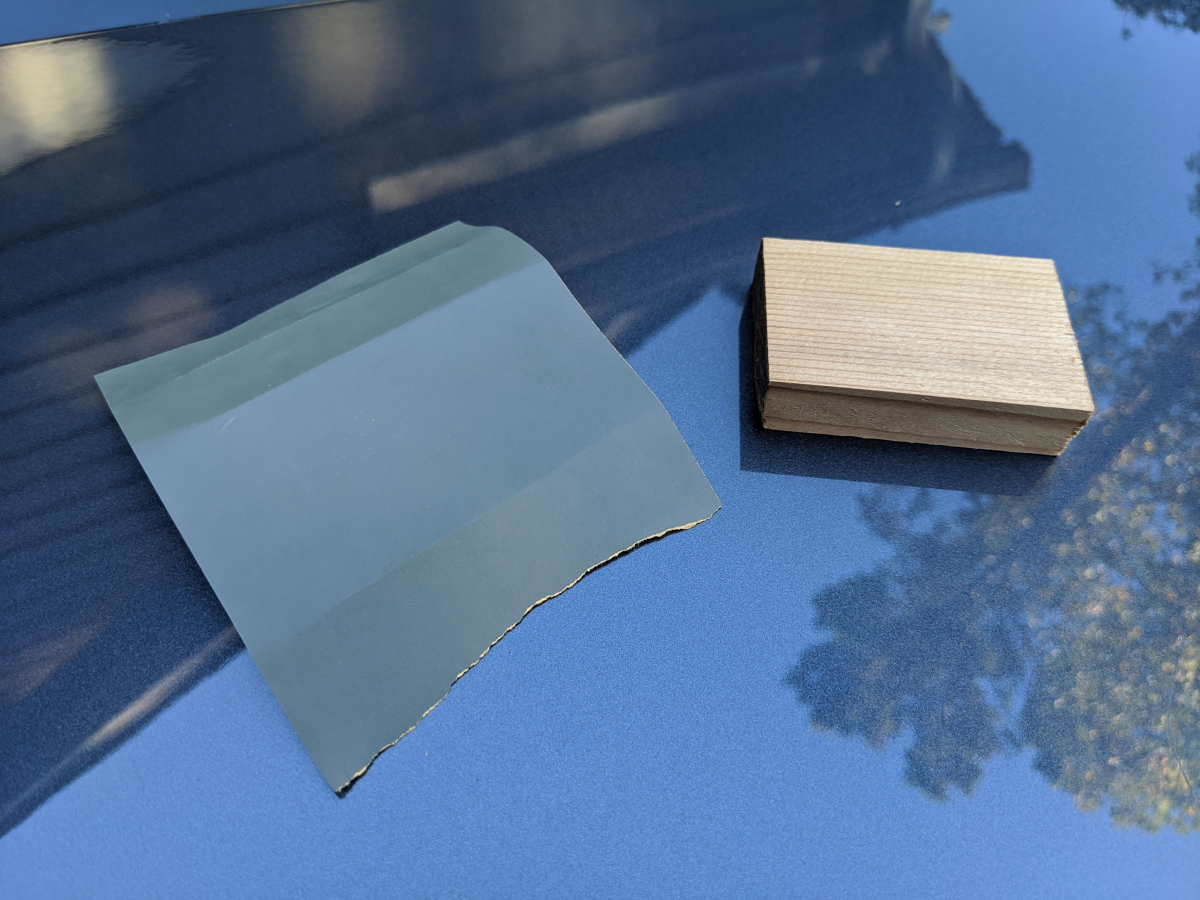
Picked some wet sanding paper
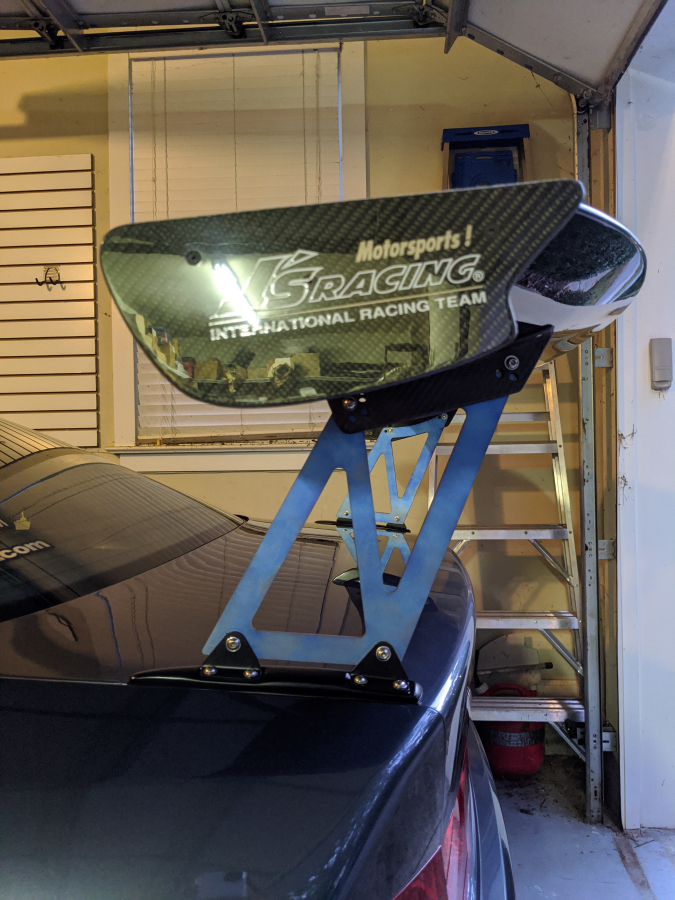
The shop that removed my Spoon spoiler from this trunk must have used a nylon pry bar or something

Time to get going
Round 1
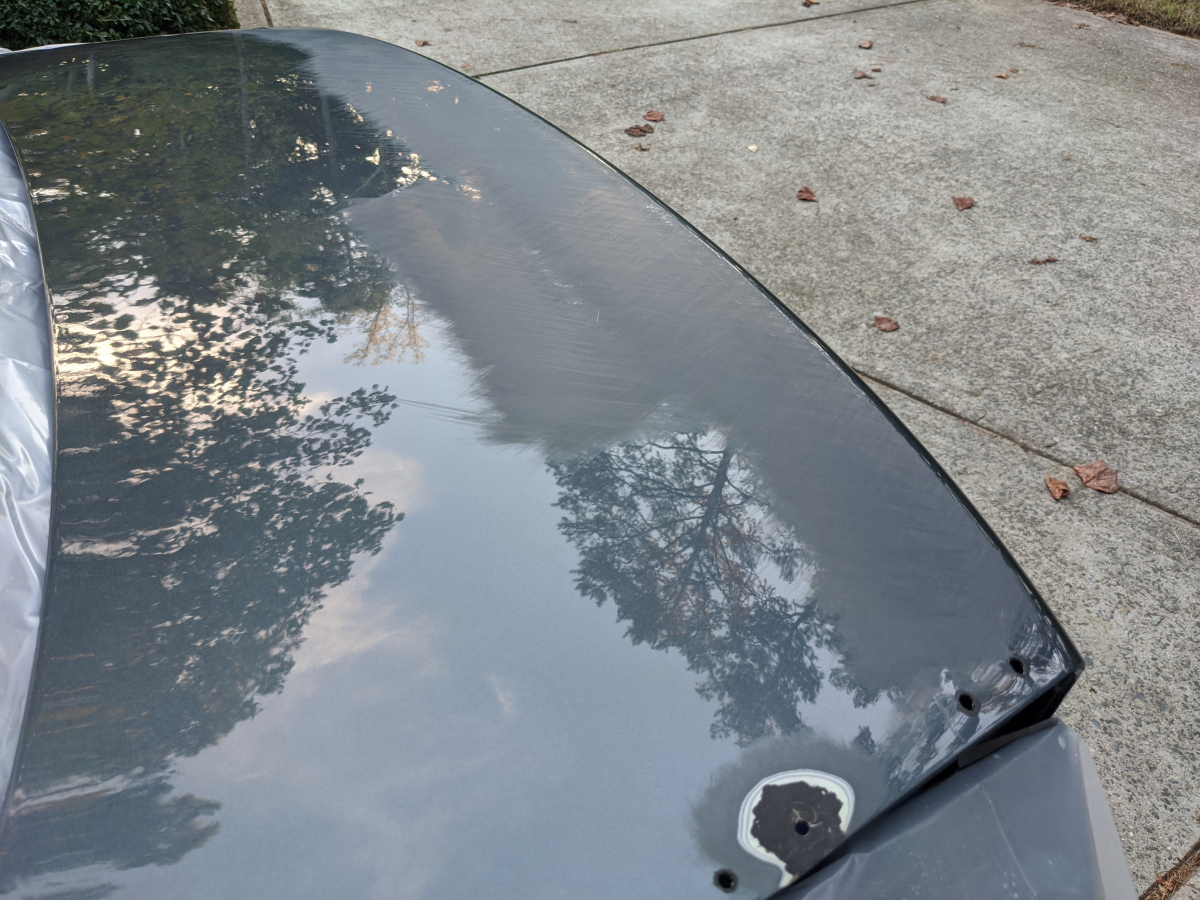
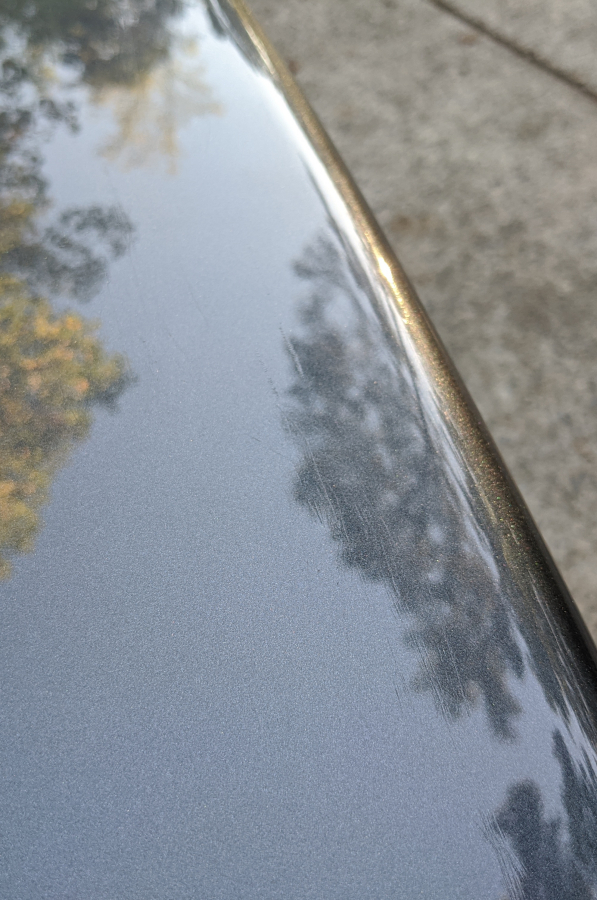
Final compounding and polish. The compound wouldn't get out all the sanding scratches out the first time so I went back over it and this time in addition to the 2000 grit also did 3000 before compounding.
Only 2-3 worst marks still remained and you really have to look for them to even spot them. Otherwise, it looks like glass.
I also sanded down the mounting brackets from some of the surface rust that had built up from the previous owner and gave them several coats of satin black Rustoleum.

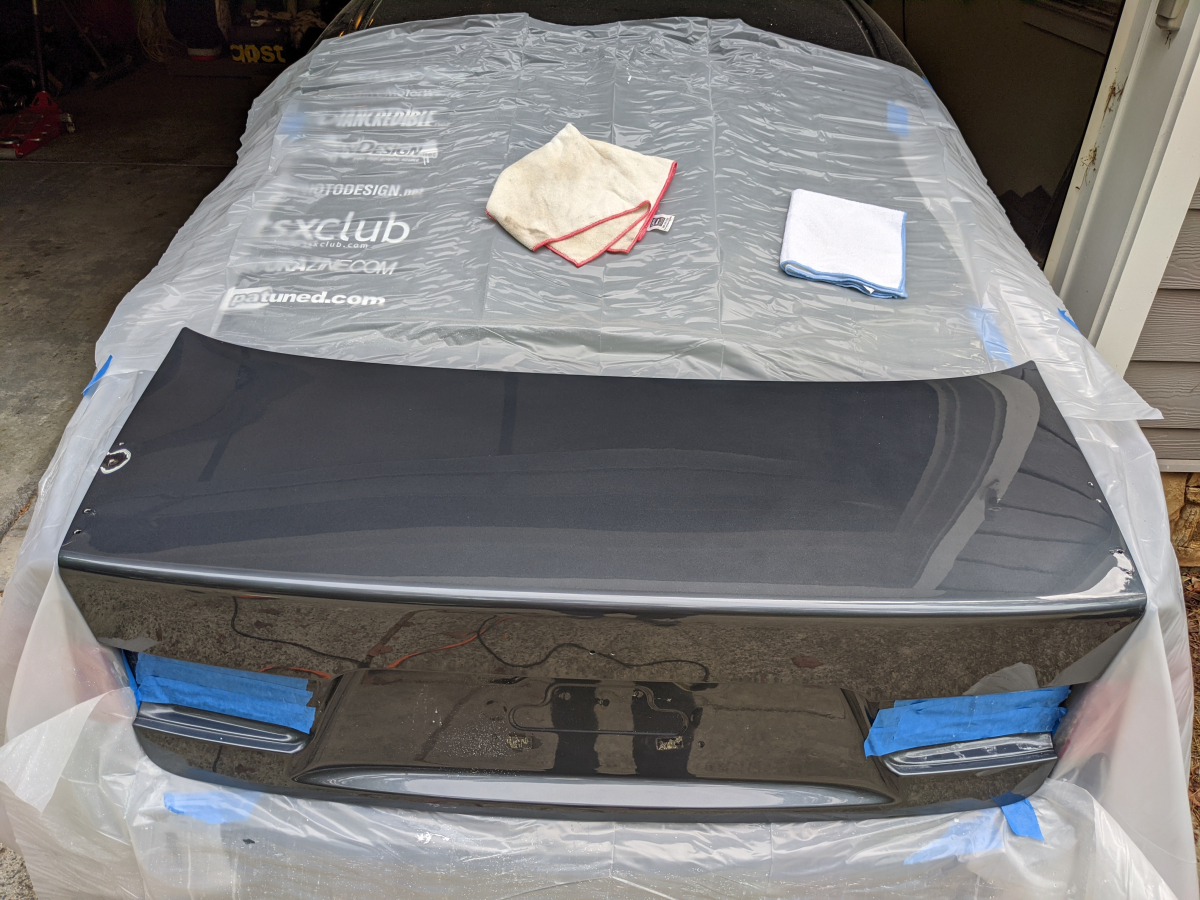
It was super dark out when I finally finished all of this
First thing next morning (I left the H badge off and put a custom decal a friend made as a tribute to a great friend and huge innovator in the car schene that passed away last month)
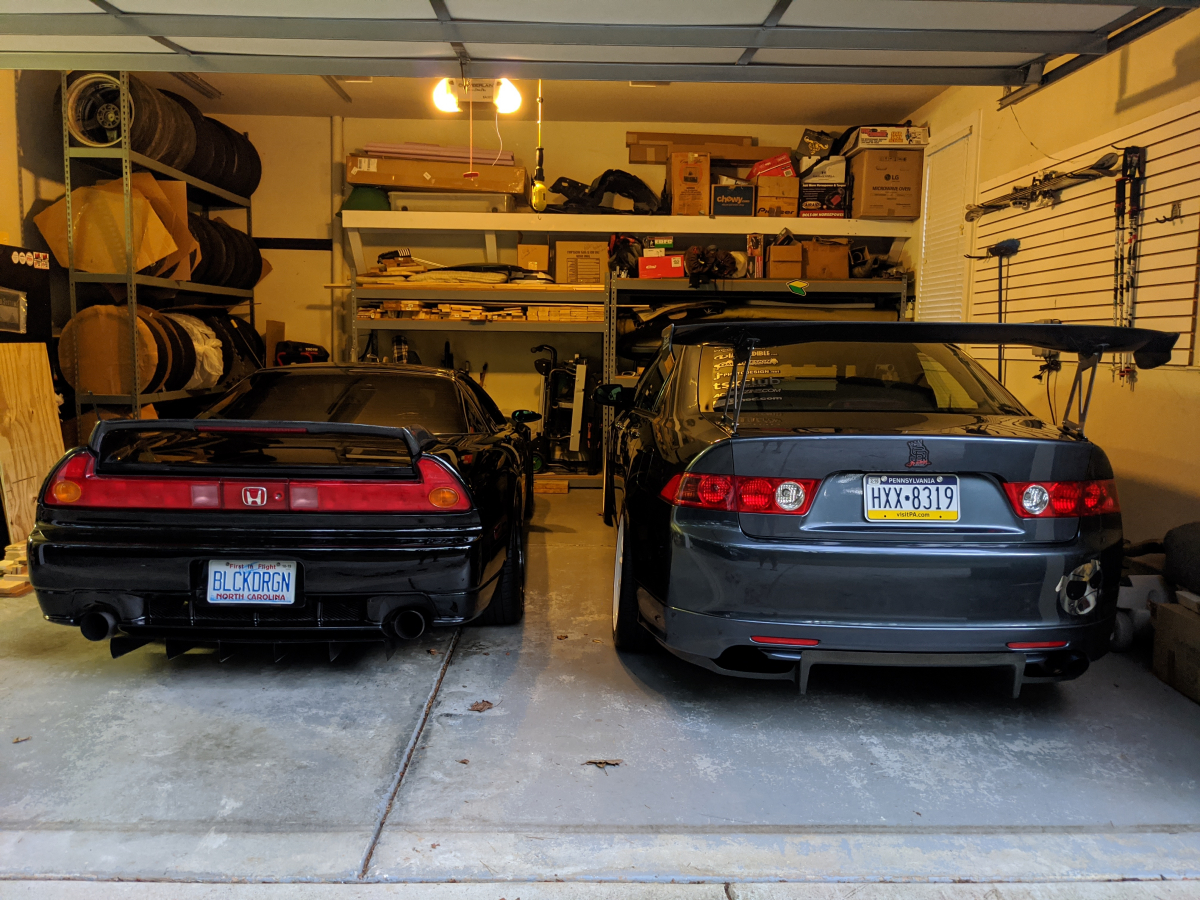

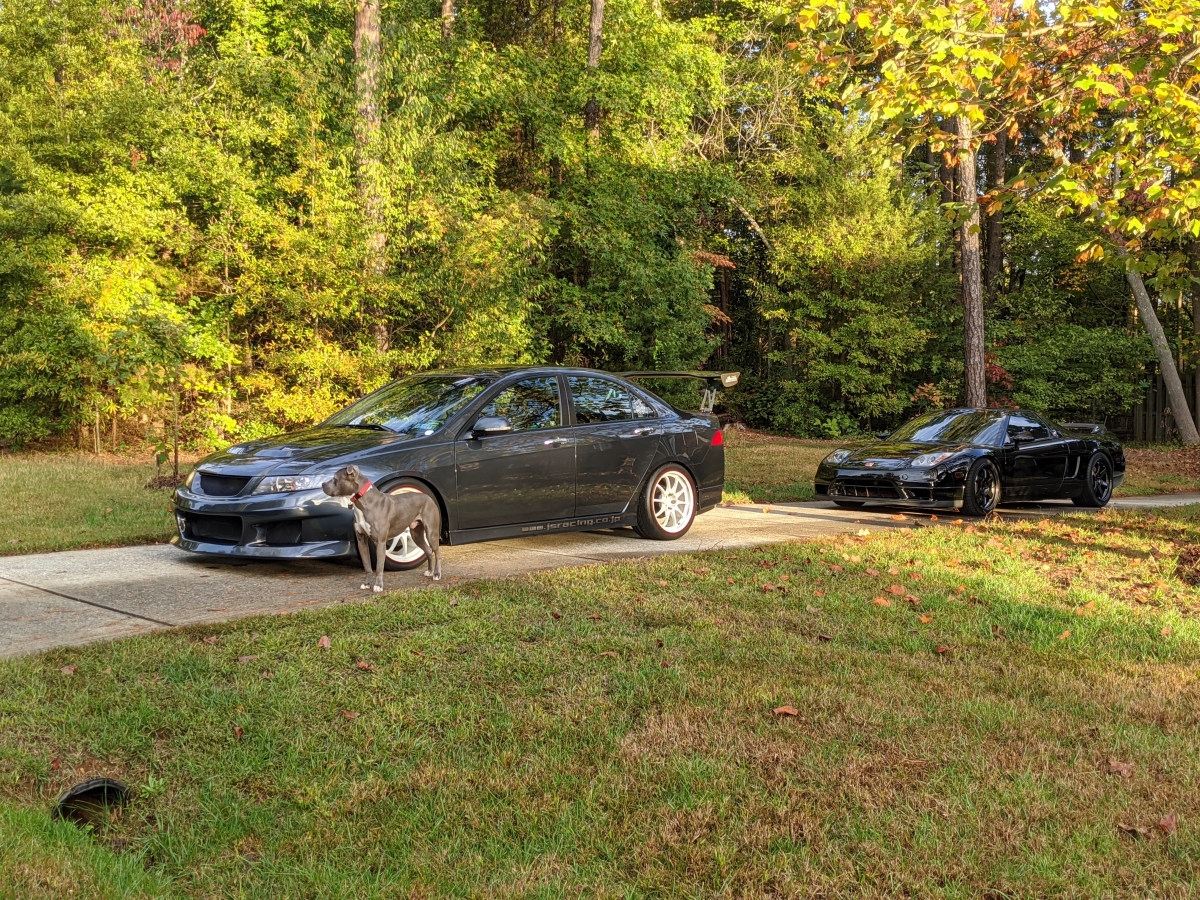
The TSX and NSX together before rolling out to my buddies show Tuner Evolution Charlotte. Enzo photo bombing.
At the show


Just like this shot for some reason
So to get the car ready for a friend's show it meant it was time to try and get as many of the scratches I could out of the trunk. First time I was wet sanding. Thank to @rockstar143 and @KaMLuNg for assuring me I couldn't really fuck this up.
Picked some wet sanding paper
The shop that removed my Spoon spoiler from this trunk must have used a nylon pry bar or something
Time to get going
Round 1
Final compounding and polish. The compound wouldn't get out all the sanding scratches out the first time so I went back over it and this time in addition to the 2000 grit also did 3000 before compounding.
Only 2-3 worst marks still remained and you really have to look for them to even spot them. Otherwise, it looks like glass.
I also sanded down the mounting brackets from some of the surface rust that had built up from the previous owner and gave them several coats of satin black Rustoleum.
It was super dark out when I finally finished all of this
First thing next morning (I left the H badge off and put a custom decal a friend made as a tribute to a great friend and huge innovator in the car schene that passed away last month)
The TSX and NSX together before rolling out to my buddies show Tuner Evolution Charlotte. Enzo photo bombing.
At the show
Just like this shot for some reason
11-07-2012, 12:43 AM
#2
AZ Community Team

Join Date: May 2007
Location: N35�03'16.75", W 080�51'0.9"
Posts: 32,488
Received 7,770 Likes
on
4,341 Posts
So you've got a TSX?!?!? 

The following users liked this post:
CCColtsicehockey (11-07-2012)
11-07-2012, 01:04 AM
#3
Your Friendly Canadian
Join Date: Dec 2007
Location: Toronto, Ontario
Age: 31
Posts: 17,427
Received 1,484 Likes
on
1,048 Posts
Holy eff...
A lot of time and money put into that car. Looks great.
A lot of time and money put into that car. Looks great.
The following users liked this post:
CCColtsicehockey (11-07-2012)
The following users liked this post:
CCColtsicehockey (11-07-2012)
The following users liked this post:
CCColtsicehockey (11-07-2012)

The following users liked this post:
CCColtsicehockey (11-07-2012)
11-07-2012, 06:37 AM
#7
Moderator
Regional Coordinator (Southeast)
Regional Coordinator (Southeast)
Thread Starter
Join Date: Dec 2003
Location: Mooresville, NC
Age: 37
Posts: 43,461
Received 3,655 Likes
on
2,490 Posts

Thanks
Way way way to much. For the cost of doing the double swap on two cars I might have been able to do RHD conversion instead.
Trending Topics
11-07-2012, 07:28 AM
#9
Moderator
Regional Coordinator (Southeast)
Regional Coordinator (Southeast)
Thread Starter
Join Date: Dec 2003
Location: Mooresville, NC
Age: 37
Posts: 43,461
Received 3,655 Likes
on
2,490 Posts
I plan to bring it to the next C&C meet if I don't end up planning a meet that weekend somewhere else. The blower loves this cool air so I will definitely be driving it around. My small 215 tires don't like it though.
The following users liked this post:
juniorbean (11-07-2012)
The following users liked this post:
CCColtsicehockey (11-08-2012)
11-07-2012, 08:13 AM
#11
Team Owner
iTrader: (4)
Cute.
The following users liked this post:
CCColtsicehockey (11-08-2012)
11-07-2012, 08:34 AM
#12
Senior Moderator
Regional Coordinator
(Mid-Atlantic)
Regional Coordinator
(Mid-Atlantic)
iTrader: (6)
 About f'ing time
The following users liked this post:
CCColtsicehockey (11-08-2012)
The following users liked this post:
CCColtsicehockey (11-08-2012)
11-07-2012, 09:40 AM
#14
Team Owner
iTrader: (4)
Is this thread like a Jay-Z cd..
The following users liked this post:
CCColtsicehockey (11-08-2012)
11-07-2012, 09:44 AM
#15
Oderint dum metuant.
Join Date: Mar 2005
Location: Lake Wylie
Age: 46
Posts: 12,496
Likes: 0
Received 534 Likes
on
446 Posts
Ah, THE thread has finally materialized...where's Eric?. And you were right, I made it as far as the paragraph discussing RHD or 6MT swap before I started just looking at pictures . In my defense, I've heard a lot of the story along the way as it happened.
And I've had the privilege of seeing/riding in this car in person. It looks fantastic (J's bumper > Spoon bumper ), sounds amazing, and is fast as hell. Definitely a job well done!
. In my defense, I've heard a lot of the story along the way as it happened.And I've had the privilege of seeing/riding in this car in person. It looks fantastic (J's bumper > Spoon bumper
), sounds amazing, and is fast as hell. Definitely a job well done!
The following users liked this post:
CCColtsicehockey (11-08-2012)
The following users liked this post:
CCColtsicehockey (11-08-2012)
11-07-2012, 10:36 AM
#17
BANNED
iTrader: (33)

safe to say you were NOT going to let this car get totaled. great rehab job on it...it truly is a masterpiece.
11-07-2012, 10:43 AM
#18
Engineer
My favorite TSX! Glad to see it back together!
The following users liked this post:
CCColtsicehockey (11-08-2012)

The following users liked this post:
CCColtsicehockey (11-08-2012)
11-07-2012, 11:57 AM
#20
Turd Polisher
iTrader: (1)
Best TSX hands down, simply beautiful and well put together.
The following 2 users liked this post by TylerT:
CCColtsicehockey (11-08-2012),
Midnight Mystery (11-07-2019)
11-07-2012, 11:58 AM
#21
Race Director
iTrader: (3)
Join Date: Feb 2012
Location: South Florida
Age: 30
Posts: 18,278
Received 3,824 Likes
on
2,847 Posts
Beautiful thread
Car looks amazing!
Car looks amazing!
The following users liked this post:
CCColtsicehockey (11-08-2012)
The following users liked this post:
CCColtsicehockey (11-08-2012)
The following users liked this post:
CCColtsicehockey (11-08-2012)
11-07-2012, 02:11 PM
#25
Moderator
iTrader: (3)
EXCELLENT write up Jason. I read every word 
I truly can't wait to see this in person!
I truly can't wait to see this in person!
The following users liked this post:
CCColtsicehockey (11-08-2012)
The following users liked this post:
CCColtsicehockey (11-08-2012)

The following users liked this post:
CCColtsicehockey (11-08-2012)
The following users liked this post:
CCColtsicehockey (11-08-2012)
11-07-2012, 04:18 PM
#29
Engrish at it's finest
11-07-2012, 04:22 PM
#30
I spend 2 much time here
The following 3 users liked this post by jiggaman:
The following users liked this post:
CCColtsicehockey (11-08-2012)
11-07-2012, 07:42 PM
#32
Team Owner
iTrader: (2)
Join Date: Jan 2008
Location: Kansas City, MO (Overland Park, KS)
Posts: 36,545
Received 6,470 Likes
on
5,162 Posts
Wow....
The following users liked this post:
CCColtsicehockey (11-08-2012)
The following users liked this post:
CCColtsicehockey (11-08-2012)

The following users liked this post:
CCColtsicehockey (11-08-2012)
11-08-2012, 09:50 AM
#36
Moderator
Regional Coordinator (Southeast)
Regional Coordinator (Southeast)
Thread Starter
Join Date: Dec 2003
Location: Mooresville, NC
Age: 37
Posts: 43,461
Received 3,655 Likes
on
2,490 Posts
Ah, THE thread has finally materialized...where's Eric?. And you were right, I made it as far as the paragraph discussing RHD or 6MT swap before I started just looking at pictures . In my defense, I've heard a lot of the story along the way as it happened.
And I've had the privilege of seeing/riding in this car in person. It looks fantastic (J's bumper > Spoon bumper ), sounds amazing, and is fast as hell. Definitely a job well done!
. In my defense, I've heard a lot of the story along the way as it happened.And I've had the privilege of seeing/riding in this car in person. It looks fantastic (J's bumper > Spoon bumper
), sounds amazing, and is fast as hell. Definitely a job well done! on not reading but yeah you have had the in person story instead.
Yeah I went with a MFactory Helical LSD as the shop doing the work does a lot of supercharged civics and says they have had great luck with them.
 I never noticed that before that is funny. I can promise that it is real though as the parts were all drop shipped directly from J's Racing.
It is unique and I would have done an engine swap at the same time as the Accord Euro R has a K20 that redlines at 8000rpm and with ITBs and a custom ecu there are people running it to 9000rpm.
11-08-2012, 02:25 PM
#39
Your Friendly Canadian
Join Date: Dec 2007
Location: Toronto, Ontario
Age: 31
Posts: 17,427
Received 1,484 Likes
on
1,048 Posts
This is great and all but it would be nice to get to Page 2 so we could read posts without having to wait for 100 pictures to load.
11-08-2012, 02:27 PM
#40
Moderator
Regional Coordinator (Southeast)
Regional Coordinator (Southeast)
Thread Starter
Join Date: Dec 2003
Location: Mooresville, NC
Age: 37
Posts: 43,461
Received 3,655 Likes
on
2,490 Posts
Yes I would have done the 6spd swap still but with the Euro R tranny instead.
The seats are Recaro Sportlines. These specific ones are from an actual Accord Euro R.
The seats are Recaro Sportlines. These specific ones are from an actual Accord Euro R.

