
DIY Wheel Refinishing
 11-06-2011, 12:53 PM
#1
In the Mid-South meow
Thread Starter
iTrader: (2)
DIY Wheel Refinishing
I just refinished some RX8 wheels (besides clear coating them, still have to do that) so I figured I'd share the steps to refinishing them and the results for anyone contemplating tackling this job. I'm by no means a professional refinisher or Terry (because I'm just not that detailed or patient lol). In fact, this is the first time I've ever refinished wheels beyond simply sanding and painting. I'm very happy with the results so I thought I'd share my process. I've done a little at a time over the past 2 1/2 months. Having a newborn in the house has limited my car hobby time, but I wasn't in a rush to get them done, so taking my time allowed me to get what I consider great results.
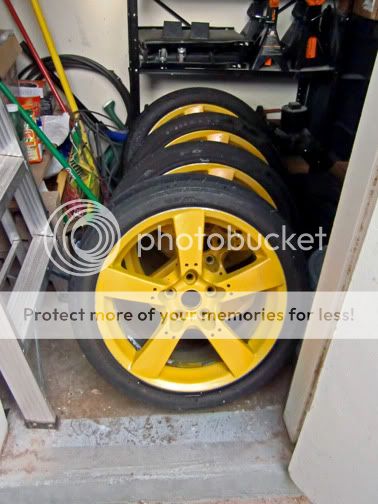
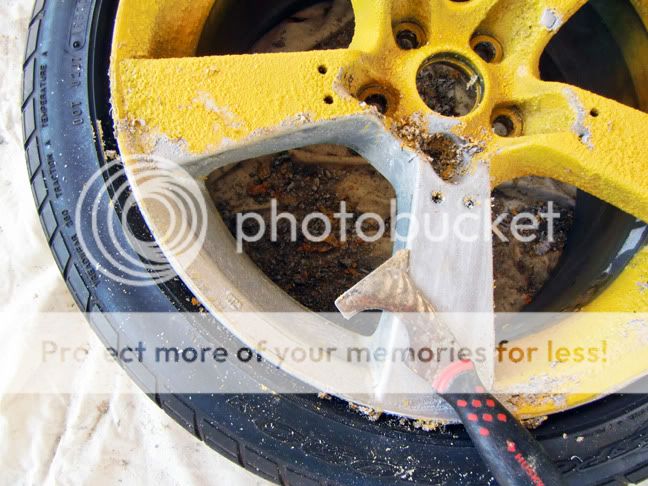
Here's what they started out as - John Deer yellow. Why someone painted them this color is beyond me, but to each their own. Because of the color they sat on craigslist for weeks and I stole the set for $90. If you can find painted wheels or wheels that have a beat up finish or a lot of curb rash, this is an excellent way to get wheels cheap and customize them to your particular taste.
Step 1.
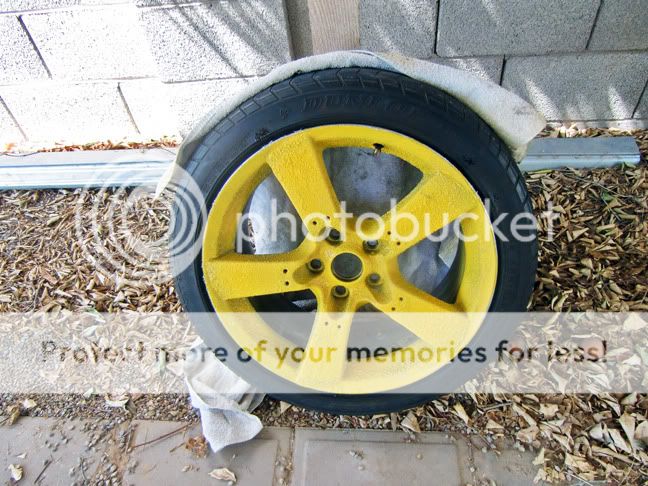
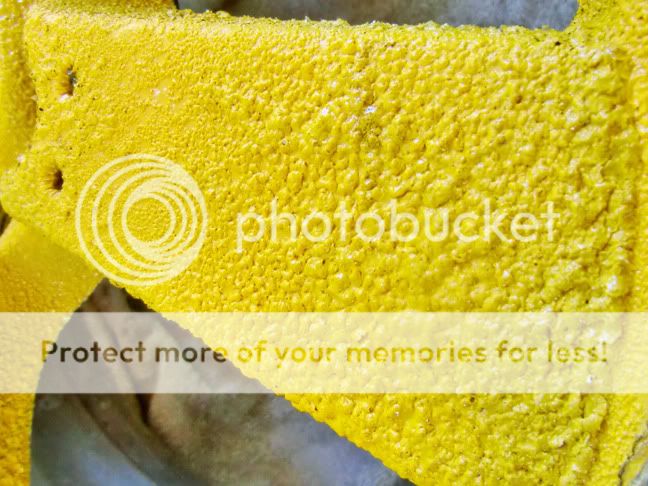
Spray the wheels liberally with paint stripper. This stuff is pretty brutal so make sure you wear thick rubber gloves, a mask of some sort and some kind of safety glasses. Allow the stripper to work for about 10 minutes. Once you see the paint bubbling up it's time to move to step 2.
* NOTE: I was not keeping the tires since they were old and I planned on getting new tires anyway, so I did not mask them off. If you are planning on keeping your tires, make sure to mask off the tires to ensure no stripper gets on the rubber. This stuff is powerful and might eat through the rubber.
Step 2.
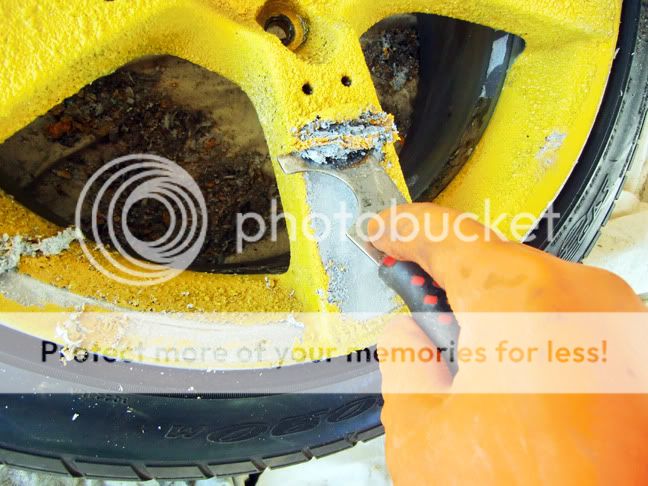
Time to start scraping. Use a flat paint scraper and work in sections. Don't worry about every little bit since you'll be spraying another round of stripper again.
* NOTE: I did the fronts and backs because there was tons of yellow overspray on the backs, but if you just want to do the fronts skip the backs since it's doubling your work time.
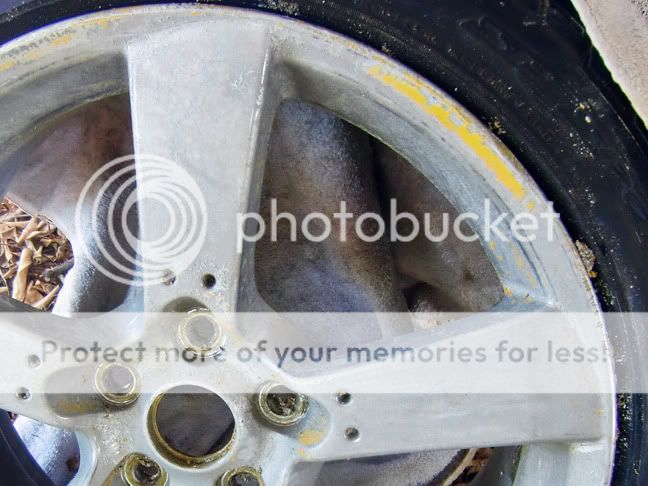
Step 3. Repeat Step 2 until most of the paint and clear coat is off the wheels. At this point I had the tires dismounted and disposed of. They were pretty shot and I was planning on getting new tires anyway.
Step 4. Test spray your color of choice. First spray just a small spot of primer, allow it to dry, then spray a light coat of your color choice. I did this now as I wanted to make 100% sure I was happy with my choice before I got to the painting step. That way if I needed to get a different color I had plenty of time and didn't feel rushed. I loved the way the test area looked, so I stuck with my paint choice.
Step 5. Grab a seat and start sanding. Start with 220 grit and work your way to 400 or 500 wet/dry grit. Pay special attention to the nooks and crannies that will test your patience, but it'll be worth the effort once you have them completely void of all paint and clear coat. To make it easy to work on the wheels I used two 5 gallon paint buckets, one to hold the wheel and one to sit on, allowing me to rotate the wheel easily while working on it.
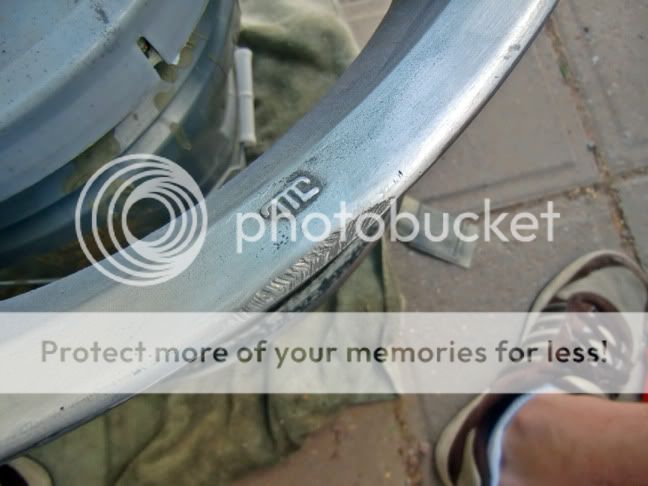
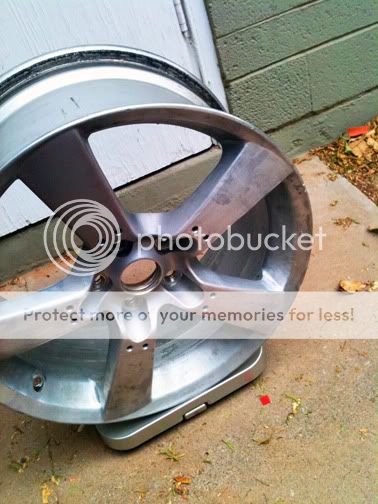
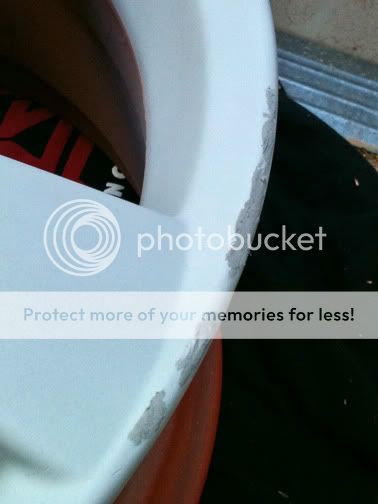
Step 6. Let's address the curb rash. For the light scrapes and scratches, simpley use an assortment of files to get those out. Pay attention to the contour of the area you're working on not to flatten it out.
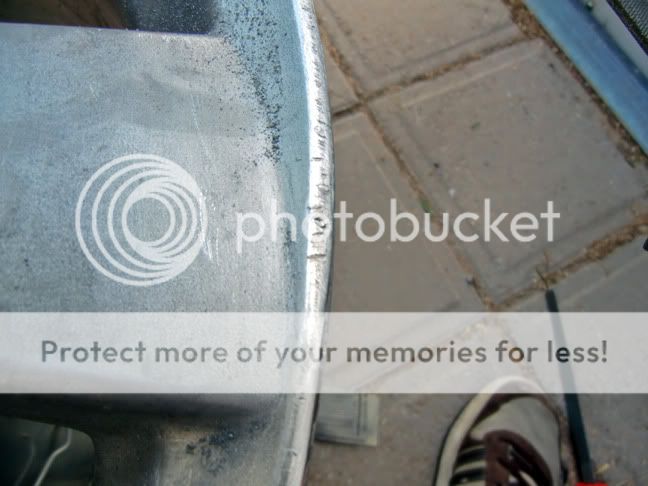
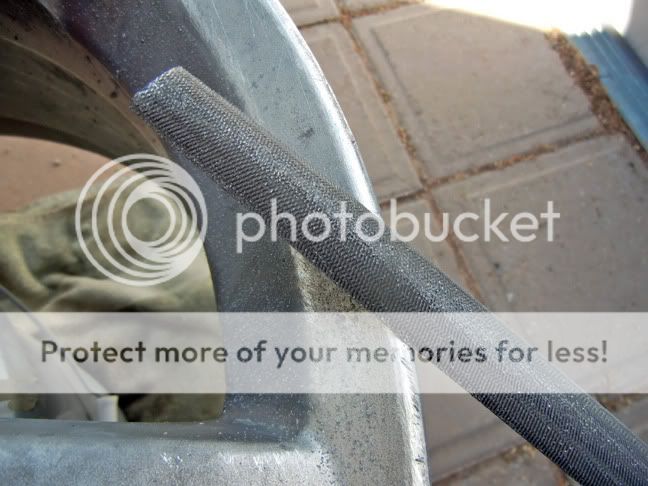
For the rash that's missing large areas of metal, for now just smooth them out with a file but don't go crazy trying to blend them in or anything. You'll be filling them in with some metal filler later on.

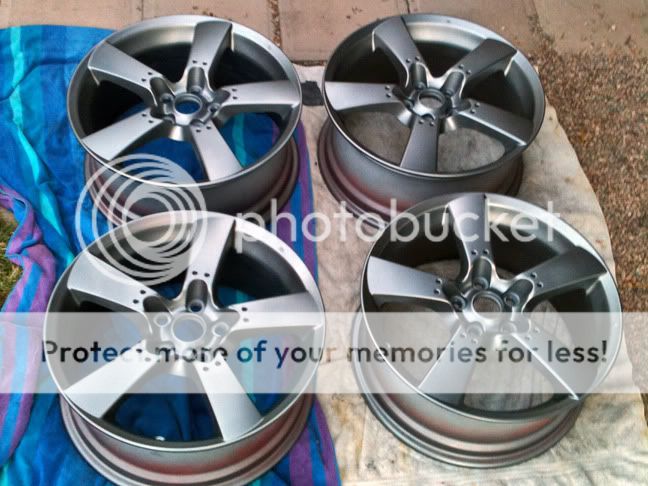
Step 7. Wash the wheels with water, Comet sink cleaner and some gray steel wool pads. Again pay attention to the little nooks and crannies and make sure you're down to bare metal with zero paint or clear coat remaining on the wheels.
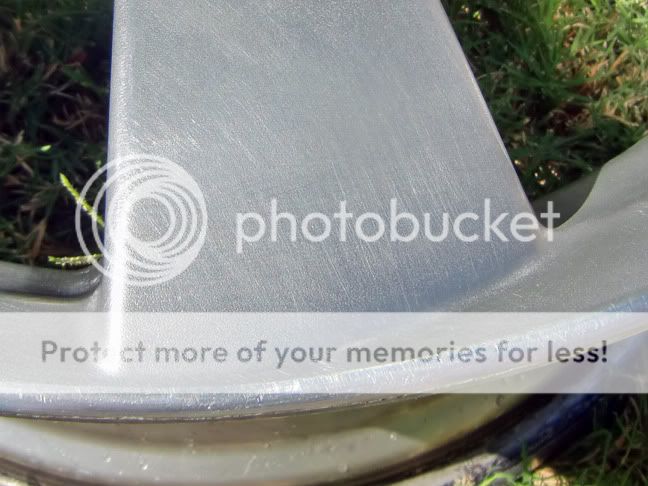
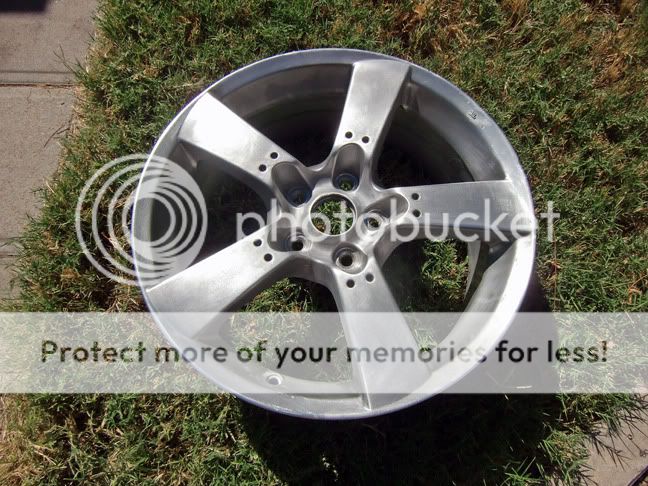
Lets see how much these puppies weight in the raw form. I have to say not too shabby for cast 18x8 OEM wheels!

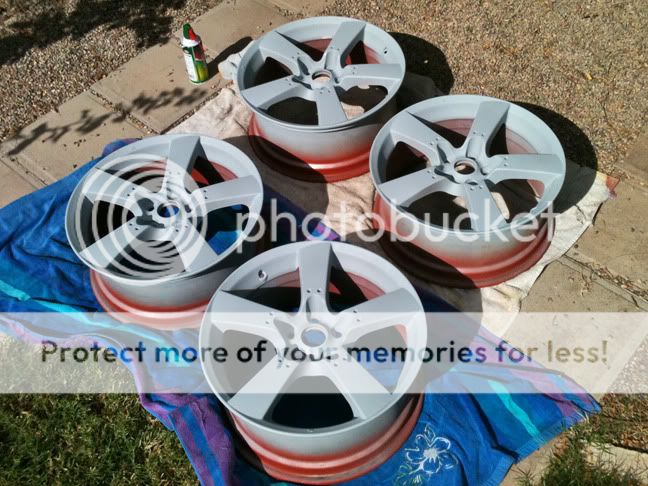
Step 8. Spray the wheels with primer. There's no particular reason I used different color primer for the front and back, it's just what I had at home and then bought at the store. Make sure to get good coverage with two to three coats to the front and back (only do the backs if you stripped them).
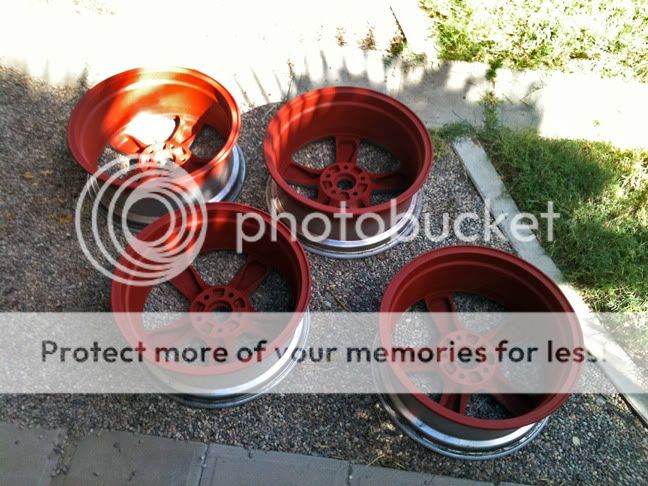
Step 9. Fill in the curb rash areas with metal filler. I just bought a small tube of the stuff (Bondo branded) and used rubber gloves to spread it over the areas. Apply liberally as you'll be sanding the areas down to blend in with the surrounding areas. Some larger missing chunks may take two applications.
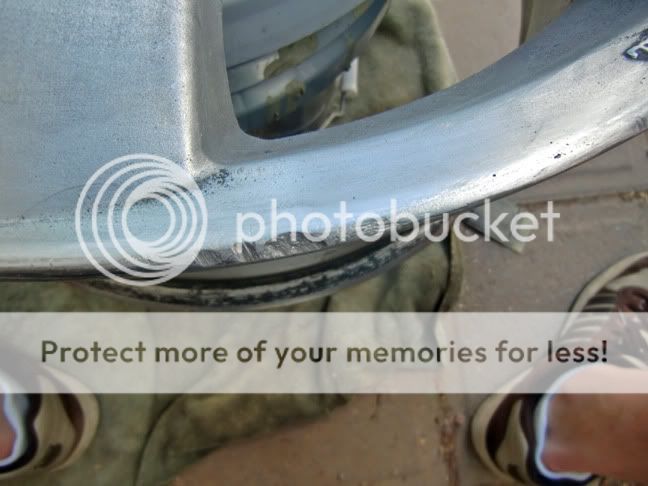
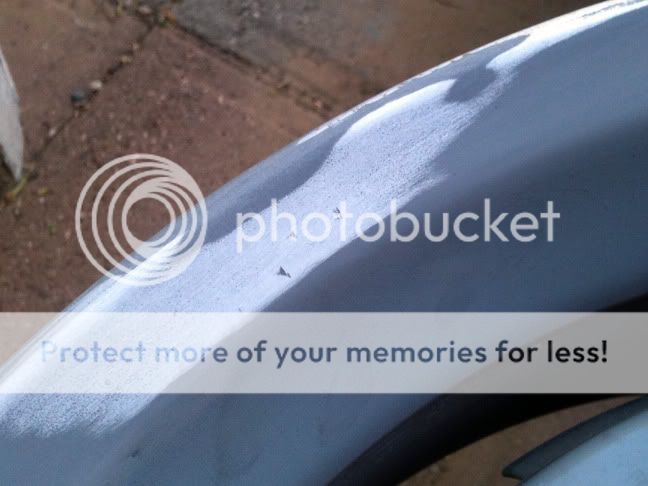
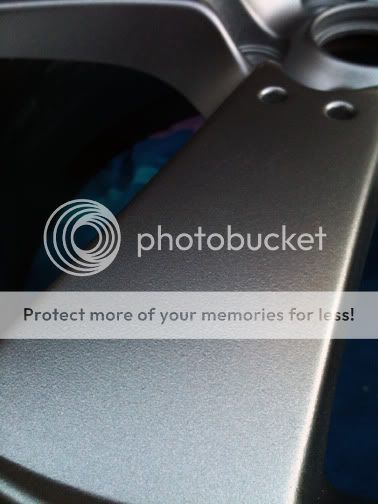
Step 10. Sand the filler smooth to the surrounding contours. I can't stress enough to take your time and don't over-sand. Start lightly with 220 grit to get the caked up areas off, then move to either 400 or 500 wet/dry and follow the countours of the areas around the repairs. Use your fingers to feel the areas over and over until it feels like it's flowing from edge to edge. The repair should look like this when it's smoothed out.
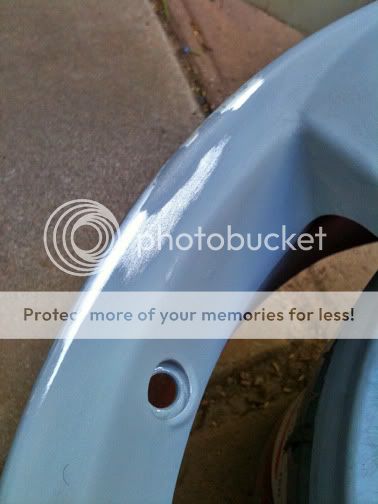
Step 11. Respray the areas you repaired with primer so the entire wheels is covered with primer and no metal/filler is showing. Do a couple light coats verses one heavy coat as this will be the base for your paint to sit on, so any drips or heavy splatter with show under the paint layer.
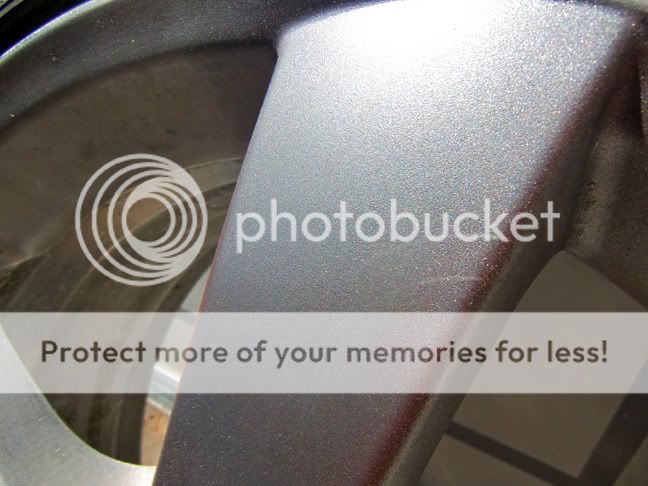
Step 12. Time to paint! I used the same two 5 gallon paint buckets to set up a stand to give me a good angle on the face of the wheel (if you're doing the backs as well, spray them first as the over-spray with get onto some of the front and you can cover that with the front spray in the final step). Just like with the curb rash repair, take your time with this step. It's very easy to get drips and splatters if you're trying to lay down one heavy layer instead of multiple thinner layers. Pay attention to how you put the wheel on the stand. Spray a light layer, then rotate the wheel 180� and spray another light layer. Rotate the wheel another 90�, spray a light layer then rotate the wheel 180� again and another light layer. Repeat this step another time. So basically you're getting a total of 8 light layers of paint which should be more than enough to cover the wheel completely and have a nice even spray.
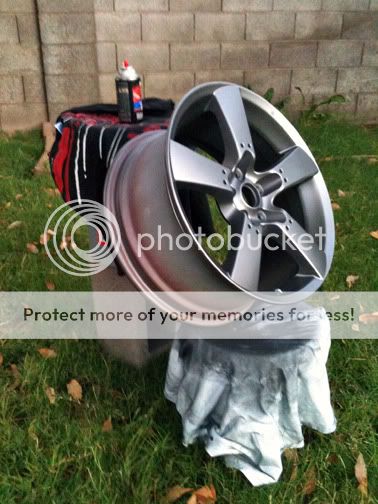
Step 12. Clear coat the wheels. Again, if you did the backs as well don't forget to clear those like the fronts. Make sure to allow enough time for the paint to dry before clearing, unless the paint instructions say to clear in a certain amount of time after spraying the color.
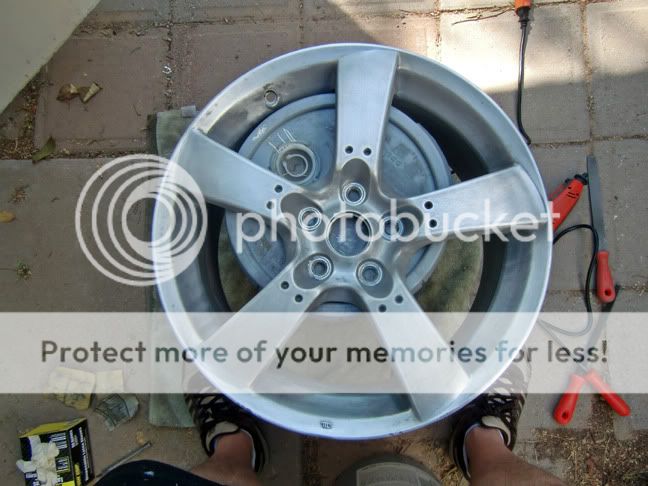
I hope this DIY helps anyone out that's considering refinishing either their current wheels or some wheels they plan on buying. Total amount of money spent on these wheels including purchase price is approximately $220, which is less than half of what a set of these wheels in this finish in this condition would go for, so I'm 100% happy with my final product.
Here's what they started out as - John Deer yellow. Why someone painted them this color is beyond me, but to each their own. Because of the color they sat on craigslist for weeks and I stole the set for $90. If you can find painted wheels or wheels that have a beat up finish or a lot of curb rash, this is an excellent way to get wheels cheap and customize them to your particular taste.
Step 1.
Spray the wheels liberally with paint stripper. This stuff is pretty brutal so make sure you wear thick rubber gloves, a mask of some sort and some kind of safety glasses. Allow the stripper to work for about 10 minutes. Once you see the paint bubbling up it's time to move to step 2.
* NOTE: I was not keeping the tires since they were old and I planned on getting new tires anyway, so I did not mask them off. If you are planning on keeping your tires, make sure to mask off the tires to ensure no stripper gets on the rubber. This stuff is powerful and might eat through the rubber.
Step 2.
Time to start scraping. Use a flat paint scraper and work in sections. Don't worry about every little bit since you'll be spraying another round of stripper again.
* NOTE: I did the fronts and backs because there was tons of yellow overspray on the backs, but if you just want to do the fronts skip the backs since it's doubling your work time.
Step 3. Repeat Step 2 until most of the paint and clear coat is off the wheels. At this point I had the tires dismounted and disposed of. They were pretty shot and I was planning on getting new tires anyway.
Step 4. Test spray your color of choice. First spray just a small spot of primer, allow it to dry, then spray a light coat of your color choice. I did this now as I wanted to make 100% sure I was happy with my choice before I got to the painting step. That way if I needed to get a different color I had plenty of time and didn't feel rushed. I loved the way the test area looked, so I stuck with my paint choice.
Step 5. Grab a seat and start sanding. Start with 220 grit and work your way to 400 or 500 wet/dry grit. Pay special attention to the nooks and crannies that will test your patience, but it'll be worth the effort once you have them completely void of all paint and clear coat. To make it easy to work on the wheels I used two 5 gallon paint buckets, one to hold the wheel and one to sit on, allowing me to rotate the wheel easily while working on it.
Step 6. Let's address the curb rash. For the light scrapes and scratches, simpley use an assortment of files to get those out. Pay attention to the contour of the area you're working on not to flatten it out.
For the rash that's missing large areas of metal, for now just smooth them out with a file but don't go crazy trying to blend them in or anything. You'll be filling them in with some metal filler later on.
Step 7. Wash the wheels with water, Comet sink cleaner and some gray steel wool pads. Again pay attention to the little nooks and crannies and make sure you're down to bare metal with zero paint or clear coat remaining on the wheels.
Lets see how much these puppies weight in the raw form. I have to say not too shabby for cast 18x8 OEM wheels!
Step 8. Spray the wheels with primer. There's no particular reason I used different color primer for the front and back, it's just what I had at home and then bought at the store. Make sure to get good coverage with two to three coats to the front and back (only do the backs if you stripped them).
Step 9. Fill in the curb rash areas with metal filler. I just bought a small tube of the stuff (Bondo branded) and used rubber gloves to spread it over the areas. Apply liberally as you'll be sanding the areas down to blend in with the surrounding areas. Some larger missing chunks may take two applications.
Step 10. Sand the filler smooth to the surrounding contours. I can't stress enough to take your time and don't over-sand. Start lightly with 220 grit to get the caked up areas off, then move to either 400 or 500 wet/dry and follow the countours of the areas around the repairs. Use your fingers to feel the areas over and over until it feels like it's flowing from edge to edge. The repair should look like this when it's smoothed out.
Step 11. Respray the areas you repaired with primer so the entire wheels is covered with primer and no metal/filler is showing. Do a couple light coats verses one heavy coat as this will be the base for your paint to sit on, so any drips or heavy splatter with show under the paint layer.
Step 12. Time to paint! I used the same two 5 gallon paint buckets to set up a stand to give me a good angle on the face of the wheel (if you're doing the backs as well, spray them first as the over-spray with get onto some of the front and you can cover that with the front spray in the final step). Just like with the curb rash repair, take your time with this step. It's very easy to get drips and splatters if you're trying to lay down one heavy layer instead of multiple thinner layers. Pay attention to how you put the wheel on the stand. Spray a light layer, then rotate the wheel 180� and spray another light layer. Rotate the wheel another 90�, spray a light layer then rotate the wheel 180� again and another light layer. Repeat this step another time. So basically you're getting a total of 8 light layers of paint which should be more than enough to cover the wheel completely and have a nice even spray.
Step 12. Clear coat the wheels. Again, if you did the backs as well don't forget to clear those like the fronts. Make sure to allow enough time for the paint to dry before clearing, unless the paint instructions say to clear in a certain amount of time after spraying the color.
I hope this DIY helps anyone out that's considering refinishing either their current wheels or some wheels they plan on buying. Total amount of money spent on these wheels including purchase price is approximately $220, which is less than half of what a set of these wheels in this finish in this condition would go for, so I'm 100% happy with my final product.
Last edited by SuperTrooper169; 11-06-2011 at 01:01 PM.

The following 22 users liked this post by SuperTrooper169:
1killercls (11-09-2011),
65 Fury Convert (11-10-2011),
callahan (11-27-2011),
Costco (11-17-2011),
crazyasiantl (11-07-2011),
and 17 others liked this post.

 11-06-2011, 01:03 PM
#3
In the Mid-South meow
Thread Starter
iTrader: (2)
Thanks bro. That's exactly why I did the DIY. 
11-06-2011, 01:05 PM
#4
Moderator
Nice job! Thanks for assembling the thread too.
11-06-2011, 01:16 PM
#5
Moderator
iTrader: (3)
Holy crap! Excellent job and write-up! I can't wait to see those on your car 
11-06-2011, 01:18 PM
#6
Drifting
What did you use for stripper? I tried 3 different kinds till I ended up buying the stuff the local airplane museum uses which is like 22 bucks a quart. Seriously caustic crap.
11-06-2011, 01:39 PM
#7
Trending Topics
11-06-2011, 02:57 PM
#8
In the Mid-South meow
Thread Starter
iTrader: (2)
Thanks for all the compliments!
I used Klean-Strip in a can from Home Depot. I used about a can per wheel, front and back.
I used Klean-Strip in a can from Home Depot. I used about a can per wheel, front and back.
11-06-2011, 03:38 PM
#9
My first Avatar....
Nice write up!
What brands of paint and clear coat did you use?
What brands of paint and clear coat did you use?
11-06-2011, 03:55 PM
#11
Drifting
Chill dog - what sadist put that in a spray can.
11-06-2011, 07:21 PM
#13
In the Mid-South meow
Thread Starter
iTrader: (2)
 11-06-2011, 07:24 PM
#14
Turd Polisher
iTrader: (1)
Can't wait to see them on your car! They look great!
Great write up too!
Great write up too!
11-06-2011, 07:55 PM
#15

Wow! Thanks for the write-up T! Very precise and detailed. The really turned out nicely. I especially liked the comment about using your hands to feel for smoothness. It's amazing how well it works.
Again, great job!
Again, great job!
11-06-2011, 08:12 PM
#16
In the Mid-South meow
Thread Starter
iTrader: (2)
11-06-2011, 08:31 PM
#18
Yeah, anything just takes practice. And it all begins with the initiative to try. Knowing how you maintained your Accord and the way you inspected the cars at the auction that day, I'm not surprised your work came out as good as it did.
11-06-2011, 08:46 PM
#19
In the Mid-South meow
Thread Starter
iTrader: (2)
That's awesome man! I sincery hope you give it a shot. That's the whole reason I did the DIY so others know it's not undoable for a first timer.
11-06-2011, 08:48 PM
#20
In the Mid-South meow
Thread Starter
iTrader: (2)
Well considering the time I spent on the wheels, I can't even begin to imagine the feeling you get after finishing an entire car. But agian, thanks for the props, it's much appreciated sir.
11-06-2011, 09:48 PM
#21
Great job ST!!
I am in the process of refinishing a set of BBS Style 5's for the E28 and I have been documenting the process as well. Looks like I won't have to start a DIY thread since you pretty much covered everything. Now get those puppies mounted and post some pics!
Plus, for anybody that is thinking about tackling such a project, I say do it. With a little research and patience, this sort of task isn't hard and can be tons of fun. Also, when you get complimented on the wheels that you refinished its nice to say that you did it.
Last edited by madcaps; 11-06-2011 at 09:54 PM.
11-06-2011, 10:38 PM
#22
In the Mid-South meow
Thread Starter
iTrader: (2)
^ Thanks man! I'd love to see your wheels and your DIY photos when they're done.
11-06-2011, 11:51 PM
#23
Did you sand in between coats of paint? I've only primered so far, but after each coat I used a green Scotch Bright to smooth out the primer. I figured when I apply the final coats I would use a high grit sandpaper (1200+) in between each coat to get a smooth, perfect finish. Then, wetsand the final clearcoat, hopefully it comes out good.
11-07-2011, 12:00 AM
#24
The Third Ball
Join Date: Sep 2002
Location: Los Angeles, Ca
Age: 45
Posts: 49,420
Received 5,079 Likes
on
2,696 Posts
VERY nice job, I love the step by step with photos.
11-07-2011, 10:50 AM
#26
In the Mid-South meow
Thread Starter
iTrader: (2)
� 4 cans of Klean-Strip paint stripper
� 4 cans of sandable primer
� 8 cans of Dupli-Color W40 Precision Gray metallic spray paint
� 4 cans of Dupli-Color Wheel Coating clear coat
� 220 grit sandpaper
� 400 or 500 grit wet/dry sandpaper
� Tube of Bondo metal filler or JB Weld
� Can of Comet sink cleaner
� 8 pack gray steel wool
� Various size/contour metal files
� Small paint scraper
� Chemical resistant rubber gloves
� Disposable rubber gloves
� Safety glass
� Dust mask
� 2 - 5 gallon paint buckets with lids (Optional)
The following 3 users liked this post by SuperTrooper169:
11-07-2011, 11:11 AM
#28
In the Mid-South meow
Thread Starter
iTrader: (2)
^ You're very welcome. Hope it inspires some wheel refinishing.
I should note to everyone that I used this exact metal filler so there's no confusion thinking it's regular ol' Bondo body filler:
BONDO/3M Plastic Metal - I'm pretty sure it's nearly the same stuff as JB Weld but pre-mixed in a single tube. I checked the ingredients out on the back and it contains a large amount of magnesium and aluminum, so it's a sort of metal in a paste form. Someone else on a different forum I posted the DIY on commented that the filler would break off when they install the tires. I wanted to clarify it's not normal Bondo.
11-07-2011, 12:45 PM
#30
GEEZER
Awesome write up. One other option instead of the paint remover is to glss bead blast (Not sand blast) the rims to remove the paint.
Nice job, finished product looks KIller!
Nice job, finished product looks KIller!
11-07-2011, 02:48 PM
#32
Drifting
I have seen people use fiberglass filler and have it stay on. In fact the style 37's I am re doing had plenty of normal pink bondo on them when I stripped them, and I think the repairs were 2 or 3 years old.
Anyway. I ended up using a 2 part epoxy that is used for bonding metal together, but is still sandable and paintable .
Anyway. I ended up using a 2 part epoxy that is used for bonding metal together, but is still sandable and paintable .
11-07-2011, 04:45 PM
#33
Did you already apply the Duplicolor clearcoat? I tried refinishing a set of TL wheels. For the most part it went ok. I got a few runs when I was applying the color. But when I applied the clear, I got runs like crazy. No matter how thin I applied it, it would run like water! I gave up and had the wheels powedcoated lol.
11-07-2011, 04:47 PM
#35
Moderator
Did you already apply the Duplicolor clearcoat? I tried refinishing a set of TL wheels. For the most part it went ok. I got a few runs when I was applying the color. But when I applied the clear, I got runs like crazy. No matter how thin I applied it, it would run like water! I gave up and had the wheels powedcoated lol.
11-07-2011, 05:03 PM
#36
Drifting
11-07-2011, 05:26 PM
#38
Moderator
