06+ DVD Player w/ Homemade Video Harness DIY
 05-15-2008, 03:09 AM
#1
Instructor
Thread Starter
06+ DVD Player w/ Homemade Video Harness DIY
**Note: this will not work on 04-05 models..
After a little of a year I finally installed the DVD player. Here is the DIY on how to wire it with the harness from my other DIY. This is geared toward people that have the backup cam too.
DVD PLAYER WIRING
Install DVD player, plenty of DIYs on the web on how to install in a TSX.
I chose the Myron Davis ad212 due to the fact that its � DIN size and has a remote turn on lead that sends out a 12v signal when the unit is turned on. This eliminates the need for another switch to have the navigation switch from GPS to aux video.
Run the remote turn on lead to back of the car. Lift up on the front of the back seat. There are two clips to hold it in. Once the rear seat is lifted up you can gain access to the 10mm bolt that holds the seat bolster in place.
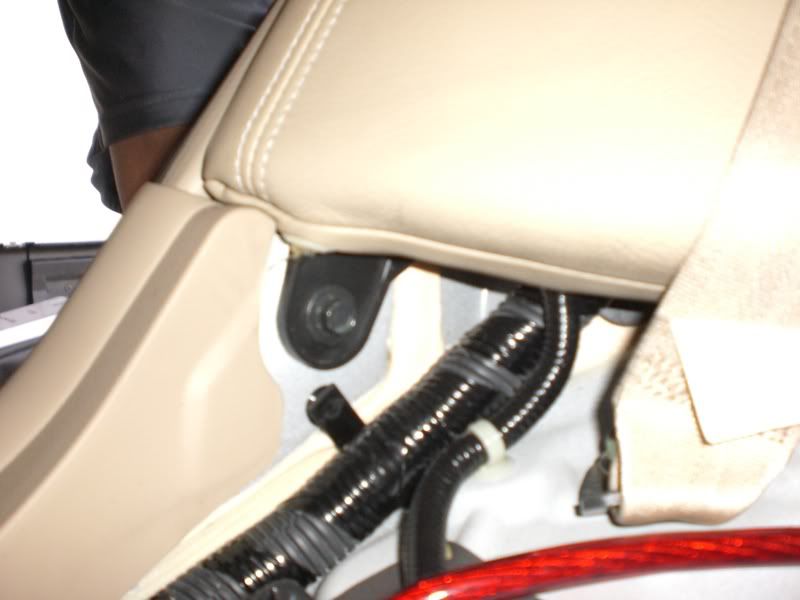
Bolt
Remove bolt and slide bolster up and out. You should see a big wire loom. Open the loom and locate the green wire.

Green wire
If you are just installing a DVD player and no backup cam just cut the green wire and splice the remote lead from the player to the end of the green wire that leads back to the navigation unit in the trunk.
If you have a backup camera you will need a bosch relay. I bought mine from Auto Zone, just had to ask the parts counter. It should look like the one below. It needs to have 5 connections, 30, 85, 86, 87, 87a.
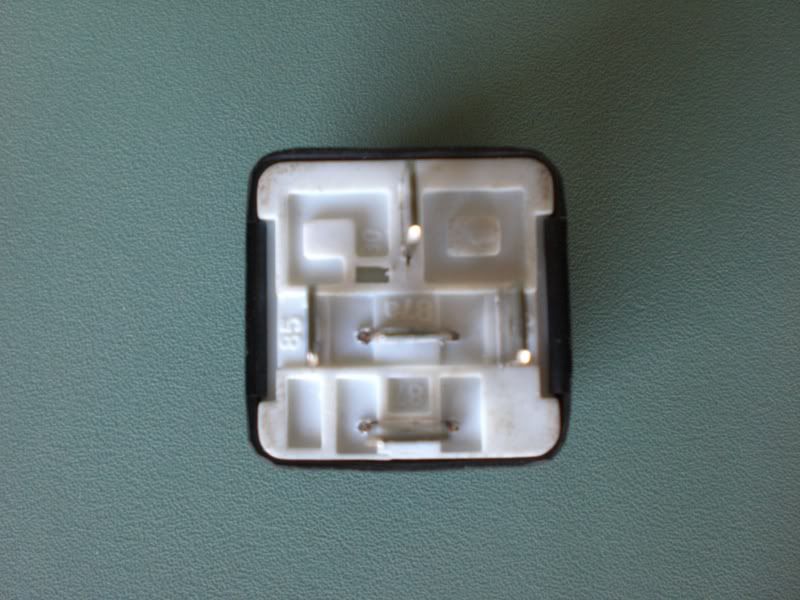
5 pin bosch relay
Below is how to wire the bosch relay.
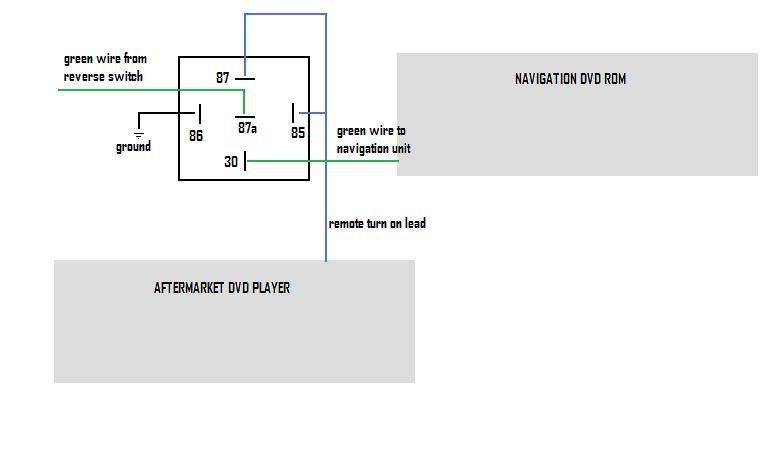
Relay wiring
Each connection should be as follows:
30 – green wire to navigation unit in trunk
85 – remote turn on lead
86 – ground
87 – remote turn on lead
87a – green wire from reverse switch

Finished relay wiring
I grounded my relay here.
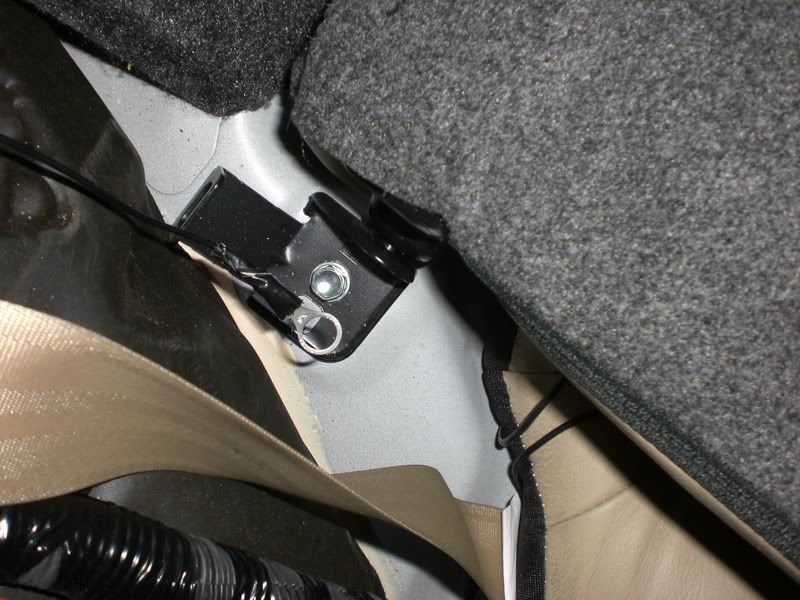
relay ground
The remote lead from the DVD player will need to be slpit and connected in two places on the relay, 85 and 87.
That’s how to make the connections for the DVD player. As far as the audio part you can either use the aux input in the center console or another device with an auxillary audio input. I have the USAspec so I used that.
For the video output of the DVD player, run that to the trunk at plug into the harness made above. If you have the camera installed to purchase 2 – into – 1 RCA splitter.
Luther
After a little of a year I finally installed the DVD player. Here is the DIY on how to wire it with the harness from my other DIY. This is geared toward people that have the backup cam too.
DVD PLAYER WIRING
Install DVD player, plenty of DIYs on the web on how to install in a TSX.
I chose the Myron Davis ad212 due to the fact that its � DIN size and has a remote turn on lead that sends out a 12v signal when the unit is turned on. This eliminates the need for another switch to have the navigation switch from GPS to aux video.
Run the remote turn on lead to back of the car. Lift up on the front of the back seat. There are two clips to hold it in. Once the rear seat is lifted up you can gain access to the 10mm bolt that holds the seat bolster in place.
Bolt
Remove bolt and slide bolster up and out. You should see a big wire loom. Open the loom and locate the green wire.
Green wire
If you are just installing a DVD player and no backup cam just cut the green wire and splice the remote lead from the player to the end of the green wire that leads back to the navigation unit in the trunk.
If you have a backup camera you will need a bosch relay. I bought mine from Auto Zone, just had to ask the parts counter. It should look like the one below. It needs to have 5 connections, 30, 85, 86, 87, 87a.
5 pin bosch relay
Below is how to wire the bosch relay.
Relay wiring
Each connection should be as follows:
30 – green wire to navigation unit in trunk
85 – remote turn on lead
86 – ground
87 – remote turn on lead
87a – green wire from reverse switch
Finished relay wiring
I grounded my relay here.
relay ground
The remote lead from the DVD player will need to be slpit and connected in two places on the relay, 85 and 87.
That’s how to make the connections for the DVD player. As far as the audio part you can either use the aux input in the center console or another device with an auxillary audio input. I have the USAspec so I used that.
For the video output of the DVD player, run that to the trunk at plug into the harness made above. If you have the camera installed to purchase 2 – into – 1 RCA splitter.
Luther
Last edited by Jonesi; 11-21-2009 at 09:43 AM.
 05-20-2008, 12:41 AM
#2
Instructor

Join Date: Mar 2007
Posts: 109
Likes: 0
Received 0 Likes
on
0 Posts
thank you!
thanks phisigbrotha! been using a pioneer backup cam that i installed using your DIY. so far it's worked pretty well. i have had problems from time to time where all i get is a black screen. I think the problem might be because the green power wire for the reverse light is really thin, and i'm using t-taps that might be a little big, so the connection isn't solid. they were the smallest t-taps i could find though. I think the power connection isn't 100% solid, but it pretty much works probably 95% of the time. i've been thinking about possibly soldering the connection. do you have any other ideas?
the dvd diy looks a little bit more complicated. can you provide a couple of pics of your unit in action? i'm curious about the picture quality and the location where you installed your dvd player. i'm not very electrically inclined, so i'm not sure if or when i'll attempt this, but thanks for the help!
the dvd diy looks a little bit more complicated. can you provide a couple of pics of your unit in action? i'm curious about the picture quality and the location where you installed your dvd player. i'm not very electrically inclined, so i'm not sure if or when i'll attempt this, but thanks for the help!
05-22-2008, 11:59 PM
#3
Instructor
Thread Starter
This video doesnt do the quality justice. it was taken with my P&S casio.
i didnt mount it in the center of the storage pocket so i could put the remote for the DVD player and the remote for my sirius radio in there.

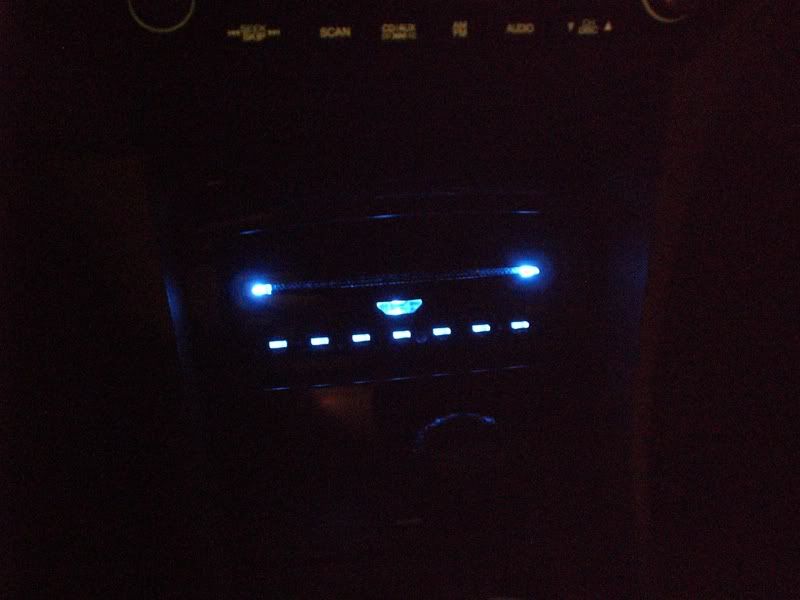
night shot of the player. its pretty bright.
bonus shot of where i ended up moving my sportster to.
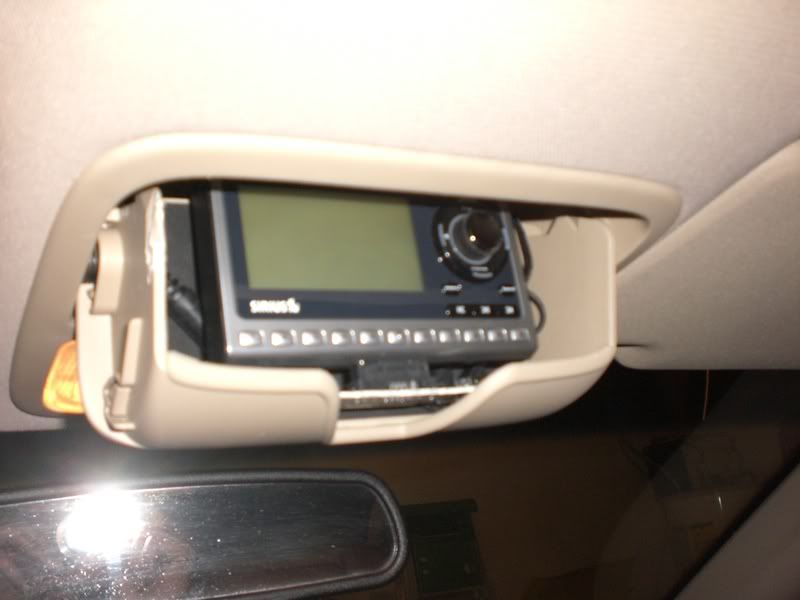
still need to make a surround for it. had to disassemble the docking station to get it to fit in there.
luther
i didnt mount it in the center of the storage pocket so i could put the remote for the DVD player and the remote for my sirius radio in there.
night shot of the player. its pretty bright.
bonus shot of where i ended up moving my sportster to.
still need to make a surround for it. had to disassemble the docking station to get it to fit in there.
luther
Last edited by Jonesi; 11-21-2009 at 09:41 AM.
06-30-2008, 02:39 PM
#4
Instructor
Join Date: Mar 2006
Age: 42
Posts: 192
Likes: 0
Received 0 Likes
on
0 Posts
This green wire that you are tapping, looks like under the rear seat if I read correctly... I'm assuming this goes to the Nav unit in the trunk. Why not just tap it in the trunk instead of pulling the seat out?
Granted, you will have to pull the seat out anyway to run other wires. I was just curious.
Granted, you will have to pull the seat out anyway to run other wires. I was just curious.
06-30-2008, 08:44 PM
#5
Instructor
Thread Starter
Originally Posted by intensity2x
This green wire that you are tapping, looks like under the rear seat if I read correctly... I'm assuming this goes to the Nav unit in the trunk. Why not just tap it in the trunk instead of pulling the seat out?
Granted, you will have to pull the seat out anyway to run other wires. I was just curious.
Granted, you will have to pull the seat out anyway to run other wires. I was just curious.
Im sure you can tap the wire right behind the navi unit. I chose to do it behind the seat bolster because its easy to take off (pop the front of the seat up, remove bolt at the bottom of the bolster, slide bolster up and out), more room to work and its easy to hide the relay.
Luther
 I plan on doing the rearview cam in the near future and possibly the dvd too. If I knew it was this simple I would done it long ago.
07-01-2008, 01:39 AM
I plan on doing the rearview cam in the near future and possibly the dvd too. If I knew it was this simple I would done it long ago.
07-01-2008, 01:39 AM
#7
Instructor
Thread Starter
Yeah it is pretty simple. Camera more so than the dvd. DVD + camera can be tricky with wiring the relay but hopefully the writeup can clear it up some.
Luther
Luther
Trending Topics
07-01-2008, 02:02 AM
#8
Instructor
Join Date: Mar 2007
Posts: 109
Likes: 0
Received 0 Likes
on
0 Posts
Originally Posted by PhiSigBrotha
Im sure you can tap the wire right behind the navi unit. I chose to do it behind the seat bolster because its easy to take off (pop the front of the seat up, remove bolt at the bottom of the bolster, slide bolster up and out), more room to work and its easy to hide the relay.
Luther
Luther

anyone know exactly what size t-tap i should get? i got the smallest one i could find but it's still kind of loose...
07-01-2008, 03:01 AM
#9
Instructor
Thread Starter
You have just the camera hooked up? Which wire are you referring to that is super thin and fragile?
I personally dont like t-taps. If at all possible i solder. Whenever i use crimp connectors i solder those too.
Luther
I personally dont like t-taps. If at all possible i solder. Whenever i use crimp connectors i solder those too.
Luther
07-02-2008, 12:48 AM
#10
Instructor
Join Date: Mar 2007
Posts: 109
Likes: 0
Received 0 Likes
on
0 Posts
Originally Posted by PhiSigBrotha
You have just the camera hooked up? Which wire are you referring to that is super thin and fragile?
I personally dont like t-taps. If at all possible i solder. Whenever i use crimp connectors i solder those too.
Luther
I personally dont like t-taps. If at all possible i solder. Whenever i use crimp connectors i solder those too.
Luther
i don't suppose you've ever considered doing this stuff as a hobby/second job? i'm sure plenty of people would pay. one of the things i thought might be fun would be a switch to show the reverse camera while driving, kind of like an extra rear view mirror.
thanks for the diy write-ups luther, i love the backup cam (when mine is working).
03-16-2009, 12:59 PM
#11
Instructor

Join Date: Jan 2008
Age: 41
Posts: 155
Likes: 0
Received 0 Likes
on
0 Posts
Another bump, I just completed these directions and I have a working setup. I didn't install a DVD player permanently, but I cut the wire mentioned in this writeup, and wired a 12V socket adaptor to it($6 part at AutoZone, 12V adaptor that goes to bare wires). So when I plug in the 12V adaptor, the navi display switches over to the video input from the homemade harness in the other thread. The wire is indeed very easy to get to by removing the rear seat bolster, and plenty of room to work with.
I've tried it with a digital TV converter box, and regular household DVD player, both work great.
I've tried it with a digital TV converter box, and regular household DVD player, both work great.
11-07-2009, 12:28 AM
#13
Intermediate

Join Date: Oct 2009
Posts: 31
Likes: 0
Received 0 Likes
on
0 Posts
Please correct me if I am wrong on this but if you have the gear in reverse and the dvd player "on" then you get 2 video feeds going into the DVD-rom unit at the same time. The camera gets power from the reverse lights, the dvd player gets power, and the green wire is at 12V, telling the navi to switch to the video. Is this right? Thanks.
11-08-2009, 09:12 PM
#14
Instructor
Thread Starter
Please correct me if I am wrong on this but if you have the gear in reverse and the dvd player "on" then you get 2 video feeds going into the DVD-rom unit at the same time. The camera gets power from the reverse lights, the dvd player gets power, and the green wire is at 12V, telling the navi to switch to the video. Is this right? Thanks.
luther
11-09-2009, 01:13 AM
#15
Intermediate
Join Date: Oct 2009
Posts: 31
Likes: 0
Received 0 Likes
on
0 Posts
And we are using a Y-splitter ( or combiner in our case) connected to pin 5, there will be two video feeds going to the dvd-rom unit. Maybe I am missing something?
Also, Thanks a lot for writing the DIYs, this is good stuff!
 11-11-2009, 06:11 PM
#18
Senior Moderator
11-12-2009, 01:42 AM
#19
Instructor
Thread Starter
The relay is used for the signal to tell the nav screen "hey, use the video input on pin 5". When 85/86 is charged on the relay (dvd on), the connection is going 30/87. When it is not charged, the connection is 30/87a. So if we are in reverse and have the dvd "on" at the same time, it is hot on both. Dvd player on and camera on.
And we are using a Y-splitter ( or combiner in our case) connected to pin 5, there will be two video feeds going to the dvd-rom unit. Maybe I am missing something?
Also, Thanks a lot for writing the DIYs, this is good stuff!
And we are using a Y-splitter ( or combiner in our case) connected to pin 5, there will be two video feeds going to the dvd-rom unit. Maybe I am missing something?
Also, Thanks a lot for writing the DIYs, this is good stuff!
luther
11-12-2009, 01:43 AM
#20
Instructor
Thread Starter
 01-14-2016, 09:55 AM
#23

Need help
**Note: this will not work on 04-05 models..
After a little of a year I finally installed the DVD player. Here is the DIY on how to wire it with the harness from my other DIY. This is geared toward people that have the backup cam too.
DVD PLAYER WIRING
Install DVD player, plenty of DIYs on the web on how to install in a TSX.
I chose the Myron Davis ad212 due to the fact that its � DIN size and has a remote turn on lead that sends out a 12v signal when the unit is turned on. This eliminates the need for another switch to have the navigation switch from GPS to aux video.
Run the remote turn on lead to back of the car. Lift up on the front of the back seat. There are two clips to hold it in. Once the rear seat is lifted up you can gain access to the 10mm bolt that holds the seat bolster in place.
Bolt
Remove bolt and slide bolster up and out. You should see a big wire loom. Open the loom and locate the green wire.
Green wire
If you are just installing a DVD player and no backup cam just cut the green wire and splice the remote lead from the player to the end of the green wire that leads back to the navigation unit in the trunk.
If you have a backup camera you will need a bosch relay. I bought mine from Auto Zone, just had to ask the parts counter. It should look like the one below. It needs to have 5 connections, 30, 85, 86, 87, 87a.
5 pin bosch relay
Below is how to wire the bosch relay.
Relay wiring
Each connection should be as follows:
30 � green wire to navigation unit in trunk
85 � remote turn on lead
86 � ground
87 � remote turn on lead
87a � green wire from reverse switch
Finished relay wiring
I grounded my relay here.
relay ground
The remote lead from the DVD player will need to be slpit and connected in two places on the relay, 85 and 87.
That�s how to make the connections for the DVD player. As far as the audio part you can either use the aux input in the center console or another device with an auxillary audio input. I have the USAspec so I used that.
For the video output of the DVD player, run that to the trunk at plug into the harness made above. If you have the camera installed to purchase 2 � into � 1 RCA splitter.
Luther

Thread
Thread Starter
Forum
Replies
Last Post