When you click on links to various merchants on this site and make a purchase, this can result in this site earning a commission. Affiliate programs and affiliations include, but are not limited to, the eBay Partner Network.
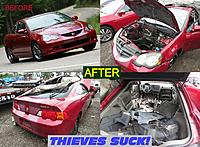
After 15 years of meticulously maintaining my '02 Type-S, what's left of it is now at the insurance company's storage lot as I await settlement. All was good until I went to my driveway one morning last month and the car was nowhere to be found. It turned up within 48 hours a few miles away, stripped of drive train, seats, and wheels. I just brought home a 2014 TSX which I will introduce in the appropriate forum.
An update. It is now 6 weeks later and after much pain and a short impasse, I finally reached agreement with the insurance company. $6080 value or $5580 after deductible. I then asked how much it would cost me to buy back this car. Note that I have owned it since new and it has never been in a wreck, has A-Spec suspension, and everything worked as new. They told me I could keep it for $400. I will be keeping it and have $5180 to spend on it.
My plan is to retrieve the car (once settlement is complete), determine exactly what is missing and what I will need under the hood. Then I will be looking for deals. My desire is to drop in a 06-08 TSX K24A2, but if I find a deal on a donor 02-04 Type-S that is complete under the hood, I will have to consider it.
Updates will likely be on Team-Integra.net where I am more active.
Answers to anticipated questions:
No, I didn't have additional security on the car. I figured if the immobilizer wouldn't stop them nothing would.
No, they didn't catch the losers who did this.
Yes, I did look on Craigslist and Ebay to see if any of my parts were for sale. The seats are custom leather and the wheels have custom paint so I would recognize them. I also know the engine serial number. No joy.
No, I can't afford a JDM Type-R conversion. $7K for a complete front clip is too much for this projectNo, I don't know if I will completely restore it. I might just put in front seats and put a cage in the rear. No one likes to sit in the seats anyway.
No, I don't want to part it out, but I will retain that as an option.
Glad to read that you are restoring the RSX! I hate to see it's a result of thieves, but you can move on knowing you can restore the car back to it's glory.
I swapped an 06 k24a2 and couldn't be happier. Good luck and keep us posted. I'm on clubrsx frequently, but will check in time to time on here.
I have been tracking salvage RSX Type-S sales on Copart and IAAI to figure out what a wreck to be used as a parts car would cost me. I found that very few show up in Florida and the bid prices for a Type-S with under 150K miles and stock engine bay go for $1500 to $2000 before fees and shipping. Plus, there are broker fees since in most states you can't purchase vehicles without a business license. The total cost ends up being $2500 to $3500 to buy and and have a wreck shipped to me.
So, I was looking on Craigslist and found a high mileage, well maintained, stock 2002 Firepepper Red Pearl RSX Type-S listed for $3000. I bought it today! It does have 238K miles but runs well and doesn't burn any oil. It has good tires, new clutch, new struts front and rear, and everything pretty much works. The body is straight and has never been in an accident. Almost anything it needs I can get from the shell of my original car. I intend to move over the A-Spec suspension including the brakes, rotors, LCAs, and hubs. Other minor parts as well that are in better shape.
The other benefit of building this car is that it has a clean title.
Updates to follow as I continue with this new build.
Wow! Nice find and looks to be in great condition! Definitely keep us posted on how your build goes!
I found some things that need addressing and ordered parts to:
Fix the leaking taillights. This common problem had been fixed by drilling two holes in the spare tire well! I ordered aftermarket gaskets on Ebay from Detroit Muscle Technologies. These are much better than OEM in my experience. I will also try to seal the holes.
Perform a valve lash adjustment. The car has 238K miles and I found no records of this being done. I ordered a valve cover gasket and spark plug tube seals. I also ordered a set of feeler gauges and a valve lash adjustment tool.
Fix the loose shifter. This is a common problem with Honda cable shifters. The bushings in the shift cable where they attach to the shifter wear out. The dealer will tell you the only solution is to replace the shift cables as the bushings are not replaceable. This can be repaired using using a suitably sized plastic, nylon, PTFE, or other similar material bushing and some lithium grease. One time I replaced these bushings using sections sliced from the extended tip that came with a tube of calking. I have since acquired a nylon tube that I think I can cut to the proper width for this application. I will create a how-to topic when I do this.
I love projects like this...
I miss my old BOM 2005 type S really badly sometimes.
Still loved that color...
nice pick up, and love that it's been maintained! If you were local, I'd come by and lend a hand if I had spare time.
I love the BOM color and would have bought in that color had it been available in 2002. I was able to get the shift cable repair completed and verified that the taillights are, in fact, leaking since it rained much of the holiday weekend. I made a DIY article for the shift cable repair.
I had my tails replaced once under warranty...
then I drilled a hole in that set because I knew it was gonna happen again
bottom inner corner and it was never an issue after that.
New gaskets and maybe some clear RTV might work though!
I almost bought in Jade Green Metallic...
I was able to get the taillight gaskets replaced today. I removed the rear bumper and then the taillights and the gaskets looked to be original and were in sorry shape. The original gaskets had adhesive in four places on each taillight that had to be removed. I cleaned all the grime off of the mounting area before reinstalling the taillights. The Detroit Muscle Technologies gaskets are a perfect fit and appear to be thicker and better quality compared to OEM. This is based on having replaced them with OEM on my old RSX only to have them leak again a few years later. I attached a few photos below.
that's the way...
I guess you could technically use clear rtv behind there to make a watertight seal...but those gaskets are damn perfect for cheap.
I used clear RTV with the original gaskets on my first RSX the first time it leaked and again with the new OEM gaskets. The sealant was a pain to clean off when replacing the gaskets. I didn't use any sealant this time. We'll see how it holds up.
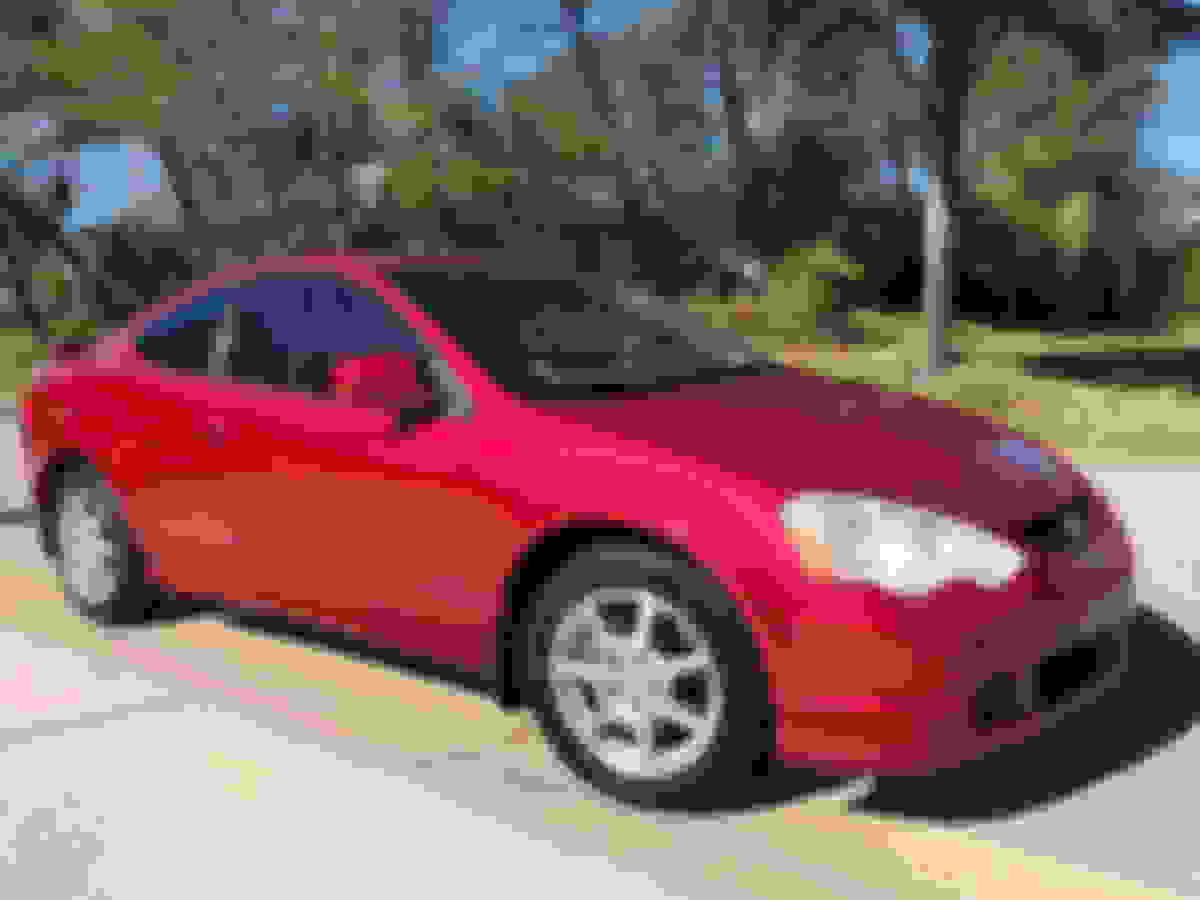
indispensable. For having 238K miles on it, the valve train is in great shape! (see photo below)
I found that the air cleaner cover connection to the breather hose is broken off. Fortunately, I still have the stock air box that was removed from my old RSX in 2006 when I installed the Comptech Icebox CAI. I am in the market if anyone knows of an RSX Type-S Ice Box for sale.
Nice, man...
yeah, I did the valve lash on the S2000 and my old TL. Scary the first time...but then you get the hang of it.
Gotcha, yeah...definitely hard to clean that off, smart that you didn't redo it then.
I finally found some time to work on the RSX. Today's task was replacing the driver side outside door latch handle. It was broken when I bought this car and I thought some industrial 3M 2216 B/A epoxy would hold it. It might have worked, but I don't think I prepared the surfaces well enough. I ended up buying a used OEM latch on Ebay (not the correct color, though).
I didn't take photos as I was in a hurry and running out of daylight. Removing the door panel was no big deal, but the Helm factory service manual leaves out a few steps regarding the handle removal. Here are the steps I ended up taking that worked:
Make sure the window is up all the way and remove the rear window track. Remove the 10mm bolt at the bottom of the track, pull out the track liner, and then tug the track housing down and remove it.
Rotate the clips holding the lock rod and latch rod where they attach to the handle assembly. Disconnect the rods by sliding them out of the retaining clips.
This is the tough part! Remove the wire retaining clip holding the lock cylinder in the handle by pulling it down. I bent the end of a stiff wire in to a small hook and tried to grab the bottom of the clip but there wasn't enough room to get the hook around it. I used a flat blade screwdriver to push the exposed top end of the clip down which provided enough room to hook the bottom. A mirror is a great help to see the clip from the bottom as it is hidden by the handle backing plate.
Once the clip is removed, push the lock cylinder from the outside and remove it from the handle. It will hang by the wire harness.
Now the two 10mm bolts holding the backing plate to the handle can be removed. This will allow removal of the handle.
IMPORTANT! Before installing the new handle, install the wire retaining clip for the lock cylinder. I found that if I partially inserted the lock cylinder, I could easily install the clip and then slide the cylinder back out.
Install the handle from the outside and attach the backing plate using the two 10mm bolts.
Press the lock cylinder into the handle through the backing plate. Push hard and you will hear the clip snap into place when it is seated.
Connect the lock and latch rods, rotating the retaining clips into place to hold them.
Push the top of the window track housing into place and then attach the bottom using the 10mm bolt. Make sure the lock cylinder harness is routed around the rear of the track.
Press the soft window track back into the track housing.
That pretty much sums it up. Getting that lock cylinder clip out was the hardest part. I will install the interior door panel after installing a plastic inner liner. The liner was missing from the door when I removed the panel. Photo below is of the new handle installed.
Replacement handle installed.
Next on the to do list (after reinstalling the door panel) will be adjusting the clutch pedal. The friction point is way too high for my liking.
I accomplished a few things yesterday evening once the sun was low enough that the heat was bearable. I still hadn't reinstalled the inside door panel since removing it to replace the outside door handle.
I cleaned off the old putty that would no longer stick to the plastic vapor barrier under the door panel. Well, where the plastic vapor barrier would have been had it not been removed at some point in this car's history (It's strange for me to work on a car that I haven't owned since new). I ordered some grey butyl putty tape to replace the old putty. I rolled it into a round cross-section and applied it to the door. I picked up some 6 mil plastic sheeting at Home Depot and roughly cut a piece to shape, applied it to the door, and then trimmed it and punched the required holes. Installation of the door panel was no problem. It helps that I had some of the push-in clips on hand to replace the ones that were broken.
After that was done, I installed a new rear-view mirror purchased because the silver was peeling away from the glass on the original mirror. My old mirror had clarity issues so I didn't transfer it from the shell. I also installed a new set of pedal covers.
Last, I adjusted the clutch pedal. The friction point was way too high for my preference. It is now at about the halfway point of pedal travel and feels right.
With all this completed, I have started using this car as my daily driver. I want to make sure there are no major issues before embarking on a long road trip in a month.
I accomplished a few things this weekend. I loaded up a bunch of tools and headed to the storage facility where my RSX shell is kept. I started pulling things off that I believe I can use in the near term:
Assorted plastic panels and covers
Sun Visors (these were recently replaced new OEM)
Steering wheel (good condition that I had recently replaced)
Air bag (had to remove it anyway)
Scissor Jack (current one is corroded)
Stereo head unit (current one has bad LCD and old one has line in modification that I want)
Windshield wiper arms (better shape than current)
Headlights (better shape, I thought)
Misc screws, nuts, and bolts
Hatch cargo area cover
Subwoofer (I know my old one had the phase miswiring corrected)
Observations: The powder used for lifting fingerprints is on everything inside the car and is a pain to clean. The thieves that stole my car totally disassembled the front end and barely put it back together to dump it. The headlights had broken tabs and mounts and the front fenders were held on with a single bolt each. The bumper beam and lower radiator support weren't replaced and were stowed inside the car.
On my way home, I got the oil changed and had the transmission MTF replaced with Amsoil Synchromesh MTF. This is what I used in my old RSX and I didn't know when this transmission had been serviced last.
I also removed the tint from the door windows which was peeling and hard to see through. After researching how to remove window tint, I bought a handheld steam cleaner. It took about an hour to remove the tint. I rolled the windows down about 3 inches and steamed about 8 inches of the top edge in the center for about 30 seconds. Then I used a razor blade to separate the tint edge from the glass so I could grab it. Steady and slowly pulling on the tint, steaming and pulling repeatedly until I could roll the window up to continue. Patience is key to prevent ripping the tint. It came off in a complete sheet. Removing the tint greatly improved visibility.
Been following your thread, with much interest. It's GREAT, to witness someone, with the fortitude, to develop such a positive, from such a negative. Thanks, for the continued updates.
And, another change in direction! When I bought my replacement RSX, I noticed that the hold-down bolt was missing from the compact spare tire. I had retrieved it from my RSX shell and intended to install it. I removed the Bose subwoofer (which is located in the middle of the compact spare) and the spare tire to find significant rust. Not surface rust, but holes and rust on the crossbrace below that the rear LCAs mount to. The leaking taillight gaskets were not addressed in a timely manner and this was the result. This will not be an easy repair. So, since I have a perfectly good rust-free shell, instead of moving the A-Spec suspension to the replacement RSX, I will be moving the interior and drive train from the replacement RSX to the shell. This work will begin AFTER I drive it to the annual Team-Integra Dragon Run (US-129, Tail of the Dragon) later this month.
I should have taken photos, but I didn't. I attacked the rusted areas with a wire brush using my drill and put down a layer of fiberglass to seal the holes and provide some minor amount of structural integrity. I will know better in the future than to use the fiberglass resin GEL. The working time is too short and it set before I could smooth it. It is a good thing it is not visible because it is a real mess!
I also repaired my rattling heat shield over the drive shaft (that I paid $$$ to the dealer to replace on my old RSX less than a year before it was stolen!). This heavy shield has three mounting points each with captive wire-mesh compliant washers on both sides of the mounting point. On one side of one mounting point, the washer was missing, having deteriorated over the years. I could not find a DIY fix that held up for any length of time, so I was on my own. One guy had wrapped the mount with steel wool to replace the wire mesh and it worked for a few months, but it eventually rusted and failed. My search for stainless steel wool was fruitless. However, I did find Scotch-Brite Stainless Steel Scrubbing Pads. I pulled several strands of the stainless steel ribbon into a crude rope and wrapped the mount. Once it was wrapped nice and tight, I used some stainless steel wire like a twist-tie around the mount to hold in the wrapping. I reinstalled the shield and the rattle has been eliminated. We'll see how long it lasts.
Damn, that is bad news!
Wouldn't be easier to find a welder and have bracing welded in and a trunk pan?
That's insane.
Check the trunk of the shell before you start swapping!
Also, fun fact...I did the Dragon last year with my gf's 3 kids in her minivan and this year we did it with her 3 and my daughter in the Yukon...
one day I'll get up there in either the S2000 or the Vagon.
The S2000 would be amazing on the Dragon. Night runs are incredible and when most of the fun happens!
Regarding my shell, I bought the car new and the spare tire well is like new. I caught the tail light gasket leaks quickly and dried everything out right away. I always kept paper towels on either side of the jack where the water seeps down and would check them for dampness periodically. Another benefit of fixing up the shell is the paint is much better and I won't need to paint it right away. It will just be different and a bit more work.
Best of luck to you on this swap! This takes me back to when I decided to rebuild my RSX when I spun a rod bearing... Little did I know what I was getting into, but it was all worth it. Looking forward to seeing the progress!
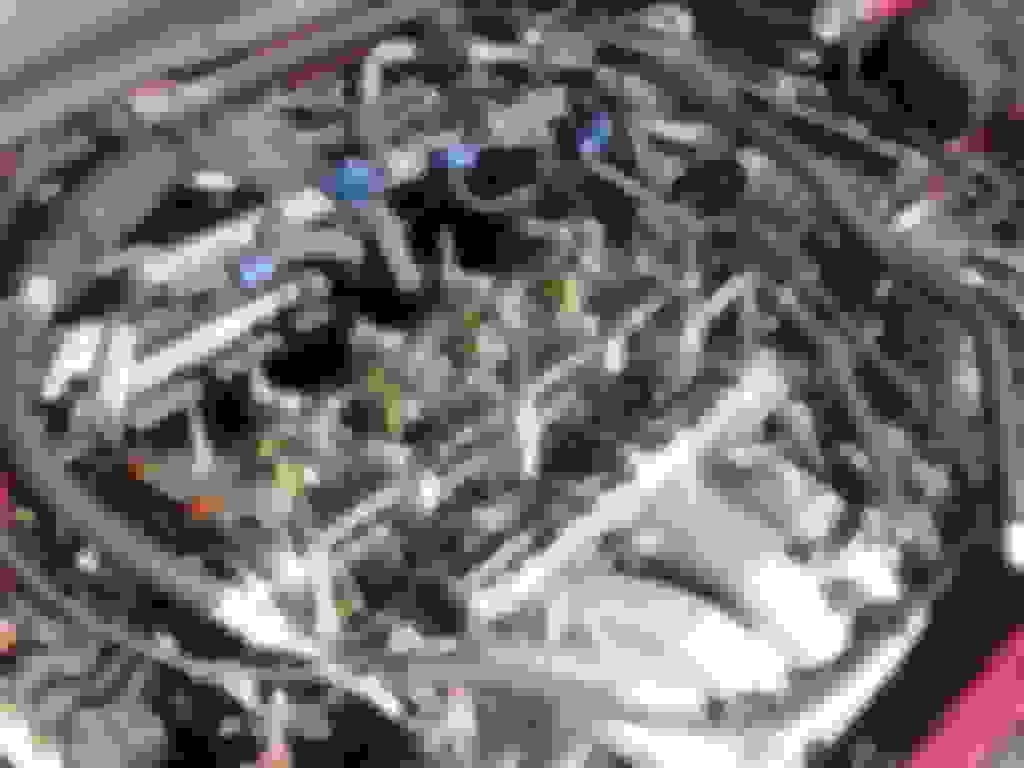
I started my road trip Friday morning driving north for a family gathering. My newly acquired RSX was running well as I drove north on I-75 through Georgia. Somewhere north of Macon (near mile 216 I would later learn) I glanced up at an overhead sign indicating that the new express lane exits were closed. As my eyes returned to the road, the SUV in front of me in the leftmost lane had the brakes locked, smoke from the tires, and was rotating to the left closing the gap between the lane and the upcoming guardrail. I hit my brakes hard and the anti-lock brakes kicked in. To avoid this, my only clear path was to drive to the left of the guardrail into the grassy median. Fortunately, there were no ditches or obstacles and I was able to maintain control as I slowed down. As I realized I was going to be okay, I saw the end of the guardrail on my right and chose to maintain my speed to get back up to the road without getting stuck. As I made it to the shoulder, I looked to see if traffic was clear and saw a car on its side, wheels facing north. I eased back onto the road and continued on my way no worse for wear. 100 miles later I stopped to eat lunch and inspected the front of the car. There were no indications of my off-road excursion. I feel extremely blessed to be able to tell this story. I found this photo on a WSB traffic twitter post. The SUV I was following appears to be the only vehicle involved. I don't have a clue what motivated the driver to lock up the brakes. It might be possible to make out the path I drove as I left the pavement. Wrecked SUV that I was driving behind.
 07-01-2017, 06:05 PM