DIY: Skunk2 Pro Front Camber Kit Install
 06-07-2012, 11:08 AM
#1
2014 Jeep SRT
Thread Starter
DIY: Skunk2 Pro Front Camber Kit Install
To my knowledge, there's no DIY for this camber kit, so I thought I'd post some DIY pictures.
Step 1 - remove shock/spring assembly.
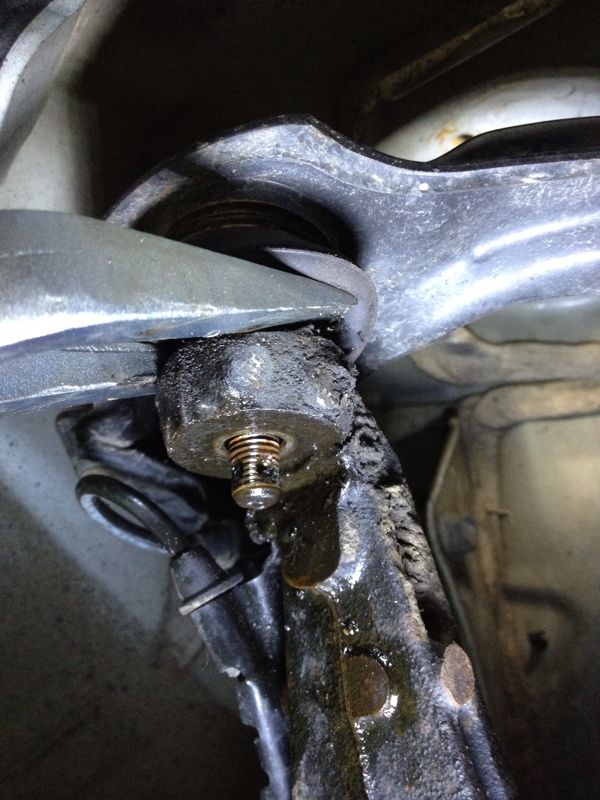
Step 2 - remove cotter pin and castle nut (17mm) from underside of knuckle (parts #13 & #19):

Step 3 - use a "pickle fork", aka "ball joint fork" to separate the UCA's from the knuckle. This took me a little while, so be patient. Use PB Blaster and bang on the knuckle with a hammer to loosen things up. Eventually it'll break loose:
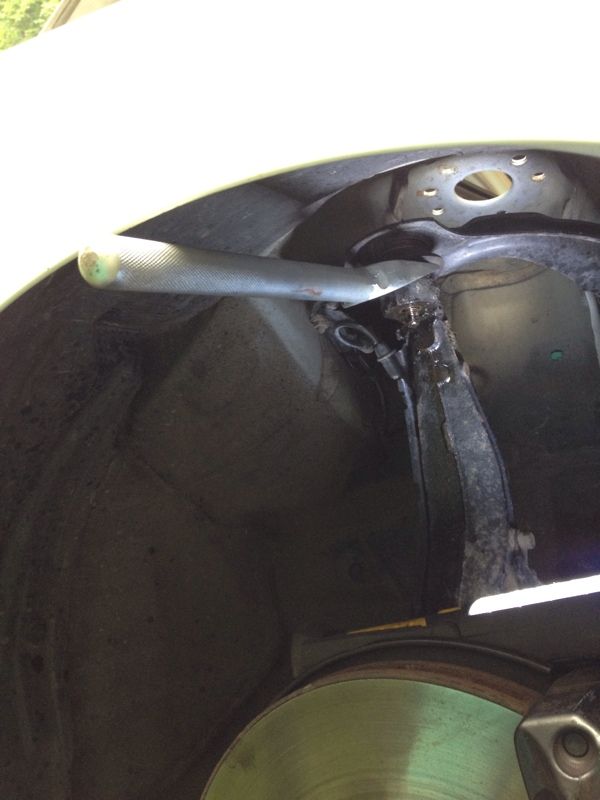

Step 4 - Remove the 10mm bolt from the speed sensor bracket that's attached to the underside of the UCA (part #18).
Step 5 - Once the ball joint comes loose and the speed sensor bracket is unhooked, remove the two 14mm bolts at the end of each arm. They come out pretty easily. (parts #12 in this pic):
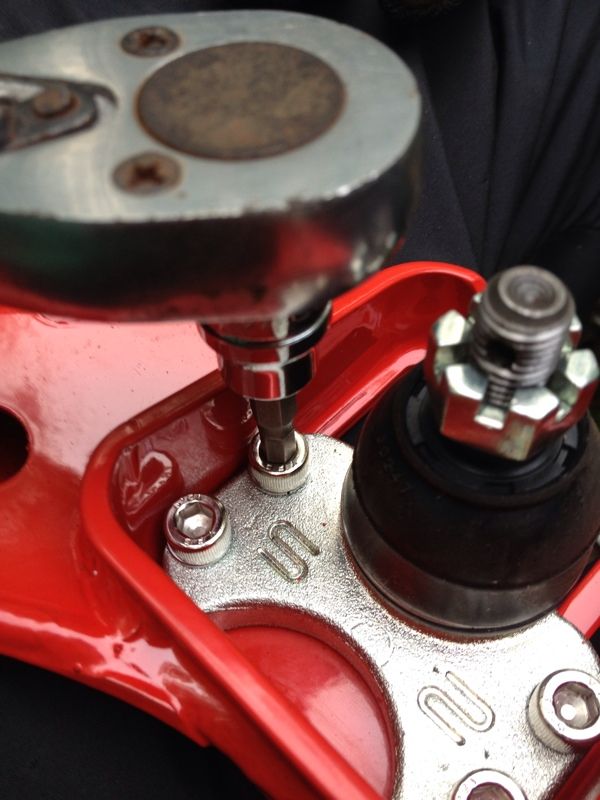
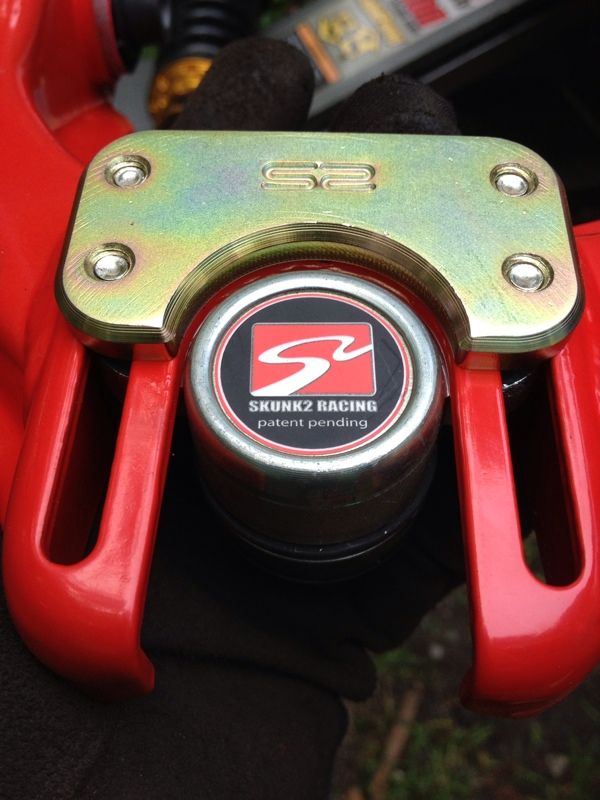
You'll want to make sure your camber adjustment bolts are tightened before you install the new UCA's. According to Skunk2, these 4 allen bolts require 12ft/lbs of torque each. I used a 3/16" hex bit on my 3/8" drive torque wrench:
Installation of the new Skunk2 UCA's is the reverse of the removal...pretty easy. Here are additional pictures:
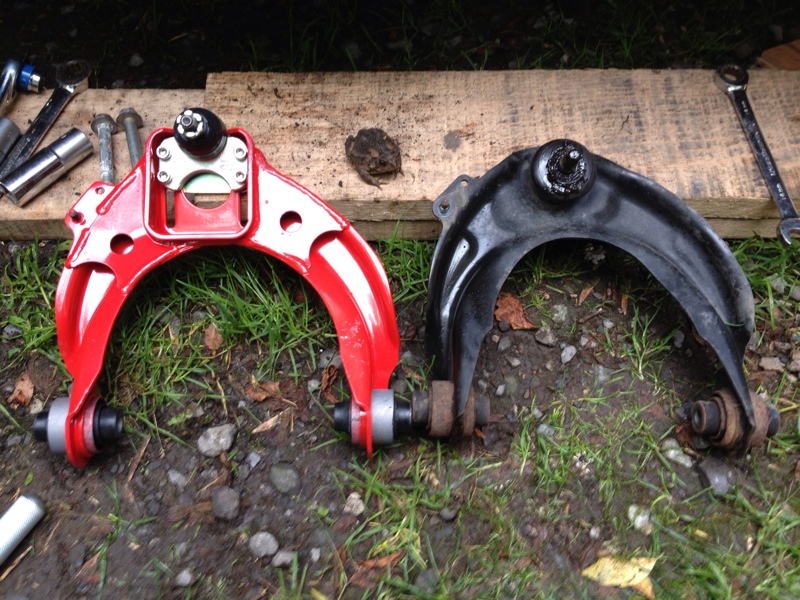
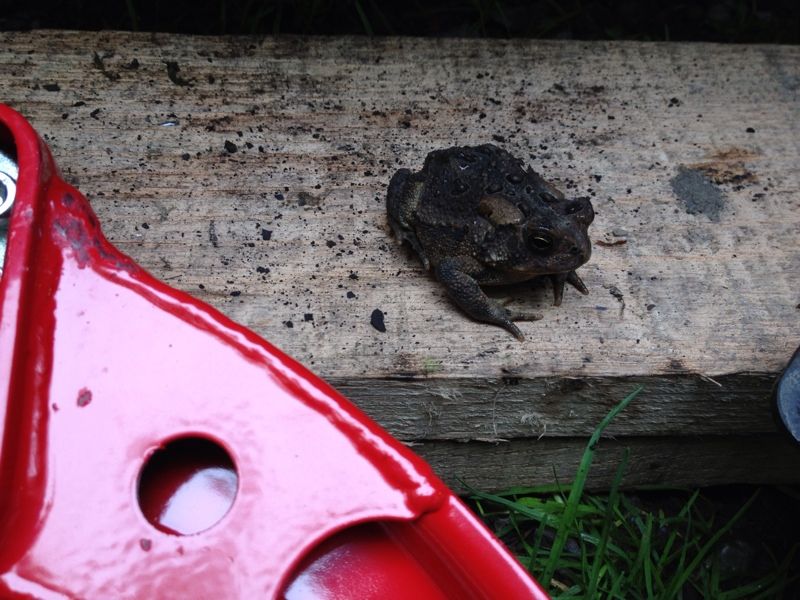
Toad:

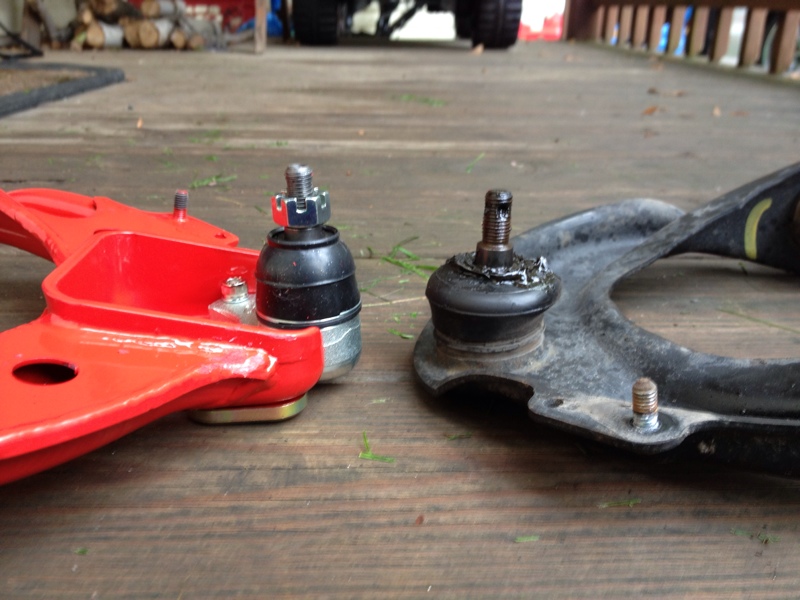


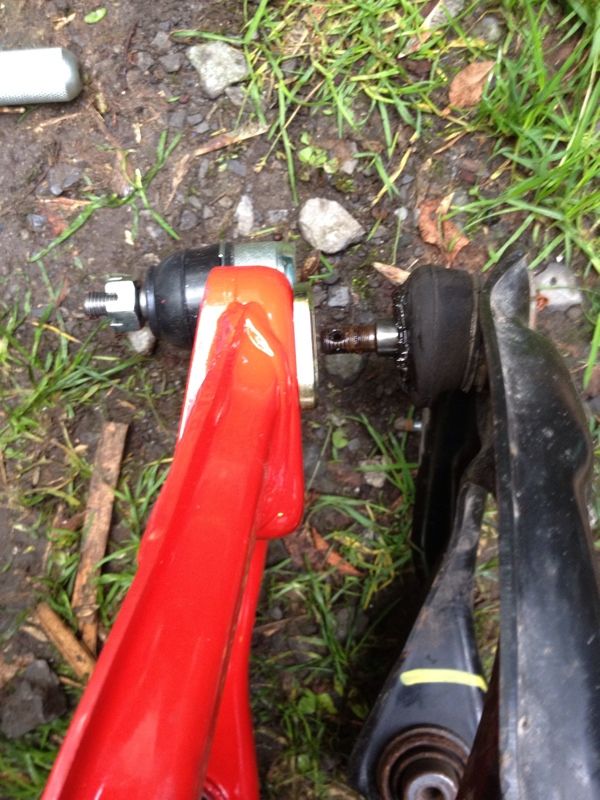
Beautiful:
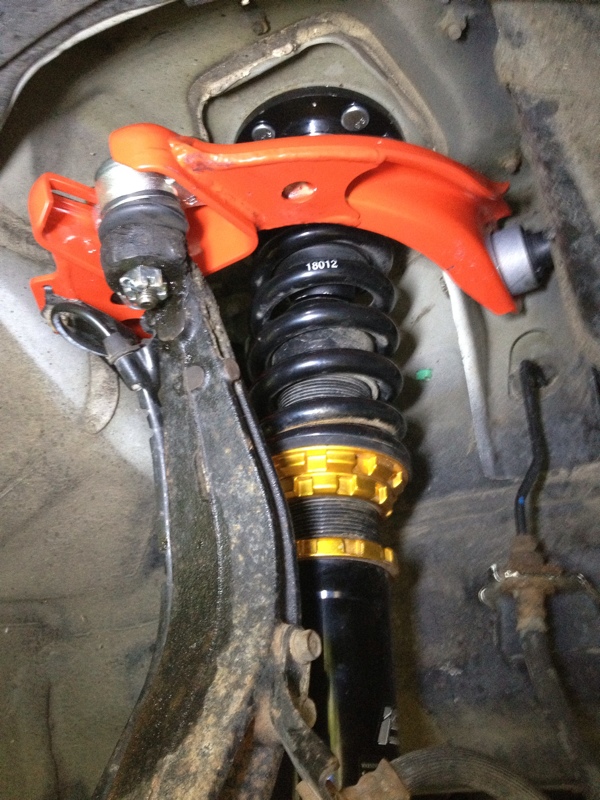
Step 1 - remove shock/spring assembly.
Step 2 - remove cotter pin and castle nut (17mm) from underside of knuckle (parts #13 & #19):
Step 3 - use a "pickle fork", aka "ball joint fork" to separate the UCA's from the knuckle. This took me a little while, so be patient. Use PB Blaster and bang on the knuckle with a hammer to loosen things up. Eventually it'll break loose:
Step 4 - Remove the 10mm bolt from the speed sensor bracket that's attached to the underside of the UCA (part #18).
Step 5 - Once the ball joint comes loose and the speed sensor bracket is unhooked, remove the two 14mm bolts at the end of each arm. They come out pretty easily. (parts #12 in this pic):
You'll want to make sure your camber adjustment bolts are tightened before you install the new UCA's. According to Skunk2, these 4 allen bolts require 12ft/lbs of torque each. I used a 3/16" hex bit on my 3/8" drive torque wrench:
Installation of the new Skunk2 UCA's is the reverse of the removal...pretty easy. Here are additional pictures:
Toad:
Beautiful:
Last edited by ebelp; 06-07-2012 at 11:13 AM.

The following 8 users liked this post by ebelp:
05_NBP_TL (06-07-2012),
heyitsnickk (07-31-2014),
MEKO (02-07-2013),
mrkingstonvi (06-16-2014),
SSM4DR (06-09-2012),
and 3 others liked this post.
06-07-2012, 11:20 AM
#2
takin care of Business in
iTrader: (5)
Join Date: Jan 2008
Location: Kansas City, MO
Age: 40
Posts: 30,994
Received 4,732 Likes
on
4,064 Posts
SICK DIY !!!
very well done John !!!
very well done John !!!
The following users liked this post:
ebelp (06-07-2012)
 06-07-2012, 11:32 AM
#4
2014 Jeep SRT
Thread Starter
^Thanks! Yes, you can rent that fork tool, but it's only $10 so I just bought one.
06-07-2012, 06:01 PM
#6
06-07-2012, 09:48 PM
#8
2014 Jeep SRT
Thread Starter

The following users liked this post:
ebelp (06-08-2012)
06-13-2012, 11:42 AM
#12
2014 Jeep SRT
Thread Starter
^Unfortunately I can't answer that because I raised my car 1/4" shortly before I installed the Skunk2 kit, so it stopped clunking before I even installed everything. Not to worry, once I get my 215's on the front I plan on lowering it again to see if the rubbing/clunking will be gone.
The following users liked this post:
SSM4DR (06-13-2012)
The following users liked this post:
ebelp (06-13-2012)
06-13-2012, 10:35 PM
#14
2014 Jeep SRT
Thread Starter
Thanks, couldn't have done it without you haha!
06-13-2012, 10:38 PM
#15
takin care of Business in
iTrader: (5)
Join Date: Jan 2008
Location: Kansas City, MO
Age: 40
Posts: 30,994
Received 4,732 Likes
on
4,064 Posts
Josh FTW 
06-13-2012, 11:07 PM
#16

Do you have a part number for this fork tool or is it pretty generic? I want to try this in a few weeks and would like to make sure I have all the right tools
Last edited by akash4u; 06-13-2012 at 11:08 PM. Reason: typos
06-14-2012, 09:20 AM
#17
2014 Jeep SRT
Thread Starter
No, I don't know the part number. If you go to Autozone and tell them you want "the fork thingie that separates ball joints...", they'll know what you mean. 
02-07-2013, 03:20 AM
#20
It is, What it is....
To my knowledge, there's no DIY for this camber kit, so I thought I'd post some DIY pictures.
Step 1 - remove shock/spring assembly.
Step 2 - remove cotter pin and castle nut (17mm) from underside of knuckle (parts #13 & #19):
Step 3 - use a "pickle fork", aka "ball joint fork" to separate the UCA's from the knuckle. This took me a little while, so be patient. Use PB Blaster and bang on the knuckle with a hammer to loosen things up. Eventually it'll break loose:
Step 4 - Remove the 10mm bolt from the speed sensor bracket that's attached to the underside of the UCA (part #18).
Step 5 - Once the ball joint comes loose and the speed sensor bracket is unhooked, remove the two 14mm bolts at the end of each arm. They come out pretty easily. (parts #12 in this pic):
You'll want to make sure your camber adjustment bolts are tightened before you install the new UCA's. According to Skunk2, these 4 allen bolts require 12ft/lbs of torque each. I used a 3/16" hex bit on my 3/8" drive torque wrench:
Installation of the new Skunk2 UCA's is the reverse of the removal...pretty easy. Here are additional pictures:

Toad:

Beautiful:

Step 1 - remove shock/spring assembly.
Step 2 - remove cotter pin and castle nut (17mm) from underside of knuckle (parts #13 & #19):
Step 3 - use a "pickle fork", aka "ball joint fork" to separate the UCA's from the knuckle. This took me a little while, so be patient. Use PB Blaster and bang on the knuckle with a hammer to loosen things up. Eventually it'll break loose:
Step 4 - Remove the 10mm bolt from the speed sensor bracket that's attached to the underside of the UCA (part #18).
Step 5 - Once the ball joint comes loose and the speed sensor bracket is unhooked, remove the two 14mm bolts at the end of each arm. They come out pretty easily. (parts #12 in this pic):
You'll want to make sure your camber adjustment bolts are tightened before you install the new UCA's. According to Skunk2, these 4 allen bolts require 12ft/lbs of torque each. I used a 3/16" hex bit on my 3/8" drive torque wrench:
Installation of the new Skunk2 UCA's is the reverse of the removal...pretty easy. Here are additional pictures:
Toad:
Beautiful:
Does the shock have to come out? to swap out the arms or it makes the job easier?
02-07-2013, 04:32 AM
#21
HE>i
iTrader: (1)
Maybe tighten the castle nut back up and cut the threads on the upper ball joint as close as you can to the castle nut, then try to remove the nut again (yes this will ruin the ball joint, but it could be replaced if you ever needed to go back to stock)
No, the shock doesnt have to come out to remove the upper control arms. It would make the job easier if you removed the shock, but you can work around it with the right tools.
02-07-2013, 07:19 AM
#22
Suzuka Master
iTrader: (1)
Awesome!!! 
02-07-2013, 08:23 AM
#23
Race Director
iTrader: (3)
Join Date: Feb 2012
Location: South Florida
Age: 30
Posts: 18,278
Received 3,824 Likes
on
2,847 Posts
Great DIY, John, I could probably do this 
02-07-2013, 08:39 AM
#24
[QUOTE=05_NBP_TL;14306267]Maybe tighten the castle nut back up and cut the threads on the upper ball joint as close as you can to the castle nut, then try to remove the nut again (yes this will ruin the ball joint, but it could be replaced if you ever needed to go back to stock)
awesome thanks. i will try that. I am also thinking about the nut splitter from autozone so there won't be any cutting involved.
awesome thanks. i will try that. I am also thinking about the nut splitter from autozone so there won't be any cutting involved.
02-14-2013, 10:56 AM
#25
2014 Jeep SRT
Thread Starter
02-14-2013, 03:28 PM
#27
Registered Member
iTrader: (8)
This kit was designed for the TSX, but it does fit the TL and it is the same exact part number. On skunk2's site they show this kit listed for the TSX and claim that it can do +/-3 degrees.
According to testing that a customer did for Heeltoe, they were only able to achieve -1.2 degrees of camber with this kit on their TL without having the hellaflush mod.
I should add that the -1.2 will be in addition to the natural camber that you get when lowering your car.
The thing that I am wondering is, are the TSX's getting the true +/-3 the kit claims to give and if so, why is the TL not getting the same result?
02-14-2013, 04:07 PM
#28
Thank you, Machine. I remember back in the day rodneyc77 had like the first set and was able to get only -2.3 or so so you're correct.
Most lowered TLs I see are getting about -1.1 to -1.6 natural camber depending on how low they are.
I'm debating if I should do the hellaflush modification first before I install mine.
Most lowered TLs I see are getting about -1.1 to -1.6 natural camber depending on how low they are.
I'm debating if I should do the hellaflush modification first before I install mine.
02-14-2013, 04:15 PM
#29
2014 Jeep SRT
Thread Starter
A non-hellaflush Skunk2 kit is most useful for achieving oem-spec camber settings, if that's your main goal. If your goal is to have aggressive camber to make your wheel/tire setup fit without rubbing, you should probably have the Skunk2 kit with the hellaflush mod done to it.
Last edited by ebelp; 02-14-2013 at 04:20 PM.
05-04-2013, 12:20 PM
#30

I wanted to add, if you happen to strip the allen head of the 4 bolts that hold the ball joint, they're easy to find at local hardware store
M6x1.00 pitch.
20mm is too short. 25 is tad bit too long. I'm using 3 washers and 25mm
M6x1.00 pitch.
20mm is too short. 25 is tad bit too long. I'm using 3 washers and 25mm
The following users liked this post:
05_NBP_TL (05-05-2013)
06-10-2013, 02:21 PM
#33
Intermediate
is it best to just adjust them all the way in to start with? not looking for hellaflush, just doing the install right new and cant get in to the alignment shop till wed. all the way in or all the way out or middle or what?
08-05-2013, 07:36 AM
#38
-------Tim-------
^not everyone. Lol! I bought this kit to get my camber back within stock specs. The front was only out slightly, but I wanted it corrected. I do not have the hella flush (whatever) modification, just stock Skunk2 kit.
01-02-2015, 10:05 PM
#40
Drifting

You dont need a pickle fork to separate that. Just take off the castle nut and hit the vertical arm at the top, on the flat spot with a hammer. It will spring apart.
But question: did you reuse your oem rubber bushings or did you order the urithane bushings? I am wondering if you experienced any added noise with urithane bushings... thanks
But question: did you reuse your oem rubber bushings or did you order the urithane bushings? I am wondering if you experienced any added noise with urithane bushings... thanks