
Rotor set screw help
 08-18-2018, 10:22 AM
#1
1st Gear
Thread Starter

Join Date: Aug 2018
Age: 35
Posts: 1
Likes: 0
Received 0 Likes
on
0 Posts
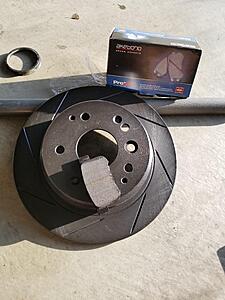
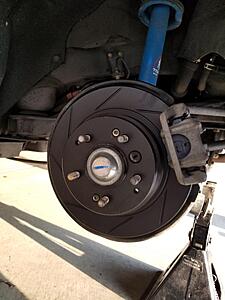
So I was recently changing the rotors and brakes on my 2007 TL. All of the rotor set screws were stuck so I used an extractor to get the firs 3 rotors removed. While I was doing the last rotor the extractor broke inside the set screw hole and now I cant remove the last rotor. Anyone know how I can fix this issue?

 08-18-2018, 10:48 AM
#3
Latent car nut
iTrader: (2)
Join Date: Jan 2017
Location: Southern New Hampshire
Age: 68
Posts: 7,844
Received 2,005 Likes
on
1,407 Posts
Drill it out and then do not use a set screw when you mount the new rotor. In fact, I threw the freakin' set screws in the trash from both of my cars; they might well aid the manufacturing process, but they are utterly worthless once the car is built and a royal pain in the hind parts when brake-job time comes around.
 08-18-2018, 12:40 PM
#4
Senior Moderator
Drill it out
08-18-2018, 03:40 PM
#6

I ran into this issue the other weekend when I was replacing a wheel hub. The tip of my screw driver broke off in the screw head, which took a while to pry out. I ended up buying an impact driver kit, which worked for one screw but ended up stripping out the other one. I decided to drill it out until the head was separated from the neck of the screw and popped it off.
Trending Topics
08-19-2018, 07:17 AM
#8
Burning Brakes
IMO: Probably be difficult to drill through the extractor bit, but you should be able to, using the smallest bit you have available, drill either side, and top and bottom, of the screw, in other words, drill all around the extractor, until the screw is gone. For future reference, an IMPACT screw driver, usually works very well on these screws.
08-19-2018, 01:22 PM
#9
Racer

I agree about the impact screwdriver. I had to change my brakes recently and the screws came out without any issue. That's with the Canadian climate and I don't think the rotors had been opened for 6-7 years or so. I do believe there was some antiseize on the screws though so I'm sure that helped.
08-20-2018, 12:10 AM
#10
i just changed my brakes out this weekend and i completely jacked up one of the set screws by not putting enough pressure on the electric impact driver and basically rounded out the screw head
it took me maybe 5 minutes after messing up the set screw to removing the entire rotor off
i switched from my impact driver to my electric drill and used a drill bit that was just smaller than the size of the center of the screw.. i started slowly drilling a pilot hole in the center and within 3 minutes i was able to drill through the screw head then used a flat head and hammer to chisel it in for grip and was able to remove the set screw.. then used 2 M8 x 1.25 bolts and inserted them into the rotors and slowly rotated them one by one until the rotor popped off the hub
r1 e line w/black zinc coating and akebono ultra premium ceramic pads
edit: just saw the part about the drill extractor i must of glossed over that part.. what you should do is try to drill around the extractor.. your main objective is to try to disconnect the screw head from the screw.. once you've weaken the center of the screw, you might be able to try and insert the M8 bolts and break it free from the hub
it took me maybe 5 minutes after messing up the set screw to removing the entire rotor off
i switched from my impact driver to my electric drill and used a drill bit that was just smaller than the size of the center of the screw.. i started slowly drilling a pilot hole in the center and within 3 minutes i was able to drill through the screw head then used a flat head and hammer to chisel it in for grip and was able to remove the set screw.. then used 2 M8 x 1.25 bolts and inserted them into the rotors and slowly rotated them one by one until the rotor popped off the hub
r1 e line w/black zinc coating and akebono ultra premium ceramic pads


edit: just saw the part about the drill extractor i must of glossed over that part.. what you should do is try to drill around the extractor.. your main objective is to try to disconnect the screw head from the screw.. once you've weaken the center of the screw, you might be able to try and insert the M8 bolts and break it free from the hub
Last edited by champaned_out; 08-20-2018 at 12:15 AM.
08-20-2018, 12:22 PM
#11
An Electric Impact driver is the wrong tool. Especially because nobody uses JIS screwdriver bits. Its not just a phillips head screw.
Unless you have a manual impact screwdriver, you need JIS screwdriver bits.
Impact screwdriver works. Its a manual tool. You literally use it by hitting it with a hammer. They're cheap at harbor freight....like under $10, IIRC. You *can* use a phillips head screw with a manual impact screwdriver because you're just forcing it to conform...with a hammer.
08-20-2018, 12:25 PM
#12
Senior Moderator
Impact screwdriver is what I use.
08-20-2018, 12:26 PM
#13
Suzuka Master
I don't know why it such a big issue for removing these screw, I had to deal with them since my Legend.
I soak them in WD-40 about 20 mins then use the sturdiest Philip screw driver I find and tap it with hammer and drive it out (it will be better if you own an impact screw driver).
I soak them in WD-40 about 20 mins then use the sturdiest Philip screw driver I find and tap it with hammer and drive it out (it will be better if you own an impact screw driver).
08-20-2018, 12:46 PM
#14
Latent car nut
iTrader: (2)
Join Date: Jan 2017
Location: Southern New Hampshire
Age: 68
Posts: 7,844
Received 2,005 Likes
on
1,407 Posts
I don't know why it such a big issue for removing these screw, I had to deal with them since my Legend.
I soak them in WD-40 about 20 mins then use the sturdiest Philip screw driver I find and tap it with hammer and drive it out (it will be better if you own an impact screw driver).
I soak them in WD-40 about 20 mins then use the sturdiest Philip screw driver I find and tap it with hammer and drive it out (it will be better if you own an impact screw driver).
08-21-2018, 09:01 AM
#15
Suzuka Master
I never had an issue with remove that rotor screw tho, I mean its take extra time out the main job but its not like impossible to remove.
Last edited by truonghthe; 08-21-2018 at 09:03 AM.
09-04-2018, 08:46 AM
#16
Burning Brakes
I replaced the brake pads and rotors on my wife's RDX this weekend. I was able to get all four rotor screws out from the rear rotors. The front ones were a different story. It took about three good soaks with PB Blaster, lots of heat with my MAPP torch, and about 30 min each with an impact screwdriver. I was just about to call it quits and drill them out, when all of the sudden one of them slightly broke free. It was like I won the lottery.
09-04-2018, 10:48 AM
#18
Senior Moderator
 09-06-2018, 11:40 AM
#21
I work as a car mechanic, so dealing with those screws is really common for me.
80% of the time "impact screw driver" works great, just pick anything (I really like Capri Tools one):
Just don't hit it too hard. If you feel like screw is not getting lose:
rest of the time, heating the screw red hot and then using the impact screw driver works
Once, everything failed and screw just stripped off, I needed to drill it out. Real pita, especially after you heated it and made it harder.
Decent drill bits, some oil, and some patience are required for this step.
09-06-2018, 02:01 PM
#23
Heat it quick, hit with impact screw driver, cool down with water.
If you aim acetylene at the screw, it will glow within seconds. Rest of the rotor is not getting hot, so I doubt it will hurt the bearing.
And you are throwing out the rotor anyways.
If you aim acetylene at the screw, it will glow within seconds. Rest of the rotor is not getting hot, so I doubt it will hurt the bearing.
And you are throwing out the rotor anyways.
09-07-2018, 10:28 AM
#24
Chapter Leader (Southern Region)
If you use an impact screwdriver
Spray it down with PB blaster, sit for 20 mins
Tighten on first few impacts
Then loosen
And FFS, don't replace them
You don't need the retention screws to hold the rotor in place
They're added as part of the assembly process
Spray it down with PB blaster, sit for 20 mins
Tighten on first few impacts
Then loosen
And FFS, don't replace them
You don't need the retention screws to hold the rotor in place
They're added as part of the assembly process
09-07-2018, 06:11 PM
#27
Latent car nut
iTrader: (2)
Join Date: Jan 2017
Location: Southern New Hampshire
Age: 68
Posts: 7,844
Received 2,005 Likes
on
1,407 Posts
09-08-2018, 11:22 PM
#28
Senior Moderator

 09-11-2018, 11:12 AM
#30
Senior Moderator
The following 3 users liked this post by thoiboi:
09-11-2018, 12:35 PM
#31
Chapter Leader (Southern Region)
 09-13-2018, 03:06 PM
#33
Senior Moderator
I think this horse is dead 


Thread
Thread Starter
Forum
Replies
Last Post
DiaBando
1G TSX Performance Parts & Modifications
17
07-19-2008 03:43 PM
rockyfeller
Car Parts for Sale
2
05-19-2008 07:59 PM