When you click on links to various merchants on this site and make a purchase, this can result in this site earning a commission. Affiliate programs and affiliations include, but are not limited to, the eBay Partner Network.
I dunno if this has been done but I thought I would post the DIY while I was doing it. I dunno if these are common wear items but I hit a curb a while back and killed one of my center mounts (bought both sides because they were cheap). I bought new ones from Acura along with a few others bushings which I might DIY later if needed (Both lower control arm bushings and front sway bar bushings). Parts were bought at: oemacuraparts.com
Anyway hope this DIY helps some people I took some extra precautions that might not be needed but I felt like being safe just in case. WARNING: Attempt at your own risk I am not responsible if you injure yourself or mess up your own vehicle.
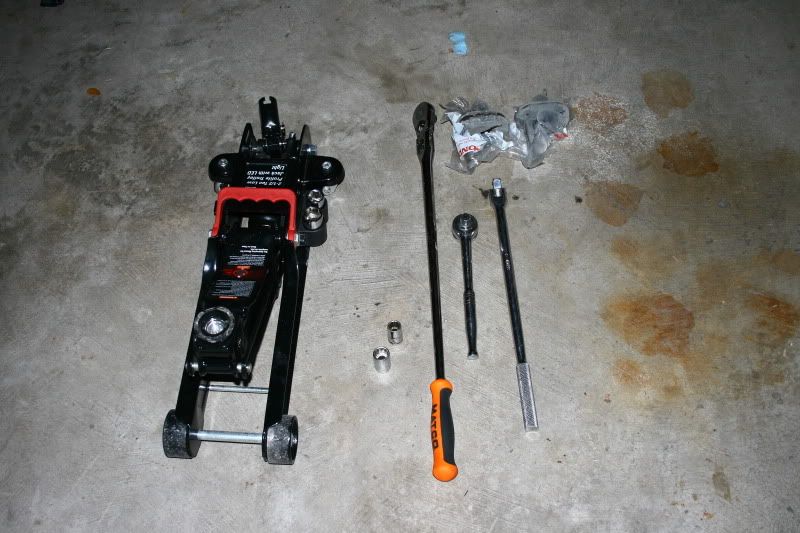
First off...Tools Required:
-Breaker bar your choice (I had my ratcheting and my short one to get into the tighter areas.
-Ratchet 3/8 or 1/2 drive your choice
-14mm Socket
-17mm Socket
-Jack
-Jack Stands
-Two center mount bushings
*50280-SDA-A01 - Right Front (passenger side)
*50285-SDA-A01 - Left Front (driver side)
1. First thing you want to do is set the parking brake and jack your vehicle off the ground, set the jack stands at proper locations, and remove your front wheels. This should be self explanatory. If you have problems doing this I recommend not going further.
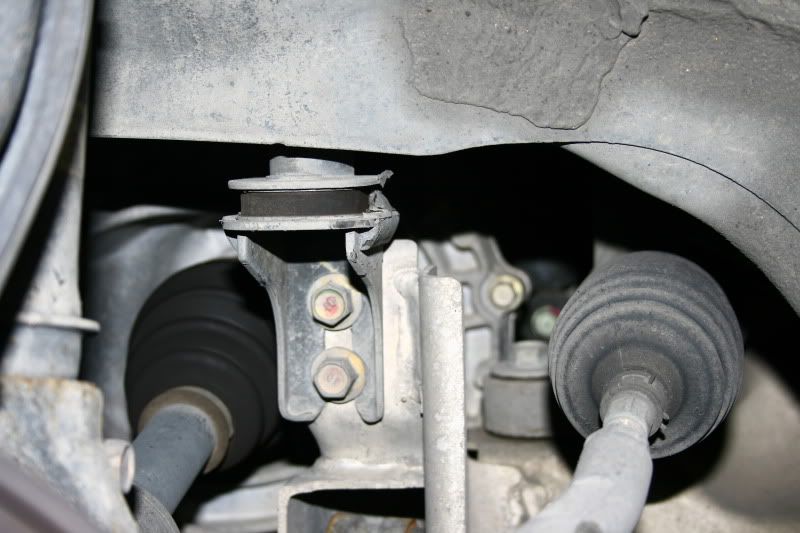
2. Heres an Image of the Center mount Bushing.
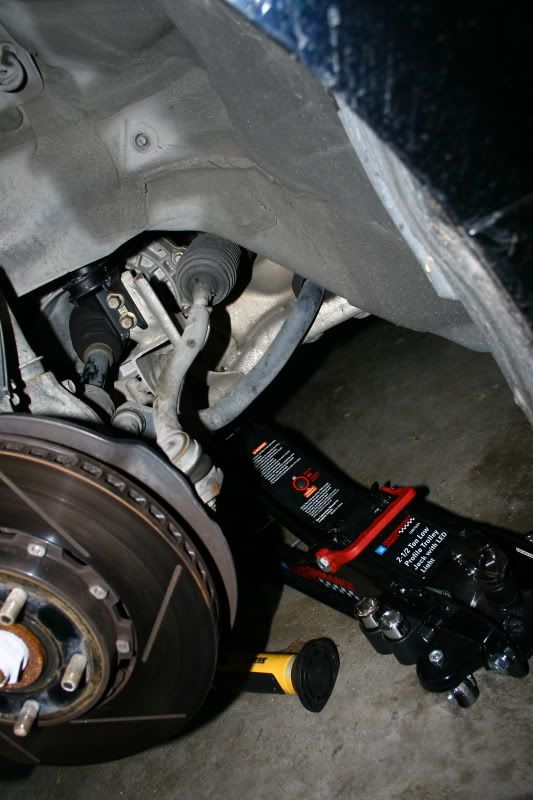
3. I placed a jack underneath the engine cradle just for an extra precaution. It prob isnt needed but I put it down there just in case.
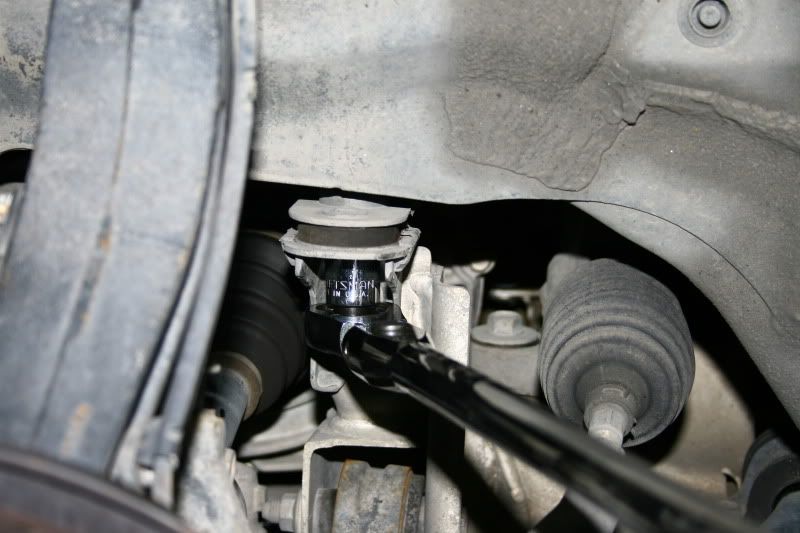
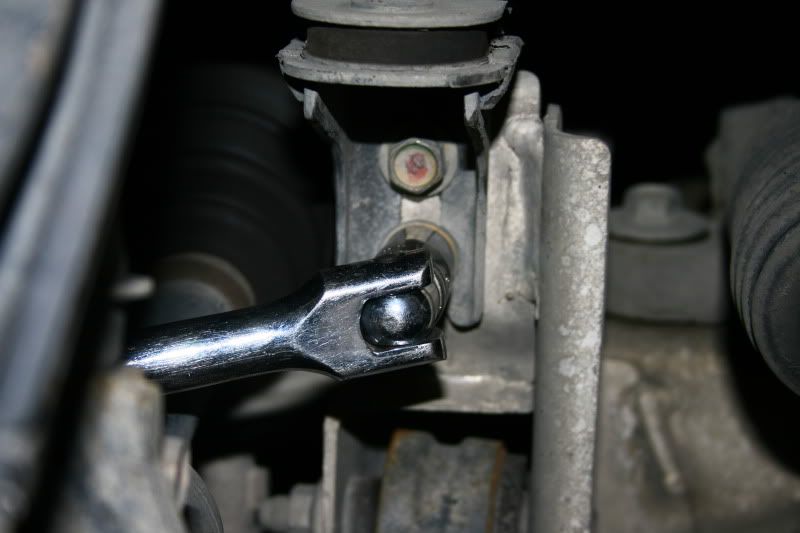
4. First things first I removed the 17mm bolt with my breaker bar.
5. After you get that out I took out the two 14mm Bolts.
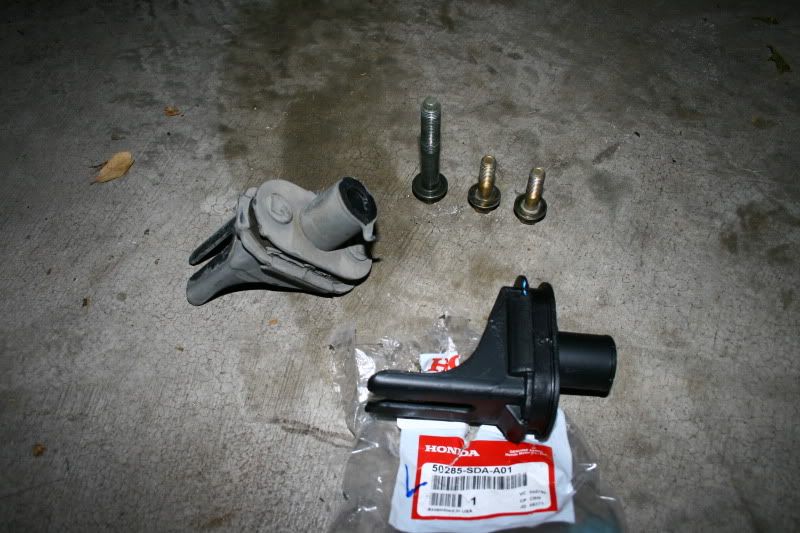
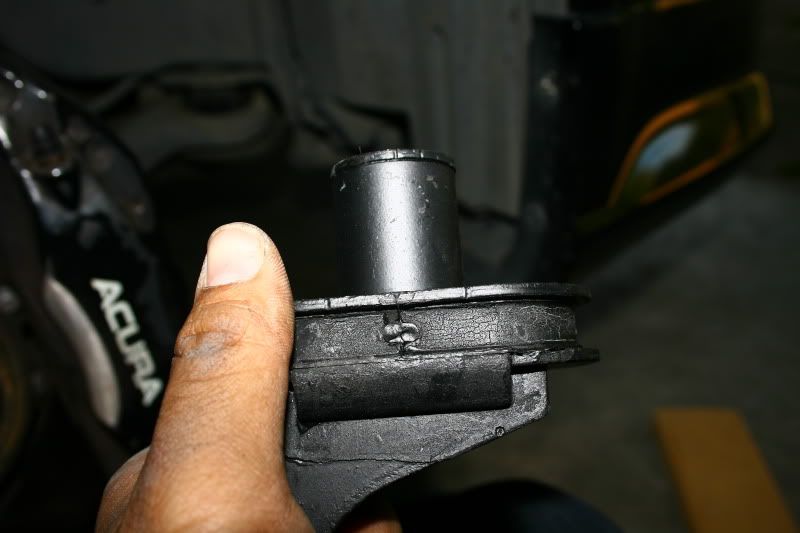
6. This is what the Center mount looks like out along with the bolts.
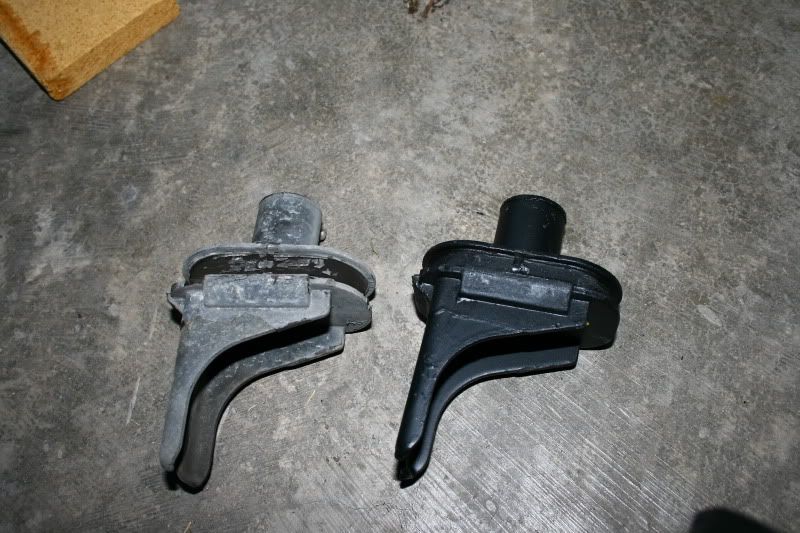
7. New vs Old comparison
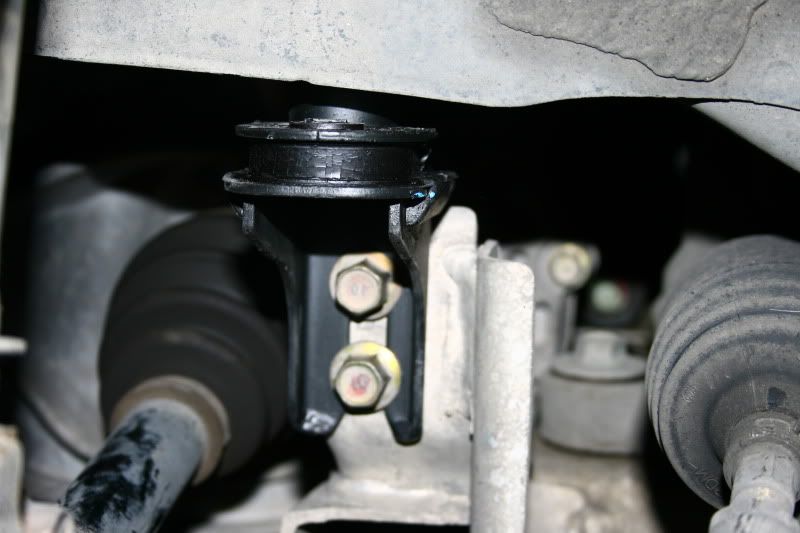
8. When reinstalling make sure the lil hump on the Center mount lines up with this hole. It is for alignment and helps hold it in place. With the 17mm bolt screw it back on.
9. Then after tightening up the 17mm bolt tighten the two 14mm bolts and the final product should look like this.
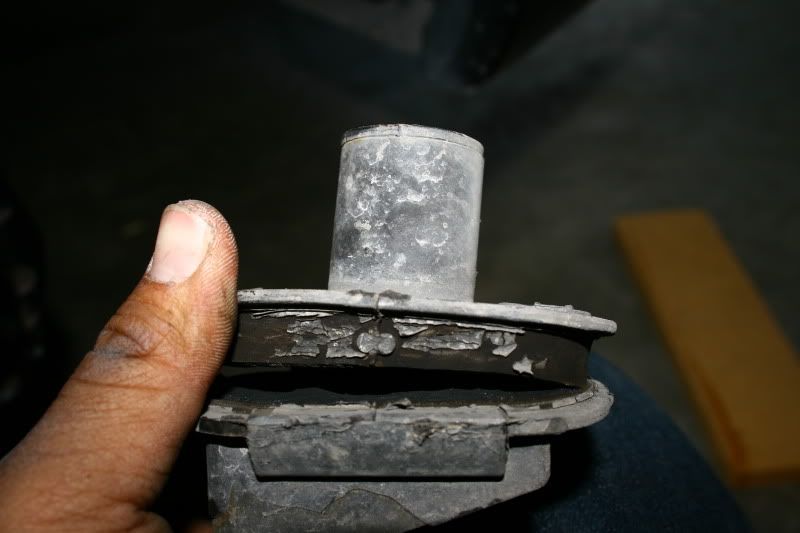
Just a side note...This is the drivers side and it was pretty easy. The passenger side I had to take out the 14mm's first before the main 17mm like I did on this side because my breaker bar wouldn't fit. That was all but here is what a bad center mount bushing looks like:
Bad old center mount...It was bad enough to wear I could break the mount off.
The left mount was 14.83 and the right was 18.45 from the website. I dunno why the price difference they both looked the same to me. As for the difference its just to decrease movement of the cradle if not dampen it a bit from shock. Thats what I would think but I replaced them since they were cheap and I saw one side of the mounts started to tear. I guess the curb sealed the deal on that one.
Quick question for this newbie. If i have a problem with a 'mount' and don't change it? What will happen? I have a receipt from Acura from the previous owner advising to replace 'PASSENGER sub-frame mount'
what does the mount do and what causes a bad mount?
Quick question for this newbie. If i have a problem with a 'mount' and don't change it? What will happen? I have a receipt from Acura from the previous owner advising to replace 'PASSENGER sub-frame mount'
what does the mount do and what causes a bad mount?
It's an easy and cheap repair to do yourself. If it needs replacing, just do it. I just replaced my driver's side mid mount. It was about $18 and look 30 minutes to do including time to jack up my car and put it on jack stands. This is probably the easiest thing I've ever had to replace on my car. Easier than changing oil.
As far as what will happen, I think you'll be putting more stress on other parts causing them to wear faster. You may get a clunk or loose feeling over hard bumps. This mount is part of what attaches the subframe to the frame and cushions it.
When my mount was shot the rubber was deteriorated and looked chewed up. Mine was so bad that it detached and fell apart once I removed it. As far as what causes a bad mount - wear. Rubber wears out with age, especially in hot places. Same as other rubber parts that eventually need replacing (motor mounts, bushings, etc.).
Thought I got all the mounts, guess these two are next
#10 & 11 in picture below:
Just did this on my passenger side..super easy. mine was completely broke in half. Got the new one on put wheel back on and drop the car down off jack stands and now the new one is broke in half and i havent even driven it yet! Anyone got any idea what could be the cause?
Did you ever figure out why your broke again after installing??
I had a broken lower control arm replaced that and then put another one on and it didn't break and is still holding up so it must have been the control arm causing it somehow. But I would recommend putting top bolt in first and then doing the two in the fork looking part of the mount. And don't fully tighten until they are all in place...don't know if it's the right way but it worked for me...
Excellent man good to hear. Should be doing it this weekend. Thanks for the tip. Also doing the tranny filter now. Have you tackled that yet assuming your car is an automatic. Thought I ordered everything I needed and realized I needed more stuff to complete. Take care. Jim
It's an easy and cheap repair to do yourself. If it needs replacing, just do it. I just replaced my driver's side mid mount. It was about $18 and look 30 minutes to do including time to jack up my car and put it on jack stands. This is probably the easiest thing I've ever had to replace on my car. Easier than changing oil.
As far as what will happen, I think you'll be putting more stress on other parts causing them to wear faster. You may get a clunk or loose feeling over hard bumps. This mount is part of what attaches the subframe to the frame and cushions it.
When my mount was shot the rubber was deteriorated and looked chewed up. Mine was so bad that it detached and fell apart once I removed it. As far as what causes a bad mount - wear. Rubber wears out with age, especially in hot places. Same as other rubber parts that eventually need replacing (motor mounts, bushings, etc.).
I got terrible vibrations from the front passenger side after I installed my Tein Basis Coilovers. I thought it just needed an alignment but the technician called me over to take a look and the only thing he said he could find that could maybe cause that vibration is a broken sub frame bushing.. I don't know if anyone else had the same problem but i was getting violent vibrations from 5-20 mph but stopped afterwards. Going to get the parts after work today. Did anyone else here have the same symptoms from a broken sub frame bushing?
I still don't know how I broke the passenger side one because the violent vibes weren't there before the coilovers...
Well this piece seems very unnecessary. Thought it would fix the vibrations but no. Pretty sure the car will function without them. So this did not fix any vibrations I've been having. Money down the shitter again. Thanks for nothing, everyone. Thought this community was helpful and friendly
Well this piece seems very unnecessary. Thought it would fix the vibrations but no. Pretty sure the car will function without them. So this did not fix any vibrations I've been having. Money down the shitter again. Thanks for nothing, everyone. Thought this community was helpful and friendly
Thanks for the article! I have a random loud clunk on my 04 and thinking it is this. It started happening after I broke the passenger cv axle when accelerating from a stop sign
 10-24-2009, 06:27 PM