When you click on links to various merchants on this site and make a purchase, this can result in this site earning a commission. Affiliate programs and affiliations include, but are not limited to, the eBay Partner Network.
So I finally had time to have a garage disassembled the rear driver side. The installation / assembly look alright. Still the noise is there. They took everything apart and put them back together.
Are rubber silencers going to help ? I guess I might as well give them a try if they do no harm and just might solve this "clicking" and "squeaking" issue.
As for the dealership that installed the coilover, I don't think they'll have an answer and be of responsible. They came as a pre-assembled kit and since it's aftermarket, their only job is to replace the assembly. Hence I went to a garage that does aftermarket mods , and had them re-assembled but to no luck.
Anyhow, I am going to give rubber silencers a try.
I ordered a set of Tein Street Advance Zs this weekend. You can bet that I'll be referencing this in a few weeks when I perform my installation. Great informational write-up!
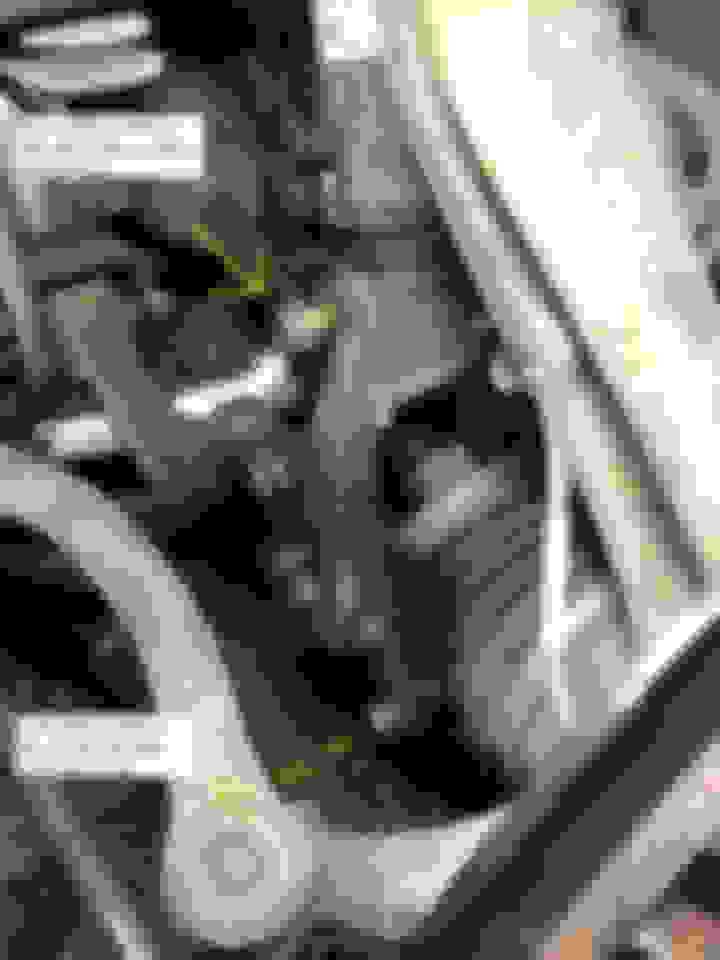
I'm in the midst of this installation and I cannot get the dang flange bolt removed from the front OEM spindle. I need to remove this in order to drop the fork low enough to remove the OEM suspension. I was able to remove the nut, but the bolt itself doesn�t want to slide out. I fear that it has seized to the bushing inside. I can rotate the bolt a little and can see that it�s not rusted to the spindle.
I was able to remove the driver�s side with no problems. Ugh, does anyone have any advice? I�m so frustrated and defeated. I don�t want to cut it out and replace the entire lower control arm. That's a lot of extra work and money.
I've used some heat (very carefully to avoid melting any rubber), PB blaster, a hammer, raised the control arm at various heights and pounded away. No luck.... ugh, this makes me think the rears are going to be a nightmare as well.
I'm in the midst of this installation and I cannot get the dang flange bolt removed from the front OEM spindle. I need to remove this in order to drop the fork low enough to remove the OEM suspension. I was able to remove the nut, but the bolt itself doesn’t want to slide out. I fear that it has seized to the bushing inside. I can rotate the bolt a little and can see that it’s not rusted to the spindle.
I was able to remove the driver’s side with no problems. Ugh, does anyone have any advice? I’m so frustrated and defeated. I don’t want to cut it out and replace the entire lower control arm. That's a lot of extra work and money.
I've used some heat (very carefully to avoid melting any rubber), PB blaster, a hammer, raised the control arm at various heights and pounded away. No luck.... ugh, this makes me think the rears are going to be a nightmare as well.
I call that the lower fork bolt, not sure what the correct term is...
OK, nut is off.
Can you turn the bolt at all? Have you tried putting an impact wrench on the bolt end and spinning it to help break it loose and then punching it out (first with the nut partially threaded on the other end). This finally worked for me. (I can't remember for sure, but I think I had to let it set overnight after coating it with Deep Creep).
Those bolts are a bitch if they are the originals. They are likely frozen due to corrosion/rust. I installed new ones when I did my aspec strut install.
And FYI, I recall the rears being easier than the front.
Last edited by nfnsquared; 04-26-2019 at 11:39 AM.
This is what mine looked like. It was a bitch to get out but I put my break bar on it and my jack handle over that for leverage. Was able to break it free eventually but it was very frustrating to say the least. Loaded he new one with anti seize and put it back in no problem!! Also, as mentioned. Try to unload it so it isn't "pinched" in there.
Yes, I tried raising the LCA with a jack at various heights, That didn't work unfortunately.
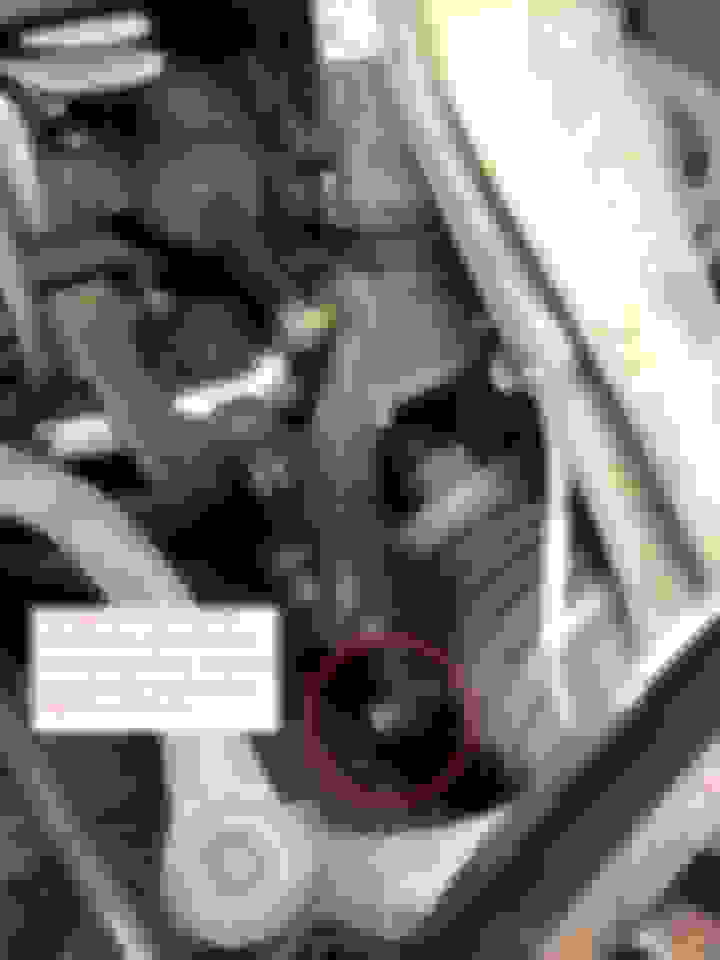
And yes, I am able to turn the bolt fairly easily about 1/4 turn each way. I can see the ends of the rubber part of the bushing twisting as well when I turn the bolt. When tension is taken off the bolt, it kind of springs back into its original location.
From what I see, the bolt is not seized to the fork itself, but rather seized inside the metal bushing.
My buddy has an air compressor and impact wrench that he may let me borrow tonight. If I use that and try to hammer it out at the same time, could the torque end up ripping the rubber part of the bushing? I'm just trying to not replace my whole LCA since it's only a year old.
I didn't have any issues with that bushing getting mangled.
You don't have access to an electric impact gun? A couple of hits should break that bolt free and then you should be able to punch it out. Check with the auto parts stores, they may rent one.
In the meantime, try to get PB or Deep Creep into the area where the bolt meets the bushing (I know you've probably already done so).
Good luck. As I said before, you might need to let the PB/DC work for a few hours or even overnight, dunno.
No, I do not have an electrical impact gun. I've always been able to use hand tools for all of my projects. Obviously, suspension components are a different beast.
I've used PB blaster several times over the past two days and let it sight overnight. Here's to hoping an impact gun will break this thing free! I knew this would be a challenging task, but man, how frustrating...especially since the driver's side came out with no problems.
Thanks to everyone for their quick responses!
I went thru the exact same scenario. Put a long enough extension on it and break it free. The splines are rusted to the hub of the bushing. Once broken free, you can punch it out.
I went thru the exact same scenario. Put a long enough extension on it and break it free. The splines are rusted to the hub of the bushing. Once broken free, you can punch it out.
^^^^Yup, this. When I said "a couple of hits", I was referring to the impact gun, but if you can get enough leverage with a hand wrench, that would work as well. You just need to break it free somehow and then it should "punch out" fairly easily.
The bushing is probably toast, bruv. You are fairly unlikely to get the bolt free in any case. But even if you do manage it...getting the bolt free will probably ruin the bushing.
You'll probably need to cut the bolt out. Use a sawzall. Don't use a cutting disk. Protect the axle boot.
The best thing to do afterward is to just buy new OEM Acura bushings and press them in.
A much easier thing to do is to replace the whole arm. Aftermarket is way cheaper than OEM...but with nowhere near the same bushing quality.
If you are going aftermarket, I recommend Hardrace arms if you're willing to spend ~$350 and deal with brightass blue control arms.
Or if you want a "OE replacement", go with Beck Arnley.
Pro tip = make sure the other two control arm bolts come out if you plan to replace the arm. That way, you know how many bolts you'll need to cut and replace.
^^^ I've read quite a few stories of these bolts being frozen and requiring an impact wrench to break them loose. I've never read an instance of where a frozen lower fork bolt ruined the bushing...
^^^ I've read quite a few stories of these bolts being frozen and requiring an impact wrench to break them loose. I've never read an instance of where a frozen lower fork bolt ruined the bushing...
Well, to get the bolt broken free, one would have to rotate it enough to twist the bushing enough to create the amount of force needed to break the rust.
Has anyone actually inspected the bushing after getting a bolt free? And how old are the bushings already?
Hey guys, here is an update. I made a video to explain my status. As far as I know the LCA are the originals. I only had the lower ball joints replaced last year.
Ran into this same problem installing coilovers for another member. Had same problem, twisting with a breaker bar would move the bolt but also spin the bushing and releasing the breaker bar would allow the bushing to spring back.
Honestly, best decision was to put everything back together and drive it to a shop. They were able to break it loose pretty quick. Not sure exactly what they did, though.
i do also like the panning from the garage tv to the car at the beginning of the video
Well, yeah! I had to show off my lovely organization skillzzzzzz.
My buddy told me that sometimes at shops, they�ll break the bolt (and replace it) by using acetylene and then carbon dioxide. Do you know if that�s what they did or were they able to just break it free?
I�m now also concerned that I noticed the other bushing is ripped on the control arm. The lower ball joints are new, but the control arm looks a little beat up. What are your thoughts?
I'm sorry, I'm an idiot. They must have just broken it free. If they destroyed to bolt or cut it off in someway, then they would have had to likely replace the LCA (or LCA bushing at a minimum). Forget what I said lol.
1. What type/make/model of impact gun did your friend use?
2. Did you pound on the nut while hitting it with the impact gun?
3. You can replace the LCA compliance bushings yourself with a homemade tool I came up with without having to remove the LCA: https://acurazine.com/forums/3g-tl-p.../#post14334091
4. I'd recommend installing the Fastline PCI compliance bushings rather than OEM.
And lastly, keep using penetrating oil (personally, I prefer Deep Creep), you never know, it may finally dissolve the rust enough to get the bolt out of there.
And you might as well go ahead and order 2 sets of nuts/ bolts...
Last edited by nfnsquared; 04-27-2019 at 08:04 PM.
Well, we were able to get a new coil in! We could not get the bolt to break free after countless hours of PB blaster, Snap-On impact guns, breaker bars, and hammers. My buddy got frustrated and we started to remove the caliper, rotor, and axel to swing the knuckle out of the way. We dropped the control arm as well. It took maybe 20 extra minutes, but the new coilover went in very easily. I was actually shocked this worked so well. I wish I would have known this from the beginning instead of battling this stupid thing for half a week now. We did break the stabilizer link, but for right now, that is a heck of a lot cheaper than a new LCA.
The bolt is still seized and a few of the threads at the very end of the shaft are a bit marred from hammering on the nut. I need to clean these up in order to install a new nut on there. Gosh, I hope we can get this to work! My research shows that the bolt is 12x98. Can anyone confirm if a1.25 thread pitch die would work? When we put the die up to it, it looked to be the thread pitch, but the �98� is throwing me off. I can�t seem to find a clear conversion chart Or direct answer on this. This will be my first time retreading something, so obviously I need to be extremely careful. Otherwise the bolt will still have to be cut out. I�m not out of the weeds quite yet!
That would make more logical sense now wouldn't it?
I'm going to take the good nut (from the other side) and head to Lowe's to see if it threads onto a 12-1.25 bolt. I looked online and there are a few in stock near my place. The Home Depot did not have any 12mm bolts with a 1.25 thread pitch when I checked last night.
you must likely have to go to a specialty hardware store. lowe's and home depot do not have good metric inventory
So you only tried pneumatic guns? And I'm guessing a portable air compressor was used? If that's correct, then I'm 99% certain that the gun did not have enough air pressure/volume to break the bolt free.
You really should try it with an electric impact gun if at all possible.
Regarding the nut, do you not have dealer in the area (Honda or Acura)?
Yes, I only used pneumatic guns with an 11 gallon portable tank. But like I said before, that bolt is seized seized seized to the bushing inside. A stronger electrical impact might break it free, but like BROlando mentioned, even if I were to get the bolt out at this point, I probably wouldn't be able to do so without completely destroying the bushing. I'd rather not have to replace the bushing or LCA if I don't have to. The goal of getting the coilover in was successful, so if I can fix the threads and zip it back up, then I think that problem is solved.
And buying a new nut isn't an issue. I already ordered a new one, which will be here today or tomorrow. The only reason I would bring the nut to a hardware store is to test and 100% confirm that the thread pitch is indeed 1.25. I don't want to use the incorrect die when trying to re-thread the end of the bolt.
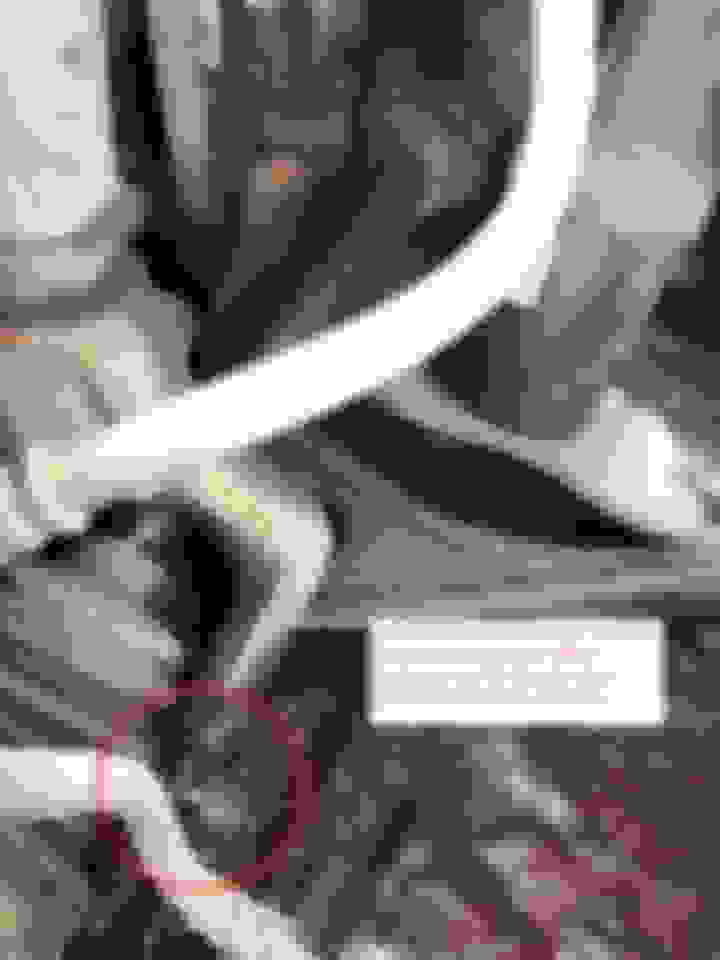
So if I am following this right. You left the fork connected to the LCA, via the seized bolt and put everything in and then lifted the LCA up and slid the coilover into the fork and secured the pinch bolt?
We managed to get the coilover installed (without removing the fork bolt). Everything was buttoned back up and the 3 bushings (2 UCA and 1 LCA) were clocked at my desired ride height. The last task with the front suspension is to get a new nut onto the seized bolt.
Here is how I see my options (in order of preference):
1) Re-thread the 2/3 damaged threads at the end of the bolt with a die and then install a new nut.
2) File the 2/3 damaged threads and then install a new nut (I would probably use a dab of loctite with this approach)
3) Cut off the 2/3 damaged threads and then install a new nut (I would probably use a dab of loctite with this approach).
4) If options 1-3 are not successful, then I will need to use a sawzall and cut off the seized bolt and replace the destroyed LCA bushing or entire LCA.
I was able to get the rears out the other day and I'm slowly working at this when I have time. Work has been busy lately and my wife and I are expecting our first child in a few months, so we're trying to get the house ready as well. I'm hoping to have this done next week sometime.
Yes, I only used pneumatic guns with an 11 gallon portable tank. ...
Just an air tank? No compressor? If that's the case, no wonder it didn't break lose.
I still say that you should hit it with an electric impact gun (rent it from ACME tools, etc. There have to be several options for tool rental in Grand Rapids), but good luck whichever way you choose
Last edited by nfnsquared; 05-03-2019 at 02:49 PM.
No, it was a compressor with tank lol. Poor word choice on my part I suppose...
Well, I am pretty much done! We went with option 1, which was to "Re-thread the 2/3 damaged threads at the end of the bolt with a die and then install a new nut." This worked surprisingly well and only took about 20 minutes. I installed the new nut, and replaced the front stabilizer links as well since the boots ended up ripping at a later time. Everything is zipped back up and we are functional!
I was able to clock almost all bushings (3/3 on each side up front and 7/9 on each side in the rear). The two bolts that I could not break free were the rear upper arm bolts and the rear trailing arm bolts as outlined below:
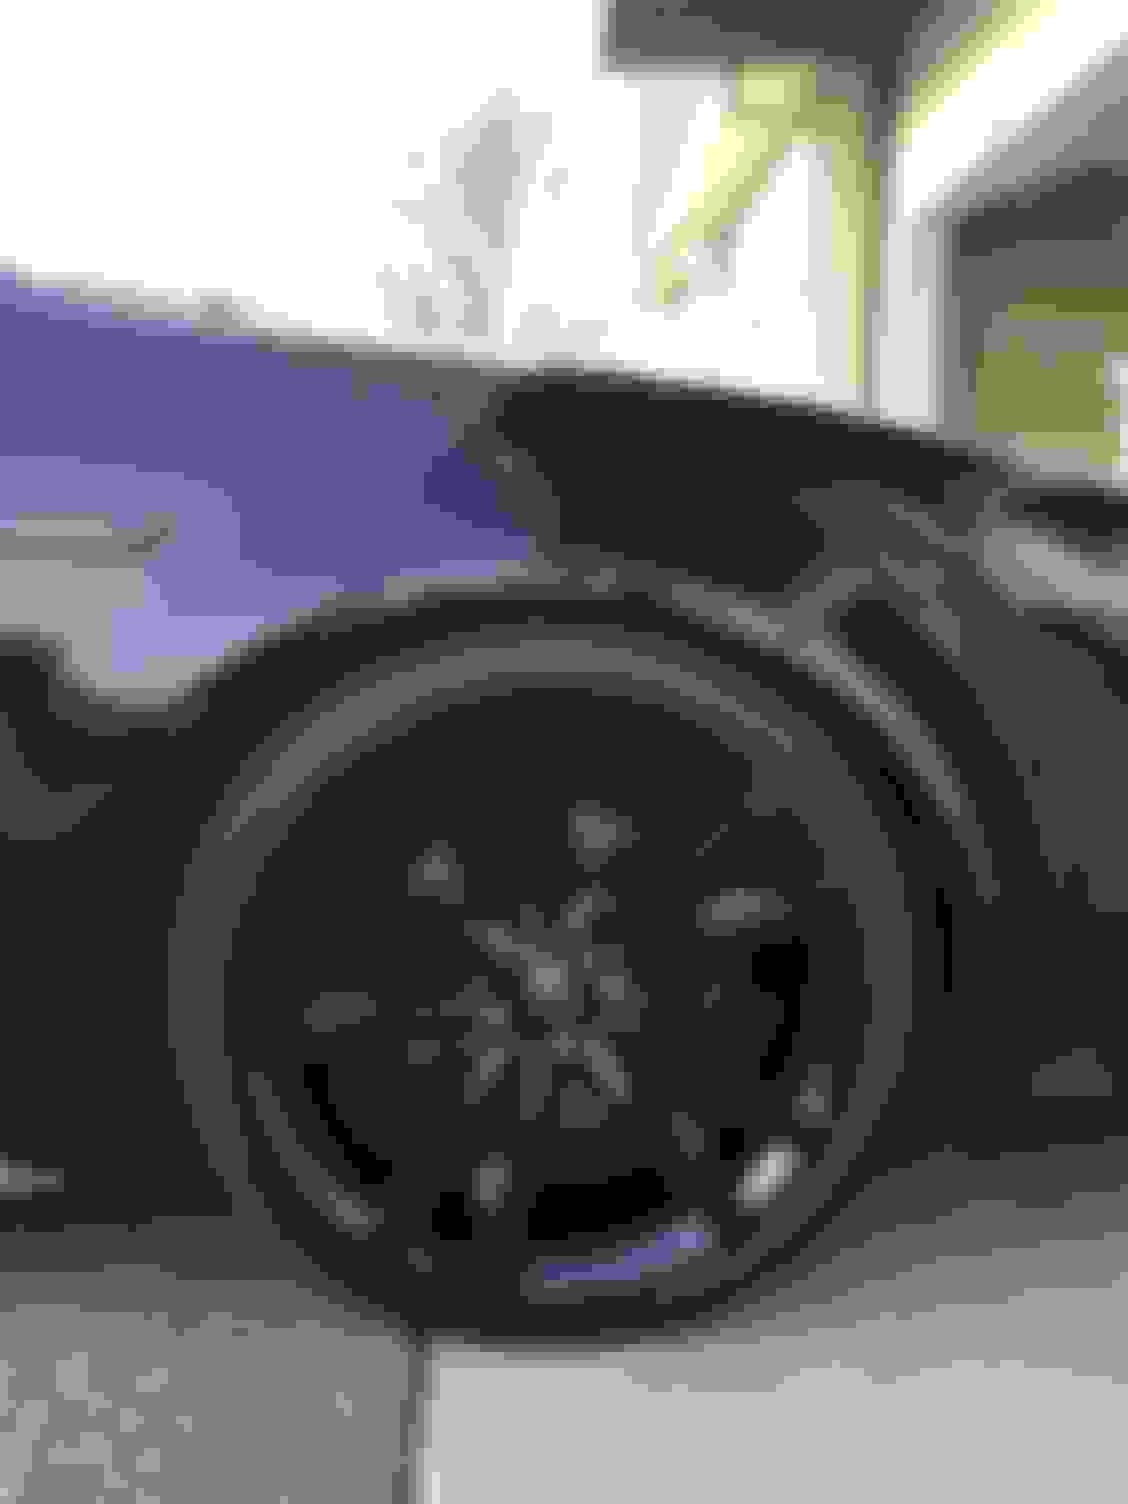
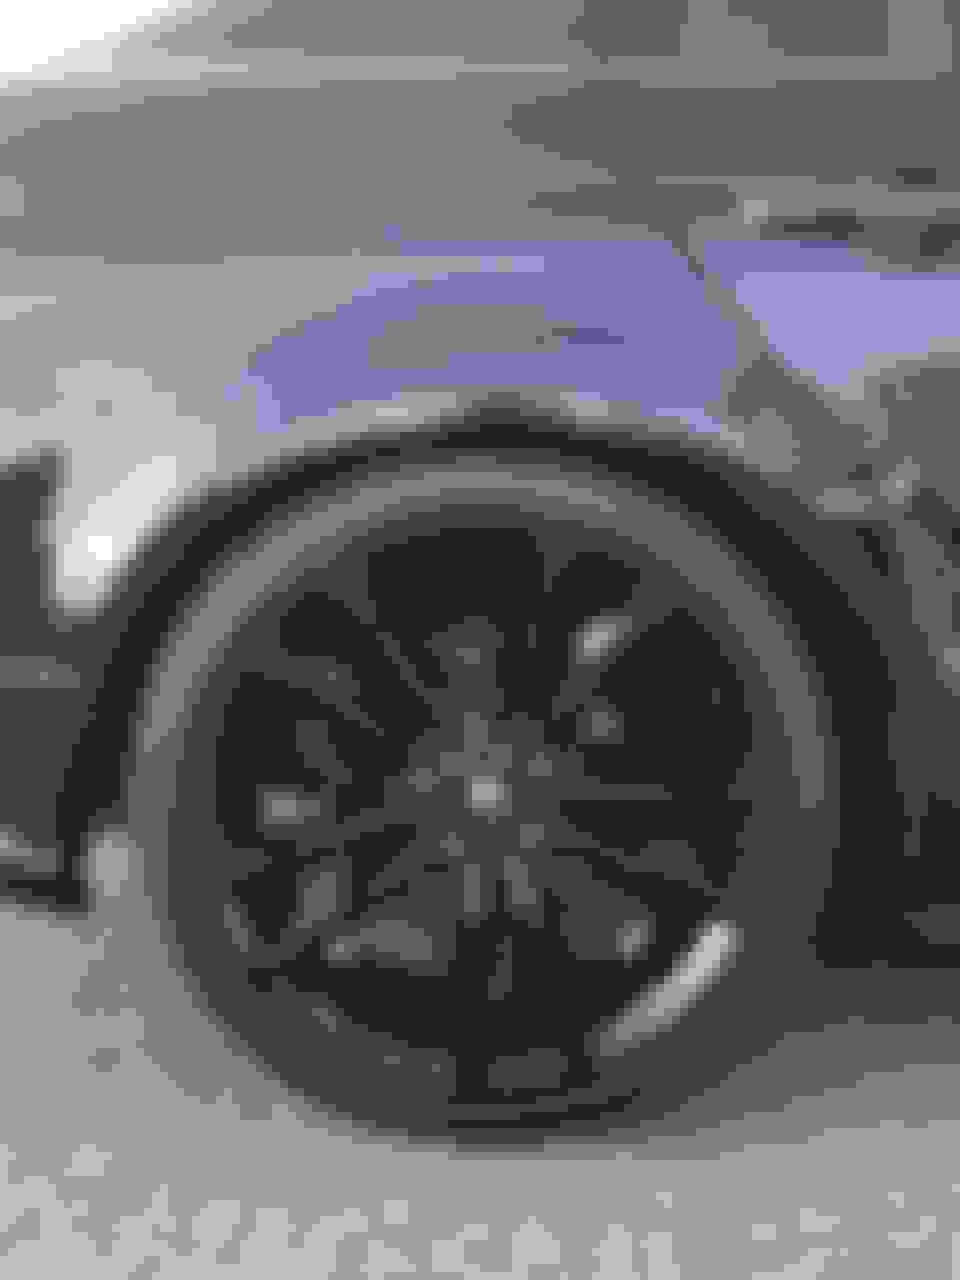
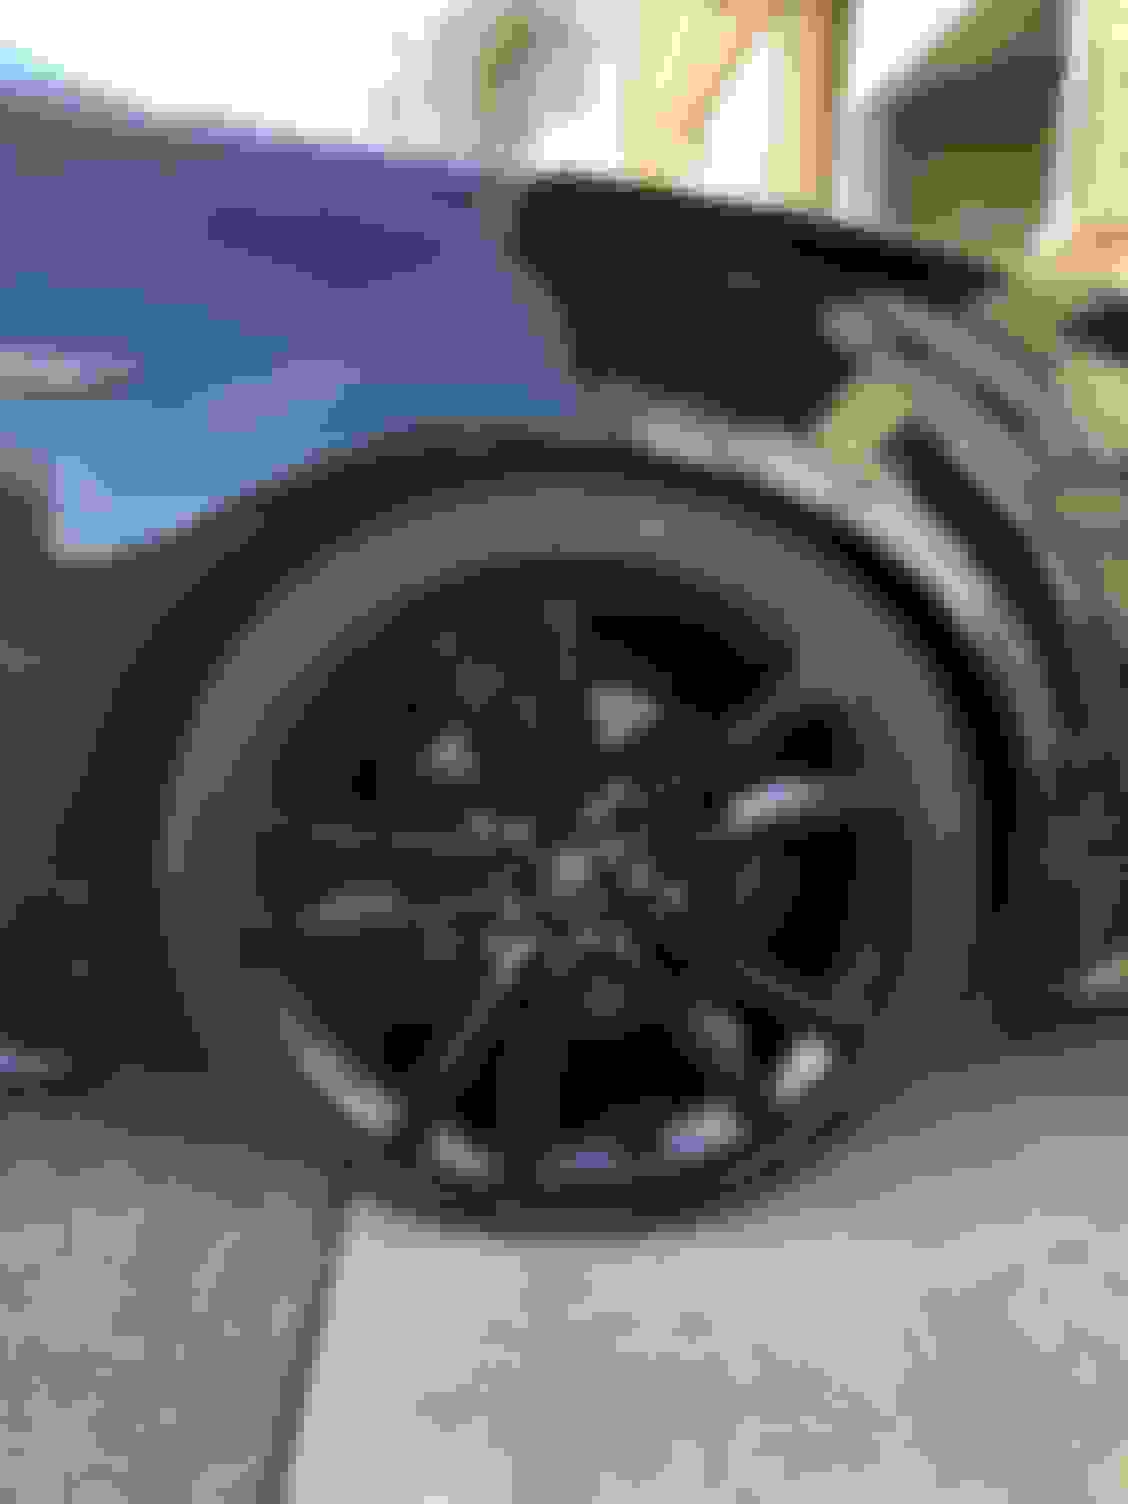
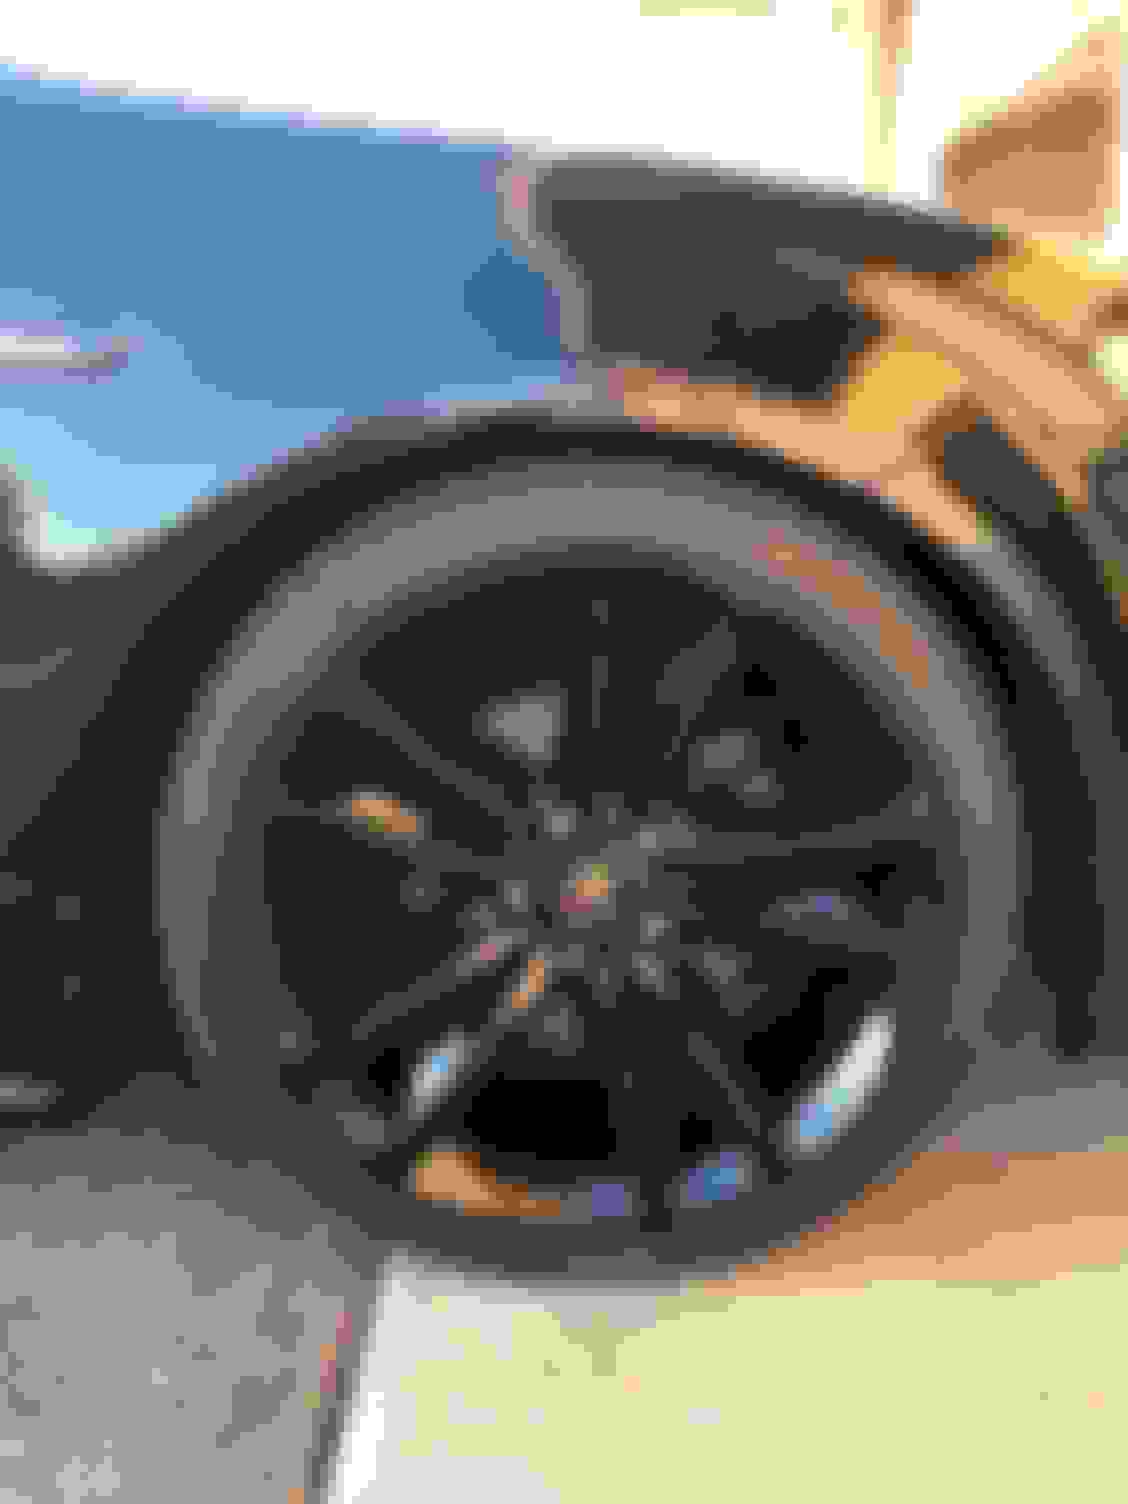
Here are a few pictures of my new drop. The fronts have to be raised by about 1/2 inch to meet my pre-measured requirements and I still have to finish painting my custom center caps.
Looks very nice! Glad you were able to get it done. I'd still break that bolt free, replace the bushing and antiseize the shit out of the new bolt before putting it all back together.
0.5" ride height change up front = raise the spring position 0.31"
I actually just installed a set of SA-Z's and I'm really happy. I'm going to ask Tein for a dyno graph of the new shocks. They feel totally different from the old SA.
Haha, I wish I knew that calculation for raising the spring position last week. However, I figured it out though via trial and error. I'm very pleased to see that my measurements were EXACTLY the same as your 0.31 suggestion.
Here is my second attempt after raising the spring position by another 1/4 inch (0.25'')
Here is my third attempt after raising the spring position by another 1/16'' (0.065 inches). Now the front height matches the rear height.

 03-05-2018, 05:26 PM