When you click on links to various merchants on this site and make a purchase, this can result in this site earning a commission. Affiliate programs and affiliations include, but are not limited to, the eBay Partner Network.
A year ago my 2006 TL got diagnosed at an Acura dealership with a bad air mix motor and I don't have a dealership close to me so I couldn't drive back. I replaced it myself with an OEM part and the same clicking/popping sound still happened. I finally took it back because it only pops when going to heat and it's starting to get cold again and got a call and they diagnosed it as a bad blend door actuator and quoted $309 (parts and labor)+tax and I can't find that part anywhere online and dealership won't call me back. I paid $100 for the part a year ago and I'm trying to find out if they're about to replace that with the exact thing or if this is 2 different parts all together. Hope someone knows because I'm thinking it's the same part!
Our TLs have five motor assemblies that control the climate system. Driver air mix, passenger air mix, driver mode, passenger mode, and recirculation. The air mix and blend terms are the same.
I fixed the driver mix motor in my 04 TL. It would not regulate temperature on that side. It was either cold or hot, no in between. Took it apart and cleaned the wiper surface on the pc board. Then I bent the "tongs" of the arm so it makes better contact with the wiper surface. It's no more than a potentiometer moved by an electric motor. At $120-135 for these things, its worth a shot to try to fix them yourself. Mine was not making a clicking noise. If yours is doing that, then maybe you have a stripped plastic gear inside. I suggest removing the blue cable actuator that connects to the heater valve on the firewall. Maybe its hanging up. You can just leave it disconnected. just move the heater valve so it is in the open position all the time. Honda did away with these in the last few year/s. In doing so, the coolant flows all the time thru the heater core. I did this to mine, too. And yes I verified it thru where I work, which is at Honda R&D.
I have the same problem as well. My local Acura dealership has replaced my air mix motor twice now. Each time the clicking sound came back, and this last time it came back in a matter of days. I drove it back to have it further diagnosed, and they came back with the whole heater box is bad. They said it would cost close to $1000. It drives me insane, but not to the point where I'm dropping that kind of money on it.
I have the same problem as well. My local Acura dealership has replaced my air mix motor twice now. Each time the clicking sound came back, and this last time it came back in a matter of days. I drove it back to have it further diagnosed, and they came back with the whole heater box is bad. They said it would cost close to $1000. It drives me insane, but not to the point where I'm dropping that kind of money on it.
This is where I'm at right now, it's not the heater box because they replaced it and it's still doing it. Its in the shop right now getting the heater control valve replaced because that is apparently the problem. Who knows! Follow the link to follow what has been done so far. https://acurazine.com/forums/problem...-issue-908802/
Last edited by ct10989; 10-08-2014 at 09:15 PM.
Reason: Adding
For those of you who have the clicking noise, and you want to fix yourself? Remove the air mix motor. Then with your hand move the arm on the heater box. Does it move easily? If not, then a new motor may not last long, as it has plastic gears inside, and may wear out fast. In that case the heater box will need repaired, which sucks definitely.
Also, I strongly suggest unhooking the blue cable from the heater valve, for anyone, even if you dont have a problem. Just leave it unhooked and put the heater valve in the open position by hand.
... I suggest removing the blue cable actuator that connects to the heater valve on the firewall. Maybe its hanging up. You can just leave it disconnected. just move the heater valve so it is in the open position all the time. Honda did away with these in the last few year/s. In doing so, the coolant flows all the time thru the heater core. I did this to mine, too. And yes I verified it thru where I work, which is at Honda R&D.
Which - the cable or the valve, or both? in the summer, can the A/C still cool OK? and is this only on the TL? the gen-1 RDX has a HVAC system roughly same as you describe for the TL.
Took it apart and cleaned the wiper surface on the pc board. Then I bent the "tongs" of the arm so it makes better contact with the wiper surface. I suggest removing the blue cable actuator that connects to the heater valve on the firewall.
i know its a bit old, but i was hoping you could help. i want to do the same and clean/inspect the "wiper surface" (and possibly remove that blue cable you speak of).
i do NOT have any sounds, but passenger side is ice cold until i set it to max heat, then it gets hot (no warm in between).
i have a copy of the 2004 service manual. and i found directions on how to get the the passenger air mix control motor, which i think would be connected to the "wiper surface".
my question, do you have any pics or links to steps to accomplish a wiper cleaning and tong bending? like what exactly is the wiper surface and how do i get to it? and exactly what Tongs did you bend? (do i just follow the service manual to get to the passenger air mix control motor and its connected to that?)
also, not sure exactly what/how/where to disconnect the blue cable you speak of.
My driver side was acting up, I had to turn it to full hot then back down to get any temp changes. Otherwise it stayed cold. Based on this thread I removed the driver side air mix motor then opened it up and cleaned the contacts with electrical cleaner. The 'wiper' he's referring to are just the contacts from the gear onto the pcb. Mine was caked in grease so it wasn't getting proper readings on the position of the door, which explains why I only had temp extremes.
I reassembled the motor, then bolted everything back into the car and bingo, my driver side is now heating up incrementally as I increase the temp. While reassembling, I left the cable going to the heater valve unhooked and just manually set the valve in the open position. This valve isn't needed, all modern cars with auto climate control today always have coolant flowing through the core. The cable/valve is just one more wear item on the driver side mix motor so I'm just playing it safe by unhooking it. Plus by looking at the parts diagram on the 4th gen, this was valve and cable was eliminated all together.
thanks for the added info.
is there any guide you followed to get to the mix motor. i obviously want to take apart as little as possible to get to the passenger side motor.
are there any pics of the cable going to the heater valve. i can mentally picture what exactly i would unhook. i also cant picture what "manually set the valve to open" means.
i dont mean to bug, i just like being as prepared as possible when going into things like this. to save time and sanity!
No worries. I'm not sure about the passenger side but the driver side was very easy to get to. It was right above the gas pedal, I just had to remove a panel under the dash. I would assume the passenger is the same. Once you locate the air mix motor, you'll need to remove it from the car. You'll see it has clips all around, pry them all up while pulling apart the sides. Once it comes apart you'll see the motor itself with a bunch of gears and a pcb board. The contacts on the board to the big gear are what you need to clean.
As for the heater valve, look for the heater valve replacement DIY for pics. Its on the firewall and you'll see it has a handle (think about a ball valve). Just slide the cable off the handle then push the valve down to the 9'clock position (it may already be there). That's the open position.
i wanted to give some tips to anyone that might try this them selves. if you are going to follow my tips, i recommend to read them all first, then start.
tools - i have the ifixit pro tech kit that has microbits, metal spudgers (helps to open air mixer), and a really small screw driver handle (many of the philips in this process are in tight spots). it helped alot. i also have a cheap-o husky brand very small ratchet with 10mm and philips bits (helps for mode box and to tighten the philips screws you will remove). a headstrap led light (its dark in there). rubber gloves (protect hands from scratches and keep them clean). i used 91% alcohol and qtips
set AC to hottest setting before starting. this will raise the arm of the air mixer which makes putting it back in at the end easier.
be careful when opening the air mixer to NOT move the arm that is sticking out around. i moved it around, when i reconnected it the "center" point was off. so lowest AC setting on dash was like 72 degrees instead of 57. luckily i tested before closing it all up. i had to reopen the air mixer and reset the white arm manually. this is a pain. i will explain later.
how to do it.
1) take out glove box along with the glove box back plate (this step can be found on the forum, look up how to replace cabin filter). basically 4 screws and pull it slightly out, remove 2 wires connected to switches, then remove completely. you will then be looking at the pic below.
this is what you are looking at after the glove box and glove box backing are gone
2) slide the black box up to get it out of the way. pull that clip out to give you wiggle room.
3) remove the white box. 1 screw up above (in pic) and 2 below (not in pic) hold it in place. you have to remove the cables as well, i found it easier to remove them after unmounting the white box. gave me more room to get them to unclick.
4) now remove the mode box. this only has 2 10mm screws. 1 on each side. again, i found it easier to remove the cable after unmounting the box, these cables can be tricky.
5) finally the air mixer. remove the green cable in front of it (goes up to a random box) to make room. and remove the green cable that connects to the bottom of the air mixer. then remove the 3 screws to remove it. the green cable in the 2nd photo is easy to reach from underneath, the screw right next to it is the bottom screw from the top photo.
6) open the air mixer. (i was careful and still broke all but 1 tab). this shouldnt matter since when you screw it back into place it will hold it shut and its not a loose box even without clips is a somewhat snug fit. clean the contact points both on the pcb board and on the motor. at least its what i did even though they werent noticeably ditry. i used alcohol on a qtip.
side note - the two halves dont fully come apart. the pic is of the bottom of the motor. on the top of the motor are 2 screws that hold it in place. it was kind if hard, but i had to remove the screws to allow me to open the 2 halfs of the air mixer so i could actually see and clean the contacts. (the ifixit small screw driver came in handy)
7) close it up. put it back into place. make sure the arm (white thing on top in the pic that shows it split open) is inserted into the arm of the AC unit. this unit moves the AC arm up and down which in turn, turns your air cold to hot. if you set the heater to hot you should easily be able to see the arm of the ac unit and should be able to easily make sure the arm of hte air mixer inserts into it properly. this is where i messed up. i moved the arm while the air mixer was open. i put it back in the car and had to move the AC arm up so it would be in contact with the arm of the air mixer (which through off the starting point of where the car thought it was). doing this made my car blow out luke warm air when set to coldest setting.
i had to use my finger to push the ac arm down all the way (to coldest setting).
then, i had to re open the air mixer unit while it was connected to car so i could manually try to reset it to the lowest position (coldest position) that the AC arm goes to. i hope that made sense.
the heater valve:
1) i had to remove the trim above the sway bar, just gently pull up on it. then i fit my hand and a pair of pliers down and pulled the cable off. then i moved the arm to the 9pm position, which is the farthest left it will go.
Last edited by carlosriosness; 10-24-2015 at 02:32 AM.
Nice write up and pics! Glad you were able to get it done, easy, right?!
My wife is out and about this morning so I decided to take apart my passenger side mix motor and clean it since I know I'll eventually have the same hot/cold problem I had on the driver side. I was able to get mine out just by removing the cover panel under the glove box. Takes a little fitness to get the top screw but it can be done with only removing minimal parts.
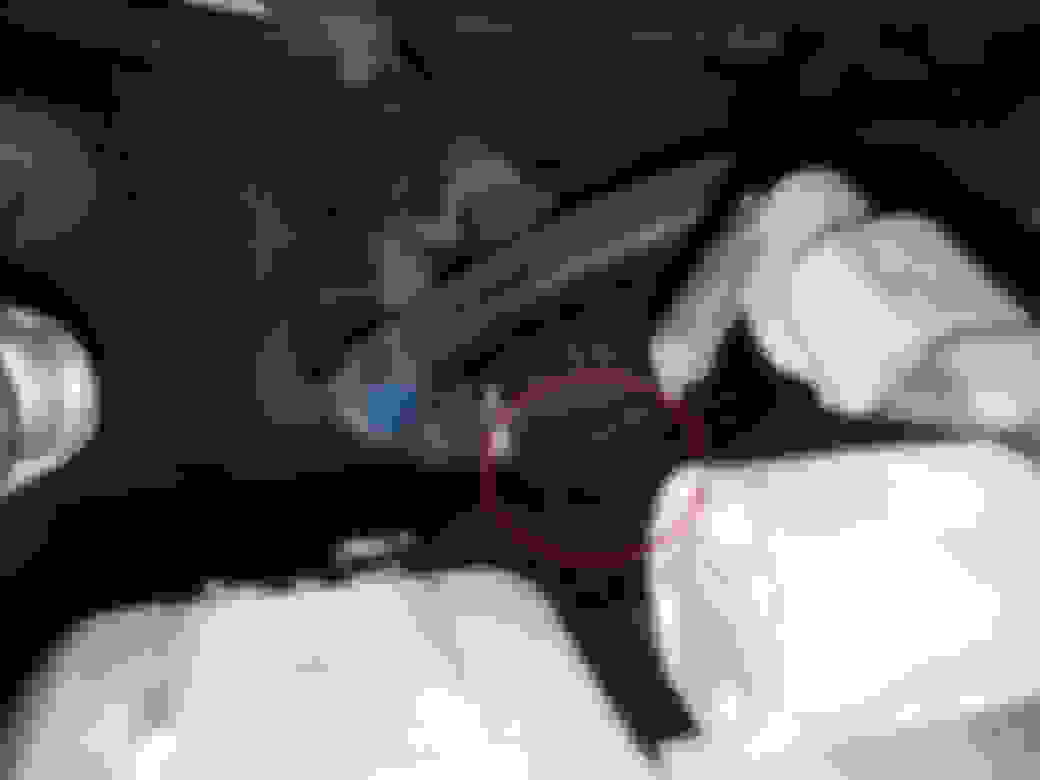
As a side note, the two halves do come apart, you just need to pop the external white arm off. Once you pop it off both halves come apart. One side is just the case while the other houses the board, motor, and gears. The contact points you want to clean is actually underneath the big gear (this attaches to the external swing arm), not the areas you circled. Underneath the gear are the 'wiper' contacts that sweep across the pcb board. This is how the climate control calculates the mix door position. These contacts were caked in grease on mine so I cleaned it all up. Then when reassembling you want to make sure to bend out the contacts on the big gear slighlty so its firmly pressed against the pcb board. You should feel slight spring pressure when snapping the two halves back together, that'll ensure good contact between the gear and pcb.
That's really weird, because I missed the main point of this, but for some reason it still fixed my issue. I may ride it out for now. But it should be easier if I have to go back in, in the future.
Obligatory "old thread comment." What should I use to re-lubricate those gears once I have cleaned the area?
Cleaning this motor is next on my to do list. Same symptoms (only full heat or cold). I read one poster used the Honda Shin-etsu grease. I have most of my tube from when I fixed my mirrors and plan to use that.
 11-05-2013, 07:17 PM