TheBlueBomber Steps Up to the Big Leagues
 09-01-2014, 11:45 AM
#1
Instructor
Thread Starter
TheBlueBomber Steps Up to the Big Leagues
So, I've been on the forums generally enjoying everyone's gorgeous cars and gathering inspiration. A little about me. I moved to Jackson, MI from Pittsburgh, PA in June starting a new job. I packed up my little Honda and made the 5 hour trek to my new home.
This is Melinda my 1985 Honda Accord. Or as my friends affectionately call her, The Blue Bomber. I've had this car for 7 years since I was 16. We've had our ups and downs, but overall I love every bit of this car. And with just over 90k miles I can't really complain.
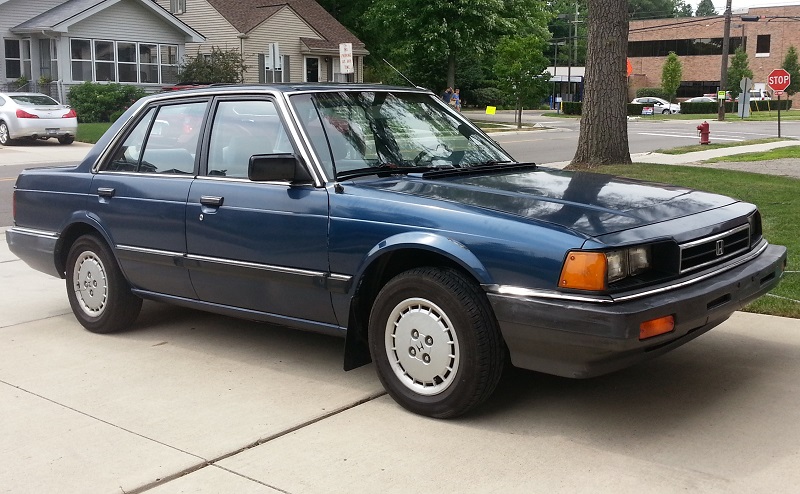
As clean as she'll get
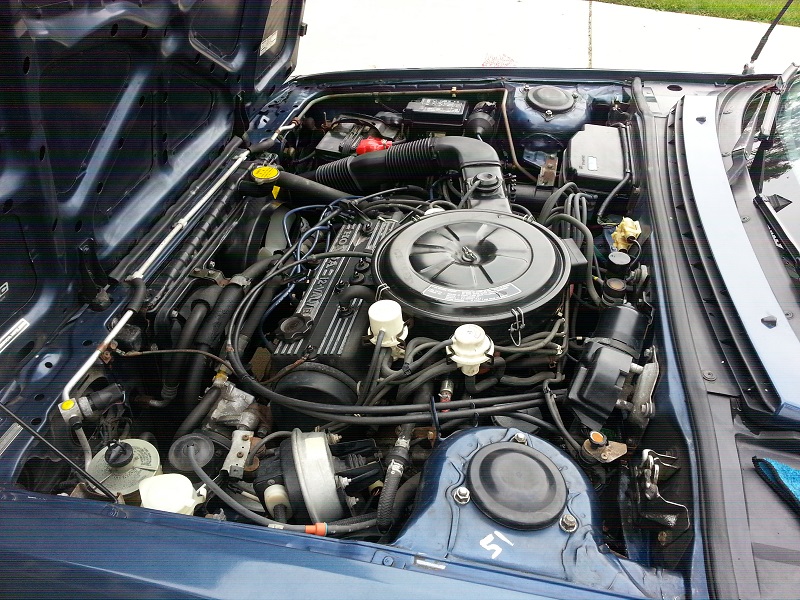

But she tends to have trouble starting in winter. Carburetors don't play nice with freezing temps. So I decided to get myself a new car. I had the hardest time deciding upon what car to get until I saw an Acura TL and what it had to offer. I saw it and fell in love. So after countless dealership hassles and craigslist scams I finally found the car, on my birthday no less. The car is an 04 NBP 5AT with 63k miles.
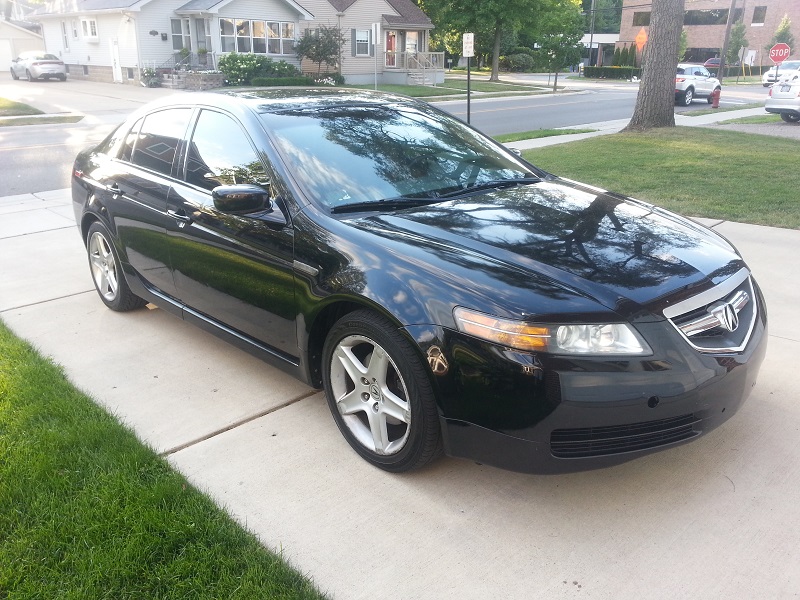
Now the car was dirty, and the interior needs some work, the wheels looked like they hit every single curb in town, and I have a suspicion that there may be some mechanicals that need fixing, but the price was right and I was looking for a project to keep me busy. So away we went starting to customize the car to my liking.
First up wheels. Fix the curb rash

A little primer never hurt no one

Then a black base.

Can't stop there though. Black on black is played out. Needs some pop. Gold perhaps.

Yea that will work. Then we clear coat and get them on the car. For future reference I need to use a little more masking tape haha.
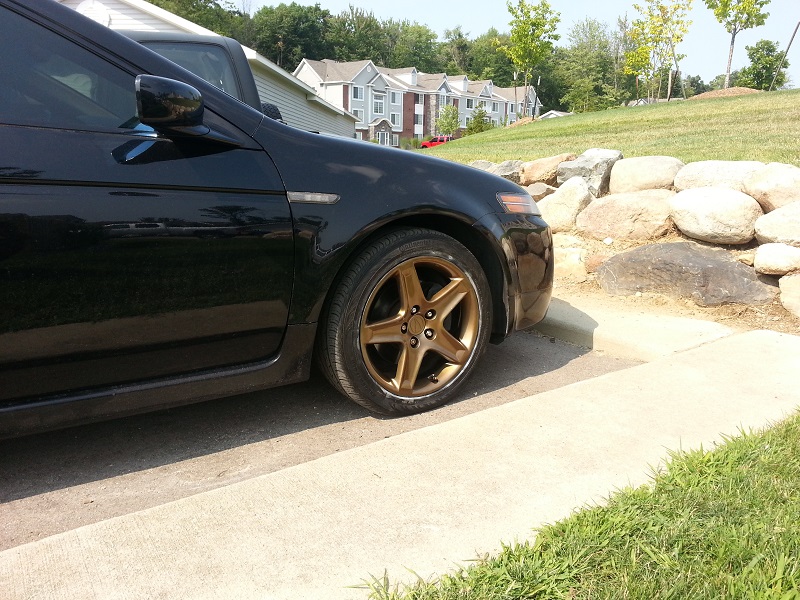
And while we're painting might as well keep the scheme flowing on the emblems and trim.
Well I hope this is enough to keep you interested. I plan on doing all the maintenance myself and will definitely plan to document it all.
This is Melinda my 1985 Honda Accord. Or as my friends affectionately call her, The Blue Bomber. I've had this car for 7 years since I was 16. We've had our ups and downs, but overall I love every bit of this car. And with just over 90k miles I can't really complain.
As clean as she'll get
But she tends to have trouble starting in winter. Carburetors don't play nice with freezing temps. So I decided to get myself a new car. I had the hardest time deciding upon what car to get until I saw an Acura TL and what it had to offer. I saw it and fell in love. So after countless dealership hassles and craigslist scams I finally found the car, on my birthday no less. The car is an 04 NBP 5AT with 63k miles.
Now the car was dirty, and the interior needs some work, the wheels looked like they hit every single curb in town, and I have a suspicion that there may be some mechanicals that need fixing, but the price was right and I was looking for a project to keep me busy. So away we went starting to customize the car to my liking.
First up wheels. Fix the curb rash
A little primer never hurt no one
Then a black base.
Can't stop there though. Black on black is played out. Needs some pop. Gold perhaps.
Yea that will work. Then we clear coat and get them on the car. For future reference I need to use a little more masking tape haha.
And while we're painting might as well keep the scheme flowing on the emblems and trim.
Well I hope this is enough to keep you interested. I plan on doing all the maintenance myself and will definitely plan to document it all.

The following 3 users liked this post by TheBlueBomber:
09-01-2014, 05:13 PM
#2
Team Owner
iTrader: (2)
Join Date: Jan 2008
Location: Kansas City, MO (Overland Park, KS)
Posts: 36,545
Received 6,470 Likes
on
5,162 Posts
Congrats on your new ride! Nice work too.
09-03-2014, 09:31 AM
#3
Instructor
Thread Starter
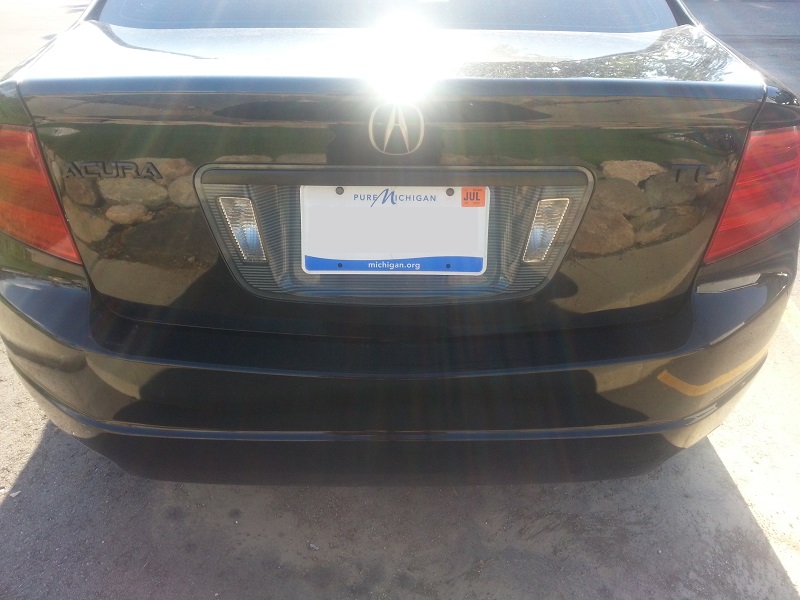
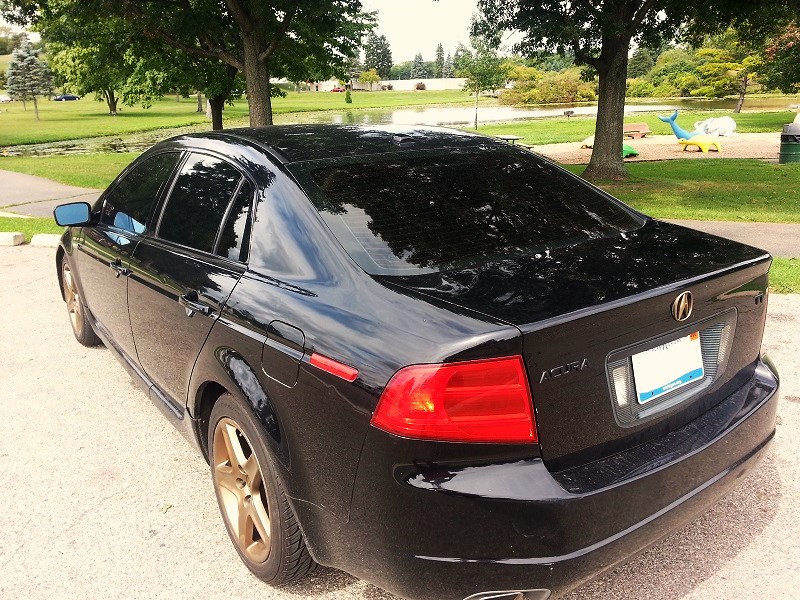
Thanks Steven.
Here's a pic of the rear badges.
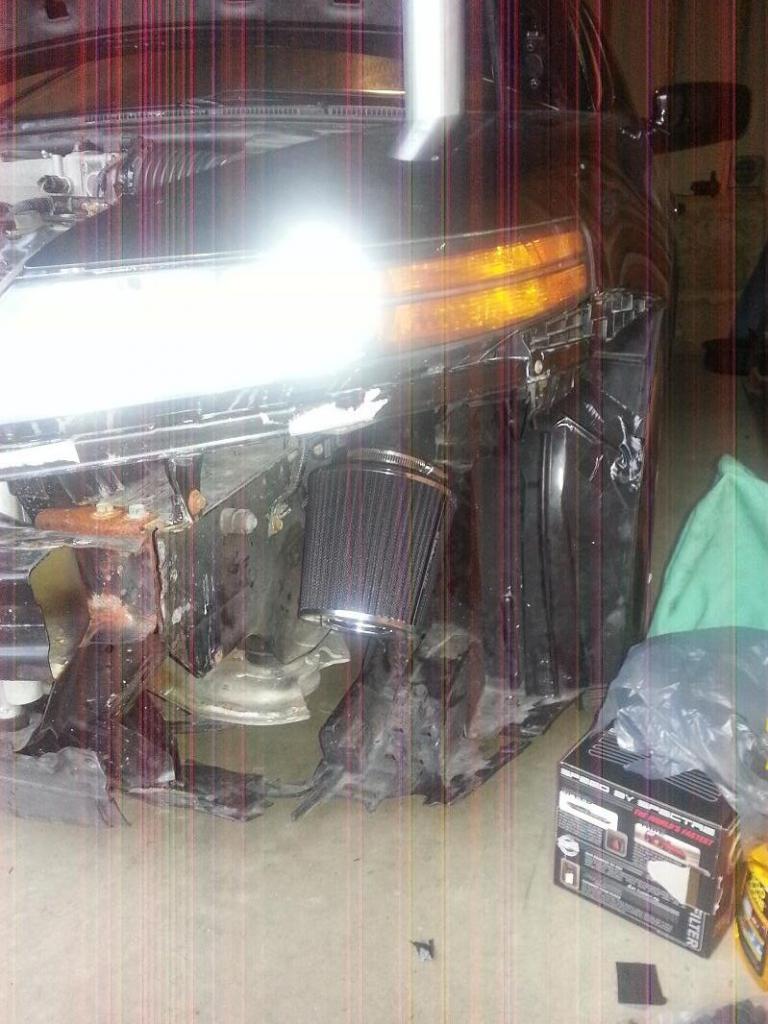
Also, quickly modded in a poor man's CAI. Started off by locating the silencer.
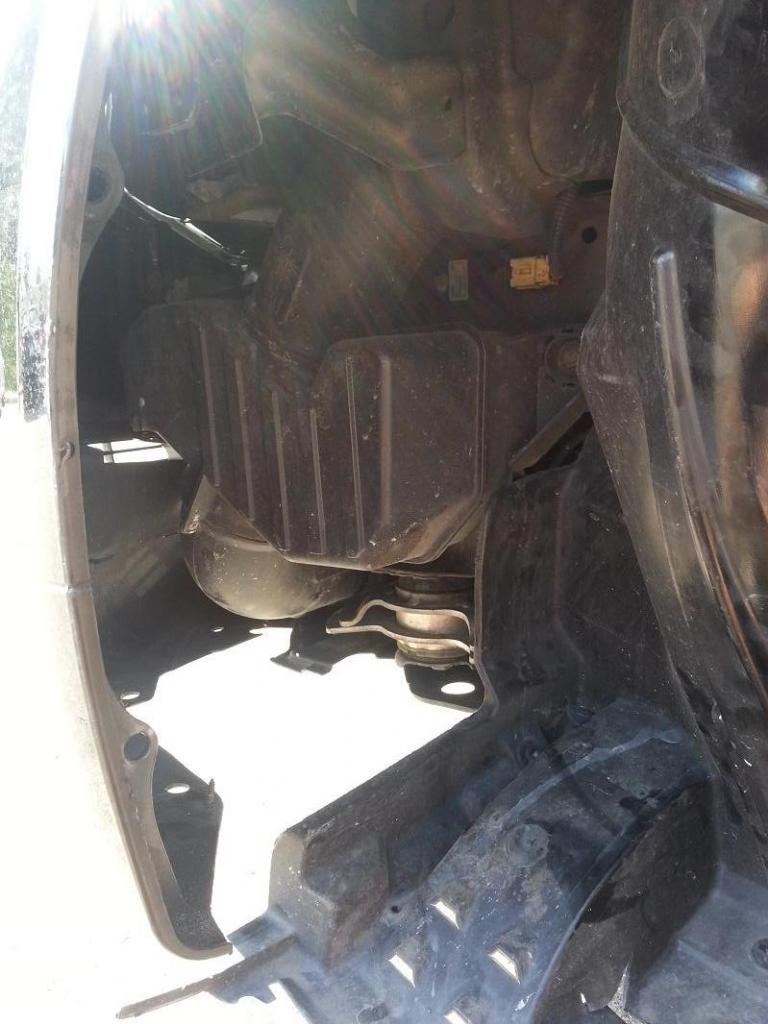
Then removing it and the attached piping from the air box and removing it from the car.
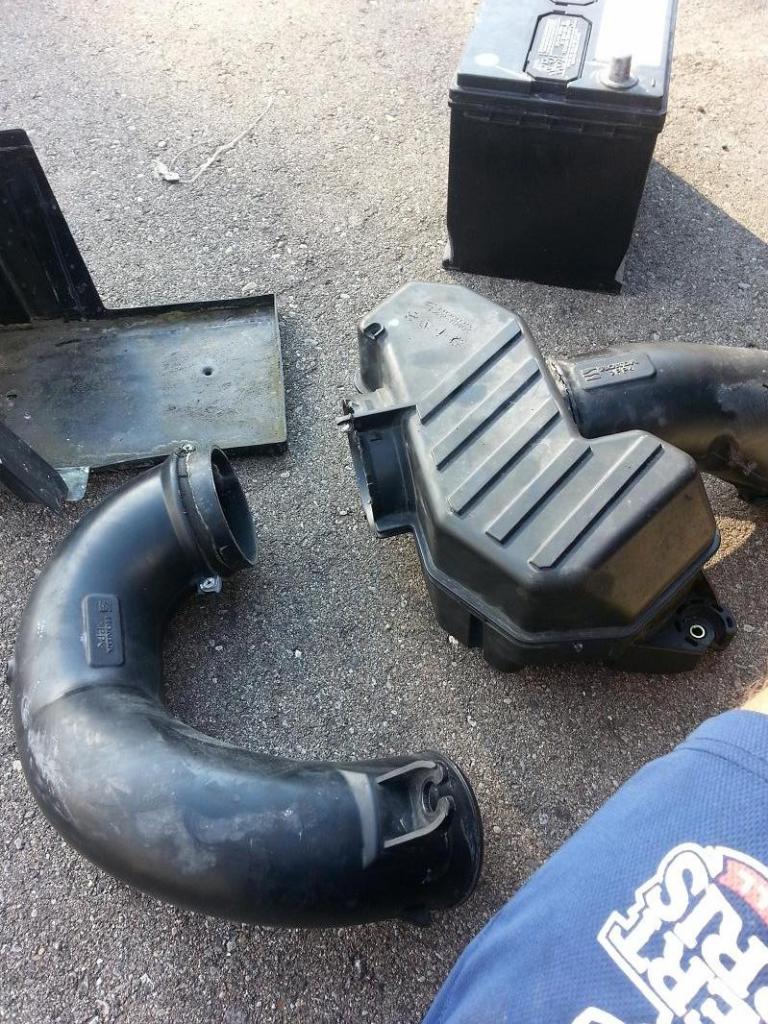
Modded the stock tubing and connected it to the airbox adding a pod filter and removing the stock filter.
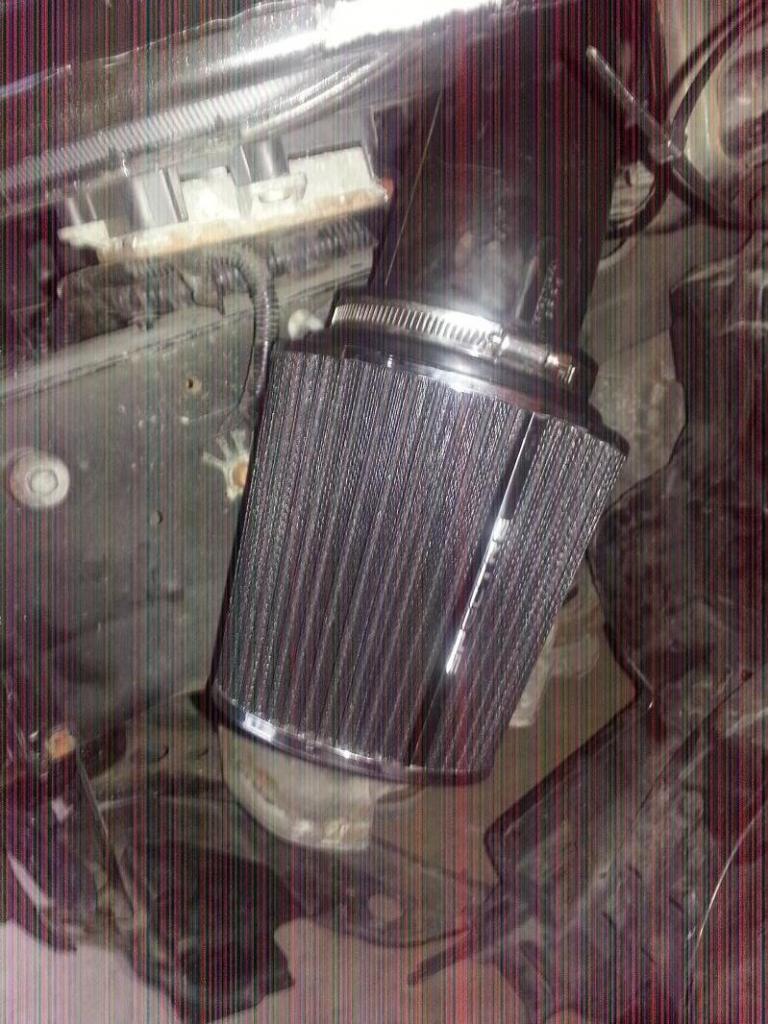
Voila! Sounds fierce now above 3k. Below that it sounds stock.
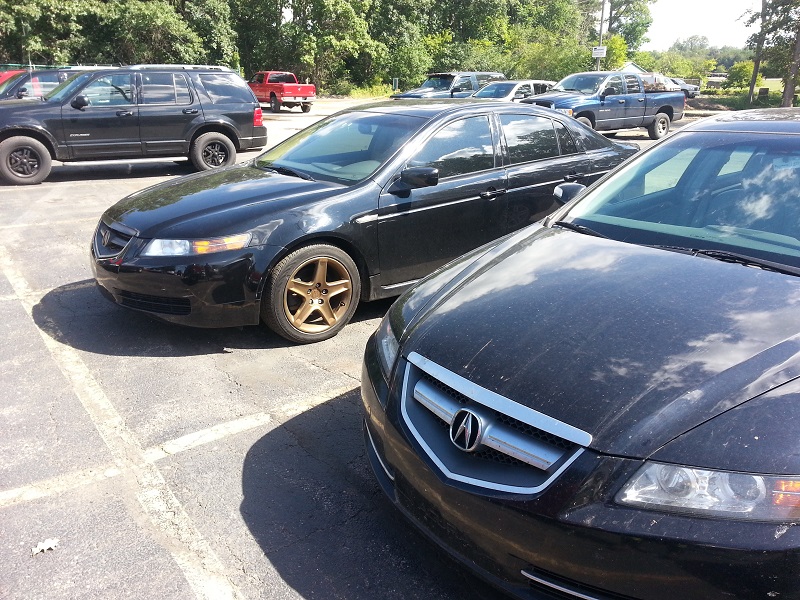
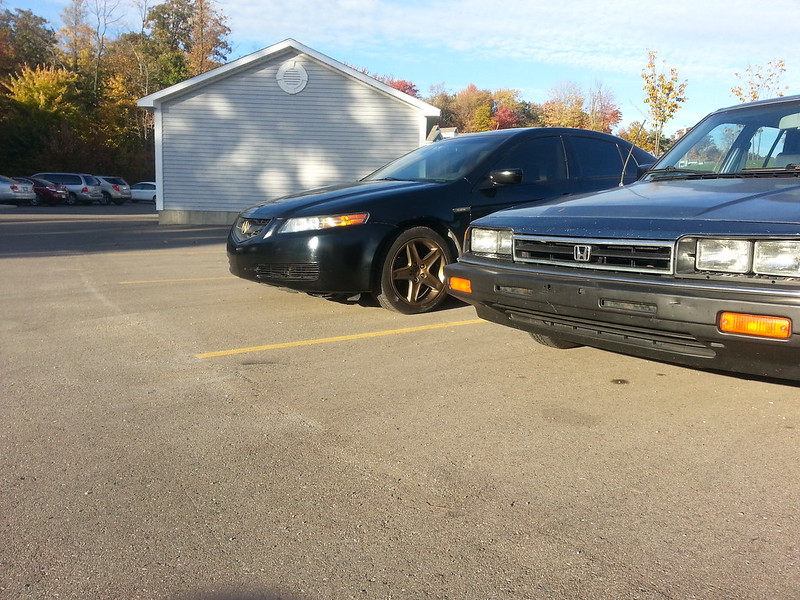
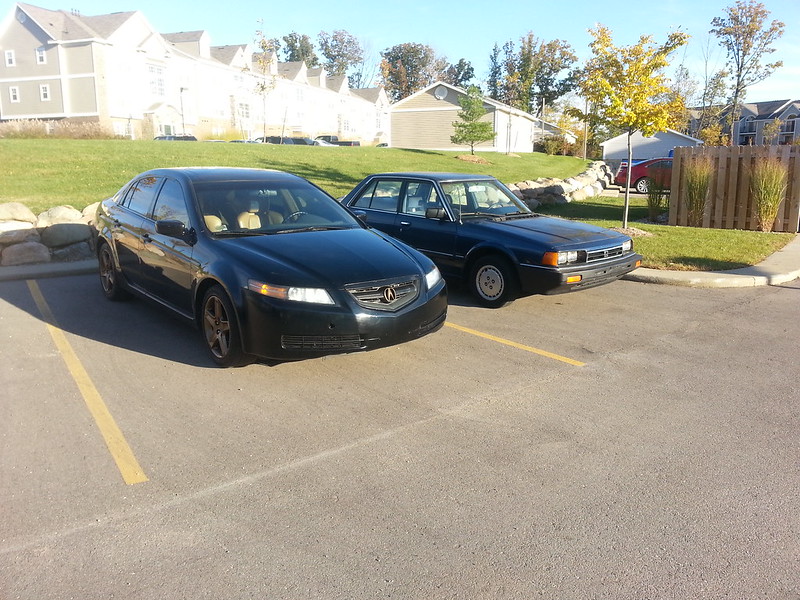
And I found a twin!
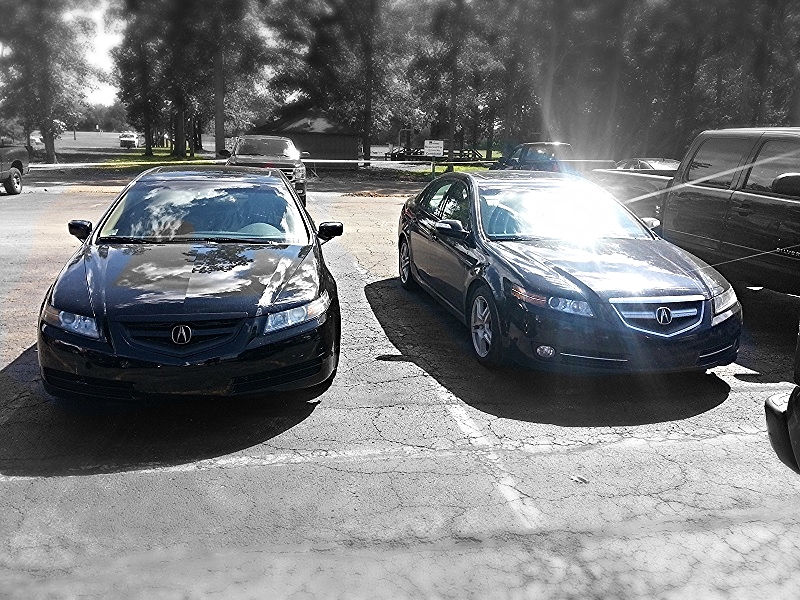
Was coming out of work and went for my car and this guy was parked right next to me. Same color but either an 07 or 08. Both need a little cleaning up.
Here's a pic of the rear badges.
Also, quickly modded in a poor man's CAI. Started off by locating the silencer.
Then removing it and the attached piping from the air box and removing it from the car.
Modded the stock tubing and connected it to the airbox adding a pod filter and removing the stock filter.
Voila! Sounds fierce now above 3k. Below that it sounds stock.
And I found a twin!
Was coming out of work and went for my car and this guy was parked right next to me. Same color but either an 07 or 08. Both need a little cleaning up.
09-03-2014, 10:20 AM
#4
Aired Out TLS
Oh wow, that was also my first car when I was 16 but that was back in 1996, mine was tan and stick shift and lowered.
Last edited by Beat-Freak...; 09-03-2014 at 10:22 AM.
09-03-2014, 10:20 AM
#5
Senior Moderator
iTrader: (1)
classic...
Welcome to AcuraZine.
Welcome to AcuraZine.
09-03-2014, 10:03 PM
#6
Team Owner
iTrader: (2)
Join Date: Jan 2008
Location: Kansas City, MO (Overland Park, KS)
Posts: 36,545
Received 6,470 Likes
on
5,162 Posts
Lookin' good! Keep on going.
09-04-2014, 06:44 AM
#7
Instructor
Thread Starter
She really is. Thanks
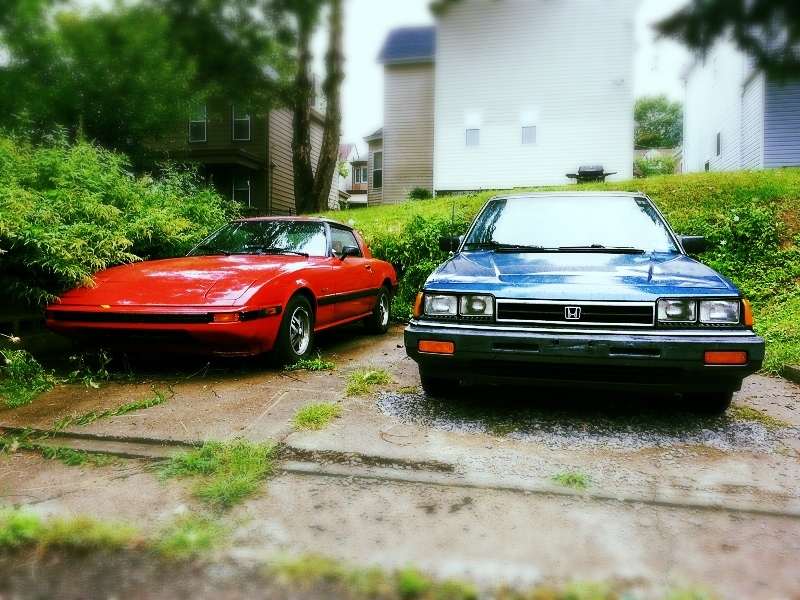
Melinda and her boyfriend(My buddy's 1985 RX-7 with a supercharger)
The following users liked this post:
justnspace (09-04-2014)
Trending Topics
09-04-2014, 05:34 PM
#9
Team Owner
iTrader: (2)
Join Date: Jan 2008
Location: Kansas City, MO (Overland Park, KS)
Posts: 36,545
Received 6,470 Likes
on
5,162 Posts
Actually....very cool shot.
09-04-2014, 05:55 PM
#10
Instructor
Thread Starter
80s japanese cars. They just have something that makes you go " damn that's actually cool"
09-04-2014, 07:07 PM
#11
Moderator
iTrader: (3)
You're off to a great start! Very cool story so far 
09-05-2014, 12:56 AM
#14
I don't get why people don't use caution when parking next to curbs either. My TL came with Winter tires on the stock wheels and those are so beat up too, I might repair it some day but not right now.
09-11-2014, 08:12 AM
#16
Instructor
Thread Starter
Thanks I'll try to keep it interesting
Thank you and we'll see about that haha
I used to be in the same camp, but there's just something about this car
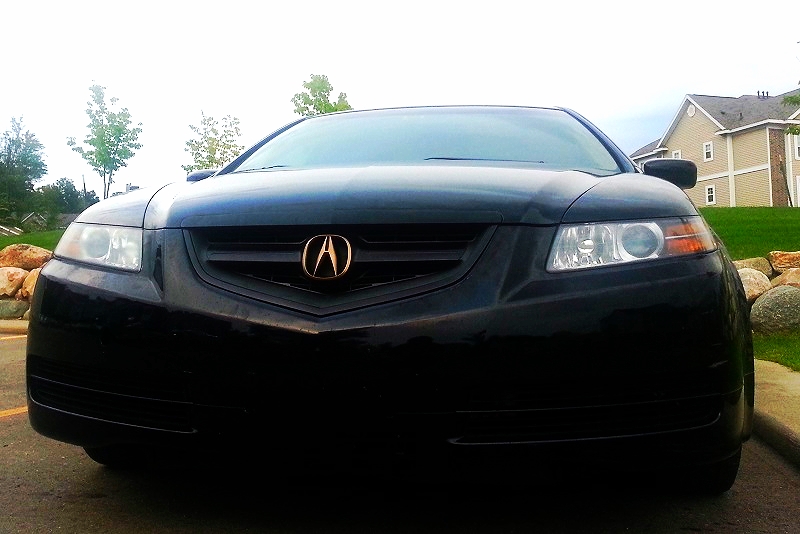
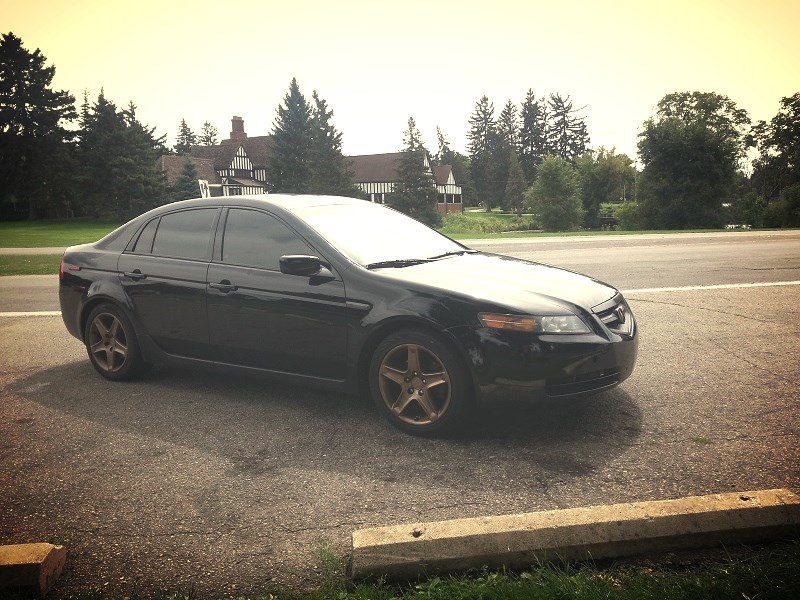
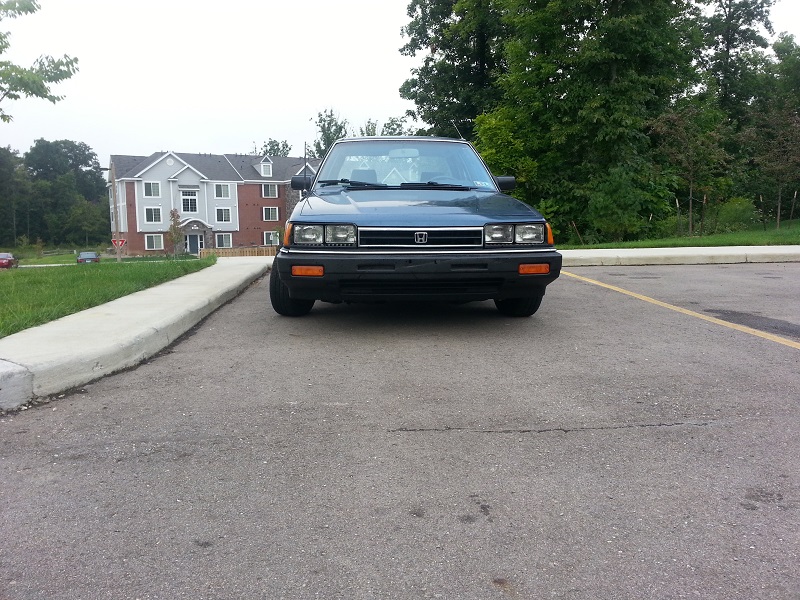
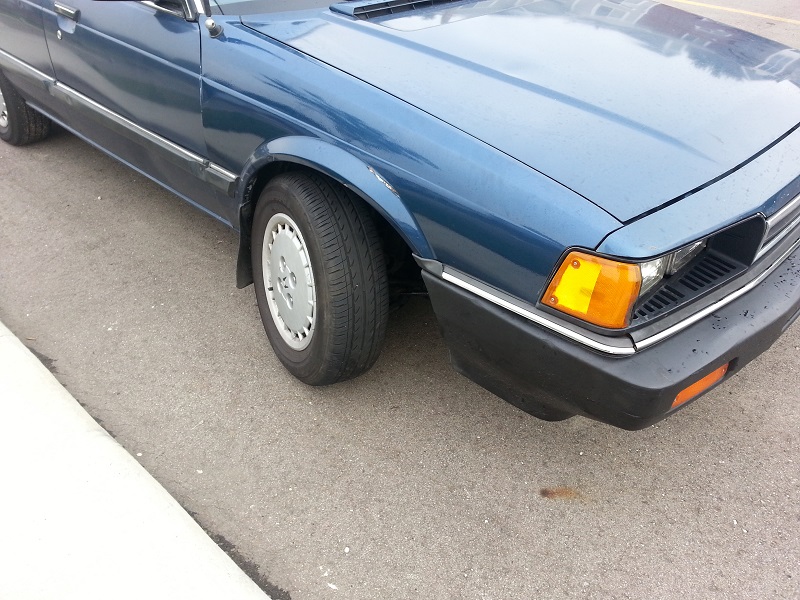
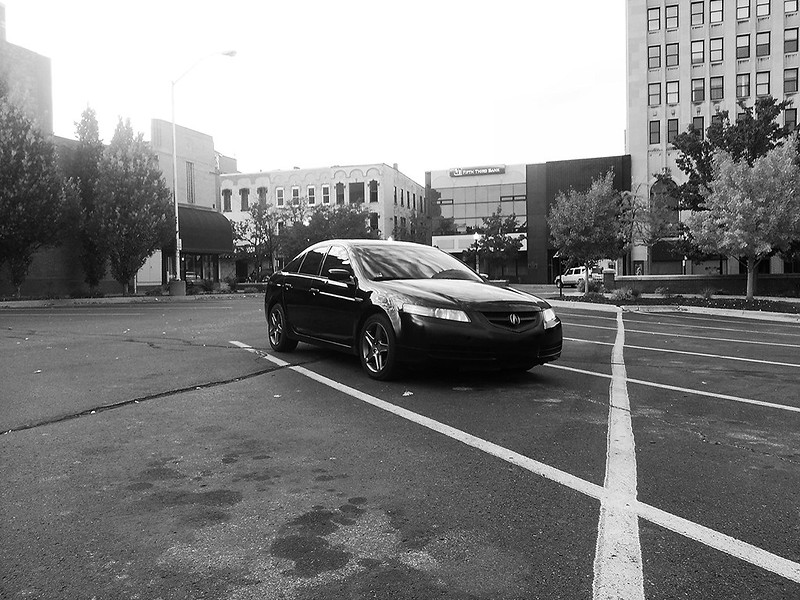
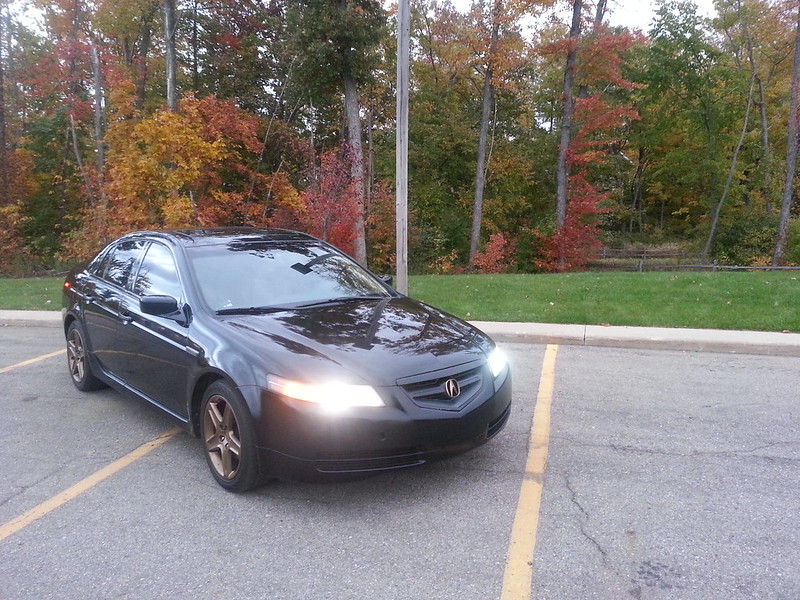
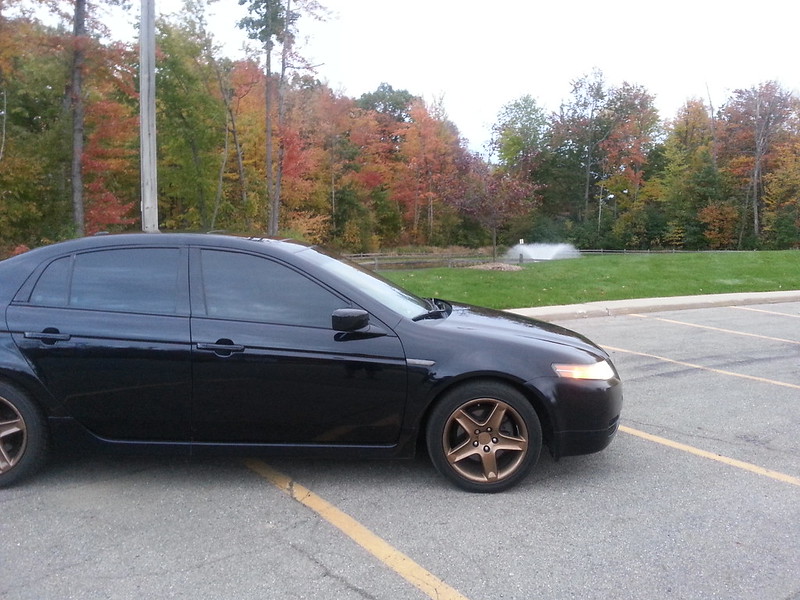
Anywho, here's some pictures of the Acura at the park near my house. Excuse the dirty dirty bumper

Well after this I took the car to get an alignment because I was getting some strange pull on the wheel when I turned and I assumed this was because of the new tires the previous owner had put on. Well remember when I said there was some lurking mechanical issues that I couldn't find?
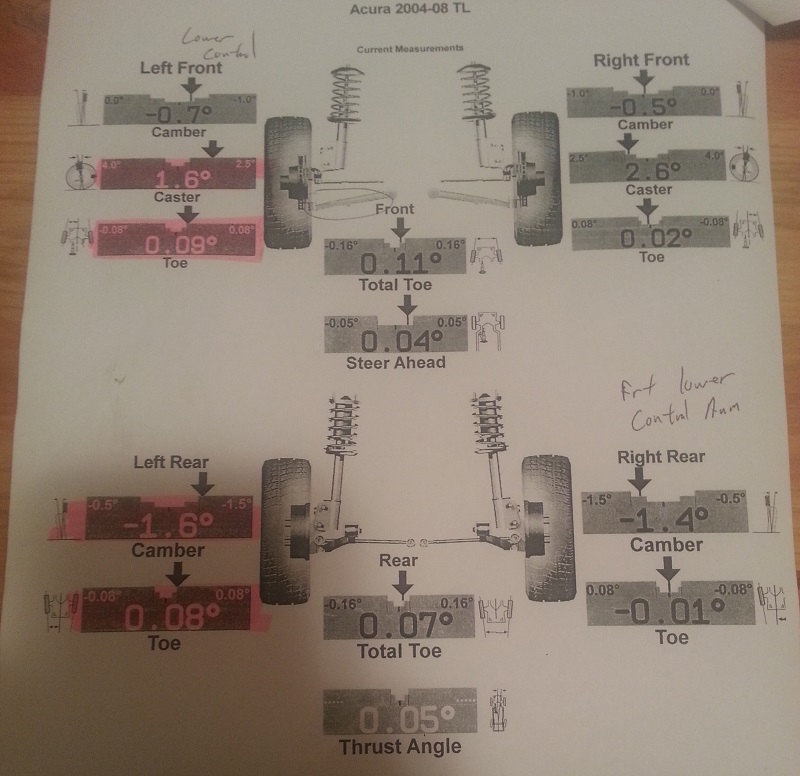
Oh dear, there appears to be a bent rear trailing arm on the passenger side and a bent lower control arm on the driver side front. Well I said I wanted a project. Parts will be here this weekend. And this work truck always cheers me up.
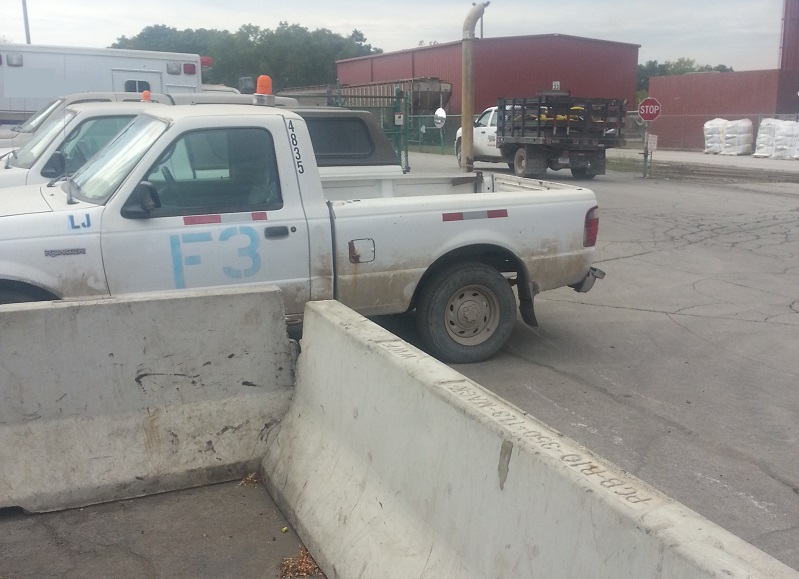
Yes that is an exhaust snorkle
Thank you and we'll see about that haha
Anywho, here's some pictures of the Acura at the park near my house. Excuse the dirty dirty bumper
Well after this I took the car to get an alignment because I was getting some strange pull on the wheel when I turned and I assumed this was because of the new tires the previous owner had put on. Well remember when I said there was some lurking mechanical issues that I couldn't find?
Oh dear, there appears to be a bent rear trailing arm on the passenger side and a bent lower control arm on the driver side front. Well I said I wanted a project. Parts will be here this weekend. And this work truck always cheers me up.
Yes that is an exhaust snorkle
09-11-2014, 03:16 PM
#17
Team Owner
iTrader: (2)
Join Date: Jan 2008
Location: Kansas City, MO (Overland Park, KS)
Posts: 36,545
Received 6,470 Likes
on
5,162 Posts
Ouch...sorry about this small setback. But....it gives you something to do over the weekend.
 09-12-2014, 01:00 PM
#19
Instructor
Thread Starter

 Very true, definitely not "driving" any guys in the foreseeable future haha
09-13-2014, 09:32 AM
Very true, definitely not "driving" any guys in the foreseeable future haha
09-13-2014, 09:32 AM
#21
Moderator
iTrader: (3)
Has your trunk ever been repainted? The emblems are lower than stock placement.
 09-13-2014, 12:40 PM
#24
Team Owner
iTrader: (2)
Join Date: Jan 2008
Location: Kansas City, MO (Overland Park, KS)
Posts: 36,545
Received 6,470 Likes
on
5,162 Posts
More install pics coming tomorrow!
09-15-2014, 07:47 AM
#25
Instructor
Thread Starter
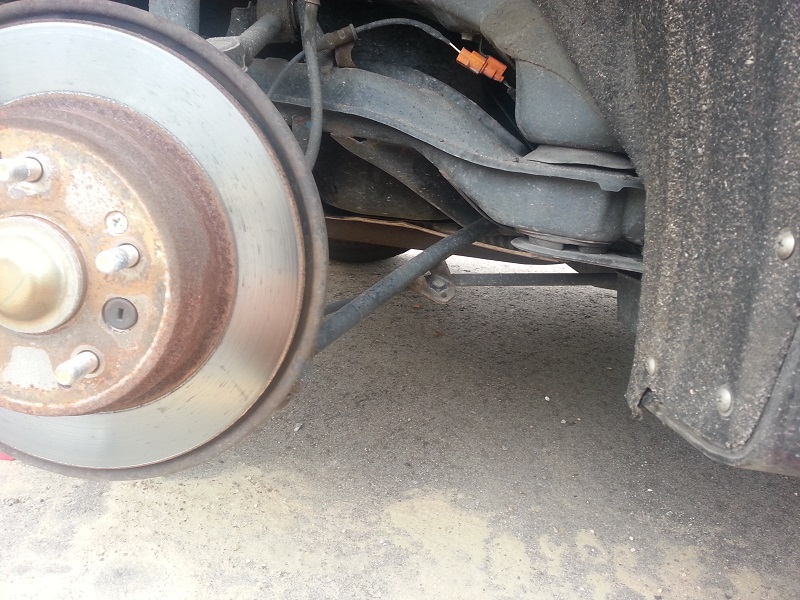
So here it is. Install for the Trailing Arm, mighty easy. Lower control arm...not so much.
So I got the back side jacked up and supported and this is what I find.
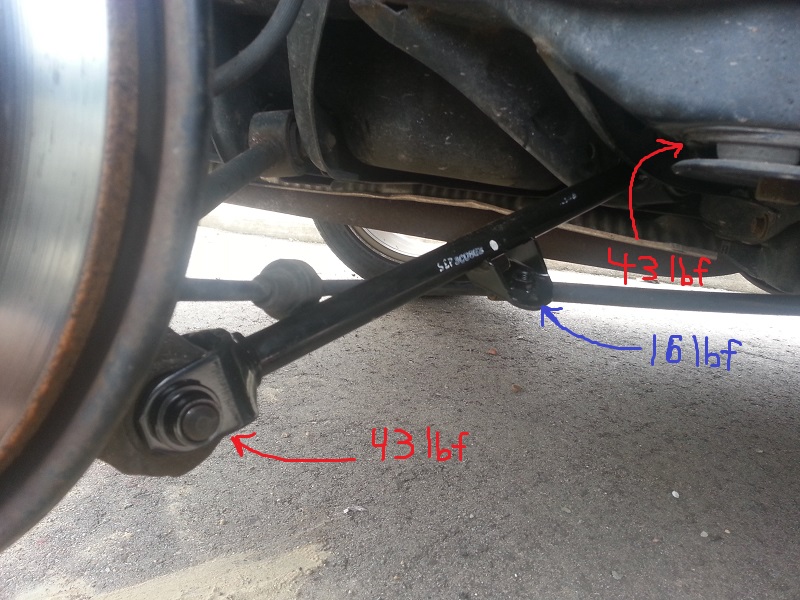
Yepp that is bent. Start by removing the parking brake line from the trailing arm; remove the 1/2" bolt. Next remove the 14 mm nut and bolt from the rear side of the trailing arm.
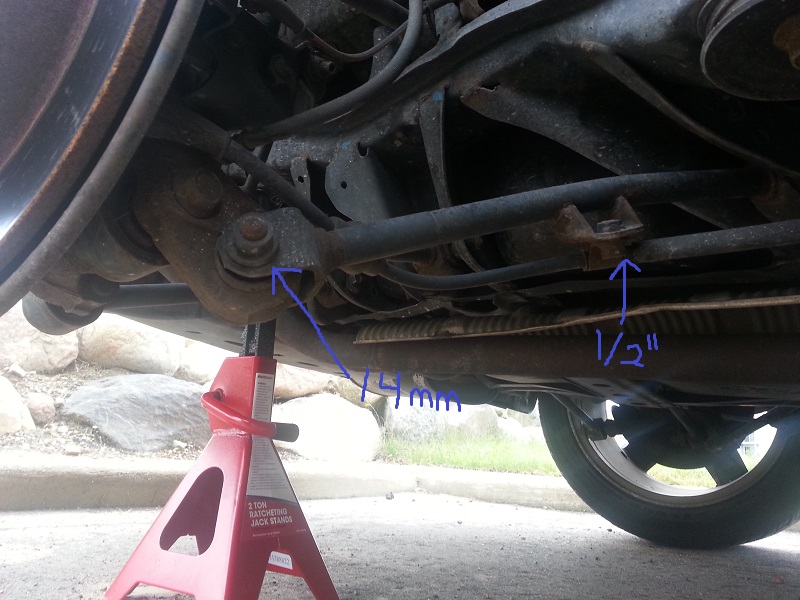
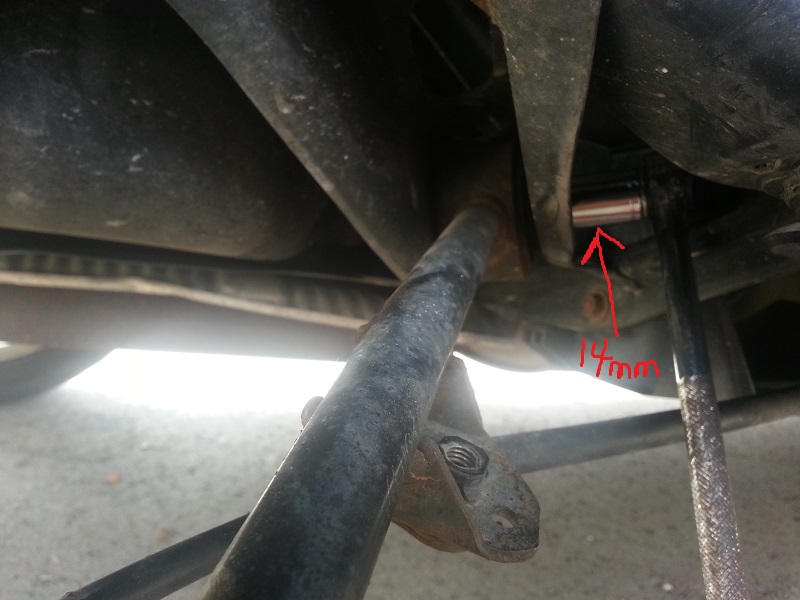
Once that's done the front side of the trailing arm is also a 14mm bolt and nut. It's a bit of a tight squeeze with a ratchet, but I got it done. Once the bolt is out the whole trailing arm should be able to slide out.
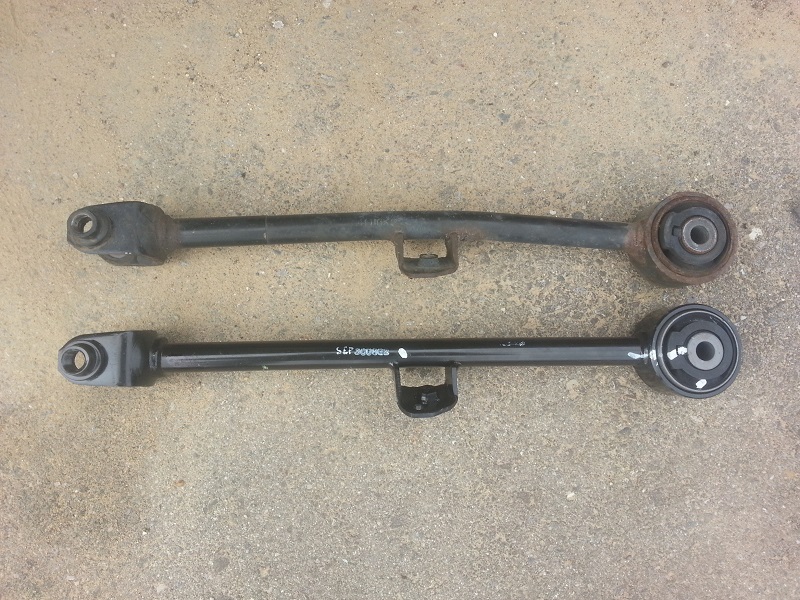
And compare. They should be the same length, although mine is a wee bit bent.
Then install your new trailing arm back in tight and put a jack where you can raise your rear suspension to put load on the part. Then torque to the specified settings
Piece of cake!
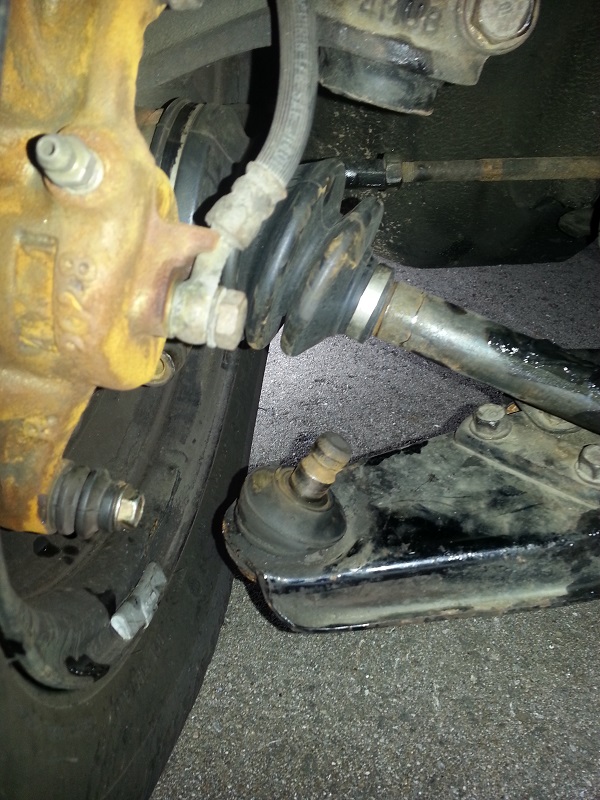
Now for the bear of a project. This project is not recommended to be done alone. This one took quite a while especially because of my lower ball joint and all the other bolts being rusted up pretty good. Also each of the the bolts and nuts take two hands to get off, so be forewarned So the pictures aren't that great, but my walkthrough will make up for it
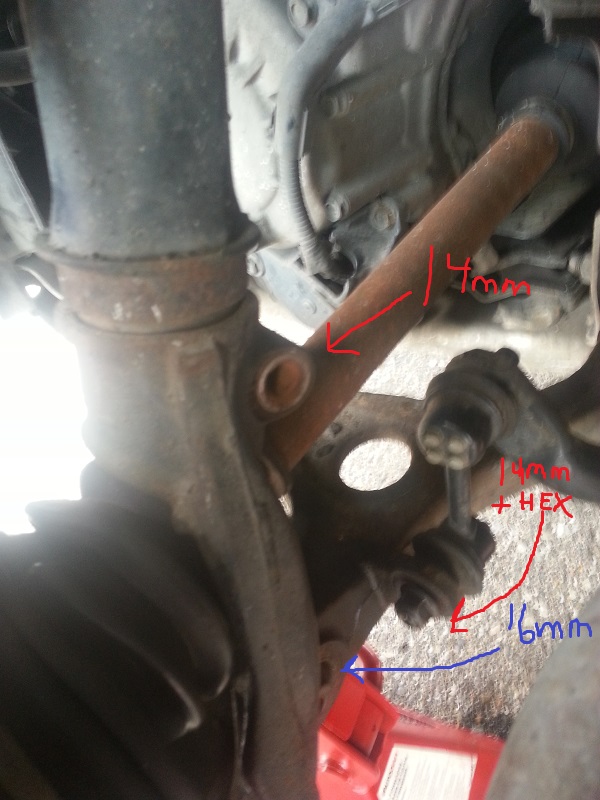
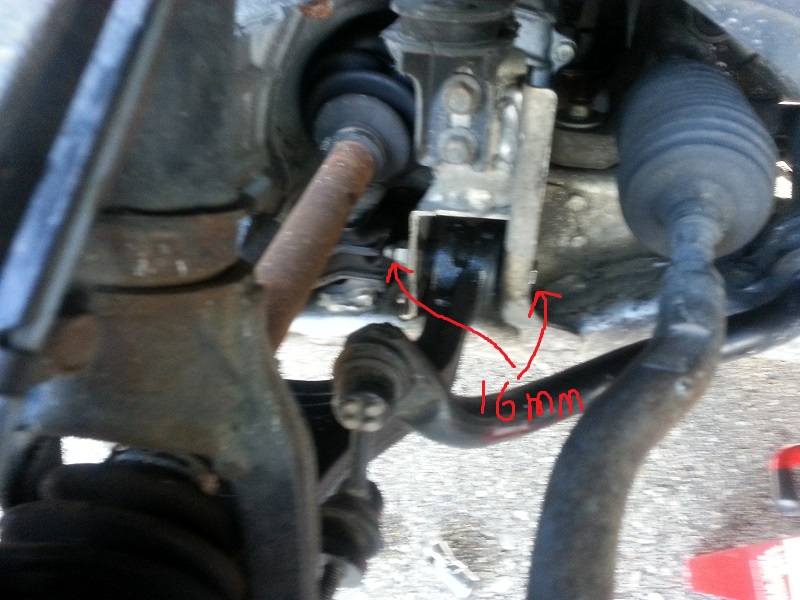
So we start off by jacking up the front of the car and putting on stands then removing the fork from the lower arm. 14 mm bolt and nut up top. Then move on to the lower 16 mm nut and bolt. Slide that out of your way. Put a 14 mm on the stabilizer link bolt and then a hex on the inside. Not entirely sure what size cause it started with one size and then had to eventually move up because the bolt and threads were pretty gnarly and it took some trial and error.
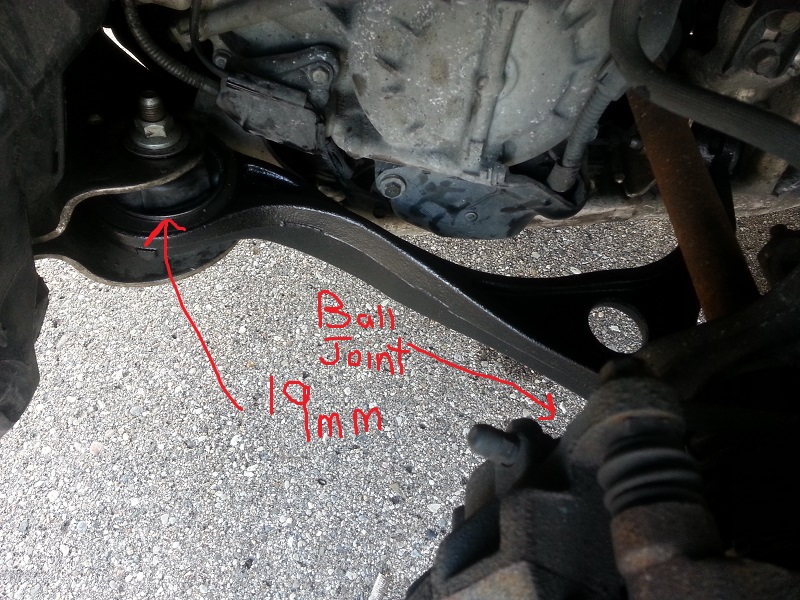
Next up we'll remove the castle nut from the bottom of our ball joint. Take out the cotter pin and slap a 14 mm ratchet on there. Spin that off.
Now if you've got a fancy ball joint remover (Part #: 07AAF-SEPA100) then slap that on there and separate that ball joint. However if you don't and you only have access to an AutoZone, O'Reilly's, etc. they will not have the separator you need and for the love of god don't use a pickle fork. You will jack up your ball joint boot and probably not get it undone unless it's been lubed well(Mine wasn't). If you do use a pickle and break your boot, remove it and cut some large heater tubing about 1/16" larger than your gap and put around the joint. The that area around the joint is tightened it will crush lock it into place. Or you could just replace the boot.
Anyway if you don't have a separator, jack up the lower arm, get yourself a nice thick 1/2" ratchet, and slide it between the lower arm and the hub above the ball joint. Now lower your jack and put some pressure on the hub a.k.a. jump on the hub bolts. Be gentle as this is not the recommended way, but I found it the only way I could get this ball joint to release. Here's a video.
Once that's out remove the 19 mm nut and bolt from the control arm at the front of the car. Then move to the back and remove the 16 mm nut and bolt. Then slide out the LCA.
Lube your new control arm up especially around the ball joint and slide it back in. Install is reverse of removal. Ball joint should slide into new hole, then the lca just needs to be jacked up and the castle nut can be put on.
Car rides much better and will finally be aligned. I'd call this a success
So I got the back side jacked up and supported and this is what I find.
Yepp that is bent. Start by removing the parking brake line from the trailing arm; remove the 1/2" bolt. Next remove the 14 mm nut and bolt from the rear side of the trailing arm.
Once that's done the front side of the trailing arm is also a 14mm bolt and nut. It's a bit of a tight squeeze with a ratchet, but I got it done. Once the bolt is out the whole trailing arm should be able to slide out.
And compare. They should be the same length, although mine is a wee bit bent.
Then install your new trailing arm back in tight and put a jack where you can raise your rear suspension to put load on the part. Then torque to the specified settings
Piece of cake!
Now for the bear of a project. This project is not recommended to be done alone. This one took quite a while especially because of my lower ball joint and all the other bolts being rusted up pretty good. Also each of the the bolts and nuts take two hands to get off, so be forewarned So the pictures aren't that great, but my walkthrough will make up for it
So we start off by jacking up the front of the car and putting on stands then removing the fork from the lower arm. 14 mm bolt and nut up top. Then move on to the lower 16 mm nut and bolt. Slide that out of your way. Put a 14 mm on the stabilizer link bolt and then a hex on the inside. Not entirely sure what size cause it started with one size and then had to eventually move up because the bolt and threads were pretty gnarly and it took some trial and error.
Next up we'll remove the castle nut from the bottom of our ball joint. Take out the cotter pin and slap a 14 mm ratchet on there. Spin that off.
Now if you've got a fancy ball joint remover (Part #: 07AAF-SEPA100) then slap that on there and separate that ball joint. However if you don't and you only have access to an AutoZone, O'Reilly's, etc. they will not have the separator you need and for the love of god don't use a pickle fork. You will jack up your ball joint boot and probably not get it undone unless it's been lubed well(Mine wasn't). If you do use a pickle and break your boot, remove it and cut some large heater tubing about 1/16" larger than your gap and put around the joint. The that area around the joint is tightened it will crush lock it into place. Or you could just replace the boot.
Anyway if you don't have a separator, jack up the lower arm, get yourself a nice thick 1/2" ratchet, and slide it between the lower arm and the hub above the ball joint. Now lower your jack and put some pressure on the hub a.k.a. jump on the hub bolts. Be gentle as this is not the recommended way, but I found it the only way I could get this ball joint to release. Here's a video.
Once that's out remove the 19 mm nut and bolt from the control arm at the front of the car. Then move to the back and remove the 16 mm nut and bolt. Then slide out the LCA.
Lube your new control arm up especially around the ball joint and slide it back in. Install is reverse of removal. Ball joint should slide into new hole, then the lca just needs to be jacked up and the castle nut can be put on.
Car rides much better and will finally be aligned. I'd call this a success
The following users liked this post:
justnspace (09-15-2014)
09-15-2014, 07:52 AM
#26
Instructor
Thread Starter

They're just good quality fun little cars and those pop-ups are fantastic haha
09-15-2014, 07:55 PM
#27
Team Owner
iTrader: (2)
Join Date: Jan 2008
Location: Kansas City, MO (Overland Park, KS)
Posts: 36,545
Received 6,470 Likes
on
5,162 Posts
Nice work-congrats.
The following users liked this post:
TheBlueBomber (09-16-2014)
09-17-2014, 10:06 AM
#28
Instructor
Thread Starter
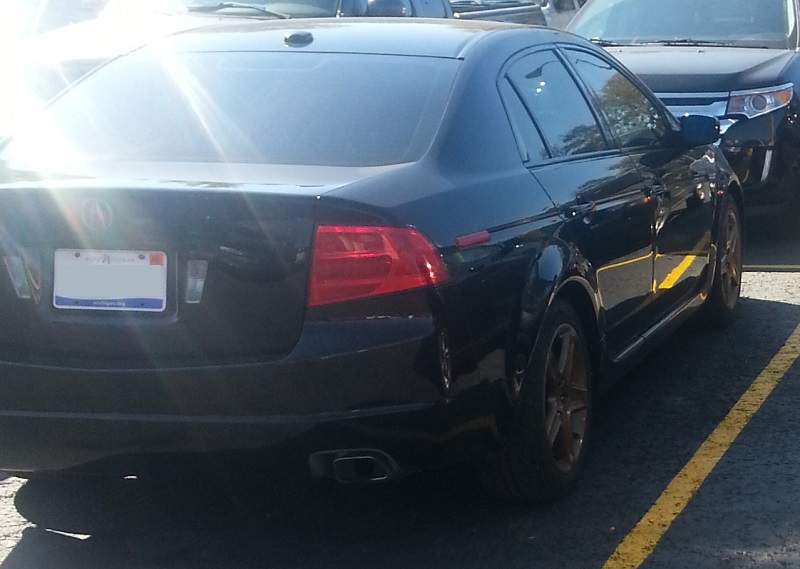
Soo just got the Acura all fixed up and this goes and happens to Melinda
Stance Nation
Looks like the cv joint blew out in the axle
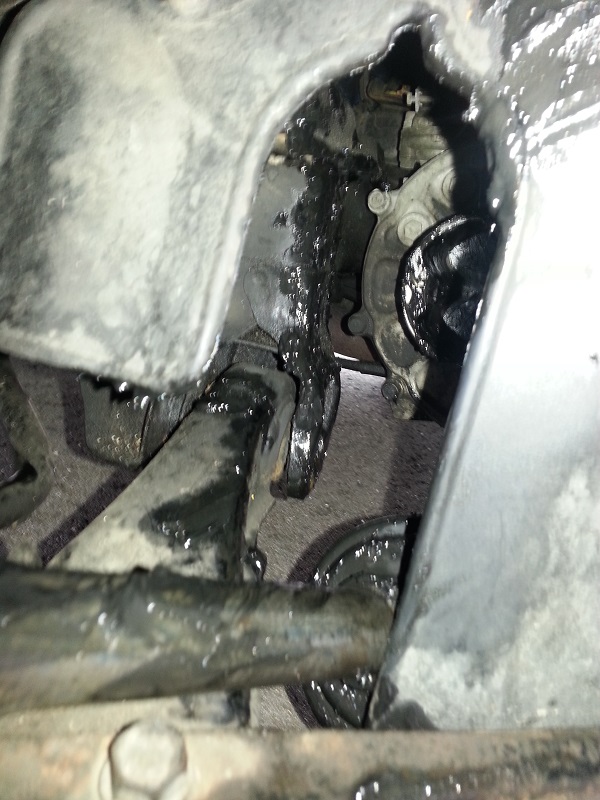
And popped this lower ball joint out
More repair pics to follow. Parts here today or tomorrow
Stance Nation
Looks like the cv joint blew out in the axle
And popped this lower ball joint out
More repair pics to follow. Parts here today or tomorrow
09-17-2014, 10:17 AM
#29
Stay Out Of the Left Lane
Join Date: Oct 2003
Location: SE Mass --- > Central VA --- > SE Mass
Age: 57
Posts: 8,953
Received 1,236 Likes
on
1,023 Posts
Did that happen while parked or were you able to get it parked neatly in the end spot backed in???
09-17-2014, 09:54 PM
#31
Team Owner
iTrader: (2)
Join Date: Jan 2008
Location: Kansas City, MO (Overland Park, KS)
Posts: 36,545
Received 6,470 Likes
on
5,162 Posts
Damn Melinda.....
10-07-2014, 09:03 AM
#32
Instructor
Thread Starter
Alright so I've been slacking hard on keeping up with this build and keeping y'all updated with Melinda.
Took about a week longer to get a bolt than it did to get the whole axle. At first I had a lot of trouble getting the axle bolt off. I actually broke my breaker bar. Snapped the head right off. So I had to let that project settle for a bit and wait for nice weather.
Finally got it and with new breaker bar in hand made short work of the axle change and locking the lower arm into place. Sadly I was too lazy to take pictures. But she runs and definitely deserves a photo shoot.
But alright news on what you're really here for.
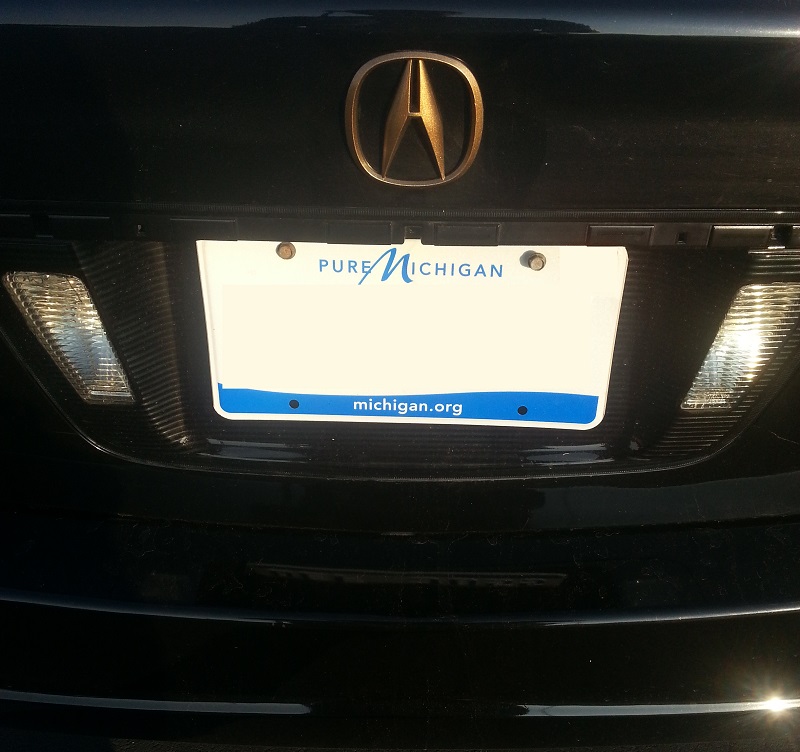
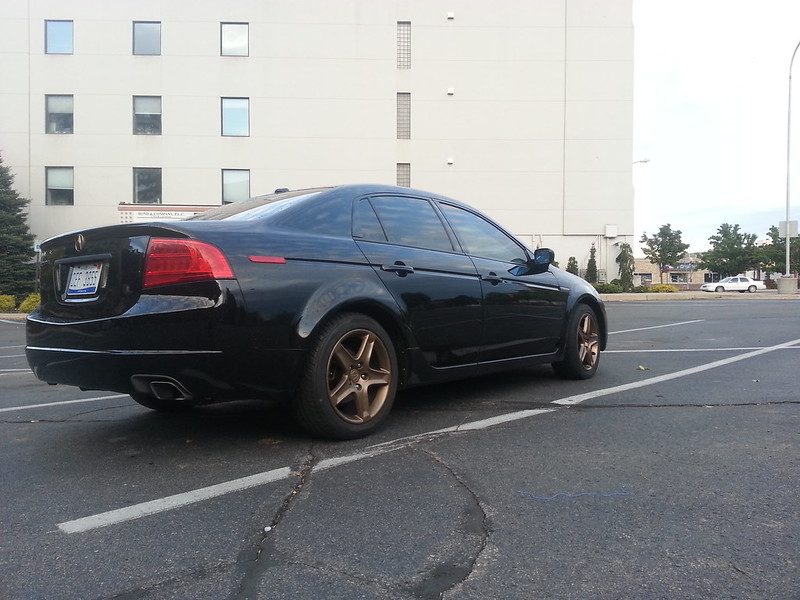
Added some VHT Night Shade to the rear license plate holder. Definitely adds to the dark look.
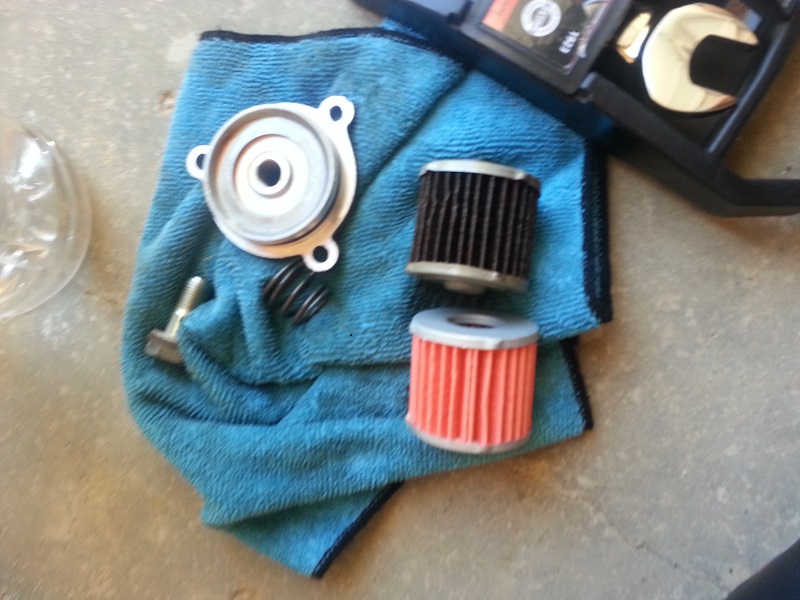
Gotta love tiny little spots where hands don't fit. Changed out the transmission filter and swapped the fluid so that I know it's OEM.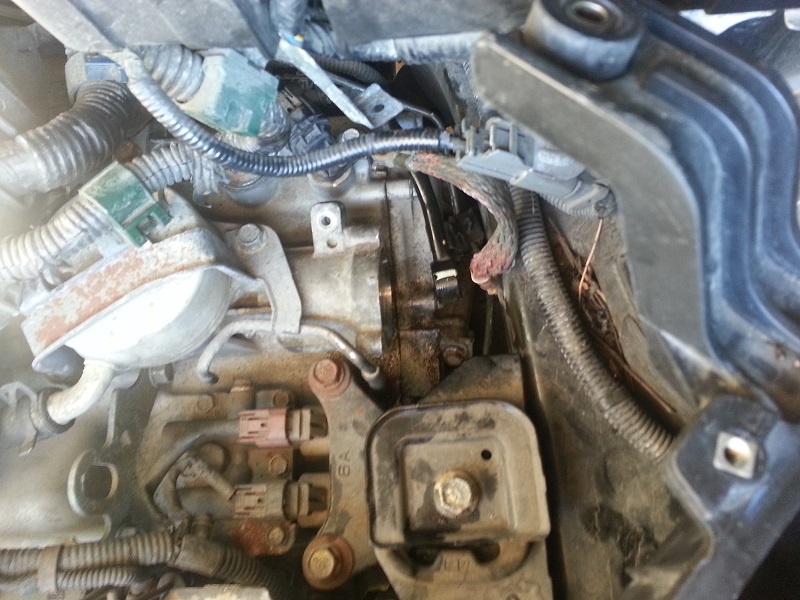
Must've been time lol
Hard not to stare as you walk away
Also took a trip to Pittsburgh, about 700 miles roundtrip for my college homecoming. Car did great!
Alright so I plan on getting some good shots in this week. Also I'm gonna take the exhaust off and winterize the underside of the car and maybe remove that mid muffler for a straight pipe
Took about a week longer to get a bolt than it did to get the whole axle. At first I had a lot of trouble getting the axle bolt off. I actually broke my breaker bar. Snapped the head right off. So I had to let that project settle for a bit and wait for nice weather.
Finally got it and with new breaker bar in hand made short work of the axle change and locking the lower arm into place. Sadly I was too lazy to take pictures. But she runs and definitely deserves a photo shoot.
But alright news on what you're really here for.
Added some VHT Night Shade to the rear license plate holder. Definitely adds to the dark look.
Gotta love tiny little spots where hands don't fit. Changed out the transmission filter and swapped the fluid so that I know it's OEM.
Must've been time lol
Hard not to stare as you walk away
Also took a trip to Pittsburgh, about 700 miles roundtrip for my college homecoming. Car did great!
Alright so I plan on getting some good shots in this week. Also I'm gonna take the exhaust off and winterize the underside of the car and maybe remove that mid muffler for a straight pipe
10-07-2014, 08:32 PM
#33
Team Owner
iTrader: (2)
Join Date: Jan 2008
Location: Kansas City, MO (Overland Park, KS)
Posts: 36,545
Received 6,470 Likes
on
5,162 Posts
10-13-2014, 07:12 AM
#36
Instructor
Thread Starter
Fall Fun
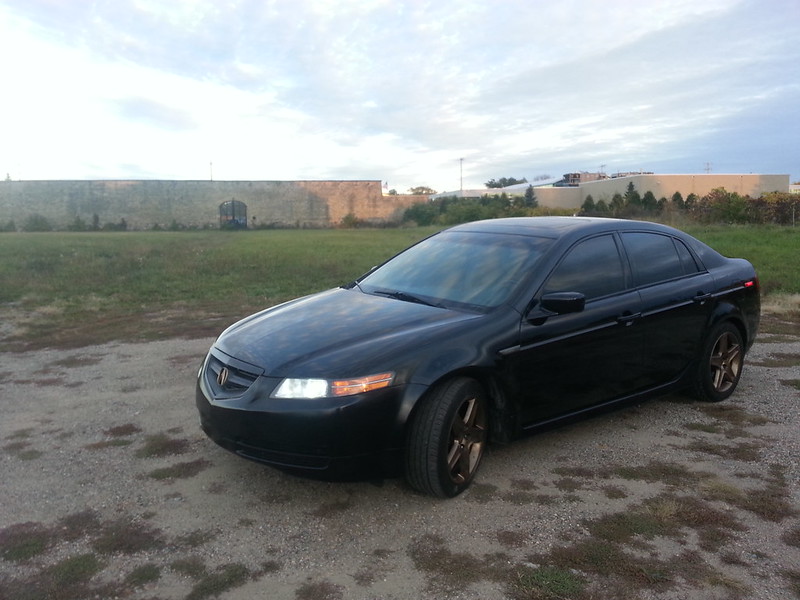
Alright everyone, I've been seriously slacking on taking actual car pictures. So here it is, the mother of all photo dumps(from me at least). Stand back cause it's coming in hot 
My beauties
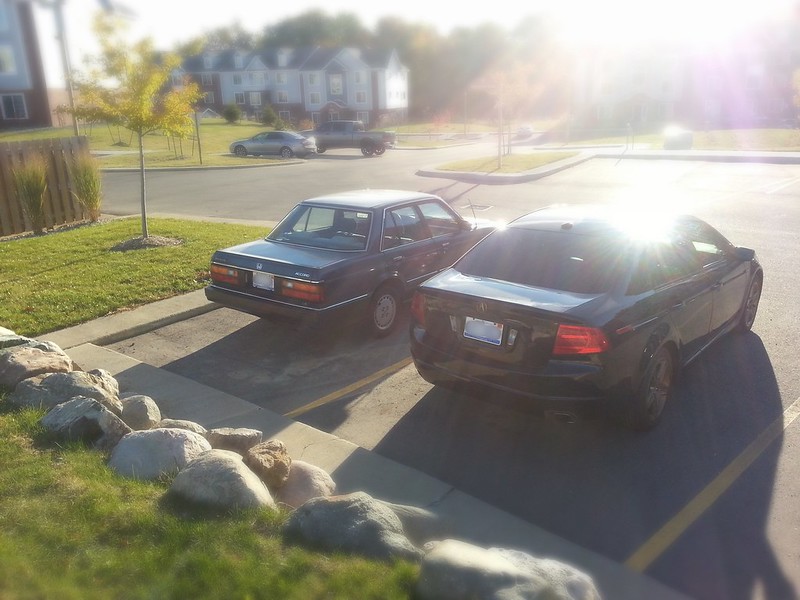
And now Sabrina on her own. Yes that is the name for the Acura now...I used to have this thing for a certain teenage witch
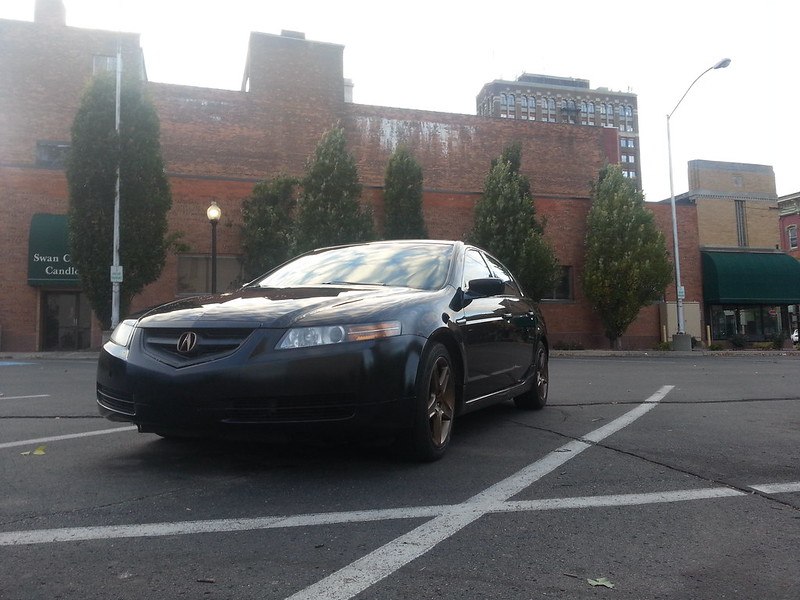
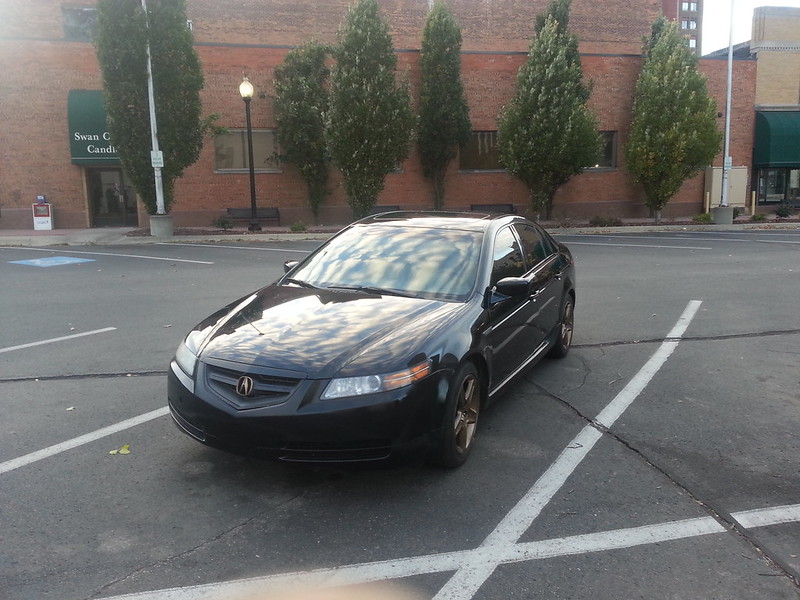
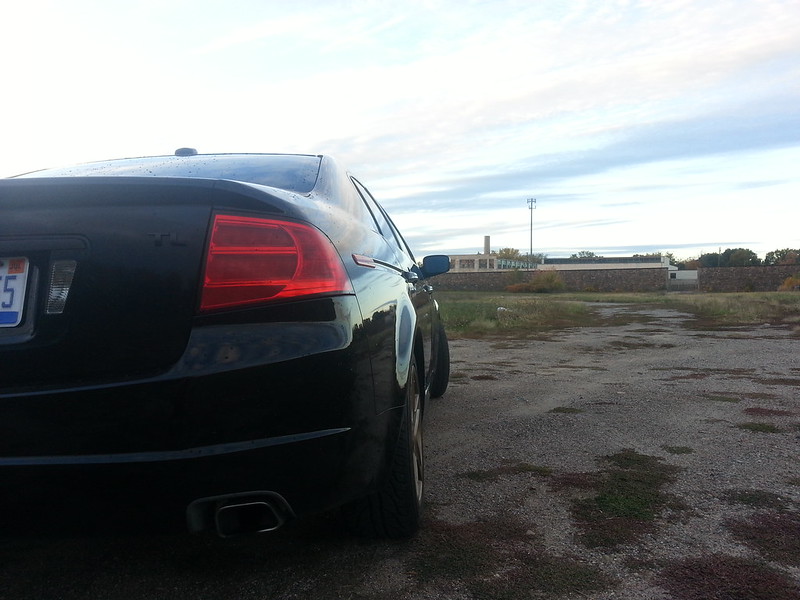
Why yes, I do live in a ghost town.
Old prison walls in the background
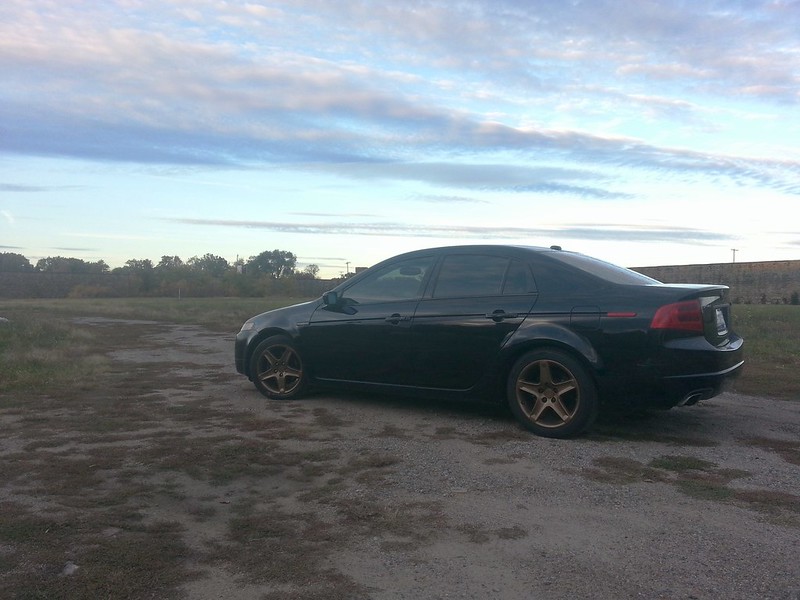

Ooh the trees are changing and basic girls that smell of pumpkin spice are donning their north faces and uggs
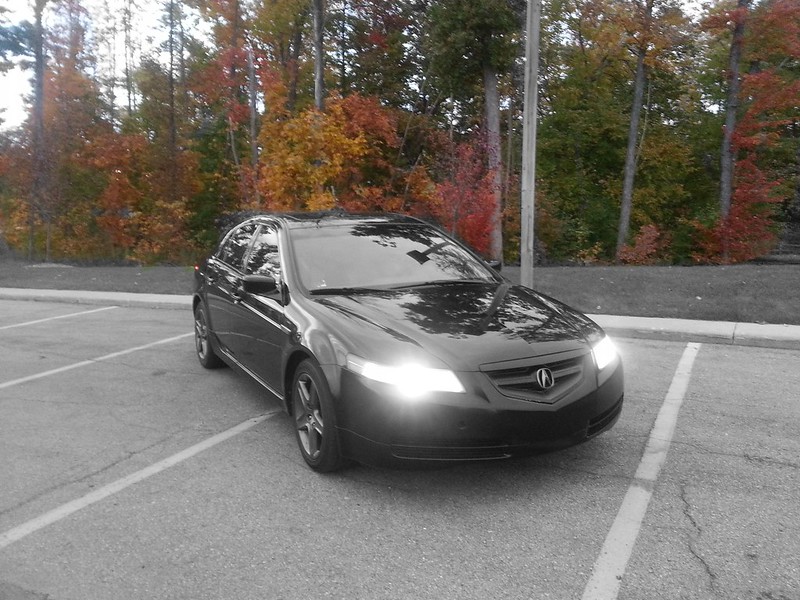
My beauties
And now Sabrina on her own. Yes that is the name for the Acura now...I used to have this thing for a certain teenage witch
Why yes, I do live in a ghost town.
Old prison walls in the background
Ooh the trees are changing and basic girls that smell of pumpkin spice are donning their north faces and uggs
10-13-2014, 07:56 PM
#37
Team Owner
iTrader: (2)
Join Date: Jan 2008
Location: Kansas City, MO (Overland Park, KS)
Posts: 36,545
Received 6,470 Likes
on
5,162 Posts
I used to own that exact same Accord-even the same color.

Thread
Thread Starter
Forum
Replies
Last Post
Joe Avesyan
3G TL Performance Parts & Modifications
9
09-29-2015 03:57 PM
maharajamd
Console & Computer Gaming
0
09-24-2015 03:31 PM