Ossman14's Nighthawk Factory A-Spec

 02-12-2018, 07:42 PM
#43
Team Owner
iTrader: (2)
Join Date: Jan 2008
Location: Kansas City, MO (Overland Park, KS)
Posts: 36,545
Received 6,470 Likes
on
5,162 Posts
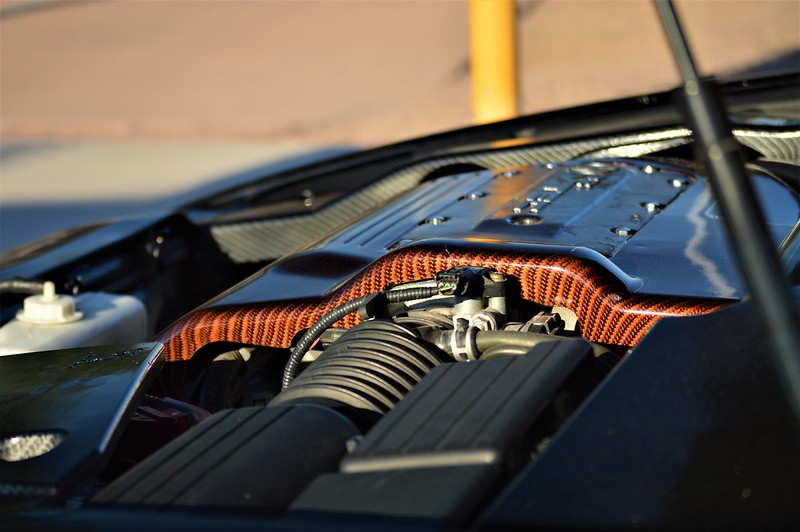
Great shots....the engine bay looks great.
06-13-2018, 06:27 PM
#44
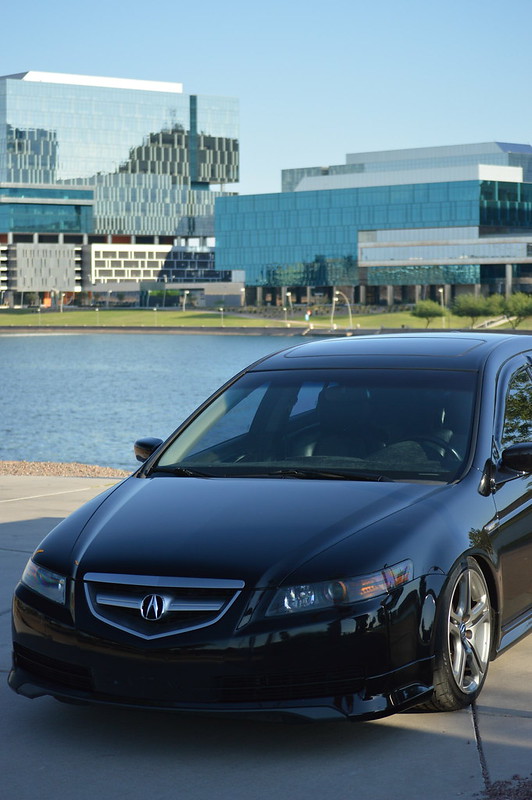
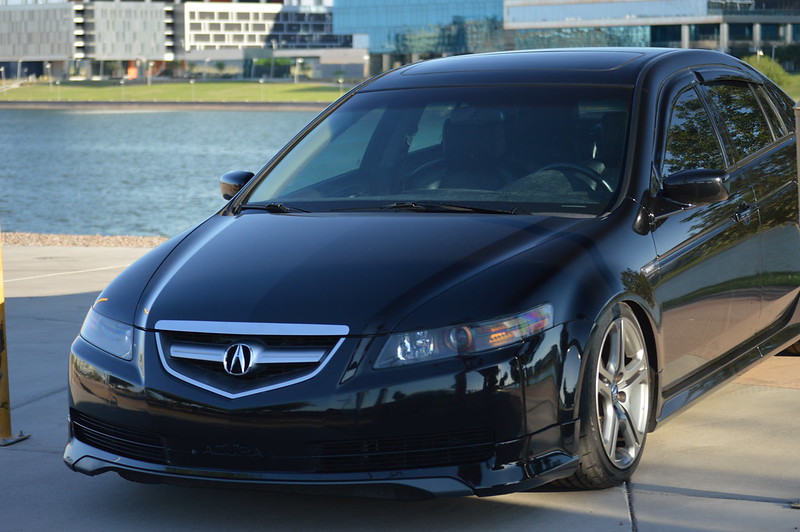
Its been a while. Hope you guys are doing good. Not much of an update from me. But I have been lurking through everybody elses threads and gotten motivated to get my shit together. So thank you lol
Been busy with work since the winter but things have settled down so I have some time to catch up with the car
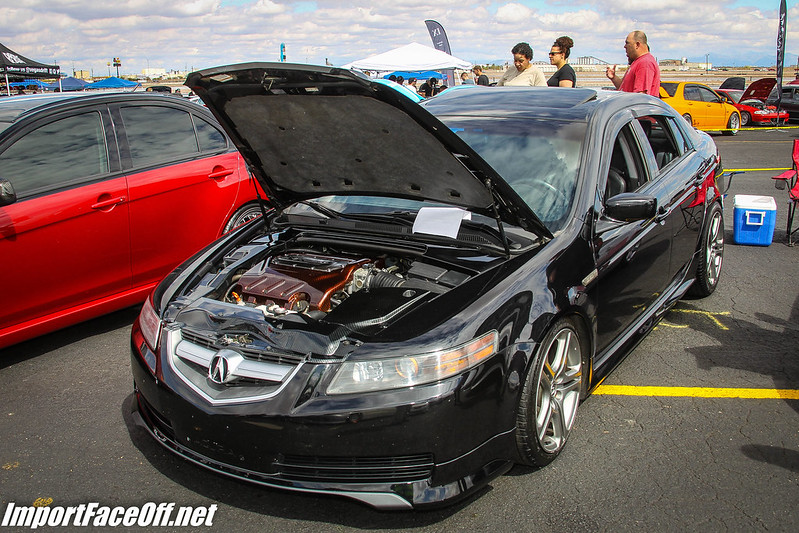
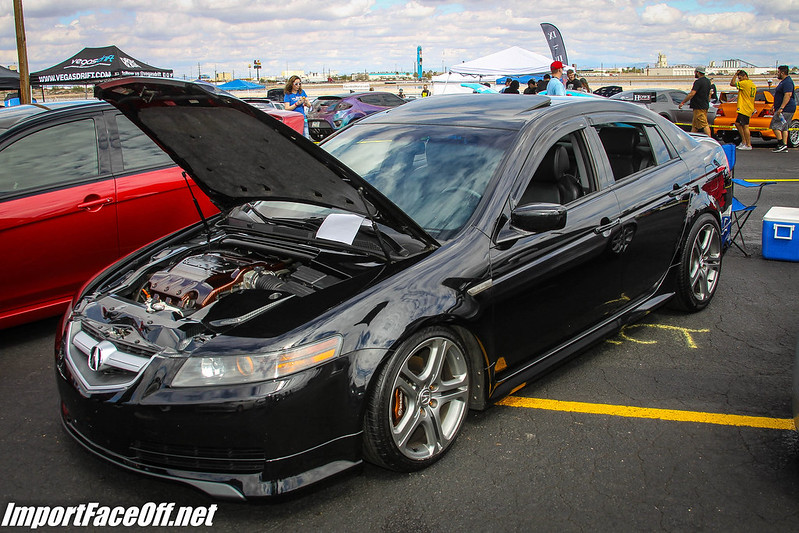
The only thing I have done since last posting is lower the front a little bit and went to a local event. I entered the show but just for funsies. Didn't expect much to come of it.
But now that I have some time I want to get a few things cleaned up on the car
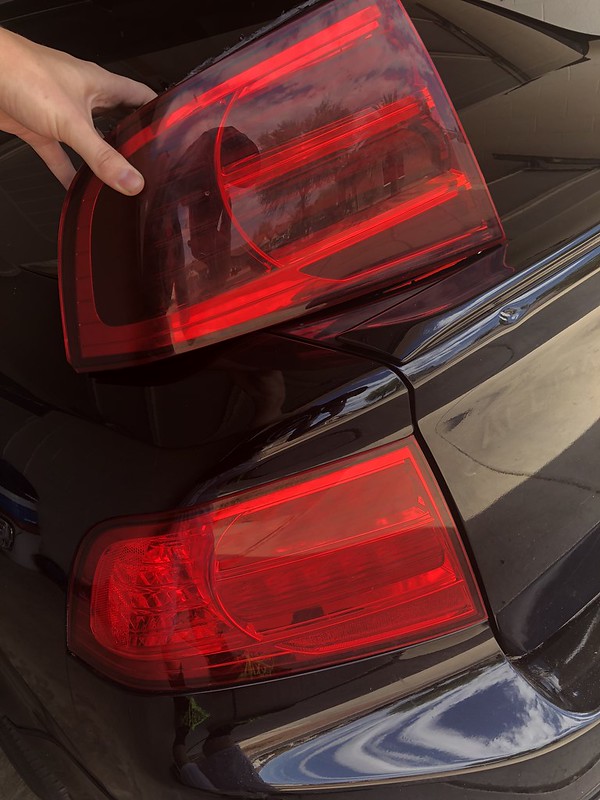
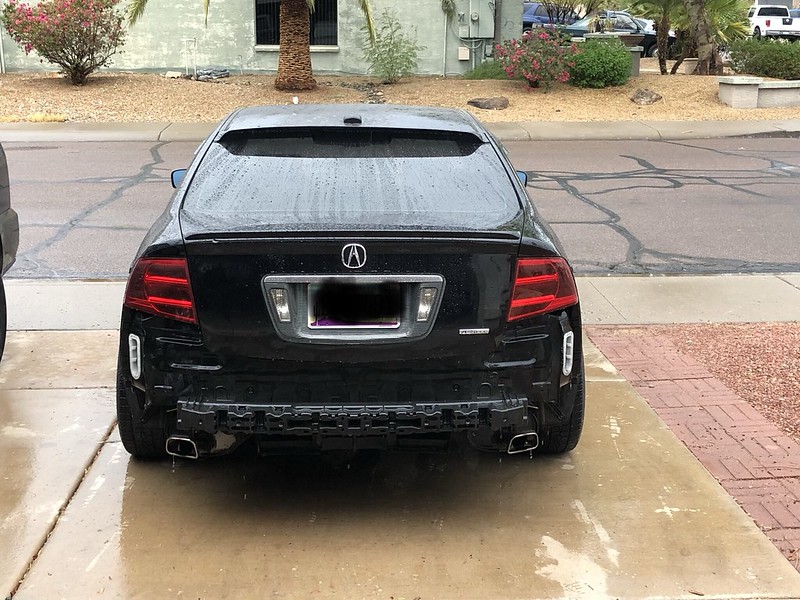
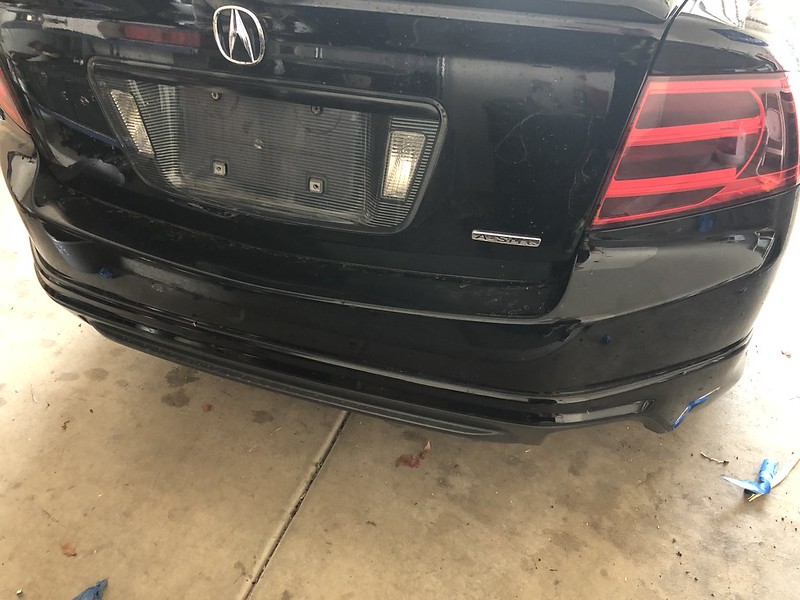
I want to try to do the tail lights to the 'red stripes'.
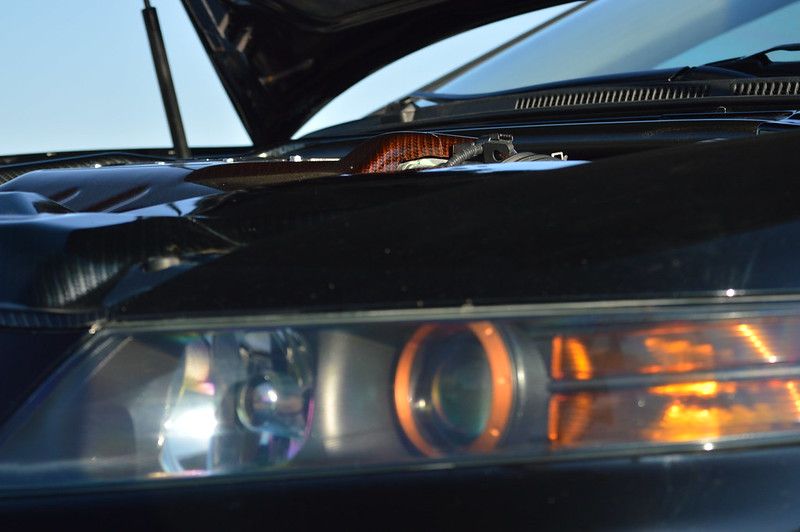
Get the headlights cleaned up too since i left smudges on the inside of the lenses last time I did them
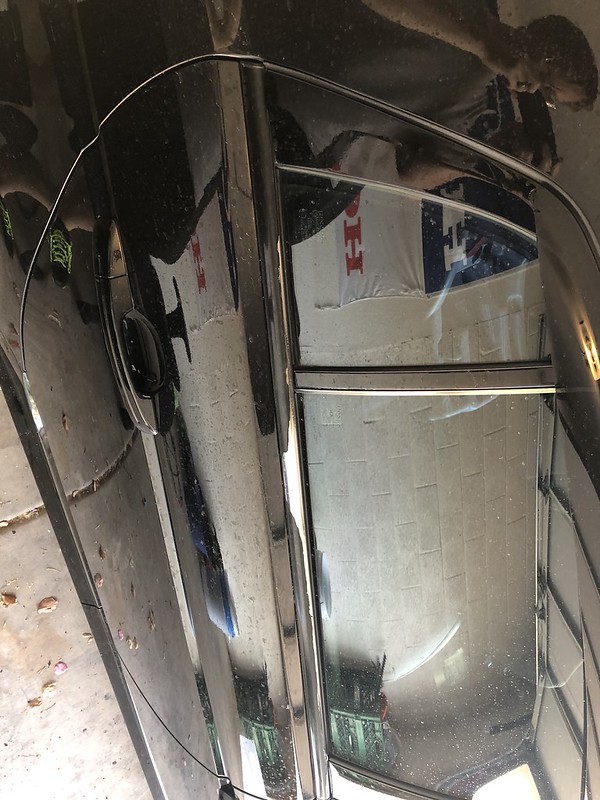
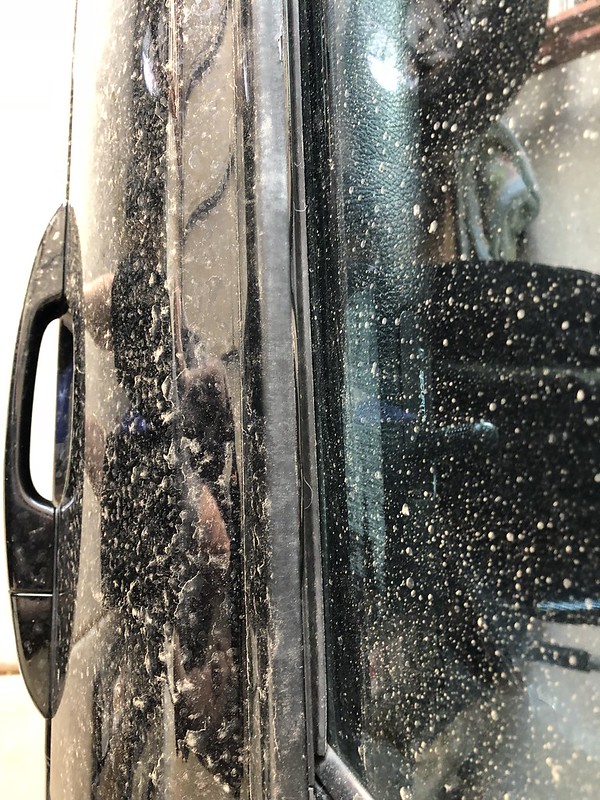
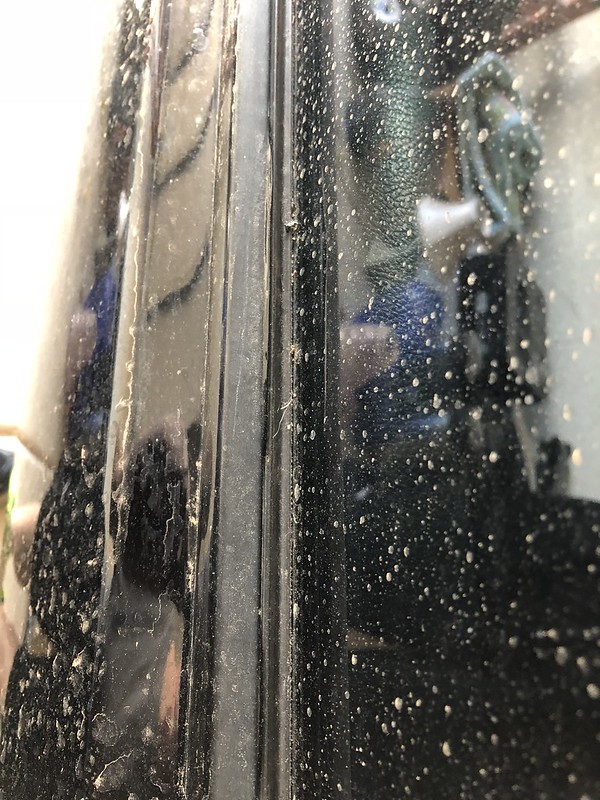
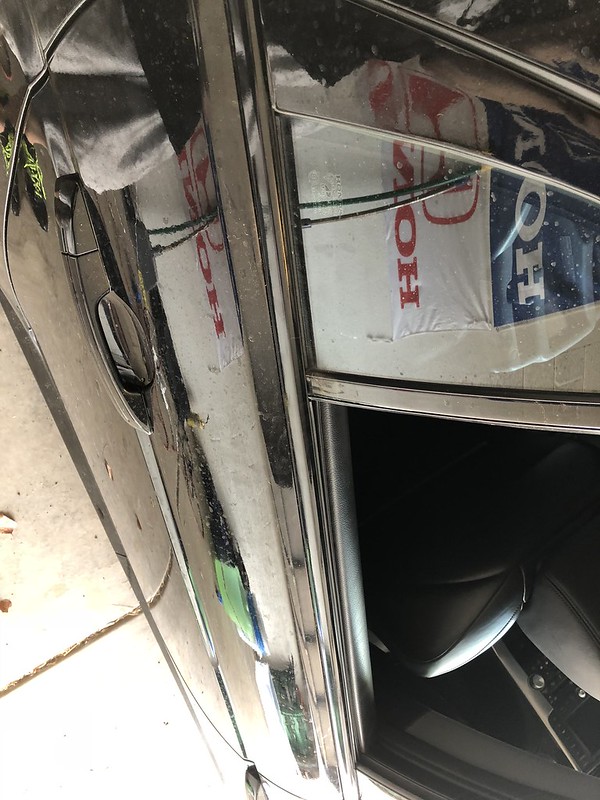
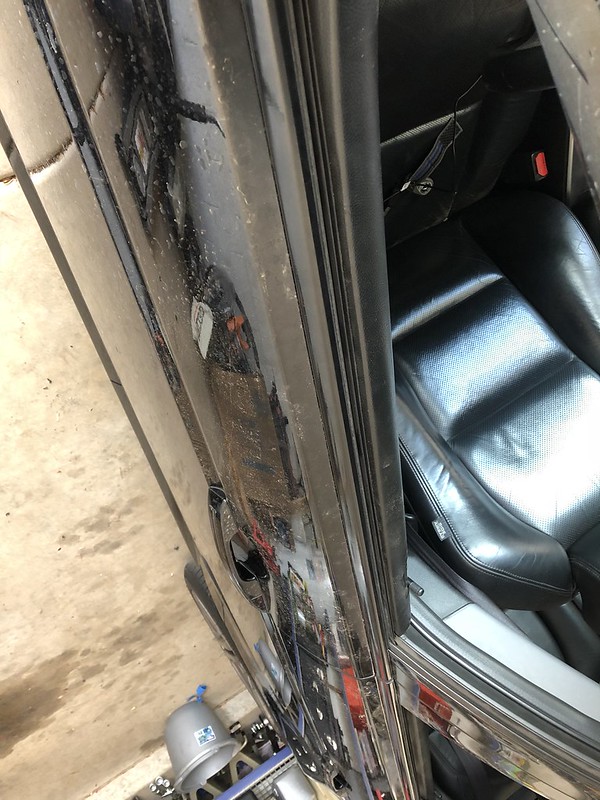
Get the window trim cleaned up since its peeling pretty bad.
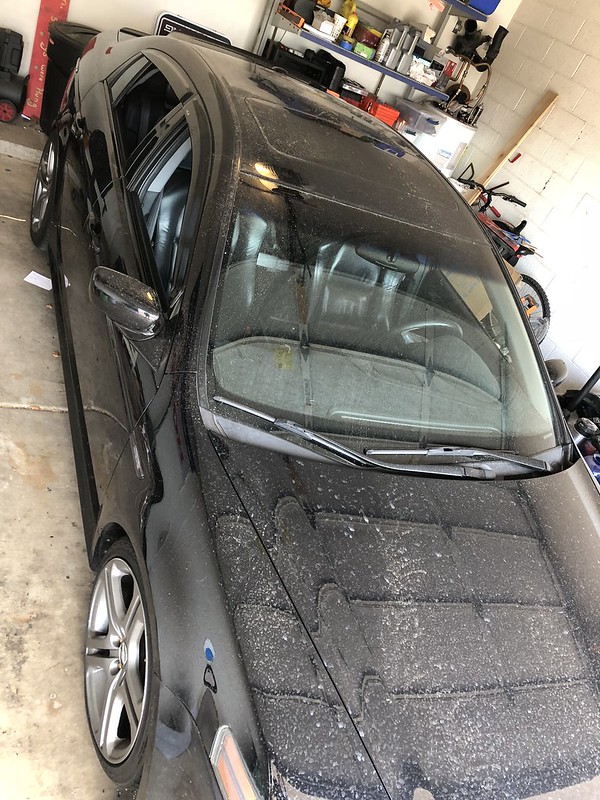
And I want to give the car a good detail. Clay bar, polish, wax, etc. Never done it all before so that should be interesting.
I need to get all this crap done before I try to spend some more money on the car. I have been looking at front grills spoilers, wheels. But I need to get the stuff I have in order. Hopefully Ill have some better updates for you guys soon!
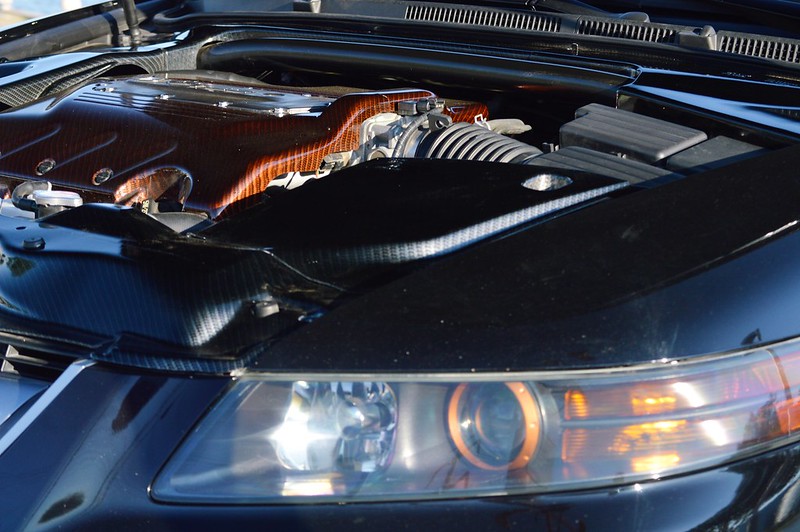
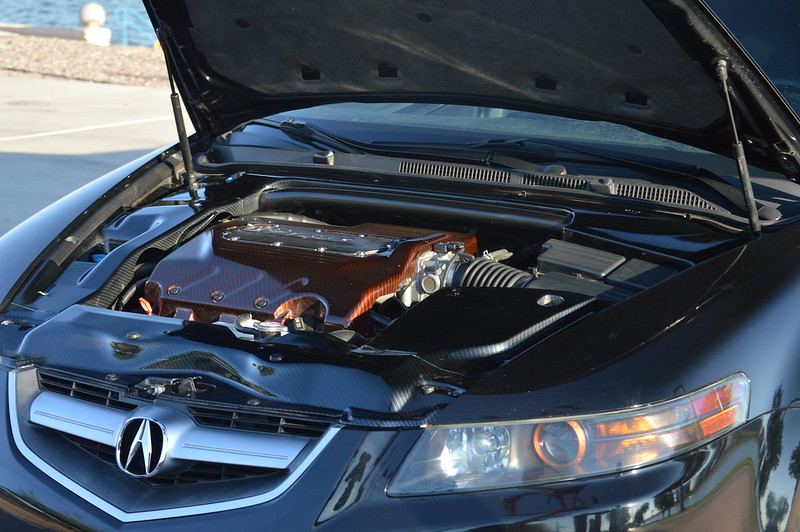
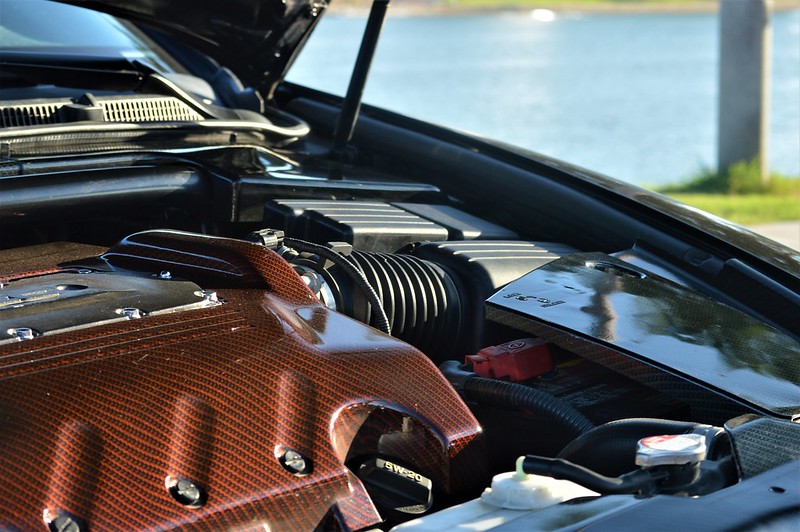
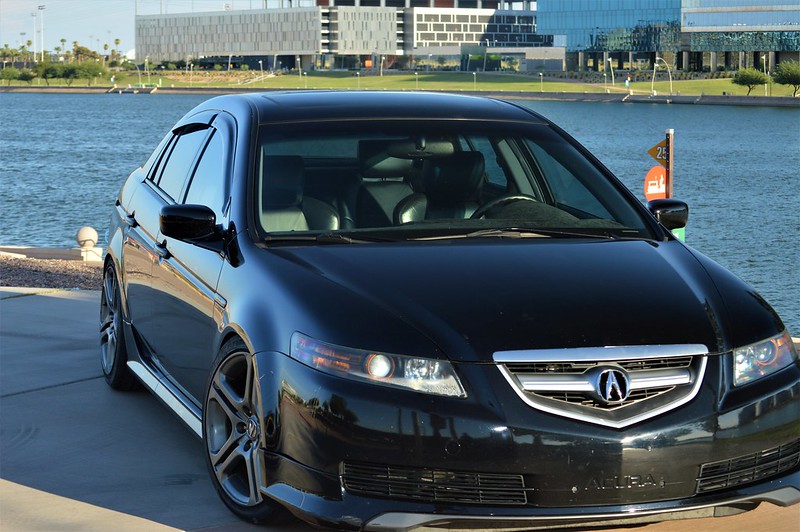
Here's a couple pics from the website that were posted on the website.
Been busy with work since the winter but things have settled down so I have some time to catch up with the car
The only thing I have done since last posting is lower the front a little bit and went to a local event. I entered the show but just for funsies. Didn't expect much to come of it.
But now that I have some time I want to get a few things cleaned up on the car
I want to try to do the tail lights to the 'red stripes'.
Get the headlights cleaned up too since i left smudges on the inside of the lenses last time I did them
Get the window trim cleaned up since its peeling pretty bad.
And I want to give the car a good detail. Clay bar, polish, wax, etc. Never done it all before so that should be interesting.
I need to get all this crap done before I try to spend some more money on the car. I have been looking at front grills spoilers, wheels. But I need to get the stuff I have in order. Hopefully Ill have some better updates for you guys soon!
Here's a couple pics from the website that were posted on the website.
 06-13-2018, 07:41 PM
#45
I think you should just do what you're planning to and not get wheels and a bunch of other stuff. There's something that's just right about a classic Aspec looking 04-06...
Keep up the great work, man. You make me miss mine. I agree too, red stripes were the best looking of the bunch, especially on a nighthawk black TL.
Keep up the great work, man. You make me miss mine. I agree too, red stripes were the best looking of the bunch, especially on a nighthawk black TL.
06-14-2018, 01:28 AM
#46
I think you should just do what you're planning to and not get wheels and a bunch of other stuff. There's something that's just right about a classic Aspec looking 04-06...
Keep up the great work, man. You make me miss mine. I agree too, red stripes were the best looking of the bunch, especially on a nighthawk black TL.
Keep up the great work, man. You make me miss mine. I agree too, red stripes were the best looking of the bunch, especially on a nighthawk black TL.
I also kinda like the idea of a more aggressive trunk spoiler too. Is the TypeS the same as the one that came on the bases?
I'm just torn. Ill have to look into some threads and see what I want I am happy with how it looks now overall though. We will see
Definitely doing the headlights though. I need to go find the thread on how to do them. Thats what im on my way to do now.....
06-14-2018, 07:32 AM
#47
Headlights are the devil, but you will make a different mistake every time you do them. 
Look into the heeltoe and endless rpm csl spoilers...
front grill could look good color painted...I absolutely abhor the sharksmouth grill.
Look into the heeltoe and endless rpm csl spoilers...
front grill could look good color painted...I absolutely abhor the sharksmouth grill.
06-14-2018, 07:11 PM
#48
lol true statement about the headlights. Ive ahd to buy a replacement set before which made me feel like shit
06-14-2018, 07:48 PM
#49
LOL...
i swore i wouldn't touch them on the blue TL-S I bought and low and behold, they had some white powdery shit I had to remove because it was driving me nuts. Probably my simplest and best work. ZKW and blacked out.
i swore i wouldn't touch them on the blue TL-S I bought and low and behold, they had some white powdery shit I had to remove because it was driving me nuts. Probably my simplest and best work. ZKW and blacked out.
06-20-2018, 03:51 PM
#52
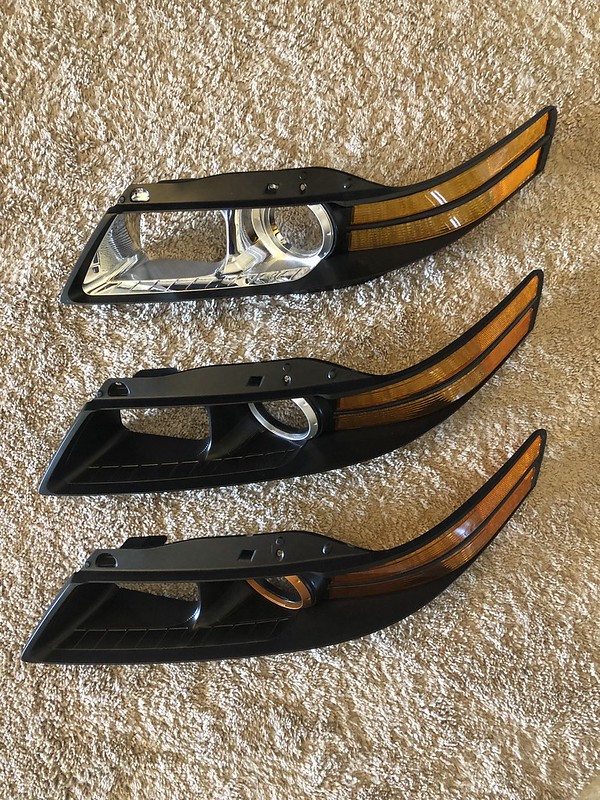
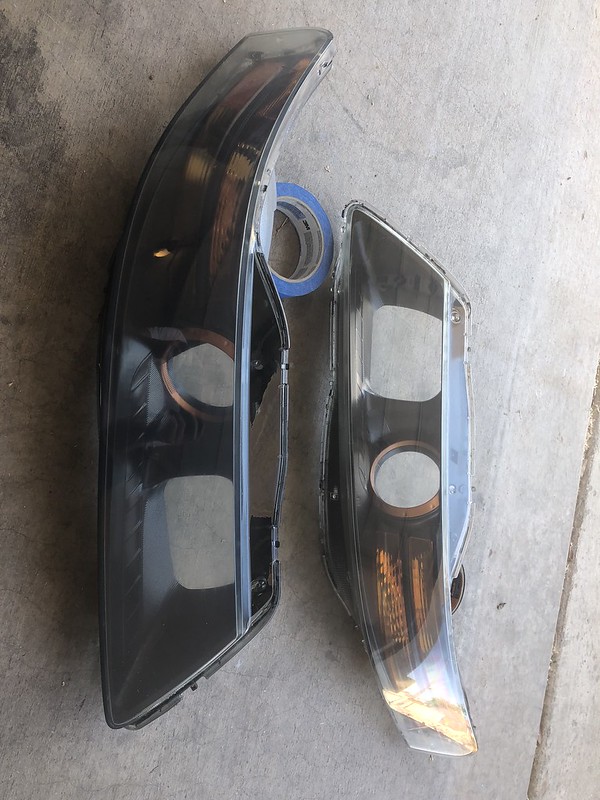
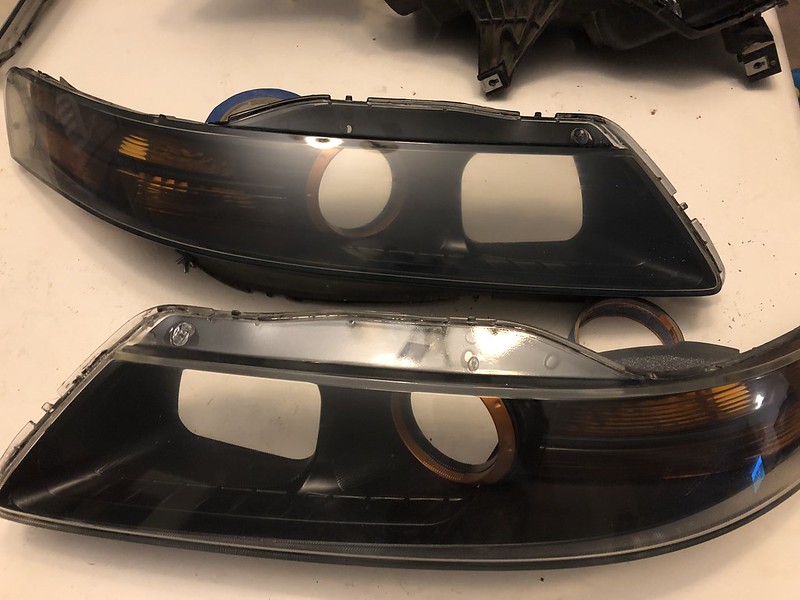
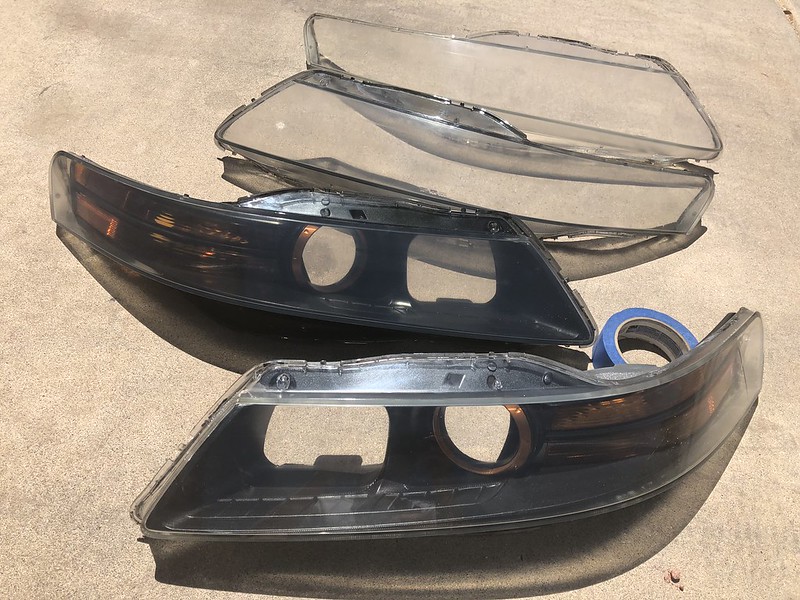
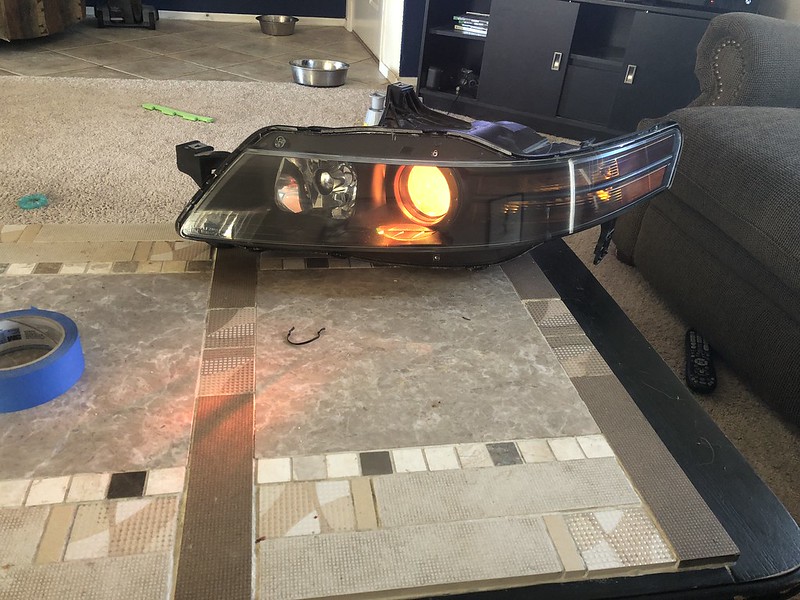
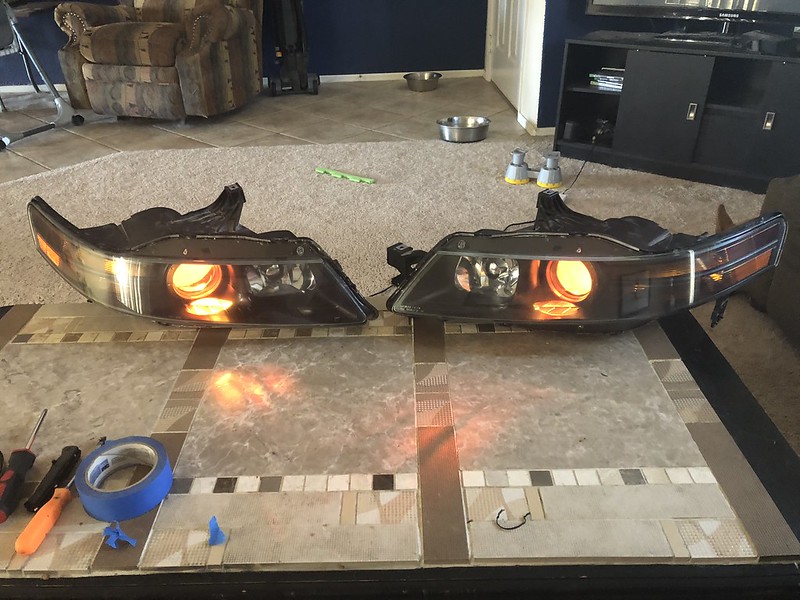
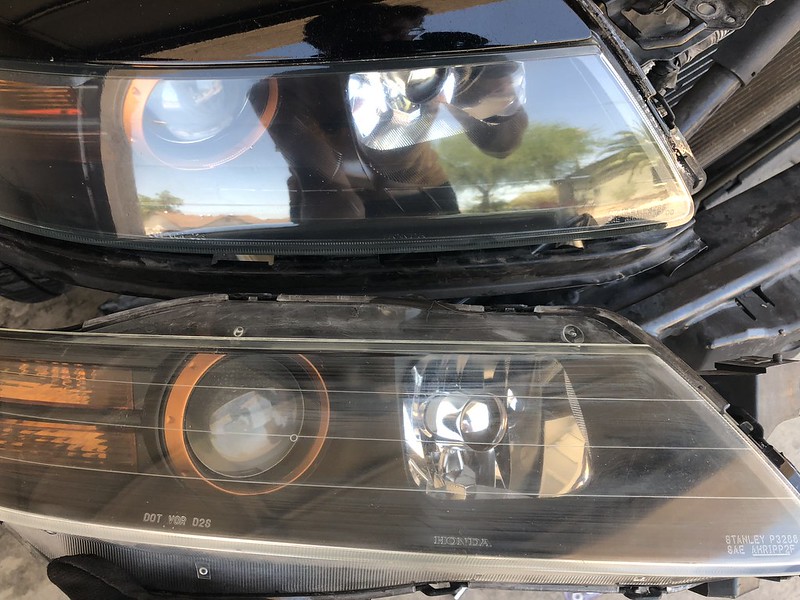
So nothing new in here as I've done this before. Doing another set of headlights and taking my time. This is not something that isn't hard, but definitely not something I'd try to "do real quik".
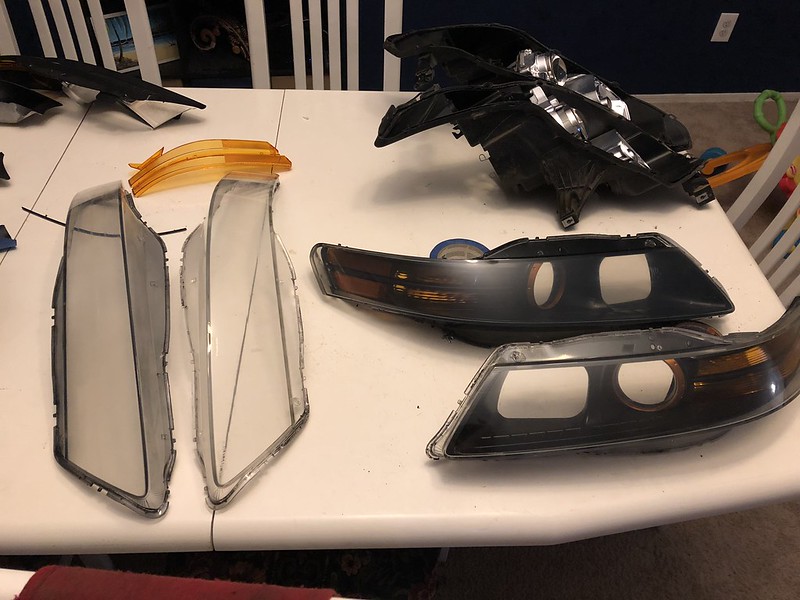
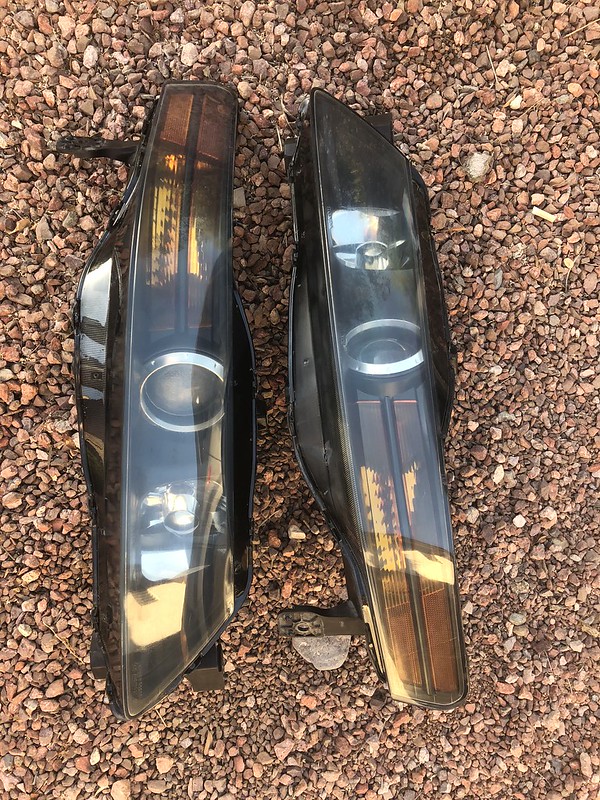
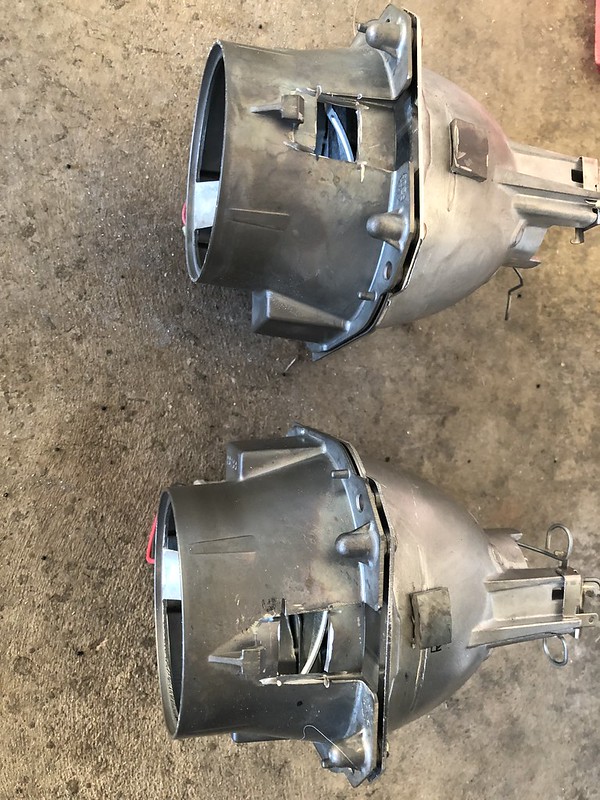
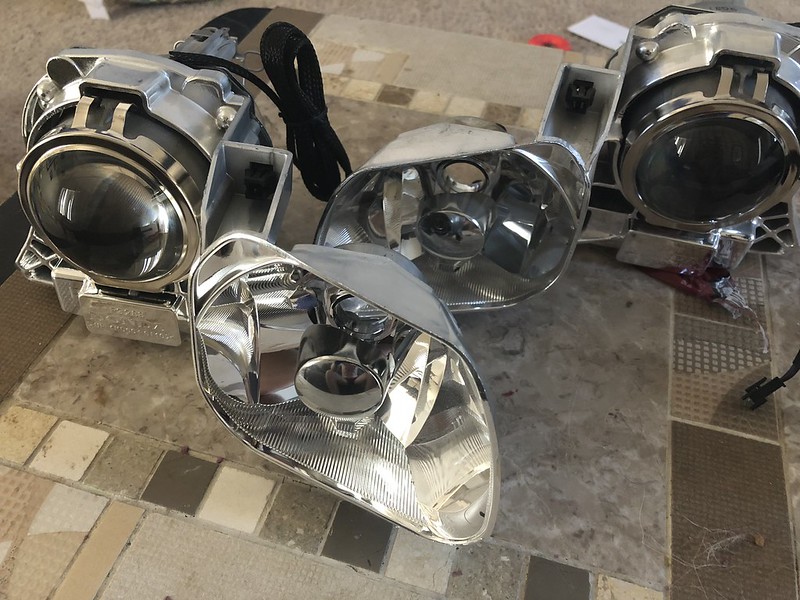
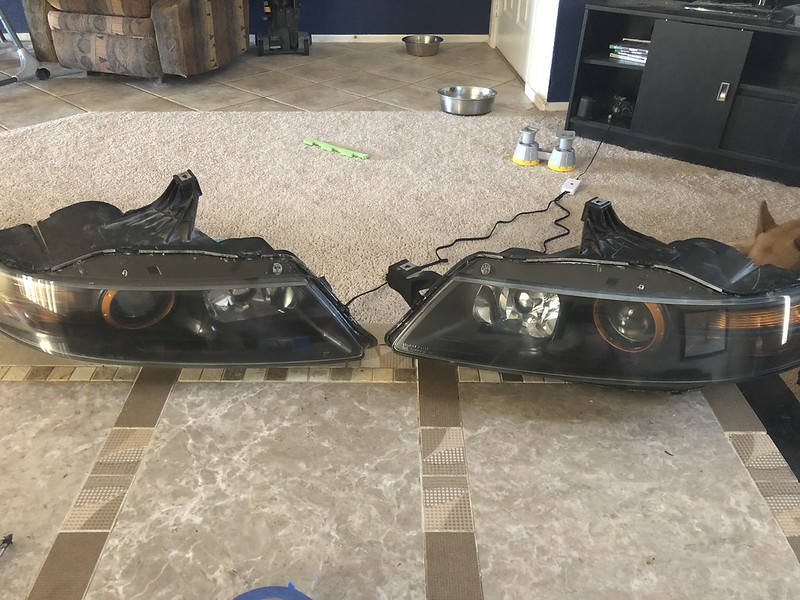
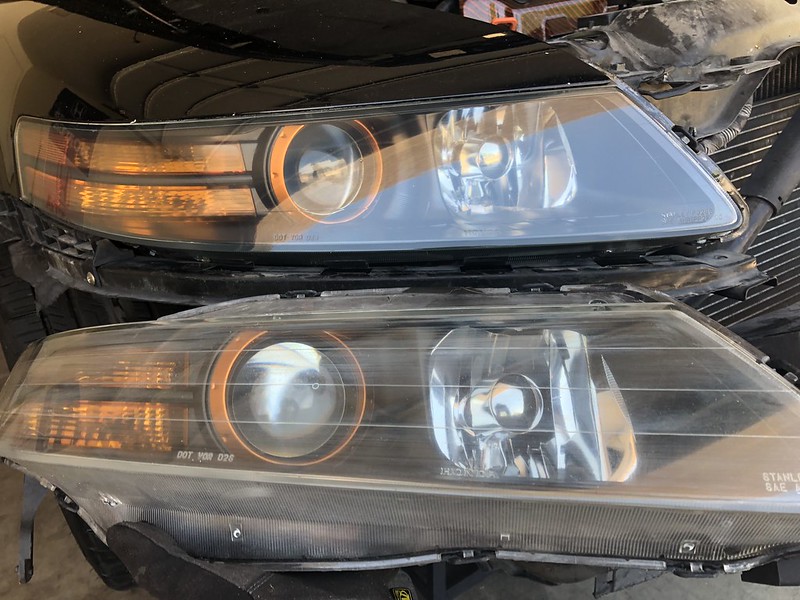
A comparison from stock to the two sets I'm doing. The last is obviously for me and the middle will probably be sold. I've been sitting on them forever. I'd rather sell and put the money into something else on the car. And then I have the original set I did still on the car that'll probably be sold too LOL.
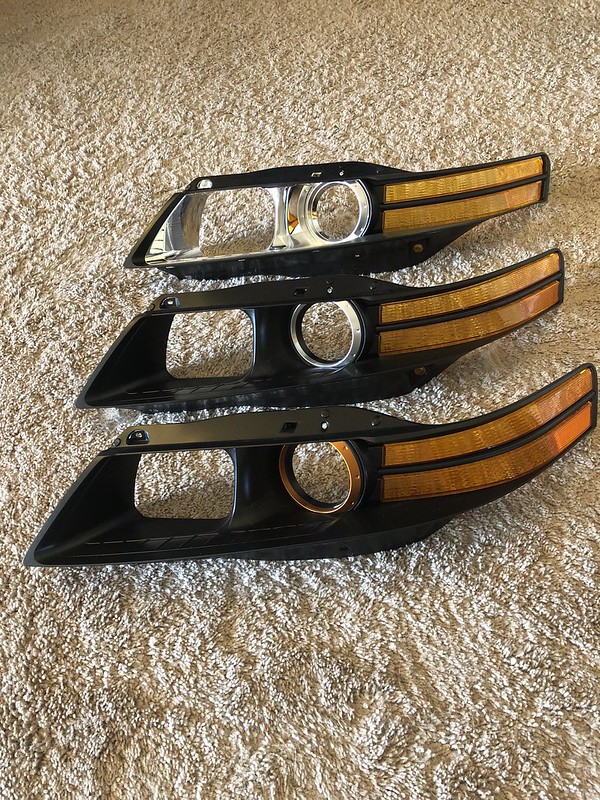
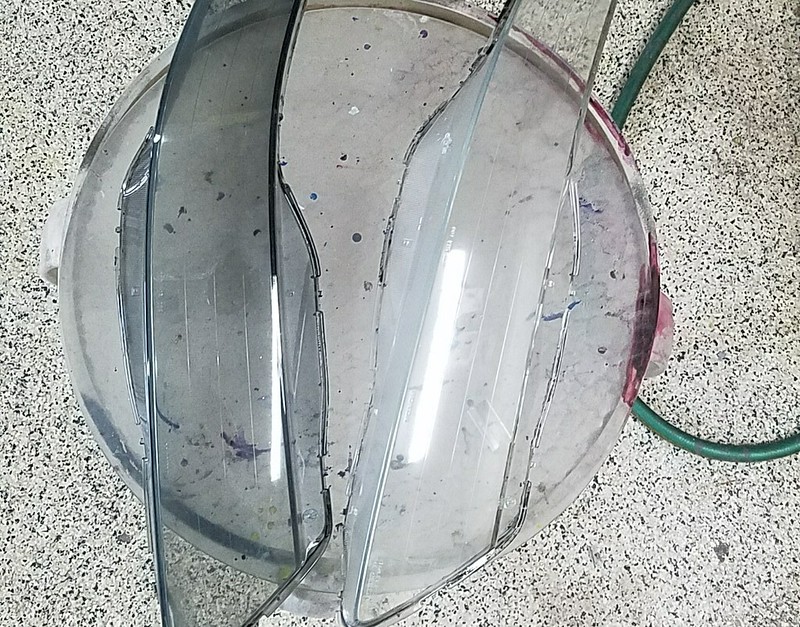
So I wanted to do these right so I sent my lens' out top get restored and hit with some clear coat. Same gut that did my engine covers. The guy told me he could try something with the clear and I told him to go for it. If I don't like them they will go on the set I sell. He sent me this pic and said he had to redo the smoked set anyways so I asked him to go lighter. He was trying to give it a slight "smoked" look. I don't think I like it but we will see when I get them back. While I wait to be able to pick up the lens', I have some sealant in the mail. And am debating new projector lens and maybe the demon eye led's? Still deciding.
Also have some nightshade waiting to do the red stripe tail lights. I'm going to have to dig through the threads to make sure I k now what I'm doing when I get in there. i'll get started on those once the headlights are done.
06-20-2018, 09:45 PM
#53
Race Director
iTrader: (8)
Definitely get the ZKW-R lens from theretrofit source. Getting new projector lens is a must if you're going to open up the headlights.
You get a sharper cutoff by adjusting the space between the projector lens and the bulb. Back in the day people cut cereal boxes in a ring shape to add space between the bulb and projector lens.
Nowadays, you can buy cut spacers right from theretrofitsource. Supposedly 2 spacers in each projector is the "best" and I was able to fit 2 spacers in without much fight and without the retaining clip breaking. I think it was the people trying to fit 2 spacers in using cereal box spacers that had a very hard time and broke the retaining clip.
With the 2 spacers in, you get a good sharp cutoff, but supposedly you can get an even sharper cutoff by just rotating the projector lens until it's the sharpest it can be. That requires you to go out to your car and power up the headlights and twist them at night - something I was too lazy to do and not to mention I hate mosquitoes and I attract them more than others. I was set on believing that I would be happy and satisfied with the results of adding 2 spacers (along with the zkwr lens) and I was.
Last edited by guitarplayer16; 06-20-2018 at 09:49 PM.
The following users liked this post:
rockstar143 (07-05-2018)
06-21-2018, 12:16 AM
#54
Definitely get the ZKW-R lens from theretrofit source. Getting new projector lens is a must if you're going to open up the headlights.
You get a sharper cutoff by adjusting the space between the projector lens and the bulb. Back in the day people cut cereal boxes in a ring shape to add space between the bulb and projector lens.
Nowadays, you can buy cut spacers right from theretrofitsource. Supposedly 2 spacers in each projector is the "best" and I was able to fit 2 spacers in without much fight and without the retaining clip breaking. I think it was the people trying to fit 2 spacers in using cereal box spacers that had a very hard time and broke the retaining clip.
With the 2 spacers in, you get a good sharp cutoff, but supposedly you can get an even sharper cutoff by just rotating the projector lens until it's the sharpest it can be. That requires you to go out to your car and power up the headlights and twist them at night - something I was too lazy to do and not to mention I hate mosquitoes and I attract them more than others. I was set on believing that I would be happy and satisfied with the results of adding 2 spacers (along with the zkwr lens) and I was.
You get a sharper cutoff by adjusting the space between the projector lens and the bulb. Back in the day people cut cereal boxes in a ring shape to add space between the bulb and projector lens.
Nowadays, you can buy cut spacers right from theretrofitsource. Supposedly 2 spacers in each projector is the "best" and I was able to fit 2 spacers in without much fight and without the retaining clip breaking. I think it was the people trying to fit 2 spacers in using cereal box spacers that had a very hard time and broke the retaining clip.
With the 2 spacers in, you get a good sharp cutoff, but supposedly you can get an even sharper cutoff by just rotating the projector lens until it's the sharpest it can be. That requires you to go out to your car and power up the headlights and twist them at night - something I was too lazy to do and not to mention I hate mosquitoes and I attract them more than others. I was set on believing that I would be happy and satisfied with the results of adding 2 spacers (along with the zkwr lens) and I was.
But yeah I dont blame you about the rotating the lens' lol
06-23-2018, 08:16 PM
#55
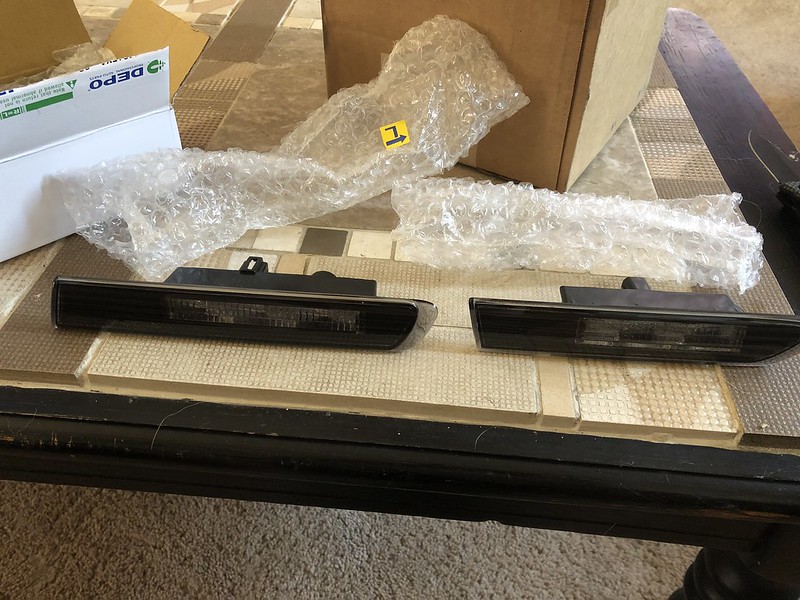
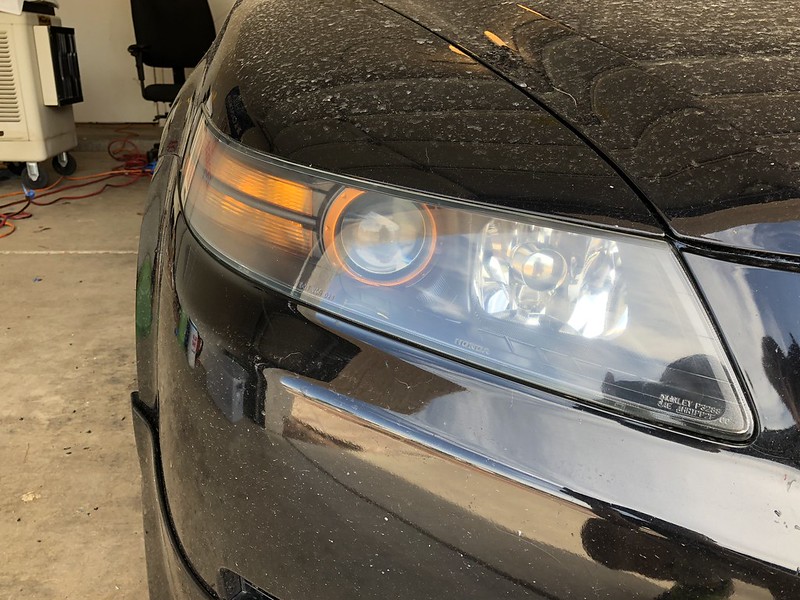
So I forgot I had these coming in. My wife got them for my birthday last month and accidentally ordered some clear one's. So I sent them back and got the smoked ones. I didn't realize they would be that dark compared to the stock front one, but I like them.
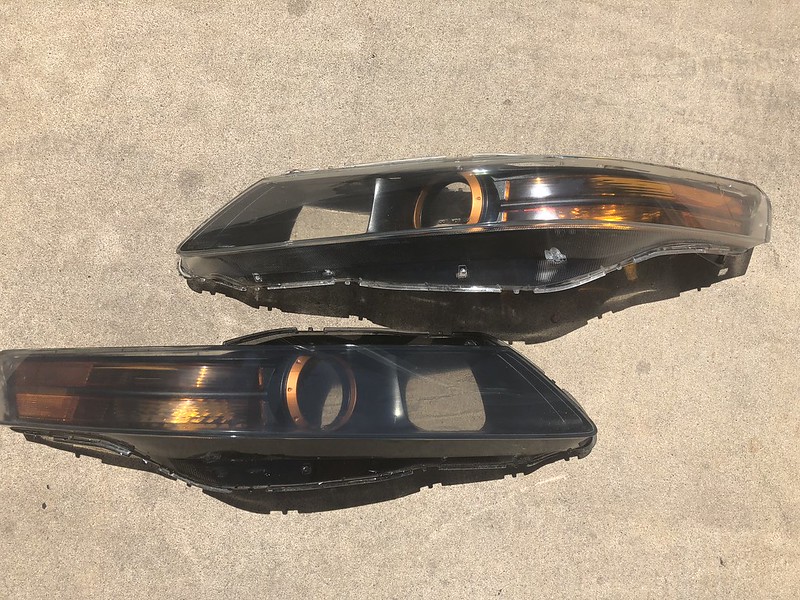
Also got my headlight lens' back from the guy who was clearing them. I didn't thing I would like the smoked but he did them lighter and I actually don't think they look bad, almost not noticeable in the sun. They would probably darken once they're sealed up in the housing too. But I think I'm still going to stick with the clear lens'. But as of now still waiting on some stuff from EndlessRPM that should be here Monday or Tuesday before I put the set for ME back together, but I'll get started on the set that I'll get rid of here this weekend hopefully.
And a question, any suggestions on HID bulbs? I was looking at the Morimoto XB's. Good price and heard decent things. I think the Phillips and Osram's are better quality and brighter, but I've never spent hundreds of dollars on bulbs LOL and seems a little excessive. Or if anyone ahs any other suggestions. Looking for a 6k-8k.
06-23-2018, 08:31 PM
#56
Race Director
iTrader: (8)
The Morimoto XB bulbs are great! They're the only bulb I'd recommend besides the Osram CBI. I've been running my Morimotos for over 4 years now.
06-28-2018, 04:15 AM
#57
So I made some good progress on both sets of the headlights.
I finished and sealed up this set that I intend to sell. (If anyone is interested lmk).
I almost decided to keep this set with the smoked front lens but I decided against it.
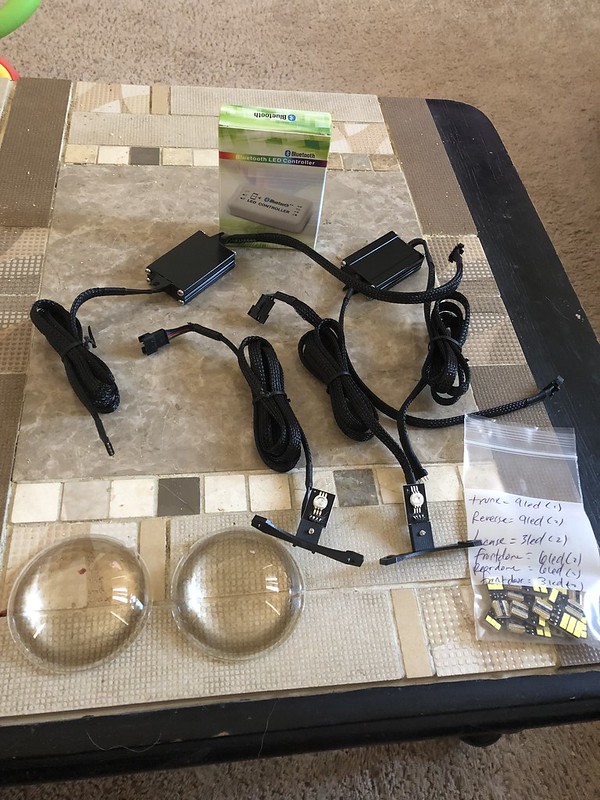
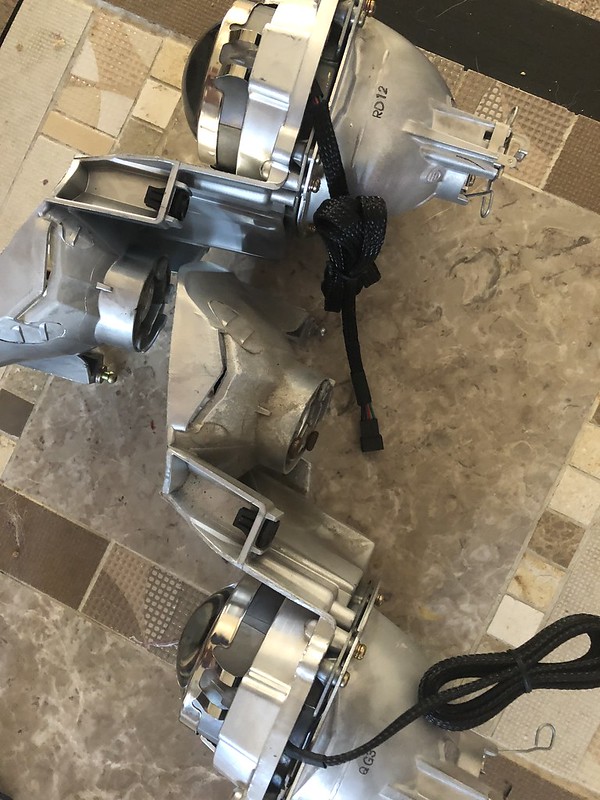
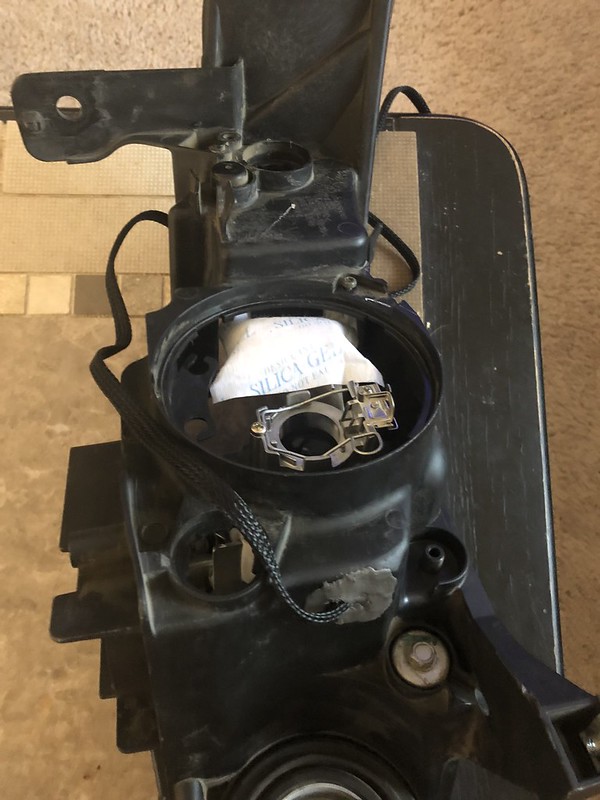
And then I got started on my set and my demon eye install. I also got my ZKW-R clear lens and Morimoto XB 6500k HID bulbs. I did not quite finish these headlights yet, but got the hard stuff done.
The goods that came in the mail
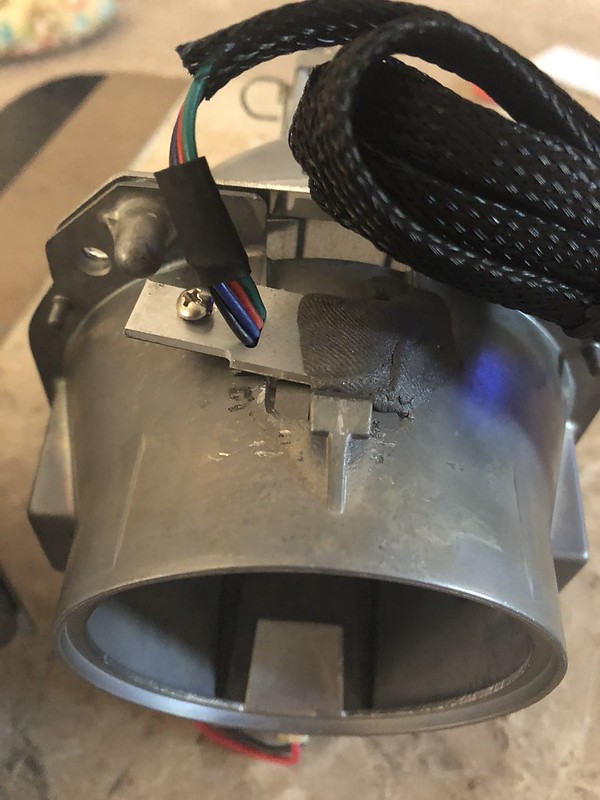
Got started by cutting a small home in the top of the projector housing to ley theLED bulb over.
Then I secured the LED 2 ways (1 of which I found to be a waste of time after).
First I drilled a hole to use a screw to secure the LED on one side and then used some JB SteelWeld to secure the other side.
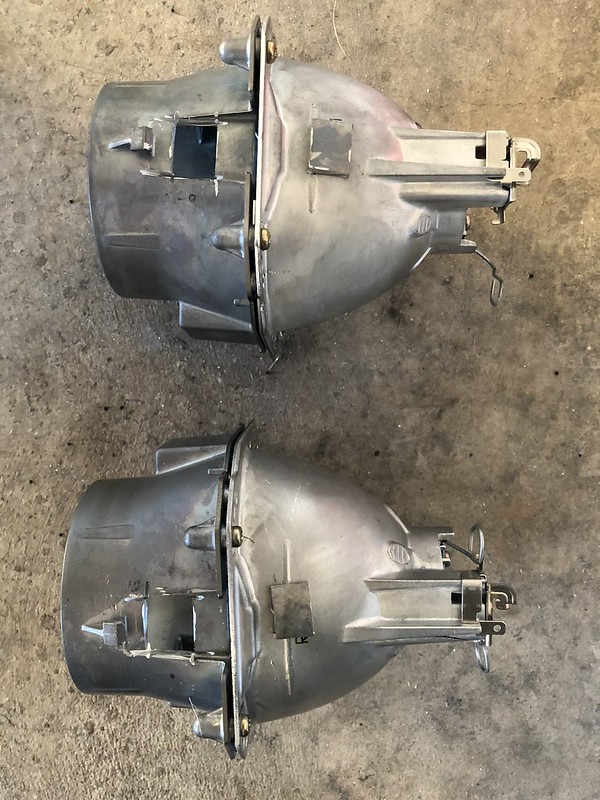
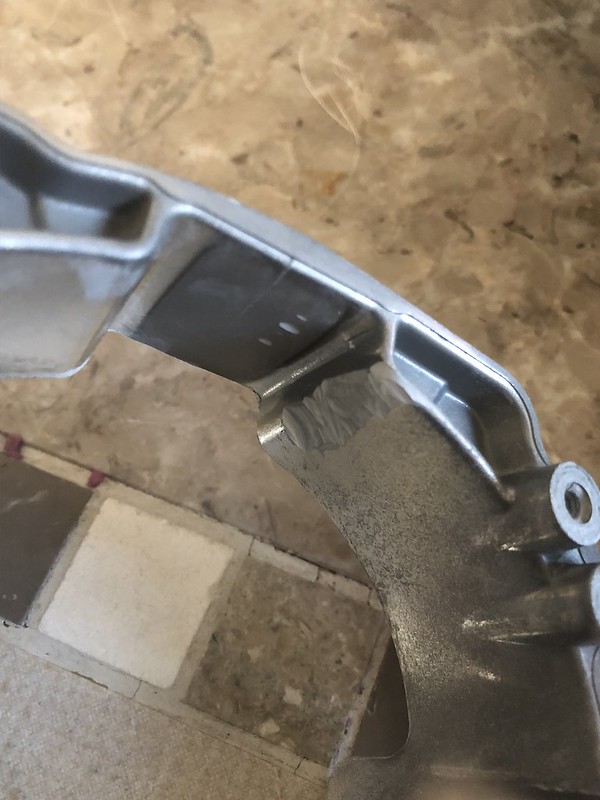
Next I put the lens' on and went to put them back onto the "reflector bezel thing". Had a couple hiccups here. The screws and part of the bracket that was attached to the led was preventing the housing from bolting up properly. At this point I tool out the original screw I had added and also used my dremel to cut the end of the bracket off. One of the housings fit on gine at this point. The second, however, kept grounding out the wires to the LED, which prevented the LED to add in red and blue, and only had green color coming through. So I used the sander attachment and shaved the inside of the "reflector bezel thingy" a bit. After this everything went in smooth and there were no issues with all 3 colors getting to the LED.
The amount I cut off and the shaved inside
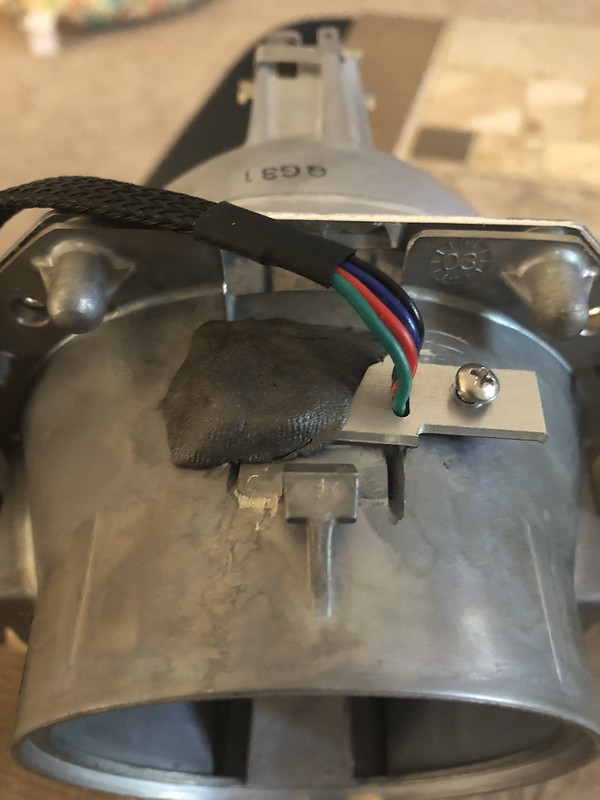
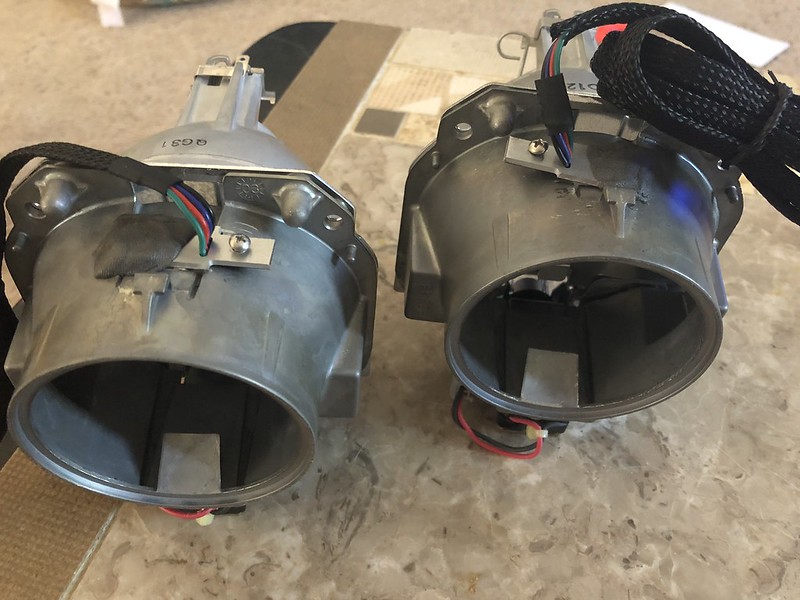
And this is wihat it looked like back together.
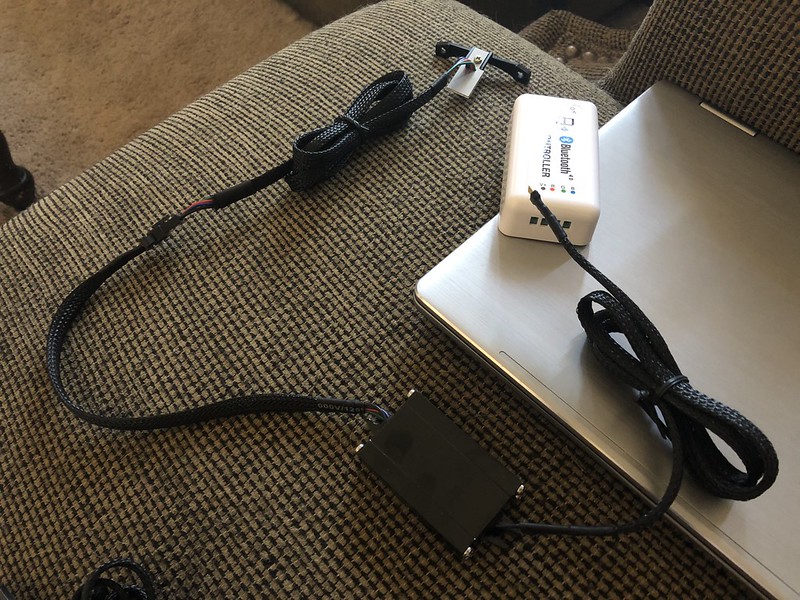
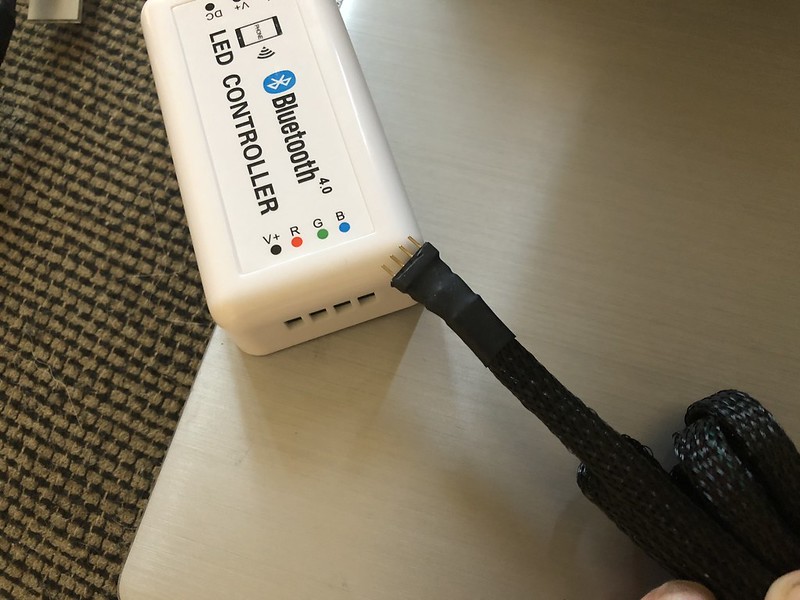
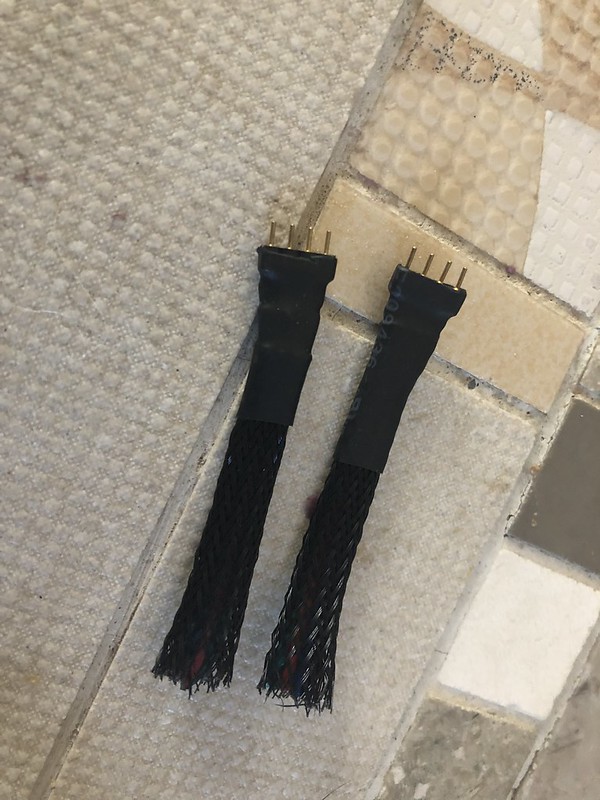
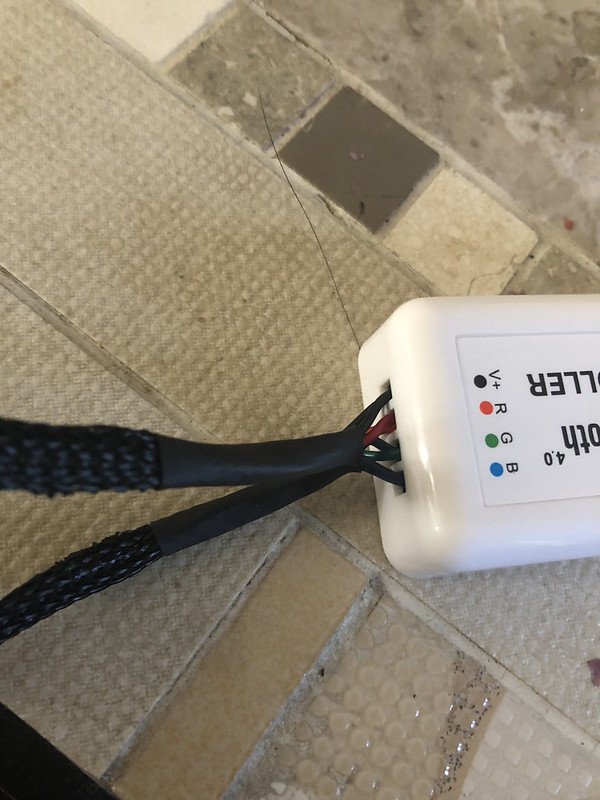
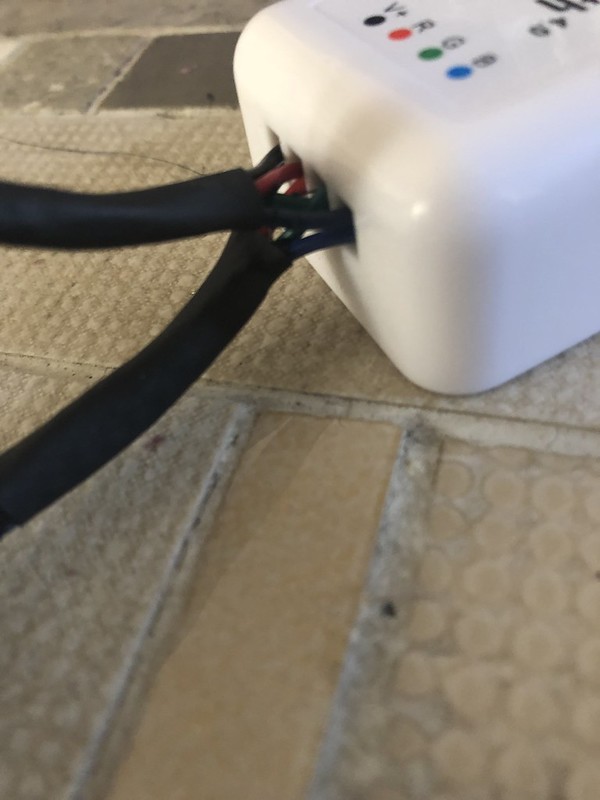
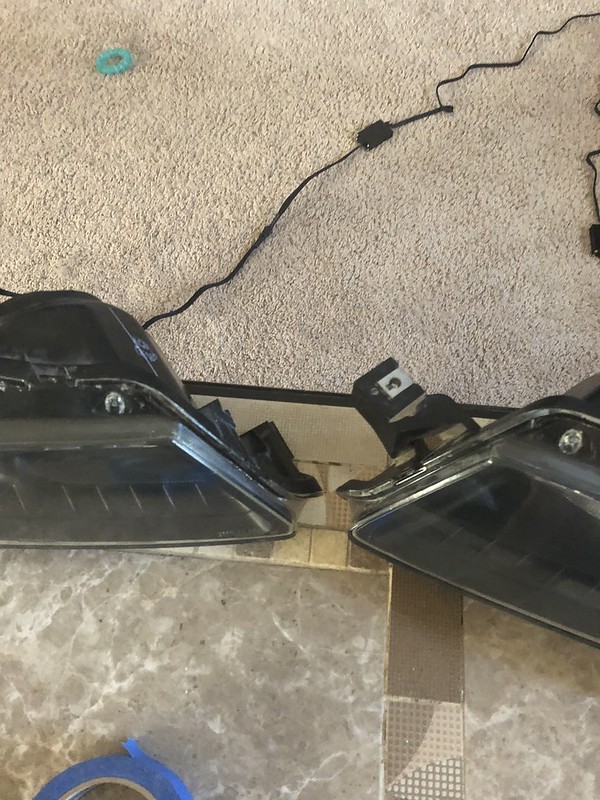
Next I had to wire up the harness into the bluetooth controller. The harness (or at least the one that came with the EndlessRPM kit) came with a plug on the end that wasn't use. So I had to cut the ends off, run the wires individually, and then used a bit of heat shrink to keep the mesh on the harness neat. Pretty straight forward since the wires and controller were color coded.
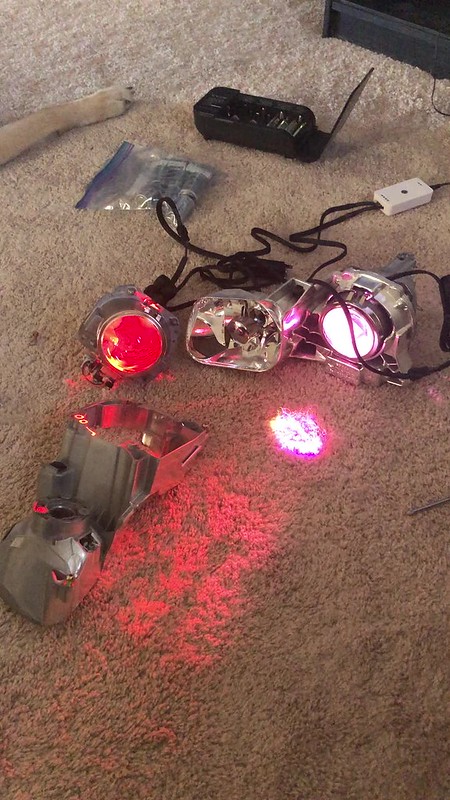
Finally, I wired up some power to test them out. I gotta say I was having alot of fun with it. The video doesn't show too much, but you can do your custom colors to stay solid, run the preset programs (strobes, gradual transitions, and flash transitions), make your own programs to run in any color/single pattern/speed you want. And then a couple feature I didn't expect. First, was the LEDs would dance to noise coming through the mic on my phone (which was quite a laugh when I played the Tokyo Drift theme song). And there was also a feature to take a picture on the app and the LEDs would try to display a color as close as possible to it. It was pretty accurate! Anyways though, this is as far as I got so far, and the video is pretty basic. Maybe I'll get a better one later.
You may ahve to open the video in a new tab to see it.
Other than that, I just got the housing cleaned up of all the old butyl and all the components cleaned off so that I can finish up the lights tomorrow. I will just need to cut a hole in the back of the housing for the LED harness to run through, and reassemble/seal everything.
I finished and sealed up this set that I intend to sell. (If anyone is interested lmk).
I almost decided to keep this set with the smoked front lens but I decided against it.
And then I got started on my set and my demon eye install. I also got my ZKW-R clear lens and Morimoto XB 6500k HID bulbs. I did not quite finish these headlights yet, but got the hard stuff done.
The goods that came in the mail
Got started by cutting a small home in the top of the projector housing to ley theLED bulb over.
Then I secured the LED 2 ways (1 of which I found to be a waste of time after).
First I drilled a hole to use a screw to secure the LED on one side and then used some JB SteelWeld to secure the other side.
Next I put the lens' on and went to put them back onto the "reflector bezel thing". Had a couple hiccups here. The screws and part of the bracket that was attached to the led was preventing the housing from bolting up properly. At this point I tool out the original screw I had added and also used my dremel to cut the end of the bracket off. One of the housings fit on gine at this point. The second, however, kept grounding out the wires to the LED, which prevented the LED to add in red and blue, and only had green color coming through. So I used the sander attachment and shaved the inside of the "reflector bezel thingy" a bit. After this everything went in smooth and there were no issues with all 3 colors getting to the LED.
The amount I cut off and the shaved inside
And this is wihat it looked like back together.
Next I had to wire up the harness into the bluetooth controller. The harness (or at least the one that came with the EndlessRPM kit) came with a plug on the end that wasn't use. So I had to cut the ends off, run the wires individually, and then used a bit of heat shrink to keep the mesh on the harness neat. Pretty straight forward since the wires and controller were color coded.
Finally, I wired up some power to test them out. I gotta say I was having alot of fun with it. The video doesn't show too much, but you can do your custom colors to stay solid, run the preset programs (strobes, gradual transitions, and flash transitions), make your own programs to run in any color/single pattern/speed you want. And then a couple feature I didn't expect. First, was the LEDs would dance to noise coming through the mic on my phone (which was quite a laugh when I played the Tokyo Drift theme song). And there was also a feature to take a picture on the app and the LEDs would try to display a color as close as possible to it. It was pretty accurate! Anyways though, this is as far as I got so far, and the video is pretty basic. Maybe I'll get a better one later.
You may ahve to open the video in a new tab to see it.
Other than that, I just got the housing cleaned up of all the old butyl and all the components cleaned off so that I can finish up the lights tomorrow. I will just need to cut a hole in the back of the housing for the LED harness to run through, and reassemble/seal everything.
06-28-2018, 07:37 PM
#58
I finally finished! And I gotta say I am SUPER happy with how these came out. Not that my first set came out bad, but there was some residue on the inside from cleaner I used. I took my time this time and made sure I used something that wouldn't leave anything undesirable. This is the set that will be going on the car.
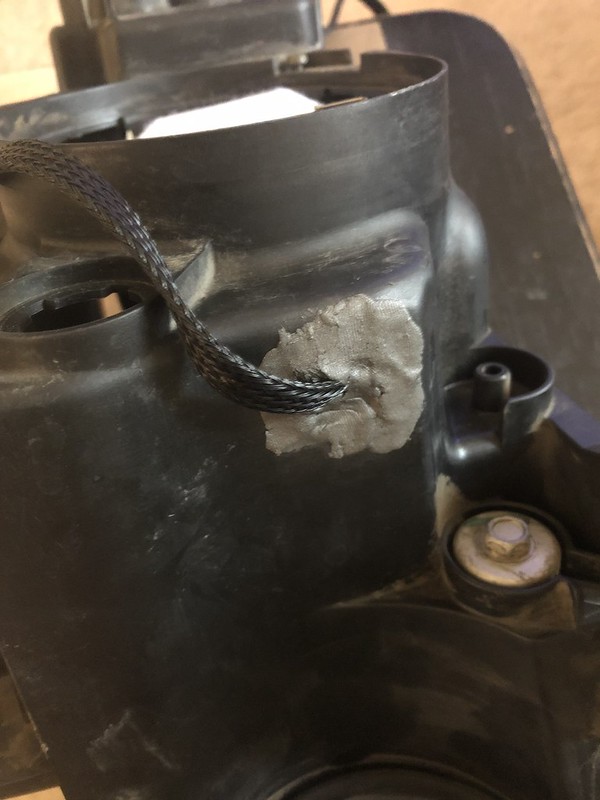
So first this morning I mocked up the projector inside the housing and marked where to cut a hole to run the demon eye wires, then cut with a Dremel.
Then I used a little more SteelWeld to seal up the hole a bit. It won't be airtight because of the mesh but should be minimal.
Then I made sure the lens were clean, added the new sealant and popped them in the oven to seal up. And this is the result.
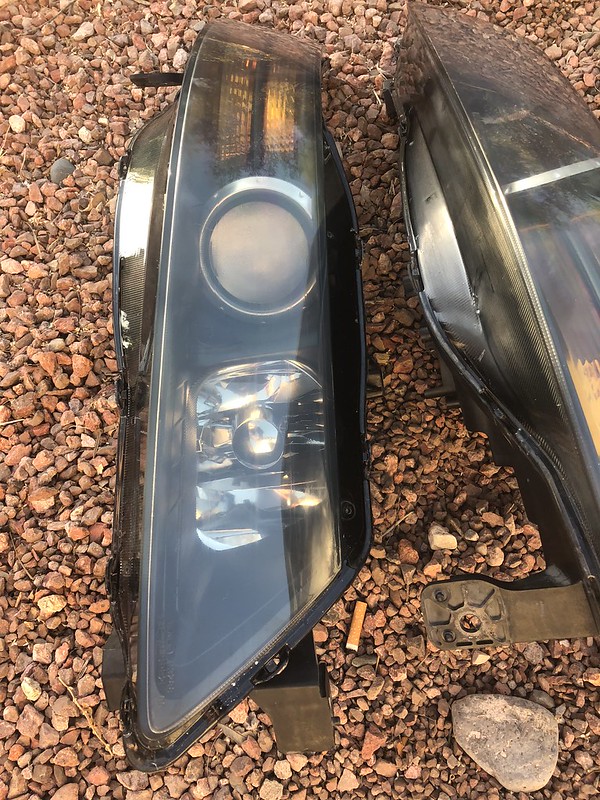
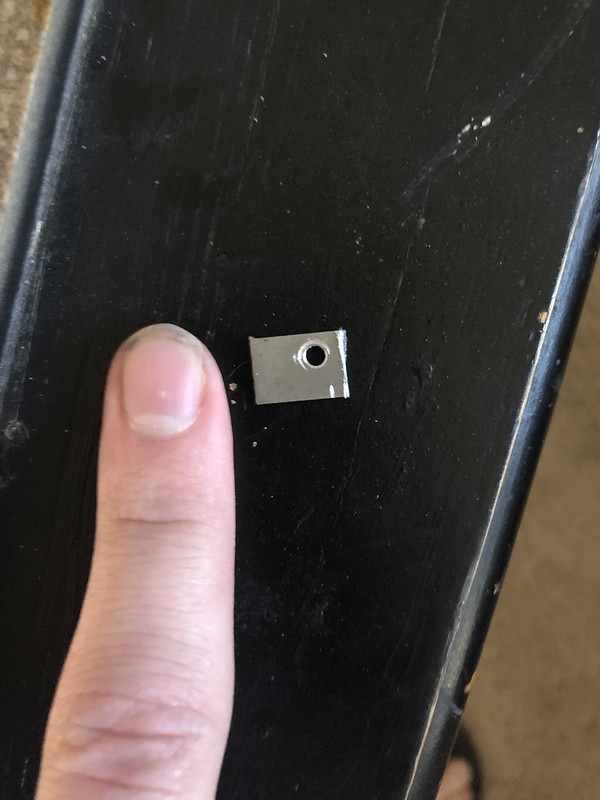
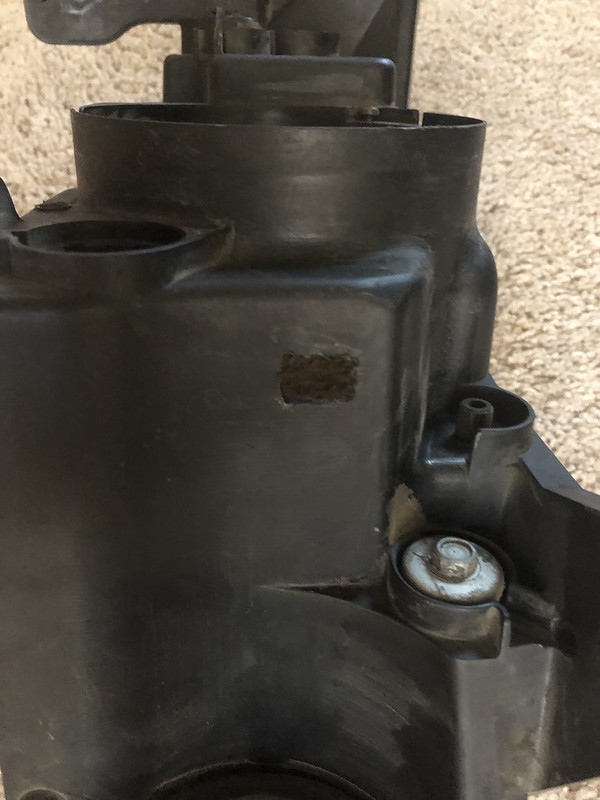
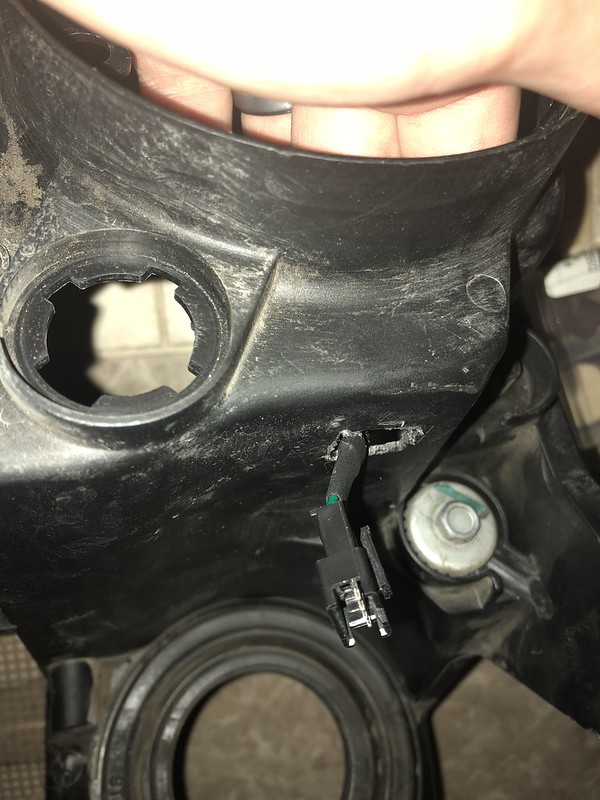
The only bad thing I noticed, which isn't really anything I did, was that this mounting tab is missing completely. I must have gotten the headlight like this and I didn't even notice. Pretty bummed, but hopefully I can get it to mount right or rig it so it's not saggy or anything.
So first this morning I mocked up the projector inside the housing and marked where to cut a hole to run the demon eye wires, then cut with a Dremel.
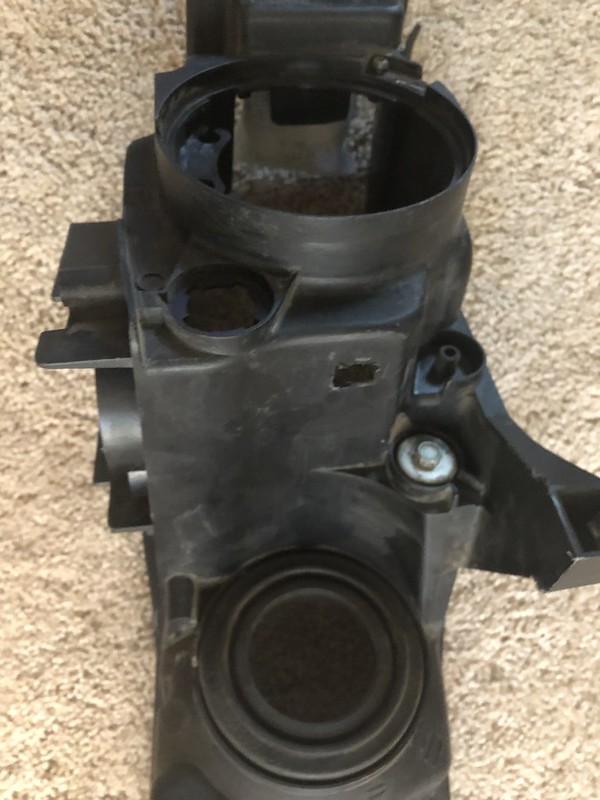

Then I used a little more SteelWeld to seal up the hole a bit. It won't be airtight because of the mesh but should be minimal.
Then I made sure the lens were clean, added the new sealant and popped them in the oven to seal up. And this is the result.
The only bad thing I noticed, which isn't really anything I did, was that this mounting tab is missing completely. I must have gotten the headlight like this and I didn't even notice. Pretty bummed, but hopefully I can get it to mount right or rig it so it's not saggy or anything.
 06-28-2018, 09:49 PM
#59
Race Director
iTrader: (8)
That is wicked cool stuff.
For the missing mounting tab, I hope it holds fine for you,
You'll have to push up on the headlight as far up as possible and then tighten the one other bolt down hard.
For the missing mounting tab, I hope it holds fine for you,
You'll have to push up on the headlight as far up as possible and then tighten the one other bolt down hard.
06-29-2018, 01:09 AM
#60
But yeah I'm kinda expecting to have some troubles with that light. We will see though
06-30-2018, 08:41 PM
#61
Instructor
Really awesome!
I've been wanting to crack my headlights open and this is pretty motivating stuff! I have the 04 headlights and have been wanting to darken some of the chrome pieces to give the front end a more aggressive look. Plus the ZKR lens, of course.
I've been wanting to crack my headlights open and this is pretty motivating stuff! I have the 04 headlights and have been wanting to darken some of the chrome pieces to give the front end a more aggressive look. Plus the ZKR lens, of course.
07-02-2018, 04:19 PM
#62
Definitely a worthwhile project. Fairly cheap to black them out to, just need to have the time and definitely patience. Patience is where I made any mistakes I did.
I will say the general consensus when baking the headlights is 200 degrees for 20 minutes with no pre-heat. But I have been able to go as low as 180 degrees for 15 minutes with no pre-heat. Really probably depends on your oven. But as least heat necessary to het the job done would be my advice.
07-05-2018, 07:04 AM
#63
I don't think you'll have an issue with the headlight missing that tab...I had a set missing it too.
Looks so cool, you take me back about 5 or 6 years. I was so driven and constantly tinkering.
Personally, I would have spent the money on the Osram CBI, I went through so many different permutations and combinations and those won every time...
they are a lot for a bulb but they were always the whitest and best output so I'd just chill on spending money on the stupid little stuff for a while and pay for that instead.
Shiet, I think I actually have them in my S2000 AND the CTS-V too.
I was going to say you should keep it simple and not add demon or angel eyes but I have to admit, it looks great.
I would probably stick with your oem sidemarkers...I had the USR ones and they look cheap to me. Eventually my buddy GP made me a set of the white front ones using OEM but still, looked better when not on.
Good luck with your adventures!
07-06-2018, 12:50 AM
#64
I don't think you'll have an issue with the headlight missing that tab...I had a set missing it too.
Looks so cool, you take me back about 5 or 6 years. I was so driven and constantly tinkering.
Personally, I would have spent the money on the Osram CBI, I went through so many different permutations and combinations and those won every time...
they are a lot for a bulb but they were always the whitest and best output so I'd just chill on spending money on the stupid little stuff for a while and pay for that instead.
Shiet, I think I actually have them in my S2000 AND the CTS-V too.
I was going to say you should keep it simple and not add demon or angel eyes but I have to admit, it looks great.
I would probably stick with your oem sidemarkers...I had the USR ones and they look cheap to me. Eventually my buddy GP made me a set of the white front ones using OEM but still, looked better when not on.
Good luck with your adventures!
As for the bulbs, I just couldn't justify the money, especially since the wife even had to be persuaded into the Morimoto's lol but who knows, maybe down the line. The XB's look good so I cant complain really. The only thing I need to look into a bit is maybe adjusting the projectors. Not hard but I have never done it so need to make sure I know what the end goal is.
I'm not into the visible LED mods either . My buddy wanted me to do the halos but I just don't like them. But the demon eye was something that isn't really visible until I want it to be. Not to mention, The app to control it is just fun to play with and pretty impressive.
As for the side markers, I actually like them. I was going to just wait for some Type-S rears to pop up but I sprung for these, or my wife did as a present. She feels slightly more involved in the car with ordering something she liked and is on, so that's fun too. I don't find them to look cheap, but the fitment definitely left something to be desired. I went ahead and threw on some body panel tape and it fixed the problem. But other than that I'm liking them.
On a side note though I did get the lights mounted, all the boxes put up in a decent location, and the wiring ran to a switch I placed up under the dash. They look good and work great. I enjoy demoing them for my family and friends lol.
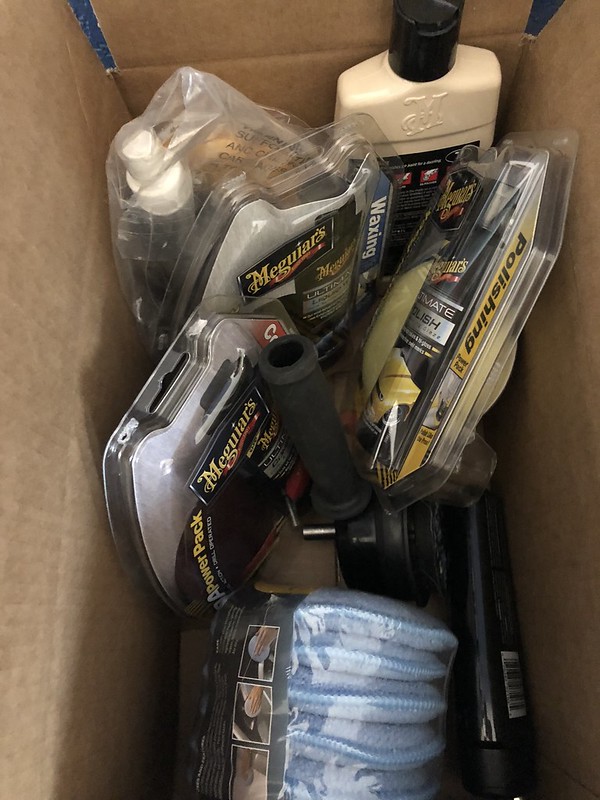
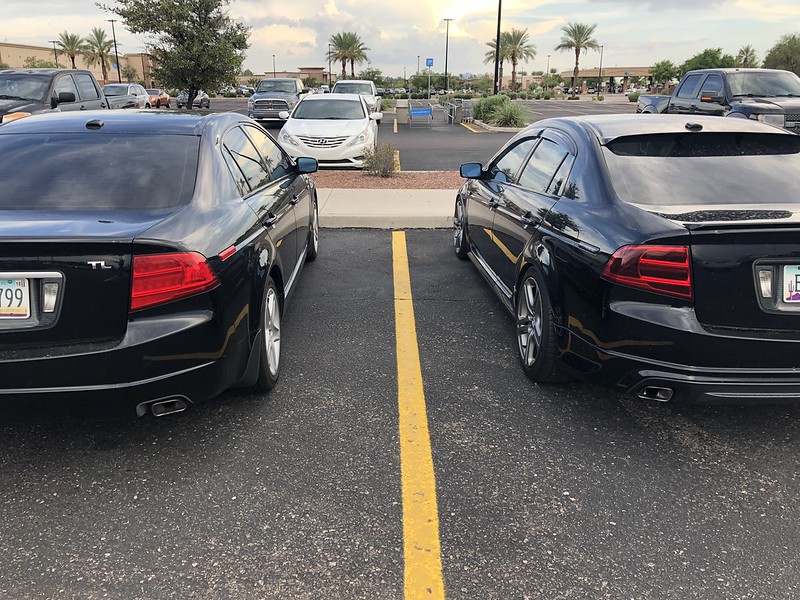
Next up is a paint correction and some modified tail lights, and after that some pictures. And I hope to have a matching set of tires as well. These 2 different sizes are kinda bugging me. But these damn Continentals won't die unless they get nails (1st world problems I guess). Stuff should be coming in tomorrow for the correction, and the taillights have already been started. I will get some pictures up of whatever progress I have. I may do a little DIY thread for the tails, only because I kinda had to piece together a few different threads due to old age/lack of pictures. We will see. I'm no expert but I definitely learned a few things opening up this first set.
Pics coming soon!
07-06-2018, 06:11 AM
#65
I believe it's like 25 feet on a flat surface on a white wall at night, then set the one headlight to 2 or 3 feet and then adjust the other cutoff to match.
All you need is one phillips #2 screwdriver.
Gotcha, and yeah, you shouldn't notice the missing tab at all once it was all back on.
Yeah I forgot about that...had to do clear rtv to get those sidemarkers to stay. Did you get the blinking ones or the oem colored ones?
Just my opinion...always great to have the wife involved and feel like part of the obsession.
07-06-2018, 11:20 AM
#66
I believe it's like 25 feet on a flat surface on a white wall at night, then set the one headlight to 2 or 3 feet and then adjust the other cutoff to match.
All you need is one phillips #2 screwdriver.
Gotcha, and yeah, you shouldn't notice the missing tab at all once it was all back on.
Yeah I forgot about that...had to do clear rtv to get those sidemarkers to stay. Did you get the blinking ones or the oem colored ones?
Just my opinion...always great to have the wife involved and feel like part of the obsession.
All you need is one phillips #2 screwdriver.
Gotcha, and yeah, you shouldn't notice the missing tab at all once it was all back on.
Yeah I forgot about that...had to do clear rtv to get those sidemarkers to stay. Did you get the blinking ones or the oem colored ones?
Just my opinion...always great to have the wife involved and feel like part of the obsession.
The sidemarkers are just the OEM colored ones not the switch back ones, which I'm ok with.
And yeah she tries to get involved since she knows its a hobby of mine. Makes it easier to spend money on the car so I love her for that lol


 07-11-2018, 04:15 PM
#68
Those turned out great!

 07-12-2018, 06:56 PM
#70
Thanks guys. I'm really happy with how they turned out. Local guys love em too. I did another set since the first was my "practice" and had a couple chips in the corner. But quite a few people have asked about buying them.
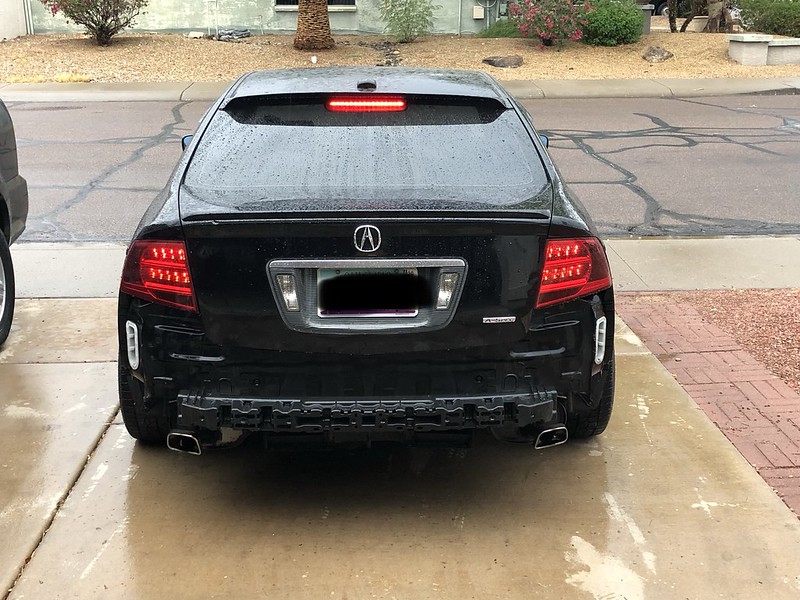
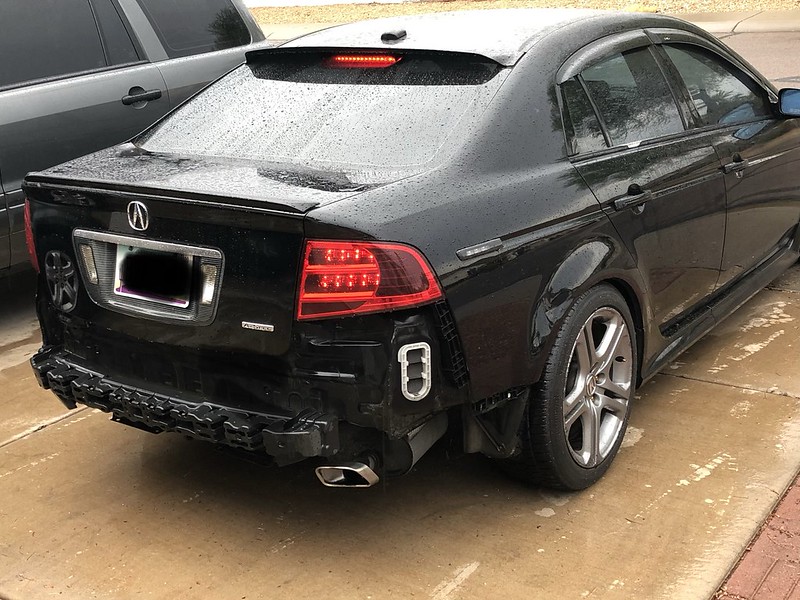
Today I got my vinyl on
Before:
After:
Also never got pictures of the headlights for you guys. The came out awesome. and I'm really glad to get the old set with the smears on the inside replaced.
The car is SUPER dirty. Of course the one week it rains in Arizona I wanted to do the restoration on the paint. 3 days in a row. The first night it took the power out for 12 hours. Then the next its sunny until the afternoon and they starts pouring rain......bipolar ass weather. But I'm prepared for when the weather clears up
Today I got my vinyl on
Before:

After:

Also never got pictures of the headlights for you guys. The came out awesome. and I'm really glad to get the old set with the smears on the inside replaced.
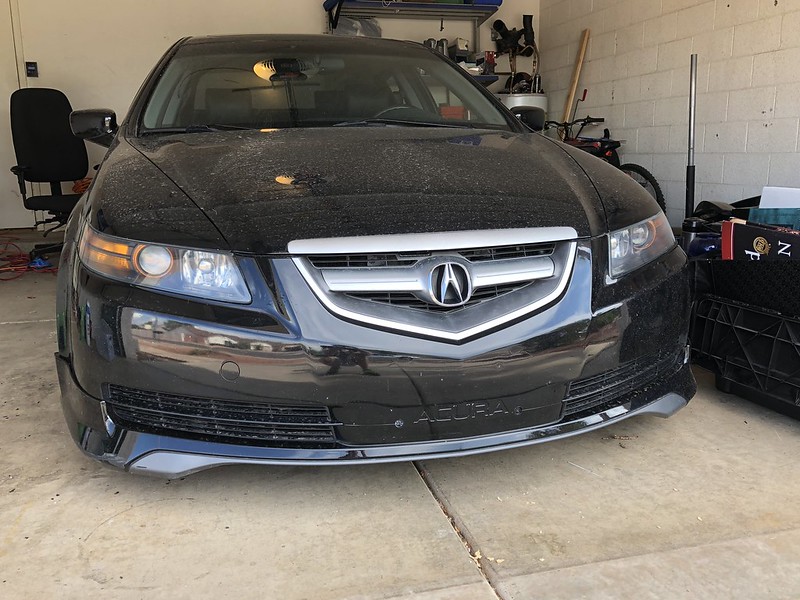
The car is SUPER dirty. Of course the one week it rains in Arizona I wanted to do the restoration on the paint. 3 days in a row. The first night it took the power out for 12 hours. Then the next its sunny until the afternoon and they starts pouring rain......bipolar ass weather. But I'm prepared for when the weather clears up
 07-16-2018, 08:30 PM
#72
Wow man that is awesome. I love what you've done with the car.
I believe yours is a factory aspec as well correct? and 6mt?
I believe yours is a factory aspec as well correct? and 6mt?
07-16-2018, 10:10 PM
#74

Those red stripes looks super good. I attempted to open a pair of ebay tails. I ended up having a hard time with removing and installing the tail light bezel(not sure what its called) so i ended up scratching a lot of the lens Ended up scrapping that but luckily it was just the knockoff and not OEM. Tried again on another pair but this time only removed and sprayed the removable piece covering the leds. Had success and great results sealing them back together with no leaks or moisure issues.
Any tips/tricks on removing that large bezel piece?(again not sure what its called) I might try again if I can find a cheap OEM pair
Any tips/tricks on removing that large bezel piece?(again not sure what its called) I might try again if I can find a cheap OEM pair
07-16-2018, 10:45 PM
#75
Yeah I feel you there. The set I bought at first was OEM but I only paid like 20 bucks so I wasn't afraid to give it some tugs.
Once you cut and remove the back of the light you're left with the lens with the bezel inside. I took my Dremel and trimmed some of the black plastic along the inside edge of the lens. But I only trimmed from halfway along the top edge to the trunk side and along half of the bottom of light. So imagine laying the lens as if it were on the car, turn is over, and you have an imaginary vertical line splitting the lens in half.
In doing this you don't trim a ton off, just a little bit. I held my Dremel at a 45 degree-ish angle and just hit a small amount of the black plastic off.
Then pull up the corners of the bezel out of the lens starting with the trunk side. You should be able to wiggle the bezel towards the opposite side to get more clearance to lift the trunk side corners out and you'll have to tug a bit. Once you have those two corners of the bezel cleared of the lens, stop trying to lift up and out. Instead you should be able to slide the bezel towards the trunk side of the lens. Keep going until the bezel is clear of the light. When you put the bezel back in you slide it in the opposite way.
I hope that helps. I was trying to describe as I remembered doing it. I did take pictures of each step when I did mine. Maybe I'll get around to doing a how-to at some point with the pictures.
07-30-2018, 11:42 PM
#76
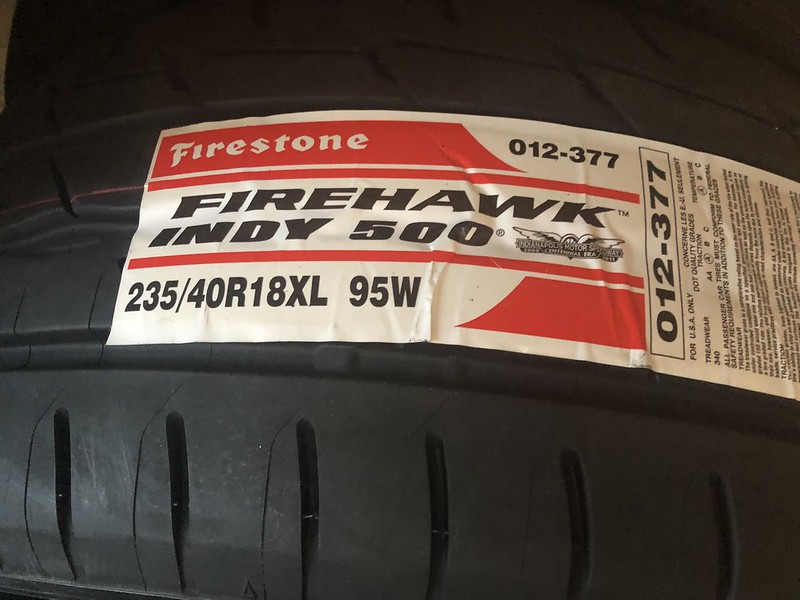
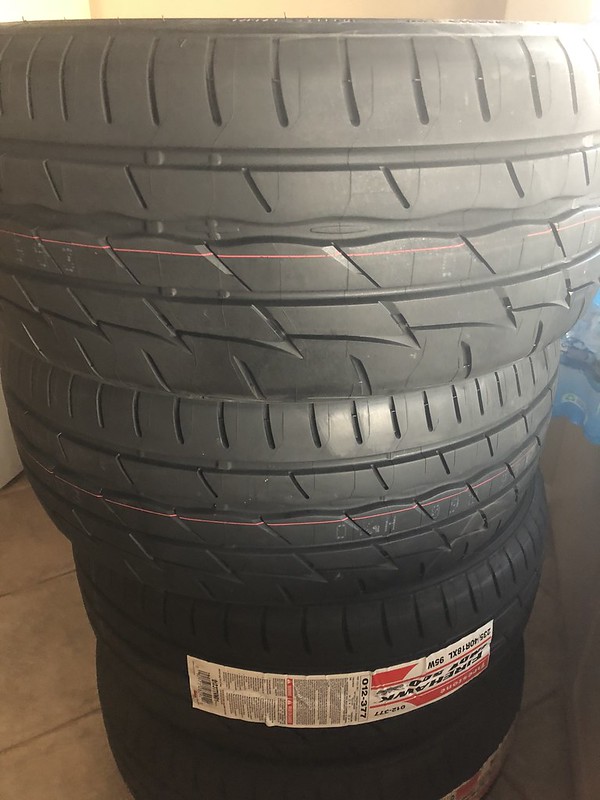
I found these local for a good price (about 1/2 what it would be on Tire Rack).
Has anybody ever ran these? Online reviews were pretty good and they look good. Probably one of the most "aggressive" looking tire I've ever had.
I'm just excited to not have 2 different sized tires on the car anymore!
Has anybody ever ran these? Online reviews were pretty good and they look good. Probably one of the most "aggressive" looking tire I've ever had.
I'm just excited to not have 2 different sized tires on the car anymore!
 08-04-2018, 10:34 PM
#78
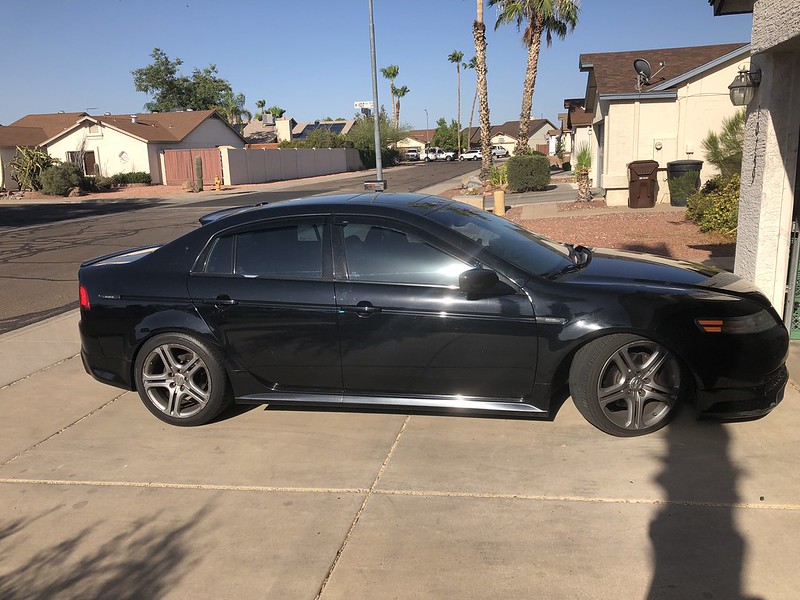
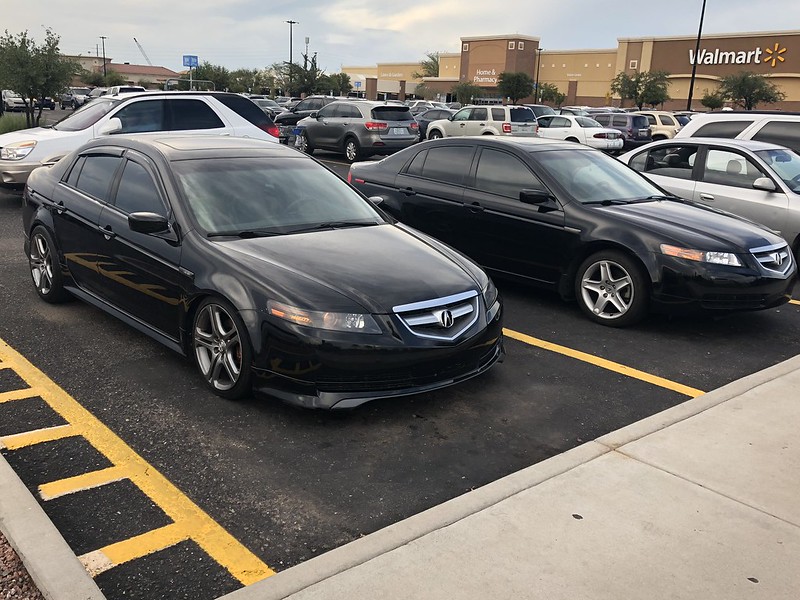
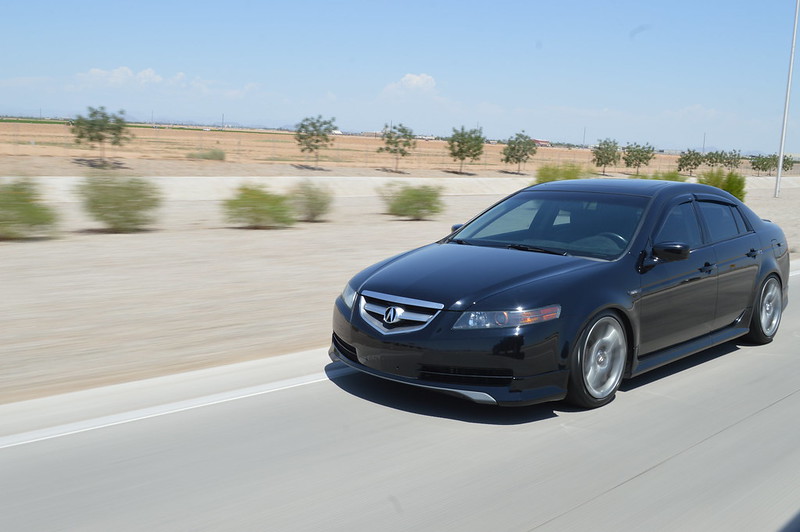
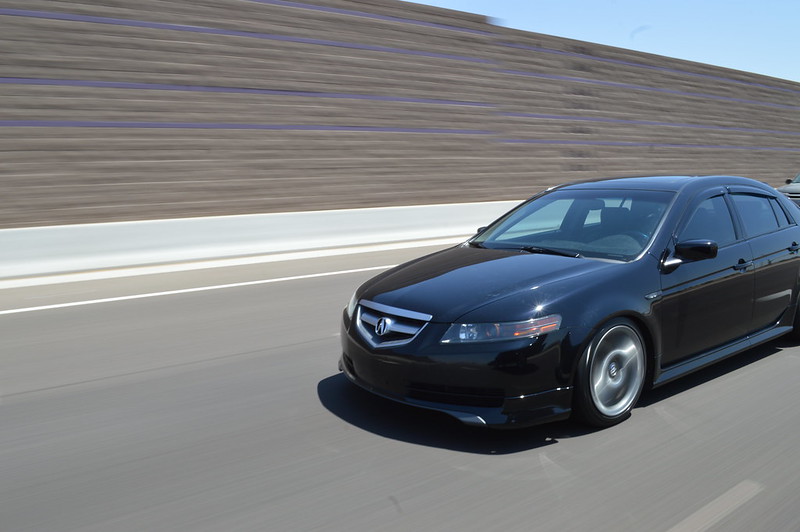
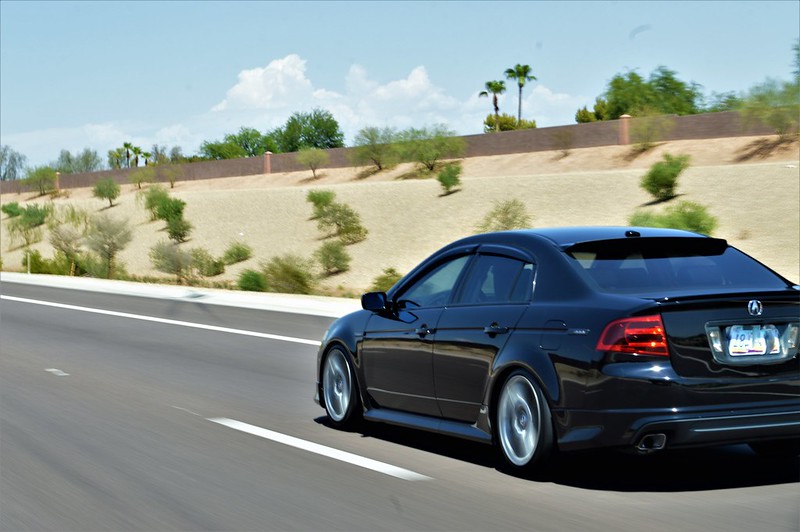
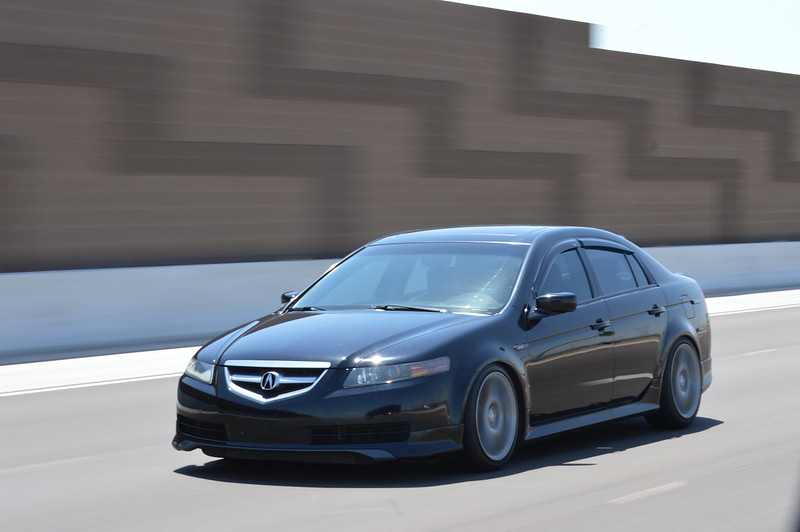
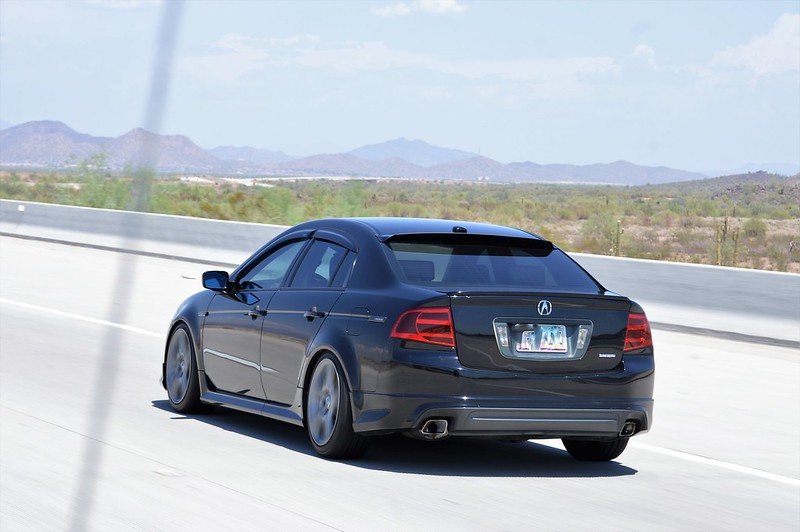
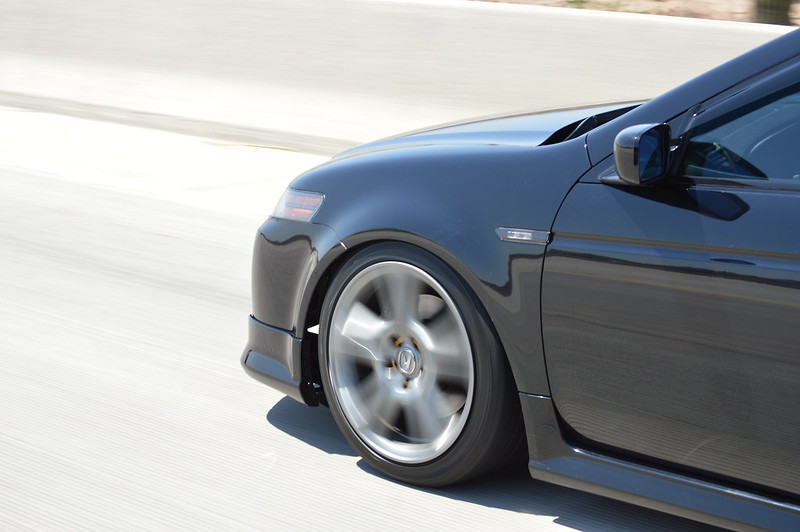
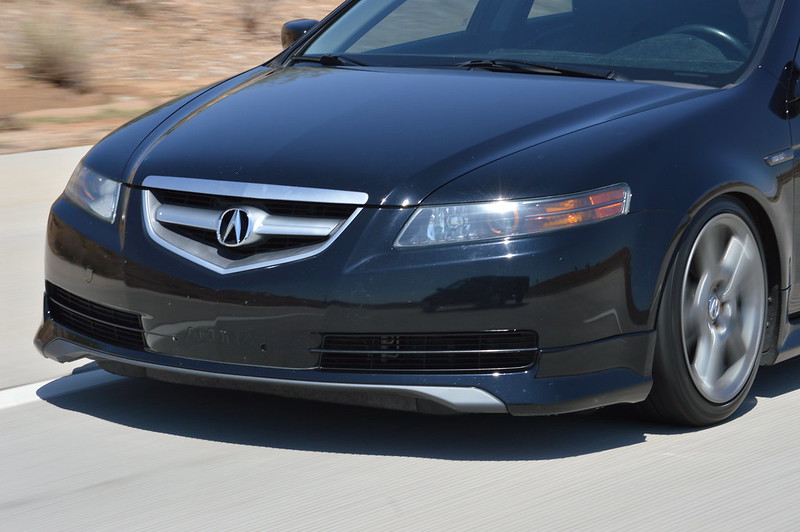
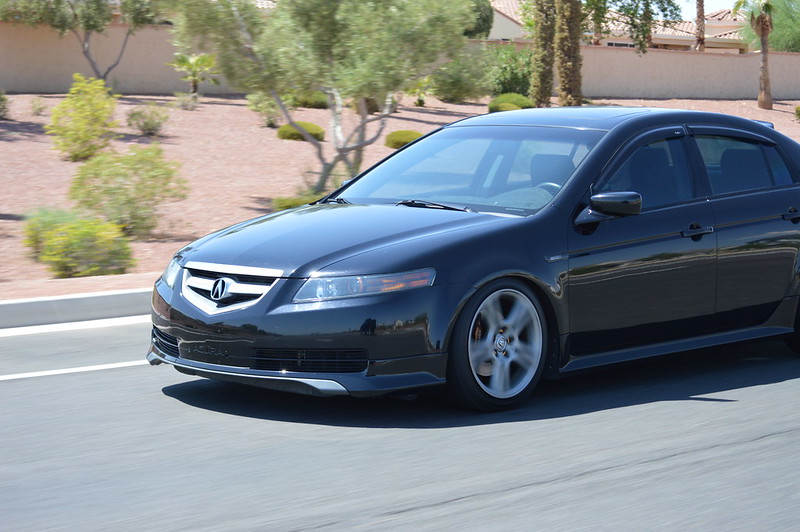
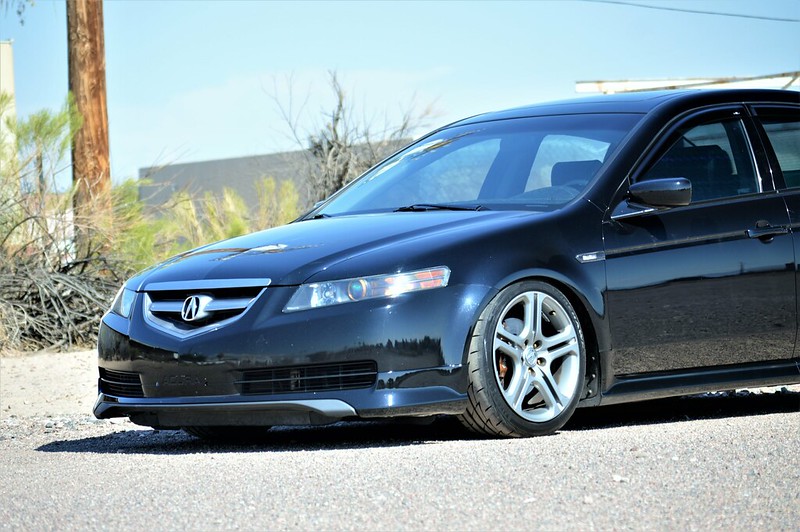
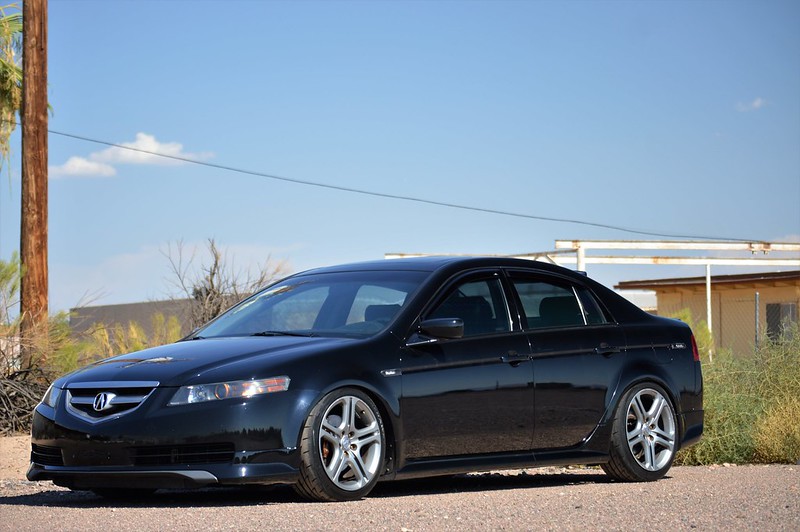
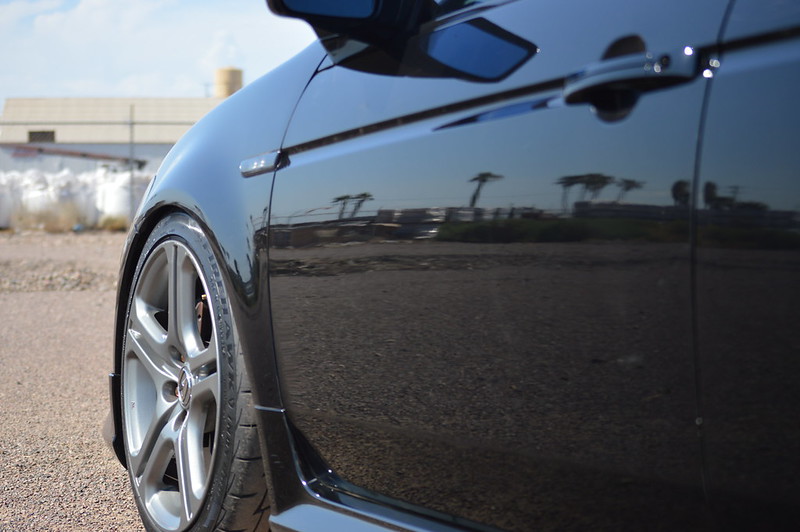
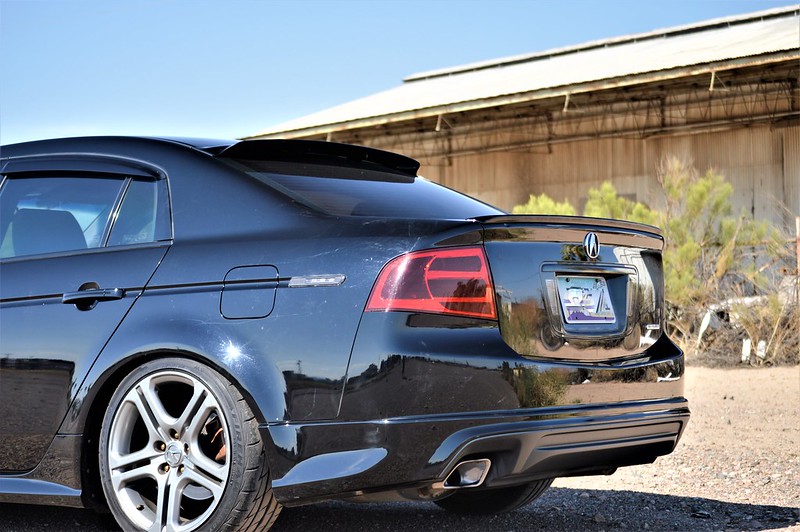
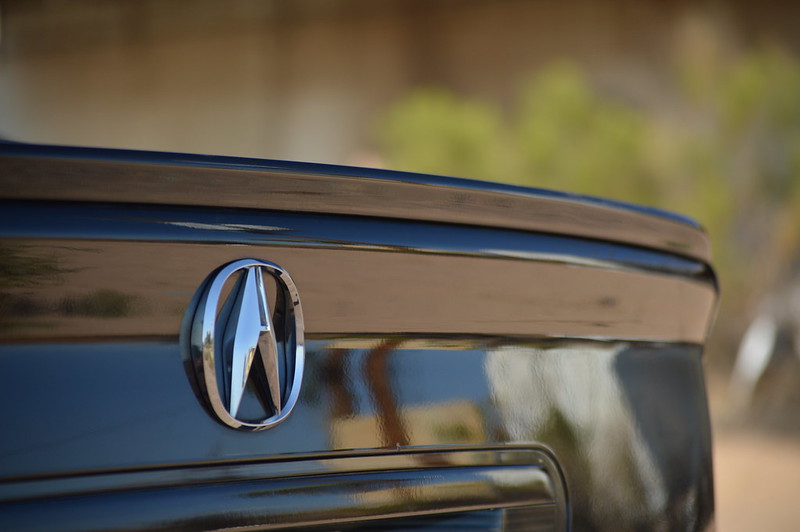
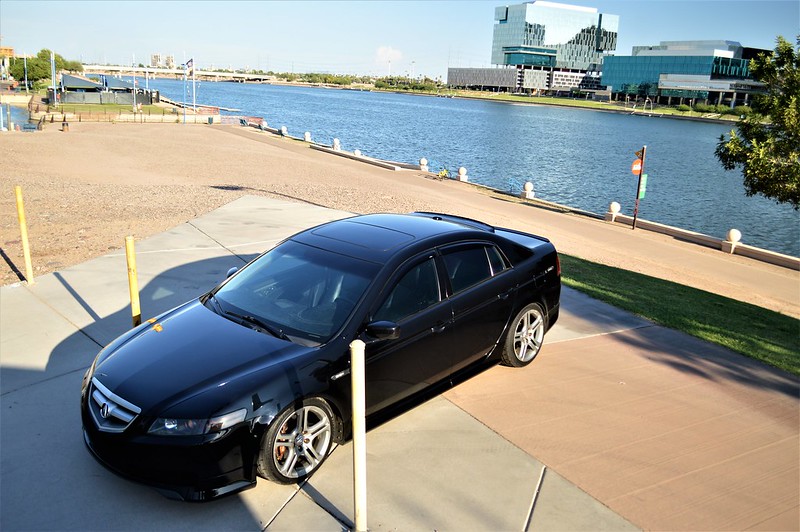
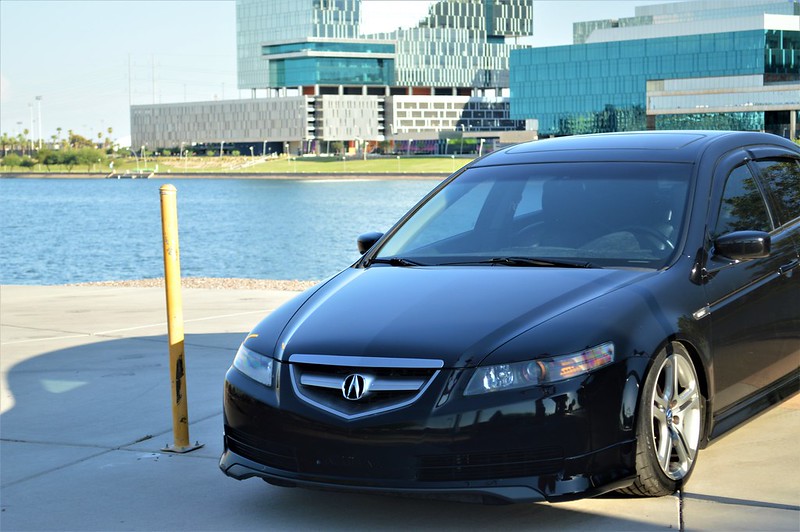
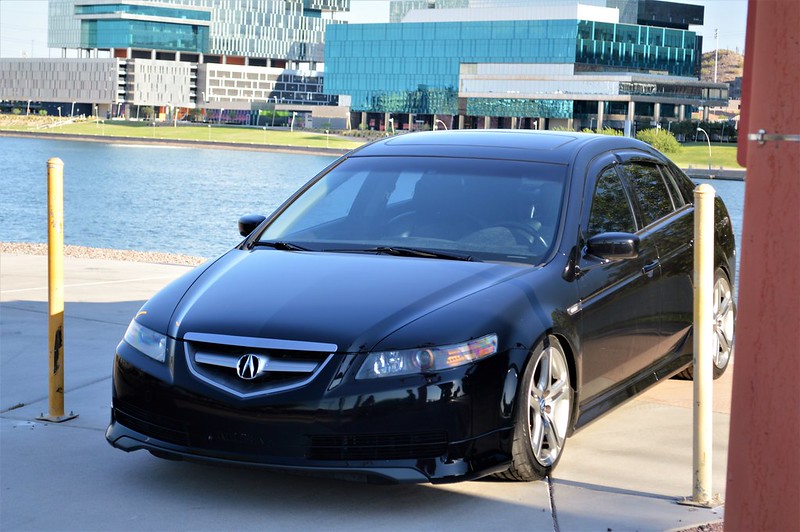
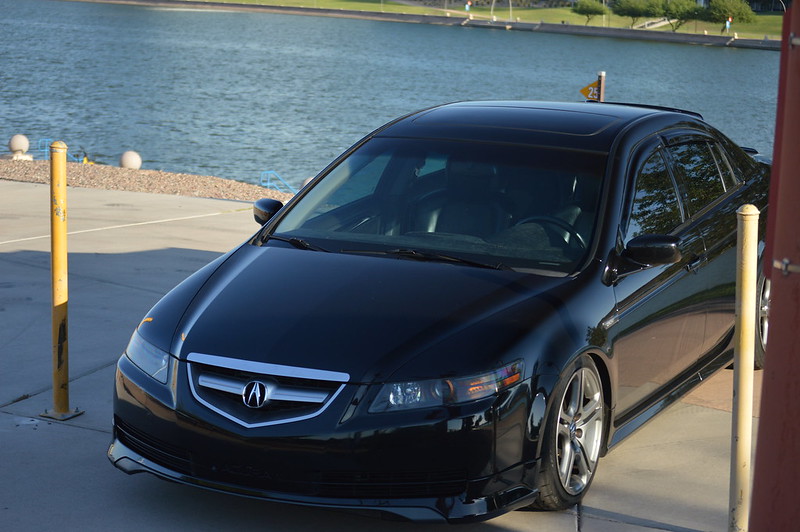
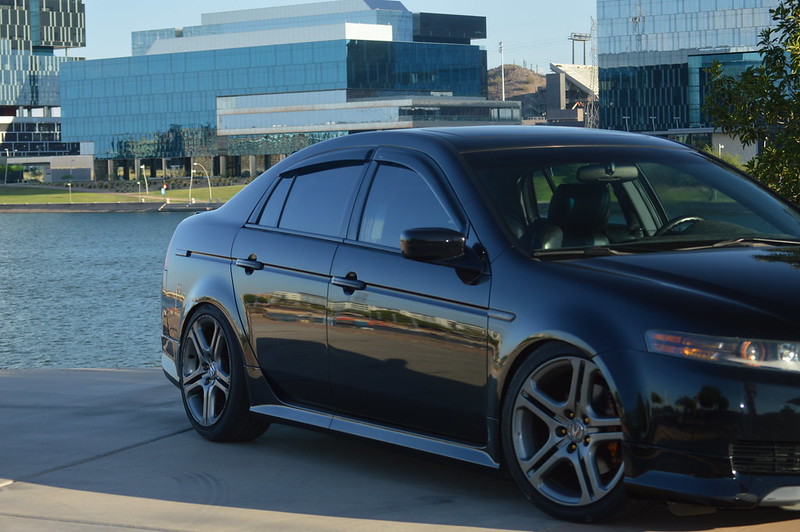
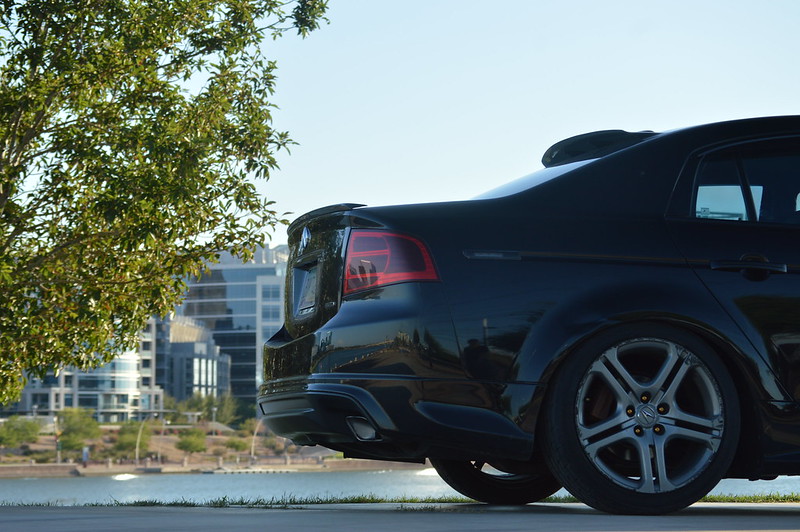
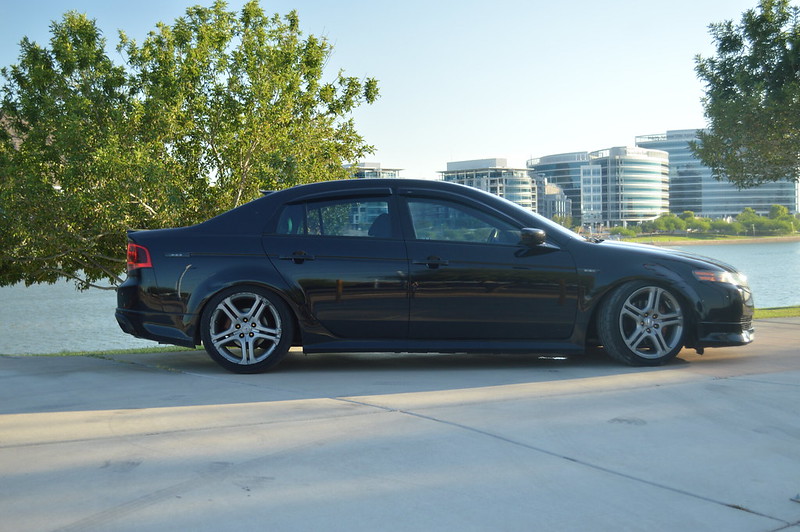
I got the tires mounted and adjusted the ride height. The front stayed the same, but the taller tire did raise it up a bit. The rear ended up getting lowered about an inch more than it was, and leveled the car out nicely I think.
I then commandeered my sister and made her bring her camera lol
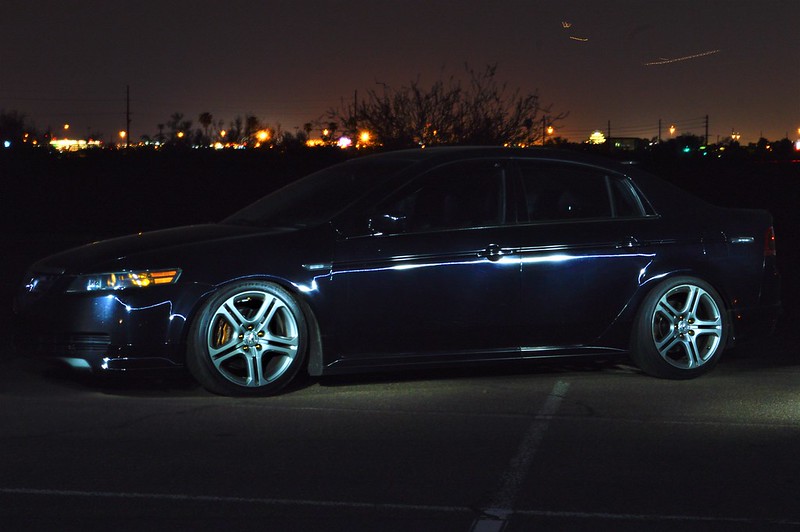
This was her first time trying rolling shots, as well as the night time shots (which didn't come out as good as we hoped) We would've tried to get some better nights but it got late and we had already taken 700 pictures so we called it a night.
Enjoy!
I then commandeered my sister and made her bring her camera lol
This was her first time trying rolling shots, as well as the night time shots (which didn't come out as good as we hoped) We would've tried to get some better nights but it got late and we had already taken 700 pictures so we called it a night.
Enjoy!


 08-05-2018, 06:01 PM
#79
Those turned out great. Really love the engine bay and headlight pics together